Recently, brick ovens have begun to gain popularity again, and in private homes you can increasingly see a design that instantly makes the environment warm and cozy. But in order for the stove to serve for a long time and delight the residents with its beauty all this time, it must be lined. Typically, ceramic tiles are used for this, and today we will talk about the varieties of this material and how to cladding a stove with your own hands.
Finishing stoves with ceramic tiles is much more practical and easier than plastering or painting. The performance characteristics of the tile will please thrifty owners - it is easy to clean, it does not lose color and retains its strength for many years. The tile covering of the stove can last from 30 to 150 years or more (depending on the type of tile). Not every ceramic tile is suitable for finishing a stove. What properties should it have to meet specific requirements? Requirements for ceramic tiles for the stove:
We have selected a list of varieties of ceramic tiles that fit these parameters. Terracotta tilesExperts consider terracotta tiles to be one of the best materials for lining stoves and fireplaces, since they can withstand extremely high temperatures (+1000C and above). This ability is due to the specifics of making tiles - kaolin clay is fired in a high-temperature oven, after which it is molded, pressed and processed under pressure. Another significant advantage of terracotta tiles is their absolute environmental friendliness - they don’t even add dyes to them! Using different types of clay allows you to create products in different shades of brown, beige and brick. Such colors have a beneficial effect on the human psyche and create a calm, cozy atmosphere in the home. The porous structure of clay makes terracotta tiles an excellent heat insulator, so this coating contributes to rational energy consumption and fuel savings. The service life is at least 50 years, and with careful handling, such a stove can last three to four generations of residents. And if you also take into account the low cost, then the popularity of terracotta becomes quite understandable. Clinker tilesExperts have different opinions regarding whether clinker tiles can be used for lining stoves. Some believe that since clinker has low thermal conductivity, the heat transfer of a stove with such a finish will be worse. Indeed, the dense structure of clinker bricks does not allow heat to pass freely, but at the same time it has good heat capacity. This means that the lining heats up slowly, but retains heat longer - even when the stove has stopped heating, it will continue to heat the air in the room for several hours. Clinker tiles can easily withstand high temperatures of up to 1300C, since they themselves were made through high-temperature firing.
Majolica tilesThis type of tile was named after the island of Mallorca, where it was once mass produced. Once upon a time, merchants brought there a variety of products made from tin-lead glaze, and artists hand-painted each tile with special long-lasting paints. Due to the complex specifics of making majolica, it was used not for household needs, but as an expensive and presentable interior decoration. It was considered a luxury to have a wall or stove decorated with majolica at home.
The tile itself is made by pressing in the same way as terracotta. The only difference is that glaze with colorful designs and patterns is then applied to a strong clay base. The cost of majolica compared to other materials is quite high, however, as before, even now, such a coating is a sign of good taste and luxury. Porcelain tilesAnother popular facing material for stoves and fireplaces. The non-porous and very dense structure makes it extremely strong, waterproof and durable. Porcelain stoneware is used to make heavy-duty floors in factories and garages, to say nothing of the finishing of stoves. In addition to durability, porcelain tiles are impervious to aggressive chemicals and temperature resistant. It contains admixtures of kaolin clay, quartz sand, natural dyes, metal oxides and feldspar. Depending on the percentage of a particular component, several types of porcelain stoneware are distinguished. It can have different colors, strength, durability, etc.
Types of porcelain tiles:
It is known that natural stone has a radioactive background (depending on the rock, it can be higher or lower). Porcelain tile is devoid of this quality, which makes it completely safe for health. At the same time, the cost of such tiles will be cheaper than stone, and in terms of characteristics only terracotta tiles can be compared with porcelain tiles.
In order for a stove lined with porcelain tiles to last as long as possible, it should be properly cared for:
Tiles and tilesDecorating stoves with tiles was popular several centuries ago, and many still prefer this option, despite the difficulties associated with installation. In general, tiles are not quite tiles, since they have a box-like shape rather than a flat one. It is thanks to this that the material has high heat-saving characteristics. The front side of the tiles is covered with glaze with ornate patterns and all kinds of designs. Until now, each design on the tiles is applied by hand and sometimes represents a real work of art.
It is quite difficult to tile a stove, especially if you have not worked with this material before, so it is better to trust the professionals. And if you consider that the cost of the tiles themselves is rather high, then it is even better not to take risks and do everything as efficiently as possible. Installation of such cladding is a rather specific job, so there are not so many specialists capable of performing it, and the cost of the work will cost a large amount. This is the most expensive and luxurious type of stove finishing today.
But in terms of durability and performance characteristics, no finishing material for a stove can compare with tiles. We can say that this is an ideal cladding option, and not only because of practical data. Psychologists have found that antique fireplaces with tiled decoration work as powerful natural centers of attraction; if a person finds himself in a room with such a stove, he will definitely try to be as close to it as possible, touch the decoration with his hands, and admire the patterns. The box-shaped design of the tiles requires a special installation technology, in which it is necessary not only to set the tiles on glue, but also to connect them to each other and to the base with metal wire. Since each box tile is made separately and by hand, it is necessary to thoroughly calculate the required number of tiles, and before laying them, arrange them by size and color. Be immediately prepared for the fact that you won’t get a perfectly flat surface - this is the beauty and authenticity of the finish. The difference in the width or height of the tiles can reach 10 mm, and a technological edge is provided specifically for adjustment (5 mm on each side).
Tiles allow you to create, without exaggeration, a unique coating, the value of which will only grow every year. If financial possibilities are limited, you can combine several types of tiles, for example, tiles with clinker, terracotta or metlakh tiles. It is better to use tiles to cover the surfaces that will most often get dirty - around the firebox, shelves, corners near the hob. How to glue the tiles?To fix the tiles to the brick kiln, special adhesives are used. They must be fireproof so that during the first kindling all your finishing does not fall off. Most domestically produced heat-resistant adhesive solutions are prepared from refractory clay mixed with fireclay powder and high-quality cement. Sometimes this mixture also contains perlite - this is what gives low thermal conductivity. The glue packaging should indicate the temperature it can withstand. Usually they write 1200C or higher, but for an ordinary home oven 300C is quite enough, especially since you are not going to glue the surface from the inside.
It is very good if the glue contains plasticizers that make the solution elastic and pliable - this way it fills all the smallest pores and adheres better. Elasticity also helps cope with deformation under load. By and large, the durability of the stove finish depends not only on the tiles, but also on what it is supported on. Grout for jointsIn addition to the adhesive composition, it is necessary to stock up on fire-resistant grout for the seams between the tiles. And it should be chosen depending on the width of the seams and the maximum heating temperature. If you plan to leave 3-5 mm between the tiles, and the oven heats up to a maximum of 70C, then you can use the most common inexpensive grout (preferably, of course, moisture-resistant to make it easier to care for the surface). The worst thing that can happen to them is that they will darken. If the surface of the oven is heated to 100C, and the seams are 7 mm, it is recommended to use dry dyes mixed with K-80 glue, for example, soot, red lead, ocher or chrome. This solution can be used to grout even fairly wide joints up to 15 mm, since it contains large grains, which means there is no fear of cracks appearing. White glue can be tinted at your discretion. In addition, K-80 glue, used as a grout, provides additional fixation of the cladding. And the best part is that it costs mere pennies (much cheaper than the most mediocre grout) and is sold in any hardware store.
If the surface of the oven heats up to 130C and above, then it is recommended to add the dry dyes mentioned above to the fireproof glue “Profix”, which can withstand up to +700C, or to sand plaster – it can handle heating up to +200C. If you want beautiful, smooth joints, use Creativeputz stove plaster. If, on the contrary, you prefer rough seams, buy Hafnerputz with a fine-grained structure. Cladding technologyThe technology for tiling a stove, described below, is suitable for all types of tiles, except tiles (a separate chapter is devoted to them). But no matter what you plan to cover the stove with, in any case you must first prepare the surface. How to prepare the surface for cladding: Remove old paint, plaster or whitewash.
When the primer is almost dry, you can begin preparing the adhesive solution, following the instructions on the package. If you have never done this kind of work before, it is better to dilute the glue in small portions to “fill your hand.” At first you will do everything slowly, and a large batch of diluted glue may harden. Use a notched trowel to apply the grout to terracotta and porcelain tiles. If you are covering the stove with large slabs, it is more convenient to apply the glue to the wall. Ceramic tileCovering a stove with ceramic tiles is not such a difficult task that even an inexperienced self-taught craftsman can handle. This applies to porcelain stoneware, terracotta, metlakh tiles, majolica and clinker.
How to tile a stove with ceramic tiles:
At first glance, it may seem that there is nothing complicated about tiling a stove, but this work requires complete concentration and skill. If you do everything according to the instructions, the tile will lie flat and will last for many years. Tiling the stove in video format will give a more complete picture of the specifics of installation: Tiles - claddingA beautiful, expensive, unique, durable and very difficult to install material - tile, nevertheless, is the most desirable and luxurious type of stove finishing. The main feature and complexity of the cladding is that first a box-shaped tile is installed, and only then the body of the heating structure is attached to it. Thus, the master simultaneously performs both laying and finishing. That is why such extraordinary and painstaking work requires specific professional skills and extensive experience. Before laying the tiles, you should carefully prepare them - make a “rough” assembly, adjust each element to size, and sand the horizontal edges. The tiles must be soaked in water before use. We will describe the laying of tiles only in general terms, since this work involves an incredible number of subtleties and techniques, and it is simply impossible to learn how to lay tiles after reading the article.
How to lay tiles:
A tiled stove must dry for at least 20 days before a fire can be lit in it. Cladding stoves with ceramic tiles, photo:
|


The most traditional use of ceramics in the home, with the exception of dishes, of course, is not even decoration, but the lining of heating devices - fireplaces and stoves. Central heating and gas boilers have noticeably reduced this area of application of KP, but if they want to get warmth from an existing fireplace, and not just a beautiful appearance, then they turn to it.
Ceramic material is an ideal cladding option due to 2 important properties.
- Firstly, ceramics can withstand heating to very high temperatures.
- Secondly, the material perfectly accumulates heat. This means that when the heating stops, the ceramic tiles will release the accumulated heat into the room for some time, and for quite a long time.
These properties are related to the porosity and density of the material, so they are suitable for cladding on any type of surface.
- Any ceramic tile is produced by firing at high temperatures, but not every one is designed for use under conditions of constant heating and cooling. Used for lining stoves and fireplaces heat resistant tiles. Products are marked with the letter T - heat-resistant. The coefficient of thermal expansion of such material does not exceed 7–8%, which ensures the durability of the finish.
It is also worth paying attention to the number of firings: double-firing material is characterized by higher strength and fire resistance.
- Water absorption– at first glance, the parameter does not matter when facing such a “hot” object. However, with high water absorption, the porous material absorbs moisture from the damp air of the room. Then, when heated, the moisture increases in volume, which leads to rapid destruction of the material. So, only KP with a wave absorption of no higher than 3% is suitable for lining the furnace.
- Accumulating effect quite difficult to assess. It is not associated with porosity, on the contrary: porous tiles, that is, those with some thermal insulation effect, are not suitable for finishing. The material should conduct heat well, but at the same time accumulate it to some extent. There is one subtlety here: for example, such high-density ceramics as, and even more so, conduct heat well and tolerate very high temperatures. However, the material accumulates heat much worse than ordinary, for example. , especially since electric or gas clinker is quite suitable, but not for a stove.
- Wear resistance has no direct significance, and the strength of the material is already considerable. For cladding you can use tiles of any class.
- CP thickness is at least 8 mm: with a smaller value, ceramics will not be able to effectively accumulate heat.
Product designs are extremely varied even with such high demands. The appearance of the tiles is selected based on the style and features of the interior, but, as a rule, both the fireplace and the stove are a kind of center of the room and are finished especially elegantly.
Do-it-yourself cladding of stoves with ceramic tiles (photo)

Types of tiles
The combination of low porosity, thermal conductivity and heat capacity narrows down the choice. Any highly porous tiles are excluded - cottoforte, for example, due to its inherent high water absorption. used only for finishing fireplaces.
Most often, the following types of CP are used for lining furnaces.
- Faience- classic option. Solid earthenware has more than sufficient strength, and even exceeds the same and low porosity. The water absorption of this variety is no more than 3%. Faience perfectly accumulates heat, which our ancestors knew about and actively used for decoration in ordinary houses and palaces. The decorativeness of faience is no less than its user characteristics. The classic version - a blue design on a white background - is still used almost most often. Plain tiles are not as interesting, but patterned tiles suit many styles.
- Tiles- essentially the same as faience tiles, but with a special structure. The front side of the product is a smooth or embossed surface; on the back side there is a kind of box - a rump. Thus, an additional air layer is created between the stove brick and the tile, which perfectly retains heat. This is the secret of the very high ability of tiles to accumulate heat. The tiles are secured to steel wire, which is installed in the seams as the hearth is laid. In principle, you can also line a finished stove with tiles, although this process will be more complicated. Tiles are a piece product, decorated with very complex ornaments and reliefs and, in fact, are a kind of art object. This cladding is exceptionally beautiful, but it also costs accordingly.
- - a much more common finishing material. More affordable, dense, low-porosity tiles are durable and have the natural color range characteristic of clay. Terracotta is not glazed and is ideal for decoration in rustic styles - Provence, Mediterranean English. It is used no less often in minimalist interiors, since such material does not create a feeling of diversity.
- - much more decorative tiles. This glazed product is double fired, inferior in strength and water absorption to terracotta, but perfectly accumulates heat. Majolica always has a shiny colored surface, often with a complex pattern. Relief patterned tiles are no less famous and popular. The material is quite expensive, so lining a large country stove can cost a fair amount.
- Clinker– with high strength and low water absorption, the material does not have such good heat retention properties. Clinker is readily used for cladding fireplaces, both active and decorative. The finish creates a brick or stone effect, which is very attractive for both modern and rustic interiors. clinker, as a rule, is designed in natural colors, but glazed products are also found.
- – has exceptional strength and exceptionally low water absorption. But, alas, the heat capacity also leaves much to be desired. Tiles can be used to decorate fireplaces, but they are not suitable for stoves.
The reason for the popularity of porcelain stoneware is not its durability, but its ability to accurately reproduce expensive facing stones: granite, basalt, onyx. A fireplace finished with porcelain stoneware looks absolutely luxurious and respectable. At the same time, the tiles can be matte, structured, or polished, which only adds to the effect.
We'll talk about the design of heat-resistant fireproof tiles for stoves and fireplaces below.
This video will tell you about the nuances of tiling stoves and fireplaces:
Product design
It is not the material, but the style of the room that determines the design. Finding the appropriate ceramic tiles is not difficult.
It is worth noting that for lining large stoves the best option remains. But fireplaces and Dutch ovens offer more possibilities.
- Classic styles use patterned ceramics - majolica, ornamental porcelain and, of course, tiles. This decoration attracts maximum attention and turns the fireplace into the most decorative, central piece of furniture.
- Geometric patterns, especially simple ones, are almost never found. Stove tiles are distinguished by a complex, multi-colored pattern, usually with plant motifs, and always symmetrical. It is possible to create an image, usually in a medieval style: the finish of the stove looks like a painting or fresco.
- In Art Nouveau, preference is also given to patterned tiles with floral designs. But often there is a combination of single-color faience with patterned ones.
- Modern styles use less colorful material. The most elegant options include porcelain stoneware and faience, imitating marble, granite, malachite, which is no less common. In techno and futurism, structured single-color tiles are used.
- For rustic styles, clinker and terracotta remain the best option, although the color of the clinker can be very far from natural.
- For rustic and hunting styles, a fireplace faced with “wild stone” is intended.
Gearbox Dimensions
 The thickness of the furnace gearbox is most often 8 mm. Clinker and porcelain tiles for fireplaces can be thinner - 5–6 mm. This material is quite durable, and heat capacity is not so important when finishing a fireplace.
- Tile sizes vary within very small limits. Experts say that CP larger than 25*25 cm should not be used. The number of seams in this case does not matter, and working with large tiles is very inconvenient: there is a lot of trimming, and the heat-resistant glue may not withstand the weight of the material.
- Small tiles - less than 10*10 cm are not used for the same reason: they are too inconvenient to work with. In addition, such finishing crushes the stove surface, and it is not so large.
- Much larger porcelain stoneware slabs are used for facing fireplaces. But, since this material is quite difficult to adjust to size, the cladding elements are made to order.
Now let's find out how the lining of bathhouses, brick, Russian, heating stoves and fireplaces with ceramic tiles (tiles) is carried out.
Facing
The technology is quite simple and hardly differs from conventional installation. Much more difficult is the layout of the material and trimming.
The shape of the fireplace, and often the stove, is very far from simple: the elements are at different angles, the contours of the body are not always geometrically correct. This requires numerous calculations and great care in work.
The correct lining of the stove with ceramic tiles with your own hands is presented in the video below:
What you will need
The set of materials and tools is somewhat different from the usual due to the fact that preparing the fireplace for cladding requires additional effort.
- Ceramic tiles - purchased with a margin of 15%, if we are not talking about specially made portal elements made of porcelain stoneware.
- KP glue - can be used for finishing the stove; it has sufficient fire resistance. But in apartments, special heat-resistant glue for CP is more often used.
- , putty compositions are heat-resistant.
- Heat-resistant grout - heat-resistant glue can also be used in this capacity.
- Fiberglass mesh for reinforcement.
- Mounting crosses.
- Trowel and spatulas - smooth, serrated and rubber, rubber hammer.
- Plumb line, ruler, tape measure, pencil.
Preparation
Both the old and new hearths must be specially prepared for cladding. Moreover, this work takes no less time than the installation itself.
- The surface is cleaned of dust and dirt, and the old finish, if any, is removed.
- The seams between the bricks are cleaned and deepened to a depth of 1 cm.
- Wet the body with water - use a regular paint brush.
- The surface is plastered. Use for this - 1 share to 3 shares. You need to achieve as smooth a surface as possible.
- The seams are filled with putty. The remaining defects and irregularities are also puttied.
- A fiberglass mesh with narrow cells is secured to the fireplace body with dowels. Reinforcement improves the adhesion of the CP to the brick.
The masonry technology and composition of the mortar for lining the stove and fireplace with ceramic tiles are discussed below.
Technologies
Laying tiles by eye is unacceptable. Here, more than anywhere else, dry layout of the material and accurate calculation are important. It is recommended to trim the tiles before starting installation, so as not to stop while working. The surface of the fireplace or stove is marked with horizontal and vertical lines to reduce the possibility of error.
- After trimming and laying out, they begin cladding. It starts from the bottom row and in the area where whole elements are supposed to be laid.
- The location of the first row acts as a template: the laying plane is checked against it. Check the levelness with a building level.
- The glue is prepared according to the instructions. For large volumes of work, prepare small portions.
- The adhesive composition is applied with a smooth spatula to the back side of the tile, and not to the surface of the fireplace, and leveled with a serrated one. The layer thickness does not exceed 5 mm.
- Then the CP is pressed to the surface and pressed lightly. If necessary, tap with a mallet. The position of each element is checked with a plumb line and level.
- The next tile is placed in the same row. To ensure that the seam remains the same, mounting crosses are installed between the products. The seam width is usually 5 mm. Porcelain stoneware cladding can be seamless.
- A day later, after the glue has dried, the seams are rubbed with heat-resistant glue or a special one. The excess is immediately removed with a damp sponge and the composition in the seams is leveled with it.
- The entire stove or fireplace is cleaned 30 minutes after grouting. For this purpose, use a sponge and a grater covered with foam rubber.
You can light a fireplace or stove after cladding no earlier than 2 weeks later. Moreover, for the first time, the stoves are heated with only a small amount of firewood, increasing each time to prepare the stove for heating gradually.
The price of covering a stove with ceramic tiles (tiles) per m2 is discussed below.
Stylish tiles for stoves (photo)

Cost of installation and materials
Heat-resistant tiles have a higher cost than regular or. For 1 sq. m. of terracotta you need to pay from 990 to 1250 rubles. The cost of majolica is even higher - from 600 to 2500 rubles. per sq. m.
The most expensive facing material is tiles. Depending on the design - painting, enamel, relief, the price for 1 piece ranges from 300 to 1500 rubles.
The cost of work also varies. It depends mainly not on the nature of the material - with the exception of tiles, but on the shape and size of the fireplace itself. On average, when finishing with terracotta or faience, facing a small fireplace costs 22 thousand rubles. A fireplace with parameters above average will cost 28 thousand rubles.
Ceramic tiles with appropriate characteristics are a traditional material for lining stoves and fireplaces. And over time, he did not lose either popularity or attractiveness. Majolica, terracotta, tiles will never go out of fashion due to their exceptional properties.
Useful tips for tiling a stove are given in this video:
The fast pace of our lives increasingly forces people to go to places where the warmth from the stove and the crackling sound of firewood will calm their nerves and replenish their energy before a new busy week of work. It is possible to give a noble appearance to a brick stove, but the question immediately arises of what tiles to cover the stove with or how to finish the stoves with ceramic tiles. In this article you will find information about stove tiles, photo examples and installation videos. The problem of how to lay tiles on the stove can only be entrusted to specialists, because this is a rather expensive process and can only be carried out along with installation. This method is the most expensive. Although nowadays it is quite difficult to imagine a country house without a stove.
Every person wants to create something both functional and pleasing to the eye in their home or bakery. For example, the owner of this bakery did not skimp on gold decoration in the literal sense of the word. We will discuss in this article how much such extravagance is necessary. In this photo, the design of the bakery is inscribed in the natural landscape; you must agree, the golden frame looked impressive, but not organic, provocative, but at the same time “eye-catching”, which is completely unnecessary when the beauty of nature is set in a different way
 It doesn’t matter that we are now in the twenty-first century and progress has reached unprecedented heights, stoves and fireplaces still have the same relevance today and are experiencing a new surge in popularity. But now stoves perform a more decorative function, but it is difficult to replace the warmth from a home fire with current heating devices. Quite often it is possible to meet them not only in a bathhouse, a private house, a country cottage, but even in a city apartment.
 Covering a fireplace with ceramic tiles is also an art; not every designer can do it beautifully.
 Before you start installing a stove in your apartment, you should think about covering the fireplace with ceramic tiles as early as possible, and also think about the installation process.
|
|
|
|
|
|
 The photo shows the interior of a home with a stove lined with real tiles. Today, what type of country house is not only outdated, but also very expensive
 Oven cladding with ceramic tiles in various bakeries is often done to match the overall interior; here the oven is framed with ceramic mosaics
 Option for complex design of stove and kitchen tiles
 Covering the stove with ceramic tiles (tiles) in the room
 As an option, decorating the stove with ceramic tiles
 Installation of the furnace consists of:
- choosing ceramic tiles for finishing the fireplace;
- technologies for finishing the stove with ceramic tiles;
- surface preparation;
- installation of metal mesh;
- preparing glue for laying ceramic tiles for the stove;
- laying ceramic tiles for the fireplace.
 A simple and laconic design of the fireplace is allowed and recommended for any home that loves laconic interior design
  More lively design of the fireplace using decors and special elements
 Materials
Today there is a huge variety of different finishing materials on the market: from ordinary plaster to real stones. This depends on your own preferences, taste and finances. Experts in this industry advise using heat-resistant ceramic tiles, which look more attractive and can fit seamlessly into different interiors.
 This stove is a historical heritage
  And such a stove can confidently claim its heritage. Design using real tiles, which are now produced in limited quantities for individual customers
 Ceramic tiles for stoves have such necessary qualities as:
- fortress;
- fire resistance;
- heat conductivity;
- hardness;
- environmentally friendly, making it the best option.
How to choose a tile
To cover the stove with ceramic tiles, you need to choose fire-resistant ceramic tiles that have a corrugated surface.
 Stove tiles are hardened so much that they can withstand any heat.
 Heat-resistant ceramic tiles for the stove are produced in 2 ways:
- fire-resistant ceramic tiles for stoves, which are obtained by firing;
- Heat-resistant ceramic tiles made using the extrusion method.
|
|
|
|
|
|
|
|
|
 For fireplaces, it is important that embers do not become the culprit of a fire in the house. The photo shows absolutely ordinary porcelain tiles that fully cope with the task.
 In addition to heat, many customers also want to see beautiful design. Products are most often offered according to a catalog or design project
 The embodiment will work for the client with bright colors, sparkle and warmth. As the tile heats up, it releases heat gradually
 In the work of a master, it is important to be able to correctly make a base, which can then be covered with various tiles
 Another design project for a fireplace covered only with decors
 Decors and special elements will be required to cover the stove.
In order for the stove to be able to enjoy its beauty for a long time, it is necessary to lay the finishing material on a special heat-resistant adhesive for ceramic tiles and add plasticizers for maximum stability and hardness.
One should not ignore the use of auxiliary fastening, without which fire-resistant ceramic tiles for fireplaces can quickly peel off due to overheating.
An adequate choice of ceramic tiles imitation brick is a very important point in independently facing the stove with ceramic tiles. A very big question arises as to how to tile a stove with ceramic tiles.
 Although there are adherents of the Scandinavian style, where the design is quite strict and is aimed at recreating naturalness in the interior
 Cladding rules
The process of lining a stove with ceramic tiles may require strict adherence to all rules. First you need to prepare the surface on which the installation will be made. To make the surface smooth and clean, it is necessary to remove all irregularities from it. You need to be very careful about the seams. They must be cleaned with a metal brush or grinder.
|
|
|
|
|
|
 Most often, bright compositions are chosen for decoration.
 Classic design of a Russian stove
 In the Italian version, the oven is also lined with ceramic tiles inside.
 Again, traditional tile laying with a podium for stacking firewood
For maximum safety of facing a brick oven with ceramic tiles, a special masonry mesh measuring 50x50 and with a diameter of 0.5-1 mm is used. The entire oven is covered with mesh and secured with metal anchors. Very often, to imitate ceramic tiles, specialists deliberately insert pieces of wire into the solution, onto which the mesh will then be attached. Ceramic tiles imitation stone for lining a fireplace are laid out on an adhesive solution, the quality of which depends on how it was mixed.
 In the Russian version, space is also required for a samovar
 Glue for work
Good craftsmen advise working with the glue solution without using special equipment, just with your own hands. The solution is prepared for fifteen minutes before use, which is applied using a metal spatula. Furnace finishing with ceramic tiles is done from top to bottom. Subsequently, the tile is attached to the surface, lightly pressed with the second hand or knocked down with a rubber hammer.
 The rules for laying tiles are similar to the general laying stops in any corner of the house
  Special luxury...
 To obtain even seams, it is recommended to use certain crosses. In order to find out whether each tile is positioned correctly, you need to use a level to check.
 And real brutality...
  In this example, the ceiling beam rests on the stove pipe, which likely led to a rework of the chimney
  The fire element is concentrated in one place: fireplace, candles...
 When the glue solution begins to stick, it will be necessary to remove its remnants from the surface using a soap solution. After 24 hours of finishing the stove with ceramic tiles, the seams are filled with a special mixture using a spatula. The remaining debris must be eliminated using special compounds and the surface wiped with a damp cloth. However, after finishing the stove with ceramic tiles, you should not use the stove immediately. It is recommended to wait two or three weeks.
The main problem when finishing stoves with ceramic tiles is considered to be uneven heating of various areas and walls of the stove in depth. It follows that the tile can fall off at any moment. You need to know that to finish a stove with ceramic tiles, it is necessary to use a clay-based solution as a connecting link. The stability of clay under the influence of elevated temperatures only increases over the years.
Furnace finishing
In order to improve a brick stove, there are many ways. One of the most popular is finishing the stove with tiles.
 This is how you can decorate an ordinary home stove with tiles
 Tile is inexpensive, and the appearance of the fireplace will change significantly. Stove tiles weigh less than facing bricks.
 The use of natural materials is at the risk of customers. After all, the strength of marble may have natural defects obtained during quarrying. Ceramic tiles and porcelain tiles are now produced of much higher quality than ten to twenty years later. They can be used without fear of cracking and crumbling.
 Tile for stove photo.
If a different foundation was installed for the stove, then such tiling of the stove would be perfect. A high-quality stove will operate under difficult temperature conditions, so a metal corner is pulled over the body of the fireplace to prevent cracks.
 But I would like to remind you that everything depends primarily on the hands of the master
  Even beautiful tiles may not save the situation...
 Before tiling the stove, you need to prepare the following tools:
- meter level;
- two spatula - serrated and flat, about one hundred millimeters wide;
- lace;
- tile cutter;
- rubber hammer;
- plastic crosses;
- rubber spatula 50 mm wide;
- protection for corners, because they are decoration and reinforcement for masonry.
 This type of stove requires mandatory decoration with ceramic tiles
  And for this stove, only the design of the wall and the tray on which the stove will operate is suitable
 Before tiling the stove, it is important to know which tile is best for the stove. Stove tiles come in different sizes.
Craftsmen recommend taking tiles for fireplaces and stoves measuring 20x25 centimeters or less. You need to choose the tiles for the stove based on its size, so that you can use less cut tiles. However, you can’t do without using pieces, so you will need a tile cutter or glass cutter. Laying tiles on the stove with your own hands will be successful if you choose the right glue to which the tiles will be glued.
 Do you think the craftsmen made the wood blank correctly?
  And these craftsmen made a wooden podium...
  The use of heat-resistant bricks is more suitable for integrating a stove into the design of a country house. Do not forget that the podium must be fireproof
 Before laying tiles on the stove, you need to try the glue. It must withstand high temperatures.
 This is also an option for a country house, when the heat from the stove will be absorbed by the refractory material. We would like to note that even the Buran spacecraft was decorated with ceramics, which prevented it from burning when returning to earth
 If the stove is located in a country house that is not always used, then the lowest temperature for the glue should take into account the minimum temperature in the house. The plane of the fireplace on which the stove tiles will be laid must be straightened in advance and without any bumps. If the brick starts to crumble, the best option would be to plaster the fireplace.
With normal masonry, it is possible to polish and tile the stove beautifully. The first row of tiles for lining the stove is laid out without glue. After you have done the fitting, you need to mix a little glue until it becomes thick and creamy and lay the tiles on the stove from top to bottom. Before tiling the stove, a layer of mortar is evenly applied to each tile using a spatula, which should be thick, but be able to cover the entire part of the tile on the back side.
 The ceramic frame can be transferred to the stove itself
 Laying tiles on the stove is done with a seam width of three millimeters.
Particular attention must be paid to the seams. After the glue has set, the tile must be wiped and left to dry for 2 days. Then the seams must be finished with grout.
 In this version, the ceramics are just decoration, they do not provide any functionality.
  To prevent buyers from making mistakes, some glue manufacturers produce fire-resistant masonry mixtures. In fact, this glue is no different from ordinary tile adhesive. When purchasing, it is better to contact specialized companies that will give you professional advice about their products, where they will clearly explain at what temperatures they can be used and how well they adhere. And such inscriptions on bags do not oblige the manufacturer to do anything, only to increase the price on the so-called specialized product...
 Before tiling the stove, it is necessary to carry out some checks to improve the result. Before placing tiles on the stove, it is necessary to determine whether it heats any rooms.
 This fireplace surround was made using regular tile adhesive.
  And the decorative stone is also laid with regular glue
 Working conditions
It is necessary to carry out such work only in the summer, when there is no need to operate the stove. How to cover a stove with tiles, the video in this article will help you understand the general process that the stove maker performs. Whatever method people choose for lining a brick kiln, they must take the work very seriously.
 In any case, the main thing is the final appearance, reliability of operation and of course the heat of the stove
 If you have doubts about your personal abilities, it would be best to entrust the work to specialists who know how to properly tile a stove. They certainly know how to glue tiles to the stove.
 You don’t have enough money for tiles, be smart, plaster the surface and stick on decors
 Covering any object with tiles is not a problem for them, and covering any masonry allows them to realize their potential. In addition, they will see if the stove can be tiled.
 The option with a natural stone finish is considered a good solution
 Although ceramic tiles are most often used for cladding, which usually last ten or fifteen years, but then the result is not guaranteed. Cladding of various stoves using any type of tile is quite the main stage, which makes it possible to extend the life of a family home and create comfortable conditions for further living together.
A real stove or fireplace is an excellent decoration for a private home. They create a cozy atmosphere, giving living warmth, and photos against its background turn out simply wonderful. If you happen to have a house with an old stove, you should under no circumstances destroy it - it will become a unique part of the interior. In many modern cottages, fireplaces are built specifically to create a unique design.
An old or new stove can be decorated with facing tiles. Covering the old or finishing the new surface of the stove with heat-resistant tiles is not so important. The main thing is that the tiles for the stove and fireplace are fireproof, that is, they can withstand high temperatures.
What functions does the furnace lining perform?
When selecting tiles for cladding a stove or fireplace, the home owner first of all looks at its design. However, in addition to decorative properties, cladding also performs other equally important functions.
- When facing a stove or fireplace with heat-resistant tiles, the heat capacity and heat transfer rates increase.
- In a room where the stove is tiled, the air temperature rises much faster thanks to the fireproof lining.
- Many people who have a stove are intimidated by its maintenance, since the traditional plastered surface of the stove requires periodic whitewashing. With tiling, maintaining the stove will be easier, as it is easy to clean and does not require replacement.
If you want to create an unusually warm and cozy atmosphere in a country house, you should replace standard heating devices - radiators and heaters - with a fireplace or stove with a real live flame.
Types of facing tiles for stoves and fireplaces
Theoretically, all types of cladding for stoves and fireplaces can be divided into two large groups: natural cladding and artificial tiles for fireplaces. Cladding with natural materials - dolomite, pebbles, basalt, marble, granite or even semi-precious stones - is very expensive and not always effective. These types of cladding do not always meet the necessary heat-resistant requirements, which makes their use impractical.
Man-made tiles are best suited for fire-resistant cladding. Refractory tiles for stoves, which are resistant to high temperatures, are produced in different versions.
Terracotta tiles for cladding
- Terracotta. Terracotta tiles for oven cladding are made from kaolin clay; in their original form, they have an unglazed surface and a highly porous structure. Terracotta fireplace tiles were among the first to appear on the building materials market and have since established themselves as a reliable facing material.
The distinctive features of terracotta tiles are their high strength, excellent fire resistance, which is similar to the corresponding characteristics of heat-resistant bricks, and adhesion to any surface. Unglazed terracotta tiles consist of one layer and have a unique natural shade, from which they get their name. Pigment can be added to the clay when making terracotta tiles to change the color.
However, glazed terracotta stove tiles are more attractive in appearance, so they are used more often. It consists of a clay base and a second layer - glaze. This option is easier to maintain.
Terracotta tiles have good vapor permeability, which is why it can be used for finishing even in a bathhouse or sauna. Another advantage of fire-resistant terracotta finishing is its low price compared to other heat-resistant facing materials. In addition, a wide range of terracotta allows you to implement different design ideas. A special glue is used to attach it.
Majolica tile
- Majolica. In fact, this is an improved version of terracotta, so their characteristics and scope of application are very similar. Majolica also has a highly porous structure, but its glazed surface precludes the use of majolica tiles for oven cladding in rooms with high humidity. The front part of majolica is distinguished by a thin layer of glaze, which prevents it from cracking when heated in the oven.
Majolica and terracotta for oven cladding can be purchased in two main sizes: 263x123 mm and 247x70 mm. Their price will differ depending on the dimensions. Majolica and terracotta tiles are attached to the stove using special glue.
Clinker tiles
- Clinker. A distinctive feature of fire-resistant clinker tiles for stoves is their increased strength and resistance to mechanical damage compared, for example, with majolica. But its price is also higher.
Clinker is made from several types of shale clay with other additives that increase its strength characteristics. It has a dense, finely porous structure, so its water permeability is low.
The uniqueness of clinker is in its appearance. Outwardly, it resembles a facing brick, and no pigments or dyes are used in its production, so over time the color of the stove lining will not change or fade. This will be clearly visible in photos and videos from the family archive, in which the clinker remains unchanged in color. The natural color of fireproof clinker tiles can be yellow, orange, red or brown.
It is advisable to use clinker in rooms where sudden temperature changes are observed, as it has high frost resistance. You can also use clinker tiles for a fireplace for finishing the outside. It is not recommended to lay the inner surface of a fireplace or stove with clinker, since the temperature inside the stove is too high, which leads to the material peeling off.
You can see how clinker tiles for a stove look in the interior in the photos and videos that are presented on the website.
Porcelain tiles
- Porcelain tiles. This is an environmentally friendly tile for the stove, which consists of quartz sand, marble and granite chips, oxides and metal salts. Porcelain stoneware is a universal ceramic tile for the stove. Thanks to its unique properties, porcelain stoneware can be used in baths, saunas, exterior decoration, and in rooms without constant heating.
Main characteristics of heat-resistant porcelain stoneware:
- dense monolithic structure,
- high strength indicators,
- resistance to both low and high temperatures, as well as their sudden changes,
- the lowest moisture absorption of all fireproof options for finishing fireplaces,
- a wide range, porcelain tiles are able to convey the texture of marble and granite, imitate terracotta and majolica, as well as any other tile,
- additional elements of heat-resistant porcelain tiles for finishing the corners of the stove.
Photos of finishing the stove using porcelain stoneware can be viewed on our website. There are also videos of laying ceramic tiles for a stove using glue.
Tile
- Tile. Experts have different opinions regarding the use of heat-resistant tiles for cladding stoves and fireplaces. Only one thing can be said for sure: tiles are not intended for use in conditions of temperature changes, like porcelain stoneware or tiles, so they can only be used to decorate a stove in a heated room. In addition, not every type of tile is heat-resistant and fire-resistant; the manufacturer must indicate on the packaging the temperature regime for which the heat-resistant tile is intended. And it is attached exclusively with glue.
If you nevertheless choose tiles among all other finishing materials, it is recommended to buy tiles no larger than 200x200 mm in size with a matte surface. The glaze will not withstand high temperatures and will crack within a short time after use. Thus, it is possible to use tiles in the decoration of fireplaces, but experts do not guarantee the long service life and durability of heat-resistant tiles. On our website you can see several examples of photos and videos of oven cladding using tiles.
Glazed tiles
- Tiles. They are simply ideal for the internal and external cladding of a stove or fireplace, as they have all the necessary characteristics for this: heat resistance, durability, high heat transfer, aesthetics and ease of maintenance of the stove. Heat-resistant tiled fireplace tiles can be classified as a type of terracotta; they are the most environmentally friendly finishing method due to their completely natural composition.
The tiles are made by hand. Usually they are smooth, without relief, tiles. The main difference between tiles and other types of heat-resistant tiles is the presence of a side on the reverse side. That is, tiles are made in the form of boxes.
This design allows for increased heat-saving properties. The presence of a side on the tiles allows you to lower the temperature of the heat emanating from the stove. That is, you can touch a fireplace decorated with tiles without fear of getting burned.
Due to their non-standard shape, additional elements are required for the installation of tiles. During the assembly process, each facing tile is attached with glue to a strictly defined place, resulting in a unique pattern or ornament. Thanks to the rich palette of colors and patterns, you can choose the design of a stove or fireplace for both classic and modern interiors.
Tiles have the only negative property - their high price. On our website you can see photos of finishing the stove with heat-resistant tiles; this option looks expensive and presentable.
When choosing ceramic tiles for the stove, you should take into account that they do not adhere to cement mortar; special glue is used when laying them. This glue is freely sold in construction stores.
Which tile is better to cover the stove in the house?
When choosing tiles for lining a stove or fireplace in your home, there are several important factors to consider.
- The purpose of the furnace, which determines the maximum heating temperature. All furnaces can be divided into three categories: with moderate heating - up to 100 degrees, with high heating - up to 120 degrees, and furnaces with high heating temperatures - over 120 degrees. The manufacturer of the facing tiles indicates the maximum permissible heating temperature on the packaging. It is welcome to have a certificate that provides accurate data on fire resistance.
- Temperature difference. If you are finishing a stove in a country house, where you come only for the weekend, then the tiles must not only be heat-resistant, but also withstand sudden temperature changes. For a fireplace or stove in a residential building, such a requirement for heat-resistant tiles is not necessary.
- Heat capacity. The higher the heat capacity of the facing tiles, the faster and better the room will warm up.
- Thermal expansion coefficient. Ideally, it should match the coefficient of the material from which the stove or fireplace is made. Otherwise, the tiles can easily break off from the base of the stove.
- Rigidity and strength. These indicators largely depend on the thickness of the tile and are responsible for its deformation. The thicker and stronger the tile, the less prone it is to change shape and size when heated. The porosity of the material from which the tiles are made also affects the strength properties. The most durable heat-resistant tiles are finely porous with a moisture absorption coefficient of up to 3%.
- Environmental friendliness. Many artificially created materials, when heated, release chemicals harmful to humans into the air, so when choosing heat-resistant tiles, be sure to pay attention to its composition.
- The fireplace can be decorated both outside, to give a presentable appearance, and inside. For interior decoration, only unglazed tiles are used. If part of the cladding will be located outdoors, then you need to use heat-resistant tiles that can withstand sub-zero temperatures.
How to choose tiles for cladding stoves and fireplaces
If you have already decided on the type of cladding for the stove or fireplace, all that remains is to choose the tiles wisely. To do this, you need to carefully examine the tiles offered for purchase. Pay attention to the following parameters that will allow you to evaluate the quality of the tiles:
- Same color for all parts of heat-resistant tiles.
- Same thickness for all tiles.
- Identical geometric dimensions, which can be estimated by placing the tiles next to each other.
- No cracks or chips, both outside and on the back side of the tile.
For cladding a stove or fireplace, the best option would be square-shaped fireproof tiles with one side measuring no more than 120 mm. When purchasing, be sure to immediately purchase the so-called “safety stock”, which is intended for cutting tiles during laying, as well as for replacement in case of damage during use. If you buy the material later, the tiles may differ in color.
Tile markings (designations)
To correctly assess the quality and characteristics of heat-resistant tiles, you should pay attention to the markings left by the manufacturer on the product packaging.
Firstly, only heat-resistant tiles marked with the letter “T” are suitable for finishing the fireplace. In addition, there should be a flame icon next to it, with a number inside - this indicates the number of firings of the tile. Usually this indicator is indicated by the numbers 1 or 2; the higher it is, the better the quality of the product.
Secondly, you need to look at the water absorption of the fireproof tile, which is indicated by the letter “E”. For hot surfaces, it is better to choose a material with an indicator of no more than 3%.
Thirdly, pay attention to the manufacturing technology of fire-resistant tiles. Fireproof stove tiles are designated by the letters “A” or “B”. The first option can be purchased more expensive, but the quality will be better - manufacturing technology “A” requires clear dimensions of each element.
Also on heat-resistant stove tiles you can find wear resistance indicators, designated PEI, and chemical resistance indicators, designation EN122. However, they do not have a big impact on the operation and choice of tiles.
A stone stove takes on a finished look and looks truly impressive only after decorative finishing of the surface is completed. For a dacha or country house, you can leave the brickwork as is, or whitewash or paint it with a heat-resistant paint composition, but for a home stove it is best to choose tiles for lining stoves and fireplaces. The matte or glazed surface of ceramic tiles is much more durable and practical to clean; it will hide minor defects and at the same time please the owners with a nice design.
Glue it yourself or invite a specialist
Most tile masters like to scare their potential clients by colorfully describing how difficult it is to tile a stove with ceramic tiles with your own hands without practice and experience. In fact, there are many nuances in how to line a stove, but they are all known and do not pose any particular difficulties if:
- Use high-quality tile materials and heat-resistant adhesive. There is no point in relying on homemade compositions;
- Prepare the furnace walls thoroughly for cladding, level the surface with plaster mortar so that the height difference is no more than 10 mm;
- Follow the technology and installation steps exactly, without trying to improve or save money, for example, as in the video:
- Be patient and take time, since facing stoves with ceramic tiles does not tolerate haste and careless attitude to work.
Advice! If you have a fireplace stove at your summer cottage or country house, you can tile the fireplace as shown in the photo as a test and to gain experience.

The body of a properly assembled fireplace does not heat up any more than a conventional stove, so the risk of chipping ceramic tiles is relatively small. Such work will add confidence and at the same time allow you to test the materials prepared for lining a home stove. A little practice will allow you to get used to laying ceramics and get better at simple operations. Of course, the issue of facing with ceramic tiles concerns, first of all, old worn-out stoves, as well as new buildings, if instead of expensive facing bricks, ordinary red ceramic material was used in the masonry.
How to choose material for oven cladding
Ceramic tiles for lining a stove must easily withstand temperatures up to 400 o C, not crack during cyclic heating, have the necessary strength and pleasant appearance. For your first experience, you can use several options for ceramic tiles:

When it comes to lining a stove, it is best to use proven and most affordable ceramic materials. To line the stove with ceramic tiles, craftsmen buy the material with a margin of 5%; for the first masonry experiments, the amount of cladding can be safely increased to 10%.
Traditionally, the walls are lined with tiles and relief majolica. Laying this kind of cladding requires a very good knowledge of the properties of stove ceramics, therefore, if you require an artistic finish to the stove, it is better to resort to the services of a craftsman. For example, to decorate a stove with tiles, you need to select corner and shelf elements of ceramic tiles, correctly calculate the size and attachment points, photo.
Considering the fact that tiles and majolica are not cut like tiles or clinker, the use of artistic ceramic tiles for cladding will require, first of all, work experience. Some techniques on how to line a stove with ceramic tiles are shown in the video:
Technology for laying ceramic cladding on an adhesive base
To attach ceramic tiles to the surface of the stove, a special tile adhesive is used, which has high heat resistance and the required coefficient of thermal expansion. Usually this is a mixture of fireclay with fireclay powder, perlite and plasticizing additives that make the adhesive material plastic and slightly viscous. One of the adhesive compositions proven by many years of practice is Plitonit W brand SuperGlue, Neomid Supercontact and Scanmix Skanfixsuper.
From home-grown solutions, clay adhesives are used, at the rate of 1 measure of clay to 4 measures of sand and 1 water with the addition of PVA and asbestos fiber. When using lean clays, the amount of sand in the batch is reduced by 40-60%.
We carry out the furnace cladding in several stages:
- Cleaning and leveling the masonry surface for laying;
- Marking and calculating the amount of material, laying out tiles, measuring rows and choosing a bond line;
- Laying ceramic tiles in rows;
- Grouting the joints between the tiles with a compensating compound.
Advice! The most labor-intensive operations, such as stripping, trimming and plastering walls, are performed at least a week before the start of masonry. Within a week, as a rule, the eye has time to “snatch” and see those defects in the walls that were not visible during the alignment process.
Removing and preparing walls for cladding
There are no stoves with perfectly smooth walls; moreover, during use, the walls can play, expand, become covered with cracks and chips. Therefore, before tiling the stove, you will need to clean the walls from dirt and old mortar. If the brickwork “wiggles” along the plane by no more than 10 mm, then leveling plaster can be abandoned; this will only improve the adhesion of the tile adhesive to the ceramic surface of the tile.

In this case, it is necessary to deepen the tile joints and apply a notch to the brick. Cracks and chips are covered with masonry mortar. At least one day before the start of laying the cladding, the brick base under the ceramic tiles is strengthened with a heat-resistant primer.
If the walls of the furnace are finished with good quality plaster, it is necessary to clean, level and strengthen the layer with a primer. The old and cracked plaster layer is knocked down to the brick, the oven walls are cleaned and primed.
To strengthen the plaster mass under the tile cladding, a 10x10 mm reinforcing welded mesh made of 0.4-0.5 mm annealed steel wire is stuffed onto the brick; it can be secured with “bugs” or loops embedded in the seams. Next, ruler-beacons are installed and plastered. If the thickness of the laid material is more than 15 mm, the plaster is applied to the stove in two layers with the first drying for 24 hours, as in the video:
The plaster is prepared according to a standard proportion - to one part cement, three parts clay and a fifth part sand. To ensure good adhesion of the plaster without shrinkage, polyvinyl acetate emulsion can be added to the solution.

Laying ceramic tiles
Tiling ovens begins with laying out ceramic material along the lower and middle tier. This is done to adjust the size of the tile cut and the width of the seam. For hot single-pass stoves, the width of the seam between ceramic tiles is increased to 10 mm; for colder wood-burning fireboxes, the seam is reduced to 8 mm.
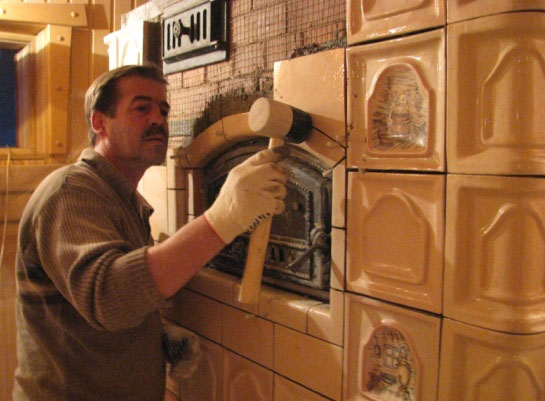
To make the first row of cladding, you can stretch a fishing line or install a laser level; laying out the tiles is done with a gap of 7-9 mm between the bottom edge and the floor surface. The walls should be warm, 30-35 o C. To facilitate the process of laying under the first row, a guide strip, perfectly aligned with the horizon, is nailed to the stove wall.
Freshly prepared adhesive mass sets quickly enough when warm, so it is prepared in small portions, for one or two rows. Before laying, the back side of the tile is sprayed with water or moistened with a brush, after which a layer of adhesive solution 4-7 mm thick is applied with a notched trowel and laid on the wall.
The front corner of the oven body is laid out first, and then the row is pulled along the front and towards the back wall. During the day, more than three rows of tiles are not laid. The seams between individual tiles are cleaned of adhesive mortar and left open.

The next row can only be laid after the previous one has been completely laid out on the wall. The result must be checked with a building level along the horizon. Within 8-10 minutes from the moment of laying, the tiles can be adjusted with a wooden or rubber hammer. The top edge of the laid tile must be perfectly smooth; for a lined stove, it is fundamentally important that the size of the seam be the same everywhere, otherwise when heated, the layer may crack and peel off.
To achieve maximum strength of the cladding, the tiles are glued in staggered rows, but such compositions do not always look beautiful, so most often the stove is covered in straight rows.

Finishing operations
Before laying the tiles, it is necessary to remove the cast iron parts of the door and frame from the firebox. If you place ceramics on top of cast iron, the heated metal will lift the tile layer. After the glue has completely dried, the cast iron is returned to its place and secured to the brick surface with long self-tapping screws with an asbestos cord.

Three days after the completion of gluing the tiles, the seams are finally cleared of glue residues and joints are jointed or grouted with a clay-based compensating compound. The grout mixture is applied to the seams with a rubber spatula and gently pressed along the entire length of the seam. After a few hours, the edges are wiped with a flannel, after which, with a damp finger or rubber float, the depth of the seam is leveled, making it the same over the entire surface of the cladding. After final drying, all grout material is carefully removed from the surface of the tile.

Conclusion
Furnace cladding with conventional ceramic materials is completed on average in 6-7 days. You should not try to do the job faster or warm up the walls to dry the cladding. On the contrary, the room with the stove should be closed from drafts, and not used for at least a couple of weeks.


