If you face problems creating a new microsoft account or when adding a new Microsoft account to use any Windows 10/8 app, we will try to figure out the reason and resolve it.
Failed to create Microsoft account
Whenever you need to add a new email account for Mail, Calendar, or any other Windows application, you need to open the Windows Settings\u003e Accounts\u003e Email Address; Application Accounts page. And here you cannot add a Microsoft account.
1. Error creating a Microsoft account
If you see an error message with the code 450 If you try to create or register a Microsoft account, try again after 24 hours. This is because Microsoft limits the number of Microsoft accounts you can create in one day from the same IP address. If you're setting up accounts for an organization or group and you get an error, waiting a day should fix the problem.
- If you still cannot create an account after 24 hours and you receive an error message 675b , try again.
- If the error message you receive includes 0x800482d4 or starts with LEFKPK , you need to contact servicemicrosoft support.
2. Run Microsoft Accounts Troubleshooter
Microsoft has released Fix It ATS, called the Microsoft Accounts Troubleshooter, that helps you troubleshoot and fix such issues automatically. Download and install the program to fix the following account problems:
- Microsoft account settings are corrupted.
- Unable to connect to sync service.
- Microsoft account policy issue.
- Failed to connect due to proxy or certificate.
- Check roaming status with GPO.
- Connected with a guest account or with roaming profiles enabled.
- You are not connected to the Internet.
- You must be connected to the Internet to sync the settings.
- Proxy settings.
- The verification system is not activated.
3. Group Policy Editor
Group Policy Editor (not available in Home edition) includes an option that can block users from adding a new Microsoft account. If enabled, you won't be able to add a new Microsoft account or switch to a different account or local account. Therefore, if you or someone else makes a mistake, you need to disable this setting before trying to add a new account.
- Click Win + R and enter gpedit.msc.
- Go Computer configuration> Configuration Windows> Security options > Local Policies > Security options.
- On the right, find " Accounts: Block Microsoft Accounts " and click on it twice to open the properties.
- In the local security options, you will be given three options. If you choose the second or third option, you will run into problems. You need to choose the first option, which reads: " This policy is disabled " and save your changes.

4. Reset Windows 10
Your account may not have any data stored. Open Registry Editor and make sure you see your email account in this location.
- Click Win + R and enter regedit.
- Follow the next path.
In previous versions of Windows, users could be added and removed through the Control Panel. But, in Windows 10, this feature was removed, which is why many users do not know how to add a new user to Windows 10.
If you are also interested in this issue, then we suggest that you familiarize yourself with this material. Here we will consider at once two ways of how this can be done.
How to add a user through the "Options" menu
Perhaps the easiest way to add a new user to the Windows 10 operating system is to use the Options menu. To do this, press the Windows-I key combination or open the Settings menu using the icon in the Start menu.
In the "Options" menu, open the "Accounts - Family and other people" section and click on the "Add user for this computer" button.

As a result, you will see a window for adding users to Windows 10. At the first stage, you need to enter the email address or phone number of the future user. You can enter this information or skip this step by clicking on the link "I do not have login information for this person."

You create a new account during the installation process. But what if you want to add additional local accounts? Read on and we'll show you how to do it.
Why do you need to do this?
Millions of Windows users never create additional accounts on their computers, but use their primary accounts with administrative privileges. As practice shows, this is not secure, and users need to get rid of this habit, or be lazy to create a new account, whatever you want.
Creating a secondary, non-admin account for yourself and additional accounts for your children (so that dubious downloads from malicious sites don't infect your computer) is a great idea and one of the important things that significantly increases the security of your machine.
You might prefer the online and synced features of Microsoft's online account, but we found many of the benefits of a local account that lacks the online bells and whistles and potential privacy concerns. A standard local account is great for people who don't want to associate their personal information with Microsoft, and it's also perfect for kids who don't need add-ons (and may not even have an email address to link to an account).
Let's take a look at the process of creating a secondary account in Windows 10.
How to create a new local user account in Windows 10
The first step is to access the Accounts menu. To do this, click on the search icon to the right of the Start menu and type "Accounts."
Select "Add, change, or remove other users" from the search results. Clicking on it will open the Accounts menu, as shown in the screenshot below. Alternatively, you can go to Start -\u003e Settings -\u003e Accounts, then select "Family and other users" to get to the same menu.

Select "Add a user for this computer". Microsoft has made it so that in the process of creating an account, you will be greatly carried away towards the online account instead of the local one. So let's be careful.
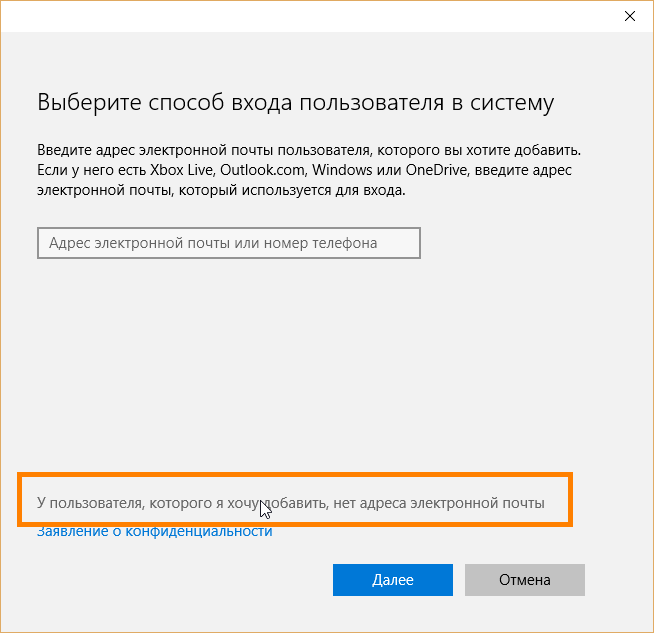
Ignore the prompts for your email or phone number. Instead, click on the link at the bottom of the window: "The user I want to add does not have an email address."
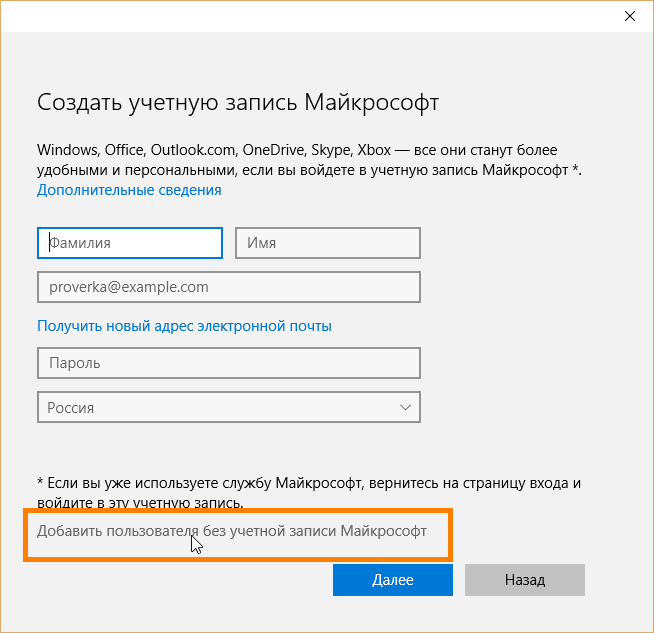
Since we don't have an email address, Windows will prompt us to create an online account. It is logical. But as we said, Microsoft is quite persistent that we create an online account instead of a local one, and suggests creating a new email address via @ outlook.com. But ignore this information and click on the link below "Add a user without a Microsoft account."
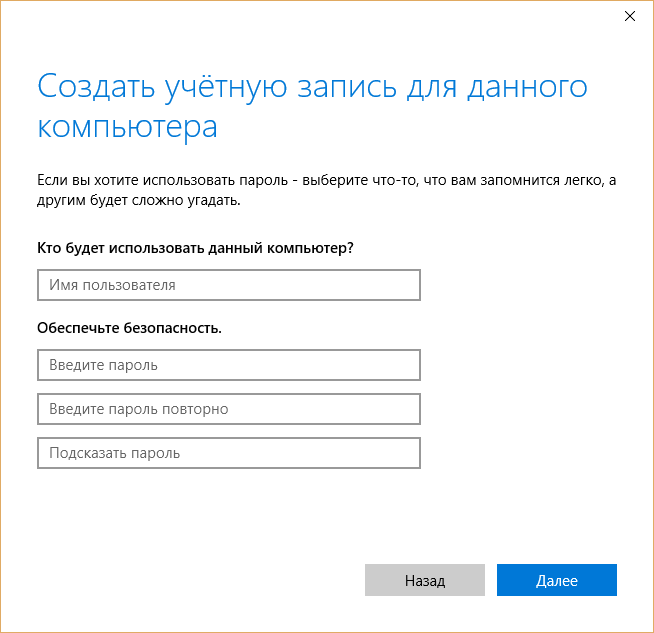
If anyone remembers, in Windows, ten years ago, the account creation screen looked very simple: just a username and password and nothing more. But now, as we can see, everything is different .. And you enter your username and password and click the "Next" button.
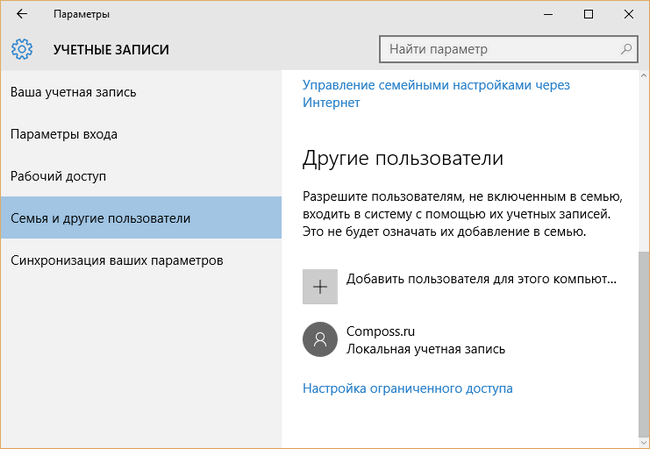
After clicking the Next button, you will be taken back to the account settings screen, and now, you can see the new account. By default, limited rights are set for the local account (there is no way to install applications or make administrative changes on the machine).
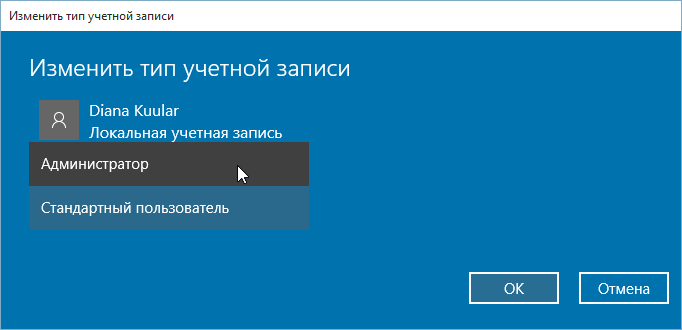
If you have a good reason to change the account type to the type with administrative privileges, click on the account, select "Change account type" and set "Administrator".
Alternatively, you can select Remove to remove an account that no longer needs to be present. If you need to make more changes (like child accounts or parental controls) be sure to check out for a closer look.
In cases where more than one person uses the same computer, it may be necessary to create separate user accounts. Accounts created on one computer will allow you to separate work with personal files and user folders without affecting the documents of another. By creating a Microsoft account, you will be able to access all Microsoft Store applications, as well as synchronize settings and access to files on devices running Windows 10. In this step-by-step guide with photos, you will learn how to create a local, guest, and Microsoft entry on Windows 10 operating system.
Step 1
How to create a local account using the User Accounts window
Start by opening the Run window. To do this, simultaneously hold down the "Win" and "R" keys on the keyboard.

Step 3
At this stage, click the "Add" button.

Step 4
To create a local account, click on the line "Sign in without a Microsoft account."

Step 5
Now we press the button "Local account".

Step 6
Fill in the fields for the username of the account, enter the password twice, and specify the password hint. Then we press the button "Next".

Step 7
Click the "Finish" button.

Step 8
The account has been created.

Step 9
How to create a local account using the Computer Management window
Right-click on the "Start" button and in the context menu that opens, click on the "Computer Management" line.

Step 10
In the Local Users and Groups section, open the Users folder.

Step 11
At this stage, right-click on the free space in the window and in the menu that opens, click the line "New user".

Step 12
Enter your username, you can also fill in the "Password" and "Confirmation" fields and click the "Create" button. The specified password will be used to log into your account.

Step 13
The account has been created.

Step 14
How to create a Microsoft account on a computer
Let's take a look at the first method to create a Microsoft account. Start by pressing the "Win" and "R" keys on your keyboard at the same time.

Step 15
In the "Open" line enter "control userpasswords2" and click "OK".

Step 16
Now we press the "Add" button.

Step 17
If you have an email address that you use to sign in to Microsoft services, enter it in the appropriate box. If you do not have a registered address, click "Register a new email address".

Step 18
Enter the last name, first name, email address, and password that will be used to sign in to your Microsoft account. Then click "Next".

Step 19
Re-enter the password, select a country or region and click "Next".

Step 20
At this point, provide your date of birth, gender, country or region code, phone number, and alternate email address. This information will help you regain access to your Microsoft account if you lose your password. Click "Next".

Step 21
In this step, enter the characters shown in the picture. Then check the box next to the items that interest you and click the "Next" button.

Step 22
We press the button "Finish".

Step 23
A Microsoft account has been created and added to your computer.

Step 24
How to create a Microsoft account using the official website
In the second method, you will learn how to create a Microsoft account on the official website. To do this, go to the Microsoft website in the browser by clicking the account.microsoft.com link and press the "Create an account" button.

Step 25
Enter your email address and password. Then click the "Next" button.


Step 27
The account has been created.

Step 28
Let's move on to connecting a Microsoft account on a computer. To do this, select the username with administrator rights. Please note that the "Require username and password" item must be checked. Then click the "Add" button.

Step 29
Enter the email address of your Microsoft account and click "Next".

Step 30
Now click the "Finish" button.

There are many benefits to signing in to Windows 10 with a Microsoft account. It allows you to sync settings across devices, purchase apps, music, movies and games from the store. Allows you to link the Windows 10 license to the account itself, which will open up access to services like onedrive (cloud storage), Outlook (mail), sync contacts and many cool and convenient tools.
When installing Windows 10, the installer will prompt you to sign in with your Microsoft account. If you do not want to create it, then you can use windows 10 with. You can always switch in the future from the created microsoft account to the local user profile and vice versa.
How to create a Microsoft account
Step 1... Go to the official microsoft page.
Step 2... Fill out the form offered to you. Enter your first name, last name, email address to which you want to link your account or click below Get a new email address and you will be prompted to create a new Outlook mail. Come up with a password and enter your phone number, which will increase the security of your account and you can easily restore it using your number. See below where to enter data on a computer to link your created account.
How to link a microsoft account on a computer
1 way... To link the created Microsoft account on a computer or laptop, go to the settings:
- Click Accounts.

- On the left select E-mail address and with the right click on.

- Enter your details that you registered above and your account will be linked to Windows 10.
- If you do not have a microsoft account, then click and follow the proposed forms. (This is the same way as described at the beginning.)

2 way... If you have created your account and logged in under a local profile, then just go to " Parameters" > "accounts" > "Your data" > "Login instead ..."Enter your details in the form offered to you.


