Drywall is by far the most popular construction and finishing material, used in the creation of two-level ceilings. Looking at the photos of multi-level ceiling structures, we think that it is impossible to cope with such work on our own. In fact, although it is not easy, it is quite feasible. You will need attentiveness, accuracy, little construction skills and knowledge of theory.
How to make a two-level plasterboard ceiling using the reverse fixation method
Again, you will need to calculate the 45 degree angle. If, on the other hand, your board weighs more than 10 kg on the scale, do not despair and do not use swing pins or screw dowels. For this last ankle, you must gently push against the stop. If you are using a rocker, you must attach the rocker to the inside of the hole. When the fins are finally crossed, bring the ankle back in your direction so that the fins are in the abutment behind the wall. The plastic cylinder should be hung on the wall.
Required materials and tools
So, you have decided to make a two-level plasterboard ceiling in an apartment or house. For the work to go quickly and smoothly, prepare everything you need in advance. You will need the following tools:
- screwdriver and hammer drill;
- water level and a rule with a level, it is better if it is at least 2 meters long;
- upholstery cord;
- square, tape measure, pencil;
- stepladder, construction "goats";
- knife for cutting gypsum board;
- hammer;
- drywall hacksaw.
Usually two-level plasterboard ceilings are made in order to arrange complex lighting. So, you should stock up on a standard set of tools for electrical work.
Now proceed to the stage of mounting the table and its modernization. Raise your board and only release it when your hook supports it. Lay down the image softly. This means your catch is not very durable. You just need to start over. Then use a level to make sure it's straight up. The effect will be less beautiful if it tilts!
Hang the painting on a plaster wall
You should be aware that gypsum walls can crack and collapse when you press down on a nail. To avoid these inconveniences, opt for adhesive table hooks, which can hurt you all over the place during the table setting operation. Be careful when controlling the average humidity in the room. Indeed, if the room is too humid, your adhesive backing will have a good chance of not sticking long enough.
Materials and tools that you will need in your work
Now let's move on to consumables... You will need:
- drywall sheets;
- bearing profile;
- guide profile;
- spokes or U-shaped suspensions, depending on the distance at which the frame will be mounted to the main ceiling;
- self-tapping screws for metal for plasterboard of different lengths;
- quick assembly, diameter 6 mm.
The amount of material directly depends on the area of \u200b\u200bthe ceiling. Do not forget that it is better to let the surplus remain than not enough material at the right time. Therefore, purchase with a margin. This is especially important if this is the first time you come across this kind of work: there will most likely be mistakes in the process.
You first need to know the weight of your graph to determine if it falls into the category of light frames, which typically weigh less than two kilograms. While this is not the funniest task, you need to do your homework before starting work. You must clean and dry the wall properly. Don't skimp on elbow grease, a wall that isn't cleaned properly can damage your desk handle. Any traces of moisture and dirt should be prohibited. Let your wall dry so your hook sticks well to the surface.
Because gypsum is relatively porous, it does not like moisture and leaves mold to grow. Rub the sponge with gentle circular motions. Then dry the wall with a dry cloth. Take a relatively strong adhesive hook to support your future frame and place a tie or wire behind your frame. Attach the adhesive hook to the wall. You can also put two hooks side by side, but make sure the space between them is less than the playback width.
Before starting work, you need to decide on the scheme of the future ceiling.
Ceiling schemes: choose the right one
There is a huge range of designs for multi-level plasterboard ceilings. Many of them are very complex and require professional work of specialists. We will focus on simple popular schemes that beginners can implement.
Now it's time to hang your painting or reproduction on the wall. To do this, use the harness on the back. If you need to hang heavier frames, we recommend you attach them to a beam in the wall. To do this, use a tape measure to select the location of the screw. As indicated at the beginning of the article, take measurements and mark them on the wall with a pencil. Then drill the hole with the pencil as the pencil is in the center. Place another piece of glue under the hole, larger than the previous one. It should be able to fold in half with the non-sticky part inward.
The first scheme
The first method involves installing only a box with a visor (or without it) around the perimeter of the room or in some of its sections. This so-called “island” installation is very easy to implement and is suitable for flat ceilings that can be simply patched before use. The second tier is usually used to hide communications along the perimeter of the ceiling or provide zoning to the room.
Glue another piece of this glue to the wall. Why use a piece of glue, you say you are reading these lines? Simply because it will adhere most of the dust generated when drilling into the wall. This is a perfectionist guide, this step can be taken if you don't have time.
Selection of materials and tools for installing a two-level plasterboard ceiling
Now is the time to carefully drill a hole in the wall and where your stamp is. Useful detail, the drill will stop when it reaches the plaster layer. Your hole should not be larger than your wick. Your glue is no longer useful, remove it before applying pressure to your ankle. Press your ankle into the wall with the hammer, again with care. You risk breaking the wall with overly harsh gestures.

If a visor is provided on the second tier, into which light cords or lamps will be mounted, then this will not only serve as a separator into zones, but will also help at a certain moment to give the interior the desired atmosphere.
Let's say you are making such a ceiling in the bedroom. If necessary, you can turn off the main lights, and leave only the cord in the side turned on. The cord itself is not visible because of the visor, so the lighting will be muted, creating an atmosphere of comfort and romance.
We hope that our advice is helpful for you to hang your most beautiful canvas in your den. If you liked the article, do not hesitate to discover the steps of one. Accurate and precise precision machining for both residential and commercial sectors, with large scale jobs for buildings such as large buildings, warehouses, subways, shopping malls and shopping centers.
Partitions and decorations
The wide range of services and works offered with plasterboard panels ensure minimal discomfort for precise, precise and clean operations. In addition, the company offers its customers excellent solutions in the construction of partitions with numerous projects for the decoration and renovation of premises for houses, offices, shops and commercial activities. Drywall - perfect and very suitable material for such a fabrication It provides effective results without the need for overly invasive structural interventions.

Diagram of a box with a visor for hidden lighting
You can make a second-level box of any shape - rectangular, round, oval, wavy. It all depends on your imagination and desire. But remember the classic rules for shaping the interior. For example, for a dynamic design, the smooth lines of the second tier are perfect. If the decor in your room is laconic, simple, then it is better to use straight lines in the design of the ceiling.
A Sicilian company can assess all types of living and non-residential conditions. Depending on the needs and requirements of his clients, he focuses on all his experience and professionalism with innovative and excellent design solutions, ideal for enriching spaces that require small or large renovation works... 360 degree service, as all the walls are realized, but also painted and decorated according to the preferences and tastes of the clients, who have completely renovated and magnificent design spaces at their disposal in a short time.
Second scheme
This method is useful if your ceiling is uneven, or there are too many communications on it. Therefore, the creation of the first level of drywall will be required.
Usually, the base surface of the ceiling is mounted first, and the second level is sewn to the frame of the first.

Housing and large structures
High professionalism and precision in the implementation of false ceilings in Catania have always been a guarantee of quality. Numerous services for both the private sector and the large work sector. The company, with its own technologies and experience, guides its customers to the most suitable solution and in a different way every time. Each time the type of solution is different, each client needs a personalized service tailored to the characteristics of your home. Here, the specialists of the Sicilian firm carefully assess the spaces and interventions the client desires, and finally suggest the best typology of intervention for each need.
Fastening the box to the frame of the first tier
The second option implies, first of all, the installation of the box, and the subsequent fastening of a guide profile to it for the main plane of the ceiling.

Fastening the first tier to the side of the box
Whichever method you use, after installation, the two-level ceiling will look something like this:
Thanks to many years of experience in this field, the company offers excellent results both from a functional point of view, knowing aesthetics and design. Ideal solutions to improve home interiors, with elements that fit perfectly into the environment and existing style.
Great care in design and quality materials
A high level of intervention that applies to all sectors, from residential, office, business and retail to large works on the environments and surfaces of every location. In order to offer the best for its customers, the company offers all its experience in manufacturing decorative elements made of drywall, all of them are made with the utmost professionalism and attention to detail. In addition, thanks to the quality of the materials used in the processing process, combined with the extensive experience of its employees, the company guarantees the result always in accordance with the requests of customers who fulfill their expectations every time.

Ceiling box with straight lines
For these simple schemes you can choose the most suitable option for a two-level ceiling, which is easy to do with your own hands.
Installation process
The first stage of work is marking. It will require special attention from you, since any mistake can lead to unpleasant consequences.
One of the strengths of the company is the absolute organization of its qualified personnel and the speed with which work is done with excellent and quality results. 360 degree service is provided by excellent professionals who take care of all aspects of their work.
Services and solutions in many areas
Works for the implementation of ceilings in Catania in plasterboard, frames and roof ceilings with mineral fiber panels. In all areas of activity, the company can guarantee the best result thanks to its experience and the quality of the materials used. This is why the Sicilian company is a reference point for everyone in sectors such as. Fire protection systems Sound insulation systems Thermal insulation systems Drywall systems Suspended ceilings. Innovative solutions and the most modern systems allow the company to build works with the highest quality standards.
- Take a tape measure and pencil. Define a point on the wall that will be the starting point for the horizontal lines of the bottom edge of the box.
- Using the water level, transfer the points from the original elevation to each corner of the room. Draw horizontal lines between them with upholstery cord.

Drawing lines for wall guides
- Draw lines across the ceiling. They will mark the longitudinal inner boundaries of the second tier.
Now draw a grid over the remaining space within the perimeter of the intended boxes. At the intersections of its lines, suspensions for the first tier will be attached. It is simple to do this: place marks at a distance of 50 cm from each other along the longitudinal borders of opposite lines. On the rest of the perpendicular lines, place the marks at a distance of 60 cm. At the intersections of the lines, you will get right angles.

Ceiling layout example
The markup is finished, now proceed with the installation.
Assembling the box
First you need to assemble the boxes. Fasten the guide profiles along the lines on the wall. Do the same along the inner borders of the second tier, along the ceiling.
From the profile on the ceiling, measure the distances to the line on the walls, subtract about 1.5 cm, and according to the figure obtained, cut off the pieces of the CD profile with a small allowance at one edge.
Insert the cut pieces into the profile on the ceiling and screw them at a distance of about half a meter from each other.
Screw the guide profile to the allowances at the lower edges of the pieces of the suspended profiles. Its sharp edges will face the wall. Now the guides can be connected with pieces of the bearing profile of the required length by inserting and screwing them.

Side edge of the box
Sheathe the bottom and side of the frame with drywall. Your box is ready!
Please note: before starting the installation of a two-level ceiling, plan where the electrical wires will be located, the chandeliers and lamps will be located. Installation should be carried out taking into account all these features.
If the two-level ceiling was planned in such a way that the width of the boxes is more than half a meter, the middle of each piece of the supporting profile must be fixed on the suspension. This will stiffen the frame and allow the drywall sheet to be secured more securely.
We mount the first tier
Attach the hangers at the intersection of the lines on the ceiling. On the side edge of the box, make horizontal lines along the drywall, thus marking the lower border of the first tier. Attach guides to these lines and screw them with self-tapping screws.
Insert the support profile into the guides on two opposite edges, keeping a distance of 60 cm from each other. On the remaining edges, place the profiles with a distance of half a meter, as a result, you will get a frame with cells of 50 X 60 cm.
Using a stretched cord or a rule with a level, give the supporting profile the required position and fasten it with hangers.
Cut the jumpers from the same profile, insert them between all supporting parallel profiles and screw them, keeping a distance of 50 cm from each other.

Two-level frame in finished form
At this point, your two-level ceiling is almost ready. It remains only to double-check whether everything is correctly and securely fixed, to correct something if necessary and to sew sheets on the frame.
Video about the installation of a two-level plasterboard ceiling
As you can see, renovating a room and giving it an original, unusual look with a two-level plasterboard ceiling is not very difficult even for a beginner. We hope our tips will help you get this job done quickly and easily. Ask your questions in the comments, or share your experience with us. Good luck and comfort to your home!
Many houses were built by builders who were not very demanding about their work. This manifests itself in the "littered" walls. When a building level is applied to them, the deviation reaches from several centimeters to 10 cm. Crooked floor slabs, violations of the geometry of the room and other flaws are also not encouraging. The solution to these problems is the responsibility of the repairmen. The technologies for eliminating the above problems have been developed and varied. One of the types of repair is do-it-yourself plasterboard installation.
Plasterboard ceilings have been popular for a long time. Suffice it to recall the advantages of this type of repair:
- The ability to fix even a crooked ceiling.
- It is easy to achieve high quality results.
- Simplicity of lighting device with additional illumination.
- When installing several levels, they create a unique design of the room.
This type of repair work also has disadvantages due to the fact that the useful height of the room falls during installation. Drywall has one bad thing - it does not tolerate high humidity, and this imposes restrictions on its use in bathrooms, or where leaks from the top are possible, although flooding will adversely affect many materials.
Two-level ceiling in the interior
But enough about the disadvantages - there are more advantages. The drywall sheet is a flat surface, so with proper installation, work on finishing are reduced to a minimum. Due to the fact that a plasterboard ceiling is a suspended structure, a free space is formed between it and the base on which it is attached. It is successfully used for wiring and other communications.
In such a ceiling, it is not difficult to install as many lamps as needed, where it is planned, and not where the cable for the chandelier in the floor slab is connected. The advantages include the ability to make two-level ceilings. There can be three or four levels, but this complicates the design and steals the useful height of the room. If you make the second level of such a ceiling, then by choosing its shape, the location will achieve an amazing effect. If you also equip it with additional lighting, including hidden, then rooms with this type of design are not just utilitarian, they are considered works of building art.
What to assemble the ceiling frame
To fix the drywall to the ceiling, a frame is mounted. For this, metal profiles are used. Sheets of drywall are screwed to wooden beams, but this negates all the potential benefits of using such a building material.
Wood - natural material with all the disadvantages inherent in any organic. It is gnawed by pests, under certain conditions it turns into dust, when it dries, the wooden beams twist, but they don't talk about the fire resistance of such material. A frame made of profiles is an ideal choice. Fire and pest resistance to metal is automatically implied, and galvanized coating adds durability and resistance to corrosion.
 Ceiling assembly accessories
 How is the structure of the frame for such a ceiling arranged? First, we will consider what components will be needed for its manufacture. The following drywall profiles are available:
- Ceiling guide profile (PNP or UD);
- Ceiling (PP or CD);
- Rack (PS or CW);
- Guide (PN or UW).
You will need cross connectors (crabs), CD profile extensions, and hangers (straight or spring). To work, you need the following tools:
- Perforator;
- Drill or screwdriver;
- Construction knife;
- Chop cord;
- Level (water, laser or construction).
Frame of the first level of the ceiling
Where does the installation of a false ceiling begin? As popular wisdom says - from the markup. Do this using a level - laser, water or ordinary construction, of sufficient length. The laser is accurate, but expensive, the usual level gives an error and there will be a noticeable difference around the perimeter. The water one, on the other hand, will make markings with high accuracy in rooms that are complex in shape.

Determine the height of the ceiling, and, if the second level of the ceiling is planned, then its height too. Having noted these two levels around the perimeter of the room, they begin to fasten the profiles, not forgetting to lay out the electrical cables for lighting and illumination in advance.
The UD profile is attached to the wall. To do this, use a dowel-nail with a length of 40 and a diameter of 6 mm. It depends on the walls and the length will be different. The next stage is the installation of CD profiles. But first, it is necessary to "cut" the ceiling and determine how the drywall sheets will be attached - along or across. This is an individual question and depends on the size of the room. The location of the profiles depends on this.
The fixing step is different, but given the standard width of drywall (120 cm) and the fact that the sheets are joined on the profile, it is more convenient to choose a distance between the profiles of 40 cm.
Having decided how the profiles are located, they begin installation. For this, in the places where the CD profiles are located, suspensions are attached to the ceiling with a step of no more than 1 meter between them. Greater distance leads to sagging of the profile, especially when using thin-walled "economy" profiles. Insert the CD profile into the groove of the UD profile, press the hangers to the ceiling just above the level, and, pulling the fishing line / cord / thick thread perpendicular to their placement, attach the CD to the hangers in one plane, lowering them to the fishing line, but without deforming it, using short self-tapping screws for metal ("flea beetle").
When this stage is completed and the frame is ready, the gypsum board is attached. It is difficult to do this alone, so you cannot do without an assistant (or two). Self-tapping screws are screwed in carefully when fastening. A deeply inserted self-tapping screw does not fix the drywall, and an under-screwed one will interfere with putty. To facilitate this process, there is a special nozzle-bit with a limiter. Well, they do not forget about lighting - the wires are taken out during the installation process where necessary, so as not to create problems with backlighting in the future.
 Second ceiling level
 Second level of false ceiling
When the first level is ready, the second is mounted. The framework for the second level is made simple - rectangular, or complex - with arcs, bends, circles.
The higher the qualifications of the master, the more complex and decorative the design options. Elements of simple (rectangular) shape are mounted similarly to the first level.
If bends, semicircles and other irregular shapes are planned, then the technology changes slightly. So that this type of UD profile is prepared by making slots in it. Moreover, the steeper the bend, the smaller the step of the slots. The resulting flexible structure is screwed to the ceiling along pre-marked lines that form the shape of the second level.
The UD profile should be screwed to the drywall where the top level CD profiles are located.
We fasten the prepared pieces of drywall to the fixed UD profiles. The bends of the sheet of GK are done by wetting its reverse side, or by making cuts in it. The first option is more often used for small bends, the second for large ones.
When installing wet pieces of gypsum, you should be careful, as when wet, an already not very strong material becomes even more fragile. We fasten the UD profile along their lower edge to the fixed drywall segments, insert and fasten the cut off the required length CD profile.
Now drywall sheets are screwed onto this frame, not forgetting about the removal of wires for the lamps. If hidden lighting is planned, then pieces of drywall are cut out to a larger size, so that the result is a protruding shelf. We fasten the UD profile to it, and to it - pieces of drywall of such a size that there is enough space between the upper edge and the first level of the ceiling to accommodate the backlight.
 Finished two-level ceiling
 After watching this video, you can better understand the features of the installation of such ceilings:
Conclusion
All the above steps for an inexperienced person will seem difficult. In practice, the installation of a two-level false ceiling is quite simple:
- Determine the height and size;
- We fix the frame of the first level;
- We fasten the drywall and mark the second level;
- We mount the second level frame;
- Cut out drywall of the required size and fix it;
- We install lighting and lamps.
For those who doubt their abilities, or who do not have the opportunity to repair themselves, but who want to decorate their home with beautiful, the right choice will become an appeal to the master. He will not make mistakes when assembling the ceiling frame, and will advise on design options and ways of organizing the lighting in it. The end result of the master's work long years will please the eye.
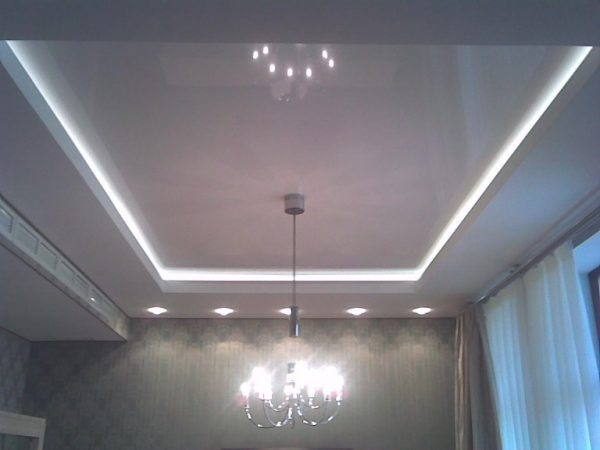
Photo gallery
Completed projects of two-level ceilings in the interior:
 Backlit two-tier design
  Smooth transition between two levels
  Sleek ceiling design
  The kitchen also needs decoration
  Two levels as a zoning method
  Rectangular design
  Ceiling construction standard solution
  Protruding part of the ceiling, decorated with lighting
  Round elements of the second level
  Living area with two-level ceilings
  Standard solutions are not always ugly
  Two-level composition of ceilings
  Rectangle at the base of the ceiling
  Smooth shapes and curves - decoration of any room
  Kitchen with ceilings on two levels
  Neon lighting on the border of two levels
 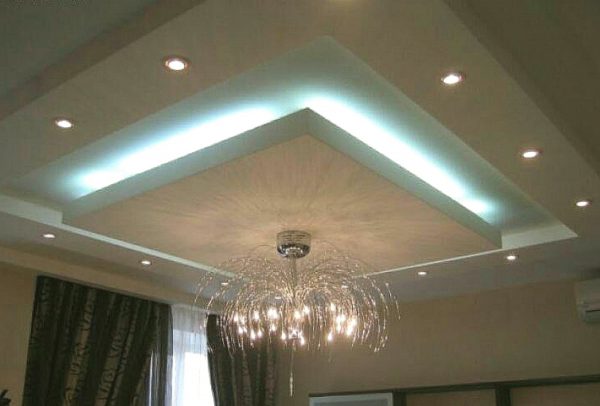 Square design as an accent
  Two levels with a decorative fragment
  How to make a two-level plasterboard ceiling
  Plasterboard is ideal for making two-level ceilings
  Graceful lines of plasterboard ceiling structures


