A true classic fireplace is coziness, beauty and an indicator of the good taste of the home owners. A self-made fireplace is a sign of craftsmanship and professionalism. This work cannot be called simple or quick. Therefore, if you are thinking about how to make a brick fireplace with your own hands, then you will need a sensible sequential instruction and drawings of masonry schemes. Correct calculation of the material and strict adherence to all technological processes will allow you to lay out a brick hearth with high quality, which will create comfort in your home.
Brief design and installation requirements
A brick fireplace is a decoration for any home.
A conventional fireplace is essentially a simple open stove with a chimney hood. The fireplace has a very attractive appearance, but the downside of such a structure is low heat transfer. Due to the design features, the efficiency does not rise above 25%, therefore, such a hearth cannot heat a large room in winter. Fireplaces are arranged as an addition to the main heating systems, or to create extraordinary comfort and decor of the premises.
All structures must meet the basic requirements:
- good traction and no smoke;
- sufficient heating of the air in the room;
- aesthetics of the design, attractive appearance and proportionality to the interior of the room.
Typical design brick fireplace consists of the following elements:
- firebox (combustion chamber) - fuel combustion chamber;
- portal - front decorative side of the firebox; external outlet of the fireplace;
- chimney, hailo - a chamber for removing smoke to the street and the outlet of the fireplace;
- fireplace table, rear fireplace plate - fireproof part of the structure. The first is located between the combustion chamber and the floor, the second is a horizontal post from the wall;
- smoke cornice - an element of protection and decor protruding above the firebox;
- ash-pan - receiver of fuel combustion waste;
- grate - built-in structure for the correct distribution of air masses passing through the entire structure of the fireplace;
- gas threshold - a protective system that prevents soot, smoke and soot from entering the room.

The combustion chamber (firebox) must necessarily expand towards the portal, in this way they achieve the maximum increase in heat transfer and heat output into the room. It should be noted that a large and deep firebox significantly reduces the efficiency of the fireplace, which is not great anyway.
For setting the hearth, a place near the end (outer) wall, or the angle between the end and any inner walls of the house, can be chosen. The hearth should not be located opposite the windows. This will lead to strong drafts and reduce the thermal effect. The size of the room must be more than 12 m 2.
The foundation of a brick fireplace must be strong and reliable. It should not depend on how the foundation of the house is made - the weight of the entire structure can exceed 500 kg. If the fireplace is installed on top floor a private house, then additional reinforcement of the floors will be required.
Standard proportions in the dimensions of fireplace elements:
- The area of \u200b\u200bthe firebox and smoke hole must be made in accordance with 1: 10-15. For a good draft device, the height of the straight section of the chimney should be no more than 4-5 meters and less than 3m.
- The dimensions of the firebox depend directly on the size of the room itself and are 1: 100. If the area of \u200b\u200bthe room is 20 m 2, a firebox measuring 0.2 m 2 will be quite acceptable.
- The depth of the firebox is 1.5-2.5 times less than its width. For a furnace of 0.2 m 2 (with a depth / width ratio of 1: 2) - a depth of 37.5 cm (one and a half bricks), a width of 75 cm (three bricks).
- The height of the firebox is 1.5 times the width. For example, for a firebox with a width of 75cm, the height is slightly more than 1m. This corresponds to 14 rows of brickwork.
All necessary materials
Mostly private developers use standard brick fireplace designs. Such plans (ready-made ordering schemes) contain accurate calculations and schematic drawings, which makes the probability of errors minimal. All orders are drawn on a lined sheet of paper (it is best to take millimeter sheets). On the drawings, the plan of each tier (row) is completed, the exact dimensions and location of the bricks are prescribed. They begin to draw the order from the base.

Having a clear scheme, you can always pre-calculate the required number of bricks. For masonry, whole bricks are needed, as well as cut at an angle, halves and quarters. At the same time, 5% is added to the performed calculation for marriage and battle. All bricks should first be inspected for defects. Their surface should be even, the corners should be intact, the sound from a hammer blow should be uniform. Melting on the surface and whitish spots indicate firing problems.
What you need (based on a medium-sized fireplace):
- Red ceramic bricks - about 300 pcs.
- Fireclay (refractory) brick - 130 pcs.
- Furnace clay - 2-3 bags (or refractory masonry mixture).
- Quarry sand - 4 bags. Sand grain size - 0.2-1.5mm. It must be clean and uniform. To wash the sand, it is poured into water and defended. The water is changed until it is completely purified.
- Cement (grade 300-400) - 1 bag.
- Crushed stone (euro crushed stone) - fraction from 3 to 8 mm.
- Armature - 20 rods, 8-10 mm in diameter, 700 mm long.
- Metal corner, steel strip (depending on the design).
- Clean door and oven damper.
How to make a brick fireplace with your own hands - the order of work
Before you make a brick fireplace with your own hands, you need to prepare its base. The foundation of the fireplace must not be connected to the foundation of the house - the structure must be away from the walls. In this case, the area of \u200b\u200bthe base of the fireplace should be more than the area of \u200b\u200bits base by about 10 cm on all sides. The space between the foundation of the house and the fireplace (5-10 cm) is covered with sand. A few days before all work, it is necessary to soak the clay in order to subsequently prepare a refractory mortar.

It is advisable to make a foundation for a fireplace when building a house
A pit 60 cm deep and 10-15 cm wider than its size is selected under the foundation. The bottom should be covered with crushed stone by 10-15 cm and tamped. Formwork is made along the perimeter of the pit, which should protrude 15 cm above the pit. The pit is lined with roofing material for waterproofing, then concrete is poured into it (the ratio of cement and sand is 1: 3). Concrete must be poured gradually, while its surface is leveled. The poured foundation is covered from above with plastic wrap. It will take a week to dry. After the foundation has dried, two more layers of roofing material are laid on it.
Attention! When installing the foundation of the fireplace, its top layer should be lower than the future flooring 7 cm. Since the first row of masonry will be made flush with the finished floor.
Brick masonry fireplace
For a refractory clay mortar, the dried sand is filled with clay. When rolling, the solution should not disintegrate and stick to hands.
Before laying, the bricks are dipped in water to remove excess air. When dry, they will not draw water from the solution. During masonry work, it is necessary in each row to check their horizontal and vertical corners (level and plumb line), as well as the evenness of the diagonals (using a tape measure). The thickness of the masonry joints is from 3 to 5 mm.

You should adhere to the drawn row-pattern:
- The lower part of the firebox is rows 1-3. The base is necessarily laid on a cement-sand mortar.
- Ash pan - rows 4-5. The bottom of the furnace (row 4) is made of refractory bricks on a clay refractory mortar.
- Fireplace bottom and flashing - rows 6-7.
- Fireplace walls - rows 8-12. The inner walls are made only of refractory bricks, the outer walls are made of ceramic. In the 12th row, a corner, a steel strip is installed on top of the masonry for framing (according to the drawn diagram).
- Smoke box - rows 13-19. In the 13th row, a protrusion is necessarily made inside in the upper front part, which prevents reverse thrust. In the 15th row, the chimney begins to narrow. In the 16th row a cleaning door is built in.
- Chimney - rows 20-25. When laying the chimney, thoroughly rub all the seams and immediately remove the excess solution with a damp cloth. The pipe lumen is gradually narrowed down to one brick. An oven damper is built into the 25th row. The chimney brick pipe is made to the desired height.
Now you know how to make a brick fireplace with your own hands, and how to decorate and decorate it, read other articles on our website.
Attention! Internal walls chimney must be smooth, so excess solution must be carefully removed. Any roughness will lead to permanent build-up of soot.
A self-made fireplace is dried for about 5 days at room temperature. Next, you need to start heating the fireplace. In this case, one should pay attention to the gradual heating of the structure for uniform sintering of the clay solution. This approach will allow, during further operation, to avoid crumbling of the solution and prolong the durability of the hearth. After the fireplace is laid out, well heated and dried, you can start finishing work.
For many centuries, a fireplace has been considered an important symbol of home comfort and coziness, with the help of which a unique atmosphere of happiness and tranquility is created in the house. The dream of sitting by the fireplace on a winter evening, chatting with friends and family in a cozy atmosphere takes possession of many owners of their own country house.
In addition, a fireplace is a practical and effective element of the interior that will decorate and warm the room in which it is installed. This heating element has many advantages, however, before you build a fireplace with your own hands, you need to design it correctly, assess your financial capabilities (the cost of building a fireplace), your level of general construction training and other important nuances.
The main components of the cost of a fireplace:
- type of fireplace and its finish,
- the height of the ceiling in the room and the total number of floors in the house,
- material facade walls at home, the need for additional insulation,
- indoor floor material,
- structural features of the building foundation,
- location of the object (climatic features).
Roughly, complex installation of a brick fireplace with cladding natural stone and full equipment, with a pipe diameter of 200-260 cm in a small two-story house will be from 50,000 rubles. In order to build a fireplace in your home, you need to consider the main stages of this process.
The fireplace device consists of the main units - the firebox and the chimney. The firebox is the most important part of the fireplace, its heart, which ensures its functioning. The chimney is more like a breathing system, which circulates oxygen and enriches the burning flame with it.
List of other important elements of the fireplace:
- heating device,
- smoke box,
- the gate valve, which is located under the grate in the lower part of the furnace, where ash falls after fuel combustion,
- ash pan,
- grate grate,
- lining - inner facing layer of the fireplace made of resistant refractory and heat-insulating material,
- forced convection system,
- fire cutter,
- protective doors.
Fireplace device (example)
The external device of the fireplace includes a portal and cladding. The portal is the decorative design of the fireplace insert, which determines the external style of the entire product. Fireplace cladding is the finish that defines its appearance.
Choosing a place and calculating the parameters of the fireplace
By location, fireplaces are:
- Wall mounted. The design of such a fireplace is located against the wall, usually has significant dimensions, it can fully or partially protrude beyond the wall contour. You can build this model in an already built house. Refers to the most common type of fireplaces. The chimney must be attached to a load-bearing, fire-resistant wall.
- Corner. They are among the most beautiful and spectacular fireplaces. Such a model is located in the corner of the room. The chimney is designed in one of the adjacent walls. Building a corner fireplace is no more difficult than other types, it is necessary to carefully make preliminary design, analysis of foundations and load-bearing walls.
- Built-in. This model of fireplaces is fully integrated into a wall niche or into a column, taking up a minimum of space. It is rational to erect such fireplaces even at the stage of building a house.
- Freestanding. Model of island fireplaces in the form of a flat platform, rising above the level of the floor surface.
Fireplaces are usually located near the main wall of the house. Hypothermia of the hearth is unacceptable. It is not advisable to place fireplaces in a draft, near a staircase or in a corridor, in a room less than 20 sq. m. Near the hearth, it is necessary to provide a free place for a recreation area. Before designing a fireplace, it is necessary to analyze the bearing capacity of the floor and foundation. When designing a fireplace foundation, it is necessary to correlate the location of the pipe with the beams and rafters of the roof structure.
The base of the floor must be made of fire resistant materials. If the house is wooden, you need to take a number of security measures. The fireplace should be positioned so that the distance from the firebox to the structural elements of the building, furniture and other flammable objects and materials is at least 800 mm.
When calculating the dimensions of the fireplace, all elements must be related to the area of \u200b\u200bthe room. For example, the area of \u200b\u200bthe portal should be about 0.02 of the area of \u200b\u200bthe room. A very large fireplace can even cool the room due to drafts, a too small one cannot warm the room. The floor area should be equal to 0.7 of the area of \u200b\u200bthe chimney portal, in the cross-section of the chimney should have an area within 0.15 of the total area of \u200b\u200bthe portal.
The depth of the firebox is optimally equal to 1/3 of its height, if it is too deep, then the efficiency of the fireplace will significantly decrease, and if it is very shallow, then smoke can enter the room. The height of the firebox is calculated from 3/5 of its width. It is important that the walls of the firebox are inclined, as this will better reflect energy and remove smoke.
The fireplace should have its own separate chimney, higher than the stove, and with a large chimney volume. The internal section is calculated based on the area of \u200b\u200bthe portal. The height of the portal is calculated as follows: the depth of the furnace is measured and the data obtained is doubled. The area of \u200b\u200bthe portal should ideally be equal to 1/50 of the area of \u200b\u200bthe room in which the fireplace will be located.
Fireplace drawings and diagrams
Before building a fireplace, you can independently draw up drawings in scale and in any form. Schemes are made in several angles - side view, top view, straight and sectional view. The presence of drawings greatly simplifies not only the work process, but also the calculation of the necessary building and finishing materials for the construction of a fireplace. Key components and details to look out for when drawing up fireplace drawings:
- Calculation of the foundation and its connection with the existing structure of the house
- The scheme of the opening in the floor and roof structure
- Calculation of building and finishing materials
- External design development
- Heat transfer calculation
- Explication and convenience of further operation
- Safety and fire resistance
(the archive includes diagrams for the installation of gas-generating furnaces, diagrams for the installation of fireplace stoves and installation diagrams sauna stoves). Unpack the archive with any archiver, for example WinRar
Many experts draw up an order for themselves, a detailed diagram, which definitely indicates the position in the laying of each brick. When building a fireplace for the first time, the order must be carried out under the guidance of an experienced stove-maker, since in the absence of experience one cannot do without his advice.
Materials
To build a brick fireplace, the following materials are required: red brick, clay, sand, rubble stone, cement, crushed stone, etc.
Red brick. A special oven brick very good quality, without any flaws, homogeneous structure, bright color, regular shape with right angles and smooth surfaces. Each brick is checked in advance, you need to tap on it with a hammer, while it should make a clear sound.
If the brick has undergone an insufficient production temperature treatment, it will have a lighter shade and a non-uniform fracture in structure.
After tapping with a hammer, a poor-quality brick will emit a dull sound, which means the presence of poor-quality firing. Burnt brick has a blue-black or dark gray color. Hitting it with a hammer will make a high pitched sound. If there are white spots on the surface of the brick, you should know that the drying technology has been violated.
Usually, one medium fireplace takes about 250-300 pieces (excluding the chimney). Effective (hollow) and sand-lime bricks are not suitable for building a fireplace and chimney. For lining the fireboxes of fireplaces, bricks of increased fire resistance or refractory fireclay are used.
Clay, cement, sand. Red will do, in the absence of it, ordinary clay will do. If you plan to use refractory bricks, then you will need refractory clay for its masonry. Clay is needed from 0.5 m3 (depending on its fat content). Cement is suitable for ordinary, Portland cement 200 or 300 brands. Maximum requirement 100 kg (with foundation works). The sand for the solution is taken in fractions up to 1.5 mm, as pure as possible. Requirement: 0.5 - 0.8 m3.
Other materials. You will need crushed stone with a fraction of up to 6 cm for the foundation, about 0.2 m3. You will also need a smoke damper (stove valve), a grate with grates, workpieces from fittings (15-20 pieces, 10 mm in diameter, 700 mm long), a chimney, and other finishing and construction materials.
Preliminary preparation of materials for laying a fireplace
Clay is prepared in advance, soaked in small pieces for several days (the more, the better). The soaked clay is filtered through a metal mesh of 3-5 mm, after which it is mixed with carefully sifted dry sand and water is added. The composition should be like thick sour cream. If the clay keeps its shape, does not stick to the hands and does not fall apart, then everything is in order.
The preparation of the solution is a very responsible matter. For the manufacture of masonry mortar, take for 1 part of water 8 parts of sifted sand and 8 parts of lean clay or 4 parts of oily clay. You can add a little cement to the mortar, in a sand to cement ratio of 1: 8. To prepare the solution, prepare a dry mixture of cement and sand in the specified proportion, mix thoroughly in dry form. After that, a clay composition is added to it and everything is mixed. The resulting solution cannot be used for laying the firebox.
The brick is pre-soaked, dipped in water for several minutes until air bubbles cease to emerge from it. Dry bricks should not be laid, this will negatively affect the strength of the structure.
Fireplace tools
During the construction of the fireplace, a large complex of general construction and preparatory workwhich require the following tools:
- bayonet shovel
- shovel shovel
- hacksaw and hammer
- metal trough or box made of boards for preparing mortar
- bucket
- sieve with meshes 1x1 mm, sieve cement
- sieve with meshes 2x2 mm, sift sand
- wet brush - for masonry joints inside the fireplace
- oven hammer
- trowel (trowel)
- plumb line, control the verticality of the masonry
- universal level, control the horizontality of the masonry
- the rule
- square
- joints for masonry joints
- tape measure, ruler and pencil - for marking.
Foundation construction
The foundation for the fireplace is made not connected with the foundation of the house. The ligation of foundations cannot be performed, since these structures can have different settlements, which in the future will lead to the formation of cracks. For convenience, you can draw a plan of the fireplace directly on the floor of the basement, as well as on the wall at the level of the firebox and chimney.
First, a pit is prepared 10-15 cm more than in the plan and about 50-60 cm deep for one storey building and about 70-90 cm for two-storey building... If the soil does not crumble and does not flow ground water the foundation can be erected with rubble concrete or bricks. The bottom of the pit is covered with a layer of rubble about 15 cm and carefully tamped.
One of the most popular and cheapest bases for a fireplace is a foundation made of rubble concrete. For the construction of the foundation, formwork is made from rubble concrete, which is lined with roofing material inside or coated with bitumen so that the slurry from the concrete does not go into the sand. The prepared formwork is placed in a pit, a layer of large stones is laid in it, and the space between them is filled with rubble. The laid layer is abundantly lubricated with a cement solution (1 part of cement grade 300 or 400 and 3 parts of quartz sand). Then a slurry is prepared from a mixture of sand and cement, water is constantly added until the required consistency is obtained (the ratio of cement and water is 1: 1).
1 row of rubble is poured at a time, the second layer is desirable to be laid every other day, and the third also. The top of the foundation at the end is leveled, smoothed, checked for level and covered with plastic wrap. In a week, the foundation will be ready for masonry production.
Fireplace laying (general rules)
Training. Before starting work on masonry, in accordance with the drawing, the bricks are laid dry. In general, laying a fireplace differs from traditional wall-building in that the next row is laid out dry first. The bricks are squeezed and carefully adjusted to each other.
Masonry process. The beginning of the masonry is made from corner bricks, strictly following the level. Then lay out the outer row (perimeter) and only at the end, the middle. The seams should be completely filled with mortar, be as thin as possible. The curves and contractions of the gas sill and chimney are rounded off. Bandaging the seams is carried out in each row by half a brick. Check each layer of masonry with the drawings, marking the rows with a pencil or chalk. The outer walls of the fireplace and the masonry of the lining are not tied up with refractory bricks, since due to different temperature regimes, the integrity of the fireplace masonry will be violated.
Laying curved fireplace surfaces. All curved surfaces of the smoke collector and vaults are laid out with a brick overlap of no more than 6 cm.The opening of the fireplace portal, as a rule, is covered with brick lintels different types (wedge-shaped, vaulted, arched). All these lintels are arranged according to a special cliche formwork (circle). Work begins with the laying of the heels and then along the desired outline of the fireplace arch. The circle must be supported with temporary wooden props. After the erection of the support feet, a castle brick is arranged on a circle, and then the laying is carried out on both sides at the same time.
Important points of the laying of the fireplace. During the masonry process, the inner walls of the smoke box, channels and firebox are wiped with a wet cloth every few rows to remove excess solution, which may crumble during operation. It is impossible to plaster the inner surface of the fireplace, because its smoothness is one of the main conditions for the high-quality operation of the fireplace. Therefore, the brick is laid inside the firebox or channel only with a whole, as even edge as possible.
(in the archive you will find instructions for laying a fireplace and fairly detailed drawings with explanations. Unpack the archive with any archiver, for example WinRar)
Chimney
When laying the chimney, carefully check the verticality of the structure with a plumb line and level. When the pipe comes out to the roof of the house, a traditional cement mortar is used (the composition of cement to sand is 1: 3). The outer opening of the chimney must be protected from precipitation. There are many protection options.
The place where the pipe passes through the roof structure is additionally secured against leaks and fires. To seal the topcoat of the roof in the masonry, the pipes above the roof are overlapped, and to ensure fire protection of floors and roofs.
Video on the topic "Building a fireplace with our own hands"
Step by step instructions
Fireplace and stoves masonry
Installation of metal elements and external decoration of the fireplace
All metal structures and elements (grates, doors) must be installed taking into account the possible thermal expansion, that is, with a gap of several millimeters. Otherwise, the fireplace masonry may be deformed or destroyed. In general, it is advisable to use as few different metal parts as possible when arranging a fireplace.
Today more attention is paid to the decoration and decoration of the fireplace, including the availability of fireplace accessories. Fireplace accessories and finishes are chosen taking into account the design of the fireplace itself and the entire room as a whole.
Classic fireplace cladding is usually done in marble and decorated with columns. You can add pompous elements to the cladding, decorate it with bas-reliefs.
In Russia and Europe, fireplaces and stoves were faced with special tiles and tiles. Today, the fashion for this type of decoration returns and becomes popular even in the most elegant and prestigious interior.
Home, cozy fireplaces in country cottages are usually faced with natural stone, left with a visible part of the brickwork, supplemented with wood, glass and metal. The main thing is to link finishing fireplace with the design of the living space, because it will play an important role in it.
Many of us dream of sitting in the winter cold near a warm fireplace, reading alone or talking with loved ones in a cozy atmosphere. But not everyone knows how to make a fireplace on their own. In fact, if you wish, you can do anything, including building a simple fireplace.
Planning and calculation
Before starting to build a fireplace in a private house or cottage, you need to design it correctly, as well as calculate all the costs associated with its construction, i.e. make an estimate.
The cost of work depends on the type of fireplace, its decoration with various materials and on many more components. It is necessary to take into account not only its location, the height of the ceilings, the number of storeys of the building, but also the features of the foundation, the material of the floor and facade walls, as well as the need for insulation,
Some experts suggest that at least 50 thousand rubles will be required if you are building a brick fireplace lined with natural stone in a two-story small house (pipe diameter from 200 to 260 cm). Consider the main stages of building such a fireplace.
Fireplace device
The main components of the fireplace are the firebox and the chimney, but other elements are equally important for its effective functioning:
- smoke box
- heating device
- ash pan
- grate
- gate valve (at the bottom of the firebox under the grate, where ash gets into)
- lining (inner heat-insulating layer of the fireplace lining)
- fire cutter
- forced convection system
- protective doors
Types of fireplaces and their main parameters
The location of the fireplace determines its appearance.
Wall fireplace
The most common. It is usually large and located against the wall. It is being erected even in a house built long ago. The wall to which the chimney is attached must be fire resistant.
Built-in fireplace
The smallest. Built into any wall niche. It should be erected during the construction phase of the house.
Corner fireplace
The most beautiful and spectacular. Located in the corner of the room. Its chimney is attached to one adjacent wall.
Freestanding fireplace
Ostrovnoy. It looks like a flat platform that rises above the floor surface.
How to choose a place for a fireplace
Do not place the fireplace in a draft, in a corridor or near a staircase, or in rooms less than 20 m2. It is necessary to carry out an analysis of the bearing capacity of the foundation and overlap, provide for free space in front of the hearth.
AT wooden house measures should be taken to ensure safety: the floor is made of fire-resistant material, the distance from the furnace to flammable elements and materials must be at least 800 mm.

Materials for building a fireplace
To build a brick fireplace, you will need materials such as:
Red (stove) brick for fireplace
It is advisable to purchase oven bricks specially designed for such purposes. Moreover, he must have a very good quality (no flaws, homogeneous structure, bright color, regular shape). Tap each brick with a hammer, a special clear sound should be made. Poor quality brick makes a dull sound. A bluish black or dark gray color indicates that the brick has been burned out. White spots indicate that the drying technology was not followed. An average fireplace requires 250 - 300 bricks (no chimney). Refractory fireclay bricks (or increased fire resistance) are used for lining fireboxes.
Clay, sand and cement
It is better to use red clay (0.5 cubic meters depending on fat content), but ordinary clay is also possible. If refractory bricks are used, then refractory clay is required. The need for the most pure sand (it is desirable that it has a fraction of no more than 1.5 mm) is about 0.6-0.8 m3. The need for conventional cement (grade 200 or 300) is 100 kg (including foundation work).
- Additional materials
For the construction of the foundation for the fireplace, crushed stone (fraction up to 6 cm) - 0.2 m3 will be needed. You will need a smoke damper, blanks from fittings (about 20 pieces, diameter 10 mm, length 700 mm), a grate with grates, a chimney and other materials for construction work.
Brick fireplace masonry - general rules


Preparatory stage
Before laying, the bricks are laid out in accordance with the diagram in the drawing. First, lay out the next row dry. Bricks are adjusted to one another.
Fireplace walls
The laying is carried out starting with corner bricks, strictly controlling each row with a level. Then they lay out a row around the perimeter (outer), and at the end - lay the middle. Thin seams are completely filled with mortar, round off the constrictions and turns of the gas chimney. Dressing the seams is done on half a brick in each row. Check each layer with the drawing, mark the rows with chalk or pencil. The outer walls and masonry of the lining are not tied.
Curved masonry
The surfaces of the arches and the smoke collector, which have curved surfaces, are laid out with a brick overlap (preferably no more than 6 cm). Then, the opening of the fireplace portal is closed with brick lintels (wedge-shaped, arched, vaulted), which are arranged according to the cliché formwork. Construction begins with the laying of the heels, and then along the outline of the desired vault. The castle brick is installed on the circle after creating the support feet. After that, the laying must be carried out simultaneously from both sides.
Features of masonry fireplace
It is important in the process of masonry work to wipe all the inner walls of the channels, smoke collector, firebox with a wet rag, removing excess solution. It is not recommended to plaster inside the fireplace, and the brick is laid only with the most even edge inside the channel or firebox.
Despite the availability and abundance of proposals for compact and quick-to-install steel and cast iron fireplace inserts, traditional brick fireplaces, the construction of which requires considerable labor and time, continue to attract modern "fire worshipers" who prefer the traditional massive open hearth, hand-made to a mass factory product. For various reasons, the owners of private houses prefer massive bricks, some are attracted by the design, others by the solidity of the structure, and still others - by the fact that, unlike rapidly cooling metal, fired ceramics will retain the heat of burning logs and coals for long hours. The laying of fireplaces is a very responsible technological process, because mistakes in the construction of a brick hearth are unacceptable, "little blood" does not fix the stove-maker's flaws.
Fireplace drawings and why orders are needed
Like any structure, a fireplace should be erected in accordance with a pre-thought out and drawn project, even experienced craftsmen who have built more than one fireplace or stove do this. You will need a front view, a side view, a section and an ordinal laying of the fireplace.
Ordering is a sequential set of plans for each row of bricks, from the first to the topmost. Laying a fireplace with your own hands, the order of which includes the image of all the elements of the row (whole bricks and halves, embedded steel parts), will be quick and error-free.
Detailed Drawings different types and models of fireplaces can be found in special manuals and on the network, but if none of the ready-made options suits the configuration or design, the fireplace masonry scheme can be developed independently, taking into account the technical features of the fireplace device. Useful articles on this topic can be found on our resource. The orders do not have to be accurately drawn on a Whatman paper, it is easier to sketch them on paper in a box, one 12x25 cm brick - two cells.
As an example, let's take a compact corner fireplace for a summer residence. Masonry scheme corner fireplace quite simple: a firebox is two bricks wide without a blower, firewood must be placed on the grate. The opening from the facade is covered with an arched lintel, the tooth shelf is located one row higher. The orderly laying of a corner fireplace consists of 18 plans, of which three upper rows are the lower part of the chimney.

On the sequential plan, the reduced (chipped approximately 3/4) bricks are crossed out with a diagonal line, the halves are crosswise. The first row is laid out with a brick on the edge
The ordering scheme of the fireplace masonry will allow you to calculate required amount material and prepare it in advance.
Fireplace brick
Full-bodied ceramic bricks are a traditional material for stoves, provided that the fireplace is well-fired, the whole fireplace can be made of it. Depending on the production technology, one of the brick spoons can be fired more than the other. The side of the brick, which has a smoother surface and a darker color, is oriented towards the fire. For greater reliability and if the quality of the ceramics leaves much to be desired, it is better to use fireclay refractory bricks for the hearth, walls and the upper part of the furnace, it will withstand without problems high temperatures.
Please note: ceramic and fireclay bricks have different coefficients of thermal expansion and, in order to avoid cracks in the masonry, they cannot be tied together.
If the brick is cut by hand, all the elements, including the halves, are counted as whole. Bricks can also be cut by attaching to an angle grinder or cutting machine paving slabs a cutting disc suitable for working with ceramics, in this case the cut will be perfect and there will be no waste.
Fireplace mortar
It is easier to buy a clay-sand mortar for laying a fireplace ready-to-use, the mixtures are packed in 20-25 kg kraft bags, their composition is balanced, you just need to seal it with water. It should be borne in mind that kiln mixtures have different heat resistance. Often, the fireplace is heated with a higher intensity than the stove, so its firebox must be folded on a heat-resistant composition.

On the left is a heat-resistant mixture with the addition of chamotte, on which the entire fireplace can be laid out, or in order to save only its firebox. On the right is a furnace composition suitable for laying the fireplace body outside the firebox and the chimney within the attic
You can prepare a clay-sand masonry mortar yourself. For this, oily clay and washed, without impurities, seeded sand with a particle size of 0.2-1.5 mm are used. It is not so easy to choose the optimal composition of the mortar for laying the fireplace, with an excess of clay it will be prone to cracking and too fluid, with a shortage it will be fragile and low plastic. Clay is chosen as pure as possible, with a minimum sand content, and long time in the open air. The ideal option is blue clay, red is also suitable. Before preparing the solution, it is soaked for several days and, if necessary, filtered through a sieve, removing pebbles.
The proportion in which clay is mixed with sand, depending on the fat content of the first, is from 1: 1 to 1: 3, the exact ratio of the components must be determined locally, guided by traditional control methods. One of the control methods: a layer of mortar no more than 5 cm thick is placed on the brick, another brick must be placed on top and pressed. After two minutes, lift the upper brick, if the lower one holds, the mortar is normal. It should be borne in mind that an excess of clay is less dangerous than its lack.
Another method to obtain a high-quality clay-sand mortar is to purchase at the factory where the fired brick was purchased, the required amount of raw materials for its production, or raw brick. Not all, but very many enterprises sell such “semi-finished products”. The raw material is easy to soak, the similarity of the composition of the brick and mortar will ensure the strength of the masonry.
What tools will be needed
- Measuring tools: tape measure, folding rule, building level, plumb line, cord, square, pencil.
- Mason's trowel (trowel), the sharp end is rounded.
- Bushhammer.
- Joining, the shape depends on the profile of the seam that needs to be obtained.
- "Bulgarian" (angle grinder), if the brick is supposed not to chop, but to cut. A diamond cutting wheel must be installed on it. rdesigned for working with ceramics.
- Abrasive, a circle or a block, for grinding masonry and cut bricks.
- Tools for solution preparation. For the ready-made mixture: a bucket and a drill with a mixer attachment, for self-production from sand and clay - troughs, buckets, sieves, shovels.
- A container with water for soaking bricks.

Basic mason tools
Pay attention to the order, this is a flat bar with cuts for the cord, located in multiples of rows of bricks. Not all stove-makers use the order, but by tinkering with its installation first, you can save time during the laying process. You need to have at least two orders, or better - according to the number of outer corners.
Masonry technology in the construction of a brick fireplace
- The concrete surface should be waterproofed with an inexpensive cement-polymer mortar (for example, CeresitCR 65), smearing it twice with a brush or spatula.
- If the fireplace is adjacent to a wall made of combustible material, a fire protection must be installed.

An inexpensive and effective option for fire-prevention cutting of a fireplace and wooden wall - plate of basalt wool (at least 5 cm thick), covered with reflective foil on the fireplace side
- Preparation of clay-sand mortar. If you make your own, the clay should be soaked in advance. Water is added to the finished mixture before starting work in accordance with the instructions.
- The brick should be soaked - immersed in a trough of water for a few minutes. If this is not done, the masonry mortar may dry out too quickly and not gain the required strength. In addition, the wet brick can be displaced if necessary, which is important when the fireplace does not lay out very experienced master.
- The first row is laid out, it should be as even as possible, the horizontal level of the level should be carefully controlled. If you "missed" the foundation a little, the first row can be laid out on a cement-sand mortar, so it is easier to fix the flaws of the base.
- Further, the laying of the fireplace is carried out in strict accordance with the ordinal plans. We recommend laying out each subsequent row first dry, only then on the solution. If the fireplace is large, the cord is pulled, with a small structure, it is enough to control the level and angle.
Vertical seams of bricks should not be located one above the other; the need for bandaging should be taken into account even when drawing up drawings.

Masonry begins with corner elements, strictly controlling compliance with the horizontal level between them
Excess mortar is removed with a trowel, the seams are sewn, the contaminated bricks are wiped with a wet rag.

The shape of the joint determines the profile of the joint, concave, convex or rectangular

Another way to make a neat seam is to lay bricks along the guides.
Take a closer look at the photo: from the outside, a square metal profile is inserted into the seam, after a few minutes it is removed.
It is not worth laying more than 8-10 rows in height in one shift.

Stages of building a fireplace
Pay attention to how the arched lintel is assembled above the firebox - according to a pre-installed wooden template.
Chimney construction technology
The chimney is placed on the same clay-sand mortar, only the area above the roof is on cement. The inner surface is carefully rubbed and leveled to improve traction. Do not forget to install a damper. At the place where the chimney passes through wooden floor make a thickening, it is called "fluff".
In order to protect the roof from the penetration of precipitation, a thickening, "otter" is also made over the roof. Under it, of galvanized sheet steel or waterproofing roofing tape (for example, unduflash), an apron (collar) is mounted, covering the gap between brickwork and roofing.

The choice of material for the otter apron depends on the type of roofing. You can use galvanized steel, regular steel or with polymer coating or flexible metallized tapes, since there are a lot of them on sale now

Otter ordering
When installing a chimney, it is important to observe fire-prevention measures, especially in terms of its passage through the wooden floor and roof.

General rules for fire safety, mandatory for the construction of stoves and fireplaces.
In conclusion, let's say that building a fireplace is a complex undertaking that requires preliminary preparationrequired technical knowledge, accuracy and perseverance. It is not easy for a beginner to cope with this work, to ensure the proper quality and fire safety of the structure. If you are not confident in your abilities, it is better to entrust the construction of a brick fireplace to an experienced specialist.
Video: instructions for building a fireplace with your own hands
A classic wood-burning fireplace gives the home a unique coziness and charm, but many consider it too expensive, believing that to lay out - work for professionals. In fact, this task is not so difficult, it is enough to find a suitable drawing or an ordering diagram, stock up on material, and a real fireplace with crackling wood will appear in your house.
Choosing the size and shape of the fireplace
Any construction works start with a project, and before you start building a fireplace, you need to decide on the size and shape of your hearth, because not only its appearance, but also your safety depends on them.
What are the ideal fireplace sizes? There is no definite answer to this question, you will have to focus on the size of the room, classic proportions and standard size bricks.
- We determine the size of the firebox. To do this, measure the area of \u200b\u200bthe room and divide it by 100. For example, for a living room with an area of \u200b\u200b30 square meters a combustion chamber area of \u200b\u200b0.3 meters is sufficient.
- We find the depth of the furnace. In relation to its width, the depth should be 1.5-2.5 times less. So, for the selected firebox area of \u200b\u200b0.3 meters with a depth to width ratio of 1: 2, the depth will be 37.5 cm - one and a half bricks, and 75 cm wide - three bricks.
- We find the height of the furnace. It should be 1.5 times wider than the width: for a firebox with a width of three bricks, we take a height of a little more than a meter, which corresponds to 14-15 rows of masonry.
- We define another important parameter - the area of \u200b\u200bthe smoke hole. It should relate to the firebox area as 1:10 or 1:15. The chimney itself may be slightly wider, while the height of the straight section should not be less than 3 meters and more than 5 meters, otherwise it will be difficult to achieve a stable draft.
Easiest to use ready-made drawings of brick fireplaces - in this case, you do not have to draw the layout yourself and you will be able to avoid unpleasant surprises when kindling. From the options offered, you have to choose the most suitable fireplace in terms of size and shape, after that you can buy material and start working.
Ready-made ordering schemes

Necessary materials:
- red ceramic bricks - 300 pieces;
- fireclay bricks - 130 pieces;
- oven clay or refractory masonry mixture - a couple of bags;
- quarry sand - 4 bags;
- cement - 1 bag;
- metal corner and steel strip - 3 pieces of 1 meter;
- stove door for cleaning the chimney;
- oven damper.
A diagram of a brick fireplace in the English style and its dimensions are shown in the figure.

Scheme of an English brick fireplace with a straight chimney - photo
The general techniques for laying fireplaces are similar, so the article discusses the most difficult option - English dIY brick fireplace ... How to fold brick, you can learn from, and laying a simple fireplace for beginners should not be difficult if you carefully read our recommendations.
Requirements for the foundation of the fireplace
The stability of a fireplace depends not only on the masonry, but also on the reliability of its foundation. The foundation for the fireplace must be poured separately from the foundation of the building, otherwise, with seasonal shifts in the soil, damage to the hearth and chimney is possible. If the fireplace is installed near load-bearing wall, between strip foundation at home and the base of the fireplace, they make a compensation pillow of sand - they fill it up between the foundations and spill it with water.
The height of the base for the fireplace should be such that the first row of masonry is at the level of the finished floor. The foundation pit can be shallow, while on heaving soils, a sand and gravel cushion with a thickness of at least 0.5 meters must be performed. A layer of sand and gravel compensates for ground movements and prevents the capillary rise of water from it, which provides waterproofing of the foundation itself and the walls of the fireplace.
The foundation is poured from concrete М150-М300 with obligatory reinforcement. The formwork is made of boards or plywood, fastening the boards with self-tapping screws. The size of the foundation to be poured must exceed the dimensions of the fireplace on each side by 10 cm. Brick fireplace drawingsusually contain the desired dimensions, and you can use them when pouring the foundation.
After pouring the foundation, the concrete should be cured until the critical strength is reached for about 5-7 days, after which you can start marking and laying the fireplace, having previously laid a double layer of additional waterproofing - roofing material.
Fireplace laying + instructions and video
The laying of a fireplace in the English style with a straight chimney is carried out strictly according to the scheme. Before starting laying, the wall behind the fireplace is thermally insulated with a metal sheet or dense foil, and wooden structures additionally treated with a fire retardant solution for internal work. Also, care should be taken to provide a fireproof floor covering in front of the fireplace, where sparks and embers can enter.
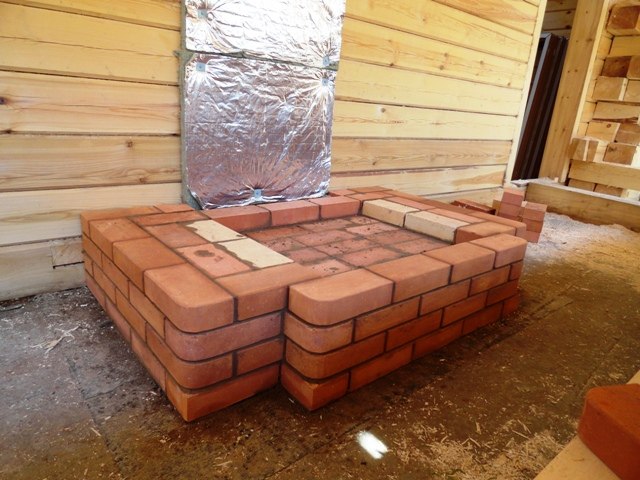
Brick fireplace masonry - photo
Before the start of laying, bricks are sorted, laying aside those that have cracks and chips. They can be used for laying the base. Before each step, it is convenient to lay out the bricks dry, cut them off, grind them.
Before laying, red ceramic bricks are briefly soaked in water, but refractory bricks cannot be wetted, dust and dirt are removed from its surface with a damp cloth. This measure contributes to a more uniform drying of the masonry mortar. Ordering a brick fireplacewith explanations is presented in the figures.

Video - do-it-yourself brick fireplace


