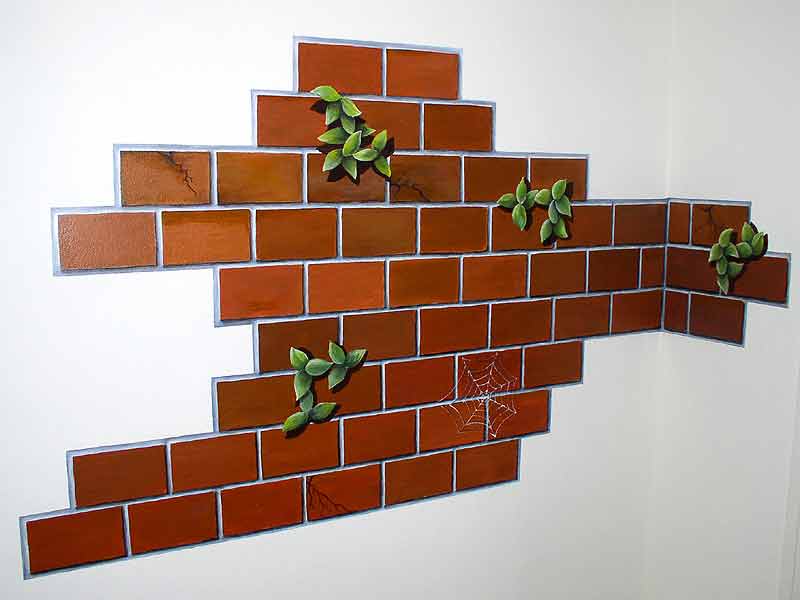
- Imitation of foam masonry
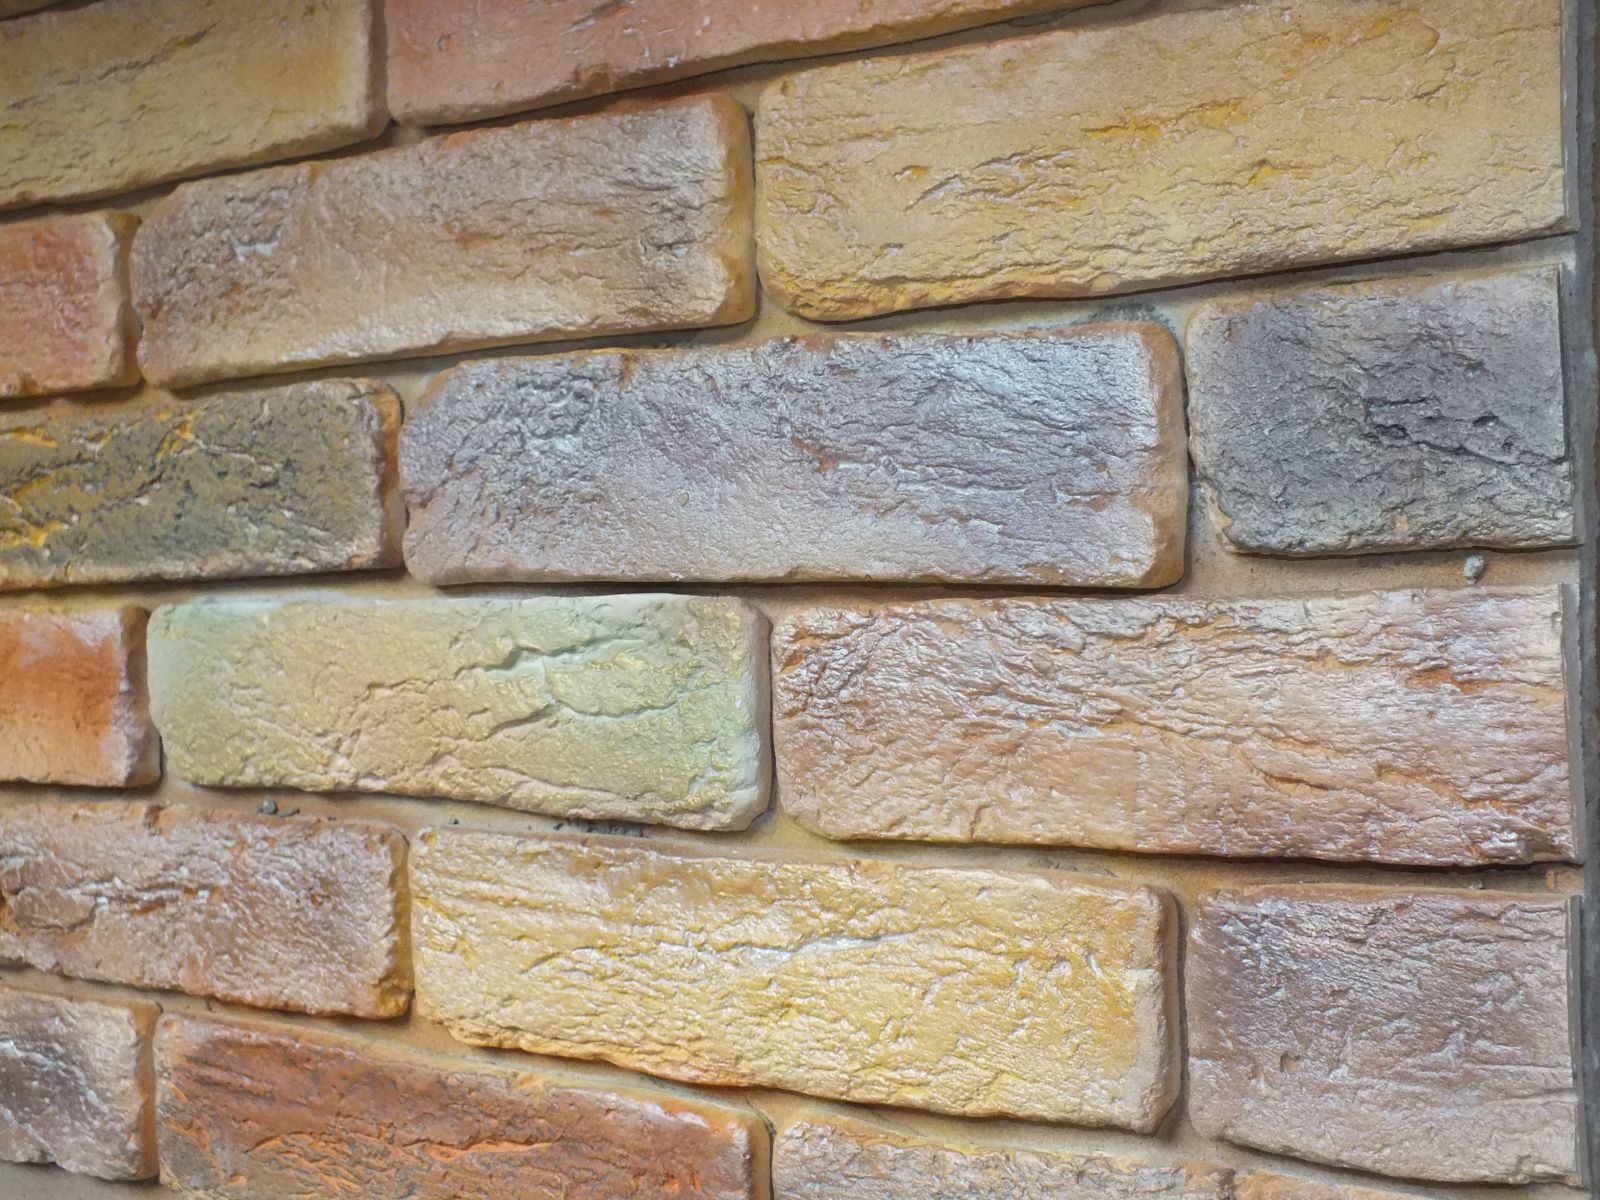
- Plaster and tile glue blanks
Brickwork (or its imitation) is often used in the design of various interiors. The surface, finished with decorative bricks, always draws attention to itself and gives the room a fresh and non-standard look. If earlier only professional designers could create such a finish, now it is within the power of most home craftsmen. There are several ways to decorate a brick wall, and all of them are relatively simple to perform.
Imitation brickwork is great for a high-tech room.
Materials for wall decoration for brickwork
The use of real bricks in interior design has a lot of disadvantages: the laboriousness of the masonry, the narrowing of the space in the room, the large load on the floors. Replacing such a brick with a facing one solves almost all these problems, but costs several times more. In addition, facing bricks must be properly maintained, otherwise the appearance of the finish will lose all its attractiveness. But there are other ways to decorate walls that are less expensive and very effective.

Polystyrene tiles are an economical material with high thermal conductivity and good sound insulation.
The following materials are used to imitate brickwork:
- ceramic tile;
- wallpaper;
- decorative plaster;
- styrofoam.
Tile is ideal for a kitchen or bathroom, but only if you have the skills to install it. Such cladding is not suitable for a living room, nursery or bedroom, and therefore it is worth paying attention to other materials. The easiest way to finish is brick-like wallpaper: there is a huge selection of colors in stores, and the gluing process does not require special skills. But there are also disadvantages here: ordinary paper wallpapers always look dull and cheap, and washable ones look too artificial.
Imitation of masonry with decorative plaster is the most profitable option. The cost consumable relatively low, the finishing technology is simple and straightforward, and the end result is as realistic as possible. With high-quality execution, it is almost impossible to distinguish imitation from real bricks. For greater effect, a coloring pigment can be added to the plaster.
A good finish for a brick wall made of thin foam or ceiling tiles. This material is easy to use, has a low weight and low price, so it is not at all difficult to make an imitation of masonry on the wall from it. Instead of foam or polystyrene, many craftsmen use blanks made of wood, gypsum and even tile glue, but tools are needed for wood, and molds are needed for plaster bricks.
Back to the table of contents
Wall decoration with decorative plaster

For gluing decorative stone regular tile glue will do.
A quick and convenient way of finishing is the application of decorative plaster. The main advantage here is that there is no need to level out minor surface defects, because a layer of plaster will completely hide them. For work you will need:
- primer;
- paint brush or roller;
- gypsum plaster;
- spatula 10 cm wide;
- coloring pigment;
- dry rag;
- small stick.
To form seams in real brickwork, a special tool is used - jointing, but an ordinary wooden stick, a broken pencil, a ballpoint pen without a rod or something similar are suitable for plastering, which can be used to draw an even and neat seam. They start work with surface preparation: remove from the wall old finish, close up cracks on it, clean it of dust and ground it thoroughly. The mixture for decorating is prepared after the primer has dried: the dry plaster is diluted with water in the proportions indicated on the package, and then the dye is added. If after finishing it is planned to paint the walls, then it is not necessary to add pigment to the plaster.

The thickness of the gypsum bricks should be about 5-7 cm.
First, a small amount of the composition is kneaded in order to have time to process square meter surface before the mass hardens. The finished solution should slowly slide off the spatula without forming lumps. If this is the consistency, then you can start applying. Using a spatula or trowel, the solution is poured onto a section of the wall, and then leveled and slightly smoothed the surface. You should not make it perfectly smooth, because natural brick is rough, and sometimes even has small defects.
Now the most important thing is the formation of the brickwork. The sizes of the bricks can be different, but it is desirable that they do not differ too much from the standard ones and the wall looks as realistic as possible. You can draw the seams under the ruler, creating a clear pattern, or you can do it arbitrarily - it all depends on the preferences of the master. Lines are drawn on fresh, uncured plaster with a dry stick, creating a pattern of brickwork, and excess mortar is removed with a rag. Then the next section is processed, and so on until the end. After that, the surface must be completely dry, otherwise further processing may damage the pattern.
The dried plaster is sanded sandpaperto remove excess material and adjust the seams, and then wipe the dust off with a cloth. Before painting, the decorative masonry is covered with a layer of primer, so the paint lays down much better. If you want to give the finish a more realistic look, then individual bricks can be painted in a different color. Sometimes they do it differently: first, they cover the wall with a layer of gray plaster, level and smooth the surface well. Then a solution is prepared with the addition of red or brown pigment, it is evenly applied over the previous layer, and then seams are drawn under the ruler. Red plaster is removed at the seams, and the result is neat bricks separated by gray lines.
Back to the table of contents
Imitation of foam masonry

Tools for wall surface preparation and imitation brick installation.
It is also not difficult to create a decorative one from expanded polystyrene or polystyrene. First you need to prepare everything you need to work:
- foam sheets without a pattern;
- felt-tip pen;
- ruler;
- sharp thin knife;
- tile adhesive;
- paint.
At the first stage, it is necessary to mark out the foam sheets: even bricks with a side of 7x15 cm are drawn under the ruler with a felt-tip pen, making sure to make allowances for the seams. Next, cut the foam with a knife along the markings and start preparing the wall.

Image 1. To create roughness and cracks, you can use a drill with drills of different diameters.
They remove the old finish, eliminate defects, carefully level the wall and cover it with a primer. A layer of glue is applied to the cleaned and dry surface to ceramic tiles and put bricks on it; the gaps between adjacent elements should be made about 2 mm. When all the bricks are glued, you can paint the wall, filling the seams well with paint and avoiding drips.
For greater decorativeness, small chaotic depressions and scratches are made on the surface of foam blanks, which, after staining, give the masonry a slightly worn, but very natural look. It is easiest to create such an texture with a tin concave strip that can be cut out of a regular tin can. Correctly chosen colors - dark gray, brown and red add realism. IMAGE 1
The cheapest way of textured finishing is imitation of brickwork. It fits almost any interior style, and even an inexperienced master can handle such a texture. Therefore, now we will talk about how to create such an imitation.
Method one - wallpaper and paint
The simplest brick wall decoration is done using textured wallpaper and paint. To do this, you need to purchase wallpaper for painting (preferably made of fiberglass - it gives the most interesting texture), paste over the area intended for finishing with them and take the following actions:
- Let the wall dry completely and go about our business for 2-3 days.
- We go to the store and buy thin masking tape.
- We glue strips of adhesive tape on the wallpaper, placing them parallel to the plinth with a step (distance between adjacent strips) of 6-7 centimeters. It is not necessary wider - your "brick" in this case will not look quite natural.
- We cut 7-8 cm strips of scotch tape. You need a lot of them - to count the number of stripes in one "row", you need to divide its length in centimeters by a factor of 12.5.
- We glue these strips on the wallpaper, perpendicular to the horizontal rows, placing them in 12.5 centimeters increments. Moreover, in the first row (from the floor or ceiling), the strip is glued at a distance of 12.5 cm from the corner. And in the second row - at a distance of 6.5 cm from the corner. So we can simulate the overlap of the vertical joint in real masonry with the top brick.
- The next step is scotch tape. You buy a water-based paint, mix a brick color into it and apply it to the wall with a roller, painting over both the tape and the "windows" obtained with it. After an hour, this operation will have to be repeated and the paint should be allowed to dry for 2-3 hours.
This is followed by the dismantling of the adhesive tape strips. They are carefully torn off, getting the seams between the painted bricks. After that, you need to take a brush in your hands and carefully paint over this seam with a different color scheme (usually white or black). And if you accidentally paint over the edge of the brick, then you don't need to worry - this creates the effect of an uneven edge. But drips are categorically excluded here, therefore, when staining the seam, the bottom row must be closed with thick cardboard.
Visual imitation brick wall do it yourself literally in a day. And even faster if you involve friends or household members in the process of cutting and gluing tape. Moreover, the water-based paint does not smell at all. Therefore, this technology can be practiced even in the cold season, when the room cannot be ventilated.
A significant disadvantage of the technology is the lack of masonry depth. The color can be selected with a successful shift of colors, the texture is provided by the embossed surface of the wallpaper, but in this case the depth cannot be obtained. Therefore, a false visual imitation will be noticeable already from a meter distance. However, the simplicity and low price of such a finish overlap this disadvantage almost completely. In addition, the "bricks" can be removed from the wall along with the wallpaper or painted over if it seems to you that this finishing option does not suit your home at all.
The rough texture of brick creates a very unusual contrast between artificial stone and modern furniture and equipment. They can decorate walls or one of the walls, niches, arches, false fireplaces, etc. In the absence of natural brick, it can be easily replaced with products made of foam, gypsum or Portland cement (a mixture of gypsum and cement) painted in warm red, light yellow or beige colors ...
Styrofoam bricks
For work you will need:• the base on which the bricks will be glued (you can choose plywood or drywall as it);
• knife for cutting;
• primer;
• PVA glue;
• soldering iron to simulate the structure artificial stone;
• spray paint (you can use car paint).
Polyurethane foam
1. To imitate bricks, it is better to take polystyrene made of polyurethane foamhaving small grains. Products made from it will be more durable and will not crumble when touched.
2. Styrofoam sliced by the size of a standard brick - 250 × 120 mm.

Styrofoam cutting
3.Using PVA glue bricks stick on a base primed to increase adhesion (plywood or drywall), which is cut in advance to the required size. To simulate masonry, a gap of 10-15 mm is left between the bricks. In the event that the walls are perfectly flat, you can also glue directly onto the wall covered with a primer.

Bonding tiles
Council. To make the gaps between the bricks the same, you can use blanks 10-15 mm wide and insert them between the rows.
4. Cracks and potholes are drawn on the bricks to simulate irregularities using a soldering iron. Any sharp object can be used instead of a soldering iron.
Important! When the foam is heated, it becomes toxic, so you should work with a mask.

Cracking the wall with a soldering iron or sharp knife
5. The last, final stage of creating a brick wall is painting it. It should be painted in several layers, each time using different shades of paint. The last layer should be lighter.

A wall imitating artificial stone masonry can be painted not only in the usual red, but also light beige

Brickwork in the interior of the kitchen
Brick imitation gypsum tile
Plastic gypsum allows you to imitate the structure of a brick to the smallest detail. Products made from it are practically indistinguishable from natural ones. They can be purchased ready-made or made by hand.For work you will need:
• mold for making bricks;
• dry gypsum mix;
• water;
• tile adhesive;
• notched trowel;
• a damp sponge to remove excess glue.

Brick mold
1. Gypsum powder, water and glue are mixed until a creamy mass is formed.

Plaster mortar
2. The prepared mixture is poured into shape... It hardens very quickly (about 30 minutes), so an excessive amount of the solution should not be done.

Pouring into forms
Council. To distribute the solution more evenly, shake the mold slightly after pouring.
3. If the bricks are to be glued directly to the wall, it should be prepared: align, knock down protruding parts, fill with glue or plaster the largest cracks and potholes. It is much easier, as in the previous case, to glue the bricks on the basis: plywood or drywall.
4. After surface preparation, it twice primed... By using a primer, the adhesion is increased and the bricks will hold more firmly.
5. Markings are made on the wall with a level. Glue is applied to it with a spatula equipped with teeth, and then bricks are laid.

Bonding brick tiles
6. Water Based Acrylic Dye can be added directly to the mortar or painted bricks after gluing to the wall. To simulate masonry, the base between the bricks is painted over with a darker color.

An example of a plaster brick finish
Decorative brick from Portland cement
For work you will need:• cardboard;
• white Portland cement;
• sand;
• foam balls (they are sold in any furniture store);
• a cement-based sealant;
• reinforcing mesh.

Styrofoam balls
1. The first step is to make mold for bricks... It can be made of ordinary cardboard. A reinforcing mesh of a suitable size is laid on its bottom and walls.
2. For making solution sand, foam balls and water are mixed in water in a 1: 1: 2 ratio. Next, Portland cement is poured so that the solution acquired the consistency of a very thick sour cream. To increase the viscosity, it must stand for 20 minutes.
3. The mass is placed by hand (it is better to wear rubber gloves) in a cardboard box, leveled and left for a day to solidify.
4. To make the products smooth, they are covered with a more liquid solution consisting of water, sand and Portland cement (3: 1: 1).
5. Bricks should be painted with acrylic paint diluted with water. First, they should be tinted with a darker solution, and then covered with a transparent layer of a lighter paint.

Portland cement bricks can be of any color
6. The last step is to cure the paint with a liquid sealant.
Brick-like gypsum plaster
For work you will need:• plaster;
• water;
• putty knife;
• Master OK.
You can also "draw" bricks on gypsum plaster. To do this, the solution should be applied to the wall in small fragments - no more than 0.5 sq. m.
1. First, a small layer of plaster is applied to the wall. With a spatula on it create irregularities in the manner of Venetian plaster. You can also simulate cracks and potholes on the wall using a regular crumpled plastic wrap or rubber sponge.

Bumping the wall

Cracking with crumpled plastic wrap

Using a regular sponge, you can also simulate irregularities on the wall.
2. To simulate masonry with a small stick stripes are drawn: Draw horizontal lines first, then vertical lines.
3. Wall colored acrylic paints in two or three layers.
Many people think about how to make an imitation of a brick wall. After all, making a wall out of bricks is not always possible. This requires a solid and wide foundation or high-quality load-bearing walls... After all, a brick weighs a lot. But today there are many options to make imitation of brickwork and at the same time not greatly increase the weight of the structure.
Today we will tell you how the imitation of a brick wall is made and you can choose the most optimal option. You can also see illustrative examples on the video in this article and photos and choose the most suitable design.
Natural brick wall
If there is a brick wall in the room, then it is enough to remove the top layer of decoration, slightly modify it and the brickwork is ready. At the same time, it will really be a "real" wall built by the builders. It will remain simply to paint and varnish it (see).
- It is enough to clean the surface of the finish, take a sander and an emery disc and grind it off. The seams between the bricks are covered with a special mixture, this will help remove visible irregularities and defects.
- At the end finishing works You can cover the surface with wax or special varnish, these materials are excellent for finishing a natural wall. If you don't want a shiny surface, just take a fine-grained emery and sand to a matte finish.
Do not forget that when removing the finish, you rarely find the perfect brickwork. But there is a way out - an imitation of natural brick. This is a great option that does not require sanding and additional finishing.
What is imitation brick finish
How to imitate a brick wall in an apartment or on a facade? Is it possible to make an imitation of masonry yourself?
Let's consider several options that are easy to implement at home, because they do not require special skills and special tools, everyone can make an imitation with their own hands. Then the final price will not be high.
Surface finishing with decorative plaster
The use gives a quick result, and it is not difficult to apply it. The main advantage is that you do not need to carry out painstaking work to smooth the surface, everything will be hidden under a layer of plaster.

You will need to acquire the following tools:
- Primer;
- Roller or wide brush;
- Decorative plaster;
- Wide spatula;
- Paint;
- Several rags;
- A small pen or regular stick.
With the help of jointing, seams are created in natural masonry, we do not need this device, for plastering, a pen, a stack or a hashi (sushi stick), in general, any long object that is easy to make an even and shallow seam is enough.
So:
- It is worth starting the imitation with the preparation of the plane: be sure to remove the previous finish, coat all the holes, clean the wall from dust and prime. The decorative mixture is prepared after the soil layer has dried: on the packaging, the manufacturer indicates the necessary proportions, collect the required amount of water, pour in the powder and add the dye. The latter is optional if you just want to paint the wall after applying the plaster.
- It is not necessary to knead the entire pack at once, it is enough to divide the composition into certain portions, in order to process each meter of the wall in stages, before the applied mass hardens. Perfect solution does not slide off the wall, there should be no clots. Having achieved a good consistency - let's get to work. Using a trowel and a spatula (see), the decorative mixture is applied to the plane, leveled and remove excess mortar from the wall. There is no need to try to achieve smoothness, since the brick itself is rough and slightly chipped.
- Then we proceed to the most important stage - we make the appearance of brickwork. Naturally, their size can be arbitrary, but it is still better that they do not differ too much from the usual ones, then the wall will look more realistic. If you are not sure of yourself, feel free to take a ruler, it will help in creating a geometrically verified pattern.
- Lines are drawn along the still unhardened mass with a dry stick, thus a masonry pattern appears, the excess solution that is released due to the drawing of the lines can be easily removed with a rag. Then you start a new section and so on until the entire surface is processed. Let the treated part harden, as further exposure will affect the pattern.
- It is easy to clean the dried mixture with sandpaper, so you will not only remove excess material, but also correct the seams, and at the end, be sure to wipe off the dust. If you want to paint the resulting wall, do not forget to prime it, so the paint will last longer. To give the wall the maximum similarity, you can choose different shades.
- There is another way: first, the wall is covered with a layer of gray plaster and only then it is leveled and smoothed. A dye is added to the solution, the resulting mixture is evenly applied to the wall and the seams are drawn on it. Thanks to the addition of dye, colored plaster remains in the resulting lines, it needs to be cleaned and as a result you will get an imitation under natural wall made of bricks.
Simulating masonry with foam
It is also easy to make decorative brick yourself from polystyrene or expanded polystyrene.

But before starting work, you need to acquire the following tools:
- Large sheets of foam;
- Marker;
- Long ruler;
- Stationery knife;
- Tile adhesive;
- Several cans of paint (see).
During the preparation, it is worth marking the foam sheets: using a long ruler and a marker, draw standard bricks 7x15 cm, do not forget to make a seam allowance.
- Then with a clerical knife we \u200b\u200bcut the marked foam and prepare the plane.
- We remove the finishing layer, cover up the holes and scratches, be sure to level the wall and do not forget about the soil layer. Glue is smeared on the prepared wall, then bricks are gradually glued; do not forget about the gaps, it is enough to leave 2 mm between each brick. After all the elements are fixed, we start painting the wall, be sure to fill the seams with paint and do not forget to remove the drips.
- To achieve maximum similarity, you can pre-apply chaotic chips and scratches to the foam, the painted wall will look somewhat worn out, but so similar to the original masonry. Achieving a unique texture is quite simple with the help of a tin strip cut from canned food. It is also worth painting some of the bricks with another paint. We select the most similar shades and go.
Textured wallpaper
There are special wallpapers that imitate natural masonry. If a couple of years ago, it was ordinary wallpaper, now modern technologies allow you to get real textured wallpaper, of course, from a distance they cannot be distinguished from brickwork, but close up it is noticeable that this is an imitation.

Textured wallpapers have several advantages:
- Low cost in comparison with the methods described above;
- High installation speed;
- Easy to clean - the wallpaper can be washed and dust does not accumulate on the surface.
Attention: If you decide to glue the wallpaper, then now there are special options on sale with the application of foamed polymer on paper - such wallpapers are very realistic.
Ready imitation panel
These words mean a ready-made plastic version, where the surface is identical to natural brickwork.

- It is enough to buy a panel and ordinary wallpaper glue to remake your wall in a few hours. Moreover, they are equally well used in outdoor decoration. In order for the glued panel to hold well, you need to prepare the wall in advance, do not forget about the primer.
- If the wall is not even then you are leveling the plane. This can be done with plaster. If this is an internal surface, then it is quite possible to do this with drywall.
- The second option is also beneficial in that you can immediately make wall insulation.
For the lathing, the choice will have to be made from two materials. It is metal and wood.
|
|
Wood is best used for interior decoration. It is quite simple to process and you can easily make transitions even in several levels. |
|
Installation of wooden lathing |
In the first case, the metal will be the most optimal for exterior decoration... A coating is made on the metal that prevents rust from occurring.
|


Screen embossing
The process takes place on a freshly plastered surface. A ready-made stencil is taken (usually made of rubber or polymers) with a masonry relief applied. Here we will take a look at how to draw an imitation brick on the wall.

- The working side must be poured over with water, you can simply spray it with a spray bottle. Then it is necessary to gently but firmly press the structure to the plane.
- Hold it for a few seconds, then gently remove it, ideally, the outline of the seams will remain on the wall.
After processing part of the wall, repeat the same operation again. It is extremely important to move the stencil to a new part of the wall, taking into account the already made lines of the imitation masonry, otherwise you will get a whistle.
- The hardened layer of plaster must be additionally primed or coated with wax. After the surface is dry, proceed to painting. Of course, you can do without it, then it is worth adding several color additives to the plaster in advance. If you did so, then you need to apply plaster in several layers and do not forget to smooth it. As a result, it will be very similar to the color of real bricks. Do not forget about additional coloring of the seams.
When choosing a paint, do not forget that when it dries, it will become darker!
Figured tile masonry
This option is notable for the installation method. Basically, you take ready-made ceramics and simply glue them onto a pre-prepared wall. The process is completely similar to conventional cladding. tiles, except that it is thicker and during the installation process they leave a wide opening.

- The gap between the tiles must be covered with any adhesive mixture. Once the seam is completely dry, it must be primed or varnished. Due to this, during the painting process, it will retain its color.
- It is not necessary to buy ready-made tiles, if you have a lot of unnecessary bricks and a grinder, if you wish, it is easy to cut the tiles yourself.
- In principle, it is possible to make tiles from wood, drywall, tile glue, corrugated board, we will tell you more about it below.
Painted tiles
The process is somewhat reminiscent of applying a print by means of a stencil, here we also need fresh plaster.

- We put plaster on the plane and smooth it out, thus, a random relief is obtained, which will be somewhat similar to the texture of bricks. As soon as the wall has dried up a little, we get to work. You need to draw the outlines of the bricks. The easiest way is to do this under the ruler, but then it will turn out too strictly, it is better to draw the contours without any devices, it will turn out much more natural and chaotic.
- Having finished drawing the contour, you need to take a narrow scraper and clean the plaster, thereby highlighting the contours of the brick. As a result, a small indentation is obtained; it must be cleaned with a regular cloth or brush. This is done to remove crumbs of plaster before it hardens.
- Subsequent finishing is completely similar to the stencil method described above.
Brick putty
If you have a prepared wall, feel free to choose this option. A light layer of putty with a color additive should be applied to the plane. And then we do it as in the previous method, just draw the outline of the masonry on a slightly frozen surface.

By the way, the relief can be done quickly and simply using construction tape.
You need to act like this:
- Having a dry plastered plane, it is necessary, armed with markers or a felt-tip pen, to mark the seams. Keep in mind that each next row should shift in relation to the previous one, otherwise, you will end up with a prison bars, but not a masonry.
- The planned seam must be painted and wait until the paint dries.
- Once the paint is dry, you need to glue strips of tape along the seams, and then stick a thin strip of tape on them. This is necessary for the subsequent easy removal of the tape.
- Then we apply a light layer of putty on top, it is not necessary to smooth it, you can leave everything as it is, then you get an interesting and original structure.
- As soon as the putty grabs, we begin to tear off the strips of adhesive tape. Since they are glued together, it will be easy to remove all the tape.
- Now we are waiting for the wall to dry completely.
- As soon as the plane dries, you can start finishing the surface as described above.
Corrugated board imitation
Imitation with of this material - this is the most profitable and simple way to decorate a wall.

The work will need the following things:
- Corrugated cardboard - in principle, it does not have to be a buyer, it is enough to take all cardboard boxes from under shoes, household appliances, etc.;
- A couple of packs of paper napkins, always thick;
- Several cans of PVA and wide brushes;
- Glue gun, hot melt glue;
- Sharp narrow knife (clerical will do);
- Pencil and large ruler;
- Paint, varnish.
Now let's talk about the process itself:
- If there was wallpaper on the wall, we must prime the surface, and if paint, we clean it and degrease it.
- We cut the corrugated cardboard to the size of the side plane of the brick, this will take some time.
- We mark the wall, so it will be more convenient to glue our "bricks", but keep in mind that the rows must be displaced to get the masonry, not the lattice.
- Then we spread PVA cardboard, but there is a trick, at the corners the corrugated cardboard must be dry, glue is applied there from a pistol. Thanks to such a simple combination, you can quickly fix the cardboard;
- Now is the most difficult stage. We take paper napkins and decorate cardboard bricks by gluing. It is not as difficult as it seems, you need to apply glue to the surface of the rectangle, and then stick a napkin there, which should be smeared with glue.
- At the stage of gluing the napkins, it is important to form the seams, there is no need for any special tool, you can take a pencil, or simply press in with your finger, so they will be slightly recessed into the wall. This must be done to smooth out the sharp edges of the "bricks", thereby achieving maximum similarity to a real wall.
- At the final stage, when the entire wall is dry, decorative painting and varnishing begins. The varnish will help protect the imitation from mechanical damage. After drying, the decorated wall will be as similar as possible to a brick one.
Attention: Only thick napkins are used in the work, otherwise they will simply get wet from the glue.
Before sticking to the surface, wrinkle them a little in the palm of your hand, this way you get folds that will eventually repeat the random texture of the brick. Better to choose napkins whiteotherwise, it may turn out that their natural color will appear from under the paint.
Nuances and examples of design
Choosing an imitation of masonry, you need to take into account that this can not only bring zest to the interior, but also completely suppress the rest of the design with its pretentiousness.
Before starting work, you need to fully imagine how a room with an imitation of a brick wall will look like. Thanks to the wall, finished with brickwork, you can make your home original and cozy, and which method to choose is up to you, because any of the options described above perfectly imitates natural masonry.
By the way, the technologies discussed above can be used to obtain brickwork not only on the walls, many decorate vases, pieces of furniture in this way, thereby adding a few more elements to the "brick" design.
With the help of imitation, you can create unique patterns. They can be quite original and decorate any room.
The selection of openings will also look quite acceptable, it can be windows or doors.

Also, with the help of imitation, you can find interesting and useful solutions.

With this decorative finishing you can always make additions indoors. Which is not always possible to do on the walls.

Decorative brick finishes can look good and can be useful when simulating a kitchen worktop. After all, if you take the panels, then it will not only protect the wall from moisture, but it will also look good.

You can also zone the room, highlighting the most attractive places in the room.

Do-it-yourself imitation of a brick wall is not difficult, but creative. With imagination, you can make simply masterpieces and the instructions will help you with this.
Brickwork brings in the interior a unique charm and the very "zest". And if the outer cladding of the building can still be done using various types of bricks, then indoors, especially in an ordinary apartment, it is not always possible to apply such a heavy finish, because additional load on structural floors can lead to extremely unfavorable consequences.
However, there is a way out - you can create a beautiful imitation of a brick wall. There are several options for such a finish, and you can handle each of them yourself. The final result depends solely on your imagination and personal preference.


Before starting work, prepare the fixtures necessary for making decorative "brick" cladding. The list will vary slightly depending on the finishing method you choose, but in general you will need the following:

The simplest version of masonry imitation
The easiest to manufacture option for imitation of brickwork is to draw the corresponding cladding elements on plain wallpaper or simply a painted wall.

Of course, in this case, there is no question of the realism and "bulk" of the masonry, but the method has a number of great advantages, namely:
The disadvantage, as already noted, is the unnaturalness of the facing. And the finished result looks, to put it mildly, not very attractive. Therefore, it is recommended to use it only in some utility and household premises such as a dressing room, garage, etc.

For living rooms, choose a more effective method of imitating brickwork from the following ones.


Using masking tape, mark out the bounding paths


We mark the window according to the template with a narrow masking tape and paint over with "brick" acrylic

![]()
![]()
Homemade gypsum bricks look just as good as factory-made trims. The execution of such cladding does not require the performer to have special skills and large financial costs.

The first step is making a mold
Make a mold for making bricks. The thickness of an individual element can be 5-20 mm. At a lower height, the bricks will quickly break, and the use of large-sized elements will lead to a significant increase in the consumption of plaster for grouting. In addition, too large bricks will visually reduce the area of \u200b\u200bthe room.
The second step is preparing the solution
Prepare a solution for making cladding elements. To do this, dilute dry gypsum with water to a state similar to thick sour cream. Lubricate the form prepared at the last stage with soapy water or simple petroleum jelly and pour the finished mass into it.
Align the fill using an ordinary ruler. Leave the mold on for 20-30 minutes, then turn it over and carefully remove finished item facing. Paint the brick the desired color. Sometimes, to obtain the desired shade, the product must be painted in at least three layers. You can varnish the brick if you wish.
Third step - cladding
Start simulating brickwork. To do this, apply the markings to the section of the wall designated for finishing. At the bottom of the wall, set aside the starting line from which you will begin to lay the plaster stones.
To fix the bricks, use an adhesive specially designed for this type of work, such as tile adhesive. Buy it from a related store.

Lay the first row of bricks in compliance with the selected joint width. Fasten further rows in a checkerboard pattern. Use a notched trowel to apply the adhesive to the wall. For more effect, you can gently break the outermost bricks in each row to make the edges look torn and uneven.
Leave the finish to dry for 1-3 days. You can check the exact drying time of the glue on the package.
Imitation Styrofoam Brick
An imitation of a brick wall can be made from a ceiling foam tile without a pattern. The recommended size of "bricks" is 150x70 mm. A cladding made of elements with larger dimensions will look unnatural. The procedure for making bricks is extremely simple.
First step. Lay out the tiles. An ordinary gel pen will help you with this. Do not forget to leave small allowances for the tile joints.

Step two. Use a toothpick to push in neat, straight lines along the markings.


Fourth step. Cover the selected section of the wall with finished bricks. Use tile adhesive for gluing. Start the cladding from the bottom edge of the wall. The seams do not need to be filled. Leave a 1 to 2 mm gap between the bricks.

Fifth step. Paint the finished veneer. Apply more paint into gaps. This will create the most realistic imitation of brickwork.

Wood bricks
Imitation of brickwork can be done very easily from wood.

First step. Buy material for making "bricks". You can use plywood, for example.
Step two. Cut the workpiece into the required number of rectangular pieces of the same size.
Step three. Sand the front of each piece.
Fourth step. Prepare the markings on the wall.

Fifth step. Lay out the bricks according to the markings, starting from the lower opposite corners. Attach the elements at the same distance corresponding to the seam thickness you have chosen. A gap of a couple of millimeters will be enough. Lay out all the bricks.
Sixth step. Paint or varnish the finished masonry.
The advantages of the imitation brick wall made of wood are environmental friendliness and impressive durability.
Decorative bricks can be made with dry tile adhesive.
First step. Dissolve the dry component in water until a mixture is obtained in consistency close to very thick sour cream.
Step two. Divide the resulting mass into 3 approximately equal parts and add a small amount of paint to each of them. The coloring components should have a different shade.
Stir each "heap" thoroughly. As a result, you will get a lot of beautiful and interesting divorces.
Step three. Roll each pile into a "pancake", and then cut the resulting product into identical bricks. Let the elements dry.
Repeat the above steps until you get the required number of bricks.
Fourth step. Line the wall finished bricks... Use tile adhesive to fix the elements.

Fifth step. Fill the seams with a specially designed compound. It is best to keep the core slightly darker than the cladding.
Sixth step. Cover the finish with a couple of coats of varnish.
Finishing decorative cladding
First step. Mix red and light ocher.


Step two. Add some white to the mixture.
Step three. Treat decorative masonry using the tampon method. To do this, take a sponge, dip it into the thick mixture prepared in the previous stages, and evenly distribute the composition over the lining.
Fourth step. Take liquid paint brown tint or close to it. Spray paint over the veneer with a toothbrush.

For a more dramatic and natural look, you can use a different color technique for each row. For example, you can treat the second row of masonry with hematite with cold diluted water, cover the third row with a mixture of sienna and white, etc. Apply all coloring compositions according to the same tamping technique. Alternate shades in order.

Finish off with a couple of coats of varnish on the imitation brick wall. If you want to give the cladding a matte surface, carefully sand it with fine-grain sandpaper.
You don't need to be a great master to create an imitation brick wall yourself. Choose the method you like the most and start finishing in accordance with the instructions.
Happy work!
Video - Imitation of a brick wall with your own hands


