Elevated temperatures and fairly frequent watering form conditions in greenhouses that promote the reproduction of all living things. To guarantee a good harvest, it is imperative to cultivate the land from diseases and pests. The special microclimate favorable for the cultivation of garden crops promotes the reproduction and spread of bacteria. In this case, the plants begin to grow and bear fruit poorly.
Greenhouse processing in spring before planting
In greenhouses, pests multiply, which can be very dangerous for plants and often completely destroy crops. To avoid their appearance in a greenhouse, it is imperative to take appropriate measures.
Pest and disease control must be comprehensive and include:
- Adequate amount of sunlight;
- Use different kinds drugs;
- Mechanical cleaning of racks and soil.
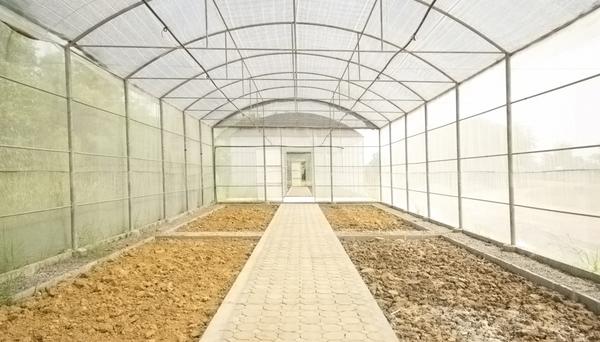
Should be located in a sufficiently well-lit area. In this case, sunlight will hit the plants for as long as possible. It is best if the greenhouse is facing south. Thus, sunlight will penetrate inside and warm the greenhouse well. Depending on the growth phase of the plants, periodic treatments should be carried out. It is necessary to take into account what kind of diseases and pests appear in a certain period, and, based on this, it is necessary to select a drug for processing crops.
In spring, stem pests are especially active, and soil cultivation must also be carried out to protect plants from cytosporosis.
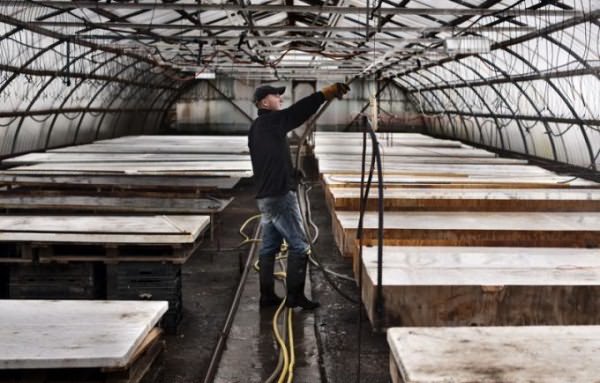
In addition, mechanical cleaning of the racks is also important. To disinfect the surface, you need to use hot water with the addition of copper sulfate, bleach or formalin. Spring tillage from diseases and pests is considered the most important, since the quality of the future crop depends on it, and also helps to replace several much later treatments. in the spring, carried out before planting plants, it requires certain measures, without which it is almost impossible to get a guaranteed good result.
The reason for this is that certain conditions are formed in the greenhouse that are most comfortable for growing cultivated plants, as well as:
- Weeds;
- Pests;
- Pathogenic microorganisms.
You need to deal with pests constantly, and not only when they begin to harm. As soon as the snow melts, you need to start preparing for planting. All work carried out in the greenhouse can be divided into several stages, in particular, such as: cleaning the site, assembling the structure, washing all elements of the greenhouse and disinfecting the soil and premises. Disinfection of the soil should be carried out several weeks before the intended planting of seedlings. So, what if you plan to plant cold-resistant or early cultures, then the processing of the greenhouse should be started at the end of February. This will allow you to get full protection from diseases and pests for a long time and increase the germination and growth of plants.
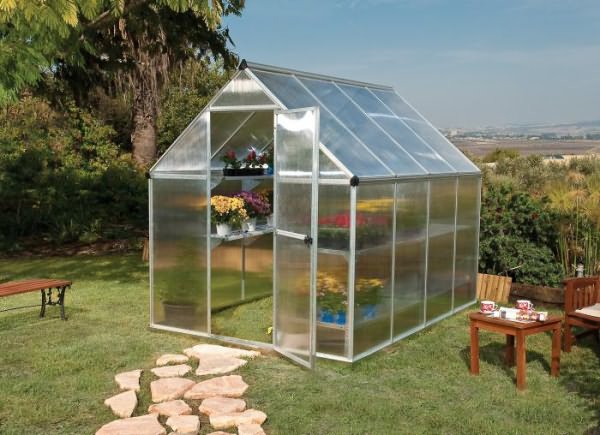
How is the processing of a polycarbonate greenhouse in spring
At the beginning of the new summer cottage season, compulsory soil preparation and greenhouse processing are carried out. The processing of the structure, made of polycarbonate, allows not only to reduce the risk of infectious diseases, but also to clean the greenhouse of dirt, dust and rust. Important! When preparing a greenhouse, it is very important to follow all the required steps, since the success of growing garden crops depends on this.
The initial preparation and processing of the greenhouse, carried out in the spring, implies:
- Elimination of all plant residues;
- Replacement of damaged parts;
- Greenhouse construction cleaning.
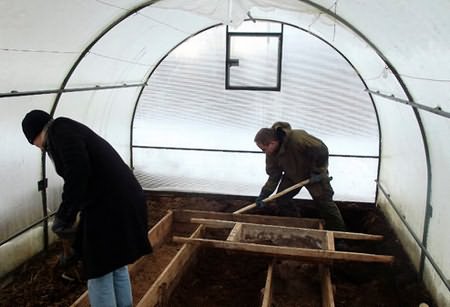
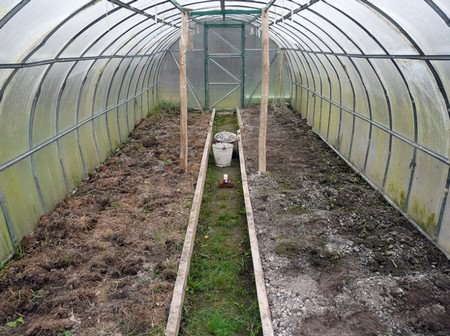
Then it is imperative to thoroughly process the soil before planting seedlings in order to protect it from diseases and pests. When the ground warms up well enough, you need to dig it up and proceed to the main stage of disinfection.
Disinfection methods can be divided into several types, namely:
- Biological;
- Chemical;
- Temperature.
Each of the methods used has its own specific characteristics, and also implies the use of special means.
Greenhouse processing techniques in spring
Processing a greenhouse in spring involves the use of several different methods, which are selected depending on the characteristics of growing crops. The biological method is considered to be the longest and most difficult method of processing in spring time. However, it is the safest for plants and does not affect the quality of the future crop in any way.
The biological method of soil cultivation implies:
- Replacement of soil;
- The use of green manure;
- Replacement of crops.
Siderata are special plants grown to fertilize the soil and suppress the growth of weeds. Not everyone can afford to replace the soil, which is why this method is practically not used. The temperature method is widely used, since in early spring it is possible to freeze the ground a little. At low temperatures, many insect larvae and bacteria die. In addition, the soil can be slightly steamed.
To do this, pour boiling water over the ground and immediately cover it with foil. This method is quite effective, as it helps to destroy a large number of bacteria.
The most common method is chemical. It is necessary to select preparations for soil treatment very carefully, since there are chemicals of a wide spectrum of action, and those aimed at combating only a specific type of pest.
How to treat a greenhouse in spring from pests
It is believed that the main processing of the greenhouse is carried out in the autumn, however, this is not entirely true, since processing is required in the spring. There are various technological processing techniques and folk methods.
The most popular are:
- Sulfur smoke bomb;
- Fugicides;
- Folk methods.
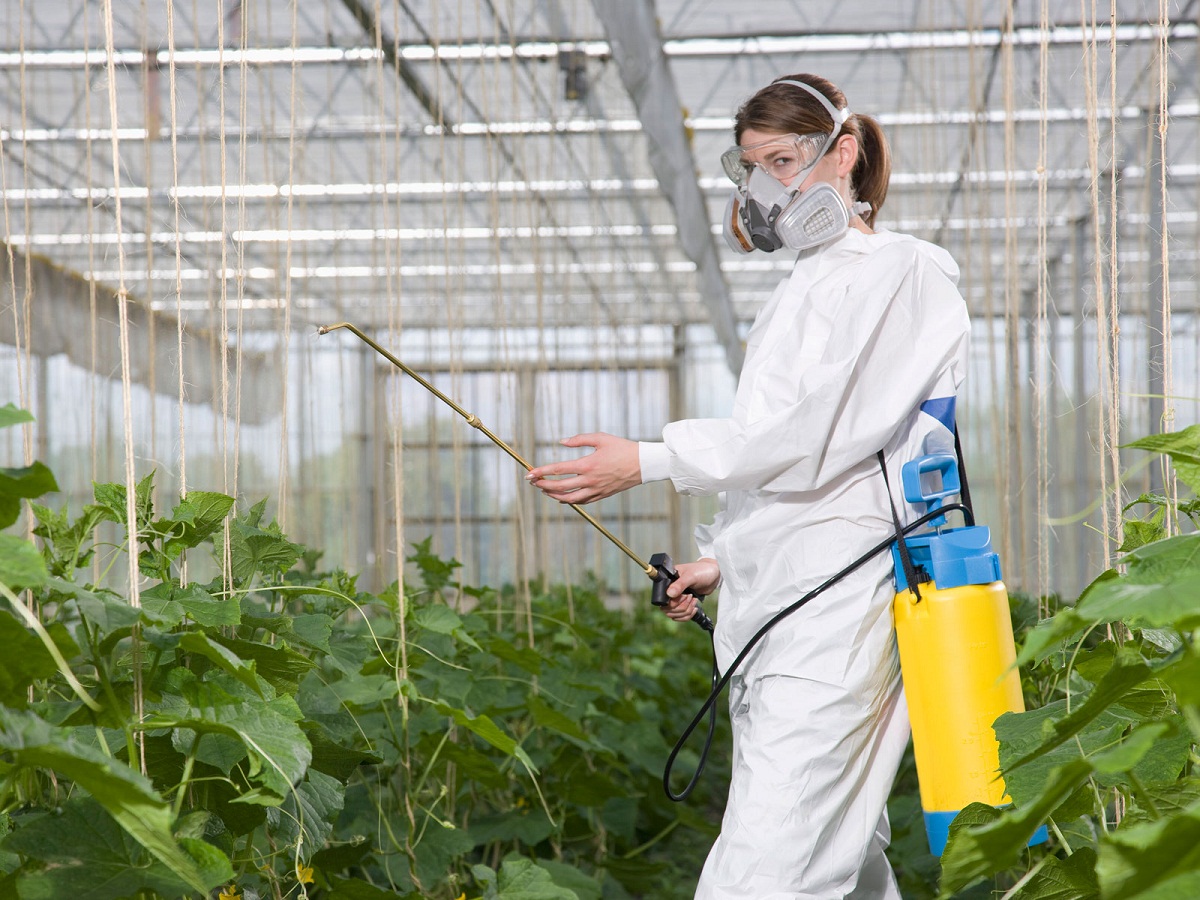
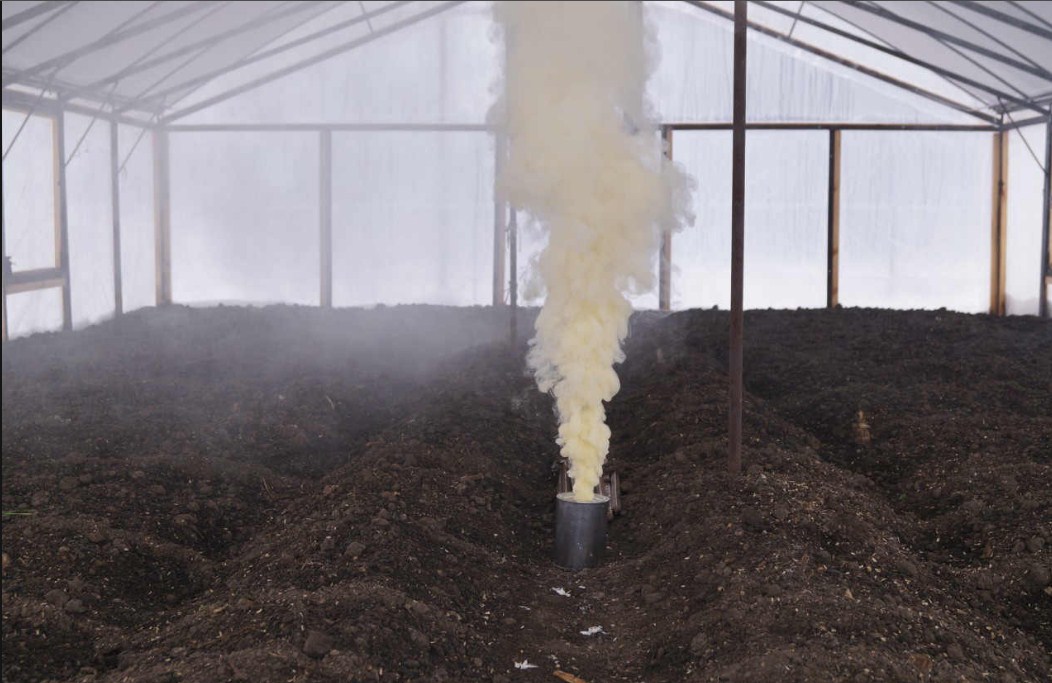
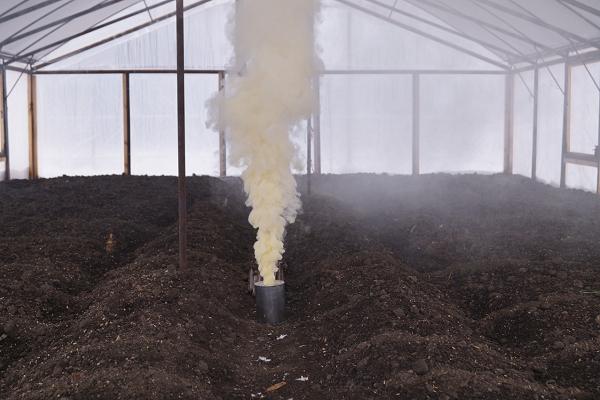
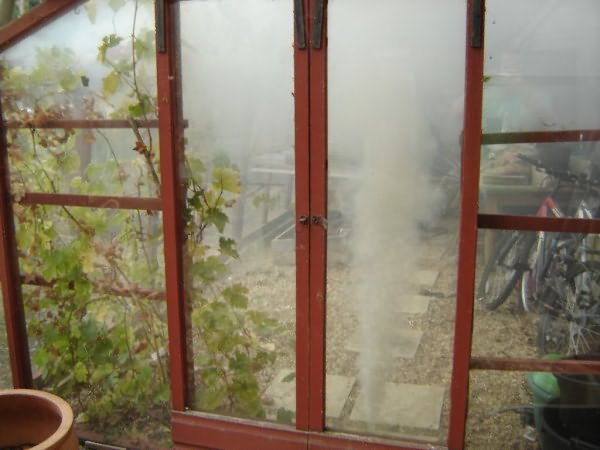
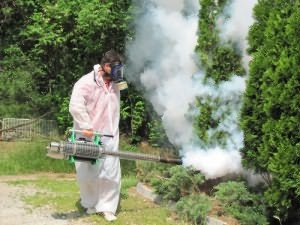
A sulfuric smoke bomb is often used in polycarbonate greenhouses, as it can have a very bad effect on glass. The impact of such a checker is based on the release of a special gas. It is harmful to absolutely all living organisms, which is why, during processing, you need to set fire to the saber, tightly close all windows and doors and leave the greenhouse.
Fugicides are very suitable for treating a polycarbonate greenhouse.
One of the most popular remedies is a mixture of copper sulfate and lime. Since the composition is very caustic, precautions must be taken when preparing it and processing the greenhouse. Fugicide treatment can only be carried out under the condition of a stable warm temperature.
Competent care: how to treat a greenhouse in spring from diseases
Many people use relatively safe folk remedies instead of chemical solutions. Of the simplest and most affordable means, it is necessary to allocate watering the soil in spring with boiling water or potassium permanganate. These products are very effective against many pests and bacteria. The safest methods are infusions of garlic, mustard and tobacco. With this tool, you need to treat not only the soil in the greenhouse, but also its walls and racks.
When growing plants in a greenhouse, it is very important to create the most favorable conditions, which is why it is imperative to cultivate the soil from various bacteria and pests.
For cultivating the land, tools such as:
- Fitosporin;
- Redomil;
- Mokosan.
When carrying out processing, it is advisable to first remove the top layer of the soil, and only then carry out thorough sanitization.
Correct processing of the greenhouse in the spring from diseases and pests (video)
Spring processing of greenhouses directly depends on the exact purpose for which it is carried out. It is very important to determine with which pest the fight is being carried out, and what result needs to be achieved in the end.
Attention, only TODAY!
A comfortable temperature, favorable microclimate and frequent watering contribute to favorable conditions for all living things. We are talking not only about crops grown in greenhouse conditions, but also about microorganisms. Of course, beneficial microorganisms are needed for normal plant growth, but in such favorable conditions not only they multiply, but also harmful representatives of flora and fauna.
In order to protect the future harvest from diseases and pests, an annual spring and.
Greenhouse processing in spring is carried out in several stages. In order to prepare the greenhouse for planting, you need:
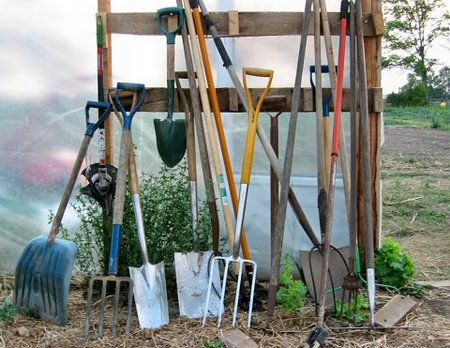
- Free the area from tools, fixtures, etc.
- Dispose of trash.
- Remove dust and dirt.
- Disinfect.
- Prepare the soil for planting.
When to start spring treatment?
It is better to start processing as early as possible. It is important that all activities are completed at least 2 weeks before boarding. It is best to start preparing the greenhouse at the end of February.
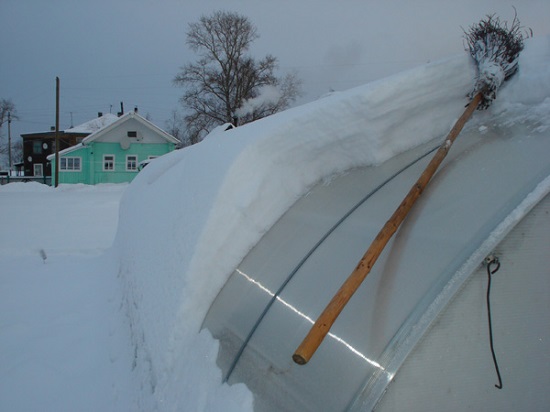
The first thing that can be done is to spread out in the beds, while on the street he has not yet descended. At the first warming, it will melt, and the melt water will saturate the soil with useful moisture.
If frost has formed on the polycarbonate sheets, then at freezing temperatures outside, you need to open the transom and the door. In the process of balancing the air temperature, the ice from the surface will "lag behind" itself. It is strongly not recommended to scrape polycarbonate, it can damage it.
Such "freezing" will help not only get rid of ice, but also kill larvae and microbes that are sensitive to low temperatures.
The bulk of the work will still have to be done a month before the start of planting.
Stages of spring processing of the greenhouse before planting
So, we will consider in stages the spring processing of the greenhouse.
Stage 1. Free the area from tools, devices
The first step is to take everything out of the greenhouse: buckets, trellises, seedling vessels, racks, etc. We carefully examine the things taken out.
In case of detection of rotten or infected with fungus wooden structures, they need to be replaced. If this is not possible, then treat with a solution of bleach or slaked lime.
We inspect metal structures for rust. To get rid of it, you will need baking soda or a special solution made from vinegar and lemon juice. Apply the resulting mixture to a metal surface and leave for two to three hours. After you get rid of the rust, you should prime and paint.
If the greenhouse has additional devices (autowatering, etc.), it's time to check their work and, if necessary, repair them.
Stage 2. Disposal of garbage
All aids from last year (pegs, garters, hose pieces, etc.) must be removed. Naturally, the tops and roots of last year's plants also need to be removed, if you did not do this in the fall. If weeds appear in the greenhouse, then he also needs to get rid of them.
All rubbish that you find in the greenhouse needs to be burned. You can also burn down wooden parts of structures that were not subject to restoration. Thus, you will not only get rid of garbage, but also get ash, which will serve as a mineral fertilizer for the soil. With its help, you can enrich the earth with magnesium, potassium, sulfur, calcium, iron, etc.
For full fertilization of the soil with ash, you will need from 3 to 5 glasses per 1 square meter. Ash is added to the ground in dry form, then the soil is dug up.
Ash can also be used as plant food, in which case a glass of ash is dissolved in a bucket of water.
Step 3. Cleaning up dust and dirt
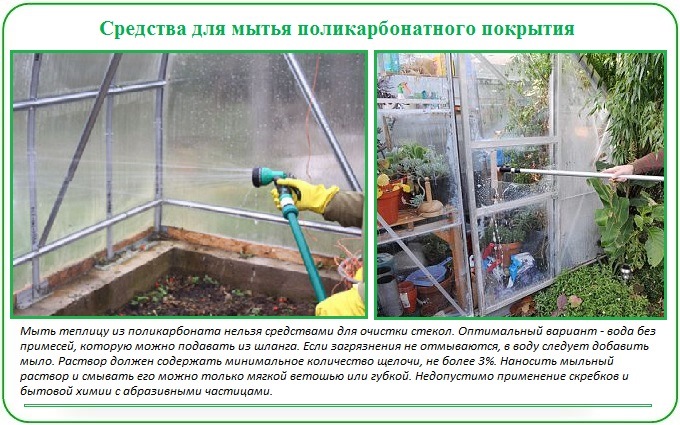
There is only one way to get rid of dirt and dust - by washing. It is important to wash everything: frame, walls, ceiling, door, etc. To do this, use warm, slightly soapy water. The greenhouse can only be washed with a soft cloth or sponge; for cleaning joints and crevices, a tooth or household brush with only soft bristles is used.
It is not recommended to rinse the soap solution with pressure from a hose inside the greenhouse, since soap is not the most necessary component for the soil. It is better to remove soap from the walls of the structure with a damp cloth, wiping it two or three times.
Stage 4. Disinfection of the greenhouse
The next stage of preparation for planting is the greenhouse itself. To do this, after washing the greenhouse, it must be sprinkled with a Bordeaux mixture or a solution of copper sulfate in a weak concentration. This procedure will protect against many diseases: scab, downy mildew, late blight, gray rot, etc.
For the purpose of disinfection, you can also use a completely natural remedy - a decoction of pine needles. It is made simply: you need to tamp pine branches into a bucket, fill them with water and let it brew. Alternatively, you can speed up the process and boil the branches with water for 20 minutes. Nettle can also be used instead of pine needles. This disinfectant is completely natural. It is suitable for disease prevention.
If last season there were pests in the greenhouse or the plants were susceptible to diseases, then the greenhouse must be treated with sulfur. For this, sulfur checkers are used.
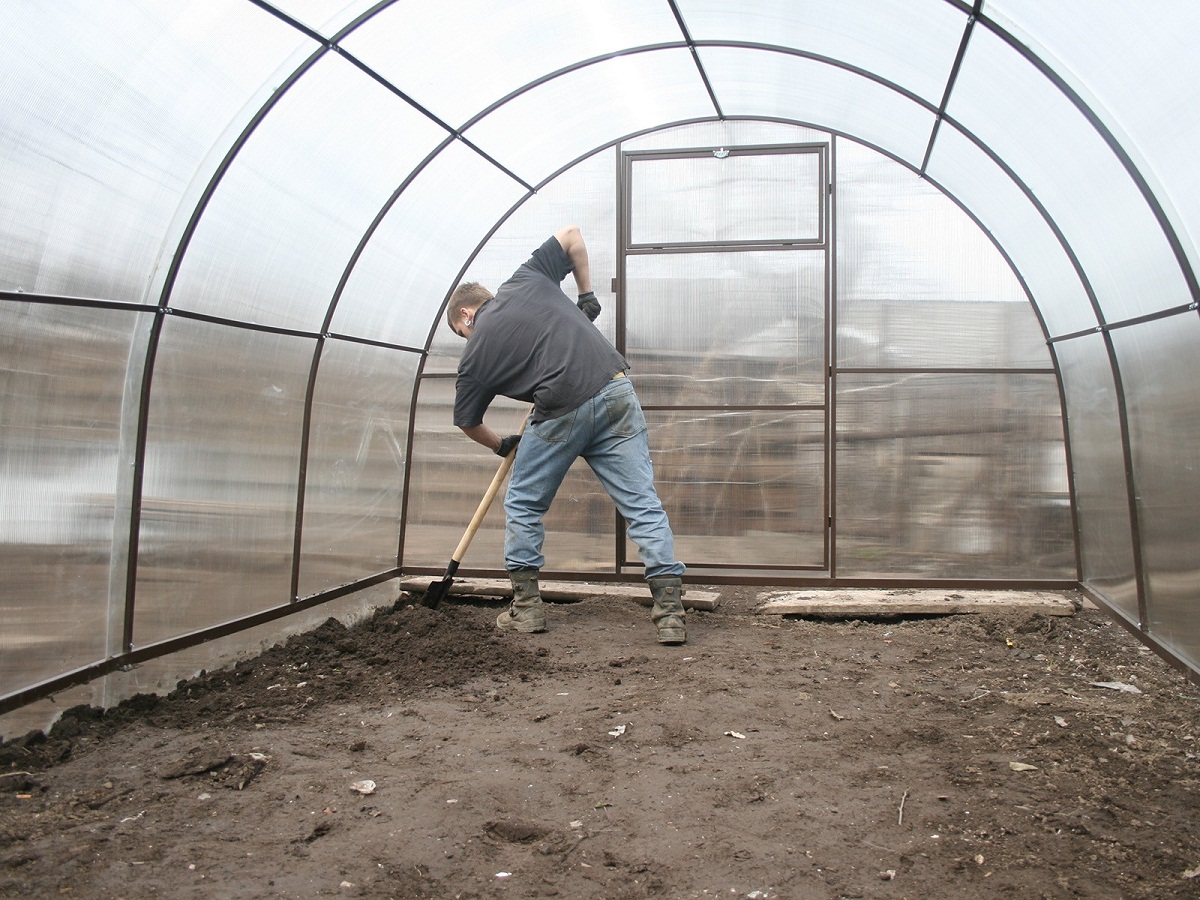
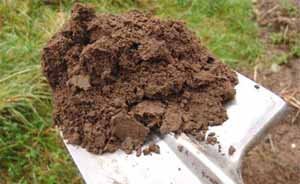
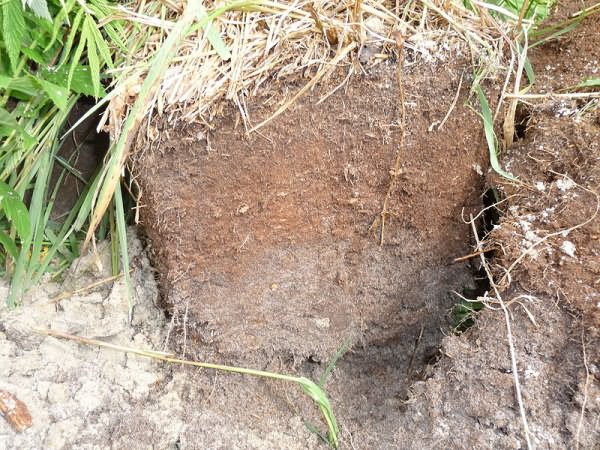
Stage 5. Preparing the soil for planting
The most ideal option is to change the land to a new one every year, but this is a laborious and financially costly method. It is more realistic to remove a 12-15 cm layer of earth and change it to a new one.
The rest of the land needs to be cultivated. For example, boiling water. To do this, pour 3 buckets of boiling water per square meter of land, and cover it with plastic wrap on top. This procedure should be carried out throughout the entire greenhouse.
Potassium permanganate solution or 3% nitrafen solution also kills microbes well.
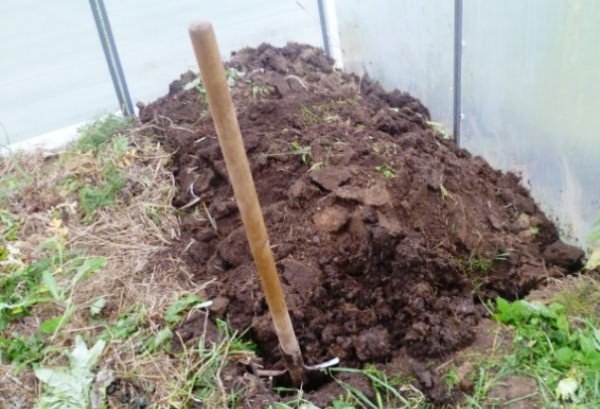
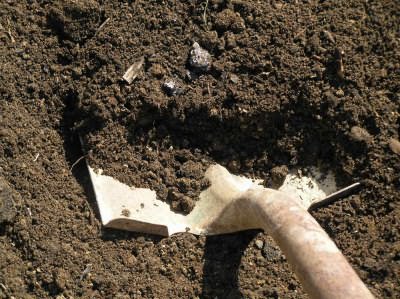
After processing, the soil must be dug up.
Preparing the greenhouse for planting in spring
All of these simple methods will help prepare your greenhouse for planting crops and protect them from disease and germs. Following our advice, you will quickly and efficiently carry out the procedures for spring preparation of the greenhouse for planting.
From our article you will learn how to properly prepare a polycarbonate greenhouse for the new season.
Every gardener knows that in order to get a good harvest, you need to work very hard. After all, in order to vegetable crops grew intensively and were healthy, they must be planted in properly prepared soil. In view of this, it will be better if you start the battle for the future harvest not by sowing seedlings, but by cultivating the soil in a greenhouse.
If you try and do everything right, then with great confidence we can say that all the crops you have planted will delight you with abundant fruiting.
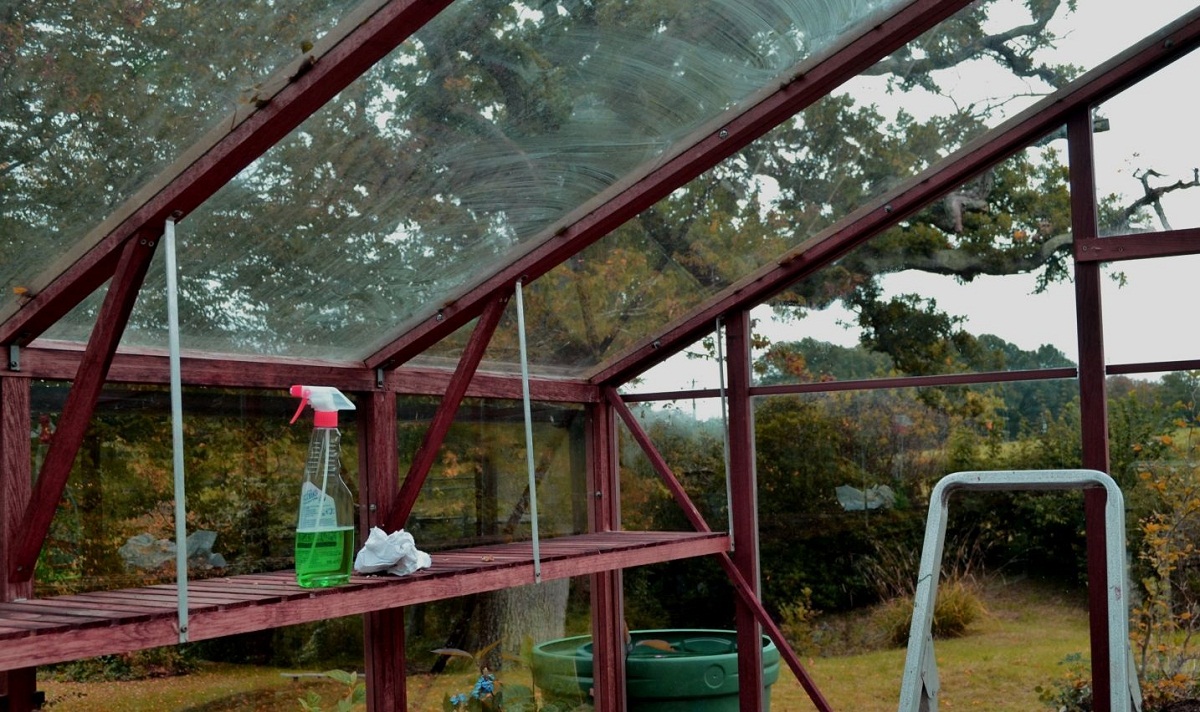
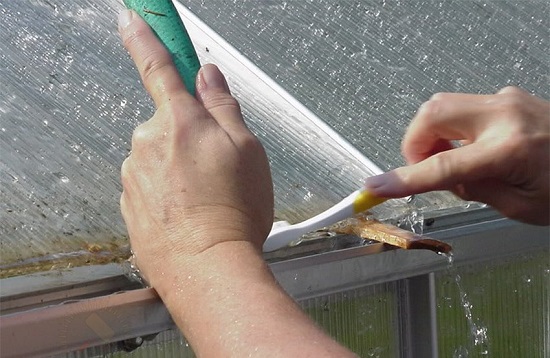
How to wash a polycarbonate greenhouse in the spring?
- If you have been growing plants for several years, then you probably know that polycarbonate greenhouses have one small drawback. Since they stand closed during the entire autumn-winter period and are not ventilated, then on all internal surfaces in large quantities pathogenic microflora is collected, which can subsequently infect young seedlings.
- Therefore, it is extremely important to disinfect all surfaces in the greenhouse as thoroughly as possible before starting to sow the change into the ground. It is advisable to do this almost before you start to carry out any work on the soil. This means that if you plan to plant cold-resistant crops in the greenhouse, then surface treatment should be carried out around the 20th of March. Ordinary soap solution can be used as a disinfectant.
- But keep in mind that it must be applied with an exceptionally soft sponge or cotton cloth. If you rub the walls of the greenhouse with something more rough, then it is likely that you will scratch the polycarbonate and subsequently bacteria will settle in the formed grooves, which will provoke various diseases in your plants.
- In view of this, if you find a sufficiently large accumulation of dirt on the walls of the greenhouse, then in no case try to remove it with scrapers. Better to wet it well with soapy water, wait a little, and then carefully remove everything with a soft cloth.
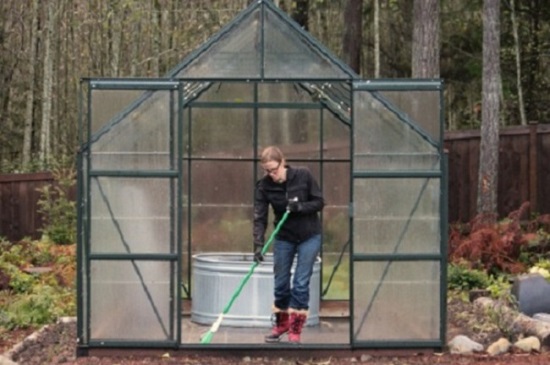
- First, ventilate the greenhouse itself a little.
- While this process is in progress, prepare a soapy solution.
- To do this, heat 6 liters of water and dissolve 70 g of laundry soap in it.
- Treat all surfaces in the greenhouse with the resulting solutions (both the polycarbonate itself and the frame to which it is attached)
- Apply the solution in such a way that it is clearly visible on surfaces
- Leave it there for literally 2-3 minutes, and then wash it off with plain clean water.
- This procedure must be carried out both inside the greenhouse and outside.
Sulfur block for disinfection and disinfection of polycarbonate greenhouses in spring: application
Disinfection of a greenhouse with a sulfur checker
As you probably already understood, processing the greenhouse is a very important stage before planting plants in the ground. Therefore, you must do everything so that not only its surface, but also the air that is in it is disinfected. For these purposes, you can use the so-called sulfur stick. This antibacterial agent, when used correctly, will help you disinfect not only all surfaces in the greenhouse, but also the topsoil.
Moreover, if you do everything right, then the sulfur stick will kill all the larvae that have successfully survived the winter frosts. But keep in mind that in order for it to be able to have just such an effect, before using it, you should check the body as well as possible for cracks and cracks. If there are any, then you must first correct all these shortcomings and only after that apply the sulfur checker.
So:
- Inspect the greenhouse and if necessary, replace the damaged pieces of polycarbonate
- Seal all cracks and crevices carefully and close windows and doors tightly
- Place a brick or flat stone in the center of the greenhouse
- Place a sulfur stick on it and light the wick
- As soon as you see that the smoke began to stand out immediately, exit the greenhouse, tightly closing the door behind you.
- Do not open doors and windows for 36 hours
- After this time, be sure to properly ventilate the greenhouse.
How to dilute copper sulfate for processing a greenhouse in the spring before planting?
Copper sulfate is a blue-blue powder used to fight fungi and bacteria that settle on plants, in the soil or on the walls of greenhouses and greenhouses. After application, it provides almost 100% protection for a full thirty days. And remember, this substance contains copper ions that plants do not like very much, so it will be better if you disinfect the greenhouse with this tool only once.
For this reason, try to treat the greenhouse with copper sulfate just before you start sowing or planting in it. In this case, you will not need to re-treat with copper sulfate until the next season. But when working with this tool, you must take into account that if used incorrectly, it can harm your plants.
If you want to avoid such problems, then try to use the right concentration for disinfecting. So, for example, a 10% solution of copper sulfate can be used to treat the surfaces of a greenhouse, but for disinfection of plants and soil, the indicator of the active substance should not exceed 3%.
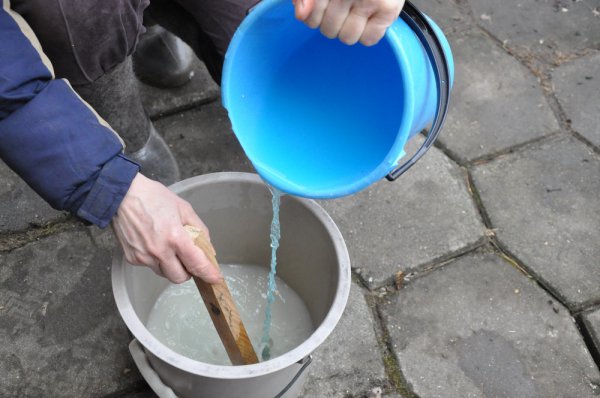
- First, heat ordinary water to 50 degrees
- At this stage, literally 2 liters of water will be enough
- Add 100 g of copper sulfate to it and try to dissolve it in liquid as thoroughly as possible
- When it dissolves, bring the volume of the solution to 9-10 liters
- Mix everything again and strain the liquid through a fine sieve or old nylon tights
- The resulting solution can be poured into a sprayer and treated with it in the greenhouse.
Processing of polycarbonate greenhouses in spring from late blight
Processing of polycarbonate greenhouses from late blight
- Phytophthora is a fungal disease that affects the stems, leaves and fruits of vegetable crops. As a rule, most often this disease affects exactly those plants that grow in greenhouses. High temperature and very high humidity contribute to the rapid multiplication of phytophthora bacteria, as a result of which they enter the soil from the plant itself in the shortest possible time.
- The worst thing is that these pathogenic microorganisms are very tenacious and, under favorable conditions, can quite calmly survive the winter. Therefore, it will be better if, before planting a new crop, you carry out the most maximum disinfection of the greenhouse. The frame itself, the coating, you can tidy up the topics in the ways that we introduced you a little higher, but the soil will need to be treated with completely different substances.
- If you do not want to bother with the preparation of any solutions, then you can quite safely buy the necessary product in a specialized store. True, in this case, you will need to work a little. Since late blight is very tenacious, experienced gardeners are advised to first remove the top layer of soil (approximately 5 cm) and only then sanitize. Fitosporin, Mokosan, Bordeaux liquid and Redomil are perfect for these purposes.
- But nevertheless, the so-called temperature method is considered a more effective method. In this case, you will need to boil a large amount of water and then, without waiting for it to cool, pour it over the top layer of soil. Having processed one area in this way, be sure to cover it with polyethylene. This will help the soil stay hot for a longer period and as a result, the largest possible number of phytophthora bacteria will die.
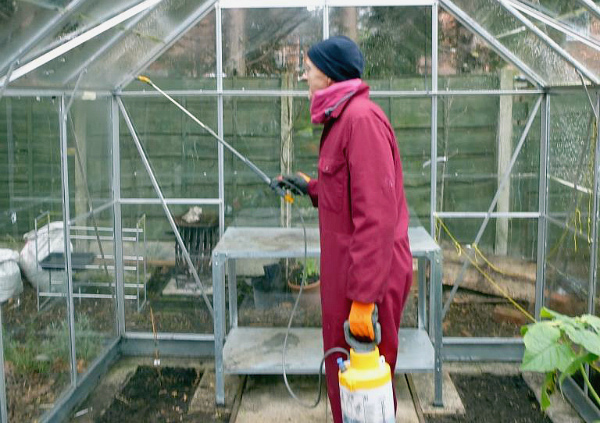
Greenhouse treatment with phytosporin in spring
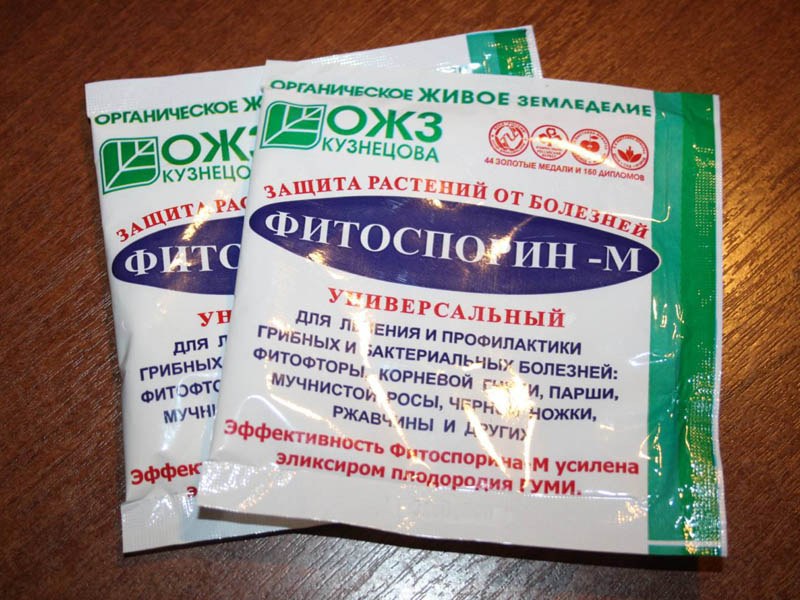
Greenhouse treatment with phytosporin
Fitosporin is a new generation fungicide that effectively fights almost all bacterial diseases of vegetable crops. This substance is sold in the form of powder, paste and aqueous suspension. The biggest advantage of this drug is that it is not afraid of either high or low temperature indicators.
The active ingredient remains active at both -40 and +50. Therefore, in this case, you can quite safely carry out the processing of the greenhouse long before you begin to carry out the first planting work on it. But still remember, phytosporin is quickly destroyed by ultraviolet radiation, so it will be better if you process it in cloudy weather.
As a rule, in order to disinfect the greenhouse, one treatment of the soil surface is enough. But nevertheless, if in the previous year you observed a sufficiently intense defeat of vegetable crops, then it would be better if you re-treat with phytosporin after 10-14 days.
- Powder. Diluted 2 hours before treatment. To prepare a disinfectant, you need to take 5 g of dry matter and dissolve it in 10 liters of water.
- Paste... In this case, you just need to dilute the product with clean water to the desired consistency and thoroughly treat the soil with it. It is advisable to do this a week before planting seedlings.
- Aqueous suspension. Typically, this substance is added to water in the amount of 50 drops for each liter of liquid, and then immediately treated with it in the greenhouse.
Preparing the soil and beds for cucumbers, radishes, seedlings in the spring in a greenhouse
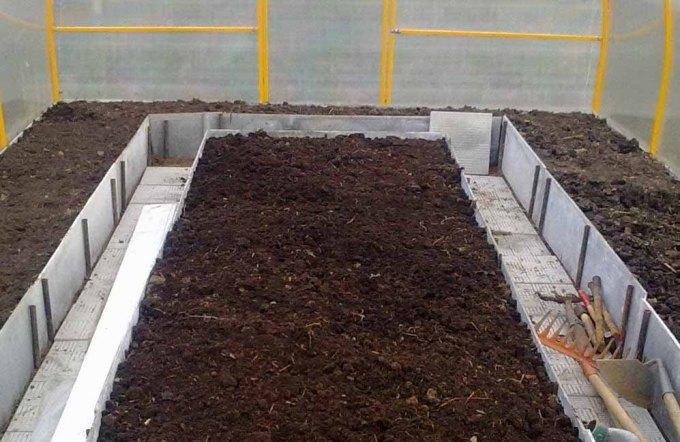
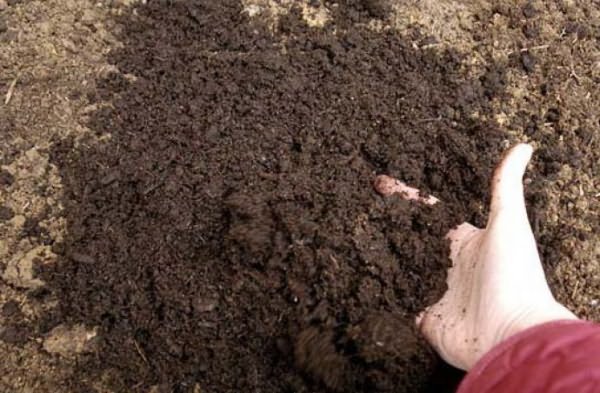
Preparing the soil for the new season
Proper preparation of the soil for sowing and planting vegetables is a guarantee that you will get a good harvest in the fall. Therefore, before planting seedlings in the ground, bring it to life.
This must be done, since during the winter the soil in the greenhouse dries up very much and becomes dusty. And if for the winter time this is good (the ground does not freeze deeply), then with the arrival of spring, such a state of the soil will not allow it to warm up evenly.
- First of all, you must disinfect the soil in any way convenient for you. You can use ready-made fungicides for this, or use a sulfur stick or copper sulfate.
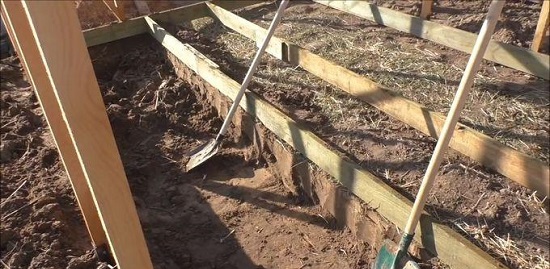
- When this is over, immediately start warming up the soil. If you start to work very early, then use heat guns or electric heaters for this purpose. Ideally, you should warm up the soil to at least 10 degrees.
- When the ground in the greenhouse warms up, you can start plowing it up. To do this, make shallow grooves over the entire area of \u200b\u200bthe beds. They will help to increase the contact of cold and warm air, thereby helping the soil to be enriched with oxygen as well as possible.
- In the next step, start revitalizing the soil. To do this, heat the water, dissolve, for example, Baikal-1 in it, and then pour the still warm solution along the grooves. After that, cover them with soil as quickly as possible and give the liquid time to absorb.
- If, after these steps, the soil in the greenhouse still has not warmed up to the desired temperature, then try covering it with a black film. It will heat up very well in the sun, thereby creating a comfortable environment for planting radishes and cucumbers.
How to feed the land in the greenhouse for cucumbers, radishes, seedlings in the spring?
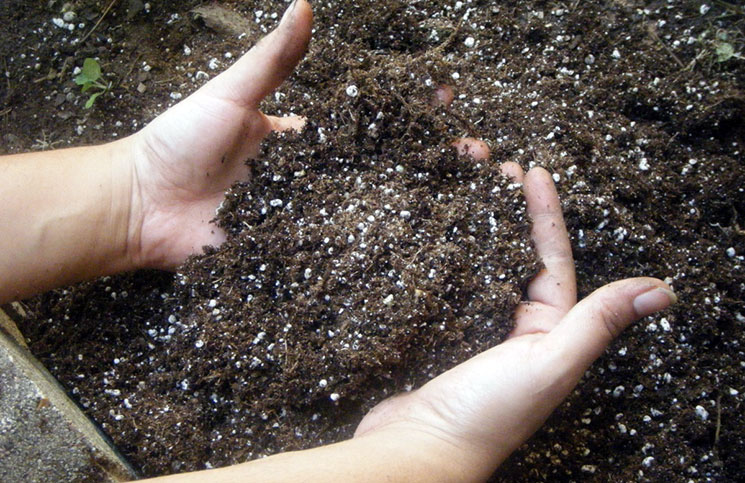
Types of top dressing for the soil in the greenhouse
A good harvest is directly related to the quality of the soil. But unfortunately, vegetable crops bear fruit abundantly only on fertile soils, which are very rare in our country. For this reason, almost all gardeners have to artificially enrich the soil with the necessary microelements.
In addition, top dressing allows you to restore the quality of the soil after the previous season. As for the types of feeding, there are three of them. Each of them has its own characteristics and nuances, but still they all help to make the worst soil suitable for planting seedlings.
so:
- Organic... This type of dressing includes manure, bird droppings and humus. As a rule, these substances are simply laid out in a thin layer on the surface of the beds, and then dropped in with a shovel. Alternatively, if you wish, you can simply put the organic feed directly into the seedling pits.
- Inorganic fertilizers. In this case, it is best to give preference to multicomponent fertilizers, which include the entire list of necessary substances at once. Such a top dressing must be applied either to very wet soil or simply to dilute it in water, and then water all the beds with the resulting liquid.
- Mineral supplements. The most affordable top dressing of this type is ash. Most often it is scattered over the surface of the soil, and then it is simply loosened. If you do not have the opportunity to get ash, then replace it with ready-made micronutrient fertilizer.
How to heat a polycarbonate greenhouse in spring?
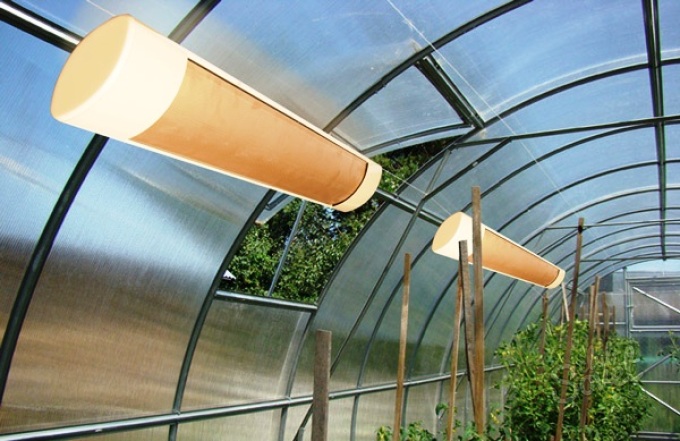
Methods for heating a polycarbonate greenhouse in spring
If you plan to start planting plants in the ground in the second half of March, then you need to take care of high-quality heating of the greenhouse. If you do not take care that the soil and air are well warmed up all the time, then your seedlings will either die or grow very poorly. The most affordable heating method is the sun's rays.
In this case, the greenhouse is located in such a way that through its roof (it must be transparent), the sun's rays can hit the soil for almost the entire daylight hours. But unfortunately, this heating method is not suitable for regions with a very cold climate. Therefore, it will be better if you try to equip the greenhouse with artificial heating.
So:
- Radiator heating. In this case, electric radiators are placed over the entire area of \u200b\u200bthe greenhouse, which, if necessary, can literally warm up the space to the desired temperature in an hour. If you wish, you can also install special automatics and then they will turn on only when the temperature drops below 10 degrees.
- Cable heating. Such heating is installed even at the stage of greenhouse construction. In this case, a special pillow is made under a layer of fertile soil, on which special cables are laid, which are subsequently also connected to the electrical system.
- Infrared heating. It can be installed at any time, although the disadvantage of such heating is the rather high price. In this case, you will need to place special heaters on the walls under the ceiling, which will warm up the space.
- Solid fuel heating. This kind heating is very easy to use, and most importantly, it is available to people with a small income. All that will be required of you in this case is to install a solid fuel boiler in the greenhouse and put firewood or coal into it a couple of times a day.
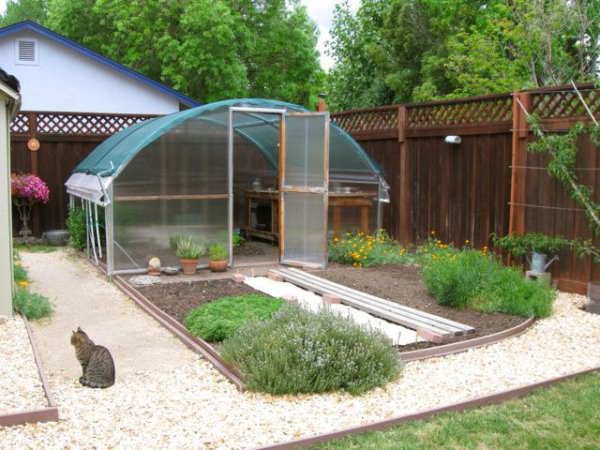
A greenhouse, like any complex structure exposed to the external environment, requires maintenance and periodic cleaning. Depending on the season, the actions for its maintenance will differ significantly.
In this article we will tell you whether you need to wash a polycarbonate greenhouse and why is it done? How to clean and how to care for a polycarbonate greenhouse in autumn, spring and summer. What means are used for this, and what is better not to use.
Spring cleaning
The purpose of building maintenance in spring is to increase the light transmission capacity of polycarbonate. The more transparent the coating, the faster the room will heat up and the more intensively the plants will develop. Polycarbonate is processed, both outside and inside.
Summer care
In summer, the greenhouse does not need much maintenance. It is not possible to do anything inside because of overgrown plants. But if the season is sunny and too hot, then you can shade the greenhouse, reducing the flow of light. This is especially useful for small buildings that cannot create a suitable microclimate inside.
This is done as follows. Ordinary chalk is ground to a fine powder. Mixes up with water, the proportion depends on how much you need to "darken" the structure. Using a spray gun set to maximum throughput, polycarbonate sheets are covered with chalk emulsion. To remove it in the fall, you just need to rinse the polycarbonate surface with water under a slight pressure.
Important! If during the growing season the gardener is able to harvest several crops, then the body should be washed and the soil disinfected after each harvest.Autumn care
Working with the greenhouse in autumn - cleaning, fertilizing, general care is carried out in several stages. Its main goal is not only to clean the entire structure, but also to disinfect the earth, frame and polycarbonate. As well as fertilization, general repair and strengthening of supporting structures.
Caring for a polycarbonate greenhouse in the fall - cleaning the ends from green mold
Before the inside of the polycarbonate greenhouse is washed, all plant residues and garters are removed from the building. The processing of structural elements is carried out with chlorine lime. Polycarbonate sheets are treated with a solution of potassium permanganate. When caring for the greenhouse in autumn, special attention is paid to cracks in frames and other structural elements, where pest larvae and disease spores can hide.
Greenhouse cleaning in autumn, everything is removed from the room before washing the polycarbonate
Land care consists in disinfecting treatment with copper sulfate, lime or other means, which should rid the gardener of aphids and phytophthora. If the pest infestation has reached a critical level, before washing the greenhouse in the fall, 5-10 cm of soil is removed from it and replaced with fresh compost.
By properly caring for the frame, you can significantly extend the life of the structure. Metal structures must be periodically painted, wooden ones must be impregnated with antiseptic preparations or coated with slaked lime.
Video on how to wash a polycarbonate greenhouse in the fall and how to do it correctly:
As fertilizers, manure, humus, compost or inorganic fertilizers are introduced into the soil. It is advisable to purchase universal feeding mixtures throughout the season.
Cleaning the polycarbonate greenhouse in the fall includes replacing the topsoil
Winter care
Preparing and cleaning the greenhouse for the winter consists in strengthening the frame with additional wooden posts, this will help withstand the snow load. If the winter is snowy, it is necessary to periodically throw snow from the roof. This should be done with a soft brush or broom and never with a shovel.
Winter care - removing snow from the roof
How to properly clean polycarbonate
As a cleaning solution for care, ordinary household soap with a neutral pH of 72% is used. How to wash polycarbonate greenhouse autumn or spring? To prepare a concentrated cleaning solution, the soap is rubbed on a coarse grater. ½ piece for 10-15 liters of water, infused overnight. Stir the solution thoroughly before use. If necessary, you can use in small portions with additional dilution with water.
A flannel cloth is used as a cleaning agent for gentle care. Before washing the greenhouse in the fall, you must thoroughly rinse it with water from a hose. This is done so that all the dried mud is acidified.
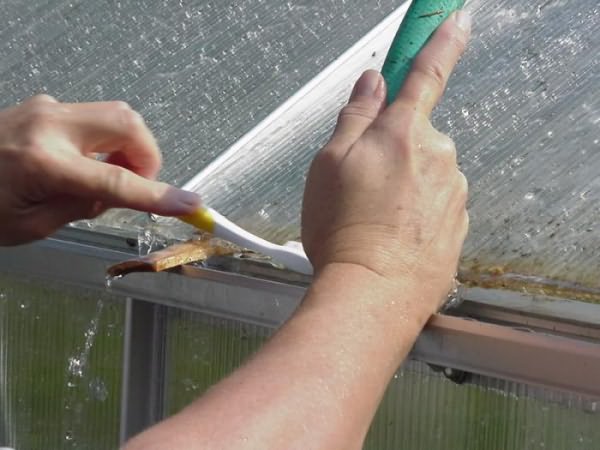
Particular attention should be paid to maintaining the joints between the polycarbonate sheets and the greenhouse frame. The green plaque that appears there should be thoroughly washed. It is in such places that late blight spores persist after general disinfection. When removing mold, it is allowed to use soft brushes (you can take an old toothbrush).
Unlike glass, polycarbonate is very sensitive to superficial microdamages. Strong mechanical stress and abrasive properties of semi-dry dirt or improperly selected detergents can matt the surface of the sheet, which will significantly reduce the intensity of sunlight penetration. When caring for a polycarbonate greenhouse, it is recommended to refrain from the following actions:
- Use brushes and long-handled scrapers intended for cars for cleaning and maintenance;
- Use detergents with abrasive microparticles;
- Use aggressive, acidic household chemicals, including detergents or auto chemicals;
- During summer care, do not wash polycarbonate, if it is heated by the sun, this can cause clouding of the material;
- In winter, rip off ice from the surface of the greenhouse with scrapers.
It is not enough to build a greenhouse on the site, get extraordinary seedlings and place them in the soil, waiting for the harvest. The land requires constant maintenance, whether it is outdoors or in a greenhouse.
Nothing will grow by itself. Limit calculation, knowledge, labor and discipline - this is what the earth loves - these are the terms good harvest.

It can be said in another way - you love to ride, love to carry sledges. And we will add that this should be done on time and should begin in the fall.
The first, still autumn, operations
Back in the fall, when the last harvest was harvested, and the land was prepared for winter rest, it is very important to do the following:
- At first, remove all remnants of old vegetation. Do not forget to test them at the maximum possible depth, and 50 cm is not the limit here, given the roots. Not only plant residues are subject to removal, but also small items of all kinds of devices, ropes, sticks that were used in the process of caring for the crop.
- Secondly, carefully break up the lumps and level the entire surface. In no case do not tamp the earth, let it breathe and rest after the summer and autumn labors. Soak the earth in this way for at least a week before the next operation, since nature itself will help to do this - you never know when the first snow will fall.
- Well, and thirdly, with the very first snow, lay a layer of 20-30 cm on the ground of the greenhouse. This alone will be an excellent protective and disinfecting factor until spring.
Early spring operations
Although all the above operations will need to be carried out early in the spring, when a steady average temperature has already been established during the day above 0 degrees, warming should be stable. That is why, if the weather permits, it is recommended to perform all operations in February.
Soil disinfection
All operations will be mainly related to soil disinfection. To do this, you must first remove the remaining snow. If you want to do this quickly, you can put earth, peat or even ash on top.
Further actions depend on the area of \u200b\u200bthe greenhouse. If the area is small, then often boiling water will be quite enough, which will successfully destroy all pests in the soil.
If you are lucky with the sun, then these actions can help:
- first, the soil is watered;
- the covering material is thoroughly washed;
- the material is applied to the ground;
- doors and vents are closed;
- all the cracks are caulked.
In a week, you get a greenhouse that is quite suitable for further use. But, unfortunately, in the middle lane, such a technique is possible only in the summer, when there is no longer a question of tillage.
Among experts, there is one answer to the question of how to disinfect the ground in a greenhouse - this cannot be done and the best way is to simply replace the ground, if not all, then at least the top level of 5-8 cm.
But, by and large, more active intervention is indispensable here.
Helpful advice! Some experienced greenhouses advise composting to get rid of old tops. This method is quite possible to use, but subject to the following conditions: you closely monitored the presence of pests in the greenhouse during the previous year and did not observe their increase; compost is truly able to get rid of pests for quite a long time - at least 3 years - you have this time, and you are ready to wait; the compost should not be used for the same crop from which it was obtained.
Active forms of land preparation in spring
Among the active forms that perform their work quite effectively, but affect different types of fungi and bacteria, the following are distinguished:
- Chemical method - the use of special chemicals. This method is quite effective, but it is strongly recommended to use only in the autumn period, immediately after the last harvest, maximizing the time until spring sowing.
- Biological method - in other words, the introduction of living organisms into the soil with the help of compost or manure, helping to cope with pests. This method gives very good results, but it is long lasting and not always suitable for greenhouses. In addition, during the operation of the compost it is required constant care behind the land - digging it up and removing new weeds.
- Temperature method - or against the ground with boiling water. This method involves preliminary covering the area with a heat-resistant film, which will retain moisture and release steam outside.
And yet, if the chemistry
This is the most aggressive way to fight harmful microorganisms, it is better to avoid it if possible, but when it is no longer possible to do this, then you have at your disposal:
- Bleaching powder - it will be good for combating black leg, keel, white rot gall nematode, late blight. In autumn, the concentration of chlorine can be high, but in spring it is quite minimal. It is very useful to spray plants with a liquid solution in a ratio of 400 grams of lime per 10 liters of water. Often a delay in processing results in the loss of the entire crop that has already become diseased.
- Carbation - recommended against root rot, fusarium and verticillary wilting, keel, blackleg, it can be indispensable for complex soil diseases. Spraying must be done no later than a month before planting the seedlings. On square meter area, it is permissible to use no more than 2 liters of solution, after which the earth must be dug up.
- Sulfur - mainly used to fight fungi and bacteria on the plants themselves. Application is carried out in the form of fumigation of a closed greenhouse at the rate of 80 grams of substance per cubic meter of greenhouse volume. If you are unlucky and a spider mite has settled in the greenhouse, double the dose. The technology of application provides for the installation in the room of several metal pallets with glowing coals, on which sulfur or sulfur bombs are placed.
Helpful advice! Sulfur bombs, as a matter of fact, do not require preliminary presence of coals; it is simply enough to set fire to bombs. At the same time, it must be admitted that, although this method is extremely effective, it is unacceptable in greenhouses with metal structures - all metal protection against corrosion will come to naught.
- Formalin solution - a good remedy against whitefly and its larvae, against spider mites, fungus and mold. Work with formalin must be carried out at an internal temperature not higher than 10-12 degrees and using a 40% solution.
Work must be carried out in a gas mask. Upon completion of watering, the temperature inside is raised to 25 degrees and the greenhouse is kept closed for a day.
As the final chord of all works - thorough airing. Keep in mind that formalin has the ability to absorb and persist in concrete for a long time.
- Copper sulfate - this well-known drug shows itself perfectly against pathogens of powdery mildew, late blight, rot, scab, curliness and bacteriosis. The use of copper sulfate has a negative effect on plants, therefore it is available for use only in autumn. A concentration higher than 10% is not used. Copper sulfate is part of the Bordeaux mixture
- Special drugs - a whole class of drugs developed against specific types of bacteria: "Fitolavin-300" against pathogenic bacteria and rot, "Bayleton" - against gray rot and powdery mildew, "Acrobat MC" - against downy mildew and late blight. The use of these drugs must be preceded by familiarity with the recommendations.
Helpful advice! Carrying out the correct agrarian policy can also be attributed to the care of the land. It is not worth constantly planting the same crop on the same bed all the time. Crop rotation prevents pathogens from adapting to soil and crop conditions.
Ideally, be sure to leave at least 20% of the entire greenhouse area for steam - let the earth rest and nourish with vitamins for at least one season. Be sure to keep a diary of soil use.
Every year last year's fallow goes to work, and new areas take its "place" in the care of the soil. This approach is especially important if there is a need to resolve the issue of how to prepare the land in the greenhouse for tomatoes.
Land renewal
If not every year, then regularly every 2-3 years it is recommended to renew the land in the greenhouse.
The process of solving the problem of how to update the land in a greenhouse is as follows:
- the top layer is removed at 30-40 cm;
- the first layer of hay, straw, leaves is laid;
- then - the second layer of manure; this double pillow should be 15-20 cm thick;
- the third layer is a mixture of peat and sod land, 10-15 cm thick; peat must be ventilated before use to remove toxic substances - peat is considered suitable for use when its moisture content is 50-60%.
findings
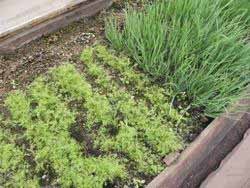
Oddly enough, excessive care of the land in the greenhouse will be the answer to the question of why the land in the greenhouse turns green. Too much watering in the greenhouse causes uncontrolled reproduction of moss, too much light - phytogenesis in the soil intensifies, a green carpet is planted for planting a tomato, which, after the seedlings emerge, is not cut.
In other words, greenhouse work and land maintenance require a smart approach, and skill will stop in time. When a decision is made to use chemistry, then careful adherence to all application processes.
Only confidence in all your actions will give in summer and autumn desired result... And after harvesting - back to work (also learn how to prepare the greenhouse for spring).

The video in this article will answer these questions more fully.
oteplicah.com
Processing a polycarbonate greenhouse in the spring from pests and diseases
The function of any polycarbonate greenhouse or greenhouse is to provide the most favorable conditions for growing cultivated plants. At the same time, optimal temperature and humidity indicators contribute to the activation of various pests, microbes and pathogens. To prevent such phenomena, a special treatment of the polycarbonate greenhouse in the spring from pests should be carried out, the results of which will be reflected in the form of an increase in the yield and quality of the fruits.
Pests and ways to deal with them
Polycarbonate greenhouses are prone to infection with fungal diseases, spider mites and late blight. At the same time, a separate control method is provided for each pest or disease. For example, the fumigation method or the use of sulfur sticks works effectively with a spider mite, but in the case of fungi, this technique does not work. To prevent the development of phytophthora, one should actively deal with the soil, changing its composition, processing and applying fertilizers containing copper. Comprehensive cultivation of the land in a polycarbonate greenhouse in the spring will help to cope with other garden misfortunes, in the fight against which even specialized preparations are useless. By combining disinfection of the greenhouse structure and proper soil maintenance, a comprehensive program for the control of all insects, diseases and microorganisms can be achieved.
Greenhouse cleaning
Before proceeding directly to the processing of the garden structure, it is necessary to prepare it accordingly. In addition, it may be necessary to replace the old twine and trellis. The first step is to remove all remnants of vegetation from the last season - these include missing fruits, tops, weeds and roots.
It would seem that this material can be used for fertilization in the future, but if a complex processing of a polycarbonate greenhouse is planned in the spring from diseases and pests, then you will have to burn all the remains of plants. The fact is that pathogenic organisms appear not only in infected specimens, but also in healthy ones. After the winter period, they come to life and increase their activity. However, under some conditions, the remains of old plants can be used as compost. In particular, leaf preservation is possible if:
- there were no outbreaks of diseases in the past season;
- compost is prepared for at least 4 years (during this time the pests will die);
- fertilizer is not intended for the crop from which it will be made.
Preparation of the greenhouse structure for processing
At this stage, the goal of providing disinfectant treatment of surfaces is not worth it, so it is enough to limit yourself to a standard set for washing - water and soap and abrasives... Polycarbonate is easy to clean with common cleaning agents. Subsequently, the surfaces are easily washed with the applied chemistry. After that, the processing of a polycarbonate greenhouse in the spring from pests can be carried out, which involves the use of already more effective preparations.
In addition to the design of the greenhouse and in particular polycarbonate sheets, it is necessary to clean inventory, racks, containers and containers. Plastic items are disinfected with bleach, boiling water, formalin or vitriol. In addition, disinfection of polycarbonate greenhouses in spring can be carried out using limestone. This product is also suitable for wood-based materials.
Greenhouse disinfection
At the moment, gardeners use three main methods of processing polycarbonate greenhouses. Among them are slaked lime, sulfur checkers and biological products. Since the question is how to treat the greenhouse in the spring before planting, alternative methods of disinfection should be treated with caution, since the effect of many chemicals has a strong effect on the quality of the crop.
So, sulfur checkers can be used with the calculation of 50 g of substance per 1 m3 of the greenhouse. This agent predominantly acts on insects and microorganisms, but is ineffective in the fight against late blight, bacteriosis and powdery mildew. Slaked lime is used to process elements of a greenhouse structure - it is diluted with copper sulfate and all surfaces of the frame, as well as walls and ceiling, are disinfected with the resulting solution. Biologicals in crop production are considered to be quite a promising direction. If there is a problem of how to process the greenhouse in the spring before planting, then the preparations of this line will become optimal solution... They eliminate fungal diseases and suppress the growth of unwanted microflora in the future.
Soil cultivation in the greenhouse
The peculiarity of the operation of the soil in the greenhouse is due to the fact that, as a rule, the same crop is grown on it from year to year. This contributes to the preservation and development of harmful bacteria, which must be fought with green manure, drugs with effective microorganisms and biofuels.
Thorough cultivation of the land in a polycarbonate greenhouse in spring with green manure will create optimal conditions for growing oats, mustard, phacelia, salads and other crops. Siderata are literally sown to plants in the aisles, protecting them from all kinds of pests. Formulations with effective microorganisms also protect greenhouse plants from diseases and pests by colonizing the soil layer with beneficial bacteria. Special microorganisms multiply in the earth, improve its structure and have a healing effect.
Biofuel ridges are also gaining popularity. This is an unconventional treatment of a polycarbonate greenhouse in the spring from pests, which also has a warming effect. Wood filling is laid in the soil, consisting of old boards, hemp and other waste. In the future, this layer has a beneficial effect on plants in the greenhouse, and has a disinfecting effect.
Conclusion
In order for the seasonal maintenance of the greenhouse to give the expected results, it is necessary to use several methods of disinfecting and disarming the surfaces of the structure and the soil. Multi-level processing of a polycarbonate greenhouse in the spring from pests will allow you to cope with both common microbes and insects. The main thing in this case is not to forget about the protection of the plants themselves, which sensitively react to most potent drugs.
fb.ru
We grow cucumbers: preparation of seeds, beds
Experienced gardeners pay great attention to the preparation planting material, because the future harvest largely depends on this.
In order to increase the germination of cucumbers, their seeds must be soaked in water at room temperature for several hours before planting.
Cucumbers are no exception, which can be grown both outdoors and indoors, but the preparation of seeds and the process of growing the crop itself are almost the same in both cases.
Methods for processing cucumber seeds before sowing.
Seeds can be disinfected in two ways: by dry dressing and wet disinfection of seeds.
The easiest way to increase the germination rate of cucumbers is to soak their seeds in room temperature water for several hours. Thus, it is easy to determine which seeds will not sprout: these usually float to the surface of the water and are removed before planting. Plain water is sometimes replaced with a solution of ordinary table salt at the rate of 50 g per 1 liter of water. It is recommended to dry seeds suitable for sowing. Another important point: don't rush to buy seeds every year. Practice shows that high germination is observed just in two- or three-year-old seeds. If you do not have such seed, try to create certain conditions for one-year-old seeds that will help improve their quality: store them in a warm, but dry place at a temperature of at least 25 degrees. If this condition was not met, before planting, the cucumber seeds are heated at 60-degree temperature for at least 2 hours. The main thing is not to overheat and not steam up the planting material. But still it is better to make sure that the seed "stood" for a year or two.
Cucumber seeds should also be disinfected. This can be done in two ways: dry dressing and wet seed disinfection. In the first case, NIUIF-2 or granosan is used: 3 g per 1 kg of seeds or TMTD preparation: 4 g per 1 kg of seeds. These powdered preparations require sealed containers, such as jars, where the seeds are placed and shaken constantly for 5 minutes. Wet disinfection occurs with a 1% solution of potassium permanganate (10 g per 1 liter of water), where the seeds stand for 20-30 minutes, and then washed with running water.
Using sprouted planting material
Checking seeds for germination: 1) dry seeds; 2) spiked seeds; 3) germinated seeds.
Previously, this method was not used so often when planting cucumbers, but recently even amateur gardeners unanimously declare that in this way the yield of the crop is significantly increased. Along with germination, it is recommended to additionally treat the seeds with chemical and biogenic stimulants, which accelerate the germination process, and then increase the growth rate of cucumbers. This method consists in the fact that the planting material is soaked before sowing for a day in a solution of boric acid (for 1 liter of water, you will need to take 20 mg of it). The room where germination takes place must be warm. Boric acid can be replaced with solutions of methylene blue (300 mg per 1 l), succinic acid (7 mg per 1 l), zinc sulfate (2 g per 1 l) or baking soda (5 g per 1 l).
Whoever does not like chemistry can use aloe juice, half diluted with water, but in this case the soaking period is reduced to 6 hours, and the required temperature is regulated in the range of 20-22 degrees. After etching, the planting material is placed in a thin layer on a piece of cloth, and wet sawdust or sand is placed on both sides, you can use a slightly wetted and wrung out cotton wool, but for a large number of seeds this is quite uneconomical. The temperature of the resulting structure should be at least 20 degrees, but not more than 25, so as not to steam up the seeds. If you decide to use sawdust, scald them before this boiling water to remove harmful resinous substances, and only when the temperature becomes optimal, put cucumbers on them.
For the cultivation of cucumbers in open soil conditions, their resistance to low temperatures is of particular importance. It is also worth taking care of this in advance. In this case, the period of seed germination increases to 36 hours, but the temperature gradually decreases to +2 degrees. If the germination period falls, the wetted planting material should be hardened for 3 days at a temperature of at least -5 degrees.
Preparing the soil for sowing
When planting cucumbers, make sure that the soil in the allotted area is loose, organically fertilized, because this culture prefers beds that are light in texture, and acidic soil is contraindicated for it. Even in the fall, add 80-100 kg of manure to 10 square meters of beds, and if it is absent, replace it with 250 g of potassium salt or 400 g of superphosphate. It is very good when cucumbers are preceded by corn, peas or potatoes. Spring preparation consists of thorough loosening of the soil and fertilizing it with ammonium nitrate (150-200 g per 10 square meters). Ash can also be used.
Cucumbers are planted in rows, the distance between which should not be less than 70 cm, and the plants themselves are 7-10 cm apart from each other. Cucumbers can grow well even in conditions of slight shading, but low temperatures are unacceptable for them. Therefore, they can be planted in the beds only when the soil warms up to a temperature of at least 12 degrees. Do not rush to plant all the seeds at the same time, but in two or three steps. Firstly, if the first crops die, there will still be a second and third planting. And if all goes well, you will get an early harvest.
Gardeners argue a lot about the depth of planting of cucumbers. The optimal depth is 3-4 cm, but those who practiced deep (up to 6-7 cm) planting also received a good harvest, motivating their choice by the fact that moisture remains longer at a greater depth. Sometimes cucumbers are planted in one hole at different depths. For this, a hole is made for planting with an inclination, the seeds are fixed at different depths, but not deeper than 8 and not higher than 2 cm. In this case, the seeds themselves control the germination process. With a high humidity of the upper layer, the upper seeds come out faster, and if the temperature drops sharply or, conversely, the upper layer dries out too much, their counterparts located below are more likely to sprout.
When choosing the cultivation of cucumbers by the seedling method, it is recommended to wait out the threat of frost, that is, the seedlings are planted no earlier than June 10-15. An ordinary landing method is acceptable in this case. The sprouts are buried in the ground to the cotyledonous leaves, and the pot with the root system is sprinkled with a layer of soil 2-3 cm.After that, the soil is pressed a little and each hole is watered with 1-2 liters of water.
Cucumber is a demanding plant for the preparation of planting material, but knowing some secrets will help you get a good harvest of this popular culture in our country.
ParnikiTeplicy.ru
Processing the greenhouse in the spring before planting: treating diseases, destroying pests
Spring processing of the greenhouse is included in the list of mandatory measures, without which it is almost impossible to get a high yield. The reason for this is the fact that conditions are formed in the greenhouse that are comfortable not only for cultivated plants, but also for weeds, pests and pathogenic microbes.
And you need to fight them constantly, and not only when they have already shown themselves and begin to cause damage.
Description of the main procedures
Stages of spring work
So, in the fall, after harvesting and harvesting plant residues, the soil was dug up, and the structure itself was dismantled or closed for conservation. In the spring you have to start all over again.
Greenhouse work can be divided into stages:
- Site cleaning.
- Assembling the greenhouse structure (if it was dismantled for the winter).
- Washing of load-bearing elements and glazing.
- Disinfection of soil and premises.
When does it begin spring processing greenhouses? As a rule, disinfection should be carried out several weeks before the first seedlings are planted. So if you plan to grow early or cold-resistant crops, then processing can be started at the end of February.
Initial preparation
First of all, it is worth collecting again all plant residues, as well as the remnants of materials that were used in the greenhouse in the previous season (ropes, pegs, garter nets, etc.).
If you are not sure about the quality of roots, tops and leaves, then it is better to burn them. If there were no outbreaks of diseases last season, then the biomass can be put into a compost pit.
During the winter, such defects may occur:
- Rotten wooden parts.
- Deep corrosion of metal elements.
- Mechanical damage to structures (cracks, breakages).
- Mold or microbial contamination.
Note!
Inspection must be carried out even if the structure was stored disassembled.
It is better to replace all damaged parts. Particular attention should be paid to blackened or moldy elements - they will require more thorough disinfection.
Transparent fragments of the greenhouse cover should also be examined carefully.
The instructions for processing transparent parts of the greenhouse are as follows:

- We wash the glass. The better we wash them in the spring, the more light our plants will receive during the growing season.
- We drag the film, glue or replace the torn areas.
- We thoroughly wash polycarbonate fragments of the greenhouse without using abrasives and hard brushes. We replace panels with clouding and impaired transparency with new ones.
It is best to rinse transparent parts with conventional window cleaners. After processing, be sure to wash off the remnants of chemistry with clean water.
Disinfection
Techniques used
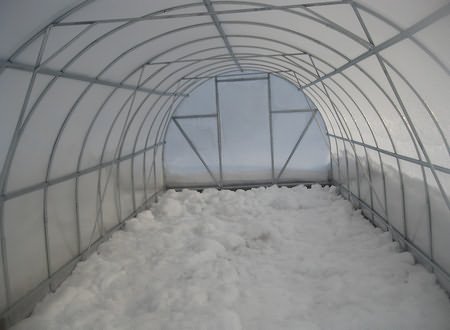
If the cultivation of the greenhouse in the spring began early, and there is still snow on the soil, then before starting the disinfection work, it is necessary to melt the snow.
- If time permits, you can sprinkle the snow cover with something dark - ash, peat, earth. A darker surface will absorb more sunlight and the snow under this deck will melt faster.
- If the greenhouse has heating equipment - you can enable it in test mode.
When the ground of the greenhouse has warmed up enough and you can dig it, go to the main stage.
Spraying with a solution of chemicals
Disinfection methods can be divided into:
- Biological;
- Temperature.
- Chemical.
Biological method
The longest and most difficult method is biological.
It means:
- Replacement of soil.
- The use of green manures (special plants grown for the purpose of subsequent fertilization of the soil and suppression of weed growth).
- Replacement of crops.
Not every gardener can afford to remove and remove soil from the entire site or leave the greenhouse for several years without planting, therefore, biological soil cultivation in the greenhouse in spring is used mainly by industrial greenhouse farms.
Temperature method
Parboiled soil
Sometimes the question arises, how to treat a greenhouse in spring using the high temperature method? Boiling water will help with this. The earth is watered abundantly with hot water and immediately covered with a dense material that does not allow moisture to pass through. The steam under the greenhouse film will kill up to 80% of the pathogenic microflora in a few hours.
Chemical method
The most common method is chemical.
The following chemicals are used for wet disinfection:
- Bleaching powder;
- Carbation.
- Creolin.
- Formalin.
- Copper sulfate.
Let's look at a few examples of how to treat a greenhouse in spring with these chemicals:
- Bleach we take in the proportion of 400 g of dry matter to 10 liters of water. We insist the solution for about 4 hours. We wipe the transparent elements of the greenhouse with the upper suspension, and use the sediment to process the supporting structures.
- If a spider mite was noted in the greenhouse last season, then the proportions of the solution are changed: 1 kg of dry matter to 10 liters of water.
- When disinfection with copper sulfate in the spring we use a 10% solution for processing the inner surfaces of the greenhouse. This will help protect the future harvest from powdery mildew, late blight, scab and some bacterial diseases.
Of the specific chemicals, it should be noted:
- "Fitolavin-300" against pathogenic bacteria and rot.
- "Bayleton" from the gray gili.
- "Lightning" from a spider mite.
How to dilute these substances will tell us the instructions on the manufacturer's website.
Some farmers also advise using decoctions and infusions of plants (garlic, mustard or tobacco) for disinfection, which can be prepared by hand. They are, of course, less effective, but safe for the future harvest.
Gas disinfection
The most famous method of gas disinfection is sulfur fumigation. For this, special sulfur checkers are used. Before the processing of greenhouses begins in the spring with the help of these devices, it is necessary to well seal all the cracks, close the vents.
The optimal consumption is 60-80 g of sulfur per 1 m3. If the greenhouse is affected by spider mites, then the dose should be increased to 150 g.
Advice!
Do not use sulfur fumigation if your greenhouse structures are made of metal: the emitted gas leads to accelerated corrosion.
Output
As you can see, the farmer has a lot of work. You should fight for a good autumn harvest, having decided in advance how and with what to treat the greenhouse in the spring: then the risk of infection will be minimal, and the harvest will turn out to be plentiful and healthy. The video in this article will show you some more useful information, take a look!
oteplicah.com
Land in the greenhouse: soil selection and care
It has always been considered that the land in the greenhouse plays the most important role in obtaining a good harvest. It contains all the necessary minerals that contribute to the normal growth of any plant.
What should be the soil for the greenhouse
What kind of land is needed for a greenhouse? This question, basically, worries only novice gardeners.
The choice of soil type is influenced by many factors:
- The type of cultivated crop.
- What time of year is she raised.
- Whether there will be soil heating in the greenhouse or not.
- What are the climatic conditions in the region, as they directly affect the composition of the soil, and so on.
Let's take a closer look:
- As a rule, the soil for the greenhouse contains: humus, compost, sod soil, sand, peat, limestone.
Note. As soon as it is necessary to prepare the soil for the greenhouse, they rely on the following parameters: 1 m3 of soil falls on 5 m2 of the greenhouse structure with racks, in ground greenhouses - 4 m2, for greenhouses of 4 frames - 4 m2.
- In addition, for some crops that have certain characteristics in their growth, many gardeners harvest bedding. For example, cucumbers or tomatoes (see Growing Tomatoes in Greenhouses: Process Details).
How to prepare soil for a greenhouse
For such actions, there is a special instruction with clearly established norms of components.
For this you will need:
- Sod, humus not higher than 45%.
- Sand - 3%.
- Peat - up to 10%.
Advice. In order to make soil for cucumbers or tomatoes, then all the ingredients, except for sand, are in equal quantities.
It is worth considering that if a bedding is required, then sprinkle the tomatoes with peat or the same soil as for cucumbers.
The main requirements that the soil in the greenhouse must meet for normal productivity:
- Ensure normal heat exchange.
- Let the air in.
- Saturated with water during watering (see How to water tomatoes in a greenhouse correctly) and be able to pass it through yourself in the case of growing non-moisture-loving crops.
- Absorb all necessary substances and minerals in case of fertilization.
- Making soil for the greenhouse with your own hands will not be difficult.
- Initially, the conditions for the normal growth of the culture that are planned to be grown in the structure are studied.
- Only on the basis of this is the soil made and then fertilized.
Harvesting of all soil components for the greenhouse and soil preparation
Humus is one of the main components of the soil. What it is?
Humus characteristics:
- Humus is completely rotten manure.
- It is used internally as a natural fuel (biofuel).
Manure preparation:
- There is manure that has already been used in the greenhouse.
- It is pulled out of the structure after harvest and laid out in stacks.
- Then it is covered with peat and regularly watered with slurry.
Advice. In this process, the main thing is to rearrange the stacks to other places so that the manure does not dry out.
Thus, the manure turns into humus.
Humus composition:
- Phosphoric acid.
- Calcium oxide.
- Nitrogen.
- Potassium oxide.
All of these elements are beneficial for the plant.
Humus properties:
- It saturates the soil with minerals.
- Together with humus, a huge amount of nutrient microorganisms gets into the soil.
- Soil with humus has good air exchange and water permeability.
Note. It is worth considering that humus cannot be used as soil. Subsequently, the growing season of crops will begin.
Sod is just as important as humus. Why exactly is it put into the soil for growing "capricious" plants?
Sod soil composition and function:
- It contains a large number of remains of tree roots and grasses.
- This makes the soil rich in nutrients.
- At the same time, its moisture absorption increases and the plants are in a favorable environment.
Note. It is necessary to harvest the sod for the greenhouse in the fields and meadows. Near a swampy area, and where sedges and horsetails grow, land is not worth taking. The soil will be highly acidic.
Sod is harvested in almost the same way as humus:
- Initially, the upper layer is removed from the surface of the earth, which is penetrated by a numerous root system.
- Then on the site it is laid in stacks mixed with manure. Be sure to sprinkle with lime.
Advice. The height of such a spatula should be up to 1.5 m. All the time before use, the sod is watered with slurry and transferred. Peat will also need to be prepared.
He might be:
- Transient.
- Lowland.
Note. Experienced gardeners harvest the mixture from lowland sedge peat. Its ash content reaches 12%.
- The moisture content of peat during use should not be more than 65%.
- Dry peat crumb is never used, since it can be wetted with water of poor quality.
- The acidity of the soil should be 6.5.
Advice. The soil should be free from insects, pests and pathogens of soil diseases.
The preparation of land for greenhouses is characterized not only by mixing all the components:
- All ingredients are mixed at once in the prescribed proportions.
- The soil is then placed in the greenhouse.
Advice. If the soil is placed in the structure in advance, then it is necessary to perform a number of preparatory work before planting.
- They consist in watering the soil a few days before planting the plants.
- If the soil has not been moistened for a long time, then it would be better to fertilize it with minerals two weeks before planting.
Note. Fertilization can be done after planting the plants, when it becomes clear that they have started.
The video shows an example of preparing land in a greenhouse.
Neutralization of soil in the greenhouse or its replacement
Disinfection of the soil in the greenhouse is carried out due to two factors:
- The soil has not been used for planting for a long time.
- If it is required to grow other crops on the existing soil.
Note. You can replace the soil, but this process is long and if there is no desire to make it yourself, then the price for it is quite high.
How to disinfect soil in a greenhouse? This question worries almost everyone. Here you need to follow all the rules and regulations so that clean soil contributes to the normal growth of plants in it.
Let's take a closer look:
- If you do not change the land in the greenhouse, then every year there will be less and less minerals in it, and it will be saturated with insects that can corrode the root system from the inside.
- At the same time, the yield will be less and less.
- It is better not to bring land to the greenhouse from the garden.
- It contains a large number of harmful microorganisms.
Advice. The soil is made independently or is brought from a remote area where there is no constant cultivation of crops.
To disinfect the soil you will need:
- You can use copper sulfate. Initially, a solution is prepared.
To do this, you need a standard bucket of water (10 liters) and 1 tablespoon. copper sulfate. This solution is used to water the soil after harvesting in the greenhouse.
Note. It is necessary to handle a solution of copper sulfate extremely carefully, since it is copper, which is toxic and harmful to the human body.
- There is a special soil treatment with steam. Under influence high temperature many harmful particles die.
For this, the soil is poured with boiling water and covered with foil. On this moment this method of cleaning is considered the most economical and non-toxic. - Formalin is also widely used. It is a toxic substance. Use it ready-made.
Grooves are made in the soil and it is poured into them. The grooves are buried, and the soil does not move for 14 days. Then you need to ventilate the structure (at least 2 weeks). After that, the soil is well dug up. - Sulfuric checker is well used by gardeners. It is installed in the structure and set on fire for an hour. The greenhouse is ventilated within 10-14 days after that.
- Bleach can also rid the greenhouse of pests. It is sprinkled on the soil, as it goes dry.
Advice. It is not enough to disinfect the soil in the greenhouse. It is necessary to disinfect the entire structure.
This will require:
- Wash windows and doors well.
- Dilute potassium permanganate and wipe all surfaces with a solution.
- If there is no desire to disinfect the soil, then the land is replaced in the greenhouse.
- For this, the soil is completely pulled out.
- A new soil is being superimposed in its place.
Advice. Before placing new soil, the greenhouse structure is deactivated by special means.
Heating the soil in the greenhouse
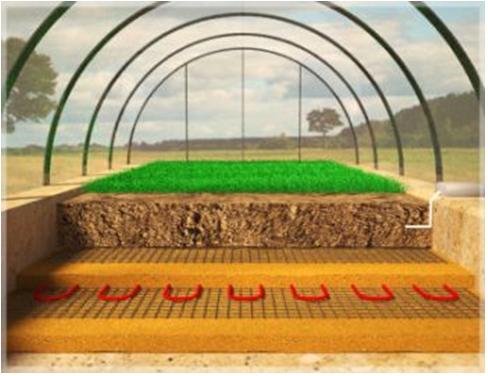
At the moment, everyone is trying to heat only the structure of the greenhouse or greenhouse, forgetting that heating the ground in a greenhouse can give a greater result.
More details:
- Heating the ground in the greenhouse increases the temperature regime inside the soil.
- Thanks to this, the maturation of the root system occurs more quickly.
- From this, the yield increases.
- A favorable microclimate is created inside the structure.
For this, special electrical plates are used, which are placed under the main soil:
- They are included from the control panel or automatically.
- It is possible to adjust the heat supply power.
- They do not light up in the event of a short circuit in the wiring, as they are underground.
- Will not harm the crops grown.
It is worth considering that it is important not only to make high-quality soil for the greenhouse. I need more for him proper carewhich will increase yields.
Recommendations:
- It is necessary to carry out regular watering, which will protect the soil from drying out.
- Mineral fertilizers are also applied, which enrich the soil with nutrients.
- A favorable microclimate should be created inside the greenhouse.
Note. If all the conditions for keeping plants are violated, then mold may appear on the ground in the greenhouse.
This is due to excessive moisture inside the structure.
Not only does the earth turn white:
- In some cases, it turns green.
- And that, and that type of fungal disease is not only dangerous for plants, but also for humans.
- Getting rid of this type of mold is quite difficult.
It is best not to overdo it with irrigation and regularly ventilate the greenhouse so that it constantly has a constant temperature regime.
parnik-teplitsa.ru


