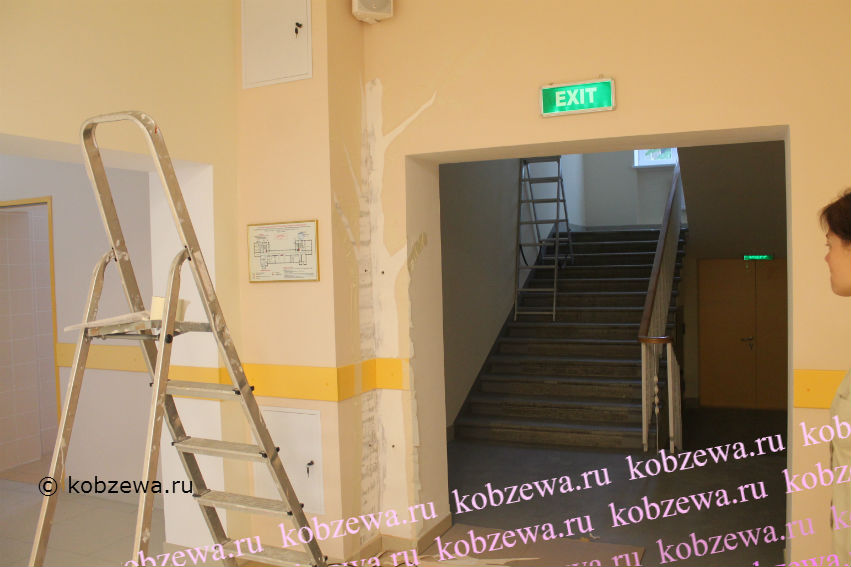
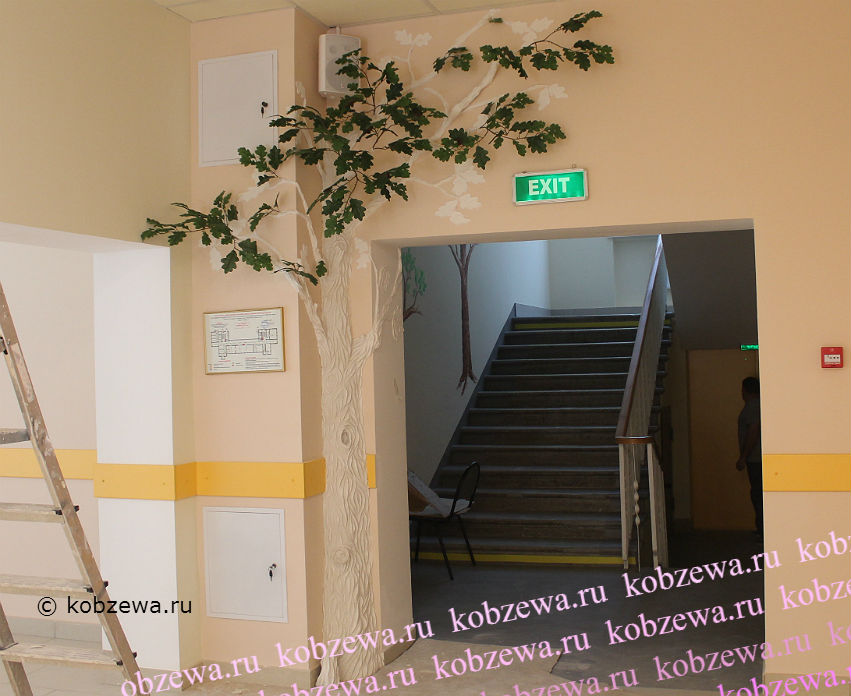
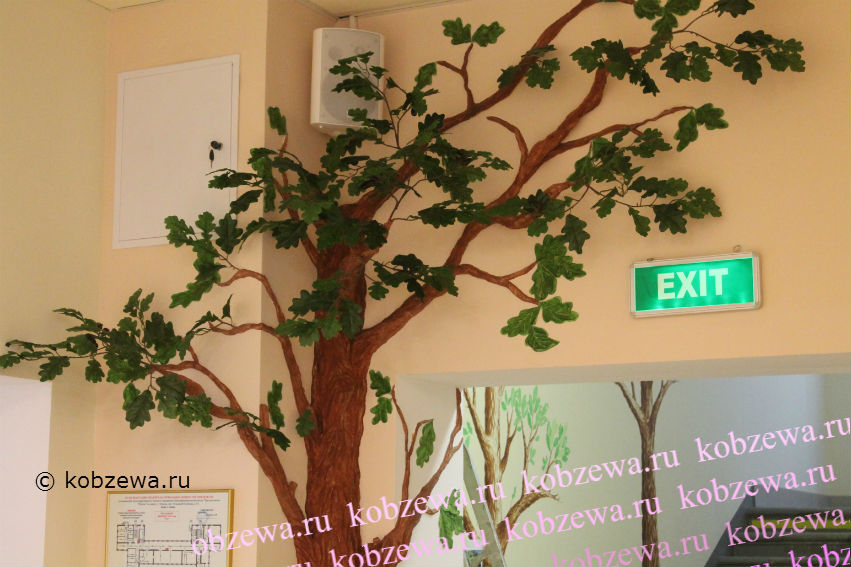
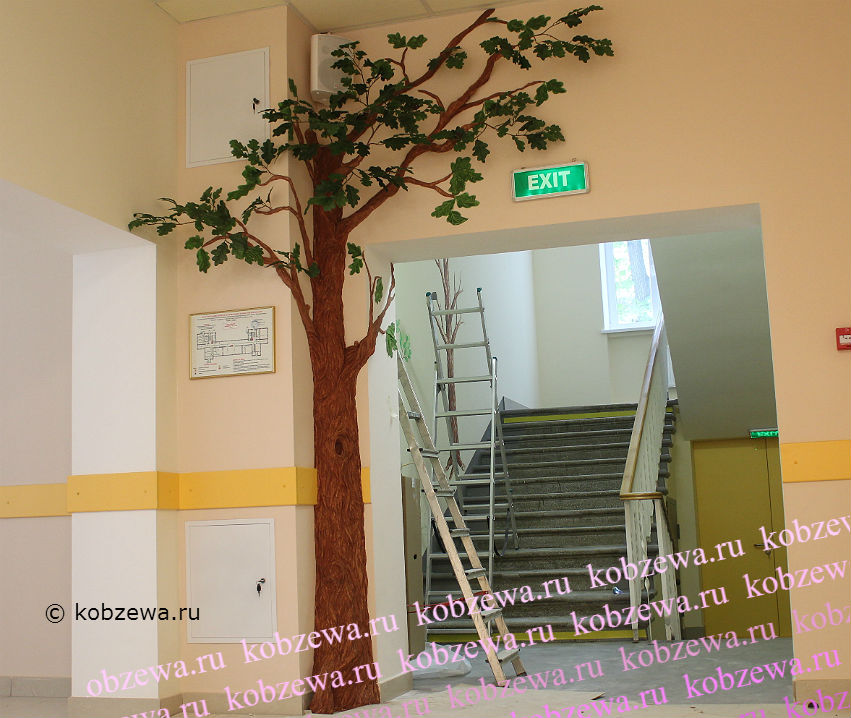
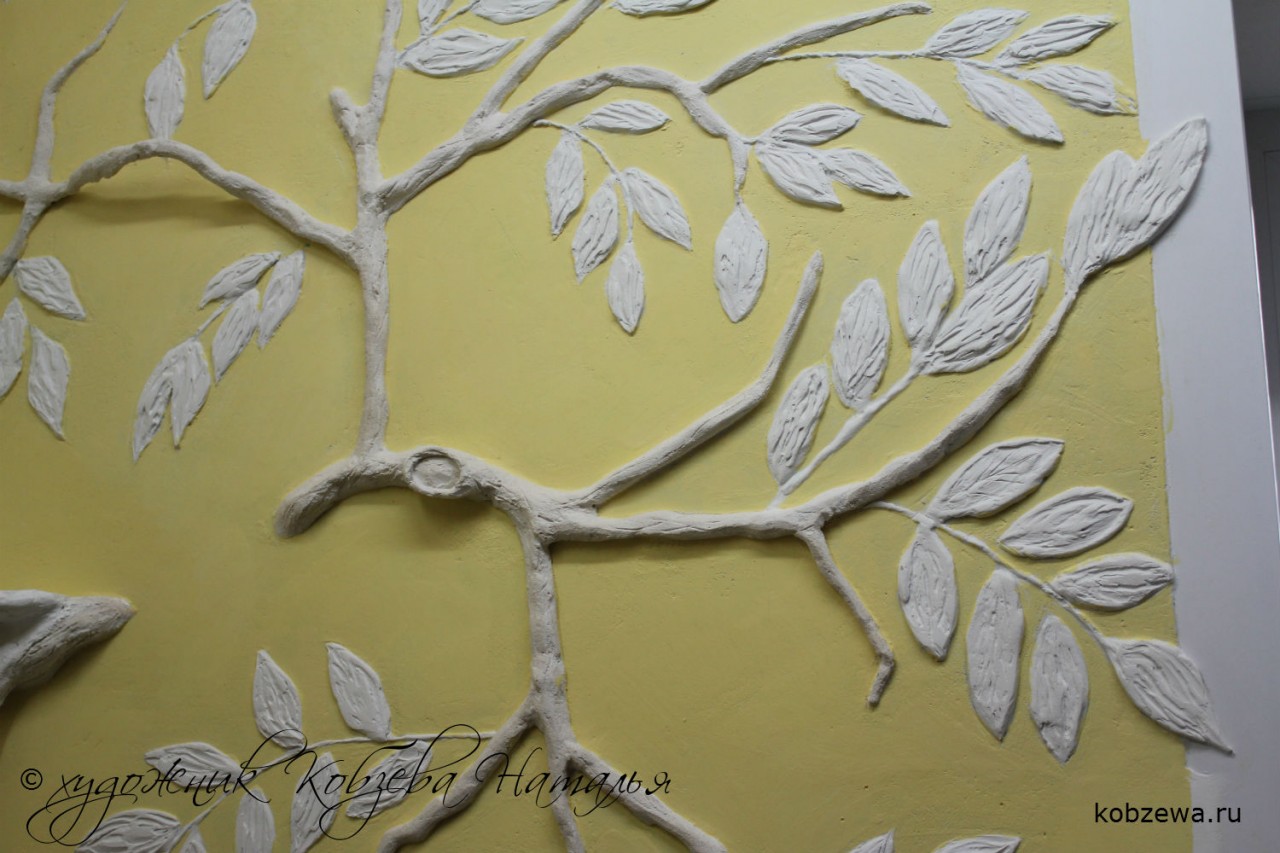
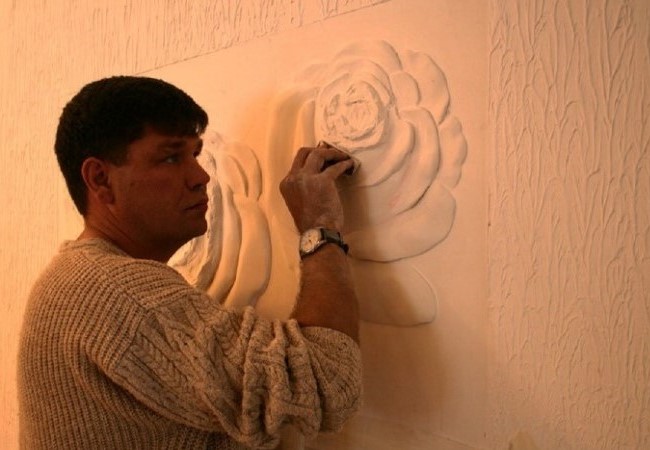
A bas-relief at a school in Moscow, June 2015. Not only living rooms, hallways and bedrooms of private houses and apartments can be decorated with wall plaster molding, but public institutions, such as a school, can also be decorated with a bas-relief. In this work, I sculpted an artificial wood from plaster in the foyer of a private school. The difficulty of the work was that it was necessary to create the illusion of a real oak tree, branches with foliage should hang over the trunk, and the trunk itself should be as similar as possible to a real tree.
For work I used gypsum plaster, gypsum plaster, serpyanka mesh, dowel nails, bandages, wire and sandpaper. All of these materials are needed to create a strong trunk, curved branches. Since the tree was located in the school foyer, it should be fixed to the wall as firmly as possible so that children do not accidentally break any part of it.
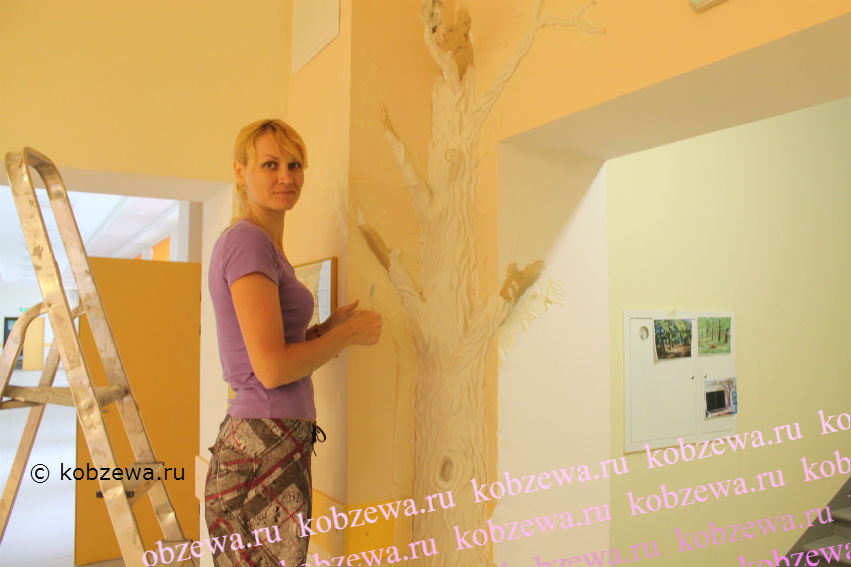
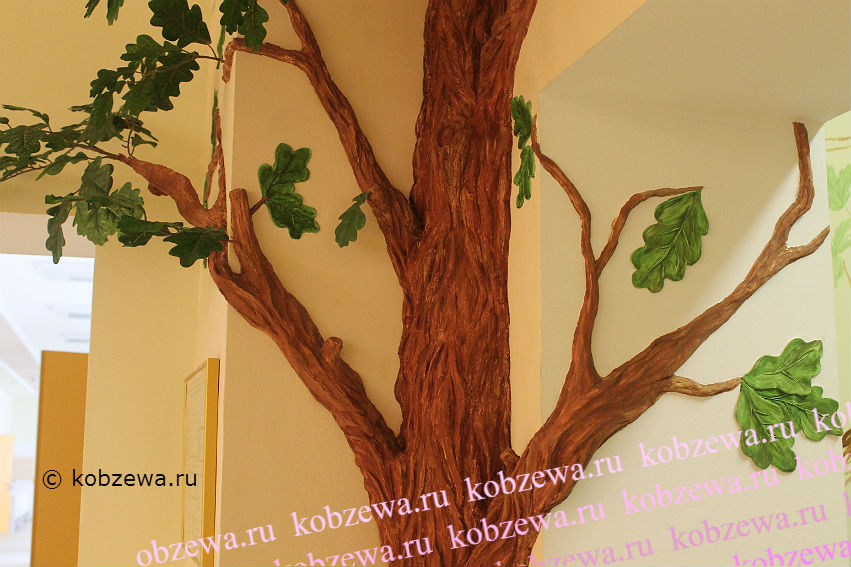
The wall was painted in advance, so I removed the top layer of plaster along with the paint with a spatula, and pasted over the edges with masking tape, so that later there would be less work to clean the stained wall. I drilled holes along the perimeter of the barrel, drove in dowel nails and pulled a serpentine over them. Then, by throwing it over, I applied a thick layer of plaster. Then again a layer of serpyanka and again a layer of plaster. This process continued until the barrel became of the required thickness. With wet hands, I smoothed the plaster layer and let it dry. The bark relief of an artificial oak tree was created with the help of a softer mixture - a finishing putty, since it is easy to sand and is more plastic.
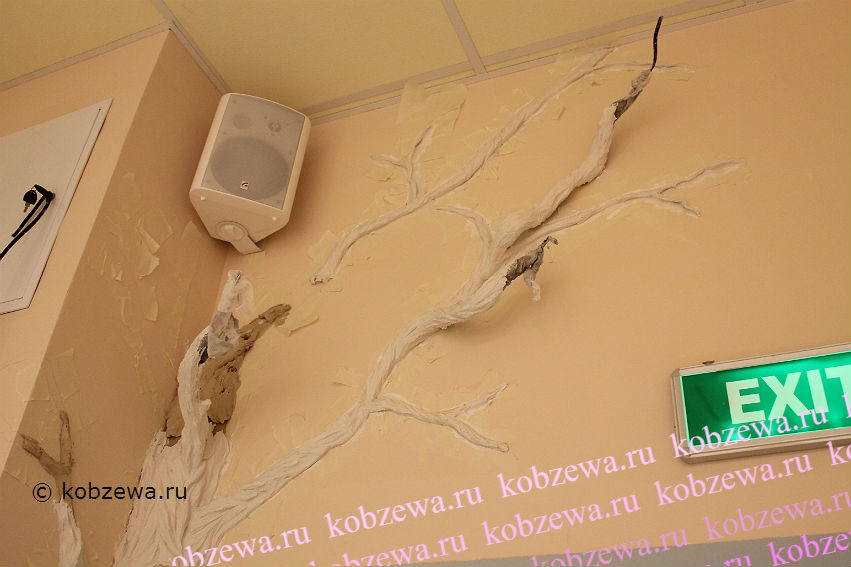
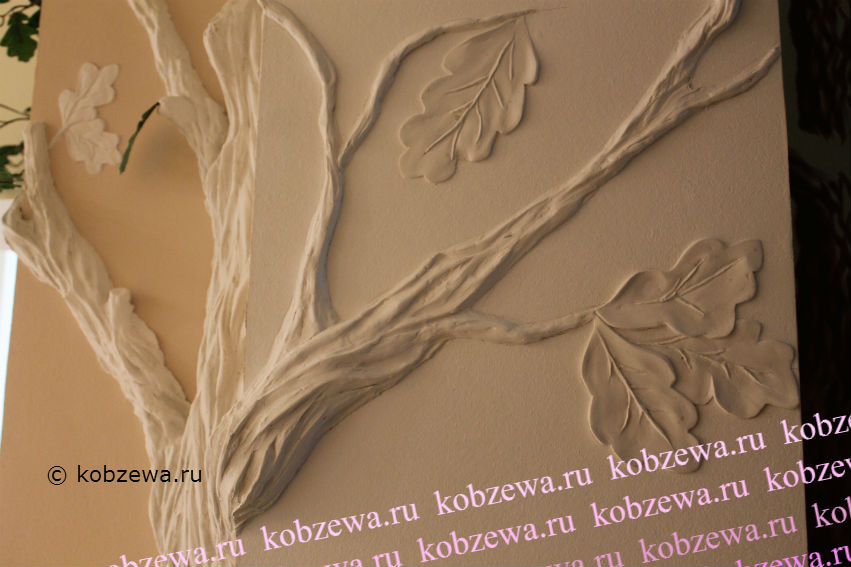
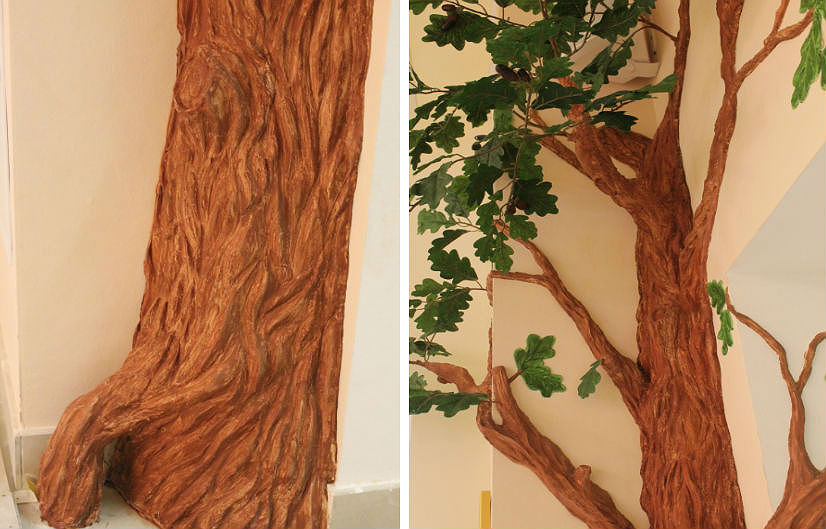
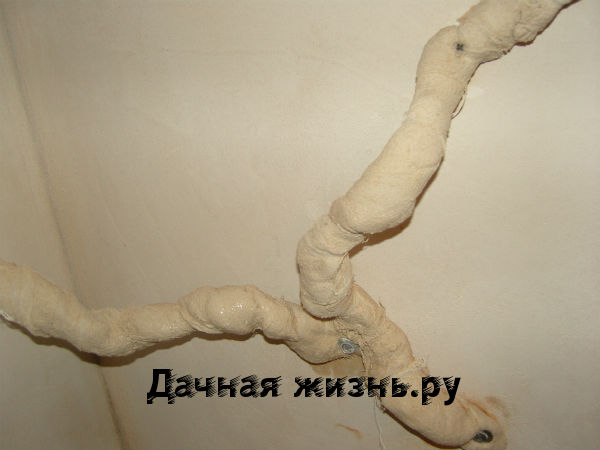
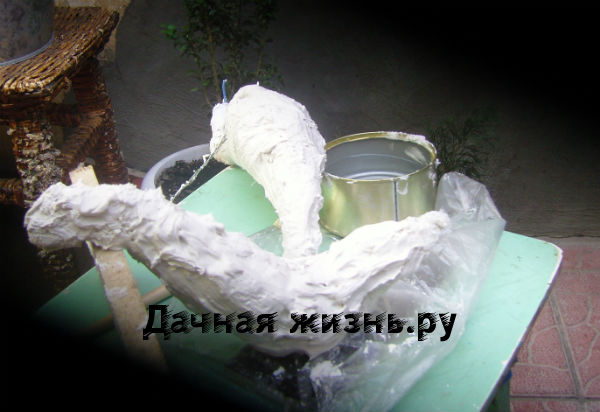
The branches were made in advance on the floor using wire, bandages and plaster. She bent the necessary piece of wire in the right direction, wrapped it with a bandage along with the plaster. I tightened everything and left it to dry completely. And only after drying, she fastened the branches to the base on wire, plaster and bandages. The finishing layer of the bark was finalized with putty, and the leaves were sculpted with it as well.
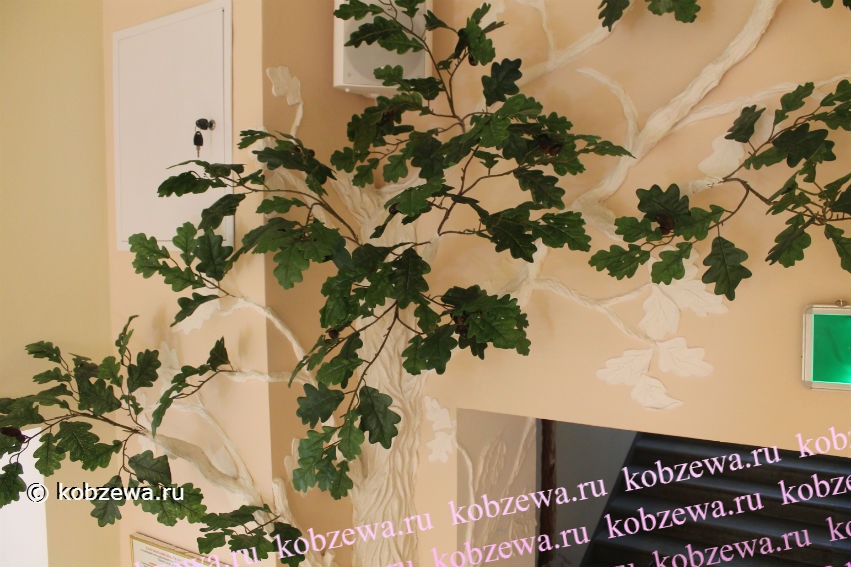
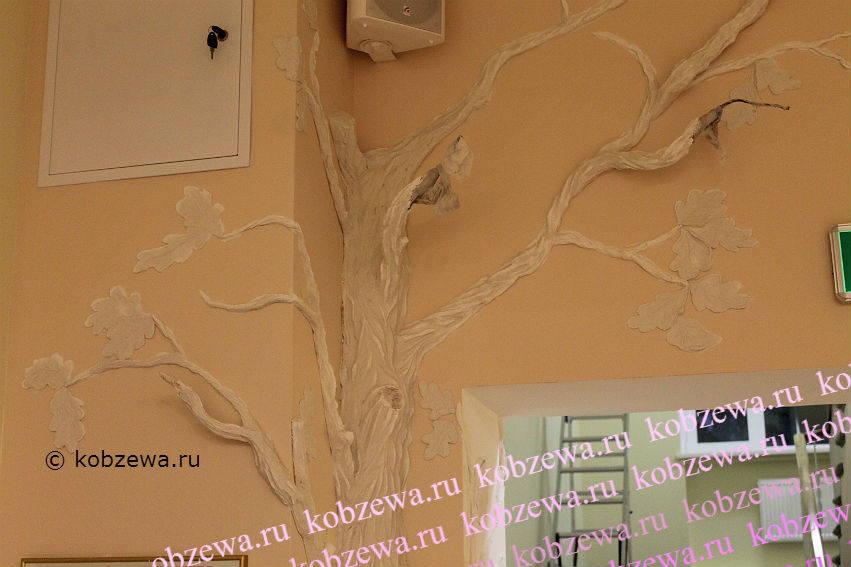
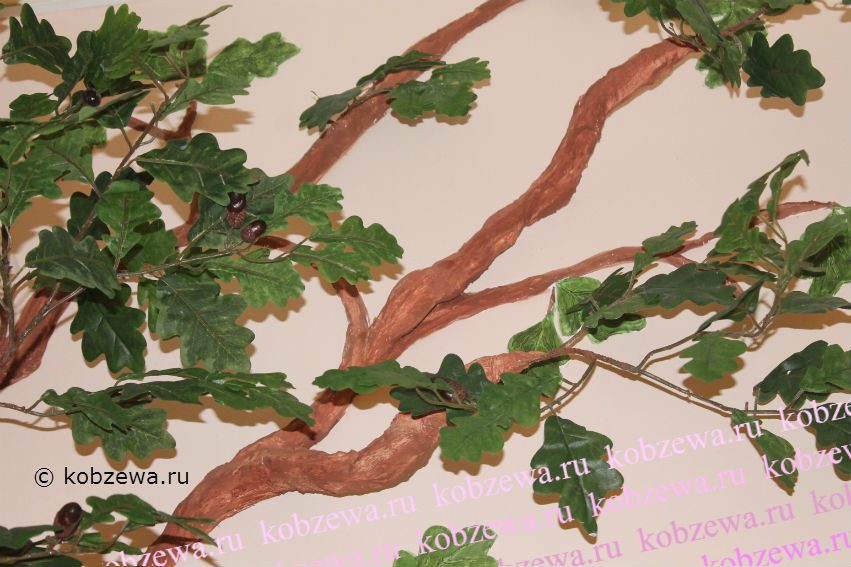
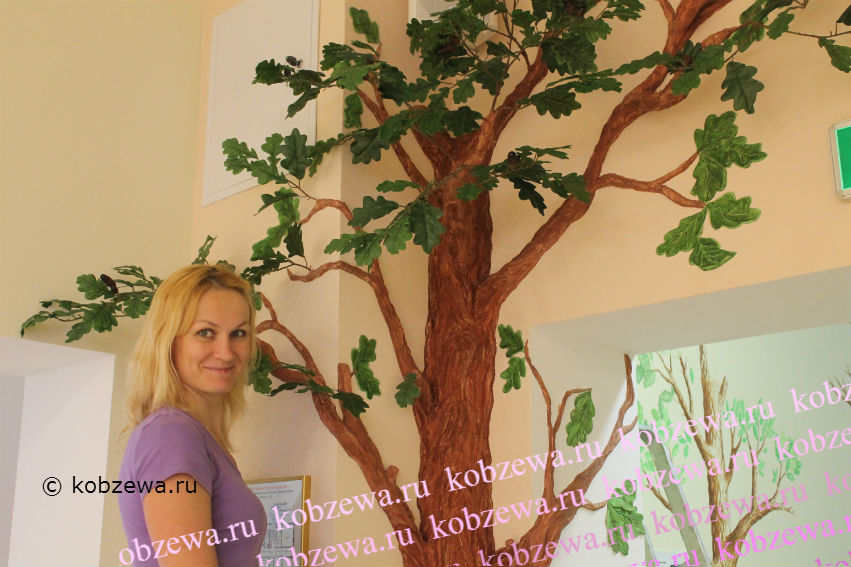
To create the look of a real tree, I used artificial oak branches with green leaves and acorns as overhanging foliage. They were attached to dried, attached thick branches using wire, and the joints were plastered with putty. Here is such an artificial oak tree made of gypsum mixtures I got.
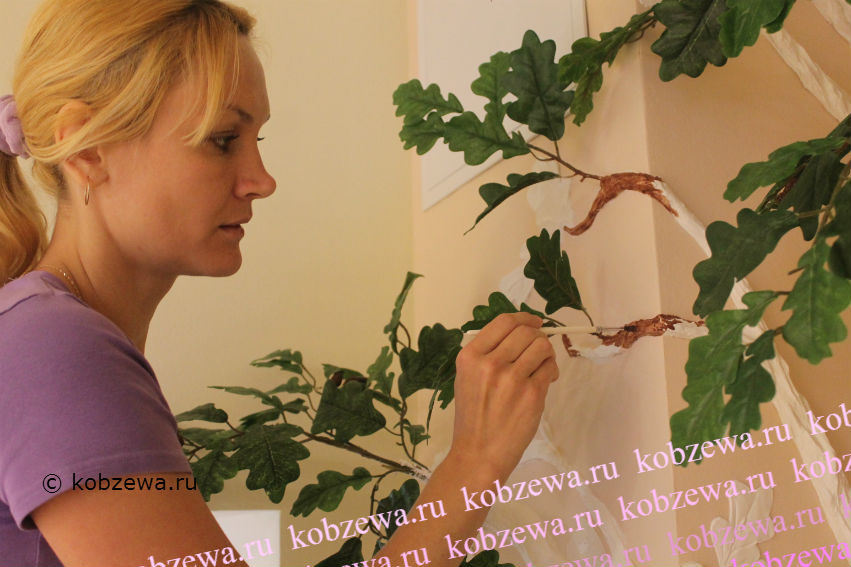
Next came the painting process. It was very important to choose the exact shade of the leaves so that they look the same as the artificial ones. To do this, I took acrylic paints (they are more saturated), diluted in the right proportion, and painted the bas-relief. This is how you can make an artificial plaster tree on the wall with your own hands using the simplest materials.
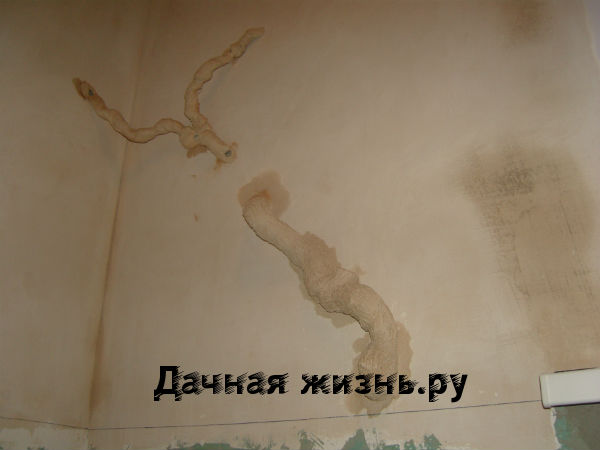
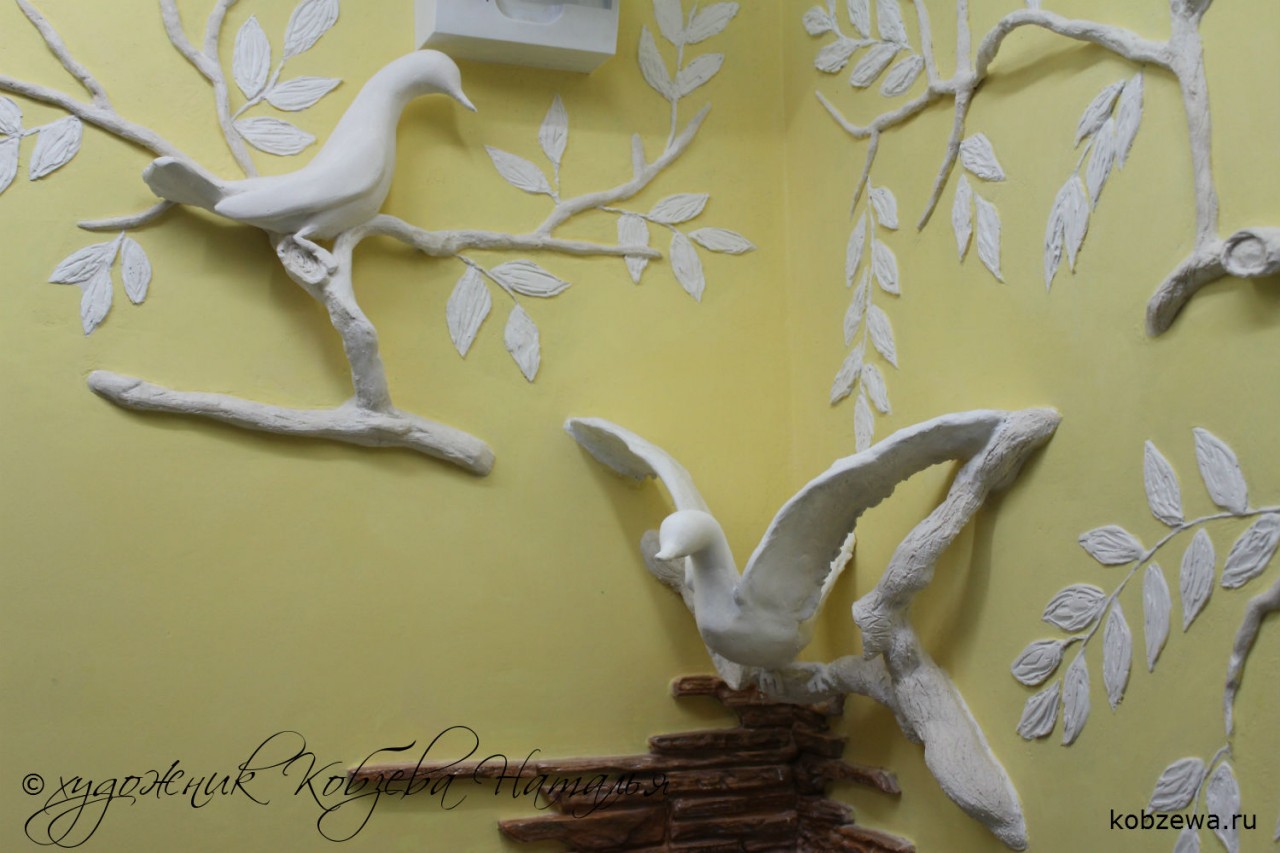
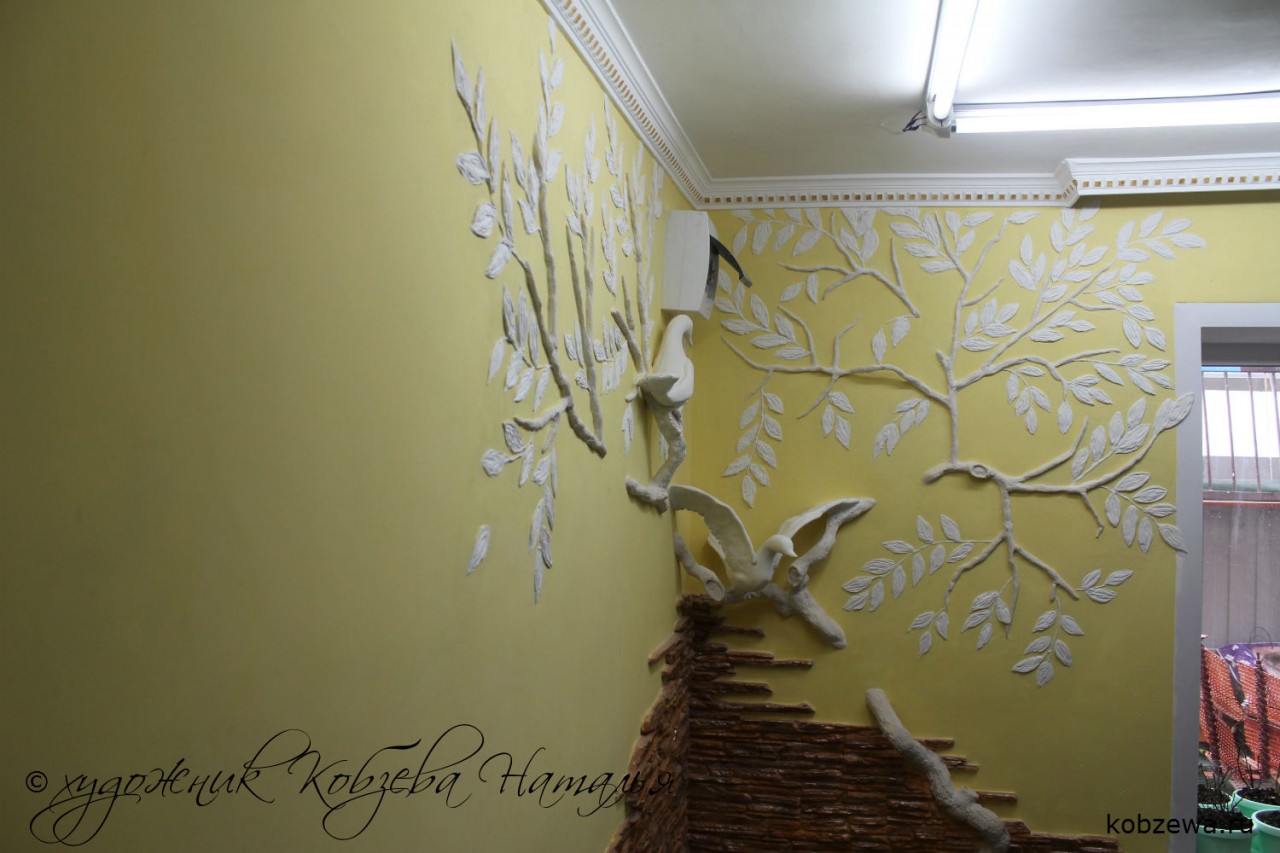
Recently, the technique of bas-relief on the walls has become so popular that I decided to try myself as a gypsum artist and make a bas-relief in the children's room with my own hands, especially since it was high time for my kids to do repairs. I was simply fascinated by the plaster trees, as it were, growing from the walls, so I had no problems choosing a theme for the drawing. It was decided to make a tree, and a couple of birds on the tree. So, I present my master class on bas-relief to your attention.
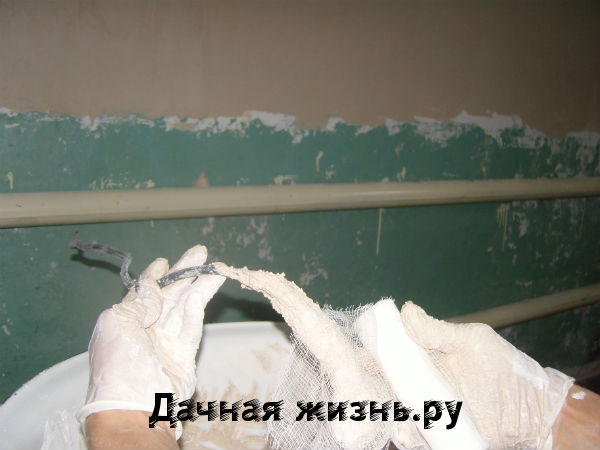
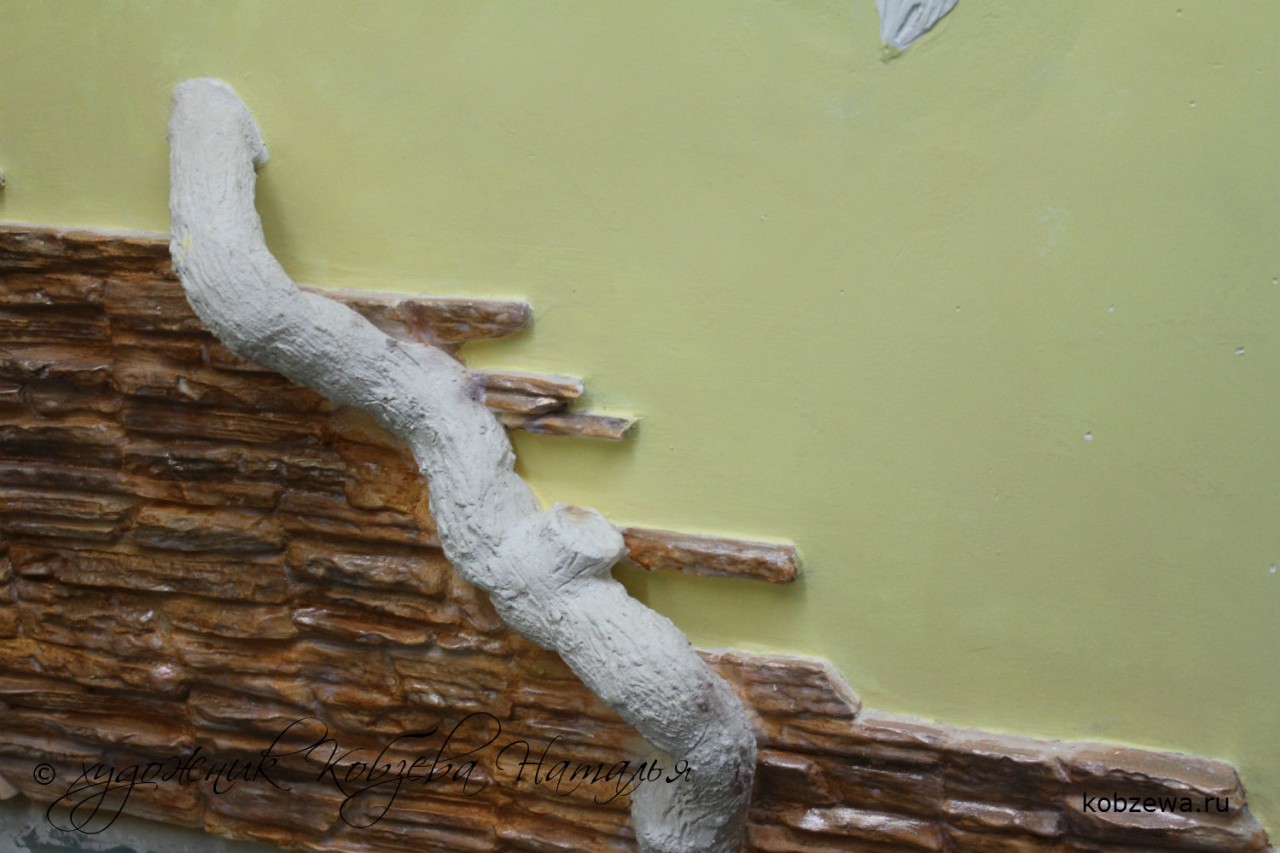
To begin with, I leveled the walls with gypsum plaster, rubbed them to a perfectly even state. I did not go through the primer - I decided to prime it before painting the finished bas-relief. I wanted to create such a tree so that its bark, twigs, leaves were as similar to real ones as possible, so I used thick, well-bending wire and gauze (bandage) as a frame. First, I bent the wire in such a position, in which the tree trunk would look later, then with my hands I stuck several handfuls of directed, very thick plaster (I added a drop of brown color to it) and wrapped it all with a bandage. The result is a curved gauze sausage.
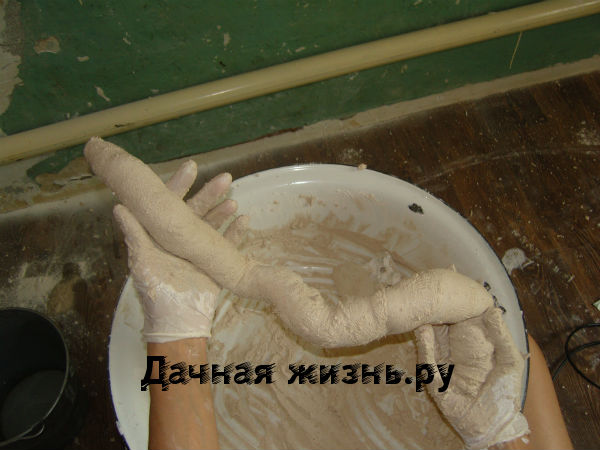
By the way, I added the plaster color scheme before making the tree trunk in order to make the bas-relief on the wall as natural as possible. The leaves were going to be sculpted from ordinary white gypsum, and added color to the plaster for the trunk. In the future, when the entire bas-relief is covered with paint, and the leaves and branches will be rubbed with sandpaper, and the difference in shades of foliage and bark will be noticeably excellent.
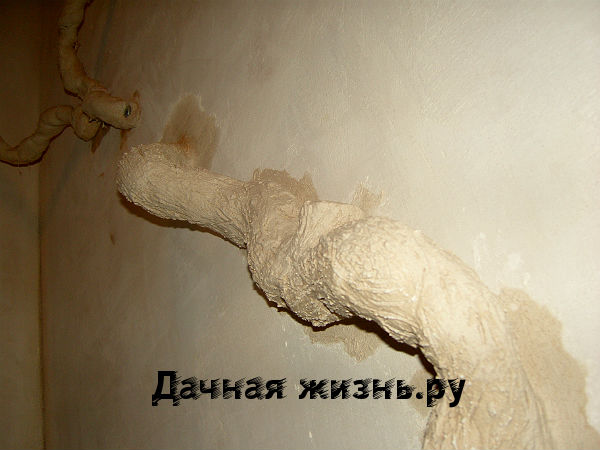
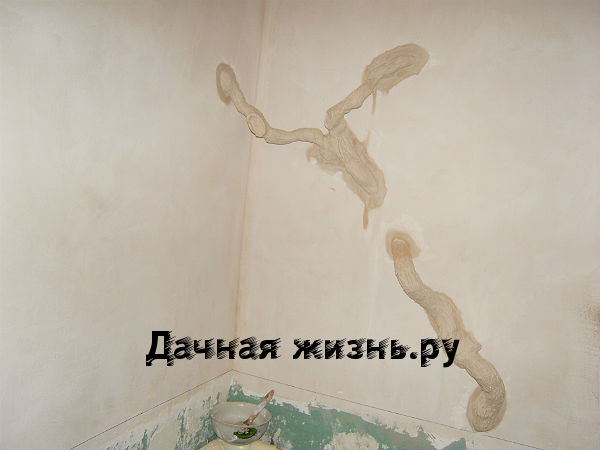
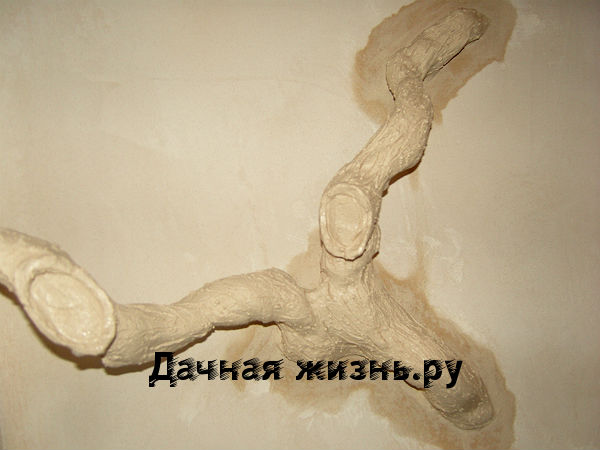
Further, in the place where the tree trunk will be located on the wall, I drilled three holes, drove in dowels and screwed the workpiece onto the wall with self-tapping screws. It is necessary to attach a wet workpiece, since when it dries, it is very problematic to fix it on the wall, and the wet workpiece can be turned as needed and tightened. Also, if, when screwing, the wire is bent not as it was, it can be immediately bent into place. In general, after fastening the workpiece, I applied a thick layer of gypsum plaster to it and, using a spatula, a teaspoon and a thin knife, drew notches on the bark, saw cut on a branch. It turned out so naturally that I myself did not expect it. This inspired me, and the work flowed further faster!

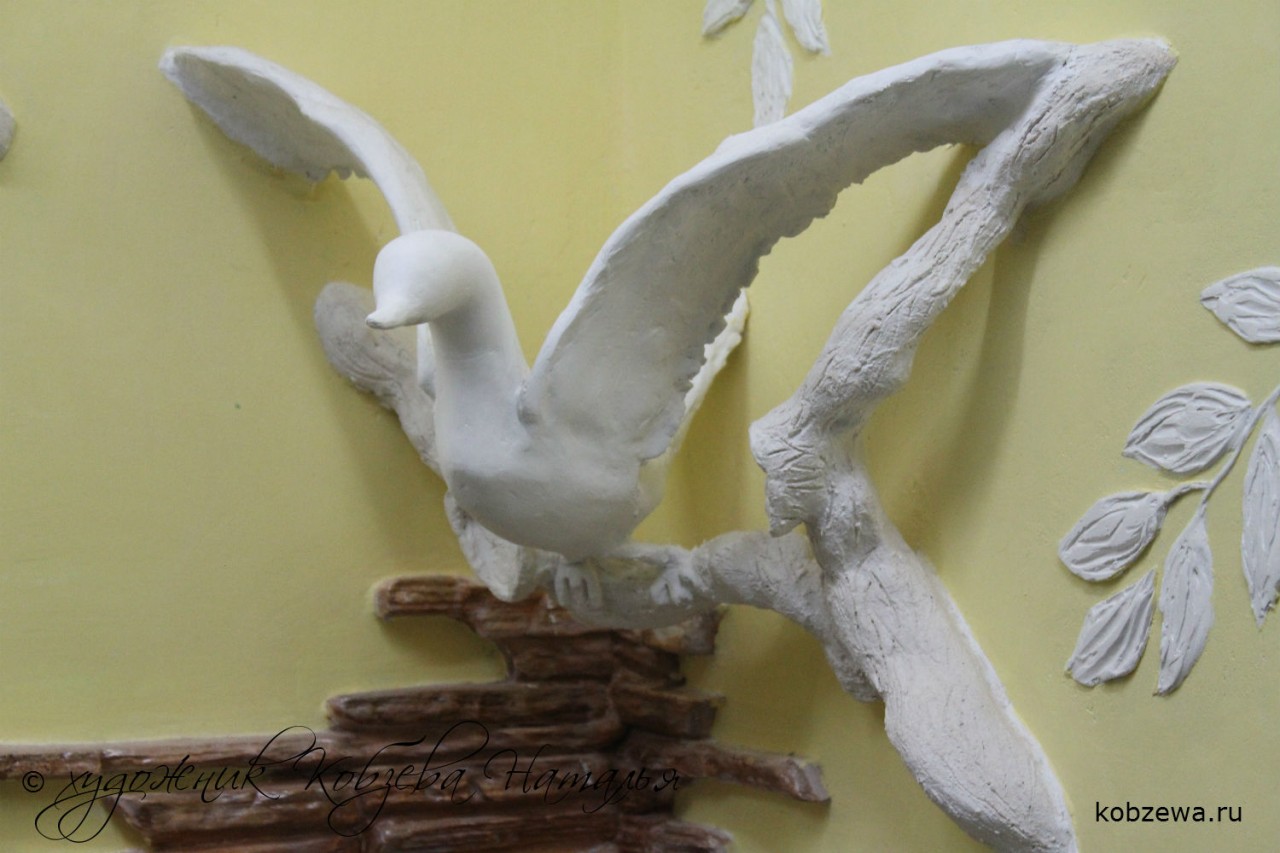
At the corner of the wall, a bird was supposed to sit on a branch and take off. Therefore, I made a second wood frame from wire, again stuck gypsum and wound a bit, attached it in a similar way (self-tapping screws). Again, she applied gypsum over the entire surface of the workpiece and formed a bas-relief of a tree trunk, which was sunk into the wall. I already drew thinner branches directly on the wall with plaster, helping myself with a spoon, a spatula and a knife, removing all unnecessary.

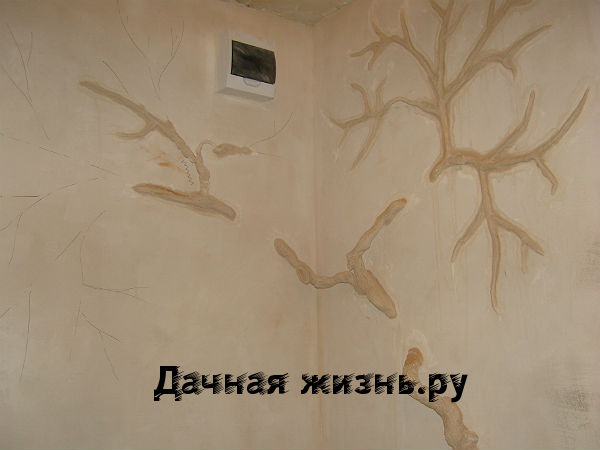
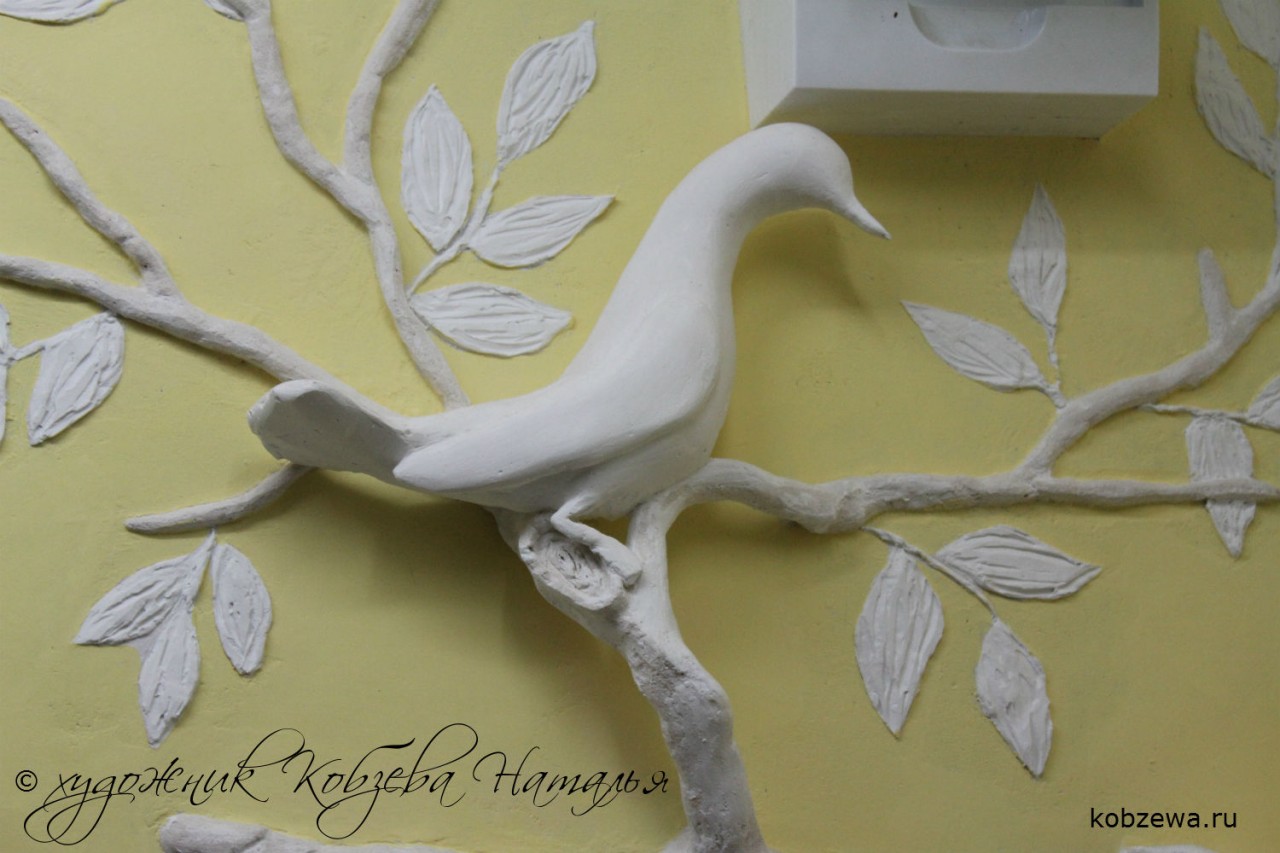
When the central trunk with branches was ready, I drew the leaves with a pencil on the wall, aligned their edges with a knife and a spatula, and removed the excess plaster. The tree on the wall turned out to be very good, but the next task for me was: how to mold birds from plaster. And not just sitting on a branch, but with open wings, about to take off, as it were. It was decided to use small pieces of fine mesh for the wings and, again, wire and bandage for the bird's body, to make the bas-relief birds.
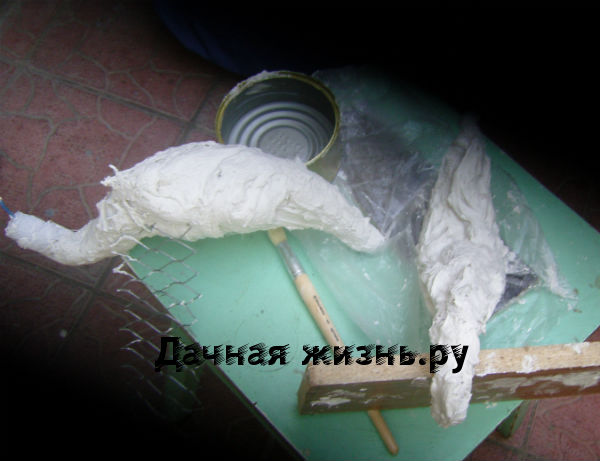
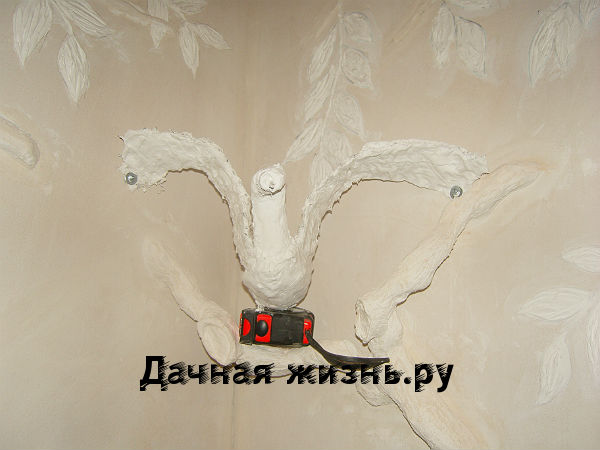
First, I formed the body of the bird, when the workpiece was slightly dry, I attached pieces of mesh on the sides to plaster. During the day, the bird dried up, and then I planted it neatly on a bas-relief branch. She attached the wings to the wall with self-tapping screws, and so that she would not settle under her weight until she dried out, she put a tape measure under her stomach.
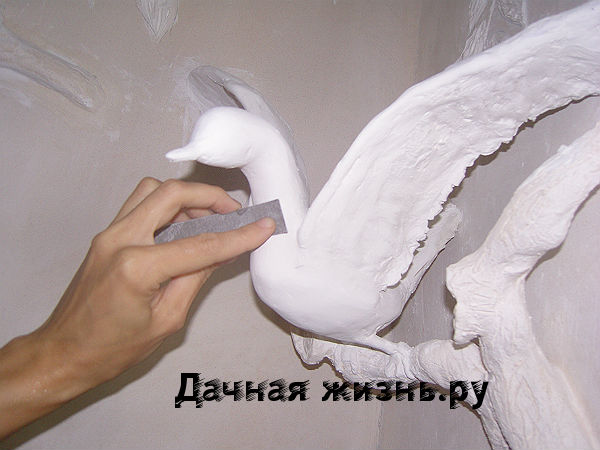
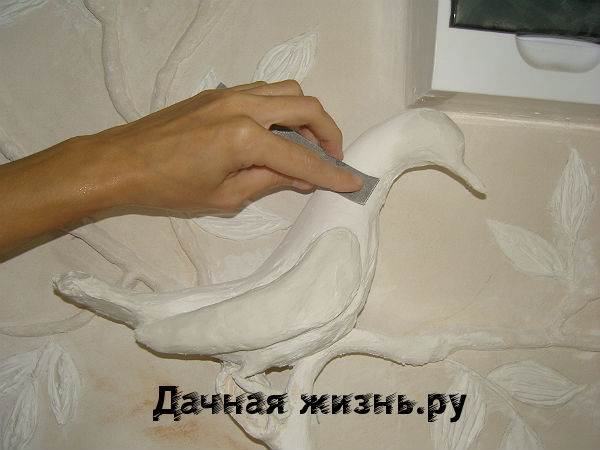
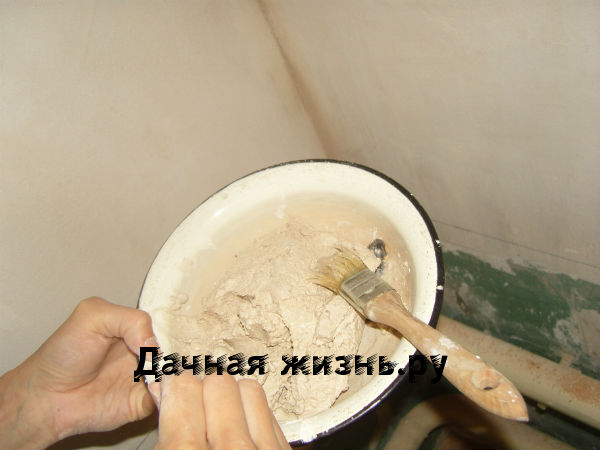
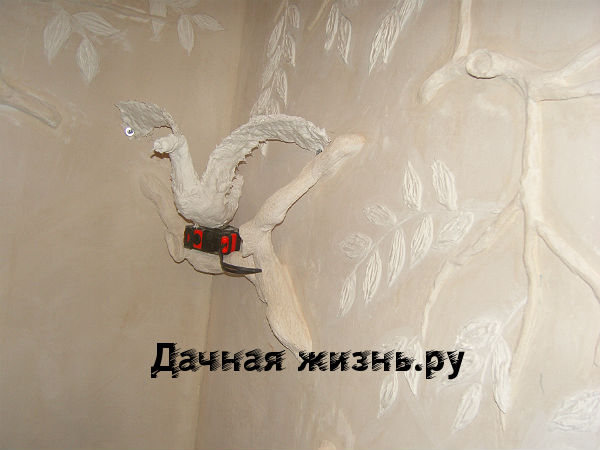
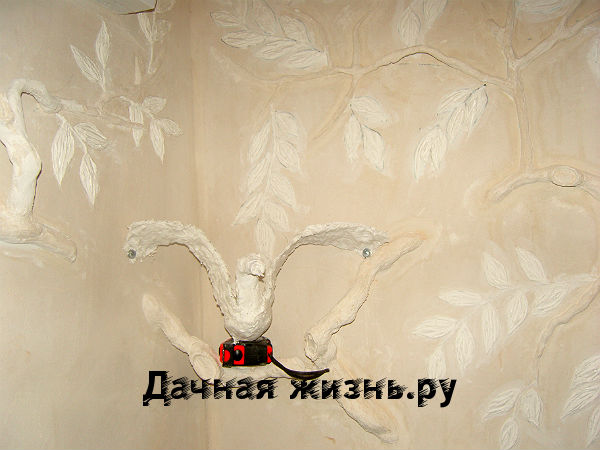
After the plaster was completely dry, I started shaping the legs and the rest of her body. When creating the head, beak and other small details of the bas-relief, I used it for better work and the precision of a regular paint brush. She applied gypsum, leveled it with it, wetting it in water. She rubbed the finished bird to smoothness with zero-grade sandpaper - and voila! The bird spread its wings and seemed to be about to fly away, only the wall holds it by its wings. Sorry, in the photo of making a bird, plaster got on the camera lens, so the photos are a little darkened. I made the second bird according to the same principle, with the only difference that the second bird simply sat on a branch without open wings.
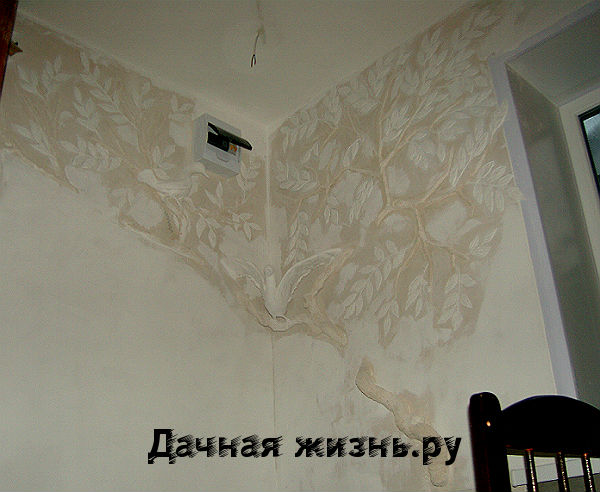
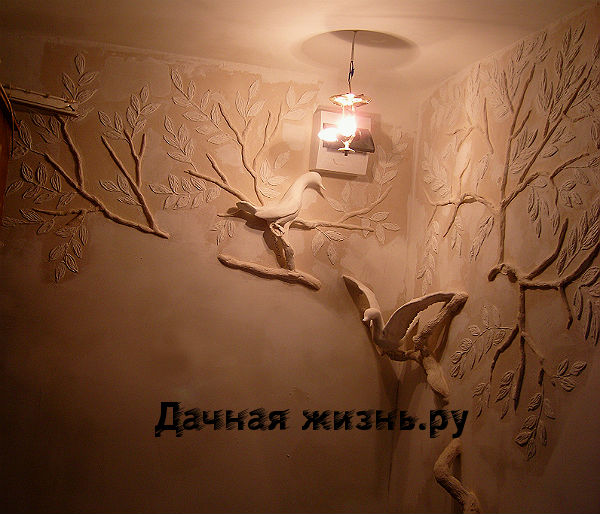
This was followed by the monotonous work of sandpapering all unnecessary plaster strokes, removing unnecessary elements and conducting light to the bas-relief. But in the end it turned out in the finished plaster version of this do-it-yourself bas-relief.

Most of the owners of apartments and private houses dream of ensuring that their home reflects the individuality of the owner, so that it has a different design, as they say, “with a twist”. But for this you can simply create a bas-relief on the wall. Such a solution will absolutely transform the room, bring something new into it.
Attention! A competition with prizes is being held on the site for the first time !!! Don't put off until tomorrow what might bring you a prize!
We also offer you to take part in the quest quiz. The questions are simple and the prizes are nice. Try it and see for yourself. First question
What can be the bas-relief on the wall?
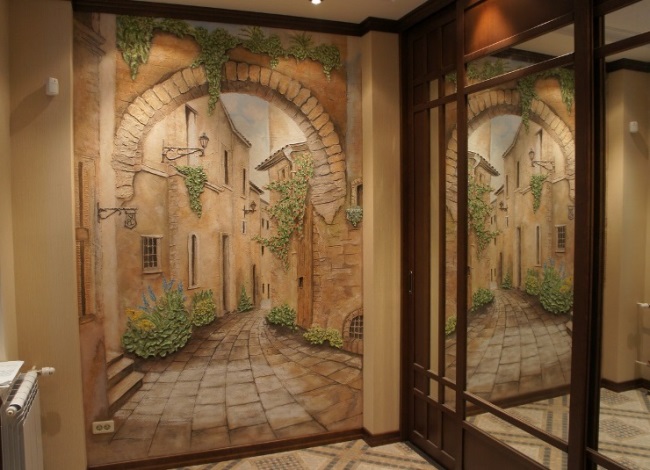
As they say, they don't argue with tastes. Depending on the design decision, the bas-relief on the wall can be very simple. For example, baguettes of paintings of different sizes look respectable.
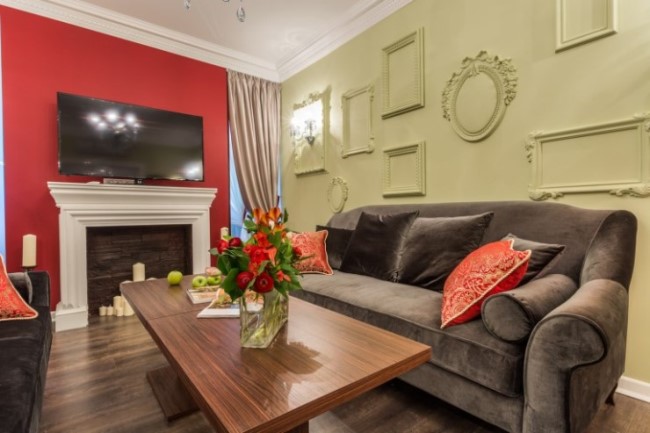
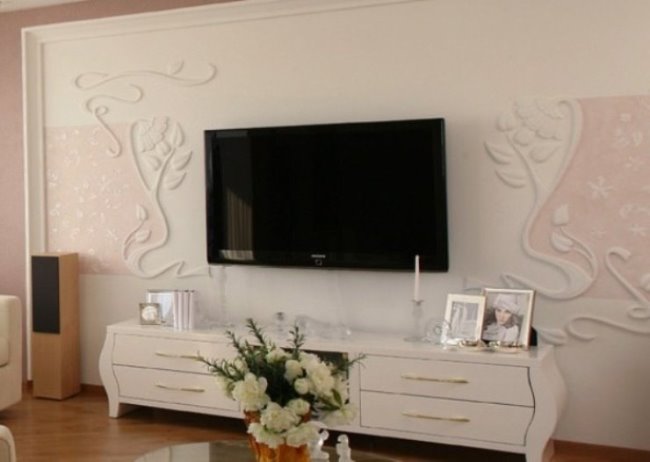
Modest luxury exudes from the bas-reliefs, which are located on the panels, launched in the form of edging at the top of the wall.

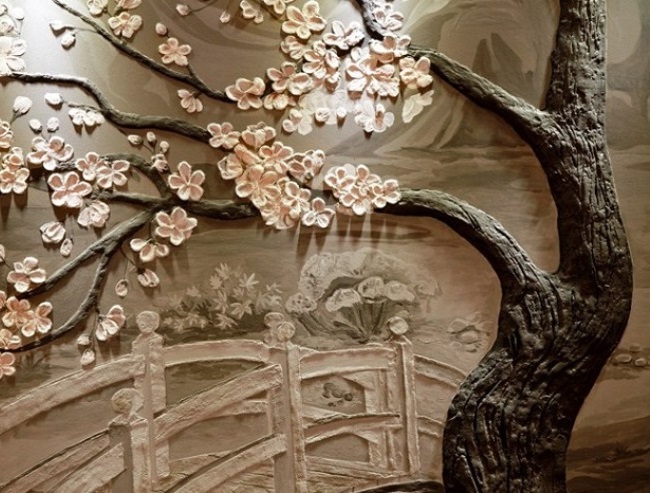
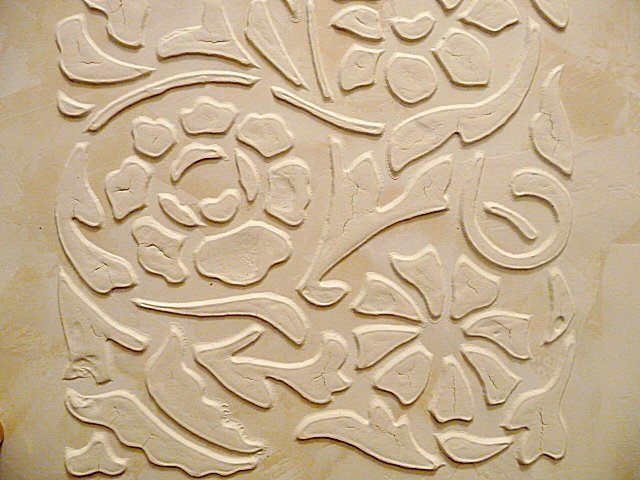
Some are inclined to decorate the wall with a floral bas-relief.
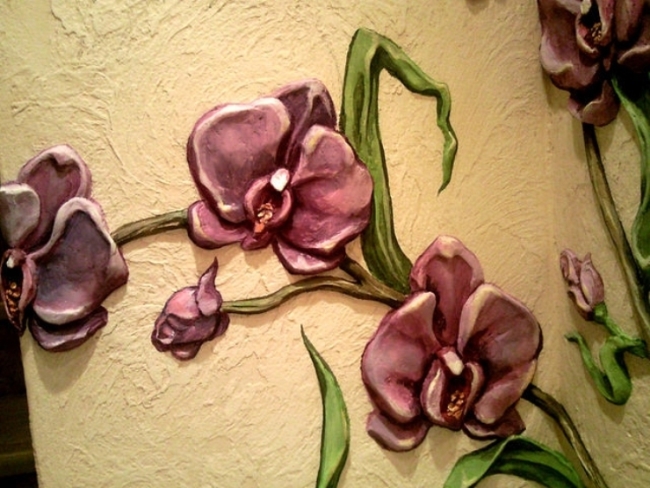
Such decorations look luxurious in combination with lighting.
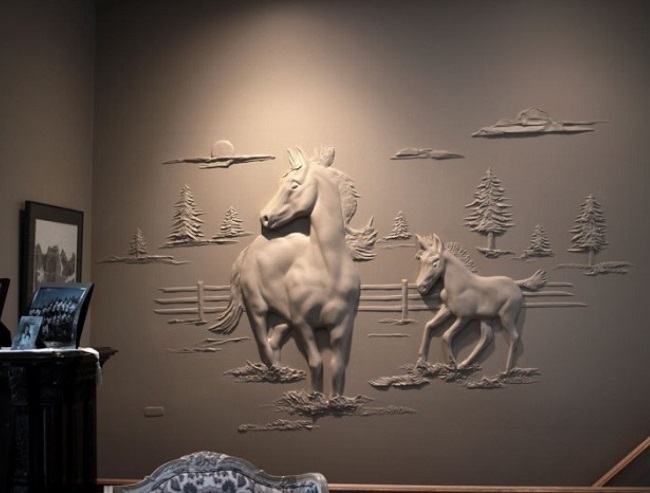
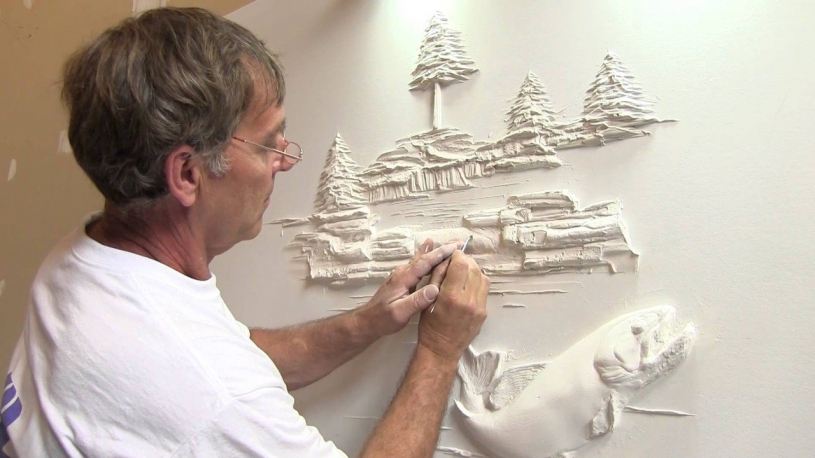
The originality of the room will be given by a bas-relief on the wall, made with your own hands in the form of a corner of nature: a tree trunk, part of a rock, a park, a shore of a reservoir.
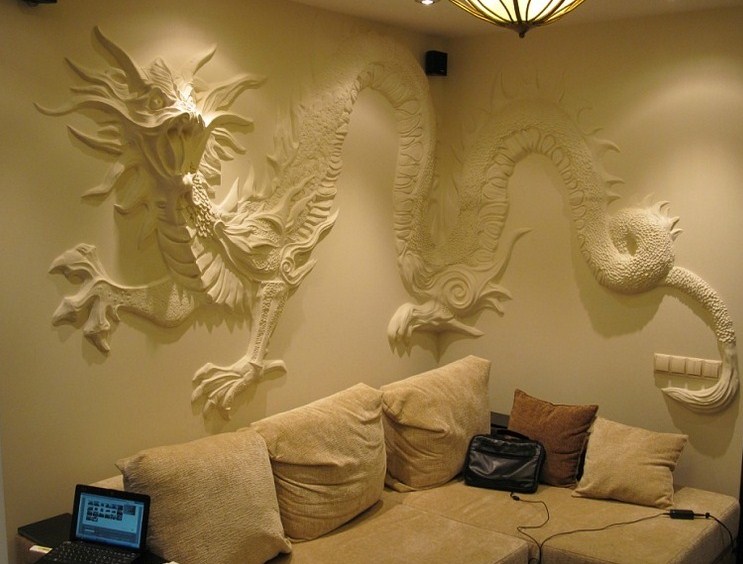
The most difficult are three-dimensional plot paintings.
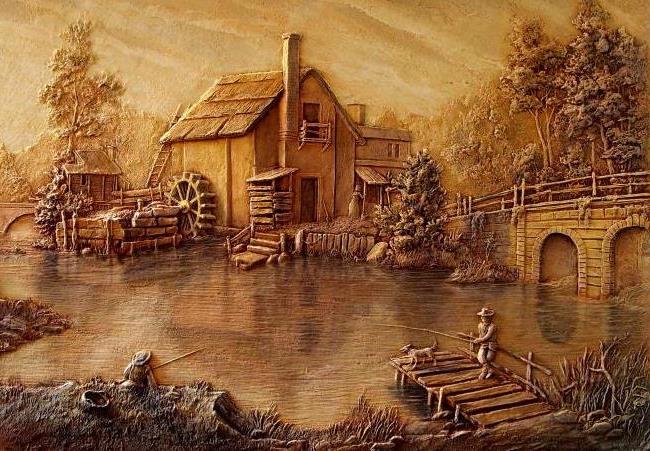
They usually occupy either the entire wall or a corner in the room.
What if it doesn't work?
Many creative people begin to tingle in their hands when they see a bas-relief on the wall in front of them, captured in the photo. But starting to realize desires is hindered by fear: what if nothing happens? It will work, it will definitely work! And the master class offered here will help in implementing the creator's plan. Following step by step instructionsapplying diligence, even one who does not have the skills in sculptural modeling will be able to cope with the goal.
There are options when a bas-relief on the wall is immediately performed. With his own hands, in this case, the master sculpts a sculptural picture from a plaster mixture, checking his creation against a sketch. However, this method is more suitable experienced craftsmen their business. For those who are only taking their first steps in this field, you should not immediately take on monumental work. And it can be quite difficult to correct mistakes in this case.
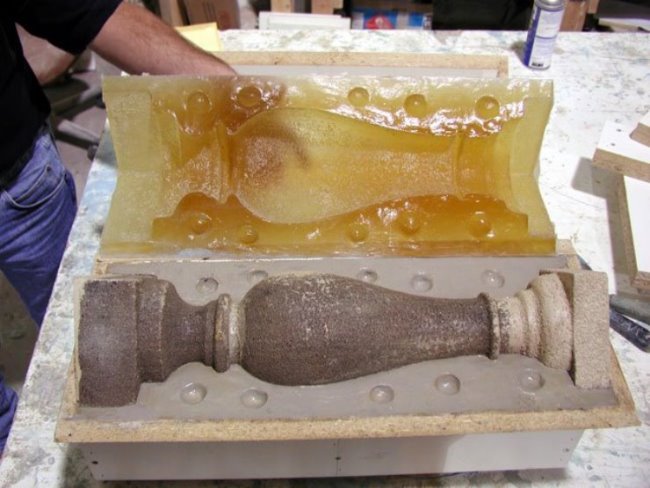
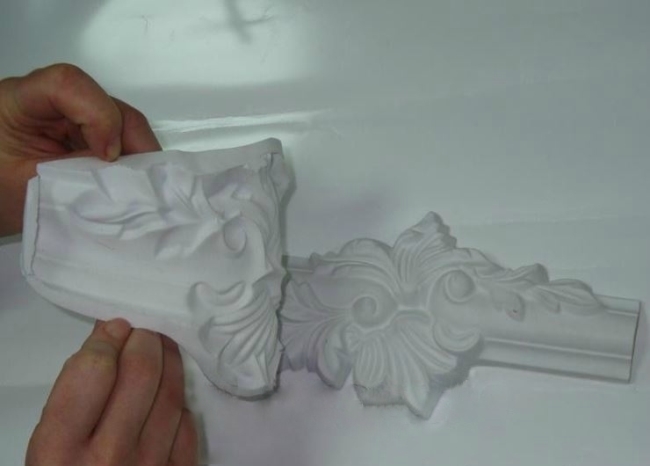
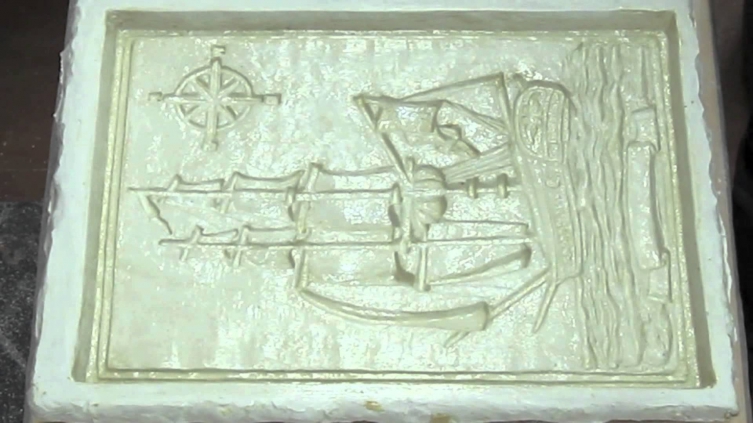
Consider the option when the bas-relief on the wall is first made separately by casting in molds, and then it is already attached ready-made. In this case, you must first prepare the silicone mold for casting the parts. And the first step will be just a master class for making molds for casting plaster parts for a bas-relief. With their help, you can create an imitation of ancient stucco molding, baguettes of paintings, ornaments.
Workshop for making molds for casting plaster parts for a bas-relief
Silicone molds are considered the best. For their manufacture, you can use several options.
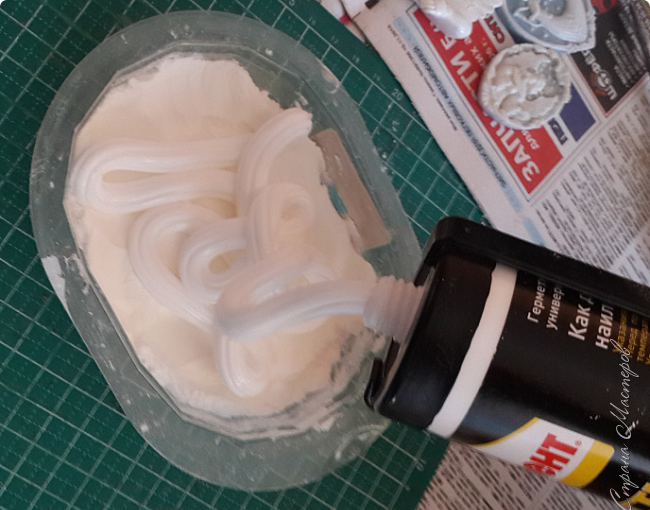
Silicone sealant
In this case, simply cover the multiplied sample with a mass from a tube, having previously lubricated it with soapy water or fat. Sometimes a mold is required to cast not a whole object, but only a part of it. Then the unnecessary part is sunk in clay, plasticine, salt dough - in a material that can then be easily removed without spoiling the object.
First, a layer is applied to the sample, carefully working out the small details. Then let the structure dry well and cover it with a second even layer. The mold is then carefully removed from the sample.
However, as a result of these manipulations, a very fragile product is obtained. Such forms can rarely be used more than 2 times.
Silicone with filler
Therefore, experts advise making the so-called dough from one part of starch or talc and the same amount of sealant.
Filler is poured onto the board with a slide. A certain amount of sealant is poured into the middle of it and kneaded thoroughly in the same way as ordinary dough is made. You can use a container and make mass in it.
To make a mold, the sample is pressed into a piece of silicone mass. Before use, the sample is smeared with soapy water or grease.

Using such a mixture, the sample is tightly covered with it, trying to prevent air bubbles and voids. The structure is dried for about a day.
Silicone Compounds
Taking, for example, "Silagerm-7000", the master, according to the instructions attached to it, will easily prepare the material for making the mold.
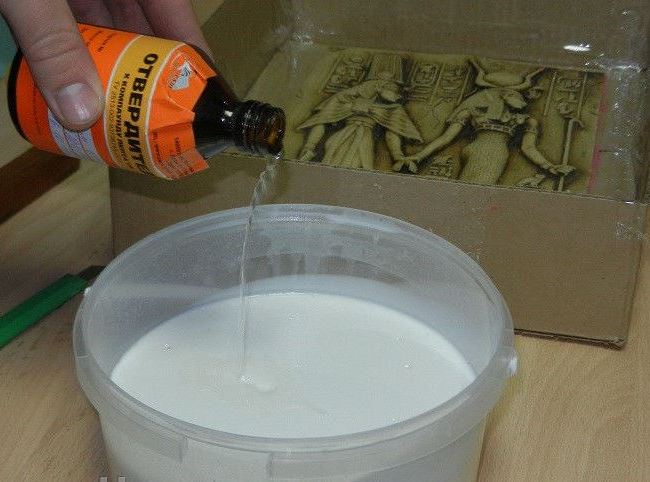
For this, a hardener is added to the bulk.
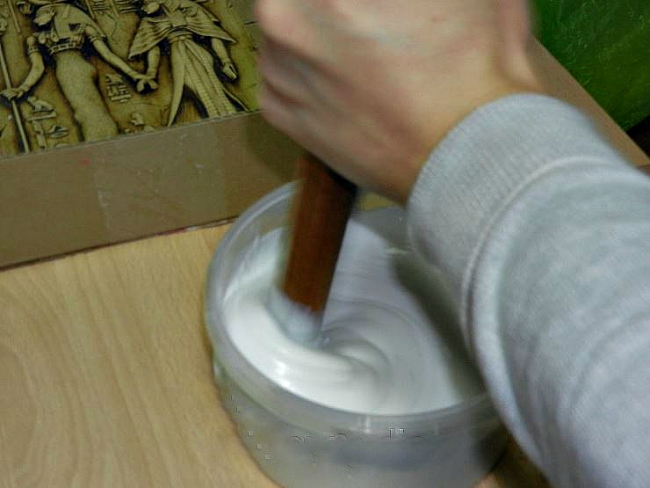
Mix the mixture thoroughly.
Then take a box without cracks, a container or a bowl. The size and shape of the container depends on what the sample part is.
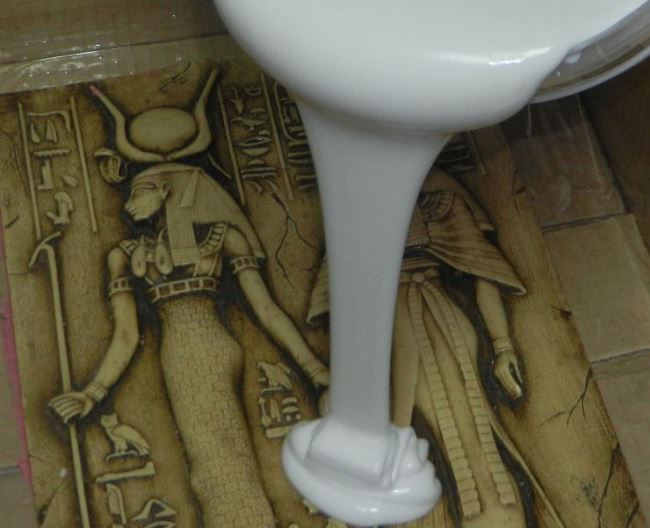
Before pouring the silicone, the original is pre-lubricated with wax, grease or soapy water so that ready product could subsequently be easily retrieved without damage.
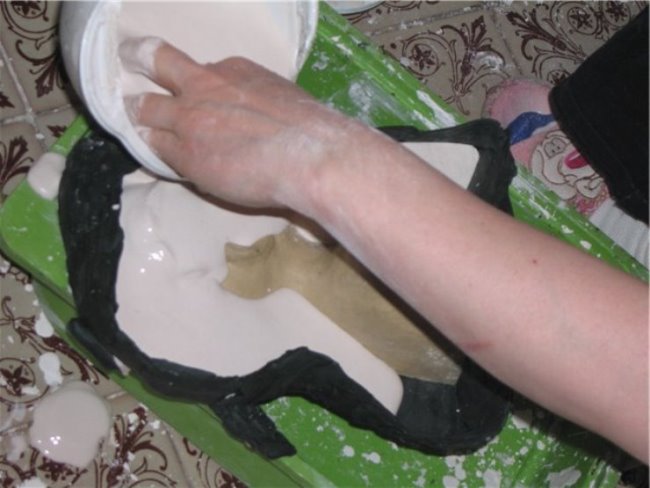
At the bottom of the container, the detail is laid, according to which it is intended to create a mold for casting. Carefully pour the resulting composition so that it completely covers the part.
If the form is to be removed not from the whole original, but only from its part, you should first pour the silicone mixture into the container, and then lower the object into it, immersing it as much as the master's intention requires.
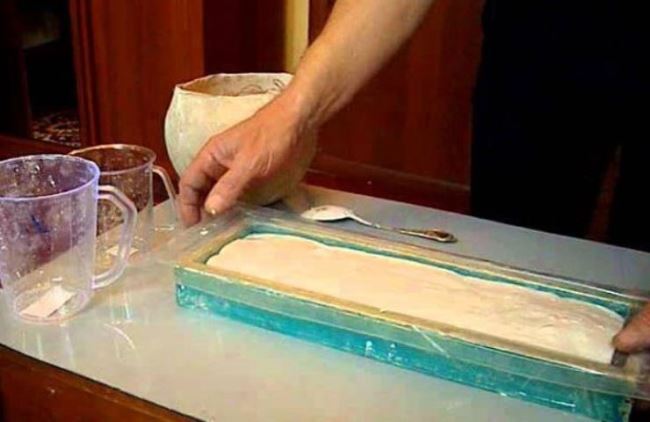
The container is tightly closed. To do this, you can use a piece of glass.
After 15 minutes, you can take out the finished form. One has only to check if the silicone compound sticks to the fingers.
If the master wants to create a bas-relief according to his own idea, the master class "How to make a template for a form with your own hands" will help him in this.
Plaster bas-relief on the wall using silicone molds
In order to cast a bas-relief on the wall with your own hands, you need to prepare the necessary:
- · clean form;
- · gypsum;
- · water;
- · grease.
Apply lubricant to the dry area of \u200b\u200bthe mold with a brush. It is made from vegetable oil, in which wax was melted in a water bath.
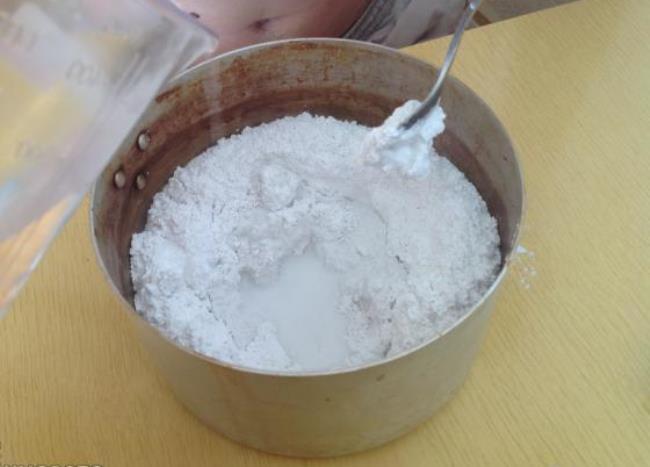
Gypsum (it is better to take GVVS-18, intended for artistic modeling) is bred according to the recipe attached to the package. Use water at room temperature. In no case should it be added to the composition of cement or sand, plaster or other material!
So that there are no air bubbles in the molded part, the master first applies a plaster composition to the inner part of the mold with a brush, and then fills it all over.
In order to prevent the formation of air voids in the product, for some time the form with the contents must be subjected to vibration. You can achieve this effect if you cover the form with corrugated glass and move it over the surface for a couple of minutes.
Typically, the recipe indicates the time it takes for the product to dry completely. But it should be noted that in this case it is better to overexpose than to remove the part ahead of time.
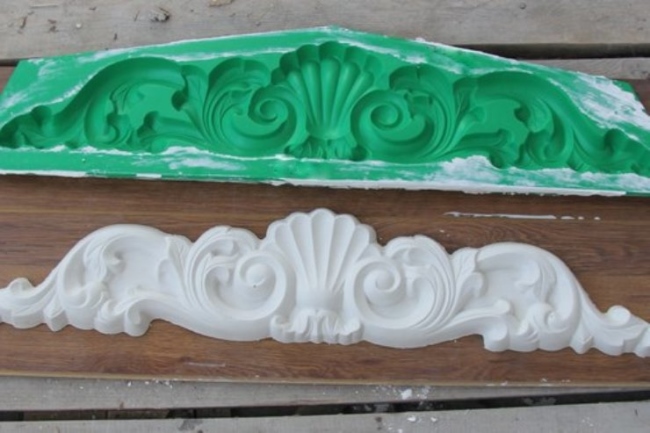
After the specified time has elapsed, the master carefully removes the bas-relief part from the mold.
They attach it to the wallusing acrylic plaster, diluted to a thick sour cream or acrylic glue. You can also glue small details of the bas-relief using PVA.
It is interesting! Instead of plaster, you can use a mass for papier-mâché. Both the figures and the bas-relief are no worse than the plaster ones.
Do-it-yourself bas-relief on the wall - video
Using this material, you can make a bas-relief on the wall with your own hands. The site also has a master class "How to make a swing with your own hands" step by step photos and video.
Do not rush! Make me feel good, drop a few words in the comments!
And on the site there are simply killer materials that will surely interest people whose hands grow from where they need to.
Here are collected ideas on how you can please your loved ones by changing something in the interior.
To help the craftswomen, a detailed master class is offered for making a charming doll from tights - a cute and original craft.
When watching TV shows or videos, many are fascinated by the unusual stucco molding that adorns the walls of various rooms. Today, man-made bas-reliefs are no longer limited to the category of luxury, and they can be found not only in historical buildings, theaters and chic mansions. Most owners of apartments and private houses successfully use this decor element in their own interiors.
Surface preparation - mix the solution and sculpt the background
Any living space needs individuality. In this regard, do-it-yourself bas-reliefs have an indisputable advantage: their sizes and shapes are not limited, materials for their manufacture are sold in any hardware store at an affordable price, and their production itself is a creative and very entertaining process.
First of all, we will select the section of the wall that we will decorate. Pay attention to its illumination, whether it will be natural light from a window or artificial lighting is needed, because it is the play of light and shadows that visually increase the volume and emphasize the texture of the image.
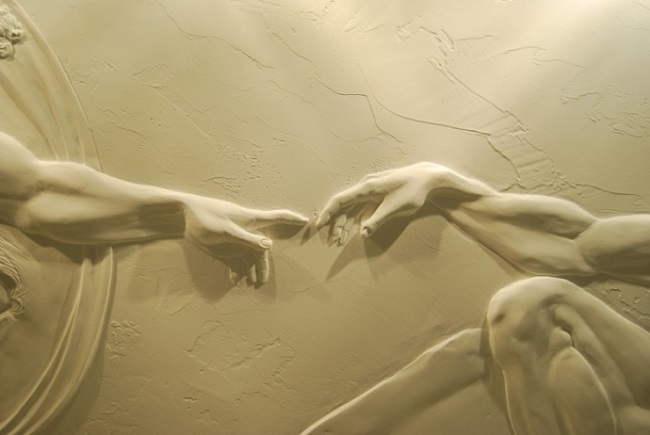
Now let's select sketches and decide on the size of the image. Of course, a hunting scene or a reproduction of Michelangelo's famous paintings in your living room would look great, but you are unlikely to be able to translate them into reality, so you should start with small elements that include floral ornaments, geometric shapes, or even simpler some details of abstraction.
For work we need:
- Latex gloves;
- Trowel;
- Putty knife;
- Wide flat brush;
- Palette knife;
- Cling film.
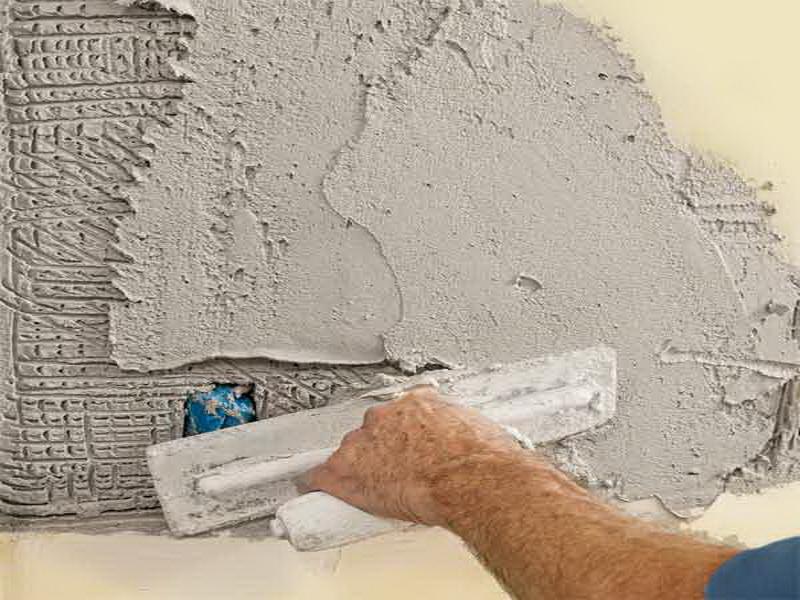
Before starting work, the surface must be prepared: the old coating is removed from the wall section, leveled, if necessary, plastered and must be covered with a layer of primer for better adhesion of materials. The wall is left to dry completely.
Stucco molding is made from clay, alabaster, gypsum or plaster mixtures based on it. The recipe for the preparation of a gypsum solution is 1.5 kg of gypsum per 1 liter of water. For plasticity, a little PVA glue is added to it and everything is thoroughly mixed. It is easy to form a future bas-relief from the resulting soft "test", but one should start with the main background. Usually these are surfaces with some texture. For example, a few random brush strokes on wet plaster or the movement of a paint roller will leave original marks.
A good background for a bas-relief will be imitation of brick or masonry, a small "sandy" pattern left by an ordinary sponge, or a textured surface of deliberately rough plastering. If the bas-relief is planned not in the form of a panel, but as a separate protruding element, then the wall around it must first be pasted over with masking tape to protect it from contamination.
We start sculpting - create a sketch and add volume
When our sculptural "canvas" is ready, we can transfer the main drawing to it. In this case, a thicker solution is needed, namely for 1 liter of water we now take 2 kg of gypsum. The finished mixture should not spread over the hands and hold well the shape given to it.
In stucco, the easiest place to start is with plant elements. When planning a vine, you need to mark the location of the branch, leaves on it and a large berry cluster. Whether it will be an image of a flower, a silhouette of a tree or part of an architectural column, it is important to respect the scale of all elements of the image relative to each other. If you do not know how to draw, then you can use the prepared stencils or make a sketch of the picture on a transparent film by copying it, for example, from the monitor screen. To draw a tree, you just need to highlight a suitable branch with a flashlight and trace the shadow obtained on the wall along the contour.
Next, we move on to the most difficult and crucial stage - we add volume to the drawn sketch. The mixture, which is intended for stucco molding, should be very plastic and not harden quickly, since it should be applied in several stages, allowing each layer to dry out. With this in mind, it is best to prepare small portions of the solution and use them immediately.
If it is assumed that the bas-reliefs made of plaster and putty will be voluminous, then their most protruding parts are recommended to be additionally reinforced by screwing self-tapping screws into the wall or fixing an ordinary plaster bandage on it with a stapler. Separate volumetric figures can be created using cardboard and foam blanks, which are attached to the wall and coated with a mixture.
![]()
You can add texture to plant elements using their natural counterparts with a clear pattern of veins - tightly attach a leaf of grapes, maple or even your favorite to the mixture indoor plant, remove the excess putty around with a spatula or a regular knife, forming a clear edge. Leave the element to dry for a few hours and remove the remaining leaves.
For such "prints" or as a decorative element of the bas-relief, you can use other handy items: burlap, shells, decorative stones and etc.
Convex parts can also be cast from plaster using a prepared plasticine mold and liquid plaster mortar. Items such as berries, protruding flower petals or a tree branch are best hand sculpted out of alabaster (the solution is prepared according to the instructions on the package), and then attached to the wall, pressing firmly and smearing on all sides.
"Free" plastering - a simple method of obtaining decorative elements
A simple and affordable way to obtain volumetric parts is "free" plastering. It is usually used to create compositions from ornate patterns created from plaster-impregnated paper napkins, as well as to form floral and vegetable bas-reliefs. This method is available even for beginners, as long as you choose the right materials and combine them harmoniously.
For "free" gypsum, architectural gypsum is best suited, from which a slurry is prepared. For stirring, you can use a construction or regular kitchen mixer, or do it by hand. So, for 1 kg of gypsum, take 0.7 liters of water. To prevent lumps from forming, it is the dry material that is added to the water, and not vice versa, and it is better gradually, in small portions, thoroughly mixing each time. To make the solution more plastic, and the finished bas-reliefs do not crack, it is recommended to add a little PVA glue diluted with water to it. In the final version, the solution should be homogeneous and be close to liquid sour cream in consistency.
Sprigs of plants, buds, elastic inflorescences of natural or artificial flowers are dipped into this composition, and paper napkins are also impregnated with them. The resulting workpiece is placed on a flat surface covered with plastic wrap and left to dry. Flowers and paper elements must be laid as they will be fixed in the interior. This will form a flat base on each part, which will then be attached to the wall. After complete drying (not less than a day later), the workpieces are again dipped in the gypsum mixture and placed again in the same position to dry. Repeat this procedure until a 1.5 mm thick layer of gypsum forms on the elements.
![]()
The finished parts are attached to the wall using thick acrylic plaster or PVA glue. To finally fix the finished composition and give it monolithic view, the entire relief is coated with a thick plaster solution with a brush, paying special attention to the joints of the attached elements. Today you can learn the basics of sculptural craft just by sitting in front of a monitor screen. It is easy to find a suitable master class on the Internet, successfully master the first lessons, and eventually take up pictures.
The best material for such modeling is considered to be a gypsum mixture based on PVA glue. The mass should turn out to be elastic and thick, like soft plasticine. Now you can remember your kindergarten experience and try to mold a cherry, a flower, or even a bee. No need to be upset if your artwork did not work out. You can use ready-made forms - buy in a store for creativity, or take a silicone baking dish or ordinary figures from a children's sandbox. In this case, a plaster mixture of sour cream density is poured into a prepared mold and left to harden. The resulting molding is removed and glued to the wall at a specific place in the composition.
Finishing - we clean, paint, protect from moisture
At the end of the work, you should smooth out all the roughness on the resulting panel. The best way to do this is to use a small piece of fine-grained sandpaper. Proceed carefully without undue pressure so as not to destroy the necessary textured elements. Sometimes, after such treatment, other imperfections appear - small cracks, irregularities or small dimples left over from air bubbles. Now is the time to finally grease and fill everything.
The finished bas-relief on the wall is thoroughly cleaned of gypsum dust and crumbs and must be treated with a primer. Now you can start decorative finishing Images. Most often, acrylic paints and tint colors are used for this. To paint the bas-relief in different colors, apply restrained two-tone halftones or stop at a virgin white color - it's up to you, it all depends on the stylistic performance of the panel and, of course, on your desire.
And finally, a protective coating such as a water repellent, acrylic wax or varnish is applied to the stucco molding. Such protection is especially important for bas-reliefs in rooms with high humidity, for example, in kitchens, in bathrooms, unheated corridors.
A bas-relief is a conventionally three-dimensional drawing that adorns the internal and sometimes external walls of a house or apartment. Unlike frescoes and sculptures, the bas-relief is made directly on the wall, due to which it fits much more organically into the interior or exterior of the house. In this article, we will tell you what tools, knowledge and skills are needed to create a bas-relief, and also give detailed instructions to create such a decoration that will allow you to independently decorate your home with various paintings.
What skills are needed to create a bas-relief
To create a bas-relief, the following skills are required:
- paint;
- create volumetric images;
- work with alabaster and gypsum solutions;
- create stencils and work with them;
- work with wire and create structures from it.
Any bas-relief is a partially volumetric picture, which should create the feeling of a volumetric drawing. If these are leaves and flowers, then they should not be two-dimensional, but create the illusion of volume. If this is a more complex image, then it should also create the illusion of full volume. Therefore, without the ability to create volumetric images and draw beautifully, it is better not even to try to make bas-reliefs, because later you will have to eliminate the consequences of your creativity. No less important is the ability to work with gypsum and alabaster mortars, because it is necessary to clearly know the lifetime of the solution, the optimal density parameters for various jobs, the possibility of mixing with dyes.
Indeed, to create a bas-relief, solutions are needed that, although slightly, differ in density. The ability to create stencils is very important, because without them it is very difficult to outline the contours of a future picture, especially if you do not have great artistic talents and high qualifications of a plasterer-painter. To create volumetric images with a thickness of more than 10 mm, and if the density and viscosity of a solution of 5 mm are incorrectly selected, it is necessary to create a frame that will prevent cracking of gypsum or alabaster.
Tools
To work you need:
- paint brushes different forms and sizes, including the lining;
- palette knives; sculptural stacks of different sizes;
- trowel;
- measuring spoons;
- container for mixing putty;
- hammer drill with a set of drills for wood and concrete;
- flat and cross screwdrivers;
- pliers;
- clean rags;
- powerful light source;
- strong goats or forests;
- overalls, respirator and goggles.
Wall preparation
Wall preparation includes two stages:
- Alignment;
- Primer.
During the leveling, you plaster the wall with a sand-cement mortar, then level with gypsum or alabaster putties to give it the necessary evenness. If you want to make a bas-relief on wooden wall, then you will have to first fix the reinforcing mesh, then plaster. Be sure to use beacons (guides to help make the surface level)... For the primer, use acrylic, alabaster or gypsum compounds with a high sand content - this will create the necessary surface roughness and improve the adhesion of solutions for creating a bas-relief. Use only those primers that say they are suitable for alabaster and clay compositions. Thanks to its large width, it is very convenient to apply the primer with a brush. When priming the surface of the wall, do not leave streaks, because after drying it will be difficult to clean them, and the streaks left will negatively affect the appearance of the bas-relief.
There are no clear recommendations for creating bas-reliefs, because each master uses the most convenient combination of actions. Some create a bas-relief directly on the wall, others first cast its elements of their plaster or alabaster, then fit them into the overall design of the picture. Some make a pseudo-volumetric image with a thin layer of solution, while others create fully volumetric pictures with a thickness of 30 centimeters or more. It all depends on the skill, artistic taste and talent of the master. Nevertheless, we will give one recommendation - in order to fill your hand and not ruin the wall, create a bas-relief on a piece of plywood, chipboard or OSB, which after completion of the work can be hung on the wall. If something goes wrong and you ruin the bas-relief, then take a new piece of plywood and practice on it.
Below we describe a few techniques to help you create beautiful bas-reliefs:
- work with stencils;
- the use of sculptural stacks, cutters and loops;
- mold casting;
- fastening the wire frame to the wall;
- work with film.
Working with stencils
For a stencil, you can either draw yourself or download it from the Internet by printing it on paper. After that, you need to decide on the material of the stencil and its thickness, as well as the method of manufacture, therefore we recommend using ready-made stencils that can be purchased in stores selling decorative goods. A stencil is needed to create the contours of the future picture, after which you can use stacks to give these contours the desired volume. Working with the stencil is not difficult - place it on the wall and fix it in any way, then fill it with a thick plaster or alabaster mortar. Remember, the thicker the stencil, the thicker the grout should be. If you use too liquid a solution, then after removing the stencil, the contours of the bas-relief will be smeared, so it is advisable to first practice on the board so that you do not have to re-prepare the wall.
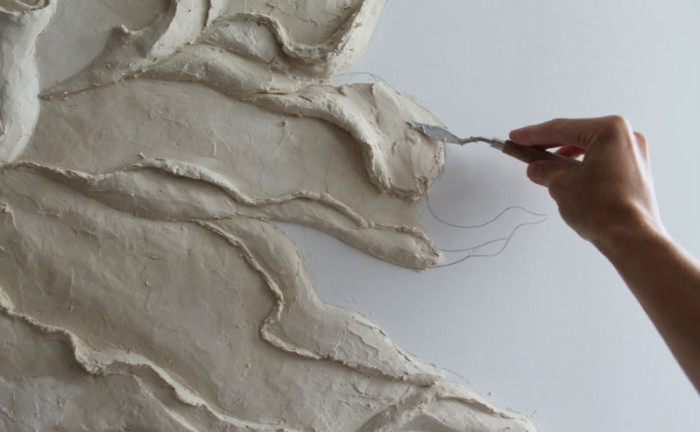
Using sculpting stacks, cutters, and loops
You can purchase these tools from their respective stores. If you have well-developed spatial imagination and artistic skills, then you can use these tools effectively without even being a professional sculptor. Indeed, with their help, excess solution is removed, giving a certain section of the bas-relief the desired shape. With the help of these tools, you can create any volumetric images, it all depends on your imagination, artistic taste and spatial imagination. These tools will not be superfluous when creating volumetric bas-reliefs, because with their help you can trim the edges, giving each layer of mortar the necessary shapes.
Mold casting
The use of pre-cast molds greatly simplifies the creation of volumetric compositions. For example, leaves are cast into molds, which are then attached to the wall and create the trunk and branches of the tree. The result is that the trunk and branches are part of the wall, and the leaves are separate, which improves the visual perception of the bas-relief and the effect it produces. The stores sell silicone and polyurethane molds any sizes and patterns. To create a bas-relief, it is necessary not only to cast molds from gypsum or alabaster, but also to make a reinforcing frame inside them - this will prevent cracking of the resulting part and facilitate fastening to the wall, because not only glue or putty will hold the part, but also wire.
Some forms need to be lubricated with castor oil (this should be written in the instructions for the form), other forms do not need such an operation. For pouring into molds, you must use a much more liquid solution than for working directly on the wall. In most cases, the solution is made similar in density to liquid sour cream, which allows you to fill the mold with quality and ensure good strength of the part. Metal carcass can be inserted into the mold either before or after casting plaster or alabaster, both methods provide the same strength, so it all depends on personal preference.
Fastening the wire frame to the wall
The wire frame allows not only to fix heavy hanging decorative elements, but also to prevent cracking of gypsum and alabaster when the layer is too thick (over 7-10 mm), which makes it possible to create figures of great thickness. The thickness of the wire depends on the place of its application and purpose - steel wire 2-3 mm thick is used for attaching external decorative elements. It possesses high strength and rigidity, due to which it effectively holds the external structure until the plaster or alabaster coating dries. For reinforcement of thick parts, you can use steel wire 0.7–2 mm thick, which has less rigidity and weight, so it is easier to work with. To fasten the wire to the wall, it is convenient to use a dowel-nails, for which a hole is drilled under the dowel using a puncher, then 1 turn of wire is wound onto a plastic clip and the dowel-nail is hammered all the way into it. If you fasten the wire to a wooden wall, then the technology is different there - 1 turn of wire is wound on a self-tapping screw with wood carving, after which it is screwed into the wall until it stops. If necessary (if you have to use a self-tapping screw of great length / thickness or the walls are made of solid wood), a hole with a diameter 2 times smaller than the diameter of the self-tapping screw is drilled in the wall, which makes it easier to screw it in, but does not weaken the fixation in the wall.
Working with film
The film is used to create pseudo-volume compositions on a layer of asbestos or alabaster plaster of small thickness. First, a drawing is applied to the film with a marker on a scale of 1: 1, then a layer of plaster with a thickness of 3–6 mm is applied to the selected section of the wall and the film is applied on top, orienting the drawing in space. After that, outline the contours of the drawing with a pen and remove the film, and the drawing remains on the plaster layer. Now you can use stacks to remove unnecessary things, creating the selected drawing and giving it volume.
Gypsum and alabaster, if they come into contact with the skin, dry it out unnecessarily, so it is advisable to work with rubber gloves. Also, be sure to use safety glasses to protect you from getting plaster or putty in your eyes. When dosing the solution, pouring it into a mixing container and stirring it, wear a respirator - it is not very convenient to work in it, but if you spill the solution or raise dust in any other way, it will protect your bronchi and lungs from damage.
To create a beautiful bas-relief, you need to properly organize the workflow. A powerful light source will help you spot the slightest flaws, so you can easily fix them before the mixture hardens.
If the defect is found after the mixture has solidified, then it will be much more difficult to eliminate it, because the frozen gypsum or alabaster will have to be processed not with stacks, loops or hooks, but sandpaper... You must learn to "by eye" determine the amount of solution that you can process before solidification, otherwise you will constantly throw out the solidified excess. The life time of the solution depends on its composition and is indicated on the package, the optimal ratio of the dry mixture and water is also indicated there, so correctly determine the amount of solution required for a particular operation, and also adjust its density by changing the amount of water. Clear understanding the required amount and the thickness of the solution comes only with experience, so first practice on pieces of plywood or chipboard and do not worry if something does not work out, over time you will learn.


