Recently, the popularity of soft roofing is gaining momentum. There is a very simple explanation for this. First of all, it should be noted the excellent performance of such a coating. Let's highlight just a few of them: absolute waterproofness, high strength characteristics, attractive appearance, durability.
The undoubted advantage of a soft tile roof is a fairly simple installation of flexible tiles. The installation instructions involve the implementation of several mandatory steps. Installation procedure for shingles – next:
- base device;
- underlay carpet flooring;
- installation of cornice and additional elements;
- laying of shingles;
- formation of abutments.
How are flexible shingles installed in practice? The installation instructions presented to your attention will answer this question. The complete set of material includes all accompanying elements, for example, a lining carpet. Considering the special adhesive applied on the back of the shingles, the installation instructions can be used for roofs with a slope of 12–90 °.
DIY installation of flexible shingles
If you intend to carry out installation work on your own, then it is all the more important to know how flexible shingles are laid correctly. Installation instructions, which detail all the stages of the necessary work, will be especially useful in this matter.
Preparation of the base
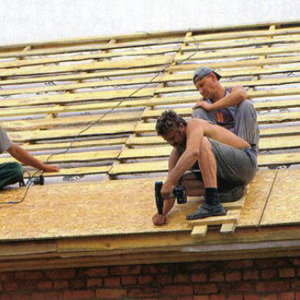
This is a plastic and soft roofing material, therefore, the installation of flexible tiles must be performed on a rigid base. Under the influence of sunlight, these characteristics of shingles only increase. If you mount the material on a sparse crate, then either the shingles will simply not fall on it, or after installation they will take the form of a crate, which, you will agree, to put it mildly, will look ugly.
According to the installation technology, the base should be smooth and smooth, therefore, sheets of moisture-resistant plywood or OSB are stuffed on top of the usual crate.
Generally speaking, the shingle can also be laid on a base of individual boards, but under certain restrictions on the step between them and the height difference: the maximum step should be 5 mm, the maximum difference should be 2 mm. However, even under such harsh conditions, literally a year later, the "pattern" of the base is already visible on the roofing.
Whichever material you choose, you need to take into account that the moisture level of the base should not exceed 20% of its dry weight.
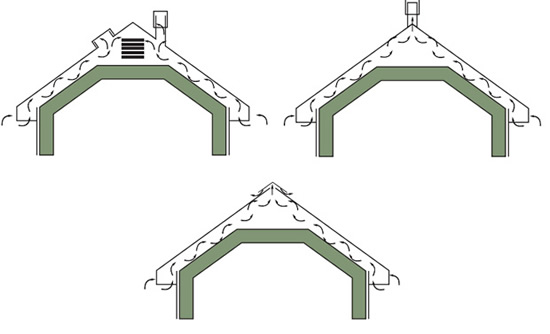
Another important point regarding this stage is the need for under-roof ventilation. It must ensure the removal of excess moisture, which over time will become, in particular, the cause of decay of the coating. In addition, the air gap between the rafters and the crate can be used for thermal insulation. Air intake is usually provided through an opening on the bottom of the roof, and outflow through an opening on the ridge.
Lining device
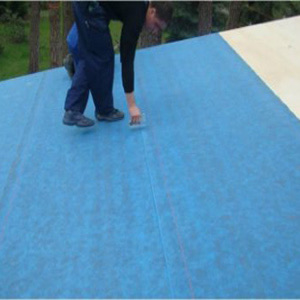
The underlay under the shingles serves as an additional protection for the roof from leaks. For roofs with a low slope, of the order of 1: 3 or less, it is laid on the entire surface of the base. At large angles of inclination of the slope, the lining carpet is used only in hazardous areas: cornices, ridge, valley, end parts.
Lay the carpet from the bottom up, starting from the lowest section of the slope, with an overlap. Having blocked the lower strip, the upper one does not allow water to flow under it. To fix the lining material, special glue and nails are used.
Further, they carry out all the necessary operations related to the device of the selected drainage system. For example, if necessary, brackets for gutters are fixed to the cornice.
Before laying the lining layer, the base is coated with bitumen mastic, therefore, after heating the substrate with a gas burner, a solid layer is obtained.
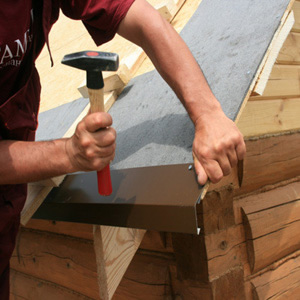
Roof overhangs need reinforcement. To do this, use metal strips for cornices and ends, which are installed on top of the lining layer.
Further stages of installation are associated with the roofing material itself.
Laying bituminous shingles
Markup

Installation of bituminous shingles, especially for a non-professional, is recommended to be carried out according to the markings indicating the exact direction of installation, which are previously performed on the roof. In fact, due to the relatively small size, quite often the rows are bent during the laying process, and if for small areas such a flaw is not significant and practically does not catch the eye, then on large areas they are fraught with unpleasant consequences.
From top to bottom (or vice versa), preferably from the edge where the shingles will be laid, draw two straight lines in parallel, keeping a distance of 50 cm between them.Then, lines of rows are marked perpendicular to them with a step of 25 cm.
Styling process
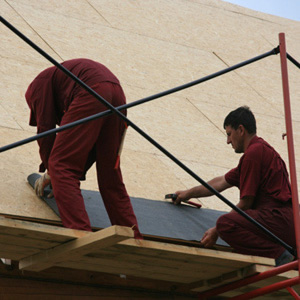
Installation is started from the bottom edge of the ramp.
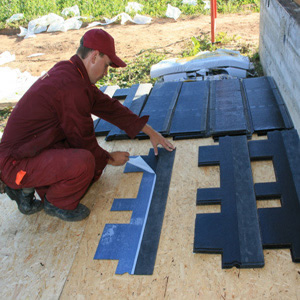
Row 1. There are two options.
- lay the shingles upside down;
- use a special self-adhesive strip, however, it costs much more - almost twice. This row should be oriented relative to the ramp.
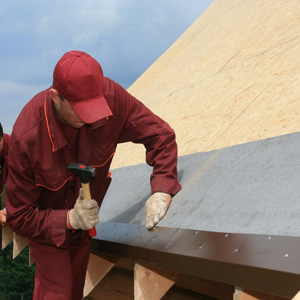
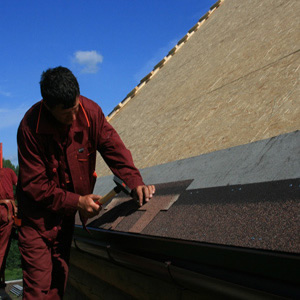
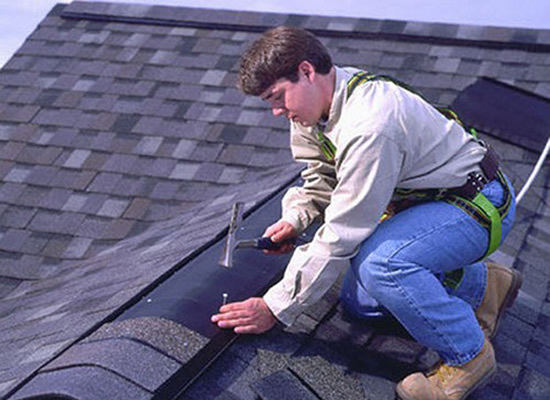
Row 2. Starting from this row, continue laying, following the markings. The shingles are provided with a protective film on the underside. It is removed immediately before gluing and pressed against the base. The tiles are fixed with special tinned or copper-plated nails equipped with a wide head.
They are hammered along the edges and in the middle of each of the shingles so that two rows can be fixed at once. Moreover, the protruding forms of each of the subsequent rows should cover the caps of the fasteners of the previous ones. For each running meter of bituminous shingles, four nails are needed.
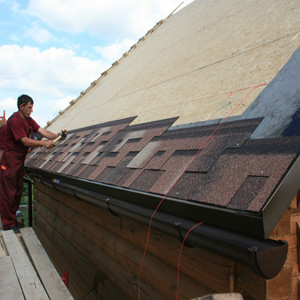
The subsequent rows are laid with a shift of half a meter. If necessary, make sure that the petals of each subsequent row are located between the same elements of the previous one.
The fixing principle of the shingles remains the same regardless of the row.

This was the basic part of the installation instructions for shinglas shingles, deck and soft shingles from other manufacturers. For example, the installation of flexible tiles tilercat prima is carried out according to the same principle.
Nuances of shinglas shingles installation technology
The so-called hazardous areas require special attention during installation. Let's take a closer look at these stages of installation work.
- The least problematic is laying the material on the ridge. To design this site, several options are used:
- additional ridge element made of metal. It is bought ready-made either in the form of a special strip made of metal, or from the same tile (ridge tile) or
- made by themselves, cutting out of individual shingles. These fragments are folded over the ridge and secured with the same fasteners.
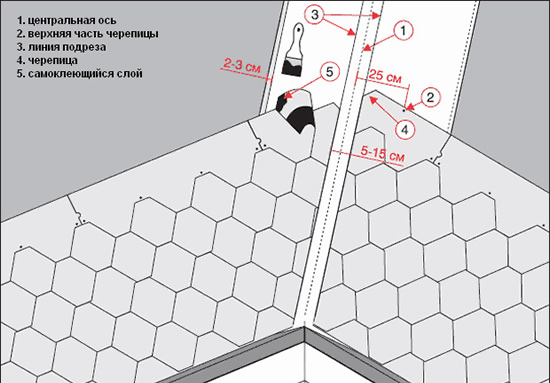

- From the valley, everything is different - according to statistics, this is a site that is sufficiently prone to leakage. Therefore, as a preventive protective measure, a substrate is used, with which they are glued to a high quality. This measure is mandatory regardless of the slope of the roof - it is used even at sufficiently large angles of inclination, when no backing layer is used. In glued valleys, soft shingles do not bend, but are cut in the direction of this element.
To increase the reliability of this joint, the valley must be glued with an additional layer of separate fragments of the tile. They are laid with an overlap on adjacent slopes forming valleys and glued using bituminous mastic.
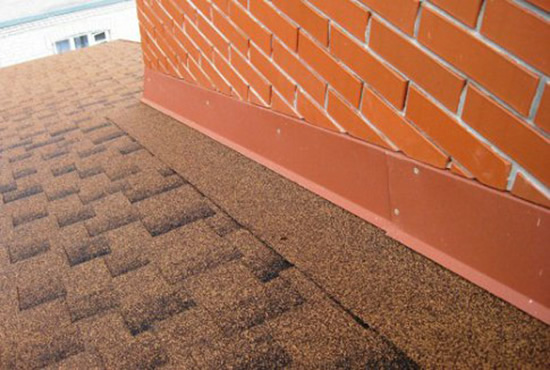
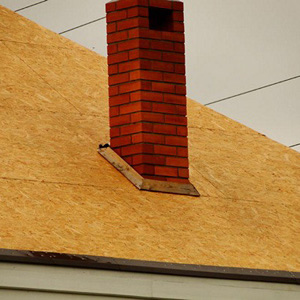
- As a rule, the roof covering is not completely uniform; in its path there are certain obstacles, for example, ventilation or chimney pipes. I seal these areas using an valley carpet and metal sheets treated with an anti-corrosion compound.
- Webs of the appropriate size are cut out of the material and cuts are made on the folds. Do the same in places where the roofing elements protrude. This way you can ensure a proper fit.