Subject to a number of conditions, you can easily lay the laminate on a wooden floor yourself and get an even and very beautiful coating.
Previously, laminated boards were mounted exclusively on a concrete base. Nowadays there is a simple technology that allows you to lay laminate flooring on a wooden floor. In essence, it differs little from the installation scheme of such a coating on a leveled sand-cement mixture. You just need to take into account some of the features of the plank grounds. And then do-it-yourself styling will pass without a hitch.
Laying laminate flooring
The wood base has two key features. Over time, they lose their original characteristics and change geometric parameters. Therefore, before laying the laminate on an old wood floor, you should carefully analyze the logs, support bars and boards. If their condition leaves much to be desired, it is imperative to prepare the base for the installation of laminated flooring.
The plank foundations are not stable and truly stable. In this regard, even minor shifts of laminated panels cause the formation of an additional load on their locks. This causes deformation of the coating during its operation.
If you want your laminate flooring to please you with its smooth and elegant surface, eliminate all defects of the plank base in advance. How to do this with your own hands will be discussed further.
The first step is to identify uneven areas of the floor. Perform this operation using a building level (even better, use a laser tool). You can level the old plank floor with your own hands using several methods.
Scraping is suitable for subfloors with slight irregularities (about 4–6 mm per square of floor). Cycling is performed with an electric plane or sandpaper (if all defects of the wooden base are located in the same area). Before starting the operation, it is necessary to sink all fasteners (for example, nails) into the wood, so as not to damage the blades of the planer or the hand scraper, which can also be used to level the floor. Be sure to check the quality of the sanding work and the plane after processing each individual area of the base. After scraping, check the floor surface again with a level.
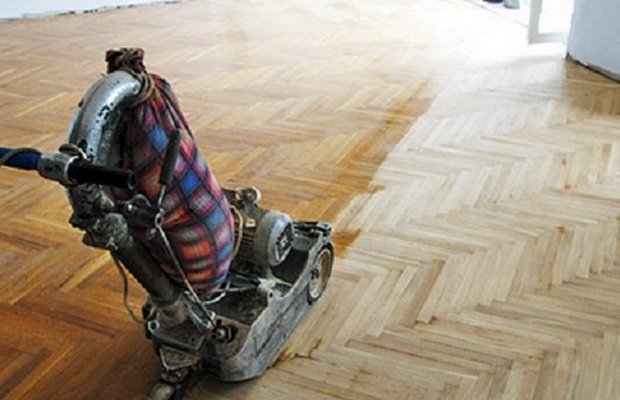
Scraping the floor
When leveling with chipboard (chipboard) or plywood, it is recommended to use sheets of relatively large thickness (about 1.5–2 cm). Treat plywood or chipboard with a fungicidal compound or ordinary drying oil, carefully level the wooden base by lining plastic or wooden wedges under the logs. Plywood sheets must first be cut with a special circular saw to the required dimensions, and then put on a rough base. After that, check the resulting difference in planes and, if necessary, place small thick wood slats under the sheets of the leveling material. Chipboard and plywood are attached.
Often there is a need for a small repair of a wooden base on which you want to lay laminated boards with your own hands. Such work is done simply:
- when the coating subsides, support special wedges should be installed under the wooden logs;
- rotten boards are replaced;
- gaps and cracks are treated with putty;
- wobbly boards are fixed with self-tapping screws;
- when both the logs and the boards stagger on them, you need to fix the supporting elements (press the logs at the base with anchors).
After the repair, do not forget to very carefully clean the base from debris and fine dust. Use a vacuum cleaner.
Laying laminate flooring requires the use of underlays. They can be made from:
- bitumen;
- polyurethane foam;
- environmentally friendly natural cork material;
- foil;
- polypropylene (foamed).
Laying allows you to hide minor irregularities of the subfloor, and also provides the effects of heat saving, noise and sound insulation. It is important to choose the right lining material. For wooden bases, experts recommend using cork underlays, which interact well with the wood. However, you can put less expensive products made of polypropylene or polyurethane foam.
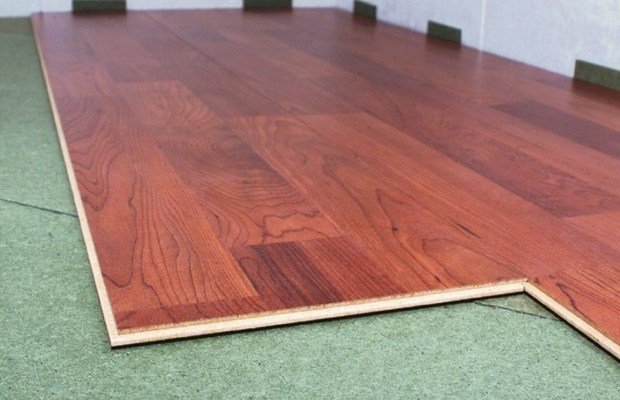
Laying laminate on a substrate
Note! The substrate should be laid on a pre-assembled polyethylene film. It performs a waterproofing function. The film is laid with an overlap of at least 15 cm (more is possible). And the installation of the substrate itself is carried out end-to-end.
For fastening the lining, construction tape is usually used (gluing is made with solid lines or periodic dots). It is not necessary to fix the substrate to wall surfaces and to the floor base.
Start the installation of laminated panels from the corner that is as far away from the door as possible. The laying of the first row of products is carried out horizontally, and it is carried out along the joints of the laminate.
During installation, check the position of the laminated boards in relation to the wall. They must lie absolutely flat.
An important point! The panels are laid on the boards perpendicular to the location of the latter. You also need to provide a gap between the laminated products and the wall. To do this, simply mount the restraints. They can be made of wood or plastic.
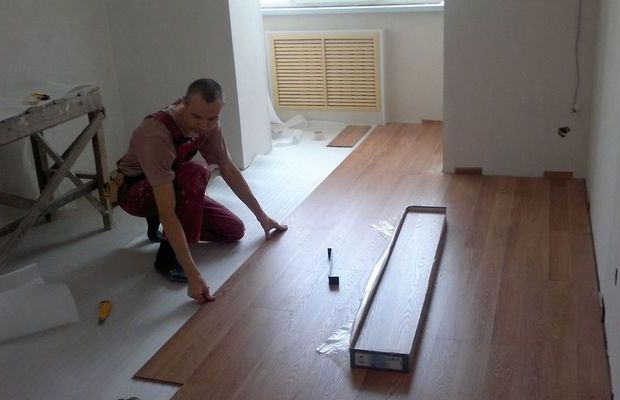
Self-laying laminate
After the first correctly laid out row rests against the wall, take an electric jigsaw and cut off part of the panel. Then you start to lay the next row. At the same time, at the ends, its joints should not coincide with the joints of the products of the previous line. To achieve this, you need to take a new product, cut off about a third of it and start assembling the second row (similar to the first).
Consider the following nuance. It is necessary to fasten together all the panels of the second row and only after that do they dock with the products of the first line. It is allowed to tamp the laminate with an ordinary hammer. But at the same time, it is imperative to use a fuse bar so as not to damage the panels.
The next steps are clear. Mount all rows in the same way. Pay attention to the gaps between the laminate and the walls. The products of the last row will need to be cut to length.
You managed to lay the laminated boards yourself! Now you remove the restraints installed at the very beginning of the installation work, and proceed with the installation of the skirting board. It is recommended to use laminate caps to mask the cut areas.
The final touch is the installation of the door sill. This element is installed so that the difference in height between individual rooms is visually invisible.


