In most private and apartment buildings, concrete slabs act as the base of the floor, which do not differ in a perfectly flat surface. Therefore, before laying the topcoat, they need to be repaired and leveled. How can such a floor be put in order, and how can it be leveled?
Why is the alignment procedure needed?
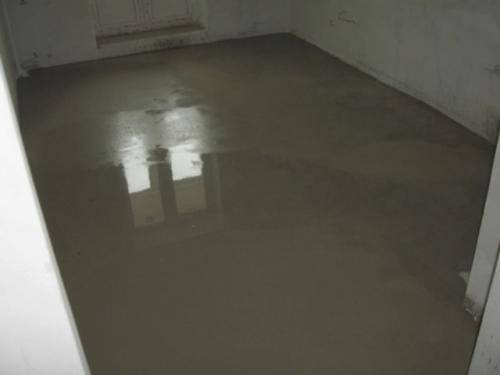
Smooth floor surface is the key to its successful cladding
Leveling the floor means creating a strictly horizontal surface. The fact is that the laying of many modern finishing materials is unacceptable in the presence of curvature. Laminate or parquet flooring will quickly become unusable if laid on a base with a large difference in height.
More and more often cabinet furniture without legs is used in interior design. If the floor is "overwhelmed", any curvature will be noticeable when installing the same wardrobe.
When do you need to level your floors? There are several such cases:
- Concrete slabs with a large height difference are used as the floor.
- The old parquet or hardboard, which had been laid earlier with the use of bituminous mastics, was removed. Small influxes cannot be eliminated, so you will have to perform a floor screed.
- The old wooden base squeaks heavily and is noticeably wobbly.
- The old screed is cracked and worn out.
- Before laying ceramic tiles.
- Before installing the underfloor heating system.
You should not start a complicated process if you need to hide the electrical wiring. It can be simply stowed in a groove or box.
There are many ways to align. Let's consider the main ones.
Modern techniques
The choice of a method for leveling the floor depends on the condition of its surface, the amount of work, the repair budget and the type of future floor covering. The amount of time allotted for all this matters, as well as the need for surface insulation and sound insulation. Some technologies go through several stages, including rough and finish alignment.
The most popular methods are:
- Cement-sand screed.
- Self-leveling floors.
- "Dry" screed.
- Leveling the floor with a lag.
- Using self-adjusting plywood.
- Glue method.
Preparation of the base
Any of the listed technologies requires preliminary preparation of the base. To begin with, it is completely freed from old finishes, paint, debris, flaking materials, oil stains and other defects. If the base is concrete, it is necessary to seal cracks and potholes, dimples and crevices in advance with the help of mortar.
It is advisable to examine the slabs for the presence of "technological" holes. Even at the stage of building a house, many workers do not stand on ceremony and, in order to save time, they simply punch holes in the concrete, through which engineering communications are then laid. The latter are deprived of reliable insulation, so during the repair it is necessary to eliminate the results of the careless work of the builders.
Note! "Technological" holes must be carefully sealed. This will provide additional heat and sound insulation of the room.

Rotten and damaged parts must be replaced with new ones
If the floors are wooden, examine each floorboard, replace rotten parts, repair damaged areas, check the reliability of the log and fasteners, as well as the strength of the entire base.
After all these actions, using the building level, they check for the presence of height differences. To do this, find the lowest and highest points of the floor and determine the difference in height. This value will make it clear how to proceed. With a drop of less than 5 centimeters and more than this indicator, different technologies are used.
For example, using the glue method or with the help of sheet material, the surface is leveled with a height difference of 2-3 cm. The cement-sand and "dry" screed allows you to eliminate the difference of 5-7 centimeters. The lag installation is used when you can steal 10 centimeters or more from the height of the room.
Let's consider each method in more detail.
Cement-sand screed
To perform a cement-sand screed, you must first mark its upper edge using a hydrolevel and an upholstery cord. And then install beacons under it. As them, you can use the ceiling aluminum profile, which is simply pressed into heaps of mortar from cement and sand in a ratio of 1 × 3.
Lighthouses are set in parallel with the optimal distance between the two rungs of 1.5-2 meters. First, the first and last landmark are placed along the marks on the walls, then others are placed relative to them. It is possible to identify and eliminate the curvature of the profiles along the stretched nylon threads. A special tape is attached around the perimeter of the room to prevent deformation of the screed during seasonal temperature changes.
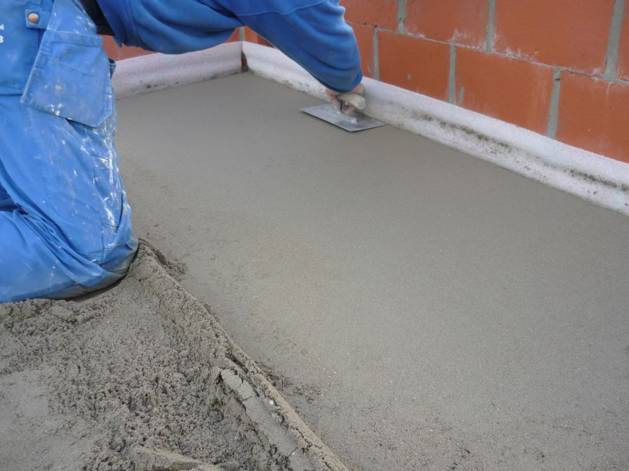
Leveling the screed
The next step is to prepare the solution. To do this, mix one part of cement with three parts of sand in a large container. First, mix the dry ingredients thoroughly and then add them to the water. In this case, it is necessary to achieve mass homogeneity. In addition, it should not be too thick or runny.
The finished solution must be left for 15 minutes, and then stir again before use. It is better to use a construction mixer for these purposes. It is not necessary to buy it, since there are companies on the service market that provide construction tools for rent.
Fill the floor
Before laying the mortar, the floor surface must be primed with two layers of penetrating primer. It will ensure good adhesion of the new screed to the old concrete base.
The solution is placed in a niche between two beacons, leveled with a rule and polished with a trowel. It is better to carry out the pouring work in two hands - some work with a screed, while others knead the solution. Continuity of the process will ensure the creation of a uniform, even surface.
Dry the screed correctly
After laying the screed, it must be covered with plastic wrap. After 12 hours, knobs are knocked off the hardened screed with a metal spatula, and the surface is rubbed with a wooden float.
Grouting solution is prepared at the rate of 1 part of sand to 1 part of cement. The sand should be well dried and sifted through a coarse sieve. The screed is moistened with water using a spray gun and a long strip is laid on it to check the quality of the base and identify defects. Small irregularities are immediately corrected with grout. At this stage, beacons are also pulled out. And the traces of them are filled with a solution.
It is also necessary to dry the screed in several stages. Sand or wood shavings are poured onto the film, which is laid on the new floor, and well moistened with water. As the layer dries, the layer of shavings should be constantly moistened for the first two weeks. Then the film can be removed and again for 5 days water the screed with water, then leave it to dry completely.
Note! In total, the screed dries for 28 days.
Self-leveling floors
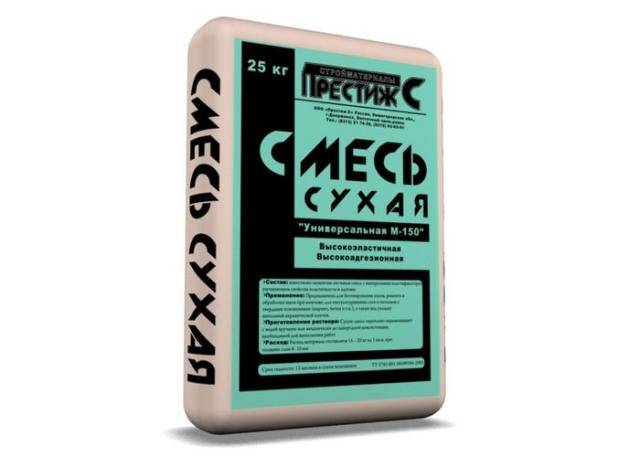
Universal mixture M-150
On sale you can find ready-made screed mixtures, which, in addition to sand and cement, include polymer additives. They increase the plasticity of the base, its strength, frost resistance and resistance to corrosive processes. Mixtures facilitate the process of preparing the solution, but also increase the cost of work.
Depending on the main component, 4 groups of self-leveling floors are distinguished:
- Methyl methacrylate.
- Epoxy.
- Cement acrylic.
- Polyurethane.
All of them allow not only leveling the floors, but also decorating them without additional topcoats. The area of application of such mixtures is quite large. Self-leveling self-leveling floor is used in rooms with the lowest possible temperatures, high pedestrian loads and the action of chemicals.
The technology of laying a self-leveling floor resembles the technology of a cement-sand screed. The only difference is that it is necessary to walk on the surface of the poured composition with a needle roller in order to get rid of air bubbles.
The self-leveling floor has:
- Great appearance.
- Long service life.
- Resistant to moisture.
- Fire safety.
But this technology also has disadvantages:
- Under the influence of ultraviolet radiation, such a floor quickly turns yellow.
- The surface of the slab must be prepared more thoroughly before application.
- This material is not natural.
- It will be very difficult to get rid of the boring polymer finish.
- When laying a self-leveling floor, it is necessary to control the level of surface moisture, which a simple consumer cannot do on his own.
Therefore, this method is not yet very popular.
"Dry" screed
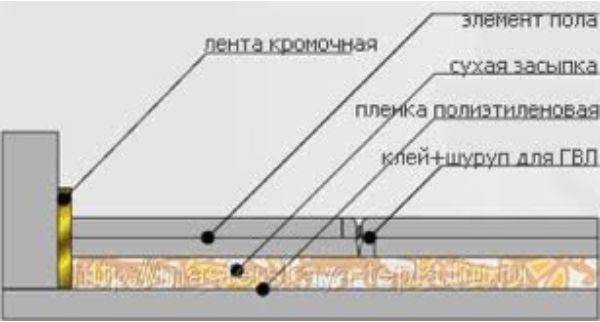
Dry option for leveling the floor
You can do this method yourself. It involves leveling the floor with expanded clay and sheet material.
The styling technology is simple:
- The floor in the room is covered with dense polyethylene so that its edges go 10-15 cm onto the walls. Beacons are placed on the gypsum solution, and expanded clay with grain sizes up to 5 mm is poured into the niche between them. On top of the expanded clay, a plastic wrap or a vapor barrier membrane is again lined.
- Any sheet material is laid on top of it. It can be plywood or fiberboard sheets, but it is better to use knauf superfloor - a special prefabricated system that allows you to quickly and easily complete the process. It consists of separate segments. Each element is a gypsum fiber sheet manufactured in the factory. It consists of two small-format bases connected to each other with an offset of 50 millimeters.
- It is these margins that help keep the two elements together. First, they are glued with glue, and then fastened with self-tapping screws for greater strength. It is necessary to lay such sheets from the threshold, gradually moving towards the farthest corner of the room.
Note! "Dry" screed saves a lot of time. You do not need to wait 28 days to start installing the topcoat. But it has one significant drawback - it is afraid of moisture. Any flood from neighbors will lead to irreparable consequences.
And how can you level the floor if there is a very high difference in height in the room?
Leveling the floor with a lag
Plywood sheets are stuffed on the exposed logs
There are simple methods for correcting large elevation differences. For example, you can lay the joists on a concrete base. As a lag, ordinary wooden bars with a cross section of 40 × 60 or 40 × 80 mm are used.
Differences in height in this case are compensated by the installation of wooden gaskets, which are attached to the base of the floor after preliminary waterproofing. They should not be too thin and small, as they will surely break under the weight of the flooring. Then the floor will begin to sag and the floorboards will creak.
First, the first two lags are exposed, and then a cord is pulled between them, which serves as a reference point for the location of other elements. The step between the lags should not exceed 50 cm. The distance between the jumpers depends on the material from which the rough flooring is made. If it is plywood, then the jumper should be at the junction of two sheets and in the middle of each module.
Note! For the subfloor, it is better to choose moisture-resistant plywood with a thickness of 10-12 mm.
At this stage, the floor can be additionally insulated using mineral wool or basalt wool mats, as well as any bulk materials. From above, all the logs are treated with bituminous mastic. If insulation is installed, then the wooden base is additionally covered with a vapor barrier membrane or ordinary plastic wrap, and then only plywood, chipboard sheets or ordinary wooden lamellas are stuffed. Fastening is carried out using self-tapping screws or screws.
This leveling is used for soft flooring - parquet, laminate, linoleum or ceramic tiles.
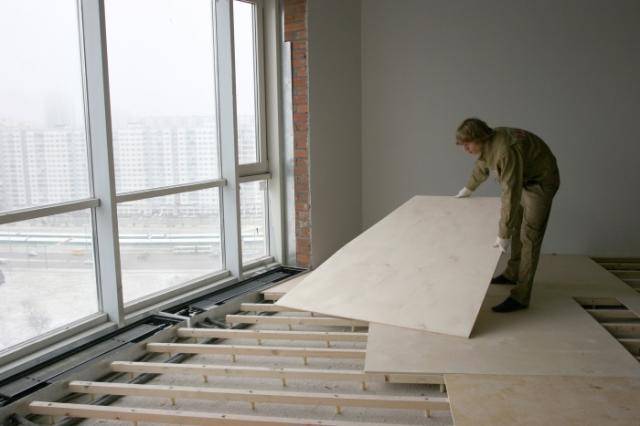
Self-adjusting plywood
If it is impossible to reduce the height of the room, use self-adjusting plywood. On the base, a honeycomb frame is assembled from plywood using a log. Differences in height are compensated for with wooden lining, which is screwed to the base or glued to it.
Previously, sheet material is laid out on the floor and its location is indicated with chalk, and then along these lines and construct a honeycomb frame. From above it is covered with sheets of moisture-resistant plywood in 2 layers.
The second layer should lie on the joints of the first. Before laying the soft finishing finishing material, the joint seams are lightly sanded and then coated with varnish. If a laminate or parquet board is being laid, it is advisable to cover the plywood base of the new floor with a shock-absorbing underlay.
Glue method
The glue method is used when there is a concrete base with a height difference of up to 3 centimeters. Squares of plywood are glued directly onto it. But initially you need to control the humidity of the base. A piece of polyethylene is laid out on the floor and pressed on all sides with wooden blocks. If after 4 days condensation has formed on the inner layer, waterproofing will have to be carried out.

After leveling, proceed to the flooring
Then the plywood sheets are cut out and laid out on the floor in a checkerboard pattern - as they will then be glued to the floor. This operation allows you to adjust the dimensions you want. Usually, the sheets are sawn into small pieces, which are then assembled into one large puzzle. The laid out plywood is numbered, and its ends after cutting are inspected for delamination.
The base is pre-primed and treated with a composition of glue, bitumen mastic and gasoline.
For gluing, use undiluted adhesive mixtures, which can be found in a specialized store. They are applied to plywood with a two-millimeter layer and rolled out with a needle roller. The first sheets are laid against the walls, leaving a temperature gap of 10-15 cm. Craftsmen recommend additionally fastening the plywood to the base with anchor bolts.
Note! This alignment is perfect for laminate, parquet or planks.
Generalization on the topic
Now you know the most popular floor leveling technologies that you can do yourself. By choosing the most suitable option, you will end up with a horizontal surface suitable for decorating with the latest finishing materials.
 Ruslan Vasiliev


