A modern mansard roof is a great opportunity to significantly expand the living space of your home without any hassle. But, if you involve builders in the work, then this can cost a pretty penny. It is quite understandable that each of us thought about the question of whether it is possible to do everything on our own without experience. We assure you that a do-it-yourself mansard roof is more than real. We provide you with comprehensive instructions.
Currently, the best option is a broken attic. It is quite spacious and can really become a full-fledged living space with a large area. Naturally, for this you need to make accurate calculations.
Building a mansard roof will require you to consider many factors before. Let's list the main ones.
Video about the mansard roof of the house with your own hands
It is quite clear that the smaller the angle of inclination, the more usable space will be in your attic. But it is far from always necessary to strive for the most gently sloping placement. Here are some features of the choice:
- If your house is located in a temperate area, where it is often windy and snow is rare, then you can safely make a roof with a slight slope;
- If snowfalls and downpours are common in your area, a sloping roof should be discarded;
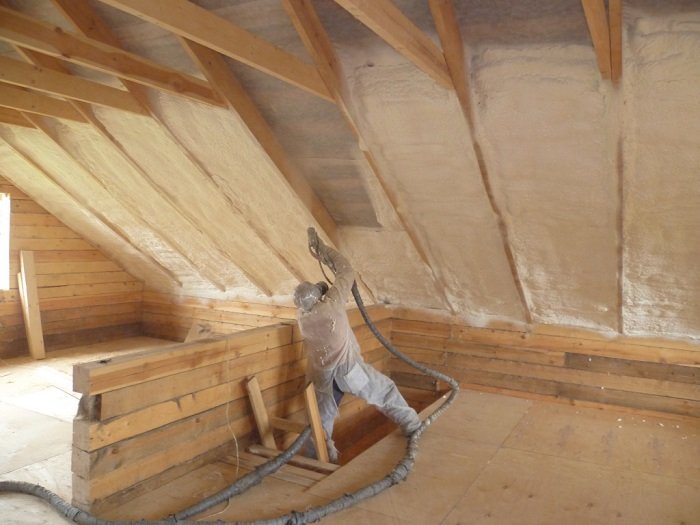
- Do not forget that you need to take care of high-quality heat, sound and waterproofing. The attic is such a living space, like the rest of the rooms in your house;
- The best roofing materials are tiles or slate. Many mistakenly put a metal coating, but with the advent of cold weather they face problems of heat conservation in the attic. Please note that the materials must be fireproof and moisture resistant. The roof always consists of wooden elements. In order to better preserve, it is recommended to treat all such surfaces with an antifungal solution;
- An outdoor staircase for the attic will significantly save space in the house. An internal staircase is a much more convenient option, but it also takes up a lot of space. Great if you take care of installing a ceiling ladder. She practically does not take up space. As an alternative, you can install a spiral staircase, but its convenience is often questionable.
An outdoor staircase for the attic will significantly save space in the house
- To begin with, you will need wooden beams 10x10 cm in cross section. They are applied over waterproofing. The best material for her is roofing material or roofing felt, which is sold in rolls. Working with them is quite convenient and you do not need any additional skills. If your ceiling is also made of wood, then there is no need to lay an additional beam under the main beams.
- The next step is to install the racks on the beams. The same bar with a section of 10x10 cm will suit you. These racks are a kind of skeleton of the walls of your attic. In order for them to fully fulfill their functions, they must be placed no further than two meters from each other. Make sure each one is perfectly level. We recommend checking each with a level and, if necessary, filing in the right places. When the racks are installed, they must be sheathed on both sides. For the inside, a great option is drywall or ordinary plywood, for the outside - slab. It is important not to forget at this stage to lay the insulation between the racks. Each rack is separately fixed with spikes and staples. So that at the same time they do not lean, we recommend that they be properly fixed with temporary braces.
- Next, lay the top beam. Its cross section should be the same as in the previous paragraphs. You can fix it the way you want. But make sure that the beams are held firmly and firmly.
Each rack is individually secured with spikes and staples
- Now you need to install the Mauerlat. This is a kind of support for the rafter leg, which is located at the bottom of the structure. For Mauerlat, you will need a beam with a section of 40x40 cm or a board with the same thickness. Thanks to the Mauerlat, high strength of the roof rafters to the walls will be ensured. It allows you to redirect the weight of the roof directly onto the walls. More than 40 cm cross section is optional. All the same, the Mauerlat lies directly on the wall and the load on it is relatively small. Just remember to put waterproofing under it, otherwise it will start to rot over time.
- A well-mounted mauerlat protects your roof from the effects of wind, snow mass in winter and other loads. Therefore, make sure that it is fixed carefully. To do this, you can use a wire with a diameter of up to 5 mm. It is best to choose annealed wire, which is just designed for strapping. In order to make the walls more durable, the wire is embedded directly into them.
- Now you need to install the rafter legs. Make markings on the rafter frame and Mauerlat in places where the rafters will be installed. Usually the step is 1-1.2 m. For rafters, a board with a section of 4-5 cm and a width of 15 cm is suitable for you. Choose only perfectly flat boards. It is better to overpay a little money for them, but be sure that a do-it-yourself residential attic will not cause you to collapse the attic roof.
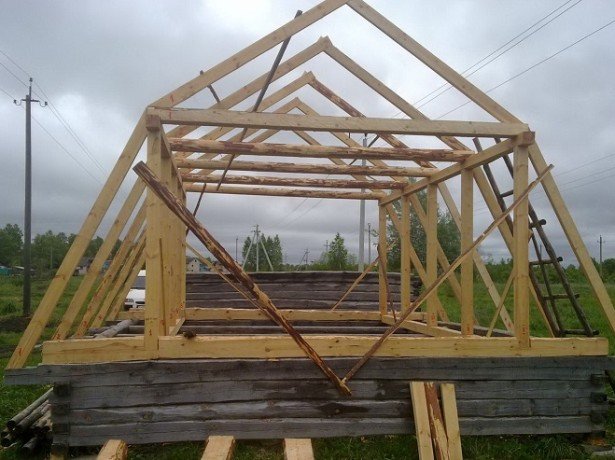
For rafters, a board with a section of 4-5 cm and a width of 15 cm is suitable for you
- Rafter legs should rest on the ridge beam. If your attic has a large area, then the weight of its roof will be large. Therefore, the beam is an indispensable structural element. It is not needed only if the length of the rafter is less than eight meters. In this case, you can do with the usual stretch marks.
- Filly installation. Produce it in the same way as the rafters. To simplify the process, start with the two extremes, pull the twine between them and align with it when installing the next ones.
- Now it is necessary to nail the hem board to the fillies. It will become an obstacle to wind and almost any precipitation.
- Before you make a mansard roof, you must consider where the windows will be installed. Remember that their area should occupy at least 12-13% of the area of the side walls. Where you decide to put windows, you need to strengthen the rafters. To do this, install the cross bars. They will take on the role of the lower and upper parts of the opening, where the window frame will be installed and attached.
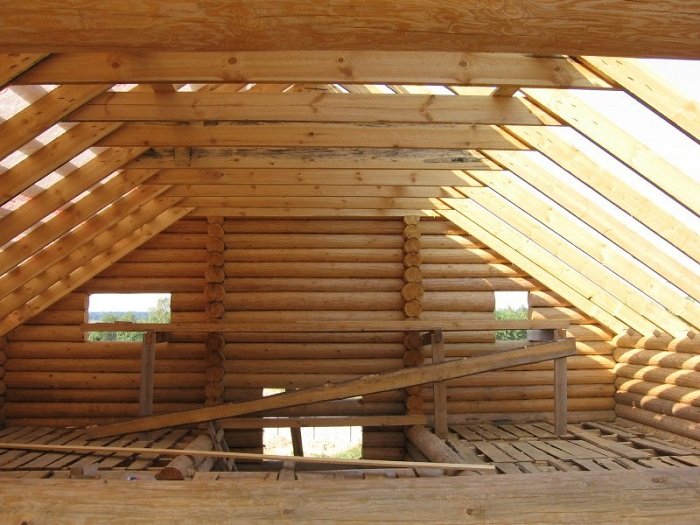
Before you make a mansard roof, you must consider where the windows will be installed.
When the previous ten points are completed, you need to carefully double-check everything that has been done. Already at this stage, you will understand how to make a roof with an attic without any problems, but you always need to play it safe. Especially if you are doing it for the first time.
Carefully go through all the rafters and beams with a level, check whether they really hold tightly and securely, whether there is insulation everywhere, whether problem areas need to be finalized. It will be better if you ask one of the more experienced builders to assess with a trained eye whether everything is really done the way it should. Remember that the roof in your house must be safe and strong. But if everything is fine and the design is held securely, you can proceed to further work:
- You have already created the roof skeleton. Now you need to nail the battens to the rafters. The pitch depends on which roofing material you choose for your roof.
- When the crate is installed, a hydrobarrier must be installed on it. In most cases, plain plastic film works best for this. It is inexpensive, qualitatively protects the attic from moisture ingress and is easily attached with construction brackets. The main thing to remember is that the layers of the film must be laid from the bottom up with the layers overlapping each other.
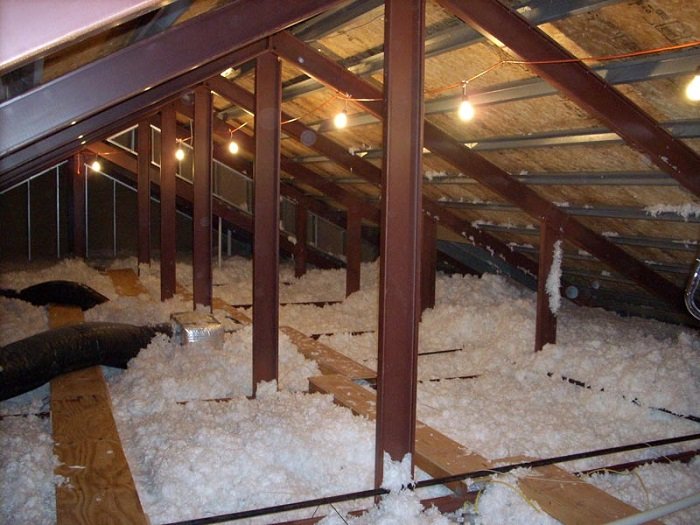
- A heat-insulating layer must be placed on top of the film. One of the best materials that serves these purposes is mineral wool. It is lightweight, retains heat well and is completely safe for your health, unlike many other heat-insulating materials. In addition, it effectively prevents the spread of rodents in your home.
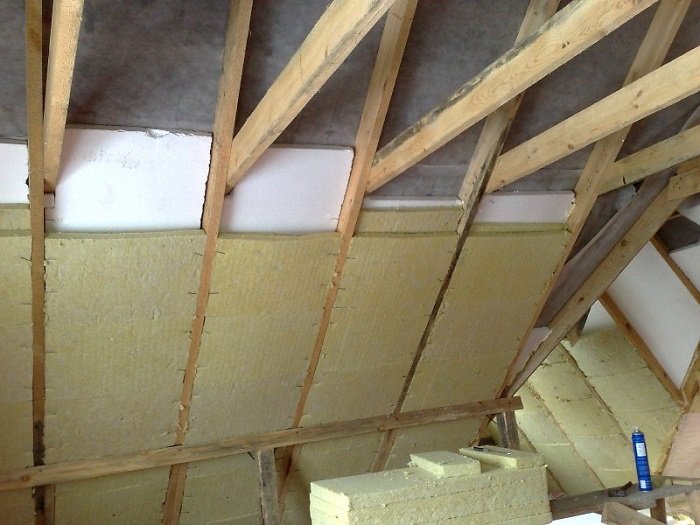
On top of the film it is necessary to put a heat-insulating layer
- When you get to the roof, proceed in the same way as in the case of plastic wrap. The roofing ball also lies from the bottom up, and the elements are superimposed on each other. Make sure that in those places where there is a break in the roof, the upper ball of the roof protrudes above the lower one. It is very important. Otherwise, with the slightest rain, your roof will leak, and the structure will gradually rot.
- The installation of the ridge should take place in such a way that its design completely excludes the possibility of rain falling under the roof of your roof.
Completion of installation
The main part of the work has come to an end. It is recommended to make mansard roofs multi-layered so that they provide the best heat, noise and waterproofing of the entire attic. Do not forget also that the attic must "breathe". Modern windows and doors are an essential element of any such roof.
If you have not fully decided on the installation of stairs, then for a start it is better to install an external one. It will be cheaper and easier that way. In any case, if you feel that this option does not suit you, you can make a staircase indoors at any time, sacrificing space in the house.
Video about a gable roof
Now you know how to build a mansard roof according to all the rules and not resort to the help of an expensive team of builders. Be patient, select high-quality materials and tools, and then follow our instructions. Good luck!


