Backgammon is an ancient oriental game. The place of their origin is not exactly known, but they are already about 5000 years old, which is confirmed by historical manuscripts. The oldest board for the game was discovered in Asia Minor, in the town of Shakhri-Sukhta. Scientists have established that the thing was created around 3000 BC. e. The same board was found in
One of the legends says that one day they decided to test the resourcefulness of the Persians and presented them with chess. They believed that they would not understand the rules of this unusual game. However, the sage from Persia was able to reveal the secret and in response sent them his game, which the Indians could not solve for 12 years. Bozorgmerh sent them nothing more than a game of backgammon (translated from Persian, "nard takhte" means "fight on a wooden board").
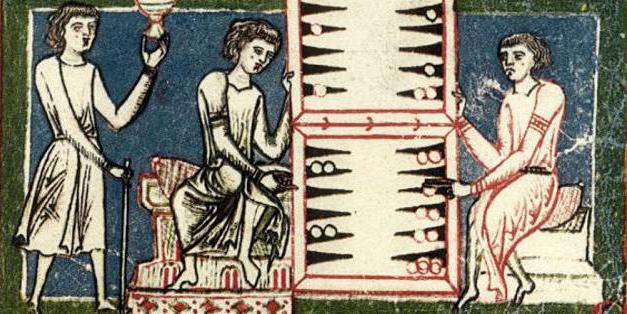
In Western Europe, the game spread thanks to the Crusaders in the 12th century. It gained popularity in the Middle Ages in European countries, where it got its name - backgammon. It imitates the impact of the bones. The name "backgammon" was used among kings and nobility.
The game has gained considerable popularity in our time. Many craftsmen never cease to amaze with their new original inlay performance. This article will describe how to make backgammon with your own hands.
What does the game develop?
Just like chess, backgammon is designed to train thinking. Only in the first case, logical thinking develops, and in the second - resourcefulness and ingenuity. Scientists claim that after everyday backgammon games, the level of intelligence increases by 10%. This conclusion was reached by researchers in the UK.
What does the board look like?
The board has a rectangular shape. It has 24 points (12 on each side). The board has two sides. Each point, as a rule, represents a narrow elongated triangle, the base of which is located on the edge, and the height reaches half the board. Six points on one side call the player's home. Its location depends on the rules of the game. The board is divided in the middle by a vertical strip called a "bar". Usually downed checkers are put up there. Each player has 15 of them. The move is determined by the pair - charge. There are also two pairs for each player, as well as cups for mixing bones.

Carpentry work when doing board
Many are interested in how to make backgammon with their own hands. Such a process is within the power of even a beginner in woodcarving. The first step is to draw up a detailed drawing. Backgammon in this case will turn out without errors in size.
You will need:
- plywood;
- slats;
- loops.
What should plywood be? Polished carefully, it has no roughness and burrs, which is very important for the manufacturing process.
Board size
Before you make backgammon, decide what size board you want to get. They are different:

What is the main thing when carving on a backgammon board?
In most cases, carved backgammon, the dimensions of which are indicated above, are made in a classic style with flat reliefs inherent in it. Such work will be possible even for beginners. Half the success lies in the right drawing. Ornaments with plants or arabesques became widespread.
For example, consider panels made of alder. On the one hand they are veneered with ash. If you want to do this part of the work on your own, then it should be noted that the veneer is applied only on one side. After drying, the panel will bend towards the veneer. In order not to get a similar result, plain paper should be glued on the opposite side, you can even newspaper. When the glue dries, there will be no deformation in this case. When working with panels, it is advised to put them on polyethylene from packaging with soft inflatable pimples. This will protect parts from damage during operation.
The film is placed with the smooth side to the workpiece, otherwise, during operation, the chips will clog in the pimples and may damage the surface. When applying a tone to the material, you can get an undesirable effect.

How to transfer a drawing?
The drawing is transferred to the workpiece by means of carbon paper. Stock up on a ready-made image, the scale of which is designed to be applied over the entire plane. This will help to avoid breaking the symmetry, which is an important point in the manufacture of the board. After transferring the drawing by means of carbon paper, it should be corrected by hand.
Background selection for carving
At such a stage as sampling the background for carving, there are two methods:

Carving tools
To make backgammon with your own hands, you will need the following tools:
- Knife-jamb with an acute angle to the tip.
- The flat shape of the chisels is 1, 2, 3, 5, 10 mm in size.
- Chisels with a semicircular shape measuring 6.9 mm.
Arabesque processing
After sampling the background in all hard-to-reach places, you should start working on the ornament. Start from the bottom and top edges of the panel. The intersections of the parts are cut with a knife. A depth of 2 mm is taken. By cutting with a flat chisel, the lower and upper points of the pattern are revealed. Thus, the ornament will be intertwined.
Then the future profiles of the drawing are drawn. By means of a knife or a flat chisel, a convex part of the profile is formed. Then, by means of semicircular chisels, the concave parts of the profiles are processed. The operation should be repeated with the central part of the ornament. The drawing must be worked out again, correcting all the shortcomings.
Matting background
Matting the background means piercing it around all the carved elements. This can achieve graphic arabesques. For this purpose, you can use a simple sharpened screw. Various punches are also used. Then the tattooing of all the remaining parts continues. The carving process at this stage ends, you can proceed to the finishing part.
Toning
Do-it-yourself backgammon involves toning. For this process, you can use stains on the water. Usually one color is used, which is diluted to three shades: light, medium and dark. In this case, two types of wood are used: ash and alder. To emphasize the beauty of each of them, two stain colors were used: dark oak and teak. Teak is suitable for ash and dark oak is suitable for alder.
First of all, the carved panel is subject to tinting. The lightest paint covers the entire carving. Then, without allowing the stain to dry, a medium shade is applied to the milled edges of the panel.
The next step involves coloring the background. It is covered with the darkest tone. Do it with care. The paint is applied with the utmost care so as not to fall on the light part. Coloring should start from the center of the selected background area, moving on to the raised carved parts. In this case, the minimum amount of dye is taken with a brush.
The wooden surface should be allowed to dry, and then on the other side, stain the teak. The carpentry components of the board are covered with the same tone.
After the stain dries, the raised pile is removed with a sandpaper. The main thing is not to damage the paint on the sharp edges that remained on the thread after working with chisels.
The whole board is covered with a colorless varnish. For this purpose, a two-component matte varnish is used.
The second option for making backgammon
The manufacture of such a product as carved backgammon was described above. Another method involves burning patterns.
To make backgammon with your own hands in the second way, you will need:

Progress
The process of making a backgammon board in this case involves the following steps:
- Work begins with the design of the external and internal sides. The prepared drawing is burned on both sides according to the selected cliché.
- glued into a spike and glued around the perimeter of the board.
- Holes for chips are cut out in wide slats and also glued.
- Next, hinges and a lock are installed.
- At the end, the board is covered with a colorless varnish in three layers.
What chips are used?
Chips are machined from You can use ready-made plastic ones for playing checkers.
Conclusion
The most beautiful backgammon boards are not like chess boards. Their reverse side is always decorated with magnificent patterns or patterns. Backgammon, made by hand, looks impressive. The price of such a product is quite high.
Municipal budgetary educational institution Secondary school No. 30
with in-depth study of individual subjects
Technology project
Making a backgammon board
Completed by: Rotkevich Gleb
8th grade student
MBOU secondary school No. 30
Head: Galkina E.R.
Pyatigorsk 2016
Table of contents:
1. Justification of the project ________________________________________3
2. Historical background ____________________________________________4
3. Variability, design development _____________________7
4. Technological map for the manufacture of backgammon boards ____20
Safety _____________________________________________25
6. Economic justification ________________________________ 27
7. Environmental justification _________________________________28
9. Conclusion (summary) ______________________________________30
10. Photo of the product ____________________________________________31
11. List of used literature _________________________32
Justification and choice of project topic
In the modern world, there is a paradox: while any necessary thing can be bought in a store, handmade items are becoming more and more popular. The reason for this is that purchased items may be of higher quality, but they do not reflect the individuality of the owner. Those created on their own carry elements of creativity and fantasy, so it is very interesting to design them and then show them to friends and relatives. One of these products, simple to manufacture, but giving a huge scope for creativity, is a backgammon board. Ethat is an interesting, useful thing in the house.
I had a decision to make backgammon for the family when we all get together and try to have a good time. Backgammon is an intellectual board game that trains thinking, memory, attention. It allows you to simulate the situation, predict, calculate the course, which develops thinking. Variants of the situation and the need for a quick decision develops the process of analysis, which refers to the mental abilities of a person. In addition to thinking training, the backgammon board game develops ingenuity and promotes discipline. This is a good thinking training that does not require special knowledge, but only knowledge of certain rules.
I wanted to develop a sketch of an original, commemorative board for playing backgammon, dedicate it to the anniversary of "235 years of Pyatigorsk" and make them with my own hands at the lowest cost.
And I set myselftarget :
to develop and make beautiful, inexpensive backgammon from wood, which you can play at home with friends, it is interesting to spend your free time.
While working on the project, I decided the following tasks:
to develop an economical, technologically advanced, durable and reliable design of wood products;
develop a simple technological process for manufacturing a product based on the studied wood processing technologies using tools and fixtures available in the school workshop;
offer your idea for decorating a backgammon board.
The ability to work with wood is an opportunity to join the beautiful. We learned this skill in woodworking technology lessons, and now I would like to use it for a necessary and noble cause.
My projected product must be original, low cost for its manufacture. It will not take much time to make a backgammon board, but how much beauty and interest it will bring in favor of our family.
Historical reference
Backgammon (from nēw-ardaxšīr -literally:brave ), other common names:backgammon ( trickrac ), backgammon ( backgammon ), tavla ( Tavla ) ; ( tabula) - "playing board"),shesh-besh , cat - for two players on a special board divided into two halves.
Purpose of the game - throwing and moving the checkers in accordance with the dropped points, pass the checkers a full circle around the board, go into yourhouseand throw them over the board before the opponent does. There are two main varieties - And .
Backgammon is an ancient oriental game. Its homeland is not exactly known, it is only known that people have been playing backgammon for more than 5000 years, for which there is historical evidence. An analogue of this game was found in the tomb(XV BC)
One of the legends says that once, wanting to test the sharpness, sent them a kit, believing that they will not guess how to play this wise game. However, the Persian sage Vazurgmihrnot only easily coped with this task, but also offered his own, which the Indians could not solve in 40 days. Buzurgmihr invented and sent his opponents a new game - backgammon (New Ardashir - in honor of the founder of the dynasty).
Thumbnail from.
IN , in the III millennium BC. e. this game had symbolic and mystical meanings. Persian astrologers with the help of backgammon predicted the fate of the rulers. The playing field was likened to the sky, the movement of chips in a circle symbolized the course of the stars, each half of the board, consisting of 12 marks for chips - 12 months a year, dividing the board into 4 parts - the seasons, 24 points meant 24 hours a day, and 30 checkers - the number of lunar and moonless days of the month. The sum of points on opposite sides of the die - 7 - was equal to the number of planets known at that time.
The game became very popular in medieval Europe and was called backgammon. This name apparently comes from the sound of bones hitting a wooden board. At that time, the word "backgammon" was used to refer to the game of kings. Only members of the highest aristocracy had the privilege of playing backgammon.
Although the roots of backgammon go back to the East, the rules of the most common modern backgammon game in Europe were established in Englishman ( Edmond Hoyle ). This variant is called" (as opposed to the older "», invented in the East) or "Backgammon". According to one version, the name "Backgammon" is formed from the English words "back" and "game" and is due to the fact that the opponent's checker, being beaten, returned back.
Today backgammon is very popular all over the world. In all major capitals of the world there are backgammon clubs and international tournaments are held. One of the most famous backgammon championships is the championship of Azerbaijan - Gizil Zar - Golden Zara. Zara (dice) made of gold are awarded to the winner.

Board for backgammon
playing field (board) has a rectangular shape. There are 24 on the board.item - 12 on each of two opposite sides. The point is usually a narrow, elongated isosceles triangle, the base of which lies on the side, and the height may be as high as half the height of the board. The points are numbered from 1 to 24. The numbering is different for each player. For convenience, items can be colored in two colors - even in one, odd in another.
Six points in a row in one of the corners of the board are calledhome player. LocationHouses depends on the rules.
Every has a set of checkers - 15 pieces of the same color (in some versions of the game fewer checkers are used).
There is at least one pair ( zar ). The set can contain two pairs of bones - each player has his own, as well as special cups for mixing the bones. In the bet game, the so-called “doubling cube” can also be used, an additional cube for the convenience of taking into account the increase in rates - the numbers 2, 4, 8, 16, 32, 64 are marked on its faces.

There are many varieties of backgammon games that differ in the rules of moves, bets, starting position and other details. However, there are two main varieties of the game - And backgammon.
variability
At the moment, in view of the huge opportunities that modernity presents us, you can find all the necessary information that will fully reveal all the features of how to make backgammon with your own hands. In order to make backgammon, as a rule, hardwoods are used; boards must be of high quality, which were stored in accordance with all the rules and requirements. After all, the quality and service life of the product itself depends on the quality of the material. So, after the material is acquired, you should proceed to the manufacturing process itself. There are many options for how to make backgammon. And they are very popular these days.


True connoisseurs of this game always have a beautiful board, and some even purchase a special table for playing backgammon - an ordinary coffee table, on the surface of which drawings-marks for the game are applied.


The choice of such boards and tables is huge: there are wooden products, there are products made of leather, glass. They are usually made beautiful by applied intricate patterns.

In a leather case.
The backgammon board, according to Eastern tradition, has always been richly decorated with carvings, inlays, and paintings.

Half the success in decorating a board for a game lies in a well-chosen pattern. The most common floral ornaments.
Many boards combine the ability to play chess, checkers and backgammon, that is, 8x8 cells are drawn on one side of the board, and 6 + 6 markings are applied on the inside. Chess pieces and checkers (chips) together with dice are placed inside the board in special holes.


The best backgammon boardsNot combine a chessboard, and on the reverse side they have a beautiful carving or pattern. Such wooden boards are most often varnished, they are expensive, since such sets are handmade. With such backgammon you can play with guests, this will be the highest "chic", they are often given as gifts to best friends.

Design development
When designing the structure and shape of the product, I took into account the followingrequirements:
Versatility, pleasant design, visual appeal, manufacturing safety, strength and durability, manufacturing time, availability of tools and equipment, ease of manufacture and assembly, material availability, maximum weight and dimensions, optimal economic costs.
1. Let's make backgammon from well-polished plywood measuring 58.5 x 28.5 cm, 4 mm thick (2 sheets).
2. For drawing on the outer surface, you will need a burner; we will translate the drawing through the stencil and apply it with care and deliberation using different nozzles of the burner, after which we will cover the drawing with several layers of varnish. And also decorate with carved wood figures.
3. Let's make blanks for the frame from thin rails and glue them to the base.
4. We attach loops to both halves of the board, they should fold and unfold freely.
5. The markings on the inside are based on the 6x6 principle. Holes for chips must be marked inside the sides. Holes are sawn from separate boards and glued, thus getting sides that mark the boundaries for placing chips.
6. Polishing is important to avoid surface irregularities.
Material selection
Before starting work on the product, it is necessary to determine what material it will be made of. I chose plywood and timber as the main material for the manufacture of the product, since its cost is not high, it is easily processed, polished and lends itself well to finishing.
For sawing, it is necessary to select healthy and high-quality wood: clean and uniform in color, without knots, cracks and chips, well dried and not warped, without areas affected by rot or fungus.
The material for sawing can be planed bars from any type of wood, preferably from soft woods such as linden, cedar, pear, etc.
For cleaning and grinding the surfaces of parts, sandpaper of different grain sizes is used. It is good to have in stock several varieties of skins with large and small grains.
Glue is used to connect the product. When making the fastening of the two halves of the board, metal loops are needed.
Lacquers, paints and other finishing materials are used for final finishing of the product. I will use varnish.
Tools
1) Hacksaw;
2) Jigsaw;
3) Burner for wood;
4) Chisel;
5) Screwdriver;
6) Ruler 1m long with divisions, pencil;
7) Brush for varnishing;
8) Sandpaper with fine grains;
9) Glue.


The listed tools are available in the household.
Manufacturing technology
Before starting work, it is necessary to develop a technological map for the manufacture of the product.
Work plan making a board for playing backgammon:
1. Selection and preparation of material.
2. Marking parts along the length.
3. Using a saw, cut plywood into two equal horizontal parts, cut 4 planks from a beam and cut holes from 2 planks.
5. Process the parts with scissors paper.
6. Develop a drawing and apply it to the outside with a burner.
7. Pre-assemble parts. Mark the position of the loops.
8. Perform final assembly: screw in the hinges.
9. Lacquering details.
Technological map for the manufacture of boards for playing backgammon
Sequence of operations.Operation sketch.
Tools and fixtures.
Making 2 halves of a part 58.5x28.5cm
Ruler, pencil, saw, sandpaper.
Production of bars with corners 2 horizontal 58.5 cm long 2 vertical 28.5 cm long and 3 cm wide
Ruler, pencil, sandpaper saw.
Development of a pattern and applying it with a burner to the outer surface of the board

Pencil, eraser, burner
Sawing ornament for exterior decoration
Jigsaw.
Grinding parts, pre-assembly
Sandpaper.
Assembly: gluing parts, screwing loops
Glue, screwdriver.
Product finishing
Work on the composition ends with finishing. Wood products are finished in different ways. With a beautiful texture, they are carefully cleaned with sandpaper, and then polished with a bar of harder rock. Such a product can be left only polished or coated with a colorless varnish to give a vitreous sheen. For sanding the product, a cloth-based sandpaper is usually used. When grinding, coarse-grained sandpaper is used first, and then fine-grained sandpaper.
Even carefully sanded wood without varnish remains pale and dull. The varnish emphasizes and highlights the natural warmth and characteristics of a particular type of wood, gives brightness to color, smoothness, purity and shine to wood. Twhich treatment gives additional decorativeness and surface protection, closes the natural pores of the material, preventing the release of natural phytoncides and odors.The varnish covering protects wooden products from moisture, dust and atmospheric influences.
Varnishing should be carried out in a dry and warm, well-ventilated, dust-free area.
Wood varnishing is done with a brush. Movements during varnishing should go along the fibers, overlapping the edges of previous strokes.
Do not allow streaks and sagging, carefully rub the varnish. The application of the first layer ends with its drying (about an hour). This is followed by sanding with a fine-grained sandpaper, followed by sanding with a cloth and thorough sweeping of the dust. The next layer of varnish is applied. If necessary, after drying, polishing and cleaning with a cloth is carried out. Mandatory, final stage - varnishing the wood with the last layer. Final drying is carried out with closed windows and doors to prevent air movement and ingress of accidental dust. Lacquering takes a relatively short time, but significantly improves the presentation of the product.


Safety
Before starting work, you should remember the general rules and safety requirements. Knowing even the simplest techniques allows you to save your fingers and hands from damage.
The main causes of injuries when working with hand tools are the destruction of the tool and non-compliance with safety regulations.
General safety rules:
The work table must be sufficiently strong and stable (do not wobble or move).
When working, you should use special fixtures for fastening the workpieces. This will secure and speed up the work process.
Lighting in the working room should be sufficient and located so that during work it is not obstructed by your body.
You can not cut on yourself, and you also need to make sure that there is no free hand in the direction of the tool.
The workplace should be cluttered with foreign objects.
Cleanliness in the workplace should be observed (it is better to remove chips from the table several times during work than, brushing it off at the end of work, unexpectedly stumble upon a sharp object).
To clean the workplace, you need to use special brushes.
Tools should always be put in their place (the advantage, and most importantly the safety of this, is undeniable, since in this case they will definitely not fall off the table and injure anyone).Proper storage of the tool is the key to safe work.
Sawing safety:
it is allowed to work only with a serviceable tool that ensures reliable and correct fastening of the file;
securely fix the workpiece, it is impossible to carry out sawing on weight;
use a guide when sawing;
put the hacksaw with the teeth away from you;
do not keep the left hand close to the place of sawing;
do not blow off sawdust, use a sweeping brush;
beware of injuries to the fingers of the cutting edge of the saw; take breaks at work; Report injuries or cuts to the teacher immediately.
Burning safety precautions:
room where it takes placeburning, it is necessary to ventilate more often;
you can turn on the electric burner only with the permission of the teacher;
When working, do not press hard on the pen. At the end of the line, the pen must be sharply torn off from the drawing;
do not lean close to the place of burning. Protect your hands and clothing from the touch of a hot feather;
after finishing workelectric burnermust be disconnected from the mains.
Safety precautions when sawing with a jigsaw:
ventilate the room;work with a jigsaw and an awl with securely fixed and serviceable handles;
securely fasten the saw table to the workbench;
securely fix the file in the frame of the jigsaw;
do not make sudden movements with a jigsaw when cutting, do not lean low over the workpiece.
Safety precautions when varnishing:
do not varnish near heating devices;
do not sniff varnish in order to avoid poisoning;
avoid getting varnish on open areas of the body;
wash hands thoroughly with soap after work;
hold varnishes (store) away from open flame.
Economic justification
In order to calculate the cost of making your product, you need to know the cost of all materials, labor and electricity spent on its manufacture. For the manufacture of backgammon, I needed the following material:
bar 58.5cm x 2 pieces = 1m 17cm; 28.5 cm x 2 pieces = 57 cm;
Total \u003d 1m 74 cm x 22 rubles \u003d 38.28rubles kopecks .
Plywood 58.5 cm x 28.5 - 2 pieces = 163 rubles
varnish 90 rubles 400 grams: 150 grams spent. Total = 33.75rubles .
tassel =40 rubles .
Loops 3 rubles x 2 pieces = 6rubles .
Self-tapping screws 1 rub x 8 pcs = 8 rubles
Total: 290 rubles
Electricity cost:
1KW = 4 rub.
Power of the electrical apparatus = 0.6KW
Working time - 1.5 hours.
15KW· 1.5h· 4 rubles = 90 rubles
Labor cost:
Normative wages for a carpenter of the 3rd category 15 rubles / hour
Working time - 12 hours.
12h· 15 = 180 rubles
Si \u003d Sal + Sm + St
Si=90rub+290rub+180rub=560 rubConclusion: this amount does not exceed the cost of similar products in the store, which indicates the feasibility of its manufacture (the average cost of such backgammon is 1,500 rubles). I could sell these backgammon for 1500 rubles and make a profit of 940 rubles.
Environmental rationale
Wood is one of the most beautiful and environmentally friendly materials. Making backgammon boards from wood minimizes waste disposal, which has a positive effect on the environment and more economical use of energy.
When carrying out the project, planed boards were used. During sawing, the resulting sawdust could be used, for example, as bedding for animals; in the fall - to warm the beds, and in the spring - to preserve moisture and protect them with crops from possible cracking of the earth after watering.
The ash from the burning of sawdust and other wood waste can also be used as fertilizer.
Based on the foregoing, I believe that the manufacture and use of the product does not entail changes in the environment, disturbances in human life.
Wooden backgammon will emphasize a special individuality. In addition, a product decorated with carving, burning, painting, etc. give it individuality, unique appeal and beauty.

Workshop
for the manufacture of wooden backgammon

In our workshop you can order a high-quality and inexpensive product! Fast execution.
Conclusion (summary)
The product I made turned out to be original and beautiful, very cheap. When working, available materials were used, manufacturing technology is available to every student. The knowledge gained in the technology lessons is sufficient for the design and manufacture of the product. In the process of working on the board for playing backgammon, I had to familiarize myself with many manufacturing options. During operation, there were no difficulties and therefore it was not necessary to change the manufacturing technology or the design of the product.
Such a board for the game can be presented to any loved one, friend, or just as a keepsake.
My product is distinguished by rational simplicity, discreet but genuine beauty and a romantic look. Students and teachers liked my work, my mother was delighted.
The process of sawing, burning out captures, since personal labor is invested in every detail, and the finished product is evaluated as its own work.
During the work on the project, all tasks were solved:
an economical and technologically advanced, sufficiently strong and reliable design of a wooden product has been developed;
on the basis of the studied wood processing technologies, a simple manufacturing process has been developed;
according to the developed technical documentation, the product was manufactured on time;
the result of the work showed a fairly good aesthetics of the product.
Therefore, I think thatthe goal of designing and manufacturing a beautiful and inexpensive backgammon board from wood has been achieved.
Product photo
List of used literature
1. Do-it-yourself series. Wood processing. - M.: VNESHSIGMA AST, 2000. - 31 p., ill.
2. Simonenko V. D. Technology. Labor training. 7 cells – M.: Ventana-Count,.
3. 365 tips for a young master.
4. Safety precautions when working with hand tools.
5.
A complete set of backgammon consists of a playing board, thirty chips and two dice. The shape of the playing board resembles a closed book 660*310mm in size (660*620mm when open) and 35-40mm thick. It opens like a chessboard.
If the inner plane of the board is mentally divided by mutually perpendicular lines into four equal parts, four rectangles will be obtained. On some modern boards, they are indicated by the letters of the Latin alphabet: A, B, C, D. They are placed in the middle of the smaller sides of the board (Figure 1).
On each quarter of the board there are six semi-circular nests-fields, the radius of which is equal to the radius of ordinary checkers - 15mm. Chips move along these nests (along the perimeter of the board). The nests are numbered from one to six, starting from the outer (side) side of the board.
Above each field is a sector with a height equal to five chip diameters (165-180mm). Sectors are drawn on the light plane of the board with black lines.
On standard boards, quarters of the board are not indicated, fields are not numbered, the arrangement of chips when playing long and short games is not indicated, the direction of movement of the chips is not given, and this is very important, especially for beginners. Therefore, we advise on a new board - whether you bought it or made it yourself - apply all the symbols shown in Figure 1.
At the same time, 15 white and 15 black chips participate in the game. Regular checkers with a diameter of 30 mm are suitable for a backgammon board of this size.
To determine the player who starts the game first (with white checkers), and the length of moves, two dice are used - black and white. The dice are called "dice", or "dice". On the planes of the cube (side size 10-12 mm), dots are applied - from one to six, as in dominoes. The edges and corners need to be slightly rounded so that the cubes roll freely when thrown.
In order to make a backgammon board yourself, you will need: two pieces of plywood 4mm thick, 260 * 500mm in size;
eight wooden slats 10mm thick, 25mm wide (four - 260mm long and four - 500mm long);
two furniture loops 30 * 30mm in size;
one or two furniture hooks for locking a closed board;
carnations 10 and 12m long;
eight screws 8 - 10 mm long for hinges;
slats for curly slats (4 pieces).
Semi-circular cutouts for nests on the slats can be cut out with a jigsaw, but it is better, if possible, to drill through holes, and then saw them in half lengthwise. Then you get two strips at once. The dimensions of the strap with nests are shown in Figure 2.

Pieces of plywood, slats and planks should be well cleaned with sandpaper. The slats are connected strictly at right angles, as shown in Figure 3. The curly slats should fit snugly between the long slats. After the frames are knocked together, connect both rectangles with loops. They must be cut in such a way that they do not protrude above the surface of the rails and that the screw heads are "drowned" in the holes of the hinges.
Then, on the outside, plywood should be applied to the frames and temporarily nailed with two carnations. Then open the board and circle with a pencil along the inner and outer perimeter of the frames. Insert the curly planks inside the board and also circle around the contour of the nests.
Then disconnect the plywood from the frames, file and trim them around the perimeter, apply all the designations with a pencil (Figure 1) and, if desired, arrange the outer planes. After that, cover all the details with one layer of furniture colorless varnish, rubbing it well into the surface of the wood. When the varnish dries, circle the traces of the pencil with black ink. Contour lines should be 0.8mm thick. On the transverse rails of the frames with enamel or oil paint, apply the letters: A, B, C, D. Then coat all the parts with varnish one or two more times, dry well and finally nail the covers to the frames. Then install curly strips and nail them with carnations from the outside of the covers.
You can also use a regular chessboard to play backgammon. Then it must be cut out from the inside and, in accordance with the dimensions of the board, make curly planks. Chips will need a smaller diameter, according to the size of the resulting nests.
Who does not like to spend time in the evening playing an exciting board game in the company of loved ones? And the masters of their craft can not only play, but also make board games themselves. In this tutorial, you will learn how to make backgammon. In the process, you will have to make a little effort and time, but the result, made by yourself, will be worth it.
We make backgammon step by step with our own hands in a master class
Necessary materials:- walnut, maple and mahogany veneer;
- MDF 6 mm thick;
- brass screws 4.5x25 mm;
- tools;
- saw machine;
- magnets.
The board game will be made of plywood. It is also possible to make it from plexiglass or wood.
Instruction:1) We start with the preparation of veneer. Using a ruler, we measure strips of walnut and maple material measuring 38x191 mm. and cut out.
2) Made of wood with a thickness of 13 mm. we cut out the upper plates with dimensions of 38x254 mm. and lower 51x254 mm. in the upper plates we measure a distance equal to 25 cm from the ends and make mounting holes 4 cm in diameter.
3) Arrange 15 pieces of veneer strips in 4 piles. Then align the edges and clamp them into the edges between the top and bottom plates.

4) Use brass screws to secure the top plates.
5) With the help of a saw machine, we file the edge of each package at a disk with 60 teeth.
6) We make a note about the sawn edge at the end of the plate.
7) Turn the package 180 degrees. Then we press it with a straight edge to the longitudinal stop and file the second edge of the package with the machine to a width of 33 mm.
8) We perform a similar sequence of actions with the rest of the packages.
9) We take adhesive tape and stick strips on the sides of the veneer bags. We saw off the marked end, thereby shortening the package to a length of 203 mm. To do this, use the corner stop, rotated at an angle of 5 degrees. We repeat the same action with other packages.

10) Set aside a distance of 32 mm. at the end and 165 mm. - on the side of the package and put labels.
11) Align the marks, circle the package for fixing on the base of the stop and the die.
12) We saw off a package of veneer according to the photo.

13) Now we start drawing up an ornament from triangles. We take a strip of veneer, which we will use to align the triangles during assembly.
14) We begin to collect the square of the field. Using oil tape, glue the light and dark triangles to the "ruler" alternating.
15) Glue the light and dark triangles together in pairs, first with adhesive tape, and then attach them to the edge of the ruler.
16) The square will be finished when there are 7 light and 6 dark triangles.
17) Remove the pieces of tape.
18) We make three more squares in the same way.
19) Take two pieces of maple veneer, attach and align them on the edges of the half of the playing field.
20) Glue one quadrant evenly to the edge of the dividing strip.
21) On another dividing strip we transfer the marks of the position of the vertices of the triangles.
http://stroyboks.ru/wp-content/uploads/2015/08/2015-08-02_10-22-14.jpg
22) We attach the second quadrant with glue and align it in accordance with the marks.
23) Similarly, we collect the other half of the playing field.
24) We seal the entire surface of the set with tape, and then remove its pieces from the bottom side.
25) We cut both parts of the playing field to a width of 191 mm., And then align the edges.
26) Cut out two strips of maple veneer with a width of 48 mm. They will become the side fields of the playing field, which are used to store checkers. Align their edges and glue them to one edge of each set using tape.
27) We cut out four plates 19 mm wide from MDF. and two pieces of veneer 255x432, as well as two bases from the figure below (numbered A) 6 mm wide.
28) We apply PVA glue to the base and put a sheet of veneer on top, which we then cover with a sheet of wax paper.
29) We squeeze the package between the MDF parts with a thickness of 19 mm.
30) After the glue has dried, remove the clamps and put the veneer on the second base of the field with further gluing.
31) Use the saw machine to trim the playing field.
32) We put a milling cutter on the table and fix a cutter with a width of 6 mm in its collet.
33) We cut the folds on all sides that are not covered with veneer. In this case, you need to adjust the overhang so that the thickness of the veneer is slightly more than 3 mm.
34) Glue the playing field to the other side of the base with wax paper, pressure plates, clamps and glue. After the glue dries, you need to repeat the action with the second base.
35) Now we insert the bases with the playing fields into the box, and then glue them and divide them into two halves.
36) We make two blanks 67x460 (in the pictures above for Figure B) and 67x300 mm. - for S.
37) We turn the blanks towards us with the inside and with a saw blade we make tongues 3x6 mm. parallel to the edges, while indenting from the edge of 3 mm.
38) With the same, we mill the roundings of both edges with a radius of 1.5 mm.
39) The next step is to saw off the blanks to the desired length, while making bevels at their ends for connection.

40) When the parts are dry, collect the box and insert any of the bases with the playing field, but only one.
41) We adjust the sawing machine to a width of 32 mm. and divide the box into two halves.
42) We cut out long partitions (in the figure under the designation D) and glue them to the right place.
43) We do the same with short partitions (E in the figure), focusing on the length of the partitions D, and then glue.
A complete set of backgammon consists of a playing board, thirty chips and two dice. The shape of the playing board resembles a closed book 660*310mm in size (660*620mm when open) and 35-40mm thick. It opens like a chessboard.
If the inner plane of the board is mentally divided by mutually perpendicular lines into four equal parts, four rectangles will be obtained. On some modern boards, they are indicated by the letters of the Latin alphabet: A, B, C, D. They are placed in the middle of the smaller sides of the board (Figure 1).
On each quarter of the board there are six semicircular nests-fields, the radius of which is equal to the radius of ordinary checker chips - 15mm. Chips move along these nests (along the perimeter of the board). The nests are numbered from one to six, starting from the outer (side) side of the board.
Above each field is a sector with a height equal to five chip diameters (165-180mm). Sectors are drawn on the light plane of the board with black lines.
On standard boards, quarters of the board are not indicated, fields are not numbered, the arrangement of chips when playing long and short games is not indicated, the direction of movement of the chips is not given, and this is very important, especially for beginners.
DIY backgammon game
At the same time, 15 white and 15 black chips participate in the game. Regular checkers with a diameter of 30 mm are suitable for a backgammon board of this size.
To determine the player who starts the game first (with white checkers) and the length of moves, two dice are used - black and white. The dice are called "dice", or "dice". On the planes of the cube (side size 10-12 mm), dots are applied - from one to six, like in dominoes. The edges and corners need to be slightly rounded so that the cubes roll freely when thrown.
In order to make a backgammon board yourself, you will need: two pieces of plywood 4mm thick, 260 * 500mm in size;
eight wooden slats 10mm thick, 25mm wide (four - 260mm long and four - 500mm long);
two furniture loops 30 * 30mm in size;
one or two furniture hooks for locking a closed board;
carnations 10 and 12m long;
eight screws 8-10mm long for hinges;
slats for curly slats (4 pieces).
Semi-circular cutouts for nests on the slats can be cut out with a jigsaw, but it is better, if possible, to drill through holes, and then saw them in half lengthwise. Then you get two strips at once. The dimensions of the strap with nests are shown in Figure 2.
Pieces of plywood, slats and planks should be well cleaned with sandpaper. The slats are connected strictly at right angles, as shown in Figure 3. The curly slats should fit snugly between the long slats. After the frames are knocked together, connect both rectangles with loops. They must be cut in such a way that they do not protrude above the surface of the rails and that the screw heads are "drowned" in the holes of the hinges.
Then, on the outside, plywood should be applied to the frames and temporarily nailed with two carnations. Then open the board and circle with a pencil along the inner and outer perimeter of the frames. Insert the curly planks inside the board and also circle around the contour of the nests.
Then disconnect the plywood from the frames, file and trim them around the perimeter, apply all the designations with a pencil (Figure 1) and, if desired, arrange the outer planes. After that, cover all the details with one layer of furniture colorless varnish, rubbing it well into the surface of the wood. When the varnish dries, circle the traces of the pencil with black ink. Contour lines should be 0.8mm thick. On the transverse rails of the frames with enamel or oil paint, apply the letters: A, B, C, D. Then coat all the parts with varnish one or two more times, dry well and finally nail the covers to the frames. Then install curly strips and nail them with carnations from the outside of the covers.
You can also use a regular chessboard to play backgammon. Then it must be cut out from the inside and, in accordance with the dimensions of the board, make curly planks. Chips will need a smaller diameter, according to the size of the resulting nests.
HomeNewsCase for chess and backgammon: do-it-yourself
Case for chess and backgammon: do it yourself
A case for chess and backgammon - soundly made, of good wood, beautifully decorated - can become the same exclusive item as a jewelry box. To do this, it is not necessary to buy expensive handmade sets. We will tell you how to make a case with your own hands, and what is required for this.

Choosing a tree
First of all, you need to choose a tree from which a box for chess or backgammon will be made. Usually one of four types of wood is used:
1) beech is a non-caustic material, and it is easy to tint it in any color, for which it is preferred by many;
2) pine is a fairly easy-to-use material, especially if a light-colored box is planned;
3) oak is valued for its hardness, but an element may break off during processing;
4) ash has a beautiful pattern, and is also slightly inferior to oak in hardness.

We make a wooden blank
You can make the blank yourself, order it in the workshop, indicating all the necessary dimensions, and if there is a suitable old, shabby case, take it as a basis. It is necessary to remove the old fittings from such a product, and then use the skin to remove the old varnish and paint.
If you have time, you can make a blank yourself. For this, a plane is being prepared on which they will play. It is recommended to cut the boards into thin boards and then glue them together. The result will be a flat playing field, but the planks will compensate for warping each other. An easier option would be to take a sheet of plywood and, by dividing it in two, create the basis for a folding board. In any case, it is important that the boards fit together, otherwise cracks may form in the future.

Next, you need to add sides to get boxes for storing chips. On the inner playing side of the board, markings are made according to the principle 6 + 6 (8x8 for chess), and holes for chips are marked inside the sides. They can be sawn separately from the boards and attached on top to make borders for the placed chips.
We select accessories for chess and backgammon
Accessories for backgammon include different elements:
- locks;
- overhead loops;
- fasteners in the form of nails, screws and self-tapping screws.
It is very important to choose hinges that will look harmoniously in the product, without going out of style and colors. However, the color can be corrected with the appropriate metal paint.

Mortise decorative hinges and locks for caskets and caskets look beautiful. Many professionals recommend purchasing lamber hinges, which are not noticeable at all when closed. They are cut not into the end of the box, but into the face, and here it is easiest to get by with a CNC machine. You can also attach leather loops 1.5-2 mm in size with studs. You can choose the skin to match the color of the tint or vice versa, a contrasting shade.
Locks can also be metal or leather. A convenient and practical option is closing with magnets or a pin. There are also overhead locks with an eyelet, which, with high quality workmanship, serve for a long time and well. Usually they fit well into the oriental style of the case.
When choosing metal fittings, give preference to the one that weighs more, as this indicates a good quality of the alloy. It is desirable that there is a good protective coating that is difficult to scratch.

drawing
A beautiful backgammon box usually has a design on the outside, which can be applied in many ways:
- burning out
- painting
- thread
- drawing.
The drawing can be applied using a stencil. The printed pattern is placed exactly in the center of the material, covered with tracing paper on top (it can be slightly oiled) and fixed with buttons on one side of the pattern. Then, old, not too black copy paper is placed under the drawing, and everything is fixed in the corners. The drawing is outlined on tracing paper with a pencil and so it is interrupted on a tree.

Burning is done with a special electric burner, but some use a regular soldering iron. A special knife is used for carving, but you will need to clearly mark each element, down to the smallest details, and work it out. This decoration method takes more time.
Few beginners come up with their own patterns, as it is easiest to use the ideas you like from the Internet, sometimes combining them. You can lay stencils on the surface and cover the surface with paint from a spray can or from a can using a swab. Before painting, the tree must be covered with primer for acrylic paints. On top of the dried primer, with a wide flat brush, you can apply acrylic paint to the sides, covering the bottom with masking tape. If you apply the drawing with acrylic paint, then in case of an error it will be possible to apply a new layer and hide the defect.
Here is a classic way to transfer a pattern onto a wooden surface using tracing paper:
And you can use the method of transferring the printed image from paper to wood using glue to decorate the case:
If you are not confident in your drawing skills and do not want to use a template, then a craquelure polish can be a good solution, which will create a beautiful decorative “antique cracked” effect. After the varnish dries, paint of a different color is applied, and cracks appear in it.
Finishing
After the image is ready, the surface is subjected to finishing. Thanks to her, the backgammon case will look respectable for many years.
DIY backgammon with bright patterns
This is done with varnish. A universal option can be called varnish in a spray. It dries quickly, evenly “fits in”, and goes well with craquelure varnishes.
For decorative art, water-based acrylic varnishes are suitable, which are divided into glossy and matte. The former give a smooth, beautiful coating with a glossy sheen, while the latter are invisible. They are usually odorless and dry quickly, but keep in mind that with intensive use, such formulations may not be the best. They are quickly applied with a #16 Soft Flat Synthetic Brush. A thin layer of varnish should be well smeared over the surface.

For maximum protection, yacht varnishes are chosen - also matte and glossy. They are slightly yellow, but for a vintage style, this is even an advantage. It has a strong smell and must be handled with gloves, using a foam sponge for application. A good alternative would be POLY-R parquet varnish, which does not have yellowness. It is applied in the same way as the yacht one, but does not have a strong smell, dries much faster and gives a beautiful shade.


