A fragrance that can get you out of bed in the morning when you don't feel like going to work. Keeps me awake because I still have a lot to do in the evening. In business negotiations, it helps to establish contacts. An addition to a beautiful dessert in a coffee shop near the house. As you can see, associations with the word coffee are far from the word decoration. But... A creative streak, skillful hands and a few tips from this article will turn coffee bean decor into another reason to be proud of the interior of your home.
What do we know about coffee beans?
Basically, we see them already packed in tight bags on store shelves. They come there from Brazil (every third), Colombia, Ethiopia, Vietnam and other hot countries. In Russia, the climate is unsuitable, but there have been attempts to grow a plantation. Unsuccessful so far.
The two main varieties, arabica and canephora (Robusta), visually differ little from each other. These are dried seeds of berries from 5 to 10 mm in length, with a sloping back and a flattened base. Arabica, slightly larger, with a shape tending to an oval. Robusta is rounder, smaller, but its cost is two times lower.
For decoration, the degree of roasting is important:
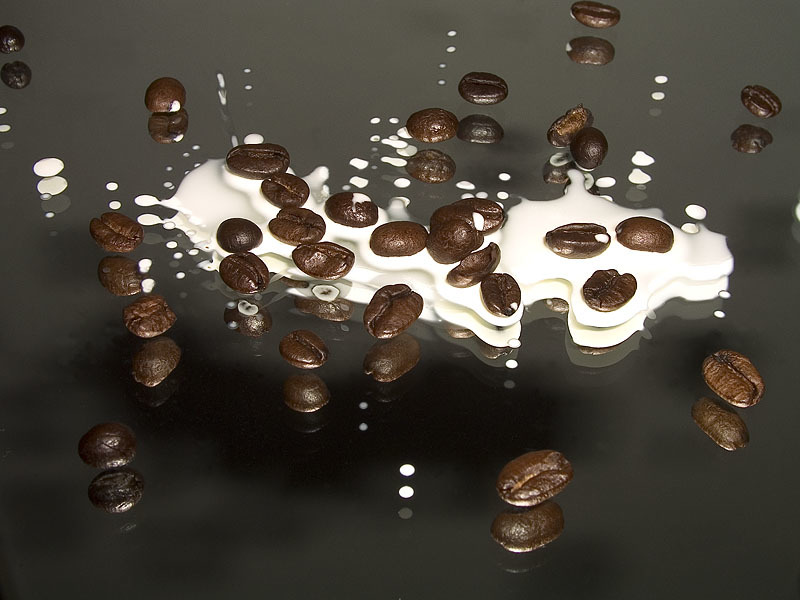
coffee picture
The hardest part about making wall paintings is presenting them in detail. Understand what plot to illustrate, what color, whether it will be a fleece or a completely filled canvas. When the questions have been answered, proceed to the technical side.
For the base model, in addition to the main material, you will need:
- textile. Texture doesn't really matter if there's superglue. Burlap looks authentic, especially with traces of printing. Choose the color more carefully, without neon shades.
- cardboard;
- frame;
- colorless varnish;
- additional elements (fur, ribbons, beads, glass, etc.) for decoration.
Work begins with the preparation of the base: wrap the cardboard with a cloth, glue it on the back. Draw a sketch. A great help for beginners is stencils, take them from the Web. And now just glue the grains into the borders of the picture, watching the density. Lacquer, decorate as planned, insert into the frame. You can't imagine anything simpler and prettier, right?
photo frames
It is impossible to count the number of ideas in the design of photos dear to the heart, but the classic version does not lose ground: a rectangular frame with a side width of 4-5 cm for a 10x15 cm photo is at the peak of popularity due to its external elegant simplicity. Nevertheless, a strong material is used in the base - plywood - which will forever hold the shape of the product. To cut a 20x25 cm wooden sheet with a 9x14 cm inner window, you will need a jigsaw, and probably a helper with physical strength. Anyone can handle lightweight corrugated board. It is the same size, only the opening inside corresponds to the size of the photo. Glue everything, paint it dark, apply glue on top, attach grains on a whim, varnish, cut out a cardboard holder, fasten with paper clips at the back. The photo frame is ready, but remove it from the bedside table. Caffeine in aromatic form under the nose will keep you awake.
Candle decoration
An indispensable thing for decorating candles is twine. This is a thin lace made from the fibers of a subtropical jute plant. Previously, it was used for auxiliary purposes, to pack a bundle, for example. But designers have built a cult of jute twine, often used for ethnic and eco-friendly interiors. Twine will help to festively decorate tall candles. They can be lit, using for their intended purpose, if only the lower part of the paraffin is decorated. Apply hot melt adhesive in a moderately thick, even layer, tightly wrap with jute, not reaching 2 mm to the base. This measure is provided to ensure that the product remains stable. Secure the end of the twine carefully with glue. Now you can glue the main elements of the decor, and on such a background both openwork patterns with color gradation from beige to chocolate and an arbitrary order of elements will look equally stylish. Complete the craft with a satin ribbon.
Fragrant candlestick
On New Year's holidays, a warming ray of hope for a good future means a little more than on other days. The symbolism and dancing highlights on the ceiling elevate candles to the rank of a Christmas miracle. It is especially pleasant to realize that these miracles can be created with your own hands. The fastest way to pair a candle and coffee is to simply put them together. Pour grains into a small beautiful porcelain bowl and place a candle in a sleeve in the center so that it sinks a little. It turns out the effect of natural aromatization, warm jets of air from the flame will spread a pleasant aroma throughout the room. Depending on the design of the room or the festive table, instead of a bowl, you can use any container, except for easily melting. Transparent glass with curly inserts looks impressive.
An interior with coffee candles is a natural aphrodisiac for a romantic atmosphere.
Coffee tree and fragrant Christmas trees
A kind of "coffee bonsai". Handmade interior mini topiary. What a catchy name you don’t think of, it still won’t convey all the unusualness of these home-made gizmos.
The Christmas tree is a little easier to make because of the shape. Build a cone from whatman paper, paint it cinnamon, paste over with even rows of grains, including the bottom, decorate with bead balls, beaded garlands. For a special mood, sprinkle with semolina snow. Souvenir for the New Year is ready.
The grace of the tree is given by a bizarrely curved long trunk. Its role is played by a thick wire wrapped with twine. One end goes into a cup of plaster (choose high for stability), and the other is the focus of the composition - a light ball. It can be a plastic ball, a candy box, polystyrene, etc., use your imagination. Before you create the shell on the ball, paint it chocolate.
Cup of spilled coffee
Direct association with items for the ceremony of drinking your favorite drink gave rise to a whole trend in decor. An overturned cup in a saucer. This happens in life, only less artistically and then you have to wash the tablecloth. A more interesting option is when the cup seems to hang in the air and the stream pours from a height. The main emphasis is on the effect of surprise, because the picture is contrary to the law of gravity, causing great interest. Of course, after a couple of seconds, the secret of the trick becomes obvious, and curiosity gives way to admiration for the work of the master. You need a hard wire, curved with the letter Z, very strong glue, modeling mass and incredible perseverance, with which you first need to methodically wrap all parts of the tea pair with jute outside and inside, and only apply natural material to this layer. Save two dried orange slices to decorate the mini-monument.
Christmas decorations
Leadership in the variety of options in this category was captured by:
- balls on bright satin ribbons, with and without tassels, decorations made of rhinestones, sequins, key rings, keys;
- five-pointed stars of all types, sizes, colors, with the addition of gilding and silvering;
- Christmas trees with artificial snow, abundantly sprinkled with glass beads, strict and with humorous emoticons;
- houses with a rustic flavor;
- powerful horseshoes for happiness at home;
- three acorns for Cinderella;
- animal-symbol of the year according to the eastern calendar;
- confectionery cookies;
- of course, hearts pierced with a cinnamon stick.
New Year's crafts are easy to make, but they are good not only for their external impression, but also for the opportunity to create something beautiful with the whole family, it is interesting to spend time with the children in order to remember their "designer" toy for a whole year!
Animals
To make a stylized figurine of a recognizable animal, first of all, you need to find a basis for the silhouette. It might be an old toy. Specially tailored. Foam model. Made from hardening plasticine. This is how chic figures of snakes, elephants, snails or turtles are obtained.
At the master class, craftsmen say that they most often use prefabricated structures from improvised materials. For example, ping-pong balls are perfect for hedgehog twins. Cut them in half, here are the backs for the coffee needles. Elongated triangles are obtained from polystyrene foam - spouts. From cardboard - abdomen. We decorate the last two with twine, and then we put it together: a circle, half a tennis ball on it, a nose to its side. We begin to plant improvised needles from the middle of the back. Having filled everything, we attach a small bead to the tip of the nose, the eyes are also made of beads, a few dried leaves on top.
Decor for the kitchen
Coffee crafts are ready to hide in any kitchen corner. A box with a butterfly for storage, a tree of happiness in a food-printed mug, a napkin holder with a sly winking kitten. In general, the cat theme is very common in handmade design, and where else is a pet, if not in the kitchen. And so as not to interfere, we will give him a place on the refrigerator.
The magnet cat must be light so as not to fall. Ceiling tiles will do. Draw a sketch, not forgetting the long twisted tail. Cut out, paint over dark, glue elements on one side, magnets on the other. It is better to use 2 pcs. In order to process the butt, glue 2 strips of jute on a thin strip of hot glue. It remains only to designate the mustache, nose and eyes. For them, a medicine blister is suitable. Put a grain into the recesses, cover with paper at the back, cut along the contour. A very penetrating look is obtained from a cat.
Clock decor
This clock always shows the coffee break time! Rebranding an old model in favor of a new home interior accessory should start with a disassembly. All the details will come in handy, but keep an eye on how much stock the arrows have on the runway so that when they are freshly assembled, they do not cling to the convex parts. On a flat dial, games with different colors of grains look incredibly impressive. Firstly, lace styling of waves or geometric shapes, stripes, paths.
You can also give meaning to the design, for example, by dividing sectors by hours or half hours. If the substrate has an interesting pattern, it makes sense to close it not completely. So even more interesting. Or create a round frame around it, decorated with additional sparkles, sticks, knots, planks and beans. If for some reason the backing needs to be replaced, use cardboard covered with cloth or burlap.
Vases, jars, bottles and flower pots
All of the above is most convenient for decorating with natural materials. The kit for a universal creative idea, as always, includes twine, hot glue, coffee. Follow the inspiration, remembering that the details add even more expressiveness to simple forms. For example, use a mix of spices. One of them is badian. A blooming flower, as if specially created to complement a handmade vase. This is a bright accent for a uniformly sealed can. Add ball-shaped pepper, small round mustard seeds, spicy cloves look like small spikes. An old friend of coffee is cinnamon. Cinnamon sticks are aesthetically pleasing to everything. A bay leaf will replace the herbarium when you need to decorate the bottle. Don't throw away orange peels, they make pretty stars.
What about the mixture of flavors from all this splendor, you ask? “Close” the smell with transparent varnish.
Coffee crafts look very stylish and organically fit into the design of a modern interior. Decorated with a few crafts made from coffee beans, the room creates a cozy atmosphere filled with a pleasant aroma. Most coffee crafts can be made easily and quickly at home. Children love to make various crafts from coffee beans or decorate various decorative objects with fragrant coffee beans. Be sure to involve your child in the creative process and create unique beauty together! Several articles on our website were devoted to making topiary from coffee beans and different options for decorating the coffee Tree of Happiness with your own hands. In this material, we will continue the topic of making crafts from coffee beans and decorating various interior objects with this material.
One of the popular options lately is to decorate cups and mugs with coffee beans. It is enough to glue the mug with grains and you can safely hold it in your hands without fear of burns due to hot contents. In addition, such a container keeps heat much longer! Why not a gift for your beloved mother or grandmother on March 8? You can also decorate a saucer under a mug with grains, arranging them in the form of an interesting pattern or composition.
Before pasting grains over a vase, bowl or mug, it is advisable to cover the grains with a moisture-resistant colorless varnish.
The dial of the wall clock and the picture frame will look stylish if these interior items are beautifully glued with coffee beans. If you want to make an elegant coffee table, you can lay out grains of varying degrees of roasting around the perimeter of the tabletop, adding dried flowers and wheat spikelets to the composition. Then you can strengthen the glass on top of the decorated table according to the size of the tabletop.
Some masters create real works of art from coffee beans, laying out surprisingly beautiful panels on the wall or even intricate paintings with an original plot, similar to stained-glass windows. In order to "play with tone", masters roast coffee beans to different levels of readiness. Thus, you can get 10-12 varieties of grains of different shades from greenish to dark brown.
♦ CRAFTS FROM COFFEE BEANS WITH YOUR HANDS. MASTER CLASSES WITH PHOTOS AND IDEAS:
OPTION 1 (click on photo):

OPTION 2 (click on photo):

OPTION 3 (click on photo):

OPTION 4 (click on photo):

♦ TOPIARY. VIDEO TUTORIALS FOR BEGINNERS:
How to make a beautiful gift for Valentine's Day and decorate crafts with coffee beans. Video lesson.
Crafts from coffee beans are an unusual and modern art that is of great practical importance.
Incredibly fashionable trend called "handmade" in recent years has moved into the category of public and exciting pastime. In recent years, skilled needlewomen have been using various materials and devices for their handmade creations, and now coffee bean crafts are at the peak of popularity, because, it turns out, they are suitable not only for creating a fragrant drink, but also for creating no less fragrant decor and interior item.
Coffee crafts for beginners, master class
Mastering the technique of creating a masterpiece from coffee beans is not such a difficult science, and anyone who knows how to manipulate objects at least a little and has a crumb of creative imagination can do it. It is better to start with simpler crafts for beginners.
In coffee crafts, you can use a variety of materials  For unusual and varied grains can be dyed in different shades.
  Creativity is a path in which initiative is never punished. Show your imagination
It can be:
- decoration of a vase, jar, glass
- creating a frame for a photo
- decorating candles
- postcard
- decorative painting

 Coffee beans are a versatile material
 Simple and boring household items can be transformed beyond recognition by pasting over coffee beans.
 If you decide to try to create a small masterpiece that will decorate your abode, then the first thing you should do is buy the right coffee beans. For this, packed packs of coffee in an opaque container, in which you cannot see the purchase, are not suitable - it is better to give preference to stores where coffee is sold by weight.
Also, you should not buy Arabica beans, as grains of different sizes are required for greater unusualness and texture. Therefore, give preference to a cheaper variety.
 It is better to use grains of various sizes in the works, rather than selected Arabica.
 The simplest coffee crafts do not require many tools - all you need is a glue gun and a decoration blank on which the beans will be glued.
After completion of the work, it can be coated with a colorless varnish.
Video: DIY coffee bean crafts
Crafts from twine and coffee
An extraordinary vase, cup or even a flower pot can be made from twine and coffee beans. The simplest option would be a decorative scented candle, which can not only be used for aesthetic purposes in your home, but also given to loved ones.

 Candles trimmed with coffee beans look very original
 To make an unusual candle you will need:
- scented candle
- leg-split
- glue or glue gun
- coffee beans
- colorless varnish

 Twine can be purchased at any hardware or craft store.
 Making a decorative candle is very simple, and the final result directly depends on your imagination:
- First you need to tightly wrap the candle with twine
2. This can be done around the entire circumference of the candle or up to its middle
3. After that, using a glue gun, fasten the ends of the twine to the candle so that it fits snugly against its surface, without protruding and without forming a void. You can also do without glue by melting small sections of the candle and pressing the twine into the surface of the candle
4. A candle wrapped with twine is glued with coffee beans to the middle, doing this in rows, so that the layer of twine under the grains is not visible
5. At the final stage, the grains are painted with a colorless varnish, which will provide shine and make it easier to wipe the structure from dust in the future.

 Instead of a scented candle, you can also use a regular one.
 The finished candle can be decorated with beads if you want to give it a more festive look or if you want to dip the beads into the melted wax along the edge of the candle.
Video: Crafts from coffee and twine
Craft coffee heart
You can please your soulmate by presenting her a heart of coffee beans. It's easy to do and doesn't take a lot of time. For the heart you need:
- coffee beans
- A4 paper
- cardboard
- scissors
- cotton wool or cotton pads
- glue gun or regular glue
- leg-split
- brown paint
- decorative embellishments: beads, lace, ribbons, bows
 Making a heart out of coffee is quick and easy, and most importantly, it requires a minimum of materials.
 First you need to cut the blanks. You may be able to purchase a ready-made foam heart blank in a needlework store, then your work will be greatly facilitated. If you want to create a masterpiece completely on your own, then you should start by creating a paper heart.
 It is necessary to cut a symmetrical heart
  In the needlework store you can buy a ready-made foam heart
 Work sequence:
- Fold an A4 sheet in half and draw half a heart so that when you turn the sheet, you get a whole symmetrical heart
- Attach a heart to a cardboard sheet and redraw it
- Glue a layer of cotton wool to the resulting heart or lay out cotton pads with balls, increasing the volume of the figure
4. After that, the heart is girded with twine in a free order in all directions to form relief
5. Next, the heart is painted: for this, a sponge made of foam rubber is suitable, with which the paint is adjusted with blotting movements
6. After the paint has dried, glue coffee beans to the heart: spread each bean with glue and place it tightly to each other
7. The final stage - painting crafts with colorless varnish

 Finished work can be decorated to your taste
 Craft picture from coffee
For beginner needlewomen and needlewomen, creating a picture from coffee beans will be a great pastime. It will not only become a wonderful piece of furniture that will fit into almost any stop of your monastery, but will also be a good gift for loved ones. The plot of a "coffee" picture can be very different: from a traditional steaming cup of coffee to a grandiose artistic canvas.
The plot is only limited by your imagination.
 The most common subject of "coffee" paintings is coffee itself.
 For a picture of coffee beans you will need:
- thick cardboard
- piece of fabric (preferably light and smooth, but if coarse burlap fits into the concept of your masterpiece, feel free to use it)
- coffee beans
- leg-split
- stencils
- picture frame
- decorative beads, ribbons or even dried leaves
- colorless varnish

 If the coffee beans are not dark enough, they can be roasted in a pan.
 The process of making a painting is not laborious and requires only accuracy and creativity. Following a step-by-step guide, you can easily recreate the intended image from coffee beans:
- Cover a thick sheet of cardboard with a cloth, securing it with glue on the opposite side
2. Think over the plot of the picture and use stencils to hover over the image (if there are no stencils, then a simple device will replace them: print the picture on a thin sheet of paper and circle it with cosmetic shadows or blush, reshoot the picture on canvas)
3. After that, carefully glue the coffee beans
5. Decorate the outline of the drawing with twine, attaching it to the picture with glue
6. Finishing touch: cover the coffee beans with a colorless varnish, and after drying, insert the picture into the frame

 To facilitate the task, coffee beans can be glued directly onto the drawing.
 In order for the picture and the frame to be in a single style and color composition, it is better to choose a dark brown frame. So the picture will create the impression of completeness and will delight the eye with aesthetics.
Do-it-yourself coffee bean topiary
For those who consider paintings made of coffee and candles pasted over with coffee beans, there is also a more difficult craft - topiary, child's play. This “tree of happiness”, as it is customary to call it in Europe, will become a real work of art, and the time spent on the topiary will pay off with interest when all the guests begin to admire such a sophisticated masterpiece and even envy your skill.

 Topiary is modern and fashionable
 For the topiary you will need:
- coffee beans
- thick cardboard
- A4 paper
- glue or glue gun
- small jar or box, cut bottle
- clothespins
- brown paint (you can use quality paints for painting)
- thick wire

 A ready-made blank can be used as a heart
  It is most convenient to glue the grains with a glue gun, but in the absence of it, you can use a simple glue.
 Work sequence:
- Folding a sheet of paper in half, draw a half of the heart and cut it out so that when you turn the sheet, you get a whole heart
2. Attach a paper heart to a sheet of cardboard and redraw it, and then cut it out with scissors
3. Glue a piece of wire or a curved piece of wood to form the stem of the topiary
4. Using cotton wool or cotton pads laid out in layers, create the volume of the figure by gluing them to the cardboard heart
5. Wrap the resulting heart with twine in different directions to secure the structure. Wrap the wire tightly to the very end with it.
6. Paint the resulting design with a small foam sponge
7. While the painted tree dries, form a pot for it: separate the wooden clothespins and glue them over a jar or box so that it looks like a wooden tub. You can paint the pot in any color, or you can leave it as it is.
8. Glue the dried “crown” of the tree tightly with coffee beans so that they fit right next to each other and no empty gaps are visible. You can apply grains in several layers, on top of each other - such randomness will only add gloss to the craft
9. Fill the finished topiary pot with gypsum and place a tree in it
10. After the plaster has dried, the tree can be decorated with ribbons, flowers and beads to your liking.
 Topiaries come in a variety of shapes.
 Trees from coffee beans
If the heart-shaped crown seems irrelevant and uninteresting to you, then you can form a topiary with a spherical crown. This will require a blank, which can be purchased at a needlework store, in the form of a foam ball or any ball that you can find at home and the material of which will allow you to put it on a wire.

 Topiary with a spherical crown
 Making a ball-shaped topiary is practically the same as a topiary with a heart-shaped crown, but the work will be greatly facilitated due to the fact that you can skip the initial stages of crown formation and start immediately by staining the crown brown. Next, follow the instructions above.
 "Tree of Happiness"
  You can decorate topiary with all means at hand.
 Topiary can be bonsai
 Other trees can be made from coffee beans
 Crafts from coffee and beans
By combining coffee beans with beans of different colors, you can create interesting applications, flower bouquets and paintings, as well as toy figures. In addition, interesting unique interior details are formed from these materials, which no one will have.

 Beans and coffee go great together
 A craft made from an elegant bottle filled with beans and coffee beans will be simple and original. This requires an empty bottle from under any alcoholic drink, which has a bizarre shape. Filling it to the top with layers of white beans and coffee beans, you will create an unusual craft that will decorate a home or a strict workplace atmosphere.

 Bottles filled with grains, cereals and salt are a popular decorative element of the interior.
  Bottles decorated with coffee beans
 Pictures made of beans and coffee beans look very colorful and aesthetically pleasing. The principle of their creation is no different from the "coffee" paintings, but the difference in texture and color of the material gives a flight of fancy.

 Coffee beans and beans can be wrapped around jars, vases and boxes, making them unique
 Crafts from coffee and burlap
Using such simple materials as coffee beans and burlap, you can recreate real masterpieces of applied art. Most often, panels of coffee beans are made from such materials, because it is simple, practical and looks very beautiful.
Even a person far from this technique can easily make even a small, but creation.

 In crafts, grains can be laid out in rows or randomly.
 To make a panel you will need:
- coffee beans
- sackcloth
- leg-split
- bamboo sticks (available at a craft store)
- stencil
- pencil
- colorless varnish

 Burlap is a universal material in needlework
 First of all, you should think about the plot of the panel, what you would like to depict. For beginners, it is better to choose a simpler pattern: a heart, a cup of coffee, some kind of inscription, an apple, etc. Having coped well with this task, you can easily proceed to more difficult work, which will require some experience and perseverance.

 From "coffee" crafts you can create whole compositions
 Operating procedure:
- Using scissors, cut the burlap to the required size.
2. Redraw the contours of the drawing with a stencil and pencil
3. Stick on the coffee beans as intended
4. Coat the grains with varnish and wait until the panel dries
5. Using twine, form a frame from bamboo and tie a panel to it by stretching the twine through the holes in the burlap

 Bamboo can be replaced with another tree, but the picture will lose a lot from this.
 At first glance, many crafts made from coffee beans seem incredibly complicated, but this is far from being the case. Most of the needlewomen who have delved into this creative direction and reached great heights of skill urge them not to be afraid to experiment and not to stop even if something does not turn out quite the way they wanted to be.


After analyzing their experience, we can highlight the following tips that will help you work with coffee beans:
- use quality material for your crafts. This does not mean that you need to buy everything expensive - a lot can be found at home for free.
- show imagination and experiment, do not try to copy other people's work, but create something new and unusual
- learn to enjoy the process of creating creation, then it will come from the soul and please the eye
Video: Crafts from coffee. Master Class
Do-it-yourself crafts made from coffee beans are not only pleasing to the eye, but also have a pleasant smell of coffee. These little things decorate our lives, give a good mood, and improve the atmosphere in the house. The master class does not require large material costs, we will tell you how to make such crafts from coffee beans.
An interesting stand for spices A cat from coffee beans can be made in one evening. A cat decorated with coffee beans, with a garden and a fence made of ice cream sticks or medical spatulas will definitely decorate your kitchen. It can be used as a spice holder or coffee jar and napkin holder. You can make a flower stand. The composition is decorated with lavender decor. A master class with decoupage elements is not difficult. We will decorate our home with such a cute coffee-scented craft.

For work you will need:
- Cardboard.
- Ice cream sticks or medical spatulas.
- Cotton swabs.
- Threads.
- Coffee beans.
- white and brown.
- PVA glue or glue gun.
- Napkins or a printout on a laser printer of a pattern with lavender.
- Scotch tape.
First, print out, or draw by hand. Choose the size of the template yourself.


The template must be cut out and transferred to thick cardboard. Circle and cut out.


We glue the cardboard sides to the stand, and fix it around with adhesive tape on top.

We take cotton pads and apply to the product.

Then we fix, that is, we tie everything with threads.

There is another option: cut out the silhouette from dark fabric, and stick it on the workpiece. And already directly on the fabric to glue coffee beans. Choose which option you like best. It seems to us that the fabric option is simpler and faster. Then we take brown acrylic paint, and paint over the Cat before gluing the grains. We let the paint dry, and only glue coffee beans on the dried surface. If you work with a hot glue gun, then you need to glue quickly, as the glue dries quickly.


This is how the product looks from the wrong side, if there were threads, then we cut them off.

This is what it looks like from the front side. A bit like a front garden.

We make a napkin holder out of cardboard, securing the edges with tape. Then we decorate it with decoupage - using napkins, printouts, or postcards with a lavender pattern.

We put the cover from the napkin holder on top, and glue it, securing it with tape on the sides.

It is better to cover the napkin holder with white acrylic paint, wait for the paint to dry, and then do the decoupage.

To decorate a coffee jar, you need napkins and white acrylic paint. We take a sponge and apply acrylic paint to the jar. We are waiting for complete drying.

We make decoupage with lavender napkins. Napkins or pictures can be any you like. If you have a laser printer, you are lucky, you can print any image.

Carefully remove one layer from the napkin, coat the napkins with a brush with PVA glue. That is, first we coat with glue the place where we planned to glue the drawing, and then we cover the drawing with glue on top. Here's what happens in the end.

Professionals almost always cover decoupage with varnish on top, but we think that in this case it is unnecessary.

As you can see, nothing complicated, but as a result we have an interesting decor for the kitchen.

I won’t reveal a secret if I say that original souvenirs are made from twine and coffee beans, for example, fridge magnets. You can make such a fragrant cat for yourself, or as a gift. After all, now many people collect magnets for the refrigerator, so such cats can be very expensive for someone. The master class uses various materials, and you can add something besides this, it all depends on your imagination.

For work you will need:
- Coffee beans.
- Cardboard.
- Burlap, or other cotton fabric of dark color.
- Leg-split.
- Acrylic paint brown.
- Brush or sponge.
- PVA glue.
- Scissors, paper, pencil.
- Glue gun or glue Moment.
- A piece of magnetic tape (cut from an old advertising magnet).
- Eyes ready, or homemade.

We print or draw by hand a template on a piece of paper. Transferring to cardboard. Please note that the distance between the paw and the tail is only 0.3-0.5 cm. - this is important, since in the future we will need to connect the tail and paw. We do this in order not to break the tail, because it is thin. There should be 2 cardboard parts, since we need a dense base.

We glue 2 parts of cardboard, we get a dense base.

On the inside, we glue the base to the burlap with PVA glue, first smearing the workpiece well.

It is advisable to put the workpiece under the press for a day. The burlap after gluing will become rigid and will not crumble. We cut off the excess.

We paint the front side of the product with brown paint. In the future, we will stick coffee beans on the brown side.

Let the workpiece dry.

We draw glue along the cut of the workpiece to glue the twine and hide the ugly cut of cardboard.

We glue the twine on the cut of the workpiece, slightly pulling it.

We make two turns of twine - close the cut with glue.

Glue coffee beans on the front side with a hot gun or glue Moment.

We completely close the workpiece with coffee beans.

Glue on the inside of the pieces of the magnet. As an option, you can not stick, but close the corners of the magnet with tape. Check if the magnet is holding on to the refrigerator.

We decorate the cat's face: glue the eyes, which can be made from an empty package of pills, and a pea, painted with a black marker. We put a pea in the recesses from the tablets, drop a drop of glue into the “eyes”, and glue it with white paper on top. You get wonderful eyes.

We make a cat mustache from twine, fix it with glue. Nose made of coffee beans.

We glue the eyes, tie a bow from a ribbon or lace.

What a great magnet.

Fragrant panels or do-it-yourself crafts made from coffee beans will add zest to the interior and will not require expensive investments. The manufacturing technology is simple and even a child can handle it. For this purpose, budget varieties of coffee with medium-sized grains are suitable. You can create paintings, decorate a clock, make a coffee tree or a floating cup - everything is limited only by your imagination.
Pictures from coffee beans
With your own hands, you can turn any drawing you like into a coffee masterpiece, which will take its rightful place on the walls of the house. Having trained on light subjects, you can fulfill the most daring ideas.
You will need:
- coffee beans;
- thick cardboard for the base;
- burlap or thick fabric;
- glue gun and glue stick;
- additional embellishments upon request.
Progress.

For do-it-yourself coffee paintings, a variety of subjects are suitable. Appetizing still lifes will harmoniously fit into the kitchen environment. A couple of cats in love will decorate the walls of the bedroom. Cartoon characters will enliven the walls of the children's room.
Clock with decor
With the help of coffee, you can decorate an old boring clock or buy a blank dial and clockwork in craft stores.
For this you will need:
- glass blank with a hole and a clockwork;
- napkin for decoupage with a pattern of coffee themes;
- coffee beans;
- PVA glue;
- alcohol and cotton wool;
- clear varnish and paint.
Progress.

souvenir tree
 Small crafts made from coffee beans can be used as a nice souvenir for the holidays. Popular handmade topiaries are made in completely different styles. It can be a traditional coffee tree for the kitchen, a baobab with an elegantly intertwined trunk for the living room. Golden Chinese coins hung in a coffee crown will play the role of amulets that attract money. Such a gift will not only be beautiful, but will also bring new money to the owner.
And you can make cute heart tree for valentine's day. For this you will need:
- wire and twine;
- cardboard, a piece of fabric or a nylon stocking;
- flower pot and alabaster;
- glue and gouache or acrylic paints.
Execution in stages.

decorative cup
A favorite cup that has lost its appearance can be turned into an interior element. Even a beginner can handle this task.
It will take twine, foam rounds, wire, glue, coffee beans and some free time.

Pleasant trifles
For creative gatherings with the kids, you should choose simple options for crafts. These can be fridge magnets, cartoon figures, simple applications.
What can be done from coffee beans with children:

original ideas
Modern handmade craftswomen do not get tired of impressing with fantastic handicrafts. Each of them is individual and carries a part of the soul of its creator. Consider the most interesting and unusual coffee crafts.
 To make a mill you will need:
- a round high jar, for example, from children's tea;
- twine and glue;
- two sheets of thick cardboard;
- barbecue sticks, matches or toothpicks;
- a piece of gray linen.
Process step by step.


