The thermal conductivity of ceramic tiles is quite high, therefore, almost always when walking on a floor made of such material, there will be a feeling of coldness. Underfloor heating is a radical solution to this problem.
In this case, the high thermal conductivity of the ceramic plays a positive role, increasing the efficiency of the heating system and reducing energy consumption. Unlike a water heated floor, an electric one has a much smaller thickness and has much greater possibilities for adjusting floor heating.
Electric floor heating device
Having made the decision to make an electric warm floor with your own hands, you need to imagine what this system is. If we take a simple analogy, then it will be a kind of sandwich from the following layers:
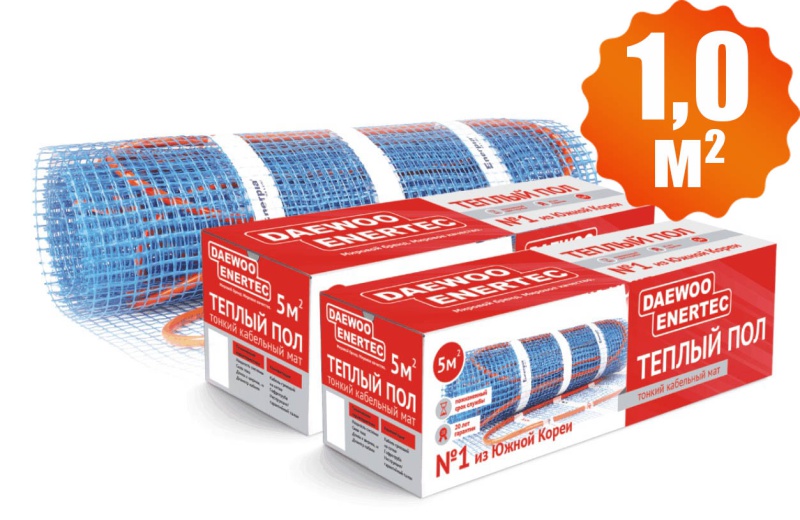 Heat-insulated floor for tiles, two-core cable mat, electric DW20W1.0M
 - Base;
- Waterproofing;
- Insulation;
- Reflective layer;
- Heating element (cable or heater of infrared film type);
- Concrete screed;
- Tile adhesive;
- The actual ceramic tiles.
Now in more detail. The base can be a floor slab - in multi-storey buildings, the ground base - in a private house. In any case, the base must be solid, even and smooth. A few centimeters thick concrete screed must be laid on top of the ground. It is advisable to level uneven surfaces using self-leveling mixtures.
From the base surface, the height of the future floor will be measured:
- waterproofing thickness - 1-2 mm,
- insulation - expanded polystyrene foam, at least 20 mm,
- reflective layer - 5 mm,
- film heater of infrared light - 1-2 mm plus reinforcing mesh - 1 mm,
- cable heater with concrete screed - 10 - 15 mm,
- adhesive for tiles 3-5 mm, tiles - 8-10 mm.
In total, the minimum thickness of the warm floor can be obtained when using an infrared heater - 38-44 mm, the maximum, when using cable heating - up to 57 mm. These values should be guided by when carrying out work.
Installation of electric underfloor heating
Before you start an electric underfloor heating under the tiles with your own hands, begin with the preparation of the base. In multi-storey buildings, it is necessary to remove the old screed to the floor slabs; in a private house, the floor deepens so that a few centimeters of concrete screed can be added to the thickness of the selected heating system. To speed up the work, the screed can be performed using special quick-drying mixtures, since the cement-sand mixture fully gains strength in a period of at least 2 to 3 weeks.
If there are large irregularities in the floor slabs, it is necessary to level the surface using self-leveling mixtures.
The leveled surface of the base is covered with a waterproofing layer. As waterproofing, you can use a special material or ordinary polyethylene. The main thing is that the sheet of polyethylene film is solid and goes to the surface of the walls with an overlap of 10 cm.
A layer of insulation is laid on top of the waterproofing. In apartments above the second floor, the floor is usually slightly warmer than on the first floor, due to the heat from the neighbors on the floor below. Here you can use foamed polyethylene sheets - penofol. Penofol sheets are glued along their perimeter using double-sided tape. The joints between the sheets are glued on top with ordinary tape.
In apartments on the ground floor or in a private house, insulation should be treated more thoroughly. Here it is necessary to use sheets of expanded polystyrene with a thickness of at least 20 mm. Penofol is also laid on top of the sheets. As a rule, on top of the insulation made of expanded polystyrene, a screed layer up to 2 cm thick is laid. Given the low strength of the insulation, the screed will not be superfluous. However, since we are talking about a warm field under the tiles, then pouring the heating cable together with tile adhesive can also play the role of a screed.
The installation of an electric underfloor heating depends on which system is used for underfloor heating. First, you need to decide on the arrangement of furniture and plumbing fixtures. Heating under them should not be done.
Installation of infrared film underfloor heating
The easiest way is to install a film (infrared) warm floor. Infrared floor heating tapes are sold in rolls of various widths. Based on the dimensions of the room, the tape is cut into pieces in such a way as to minimize the number of joints. The connection of the tape sections is carried out in a parallel scheme with special clamps, which are insulated with bitumen insulation. Clamps and insulation must be included with the sale of the heating system.
The installation of cable mats is practically no different from the installation of an infrared film floor, except that the heating mats are cut in such a way that the integrity of the heating cable is not disturbed.
Installation of cable underfloor heating
The cable heating system provides for fixing the cable to the tie by means of special metal brackets. First, the strips with brackets are attached to the floor surface using dowels, and then the heating cable is pressed with flexible tendrils.
The cable for underfloor heating is used in two types - one- and two-core. The first one can be purchased in any length. The excess is cut off and may find a similar application in the future. The two-core cable has an end sleeve at one end, where both cable cores are welded together. It makes no sense to purchase such a cable with a margin. The excess will simply be thrown out. Another difference between these cables is that a two-core cable with an increase in length gives more heating power, a single-core cable, on the contrary. For people who are not very familiar with electricity, it is better to provide the calculation of the heating system to specialists.
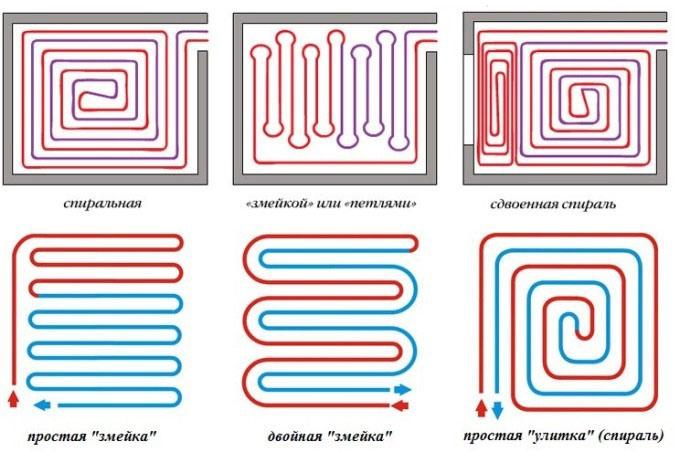
The heating cable is laid in a snake or in a spiral so that the ends face the wall where the floor power regulator will be installed. The distance between the conductors should be approximately 80-150 mm. Greater distance can result in uneven underfloor heating.
At a distance of 40-50 cm from the wall where the regulator will be installed, a temperature sensor must be installed. The sensor fits into a corrugated tube with a hermetically sealed end. The tube must have a diameter that allows the sensor to move freely with the connecting wires. This is done so that the sensor can be replaced without tearing off the floor covering. For the same purpose, the sensor tube should not have sharp bends.
The heater can now be checked. An ohmmeter is used to check the integrity of the heater, and then a test connection is made for a short time.
Above the cable underfloor heating, it is necessary to make a concrete screed in such a way that it completely covers the heating elements throughout the entire area of the room. For the screed, it is better to use ready-made mixtures, however, you can do with the usual cement-sand. The main condition in this case is the absence of large impurities in the sand. Better to use sand sifted through a sieve. And no aggregates such as crushed stone, gravel, slag!
![]()
An additional screed is not necessary for infrared floors.
Further work on laying the tiles can only be carried out after the screed has completely hardened. At the same stage, you can check the insulation resistance of the heater. A special device is used for measurements - a megohmmeter. Insulation resistance should not be less than specified on the specification for the underfloor heating.
Floor heating is regulated by a special device - a power regulator. The installation of the regulator is carried out on the wall like a switch or an electrical outlet. Connection to the regulator is carried out in strict accordance with the markings on the body. Regulators can have a variety of designs. The simplest ones stabilize the temperature at a given level. More complex ones allow you to program the floor temperature in the room for up to one week and, moreover, at different values during the time of the day on each day.
The indicator can show the room temperature and the temperature of the heating element. It is not necessary to install the most expensive and functional regulator. In most cases, they are completely interchangeable, so at the initial stage you can install the cheapest regulator and eventually replace it with the desired one. Many manufacturers of heating systems sell them in a complete set, which includes everything from the heater to the fasteners and the thermostat.
The warm floor is connected to the switchboard through a separate protection device, which must include a residual current device - RCD. The function of this device is that when the integrity of the heater insulation is violated, a leakage current appears, which causes the RCD to trip. Installing an RCD significantly increases the level of safety. The cross-section of the supply wires is calculated based on the heating power.
1 mm² of wire cross-section can withstand a current of up to 10 A without noticeable heating, which corresponds to a power of 2.2 kW. Accordingly, a wire with a cross section of 2 mm2 can withstand 20 A or 4.4 kW of power. Only as a last resort, it is possible to connect an electric underfloor heating to the existing electrical wiring and only on condition that the old wires have a margin of total consumption current.
Calculation of the power of the warm floor
- The power of the underfloor heating (of any type, including infrared film) is selected based on how the heating system is used. If the underfloor heating is an addition to the existing heating, then its power is taken from the calculation of approximately 150 W per 1 m2 of floor .
- If the warm floor itself is the main source of heat, then its power increases - 180 - 200 W per 1 m² .
Safety engineering
One of the main precautions when deciding to make an electric underfloor heating with your own hands is the thorough isolation of all current-carrying connections. During installation, make sure that the cable does not have sharp bends. The minimum bending radius of the cable must be at least 50 mm. Hitting the heater is absolutely unacceptable. The mounting brackets must not have sharp edges.
It is possible to check the floor for heating only after all layers of the screed have completely solidified, including the tile adhesive. Failure to do so may result in cracks or flaking of the tiles. Heating should be done gradually. You cannot give full power at the very first moment. Underfloor heating should be started gradually.
Installing heaters or an infrared film element under furniture or in places with good thermal insulation can lead to local overheating and failure of the heating element.


