Greetings, friends!
As you know, friends, I am not a supporter of overpaying and I believe that even the most desperate handymen can easily install a lock or latch on their own!
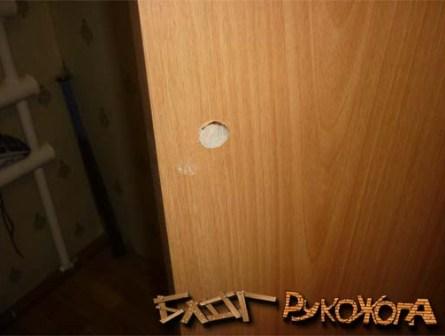
I will show the whole process using the example of MDF doors, which are the most fragile and delicate (and cheap:).
It is necessary to start installing the latch only after and, and of course after.
Necessary tool
- Hammer
- Screwdriver or drill
- Spade drill ∅ 20mm
- 20 mm chisel
- Pencil
- Square (although you can do without it)
As you can see, the tool is quite simple and should be present in almost every handyman! So, if everything is available, then you can get started!!!
How to properly install a lock on an interior door
The first step is to decide at what height our castle will be. The standard recommended height is 965mm, but I usually make the top edge of the lock 1005mm. The difference is insignificant, but it seems to me that it is more convenient. 
IT IS IMPORTANT TO KNOW!
When marking the lock, you should not go too far beyond the recommended dimensions, since MDF doors have a special additional beam for installing a lock. And if you deviate too much from the norm, you can ruin the door :(
After marking the height of the lock, we beat off the top edge of the lock with coal.
We attach the latch to the side of the door so that its upper part coincides with the mark and place a mark in the place where the handles will be attached.

Next, use a drill bit to drill a through hole.

At first I tried to drill with a screwdriver, but it turned out that it was a little weak and I had to resort to a drill.
IT IS IMPORTANT TO KNOW!
Friends, when you drill a hole for inserting locks into an interior door, under no circumstances press on the drill or crown (if you are installing a knob handle). The thing is that if you press hard, you risk tearing out a piece of the door on the exit side of the drill, so you need to drill slowly, adjusting the pressure.

In the next photo you can see that the drilled hole is a little small for the lock.

Use a chisel to widen the hole so as not to split the door. Slowly tapping with a hammer, we achieve the desired size.

We work hard and voila...

I am satisfied with the result - the lock moves freely to the end.

Having fixed the lock (you can immediately put it on the screws), you need to use a sharp wallpaper knife to very carefully trace the contour of the lock. If in doubt, you can simply use a well-sharpened pencil. The point of this whole operation is to recess the lock flush with the surface of the door as accurately as possible.

Friends, if you get a little hands-on, it’s okay. With each door there will be more and more experience! After you have outlined the outline, you need to use a chisel to select a piece of wood to the depth of the castle. When the lock is flush, it can be attached with self-tapping screws.

IT IS IMPORTANT TO KNOW!
When working with a chisel, always hold it as shown in the picture above. If you turn the chisel over, then when you hit the hammer you will probably select more material, which, of course, can be corrected by adding all sorts of wood chips, but this is already “jamming”, and we can’t “do that”!
Now you can proceed to installing the handles. By the way, the guide for door handles should be mounted with the groove down.

By the way, a few words about the castle. I used a EURO lock.

Not the most expensive, but not the cheapest either. As a result, the plastic latch did not work even for one day - it slammed shut and left my wife and my youngest locked. I had to climb into their room through the window (luckily it was a private house) and open the latch. The next day I purchased PALLIDUM locks - no problems.
We put the door handles on the guides and use a screwdriver to screw each one onto three self-tapping screws.

As we remember, the guide is installed with the groove down. This was done so that the pin that directly holds the handle itself would secure it well.
 Door handles are installed.

We screw decorative rings onto them and move on to inserting the striker plate.
How to properly install the strike plate of an interior door lock
We close the door and make marks at the point of contact between the lock tongue and the door frame.

We attach the striker plate and trace it just like the latch itself. Here I used a pencil.

We repeat all operations:
- Use a feather drill to drill a hole for the lock tongue.
- Use a chisel to make the hole perfect.
- Carefully remove the layer in order to recess the bar. Keep in mind that the MDF door frame is “crazy” cardboard and you will have to sweat a little so as not to “jam.”
And here is the result.

We fasten the bar and the lock is ready.

When closing/opening the lock, the door should close easily. If, when opening another door, a draft is created and the door seems to vibrate in the groove, then you need to tighten the tongue, which is located in the striker.

Well, that's all, friends. I hope I was able to answer the question: “How to fit a lock into an interior door.”
Now you can begin installing the slopes and the final step is installing the casings.
Thank you for your attention!
Reading time ≈ 3 minutes
Installing a locking mechanism in an interior door allows you to increase the comfort of your stay. To carry out installation, you need a small number of tools: drill, screwdriver. Any homeowner can do the job. It takes about 15-30 minutes to insert a lock into an interior door with your own hands.
What tools are needed to install the lock?
The accuracy of installing a lock on an interior door depends on the correct preparation, tools and components used. The use of amateur or professional equipment will increase the reliability of the design and simplify the installation procedure. To work, the owner will need:
- set of handles and lock mechanism;
- chisel;
- self-tapping screws (included) and a screwdriver;
- feather drill for wood 23 mm;
- drill and hole saw for wood (diameter 5 cm).
If you don’t have the tools, it is recommended to borrow them from friends or neighbors. It is impossible to carry out the work carefully without the use of auxiliary equipment. A detailed study of photo instructions and advice from craftsmen will help you learn how to embed a lock into an interior door.
Step-by-step instructions for installing a lock on an interior door
After purchasing the kit and preparing the tools, you can immediately start working. Additionally, it is recommended to study the requirements and recommendations of the lock manufacturer. Direct insertion of the lock is carried out according to the following instructions:
1. 95 cm is measured from the bottom of the canvas, 6 cm is measured from the edge. The intersection point is marked with a pencil on the canvas itself.


2. The mark from the canvas is transferred to the center of the end part (using a square).


3. At the point marked on the end, using a pen drill and a drill, a hole is drilled for the locking mechanism.


4. Using a hole cutter, a hole for handles is prepared on the blade at the previously established mark.


5. The locking mechanism is inserted into the hole prepared at the end of the door, traced around the perimeter with a pencil, and removed from the hole.


6. Using a chisel, an area for the lock is prepared in the end part (along the marked perimeter of the outer part of the mechanism). The thickness of the cut-out section should be equal to the thickness of the lock latch (approximately 0.5 cm).


7. The lock is installed and fixed in the prepared hole using self-tapping screws.


8. The handle with screws is installed first. First, the screws are unscrewed, then the handle is installed in the door.


9. From the second part of the element, remove the handle itself and the decorative trim (using the key from the kit). This procedure is well demonstrated in the attached video instructions.


10. The second part of the handle is inserted into the door and secured with screws. The decorative overlay and the handle itself are installed. The installation work is completely completed.


After the installation is completed, the contractor will only have to check the operation of the elements and remove the resulting debris. In the future, it will be necessary to periodically adjust the handles (every 3-4 years) due to their loosening as a result of use. The lock is lubricated in case of severe jamming (ingress of dust, debris). The mechanism is disassembled and processed according to the manufacturer's instructions.
When installing a lock on an interior door yourself, you should remember to carefully drill holes and cut out the area for the latch. Drilling holes with a milling cutter must be done on both sides of the blade. This will help you prepare the required diameter and easily install the components. It is also important to gradually tighten the screws holding the handles together. When tightened too tightly, the likelihood of the elements fitting too tightly and the difficulty of opening the door increases. Compliance with these requirements will help you install the lock efficiently without professional help.
Video of inserting a lock into an interior door with your own hands
Installing doors in a doorway is a task that requires prudence and accuracy. But this door will not close without a lock. It cannot be opened without a handle. Embedding a lock into a wooden door means protecting yourself and your property from strangers, keeping you warm in the winter, and making the interior more interesting.
Mortise lock in a wooden door
How to install a lock on a wooden front door? To do this, you first need to prepare. Wood is a material that can be easily finished, but it requires experience working with wood flooring. You should know the type of wood and its abilities. To install a lock in a door you need:

The work involves stages that should be performed sequentially. If you don't follow certain, simple rules, the lock may stay in place, but will it work?
A selection of locks for wooden doors
Before choosing a lock, you need to answer questions about the lock:

Door locks are divided into types - rack, code, electronic, cylinder, lever. The rack lock is a simple design that is easy to break, you can break it yourself, and has a primitive appearance.
Cylinder lock – inside the lock there are cylinders located at different heights. If the element is not in its position, the lock will not open.
When forced, the lock is drilled or the core is knocked out. But, manufacturers add special elements to the lock material, against which the drill bit breaks. Such a lock has a long service life, is easy to change, and may have special plates, which are also a barrier for a burglar.

This is what a cylinder mortise lock looks like

The lever lock is a reliable design. This type of lock is practically unbreakable. To open without a key, a professional uses 2 master keys. Inside the lock there are levers that are driven by a key. 
Combination lock – to open the lock, you must enter a specific code. This lock cannot be installed on a wooden door. 
Electronic lock – does not have a keyhole. It has one button to open, which is located indoors. To open without a button, there must be a signal from the side. 
Once the issue of the lock has been resolved, you can begin to assemble the necessary tools.
Tools for cutting a lock into a wooden door
In order to embed the lock into the door, you will need to make a groove for the lock. After which the mechanism is installed. To do this you will need a cutting tool:


Set of tools for inserting a lock into a door
All these tools will be needed to install a mortise lock. To install the overlay mechanism, you will need a slightly different set of tools.
The process of making a lock groove
Before embedding the lock into the door, you need to take measurements and markings to cut out the groove. The instructions for the purchased lock indicate the different distance at which the handle should be located from the lock. This distance ranges from 95 to 100 cm, but many craftsmen correlate this distance with the height of the people living in the apartment or house. The taller the person, the higher the castle should be.
Making a groove for a lock:
- Let's say the height is 95 cm. It should be measured from the floor up.

Distance to the lock from the floor
- Next, you need to take the lock and place it in the place where the mark is placed, with the side that will be attached to the door. The lock mechanism needs to be outlined with a pencil.


- The hole for the lock is cut along the marked lines with a feather drill, the width of which coincides with the width of the lock bar. There are 2 methods for cutting the groove here. First: carefully, slowly move the drill inside the door 2 cm to the mark. Second: immediately drill the desired groove.

- The cut hole should be slightly larger than the width of the locking mechanism (by 2mm). This will allow the lock to enter the door calmly (without the use of physical force).
- You need to level the edges of the hole with a hammer or chisel.

- After this, you need to insert the lock into the resulting groove. It should enter the nest without hindrance.

- Next, you should mark the holes for the lock strip. To do this, you need to attach it to the door and circle it with a pencil.

Marking the holes for the lock plate
- Using the markings made with a chisel and hammer, a recess is made, the depth of which is equal to the thickness of the plank. There is no need to make the notch larger, but you also can’t make it smaller.

After the work has been done, you need to carefully and carefully try on everything. If there are any errors, they should be carefully removed with a sharp knife or chisel. So that nothing interferes with the insertion of the locking mechanism into the door.
When working with a drill, you need to keep the tool level. If the work is done at a degree of inclination, then the groove may be uneven.
Nothing lasts forever, door locks are no exception. But a failed locking mechanism is not at all a reason to change the entire door leaf. The lock mortise service will help return the door to normal operation in just a few hours. We install domestic and imported locks. The work is carried out by craftsmen who are familiar with carpentry inside and out. High quality, fast, inexpensive!
The functionality of the door depends on the quality of the lock mortise!
A skewed door leaf, cracks near the cladding, and grinding noises are signs that a homeowner will soon have to become familiar with where the door locks were installed with gross violations. Most often, the culprit is an incorrectly selected installation location or a poorly selected cylinder system in the device. Such mistakes are made by owners who decide that replacing a lock is too simple a task to pay money for. If at first the lock still functions somehow after the work of the masters, then soon the first unpleasant surprises will begin in the form of jamming and creaking. Then the device needs to be repaired or completely replaced, which is very troublesome and expensive.
Mortise lock - guarantee of protection!
The company's specialists recommend that clients use mortise locks. They have proven themselves in operation many times better than overhead ones. Inserting locks requires special skills and special tools; you can’t get away with it with a regular screwdriver or hammer. And it is easy to damage doors if they are not operated correctly.
Organization specialists:
- they cut the lock quickly and efficiently;
- use modern tools;
- provide guarantees;
- do not harm the door leaf during operation;
- provide free consultations regarding the rules for using the mechanism.
The company’s significant competitive advantages attract more and more customers to the site every day. The service of inserting door locks remains one of the most popular for a long time.
How to order mortise locks?
The site operates 24 hours a day. The operator is ready to take calls on weekends and holidays. There is an urgent call. The master arrives at the work site in a minimum period of time. Consultations are provided free of charge by telephone.
Calling a specialist to install a mortise lock is the only right decision. This way the client will receive a guarantee that the door will 100% cope with its protective function. The cost of the service is affordable.
To order a service for repairing, replacing or installing door locks, you just need to call
It is, of course, better to entrust the installation of an anti-burglary entrance door with a high-security lock to specialists who know not only their job, but also the working techniques of intruders. But cutting a lock into an interior door with your own hands carefully and so that the lock does not jam, the door does not rattle and its loose jamb does not spoil the finish is quite possible for any home craftsman. Just keep in mind that this lock will be “from honest people,” simply to limit access to the room. Most often, the need for this type of work arises when children grow up and/or older family members retire. Quite often, if the apartment has the office of a business person or creative worker. In the first case, the secret mechanism (cylinder) of the lock with the key hole is located inside the room; in the second outside.

Reliability problem
The reliability of an interior door with a lock has a different meaning than an entrance door. An exception is the door to a room to which access is strictly limited (storage of liquid assets, weapons room, workshop with hazardous equipment and/or harmful substances, etc.). Here you need a reliable steel door, no less resistant than the entrance door.
Note: If this is your case, check the walls first. Suddenly they are partitions made of foam blocks, gypsum boards, etc., the room is unsuitable for this purpose. The burglar will immediately see the weakness, use a super-duper lock with all its secrets and simply cut through or break through the partition.
The lock is inserted into the interior door taking into account the trace. circumstances. Atmospheric pressure at sea level is approx. 1 kgf/sq. cm. This is a very large value, we simply adapted to it in the process of evolution. For example, due to an open window, when the ventilation is turned on, due to temperature differences, etc. the pressure on one side of the door changed by only 1%, i.e. by 10 g/sq. cm. The area of the standard door leaf is 75x190 cm - 14250 sq. cm. The excess load on the canvas on one side will be 142.5 kgf. If the door is hung on 2 hinges, the tongue of the lock and its catch eye (mating part) under it in the door jamb will account for slightly less than half of this value; if the door has 3 hinges - a little more than a third.
Note: There is no point in hanging a door with more than 3 hinges - the concentrated load on the lock tongue and eye does not drop much, but the door jamb ends up weakened and overloaded.
70-45 kgf pointwise is a small load in general - if it is static. But dynamic, repeating and smaller ones operate on the principle “A drop wears away a stone.” In the case when the lock in the door is not inserted correctly (large play, tight movement of the tongue, etc.), over time, firstly, damage to the door and jamb develops: loosening, cracking, peeling of the door leaf coating. If the door and jamb are very strong, the wallpaper will first tear along its contour, then a crack will creep in, and the plaster will begin to crumble. Then it’s clear: unscheduled repairs with all the worries and troubles that flow from the wallet and flow into the head. Therefore, the material in this article is focused on the intricacies of work that make it possible to embed a lock into a door between rooms so that it does not rattle and spoil the room for at least 15 years.
MDF doors
The design of an MDF door is shown in the figure:

It is generally the same as the old “Khrushchev” doors made of fiberboard on a plank frame. But due to the high overall strength and rigidity of the base material, the frame is assembled from a fairly thin beam, which cannot be weakened with cutouts - the door will quickly become unusable. To insert a lock, the frame is reinforced with a backing beam (highlighted in color). For greater reliability of the entire structure, the distance from the bottom edge of the door to the longitudinal axis of the lock tongue is 965 mm by default. If the lock has a separate latch, the countdown is to the middle of the distance between the axes of it and the tongue. If there are several tongues, then to the middle of the distance between their common longitudinal axis and the axis of the latch.
Locks for interior doors
The security mechanisms for interior locks are usually simple: a cylinder cylinder or a lever. The disk larva is used less frequently.

Due to the ease of insertion, convenience and features of use, trail locks are most often installed on interior doors. species (see figure):
- “flat” - in a rectangular case, with tongue(s) separate from the latch. The mechanism, as a rule, has increased secrecy, the handle is halyard (push);
- “round” – in a cylindrical body. Any type of pen. The tongue and latch are aligned. The cylinder cylinder and latch stopper are embedded in the handle spindle;
- “flat” of reduced height without a latch with a rotary handle;
- “round” with a knob handle.
To insert a lock into an interior door carefully and securely, you must also take into account its design and the thickness of the door leaf:
- Made from MDF 35 mm thick.
- The same, 45 mm thick.
- New wooden with panel thickness from 50 mm.
- Old wooden or fiberboard on a plank frame.
Flat
Flat interior locks are the most expensive and are more difficult to insert than round ones, but they provide the best protection against burglary by unskilled intruders. However, they weaken a door with a jamb more than a round one. This type of lock must be matched to the existing door. First, only a flat lock of reduced height can be inserted into a 35 mm thick MDF door (item 3 in the figure above).
Also, look at Fig. with dimensional drawings of flat locks. Pay attention to the sizes highlighted in color. Only locks can be inserted into MDF doors if, firstly, the thickness of the thickest tongue is no more than 15 mm. Secondly, the width of the lock's end plate should be no more than 24 mm. Reason: dynamic loads from the lock should be taken by a wooden frame, and not by a skin made of thin, rather fragile MDF. Therefore, from those shown in Fig. Only the one on the left can be inserted into MDF doors.

The castle in the center in Fig. Suitable for old wooden and “Khrushchev” doors. They are usually thicker than 45 mm, but old, shriveled wood also becomes brittle; most often also cracked. Therefore, only the thickness of the tongue and resp. becomes critical. lock body. Finally, the castle on the right in Fig. Suitable for wooden doors with a leaf thickness of 40 mm or more. If a decorative coating is applied to solid wood - for a door with a thickness of 50 mm or more, because There must be at least 10 mm of wood left from the side edges of the end plate to the coating.
Round
Round locks for interior doors are the best option for an ordinary apartment or house. You can embed them into any door. Locks with a halyard handle are usually installed where there are sick or infirm people for whom it is difficult or impossible to operate a turning handle. Knob handles are the safest: they cannot be scratched or caught on clothing. The technology for inserting round locks with handles of any type is the same.
The lock design for an interior door in a cylindrical body is shown on the left in the figure:

By default, such locks are produced for doors with a thickness of 35 or 45 mm. Locks for solid wooden doors in the periphery are not always available for sale. In this case, the lock can be adapted to a door of any thickness by replacing the latch carrier (highlighted in red in the center) with a longer one: this is a simple rectangular plate made of ordinary steel 2-3 mm thick with a hole at one of the ends. The latch output switch (on the right in the figure) is set to the corresponding position. door jamb material: 70 mm for wood, 60 for MDF.

Also, by default, round locks are released with the cylinder facing inward, so that you can lock from the inside. If your door is left-handed (opens to the left), and accordingly. There is no lock in the nearest store, the cylinder and the latch can be rearranged in advance (required!) by disassembling the lock (see the figure on the right and below). However, for an office and other premises where outsiders should not have access in the absence of the owner, this is not an option, because From the cylinder side, the round interior lock can be disassembled without special tools.
Disassembly and installation of a round lock
Round locks are sold disassembled into 3 assemblies: a body with a tongue, a socket with a latch handle and carrier, a handle socket with a cylinder. The latch socket skirt has holes for mounting screws; in the skirt of the socket larvae there are blind threaded sockets for them. To install the lock in the door, put the housing in place (see item 4 in the figure below and below) and insert the carrier into the groove of the tongue pusher. Then apply the socket to the canvas and check the movement of the latch: it should retract when the handle is turned to the right (clockwise). If on the contrary, turn the latch socket 180 degrees. Now put the socket of the larva in place so that the end of the carrier falls into its groove. They tighten the sockets with screws, put on a decorative trim - you're done.
To completely disassemble the lock, for example, to replace the cylinder, first remove the handle with it. To do this, you need to press the latch on the neck of the handle (shown by the arrow in position 1 in the figure).

The handle will slide down the chute (item 2), but the cylinder will remain in place. To get to its latch (ring or pin), as well as to the latch stop latch, you need to insert a hook into the window of the decorative trim (shown by the arrow in item 3), use it to pry the latch and pull it towards you. Now the lock can be completely disassembled. More expensive locks are also equipped with linings that cover the heads of the mounting screws. They are removed in exactly the same way.
Standing or lying down?
You need to know how your lock is disassembled and installed even before you approach the door with the tool. But let's get back to the topic. The first issue that is important for the quality of work that needs to be resolved is to remove the door from the hinges to insert the lock (to insert it “lying down”) and work in place (“standing”).
Experienced craftsmen, for whom time is money, who own power tools (see below), always work lying down. Those who are also experienced, but who do mortise locks manually from time to time, also prefer to work while lying down. In both cases, the speed, quality and stability of the work results more than pays for the time spent removing and re-hinging the door, see for example. video:
Video: inserting a door lock while lying down
A novice locksmith who intends to make money/earn extra money by cutting locks must also immediately get used to working while lying down, otherwise you won’t be able to fend off customer complaints. For the home craftsman, the “lying” method will be more convenient, firstly, when completely replacing a door with a jamb. Secondly, in the process of arranging and finishing a new house/apartment, because... The most tedious task of removing old doors is eliminated. But it is better to do a one-time manual insertion of a lock into an existing door while standing, see the video:
Video: inserting a door lock while standing
Tool
It's even more important to get the right tool. Some standard samples may need to be modified to accommodate locks, see below.
If you are going to work on doors and locks professionally and you expect a lot of orders, it is advisable to immediately acquire a plunge-cutting wood milling machine (on the left in the figure), its cost will be recouped by the speed and quality of the work.

As a rule, in addition to the carriage, plunge-cutting routers are supplied with templates, with the help of which you can carry out a full cycle of work on installing the door, see the story:
Video: installing a door with a lock mortise
For a beginner, in this case, the most important thing is not to make a mistake in choosing a rather expensive tool, so we offer a selection of videos:
Video: how to choose a wood milling machine
Video: what cutters a beginner should buy for it
Video: how to determine the quality of a cutter when purchasing
If orders for inserting locks are expected in the meantime, then the router will completely replace the proprietary template for inserting a lock with complete core drills. Its advantage is that many kits allow you to immediately accurately mark and install the mating part of the tongue (eyelet). This is the most difficult operation for inserting a lock, see below. Disadvantage – the template is only suitable for manufacturer’s locks. A possible solution is to install your own lock (bought by a master); owners of lock templates are often given discounts. The owners seem to have a good time: they don’t have to go shopping and struggle with the choice, and a small markup doesn’t hurt their pockets. But in a big city this is hardly an option - where is the guarantee that an unfamiliar master has not made duplicate keys for himself in advance?
Note: the template(s) for inserting a branded lock/locks according to his/their dimensional drawings can be made with your own hands, see next. video:
Video: a simple template for marking a door
For manual work
A one-time insertion of a lock with your own hands for yourself will have to be done manually according to the markings: it will take 3-4 hours to make the simplest template, and without it, standing in place, the greenest, but not armless, “teapot” will insert the lock in an hour. A more or less experienced home craftsman - in half an hour. For an electrified tool, you will need a drill or screwdriver with a power of 170 W or more, because... For a flat lock you will have to drill deep holes, and for a round lock, wide ones.
In addition to the usual household tools, you will need, firstly, a feather drill and, for a round lock, a core drill for wood, pos. 1 in Fig. There are no problems with crowns: the required diameters (50 or 54 mm) are standard. But the nib for a round lock needs 23 mm. This is non-standard; these do not exist in regular sets (item 2). This means you need to either look for it separately, or adjust it to 25 mm manually, for example. on a surface grinding machine – grinder. It is not advisable to turn: you can screw up the drill, the cutter, and the machine itself. The best option is a tabletop drilling machine (you can use a drill): a 25 mm pen is clamped into the chuck, turn on the drill and use an emery block to bring it to 23 mm; Micron precision is not needed here.

It is easier to select a chisel/chisels (item 3): it is used to select a recess under the end plate of the lock. Its width for most locks corresponds to the standard sizes of chisels. If the legs of the lining are rounded (nowadays they are rarely done), the chisel will need a joint knife (like a shoemaker's knife) with a hard blade, see below. A mounting knife will not work!
Finally, if you are installing a lock on an old wooden door, it is highly advisable to purchase a hand crank, pos. 4. This simple and not particularly expensive tool is generally very useful for working with old wood. Unlike a power tool, a rotator allows your hands to feel the resistance of the material - the likelihood of chipping, cracking and generally damaging the part is much less with it.
How to work manually
Inserting a lock into a door is a rather delicate matter: from the holes for the lock and tongue catcher to the outer surface of the door leaf (possibly with an expensive finish), no more than 10-12 mm of wood remains; usually 5-7 mm. Therefore, you need to work with the lock manually carefully and correctly: one awkward movement - and the door is damaged.
First, do not drill right through the door with a crown for a round lock, pos. 1 in Fig. The likelihood of ruining the finish is very high. You need to drill with a crown until the guide drill appears on the other side, and drill further from there. The hole will have a slight ledge inside, but it does not affect the quality of this work in any way.

Secondly, do not drill with a pen immediately following the markings, especially when working while standing in weight, pos. 2. First you need to drill a pioneer (guide) hole with a diameter of 3-4 mm. Achieving its deviation from the perpendicular to the part by 2 degrees or less with a twist drill is easy for a beginner, but with a pen it is difficult for an experienced one. Moreover, since the guide tooth of the pen describes, while rotating, a conical surface, it will not initially feel the bevel of the pioneer hole; it will stand perpendicular. And when the feather wings enter the tree approx. 1/3 of the height, then the entire drill will become self-guided.
If the door is wooden, then you need to select the end plate with a chisel, holding it with the bevel of the blade towards the wood, pos. 3 – this way the tool will not crash into the tree and split it. If the door is made of MDF (homogeneous material), then the chisel is held, on the contrary, with the bevel outward. This way the decorative coating will come off as shavings (item 4), but if it’s the other way around, a long flake may come off.
Note: if the legs of the end plates are rounded, resp. Parts of the markings, melted under them before being removed with a chisel, are cut with a jamb knife to a depth equal to the thickness of the end plate (2-3 mm). On MDF doors this is much simpler - the thickness of the decorative coating corresponds to the thickness of the linings, and the difference in the cutting force of the coating and the base material (it is harder) is very well felt by the hand.
About markup
Most of the marking operations when inserting a lock are carried out using templates or parts of the lock applied locally. It is better to make markings with a needle or a sharp awl, then you can process directly along the contour. If you use a pencil, then when processing you will have to take into account the width of the stroke and the indentation of the lead from the template/part, which is not easy for a good craftsman. But you cannot replace the awl/needle with a metal scriber: it is sharpened in such a way that it gives an indentation even greater than the stylus, and the scratch from it does not erase.
Flat lock mortise
The procedure for inserting a flat lock into a wooden door is shown in Fig. below. Notes to it, first - on the door, first mark with a pencil a vertical center line and a horizontal line at 965 mm from the bottom (for doors made of solid wood and old ones - at 800 mm). In this case, it is also better to make markings along the attached lock (pos. a in the figure) with a pencil and select a socket along the lock along its contour, this will provide the required installation gap.

Second, it is better to drill the lock socket (pos. b) with a feather drill with a diameter 1-3 mm larger than the thickness of the lock body. For accuracy, drill in 2 steps, along the pioneer holes, see above. Sampling the socket with a chisel, marking the outline of the hole using the lock inserted into the socket, and sampling the hole (pos. c-d) are carried out as described above.

There is a nuance in the marking of the holes for the handle cylinder and spindle, pos. e. It is made according to the lock attached to the side, but the holes are drilled with an additional offset from the end of the door S, equal to the thickness of the end plate. A shaped hole for the cylinder is made in 3 steps: drill a round one for the cylinder (larger), a smaller round one for the bottom of the pin cassette, and remove the remains with a chisel.
The last operation is fitting the lock, see fig. on right. It is put into the nest without the handle and the larva, and both are put in place. A loose lock assembly should have a play of approx. 1 mm on all sides.
Note: The handles from the flat lock can be removed if you unscrew the screws holding the sockets together, as with a round one, see above. There is no need to remove anything else from the lever lock. To remove the cylinder lock cylinder, you need to unscrew the Phillips screwdriver, the head of which is located on the end plate under the tongue/tongues. After this, turn the cylinder of the larva with a key little by little back and forth, pushing the larva with your finger until it comes out. The larva is put in place in the reverse order. After installation, check, also turning the cylinder with a key, whether the tongue moves, i.e. whether the carrier (link) of the larvae entered the groove of the tongue crossbar.
Round lock mortise
Installing a round lock on an interior door is much easier than installing a flat one. First, pioneer holes are marked using a template according to the thickness of the door and the exit of the tongue. The marking is carried out from the side of the larva. If the sockets of the cylinder and the latch need to be swapped, this is done before marking, see above. Then the pioneer holes are drilled. There is one very important trick here, which is discussed below in the section on installing the response part. Then large holes are selected with a crown, and the lock is inserted into the socket. The countersunk is marked along its end plate, selected, and the lock is assembled on site using standard screws.

Drawings of templates for marking doors for round locks with a diameter of 50 and 54 mm are given in the figure. To transfer them to cardboard/paper, the drawing is printed and redrawn to scale so that the distances marked in green are equal to those indicated. This can be done the old fashioned way with a drawing pantograph; homemade will work too. More accurate and faster - in a good vector graphics program, for example. CorelDraw. There you can set the length of the measured segment with an accuracy of literally up to a micron, and scale it in steps of hundredths of a percent. The raster image (bitmap) is imported into CorelDraw, scaled according to a measured segment (CorelDraw also has measuring tools, but in this case it is more convenient to scale as needed) and printed - that’s it, the template is ready.

Installation of the mate
This is the most difficult and important part of inserting a lock into an interior door. It is an incorrectly installed or bad eye that is the most common cause of rattling and skewing of the door, jamming of the lock, loosening of the jamb and damage to the wall finish. To avoid this, a modern lock tongue eyelet consists of 2 parts (except for fastening hardware): the eyelet itself (lining on the jamb with a cutout for the tongue) and a tongue catcher - a plastic box (on sale for some reason it is called decorative, although it is not visible ), pressed by the eye. The box dampens dynamic loads on the tongue and protects the jamb material from direct contact with it. For the same purposes, the eyelet is made with an adjustable mustache, see below.
About markings under the tongue

Installation of the eye begins with marking the end of the lock tongue on the jamb; everything else is not tied to. Usually the tongue on a joint is marked by marks and measurements, see fig. on right. But this can be done much more accurately in other ways, different for flat and round locks. In the first (“flat”) case, a lining with a thickness of approx. 2 mm is the size of the operational gap of a closed door. The simplest way is to fold a piece of paper into several layers, wet your finger, place it on the paper and immediately stick it on the door. Then washable paint is applied to the tongue of the lock (you can smear it thickly with a felt-tip pen). The door is now closed until it slams, i.e. until it stops at a quarter, and with a key push the tongue several times until it stops in the jamb. It will leave a mark clear enough to mark the full outline of the tongue.

In the case of a round lock, the matter is simplified again. There is no need to coat its tongue with paint, especially since it is beveled and has a complex cross-section. But you need to take your time at the end of the door to drill a 23 mm hole (socket) for the lock body. They drill a 50 or 54 mm hole in the canvas for the sockets, and for now leave a pioneer hole with a diameter of 4 mm at the end. Then the door is closed until it slams (without lining), a 4 mm self-tapping screw is inserted from the cylinder side and the center of the tongue on the jamb is marked with it. For clarity, what it looks like with the door open is shown in Fig. on the right, but in reality the door should be closed. The tip of the screw will go 1-1.5 mm as the door opens, which will give the required operating clearance.
Installation of eye and catcher
Installation of the counterpart of the interior door lock after marking the tongue mark on the door jamb is carried out step by step. order (see also fig.):

- The lock must be fully assembled on site and securely fastened;
- The eyelet is turned over (it is symmetrical about the horizontal axis), placed in place so that the vertical axes of the tongue and eyelet coincide and its mounting holes are marked (marked with arrows). Do not bend or break off the adjusting tab (also marked with an arrow)! At the same step, a pocket with a depth of the thickness of the eye is selected;
- Apply the catcher in the same way and mark the outer contour of its tray with marks by hand;
- The outer contour of the catcher tray is beaten in place;
- Drill a socket for the catcher. Do this with a pen, as in pos. 5, actually it’s not necessary, especially if the jamb is made of MDF: a through hole from the guide tooth will weaken the jamb. It is better to drill in the corners with a twist drill;
- Using a chisel, select the catcher's nest;
- The catcher is already applied in the working position;
- Mark its outer contour;
- Choose a trap under the catcher;
- The catcher is put in place;
- Cover it with an eyelet already in the working position;
- Drill holes locally for small self-tapping screws, with a diameter 1.5-2 mm smaller than the standard ones;
- Temporarily secure the eyelet with small self-tapping screws;
- Check the movement of the tongue (whether it is stuck) and the play of the closed door - yes, no;
- The tight movement of the tongue and the play of the closed door are eliminated by removing the eye and carefully bending/bending its adjusting tab;
- The mating part is finally secured with standard fasteners.
Note: The adjusting tabs of the mate parts of cheap “alternative” locks often break off at step 15. The only thing I can advise here is to bend it carefully with pliers.
About magnetic locks
There are mainly 3 types of magnetic locks for interior doors on sale. The first ones - electromagnetic - came into everyday life along with intercoms. The disadvantages are the same: they are volatile, the electricity is small, but they drain. If the room is de-energized, the lock opens without the possibility of locking - enter whoever wants. Additionally, in residential premises, you need to drill a channel in the door, and tap a groove in the walls for the power wires. Or cover them with boxes, which is also quite labor-intensive and ugly. An electromagnetic interior lock most often fits like a round one; less often as flat. Suppliers even offer coded electromagnetic locks for interior doors. In a Stalinist-style communal apartment or for partitions in a privatized dorm, these may be necessary. But in a family apartment or house, it frankly smacks of paranoia.The second type is still very rare due to the sky-high price and the lack of any advantages over mechanical ones. These are non-volatile locks with niobium supermagnets. They cut in like flat ones, but the requirements for accuracy and precision of work are lower: the counter part is a strip made of ferromagnetic material. It is impossible to push open a door with a supermagnet lock, and not every healthy man can knock it down with his shoulder. Unlocking - interception of the magnetic flux by countermagnets introduced by turning the handle between the holding ones. The disadvantage is serious: fairly rapid degradation of magnets.


