Not a single room in an apartment or house, except for a bathroom, needs careful protection from high humidity and direct contact with water. Even if you take a very gentle bath, the walls and floor will still be doused with water.
If the waterproofing is not very good, then not only the renovation in the bathroom will deteriorate, but there is also a possibility of harm to the neighbors. Also, improper insulation from moisture is a risk of mold and mildew. Moreover, in places where there is a high concentration of moisture, for example, between the bathroom and the wall, toilet bowl and the floor, unwanted insects can appear.
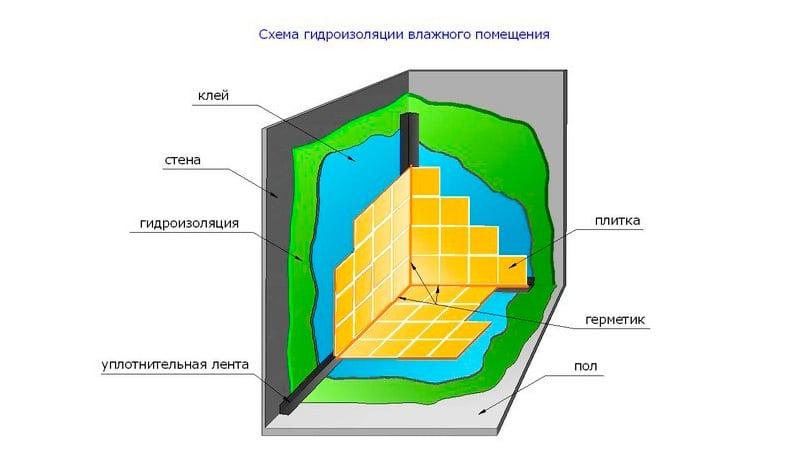
Before starting repair work in the bathroom, you must first of all determine the moisture zones, regardless of whether it is a new building or a room that is already being renovated. Often these can be walls and floors that are directly exposed to water. How to protect yourself from moisture? Showers, bathtubs, washbasins, walls exposed to moisture in the bathroom should be thoroughly waterproofed initially. The waterproofing procedure itself is described step by step in the article below, however, you need to know which waterproofing to choose for the bathroom.
It is necessary to isolate places from water using one- and two-component liquid mixtures for waterproofing.
The composition of waterproofing materials includes a sand-cement mixture, chemical plasticizers and polymer fillers. Thanks to polymeric substances, larger particles are bound, and a moisture-proof film is formed. As for the cement, which is part of the waterproofing, with its help the solution turns into a solid monolith. Well, the plasticizer creates excellent conditions to prevent this waterproof shell from cracking.
Waterproofing materials for bathrooms
The building materials market offers two types of waterproofing materials for bathrooms: one-component and two-component solutions. Let's figure out which waterproofing is better for the bathroom so that the room remains dry for a long time.
There are no particular differences with the above mixtures, the only difference is in the method of their preparation. One-component mixtures are made using water, in the amount specified in the instructions. Two-component - using a polymer emulsion that reliably protects against the penetration of fungus and mold.
Do-it-yourself waterproofing of walls in the bathroom
Bituminous mastics
Waterproofing of premises with a high level of humidity is carried out using liquid lubricating waterproofing materials. The advantages of such materials include their versatility, regardless of what surface they have. Thanks to this, you can significantly save preparation time and speed up the repair process.
Bitumen-polymer and bitumen-rubber mastics are the most common waterproofing materials. Manufacturing takes place on the basis of oxidized bitumen with an organic solvent, as well as various modifiers and fillers in order to increase elasticity.
As for the advantages, the degree of adhesion of such construction putties to the base is quite high, as well as their resistance to aggressive influences. They are often used to insulate walls from moisture, where there is constant contact with water. A screed must be made on top of the waterproofing compound.
Bathroom waterproofing materials
Cement-polymer mastics
Lubricating mixtures can be made using cement-polymer mastic. Their manufacture is carried out based on a combination of cement and mineral fillers in a solution.
One-component compositions, as mentioned above, are bonded using water, and they contain waterproofing agents, and two-component ones - using polymer-based binding emulsions.
The materials are quite viscous, in their composition they are similar to soft plasticine. The above materials are applied in two layers.
Important! There are 3 kg of cement-polymer mixture per 1 sq / m.
The adhesive coefficients of the mastics allow them to be applied to rigid and flexible surfaces. Polymeric substances, which are the basis for the tightness of mastics, penetrate into the base and close all the pores. Layers can be up to 3 mm wide. Waterproofing materials perfectly cope with elevated temperatures and are ideally combined with electric and water floor systems.
Waterproofing composition
The composition of mixtures for coating includes sand, cement, as well as polymer elements. When combined with cement, sand is the best bonding material that, in contact with the polymer mixture, penetrates even the smallest crevices and cracks, thereby providing complete protection. Nevertheless, there are rules, breaking which even the best waterproofing materials cannot be protected from moisture and water ingress.
We carry out waterproofing in the bathroom with our own hands
First of all, you should check the walls for their flat surfaces using special devices. If there are even minor deviations, it is worthwhile to level the walls using beacons and plasters with excellent water-repellent characteristics.
If you want the waterproofing material to penetrate deep into the walls and floor, these surfaces should be pre-wetted with water.
Roll waterproofing materials
Now let's figure out how roll waterproofing of the bathroom floor is carried out. The materials required for roll insulation, as well as a step-by-step algorithm of actions, are described in more detail below.
Laying a roll of waterproofing material on the floor of a bathtub is similar to laying linoleum. For this, a certain piece of material is cut off, after which the bitumen base is heated to a certain temperature, the protective film is removed. Further, it is glued to the already prepared floor using a weighted roller on its surface several times. After that, you need to make sure that the material is fixed securely.
When laying waterproofing material, it is necessary to pay special attention to the corner places where communication and sanitary facilities are concentrated. In these places, special care must be taken. It should also be noted that the joints must be covered with silicone and polyurethane sealant, or, alternatively, a specially designed adhesive tape can handle this perfectly as a sizing, which eliminates the formation of small cracks and voids. If everything is clear with this option for insulation from moisture, then it remains to figure out how to waterproof the wooden floor in the bathroom?
Do-it-yourself wooden floor waterproofing in the bathroom
Materials for such types of work must be selected according to their composition with high moisture protection. Such products exclude contact of water with wood, and their active components allow penetration into the floor, waterproofing the wood from the inside. An alternative can be the use of a material such as a thermal tree with high moisture protection and excellent resistance to fungal formations.
Waterproofing bathrooms step by step
- Before applying the waterproofing material to the walls and floor, it is necessary to carry out all the preparatory work. First, the floor must be cleaned of the old flooring. Regardless of whether it is tile or paint, they must be completely cleaned. After that, it is necessary to check for evenness using the level of the wall, ceiling and floor so that the angles between them are exactly 90 degrees.
When leveling walls, wait a few weeks before starting waterproofing work.
- It is necessary to clean the surfaces from the remnants of the coatings, after which you should walk over them with antifungal and anti-mold compounds. If you do not have this solution at hand, you can make it yourself using ammonia and medical alcohol, as well as clean water.
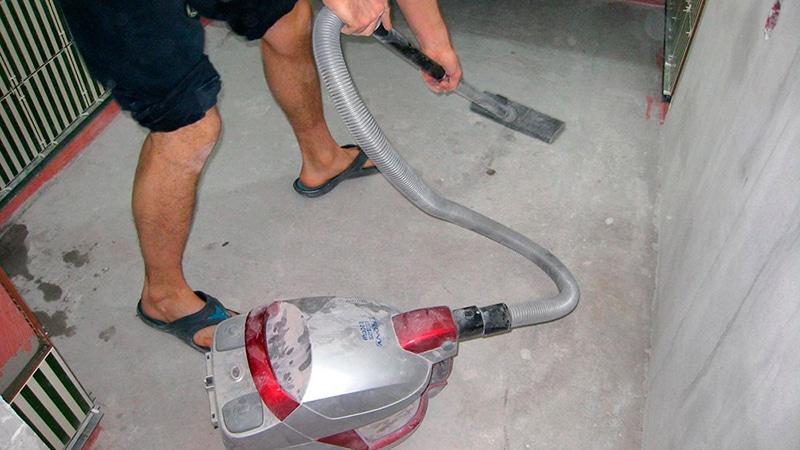
We remove all debris in the process of waterproofing the floor and walls of the bathroom
- The next step is to prepare a waterproofing mixture. It is possible to carry out waterproofing with one of two types of materials that perfectly cope with their functional features. Nevertheless, if you are pressed for time, it is better to use a two-component mortar, which sets more reliably, albeit not immediately, and also protects against bending. And for bathrooms this is very important.
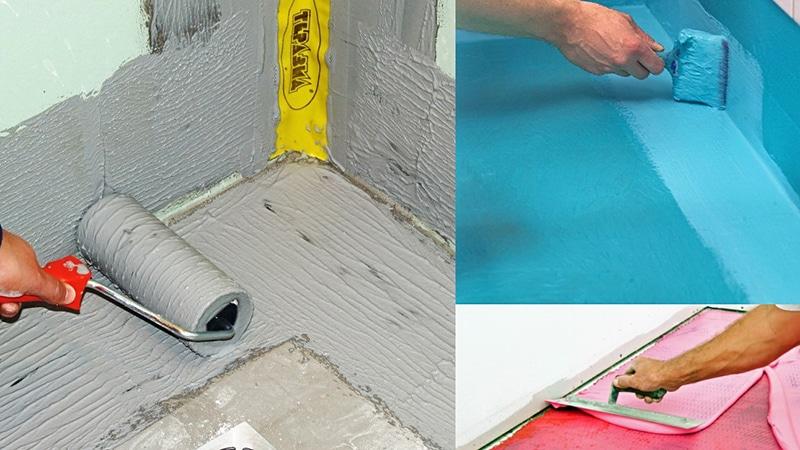
- The mixtures are prepared in relation to the enclosed instructions without adding any additional mixtures, since oversaturation can negatively affect the action of the constituent substances. The prepared insulating mixture is necessary, first of all, to process the walls. The composition is applied with a special thick brush with wide brim, but you can also resort to using tight-fitting brushes.
Important! Waterproofing mixtures can be quite thick, so you should not dilute them with water, it is better to use viscous ones, since only the density will protect the walls and floor from moisture.
A small amount of the substance is taken and applied to the brush in horizontal and vertical movements, as appropriate. But do not combine these applications alternately. Better to give preference to one.
Diy repair scheme with waterproofing in the bathroom
- The solution must be applied twice in a thick layer. For convenience, the mixture can be halved in two containers. This will determine an equal amount of mixture required for application.
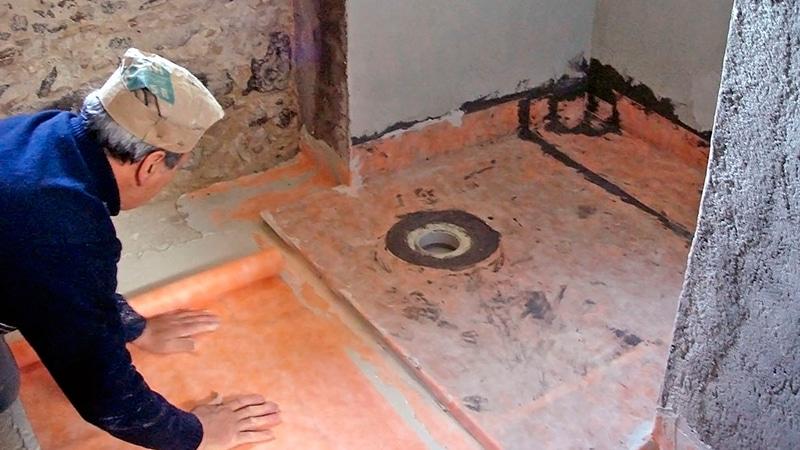
- After processing the insulating composition of the walls, we proceed to waterproofing the floor. Remember that the surface must be thoroughly cleaned of the previous coating before work. After that, the floor must be properly cleaned of debris, dirt that will interfere with work. If there are gaps between the walls and the floor, they should be carefully repaired, otherwise they can become a reason for the accumulation of moisture.
- After all the flaws are fixed, we prepare a waterproofing solution for the floor. Its composition will differ slightly from the solution for the walls. You need to know that a solution is purchased for the floor, which includes mastic and bitumen. The solution itself is made using gasoline or a very strong solvent. In the process of preparing such a mixture, you should ventilate the room, and also use a mask to avoid vapor poisoning. The floor mortar is quite liquid and can therefore be applied with a brush.
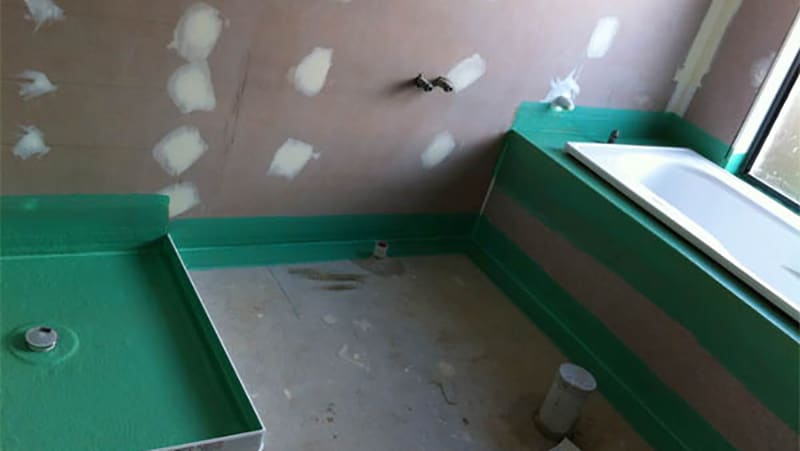
- Upon completion of the application of the solution, it is necessary to ventilate the room and allow the substances to dry completely. After that, you can safely proceed to other repair work. It should be remembered that waterproofing is applied not only to the floor, but also to the walls, retreating 15 cm. This allows the two materials insulating against water in contact to create a particularly protected surface.
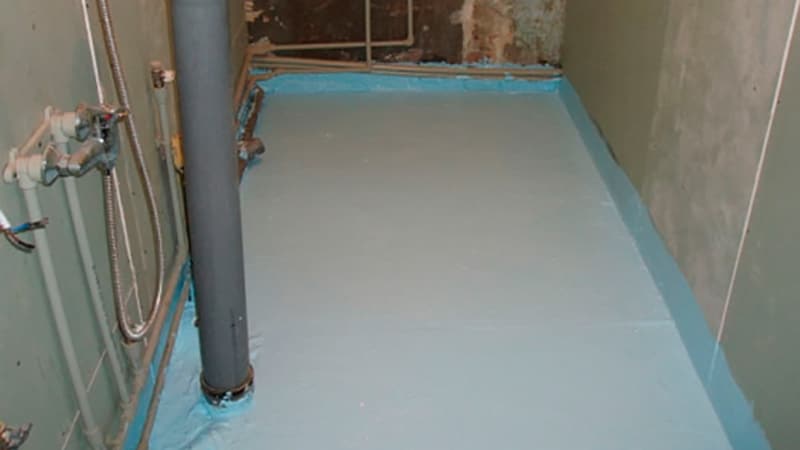
We carry out waterproofing of the bathroom floor
Considering all the rules and regulations for applying waterproofing substances to the surface, you can protect yourself from unpleasant odors, accumulation of moisture, flooding of the lower floors, damage to repairs and get a dry room for many years.
Features of waterproofing walls
In order for the waterproofing mixtures applied to the walls to perfectly cope with their functional features, it is necessary to resort to materials based on cement-polymer compositions. After all, if you use bitumen and means with it, over time, bitumen, as a flowing material, can begin to flake off. Pipes, joints and corner places must not be ignored, special cuffs must be put on them, and the corners between the walls and the floor themselves are glued using a sealed tape designed for waterproofing work.
Before and after the insulation of the walls, the entire surface is primed. For reliability, waterproofing the walls of the bathroom under the tiles involves applying a building reinforcing mesh to the mortar, which allows you to firmly hold the glue and ceramic tiles.


