Ceramic tiles have high thermal conductivity and cold floors. Installing an electric underfloor heating under the tiles is the best solution to the problem.
The tile coating heats up quickly, retains heat well, is resistant to high temperatures and temperature extremes, and does not emit toxic volatile components when heated. How to install an electric underfloor heating under the tiles yourself?
Main varieties:
- underfloor heating cable electric under tiles;
- film floor;
- heating mats;
- carbon mats.
According to the principle of operation, they are divided into two groups: cable heating and infrared radiation.
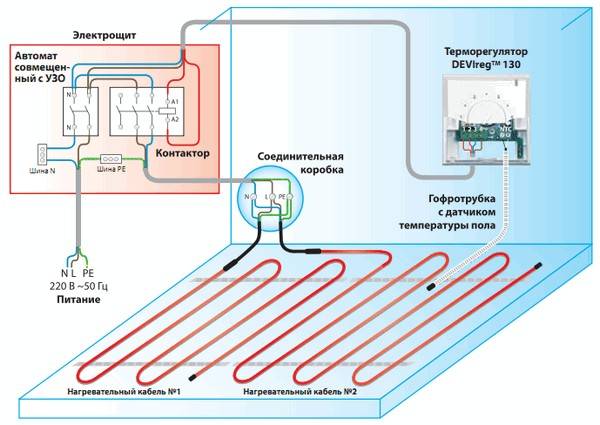
The cable floor consists of a heating section (located in the floor), an assembly end (with the help of which the connection to the thermostat and power source is made) and couplings.
Film floor - thin (0.33 mm) polymer film with built-in flat heating elements. The elements are powered from a network or an autonomous source, the film emits infrared waves.
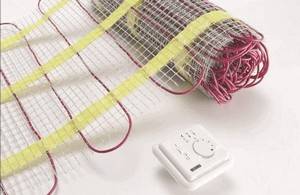
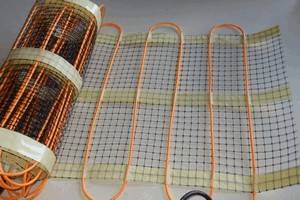
Mats are also a heat cable, only fixed on a flexible reinforcing mesh. Sold in rolls.
Carbon mats consist of parallel-connected carbon rods. The heating principle is infrared.
Choice
How to choose an electric underfloor heating for tiles?
Main criteria
- energy efficiency;
- ease of laying an electric underfloor heating under the tiles;
- price;
- energy consumption;
- security.
Under the tiles (unlike other coatings), you can put any floor - infrared and cable, with or without a screed.
When installing a cable system, you can use a single-core or two-core cable. The two-wire one is easier to install, it is enough to connect it to the source at one end. A single conductor creates a closed loop, it is connected with two ends. This option is cheaper, but more difficult.
It is much easier to lay the mats: just roll out the roll and connect the heat cable through the thermostat to the source. The price is higher than that of a simple cable.
Cable systems are tucked away. Mats and plastic flooring can be placed directly under the tiles. The energy efficiency of the film system is lower than that of the cable system.
Heat-insulated floor under the tiles, electric, energy-saving - carbon mats. Its cost is about the same as that of cable systems, energy consumption is lower (up to 60 percent savings), installation is simple. Can be installed both in screed and under cover.
The advantage of screed mounting is that the system is reliably protected from mechanical damage.
Minuses
- higher energy consumption of installation, longer installation time, additional costs for the cement-sand mixture;
- the screed reduces the height of the room;
- it is more difficult to repair the floor: you will have to dismantle not only the coating, but also the screed.
Security
- the carbon floor is considered the safest due to self-regulation, it does not overheat;
- a two-core cable is safer than a single-core cable, because the second has a high electromagnetic background. The single-core version can be used in technical structures. For residential, you need a two-core;
- heating elements must not be placed under furniture and massive equipment, in order to avoid mechanical damage and disturbances in heat transfer in the room;
- the device of the cable system requires reliable grounding;
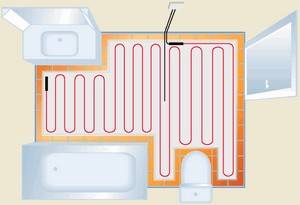
- if you are laying an electric underfloor heating under the tiles in the bathroom, the thermostat remote control must be removed outside of it.
System calculation
- If an underfloor heating is planned as the main source of heat, the recommended heat transfer of the system is 150 watts per square meter, for the lower floor - 180. And the underfloor heating itself must occupy at least 70 percent of the total area.
- If this is additional heating (plus radiators, convectors, etc.), the system power of 110-130 watts is sufficient.
- From the total length of the cable (area of mats, films, etc.), you must immediately subtract the areas occupied by furniture and other massive objects.
- The distance of the cable to the walls, furniture is at least five centimeters, to the risers of the water heating system - at least ten.
- The formula for calculating the pitch between the turns: H = S * 100 / L (S is the area of the heated floor, L is the length of the cable).
- The formula for calculating the length of the cable: L = S * Ps / Pk (Pk is the specific rated power of the cable per running meter, Ps is the required specific power per square meter). To the resulting figure, you need to add a piece to connect to the thermostat.
Characteristics of cables depending on the current and power of the system
- copper, with a cross section of 2 by 1 mm: maximum current 16 amperes, system power 3.5 kilowatts;
- copper 2 at 1.5: 19 amps, 4.1 kW;
- copper 2 by 2.5: 27 and 5.9;
- aluminum 2 by 2.5: 20 and 4.4;
- aluminum 2 by 4: 21 and 4.5.
Device and installation
 Further - several possible options for the "cake" for the floor, depending on the selected heating system (meaning the layout of the layers that make up the warm floor).
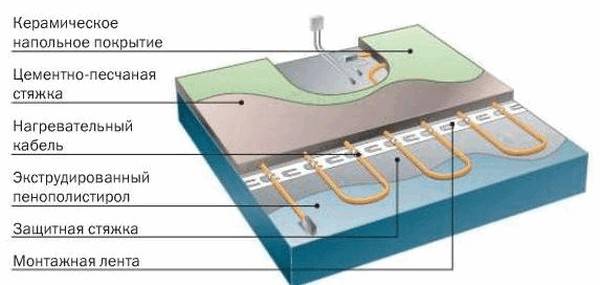
Installation diagram of an electric underfloor heating under a tile for a cable system:
- Concrete base.
- Waterproofing.
- A layer of sheet insulation.
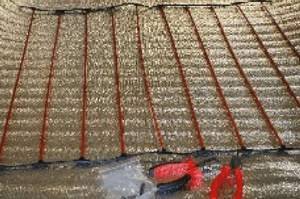
- A layer of foil.
- Cable and tie.
- Finish tile coating.
Electric underfloor heating installation under the tiles - heating mats:
- Concrete base.
- A layer of tile adhesive.
- The tile itself.
How to install an electric underfloor heating under a tile - a film system:
- Base or screed.
- Heat-reflective foil layer.
- Thermal film.
- Waterproofing (polyethylene).
- A thin layer of drywall.
- Glue and tiles.
The choice of the method of installing an electric underfloor heating under a tile depends on the characteristics of the room:
- wet (bathroom, sauna, kitchen);
- dry;
- unheated (cold balcony, open terrace);
- heated.
When preparing for installation, please note:
- the maximum permissible load of the thermostat must be higher than the power of the system;
- choose adhesives and other materials only those that are suitable for underfloor heating.
For tiles without screed
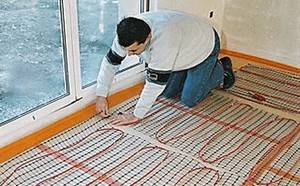
 How to put an electric underfloor heating under a tile without a screed. This is done using special heating mats.
Scheme of work:
- Draw a drawing of the placement of the mats, excluding the areas with heavy furniture.
- Make a groove in the wall and in the floor with a cross-section of two by two centimeters for the connecting cable. If the thermostat is built-in, make a niche in the wall to accommodate the box.
- Level the floor, remove debris.
- Place the temperature sensor cable in a corrugated tube with a cross section of one and a half centimeters.
- Put the plug and place the tube in the strobe (the sensor will be located in the floor between the cable loops, 5 centimeters from the loop edge).
- Roll out the mat in strips according to the drawing. The turns of the cable must not cross. Mounting options: put on glue or fix the reinforcing mesh to the base with hardware.
- Measure the resistance of the mats. The permissible error is 10 percent of the value specified in the system passport.
- Cover the mats with tile adhesive.
- Test the system again.
- Lay the tiles.
- Connect the thermostat, through it connect the system to the network.
You can start using it only when the glue is completely solidified.
Under the tiles with screed
 How to make an electric underfloor heating under a tile with a screed? This is done with a heating cable.
Operating procedure:
- Prepare the substrate with a leveling compound.
- Install a waterproofing film.
- Cut through the cable channel and make a niche for the thermostat as in the previous case.
- Make a groove in the floor, put the sensor in it in a corrugated tube with a 1.6 cm cross section.
- Install a heat-reflecting underlay under the electric warm floor under the tiles (foil foam or other similar).
- Lay the reinforcing mesh.
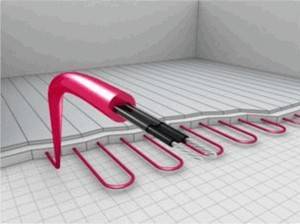
- Lay the cable with a snake in accordance with the drawing, starting from the groove. Snap to grid cells.
- Test the insulation resistance with a megohmmeter. Should it be 20 M? minimum. Test the resistance of the conductors as in the previous case.
- Connect the system to a power source and check the functionality. Switch off.
- Glue the joints of the floor to the walls with a damper tape around the entire perimeter. This is done to compensate for thermal expansion.
- The screed is placed at least three centimeters thick. For the best styling quality, it is recommended to add plasticizers to the working solution.
- After the screed has hardened, a tiled covering is laid.
Video of the installation of a warm electric floor under the tiles.


