A house with an attic is not just an additional living space, but also a presentable view of the entire building. Even if the room under the roof is not heated and is used only in summer, it still has a powerful “air cushion” that helps retain heat inside the entire building.
It will be difficult to make an attic on your own, especially if you do not have the relevant experience, because this is a rather massive and complex structure.
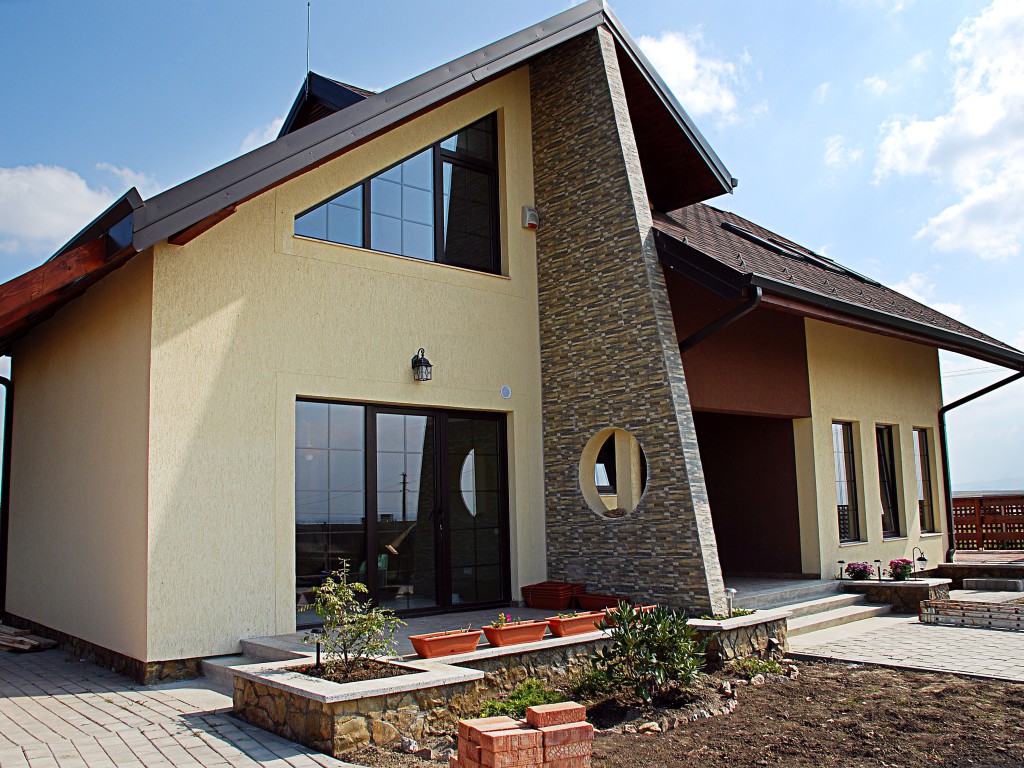
The attic room can be installed under various types of roofs, but the most popular is a broken or gable design. According to the scheme of structure, they differ slightly from each other.
In order to decide which of the designs will be more suitable for your home and will be easier to install, you need to consider both options in more detail. In addition, the master who will be engaged in the construction of the mansard roof must understand which of the two types of structures of the truss system to choose.
Any roof belongs to one of the existing two types of truss systems, it is a layered and hanging structure. Each of them has a special feature, and which one to choose depends on how the load-bearing walls of the structure are located.
Hanging structure
A hanging structure is a rafter system that rests only on the extreme main walls. This happens when in the house itself, except for the outer walls, there are no capital partitions.
This design can only be used if the distance between two main walls is no more than 8 m, since this system gives a high load on the foundation. To reduce it, various elements are used in the hanging system, such as puffs and grandmas, struts and crossbars. For example, the headstock hangs the puff to the ridge connection, and the struts pull the beams to the rafter legs.
For floor beams in a hanging system, hewn logs or rather thick bars are used that are mounted on the edge. Their cross section must be at least 100x200 mm. The floor in the attic room should be as reliable as possible, and in order not to make a mistake in the parameters, it is better to entrust the calculations to a specialist.
Layered system
The layered system, unlike the hanging one, rests not only on two external load-bearing walls, but also on the main partitions installed on the foundation. Therefore, when planning the construction of an attic, it is necessary to think in advance what the design of the strip foundation will be, on which capital partitions will be installed. The layered system is perfect for an attic device, as it can withstand high loads, compared to the hanging version. It provides a good basis for floor beams and, accordingly, for the attic floor.
If you make a broken version of the mansard roof, then it makes sense to use a combined roofing system, that is, the side rafters are installed according to the layered type, and the ridge rafters are installed in the form of a hanging system.
Do-it-yourself mansard roof: video, photo
When building a house from blocks or bricks with an attic, its front side is often built from the same material. This is convenient, because you do not have to calculate the parameters of these roof elements and assemble them from bars, the field of which should be raised to the wall. But it is important to understand that the walls of the building must necessarily stand on a solid foundation and have a good thickness, since such a pediment gives a significant load to the main building.
If the attic plays the role of another floor all year round, then a gable wall made of foam blocks or bricks is an excellent option for creating a living space under the roof.
In order for attic rooms with a gable roof to be spacious and have a normal height, the angle of the roof slopes should be approximately 45-50 °, depending on the width of the end part of the structure. If you take a smaller angle, the volume of the room will significantly decrease. An increase in the steepness of the slopes will make the roof unreasonably high, it will become heavier, it will have a large windage under wind load, and the cost of materials will be inappropriate.
Of course, the installation of a gable roof is easier compared to a broken structure, since even rafters are used without additional connections and any kinks. But the broken design allows you to make the room in this part more spacious, and the ceilings are correspondingly higher.
The broken system in execution, calculations, and roofing is much more complicated, but it not only creates a more spacious space under the roof, but also gives solidity to the entire structure. Its main difficulty lies in the large number of complex connecting elements. All ligaments must be carried out in accordance with the technology, otherwise the roof will turn out to be unstable.
If the walls are built of brick or stone, then it is better to lay out the frontal parts in advance during the general masonry. In this case, in order to create a unique truss system, leveling at the finished gables, you can install intermediate rafters and special retaining fasteners for them.
Before you buy and prepare material for a particular system, you need to draw up a design project with the appropriate dimensions - it will become the main guide for preparing and assembling elements during installation.
Video: broken mansard roof truss system
Attic project
When developing a scheme for building an attic, it is better to do this in various projections in order to clearly understand how the elements of the truss system will be placed. It is important to correctly calculate what the height of the roof ridge should be, since the size of the area depends on it.
When preparing a scheme-project for the construction of a roof for an attic, it is necessary to calculate the height of the ceiling, the ridge and the total area of \u200b\u200bthe room.
The minimum height from the floor to the ridge is 2.5-2.7 m, but if this distance is smaller, then the room cannot be called an attic, the name attic is more suitable for it. This indicator is established by the norms of SNIP.
In order for all elements to be accurately drawn and have the correct location in the overall system, it is necessary to start from a figure with right angles, namely from a square or rectangle - the section of the created attic room. Based on the width and height of the future room, you will never be mistaken with the angles at which the roof slopes are located, with the location of the rafters, ridge and other retaining elements. Having found out these parameters, they must be immediately entered into the drawing.
First of all, you need to calculate the middle of the width of the front wall. Further from this point, the height of the ridge, the attic ceiling, the location of the walls (pillars) and the size of the cornice overhang are determined.
Due to the fact that each of these structures has a certain number of connecting nodes with different configurations, it would be nice to draw each of these connections separately in order to understand in detail the features of the conjugation of all elements that are connected at this point.
All truss systems include basic and additional elements that may not be found in every design. The main components of the attic roof include:
- floor beams (the basis for the remaining elements of the system). They are laid on the main walls.
- Rafter leg, consisting of two sections (in the case of a broken pattern) or straight in a gable system. The upper rafter in this case is called the ridge rafter, since it forms the highest point of the roof - the ridge, and the rafters that form the walls of the attic are called side rafters.
- Mauerlat is a powerful bar that is attached to the main side walls. Rafter legs must be installed on this element.
- A ridge board or beam is an integral element for a gable roof, but is far from always used when constructing a broken roof.
- Buildings are supporting elements that are required to strengthen a broken and gable structure. In the first case, a side and ridge rafter is attached to it, and in the latter case, the stand acts as a good support for a long rafter. Moreover, the racks are a frame for sheathing and insulating the walls of the attic.
- Diagonal binding elements additionally fasten the longitudinal beams or posts and rafters, thereby making the structure even more durable.
- Interrafter runs are installed in the case of a broken roof for structural rigidity.
- Attic floor beams are used in both versions of the system - they connect the racks, and they act as a frame for the ceiling device.
In order to be sure that the project is developed without errors, it would be nice to show it to a specialist. It will determine how correctly you have chosen the parameters of the attic to the length and width of the walls of the building.
Video: mansard roof calculation using software
Parameters of materials for the construction of a mansard roof
When the graphic element is ready, then, based on the dimensions set on it, you will be able to calculate the amount of materials that will be needed to build the mansard roof. It is necessary to choose materials according to their characteristics, which must meet the requirements of environmental and fire safety.
For wood, it is necessary to provide for treatment with an antiseptic, which will significantly reduce the combustibility of materials. For construction you will need:
- boards for rafter legs, the section of which is selected according to the results of calculations, which you will learn about a little lower.
- A beam of 150x200 or 100x150 mm - for floor beams, depending on the width between the bearing walls, the truss system, as well as for runs, valleys or diagonal legs - if, of course, they are provided for by the design.
- Beam from 100x150 or 150x150 mm, designed for laying Mauerlat.
- Usually, timber 150x150 or 100x100 mm is used for racks.
- Unedged board for the subfloor, as well as some fasteners.
- Annealed steel wire with a diameter of 3-4 mm - for fastening some parts.
- Bolts, nails, brackets of various sizes, corners of various configurations and other fasteners.
- Lumber for counter battens and battens for roofing material - depending on what type of roofing will be.
- Vapor barrier and waterproofing membranes.
- Insulating materials intended for thermal insulation of the roof.
- Roofing material and special fasteners.
Rafter section
Rafters provide a roofing element that takes the main external loads, which means that special requirements are imposed on their cross section.
The size of the required lumber depends on many parameters - starting from the step between the rafter legs, the length of these legs between the fulcrum and ending with the wind and snow load that falls on them.
The geometric parameters of the truss system are easily determined on the drawing. But to deal with other parameters, you will have to turn to reference materials and perform some calculations.
It's no secret that the snow load is different in different regions of our country. Below in the figure you will see a map on which the whole of Russia is divided into zones demonstrating the snow load.
In total, 8 zones are distinguished (the latter belongs to extreme and can not be considered for the construction of a mansard roof).
Sg - indicator in the table (carefully study the map and the table attached to it).
μ - correction factor, which depends on the steepness of the roof slope.
For example, if the angle of the roof slope is less than 25°, then - μ=1.0; if from 25 to 60°, then μ=0.7; if more than 60°, then the snow will not linger on the roof, and the snow load is not taken into account.
If the mansard roof is a broken structure, then for its various sections the load may have different values.
The angle of inclination of the roof can be determined by a simple ratio of the height and base of the triangle (usually half the width of the span) or by a protractor according to the drawing.
This indicator also largely depends on the region where the structure was built, on the height of its roof and on the characteristics of the environment.
And again, for the calculation, you will need to determine the initial data on the map and the table attached to it.
The calculation for this task will be carried out according to the following formula:
Wp = W × k × c
W - value in the table, depending on the specific region.
k - coefficient taking into account the location and height of the building (see table).
The following zones are indicated by letters in the table:
- A - open areas, forest-steppes, steppes, tundra, deserts, forest-tundra, coasts of the seas, reservoirs and large lakes.
- B - urban areas, terrain with frequent obstacles to the wind, artificial or embossed, at least 10 m high, wooded area.
- B - dense urban development, the height of buildings is from 25 m.
With- a coefficient that depends on the prevailing wind direction (wind rose of the region), as well as on the angle of the roof.
With such a coefficient, the matter is much more complicated, since the wind can have a double effect on the roofs. So, it has a tipping, direct effect on the roof slopes. However, at small angles, the aerodynamic effect of the wind is of particular importance - it raises the slope plane due to the emerging lifting forces.
As you have already noticed, on the diagrams that are attached to the tables, the sections of the roof that are subject to maximum wind loads are marked, as well as the corresponding coefficients used for the calculation.
It should be noted that at slope angles up to 30 ° (in the area of \u200b\u200bridge rafters), the coefficients are indicated both negative (pointing upwards) and with a plus sign. They somewhat dampen the wind load, and in order to reduce the effect of lifting forces, it is necessary to carefully fix the roofing material and the truss system in this area, using additional connections (for example, annealed steel wire).
As soon as the snow and wind loads are calculated, they can be summed up and, taking into account the design features of the system, the section of the boards for the rafters can be identified.
Please note that these data are for the most commonly used coniferous materials (spruce, pine, larch or cedar). In the table you can see the maximum length of the rafters between the supports, the cross section of the board depending on the step between the rafters and the grade of the material.
The value of the total load is indicated in Kilopascals (kPa). It will not be difficult to carry out this value in the usual kilograms per m 2. 1 kPa ≈ 100 kg/m².
As for the value of the dimensions of the board along its section, it is rounded up to the standard sizes of lumber.
What tools will be needed to equip a mansard roof with your own hands?
Of course, during work you can not do without a set of tools, the list of which includes:
- screwdriver, electric drill;
- building level, tape measure, plumb line and square;
- chisel, axe, hammer, chisel;
- electric jigsaw, circular saw, hacksaw;
- carpentry knife.
If the work is carried out in the environment of competent mentors, step by step and carefully, and the tool is of high quality, the process will be much accelerated.
Do-it-yourself mansard roof: main steps + video
It is important to strictly follow the sequence of work, because only in this way the design will turn out to be strong and reliable.
- Mauerlat mount.
The installation of any truss system should begin with fixing a powerful support beam, the Mauerlat, at the end of the side walls of the buildings. It is convenient to install rafter legs on it. It is made of high-quality bar 100x150 mm. Mauerlat is laid on roofing material waterproofing, laid along the upper end of the wall (regardless of the material).
Thanks to the mauerlat, the load is evenly distributed over the walls and transferred to the foundation. It is fixed to the wall by means of metal studs, which are previously embedded in a crown or concrete belt running along the upper edge of the building wall or with 12 mm anchor bolts. They should go deep into the wall by at least 150-170 mm. In the event that the Mauerlat is installed on a wooden wall, then the bars are attached to it using wooden dowels.
- Installation of the truss system.
The installation of the truss structure begins with the installation of floor beams, which can be mounted on top of the Mauerlat (if you plan to take the beams outside the room, increasing its area). In this design, the rafter legs are fixed directly to the floor beams.
Otherwise, they can be laid on waterproofed walls and fixed with brackets or corners to the inner edge of the Mauerlat. This option is used if the rafter legs need to be fixed directly to the Mauerlat.
Racks should be at the same distance from the middle of the floor beam. In the future, they will determine the location of the walls of the room, namely its width.
Bars for racks must have a section corresponding to the size of the floor beams. Racks are attached to the beams with wooden plates and special corners. But for starters, they are baited with nails, after which they are leveled with the help of a plumb line and a building level, and only then they are thoroughly fixed with the expectation of upcoming loads.
As soon as the first pair of racks is installed, they are fastened on top with a bar (tightening). It, in turn, is connected using metal corners with racks.
When the puff is fixed, you will get a U-shaped design. On the sides, layered rafters are installed on it, which are laid on the Mauerlat or attached to the floor beam with the second end.
A groove (special notch) is cut out on the installed supports for the beam or in the rafter. With its use, the rafters are installed on the Mauerlat beam and fastened with metal brackets.
To ensure structural rigidity, struts can be installed from the base of the rack to the middle of the side rafter. If this is not enough, and you do not feel sorry for the material, then it would be nice to strengthen the overall design with contractions and additional racks.
Then the middle is calculated on the puff. A beam will be attached to this place, which supports the ridge connection of the upper hanging subsystem of the rafters.
The next step is the installation of ridge rafters. They can be fastened with various connections - these can be powerful bolts with metal washers or plates or a metal lining.
After their installation, a headstock is attached to the middle of the puff and the ridge.
Upon completion of work on one part of the truss structure, it is necessary to make the rest according to the same principle. The distance between adjacent rafters in such a system should be no more than 900-950 mm, but the best option would be an interval of 600 mm, which will give the structure the necessary stability and rigidity and will be convenient for insulation with standard mineral wool mats. But this significantly complicates the structure and increases the cost of materials.
First, the side parts of the assembled system are installed, after which the intermediate ones. They are interconnected by runs that are installed between the upper ends of the racks and work like spacers. So, it turns out a rigid structure of the attic rafters, where there will already be a ready-made frame for wall decoration.
Mansard roof waterproofing
As soon as you build the truss system, you can start finishing it with insulation and other related materials.
It is worth noting that the first coating over the rafters should be a waterproofing and windproof film. It is attached to the rafters with a stapler and staples, starting from the eaves. The canvases are overlapped (200 mm), and then the joints are glued with waterproof tape.
A counter-lattice is stuffed on top of the waterproofing, which will better fix the film on the surface and create a ventilation distance between the roofing and windproof material. Usually the counter-lattice is made of boards with a thickness of 50-70 mm and a width of 100-150 mm.
A crate is fixed perpendicular to it, on which the roofing material is laid. As for the step between the slats, it is calculated depending on the size and type of sheet roofing material, taking into account the overlap required for it.
If you use a soft roof, then plywood sheets are usually fixed to the counter-lattice.
How is roofing installed?
Roofing material is fixed on the prepared plywood or crate. Usually, its installation starts from the roof eaves and then alternately, from one of the edges - depending on the type of roof. The roofing sheets themselves are overlapped. If a metal tile or a metal profile is used for coating, then this material is fixed with the help of special self-tapping screws with elastic gaskets. Usually fasteners are matched by color to the material.
The most difficult stage in covering a sloping roof is the transition from layered side rafters to ridge rafters. Some difficulties may also arise if there are ledges on the roof for arranging the roof over windows or balconies.
Moreover, if a chimney pipe goes to the roof, it needs a separate opening in the insulation layer and the truss system, and on the roof - a device around reliable waterproofing.
What material is better to use for the attic roof, you can also find out on our building portal in the appropriate section.
Video: do-it-yourself mansard roof construction
It is worth noting that the construction of any roof, including such a complex one as an attic, is very responsible and dangerous, and therefore requires increased security measures. If you do not have experience in such construction processes, then it is better to entrust their implementation to specialists or invite an experienced craftsman, under whose control to perform all actions, carefully and carefully.


