Pipes are an indispensable element of the bathroom, the location of which directly affects the overall attractiveness of the interior. Do you want to improve the look of your bathroom at a low cost? Learn about the basic ways to camouflage pipes.
Requirements for installing pipes in the bathroom
The water supply system is arranged in such a way as to prevent a simultaneous decrease in pressure in different sections of the pipes. To assemble the plumbing, experienced plumbers use pipes of different diameters.
Trunk sections are laid using pipes with a diameter of ¾, and for branches they are laid with ½ inch lines.
There are two ways to lay the plumbing in the bathroom:
- open;
- hidden.
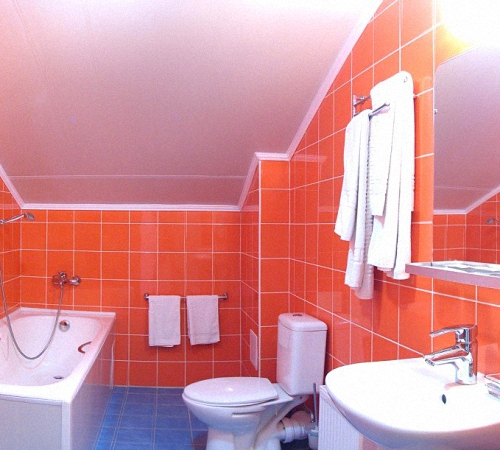
The first option is based on the installation of pipes, after finishing the walls, floor and ceiling. The pipes, in this case, are outside and worsen the appearance of the room.
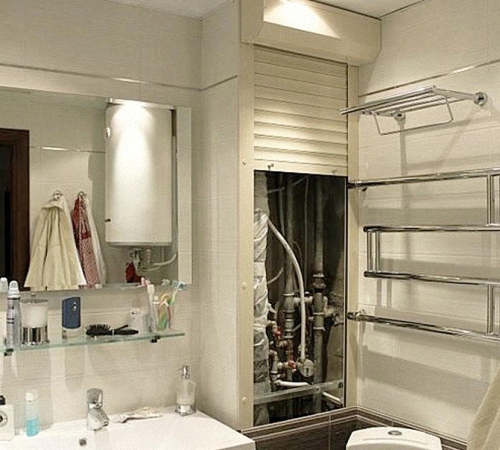
Concealed mounting is more complicated. Pipes are installed under finishing, behind furniture, behind plasterboard boxes. The appearance of the premises remains unchanged.
Check out the basic requirements for installing pipes in the bathroom in a hidden way:
1. Reliable operation. When hiding the wiring in the bathroom, make sure that all fasteners are secure. Pipes installed inside a plasterboard box or wall are carefully sealed to prevent leaks.
2. Condensation will not form inside the walls, as mold and mildew will appear in the inter-wall space under the influence of high humidity. Install insulation on the pipes,
Experienced foremen recommend using the hidden method of installing the water supply system in the bathroom. Follow the pipe installation technique carefully. The open method only allows you to save money on the purchase of high-quality materials. In the winter season, condensation forms on such pipes.
Methods for masking pipes in the bathroom: features and benefits
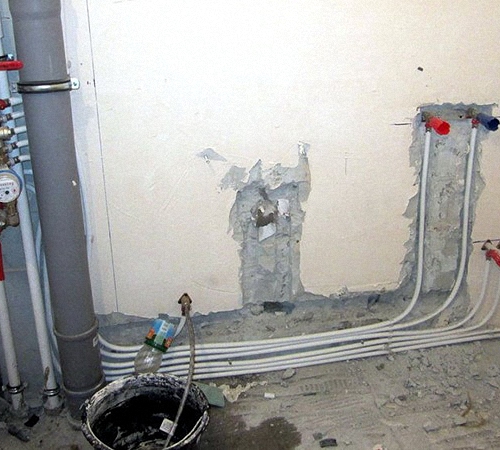
There are several ways to mask the plumbing in the bathroom. Pipes located in a horizontal position are installed in the wall using the gating method. Further, the walls are sealed with plaster mortar and tiles.
In order to have access to the pipes in the bathroom, a special box made of plywood or drywall is erected for the purpose of camouflage. Some craftsmen hide pipes in special structures in the form of cabinets. Additionally, devices perform the function of storing things.
Use your imagination and decorate the pipes:
- flowers;
- painted:
- mosaics:
- stucco molding.
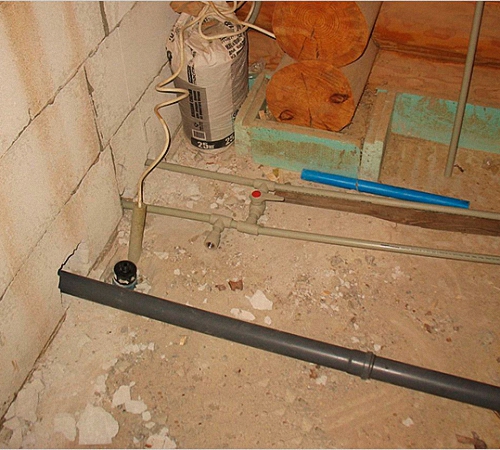
The installation of a water supply system inside the wall is carried out in the case of using copper or polypropylene pipes. At the same time, the connections between the parts must be strong and tight.
To hide the horizontal sections of the pipeline, place a corrugation on them, and then place them inside the wall. Cover the floor with plaster or concrete screed. Further actions depend on the individual preferences of the owners.
Please note that the pipes may only be put into operation after the concrete solution is completely dry. Premature water supply will lead to its cracking. This method of hiding pipes is more suitable for new apartments or when carrying out major repairs. In other cases, we recommend hiding the piping behind furniture or other parts of the interior.
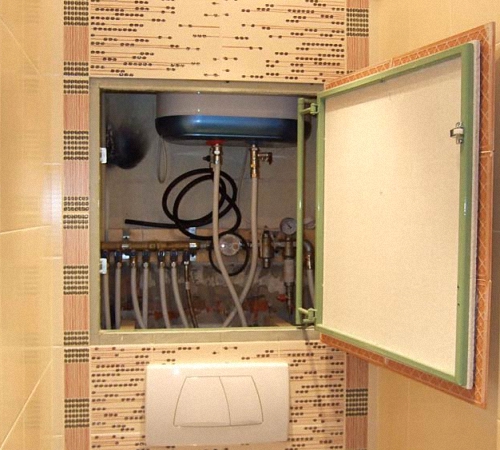
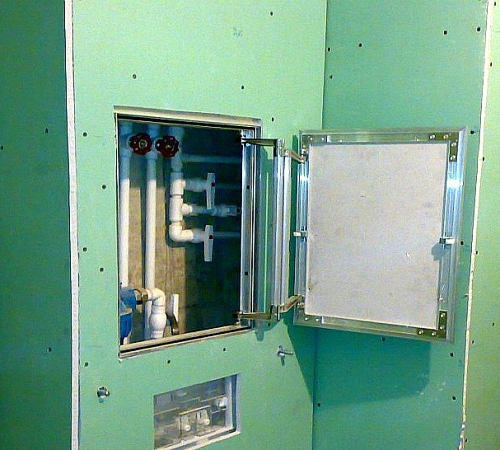
Before starting strobiravonia, make a project that clearly identifies all pipe-laying channels. When working on drawings, consider the diameter and size of each pipe, its thickness, and the need for reinforcement. In places where taps, adapters and other repair parts are installed, construct an inspection window. In a panel house, strobing cannot be performed.
We hide pipes under the tiles with our own hands
Hiding pipes under the tiles is a long and laborious process, before performing which you need to carefully consider all the pros and cons of such a repair. Initially, draft a project for installing pipes under the tiles. The drawings clearly indicate the places of passage of the pipes, determine the repair boxes.
Next, build a frame on which the tiles will be fixed. Use a wood or steel frame to make the battens. Wooden structures are destroyed faster and require treatment with antiseptics. Choose metal profiles with anti-corrosion coating. Further, the frame structure is covered with a mesh, which will become the basis for fixing the tiles. First, the front part of the frame is finished. Next, lay the tiles on the end sections and on the top of the structure. Create a hatch-like opening for permanent access to the system.
Making a tiled box is a complex process. Moreover, it is not practical to operate. Therefore, we recommend that you still hide the pipes behind furniture or plasterboard elements. Try to build a collapsible, modular design that is as strong, comfortable and utilitarian as possible.
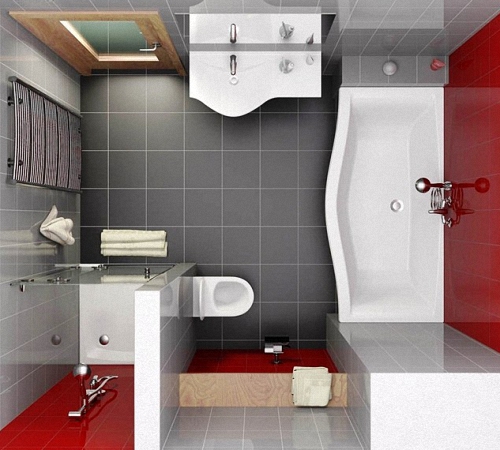
Types of piping in the bathroom and their characteristics
There are three main types of pipe layouts:
- consistent;
- collector;
- combined.
The first option is widespread in apartments. It is used if the system has a minimum number of draw-off points. Tees are used to connect consumers to the pipe. This wiring option is compact, with a minimum number of connections, and, accordingly, a decrease in the possibility of leakage. In addition, the costs for the number of pipes and adapters are reduced, the system is quickly installed and functions well. The only drawback of such a scheme is the variability of the pressure in the system, especially when several sources of water supply are turned on.
The collector method of installing pipes in the bathroom allows you to connect many water points to the main pipe. It is used in large private houses, cottages or mansions. The scheme is based on the presence of two collectors providing hot and cold water supply. Water flows through a separate pipe to each device, so there is no pressure drop. The water supply is shut off without damage to other consumers.
Combined option - connecting some devices through the collectors, and others in a sequential scheme. This option is the most optimal for small houses.
In relation to the method of laying pipes, there are three types of wiring:
- open - pipes are located directly on the walls, they are quickly and easily serviced, the room does not need additional repairs during their installation;
- hidden - installation of pipes inside walls or under the floor;
- combined - the pipes are hidden in the room under false boxes or furniture.
How to hide pipes behind furniture
The easiest way to hide pipes is with furniture. Install a cabinet or shelf in the place where the communications pass. On the one hand, you will get a place to store things, and on the other, an interesting piece of furniture that hides communications in the bathroom.
Make markings on the curbstone first. The pipe is connected to the pipe with precise joining dimensions. All elements are securely fixed to the wall.
Among the disadvantages of this method are the damage to newly purchased furniture, a change in its shape, the difficulty of selecting suitable fittings to hide all pipes. In addition, wooden furniture is more susceptible to wear and tear due to the condensation formed on the pipes.
Choosing this method, use the services of specialists who will develop a furniture project in relation to the individual parameters of the bathroom.
Stretch ceilings, podium structures and boxes of various sizes will help to hide pipes. If financial capabilities do not allow you to purchase a previously developed furniture project, make it yourself. Build shelves with your own hands from moisture-resistant drywall.
![]()
We use decorative linings for pipes
Pipes installed in an open way require additional linings. On the one hand, they protect people from burns, in the case of hot water supply, on the other hand, condensation does not form on the pipes and their appearance improves.
The easiest way to hide a pipe is to install a decorative cover on it, which consists of a mounting pipe connected by a locking mechanism. Decorative panels are easy to install in a previously installed system.
The finished panels are selected taking into account the dimensions of the pipe. Before purchasing decorative trims, measure the diameter and length of the piping at different locations.
To make a plastic pipe lining box with your own hands, follow the instructions:
- measure the distance between the wall and the floor;
- in relation to the dimensions obtained, decide on the place of installation of the pipe;
- using plastic pads, try to achieve a minimum distance between them and the ceiling;
- install a frame made of galvanized coating;
- install plastic panels or decorative items.
The service life of decorative overlays is determined by the quality of the plastic panels. When drawing up a diagram, think over the details for access to the shut-off elements, dock the lines in such a way as to prevent leakage or breakthrough.
The option of wrapping the pipes with a jute-based rope is possible. The material has good thermal insulation properties.

DIY bathroom repair with hidden pipes
The repair of pipes in the bathroom was previously based on the dismantling of old communications and the installation of new ones. Before starting work, decide on the type of pipes used.
If the pipe is a main pipe, then its diameter should be 110 mm. Internal risers are fitted with pipes with a diameter of about 50 mm. Conduct hot and cold water supply using pipes with a diameter of 1.5 and 2 cm.
We recommend using metal-plastic pipes for installing hot water supply, and plastic or copper pipes for supplying cold water to the bathroom. Metal pipes with a special zinc coating, although they are distinguished by their high cost, perfectly resist mechanical damage and do not rust.
Polymer pipe options are easy to install in the bathroom and do not need to be welded. The main condition for their installation is high-quality sealing. We also recommend installing metal-plastic pipes in the bathroom due to their long service life and resistance to temperature changes. The inner surface of such pipes is smooth, so they can easily let water through.
Before buying pipes, create a scheme for their installation, decide on the type of wiring. All work is carried out sequentially.
DIY bathroom repair video:


