Specialization: Capital construction works (laying of foundations, erection of walls, construction of a roof, etc.). Internal construction work (laying of internal communications, rough and final finishing). Hobbies: mobile communications, high technologies, computer technology, programming.
I know different ways to improve the energy efficiency of a home with my own hands. However, their use in a city apartment is limited by the design features of a panel high-rise building and the lack of equipment for high-rise work. Therefore, most often you have to insulate the room from the inside.
Today I will tell you what insulation materials are for the walls from the inside, how they are correctly installed and the final interior decoration.
Advantages and disadvantages of internal insulation
The greatest scope for engineers and insulation specialists opens up in the case when it is necessary to produce thermal insulation of a private house. There you can mount heat-insulating material indoors, on the facades of a building, and even erect multi-layer walls with insulation inside.

As for a city apartment, and especially one located on a high floor, the choice of solutions is limited. You will have to fix the insulation for the walls inside the room or use expensive high-rise equipment. The latter option is unacceptable for independent implementation, so most resort to the first.
I want to note a few more shortcomings of internal insulation, because of which experts are not very willing to resort to it:
- With the internal placement of heat-insulating material, the dew point shifts, and moisture can condense under the insulation (between the enclosing and additional wall), becoming the cause of the appearance of fungus. In addition, due to constant wetting, the enclosing structure will deteriorate faster.
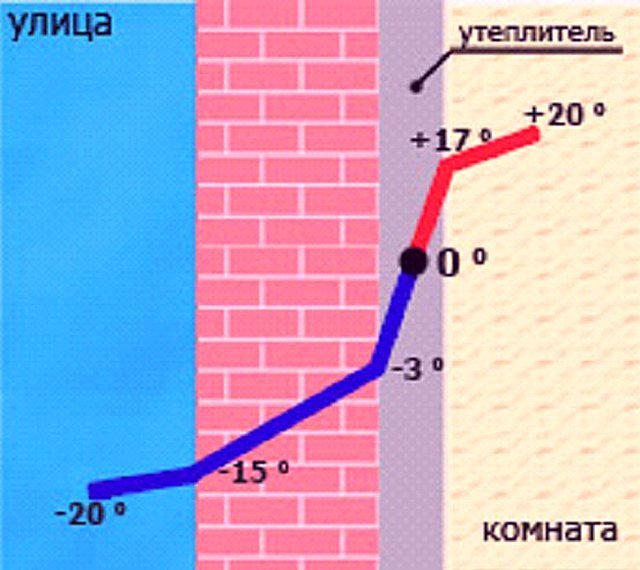
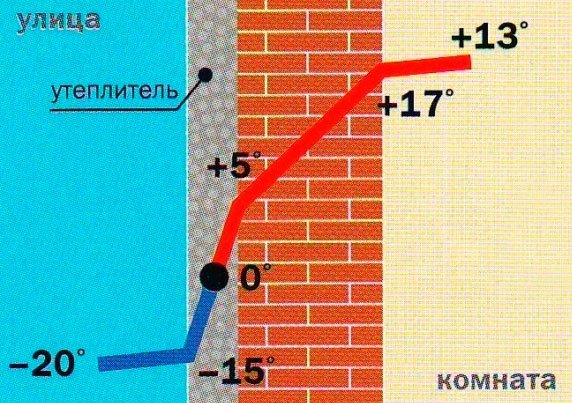
- The insulating layer inside the room does not allow the wall to warm up, accumulating thermal energy. As a result, the thermal inertia decreases, that is, the microclimate inside the room will depend more on the air temperature outside.
- The insulating layer has a multi-layer structure, and for effective operation it is necessary to use insulation with a thickness of at least 10 cm. Therefore, the insulating cake reduces the already not very large usable area in a city dwelling.
- The technology of installing insulation on the inner surfaces of the walls does not allow high-quality joining of plates on the walls and interfloor ceilings, therefore, in these places, cold bridges often appear, which reduce the effectiveness of thermal insulation.
- Some types of thermal insulation materials release chemical compounds that are dangerous to humans, which accumulate in the living room.
However, internal insulation has its advantages:
- you will not have to use climbing equipment, aerial platforms or scaffolding;
- thermal insulation work can be done at any time of the year, regardless of the air temperature outside;
- insulation measures can be combined with the process of decorating the apartment, which will save a certain amount of money.
To make the most of the pros and minimize the cons, you need to choose the right insulation material for the job. Therefore, in the next section I will talk about the types of insulation for the walls from the inside.
The choice of insulation
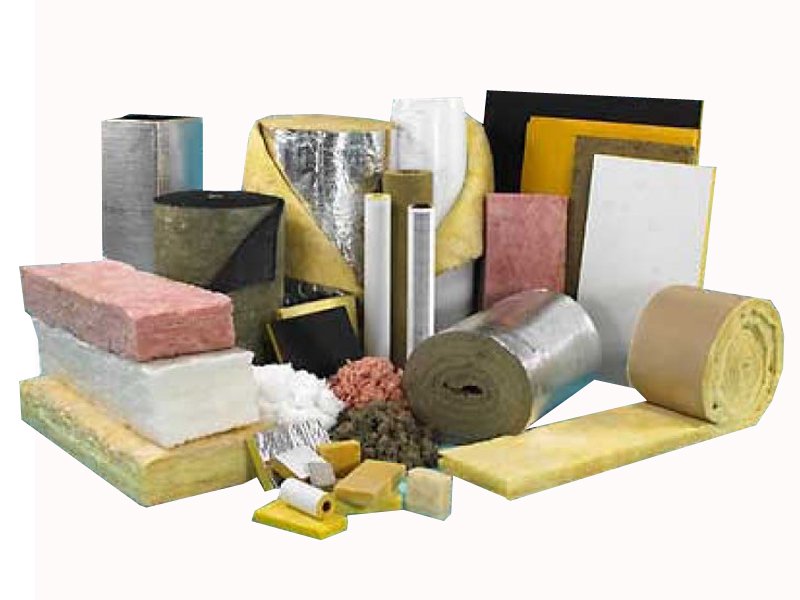
Before determining the best insulation, I will list the possible options that can be used to insulate an apartment:
- Mineral wool. Effective and environmentally friendly insulation, which is often used in private construction.
- Polyurethane foam. Sprayed polymer foam, which, covering the walls of the apartment, forms a homogeneous waterproof heat-insulating layer, which well protects the room from heat loss.
- Heat insulating paint. The downside is the very high price.
- Expanded polystyrene. Sheet cellular insulation, which has excellent technical characteristics in terms of application for internal insulation of an apartment, but at the same time it is very cheap.
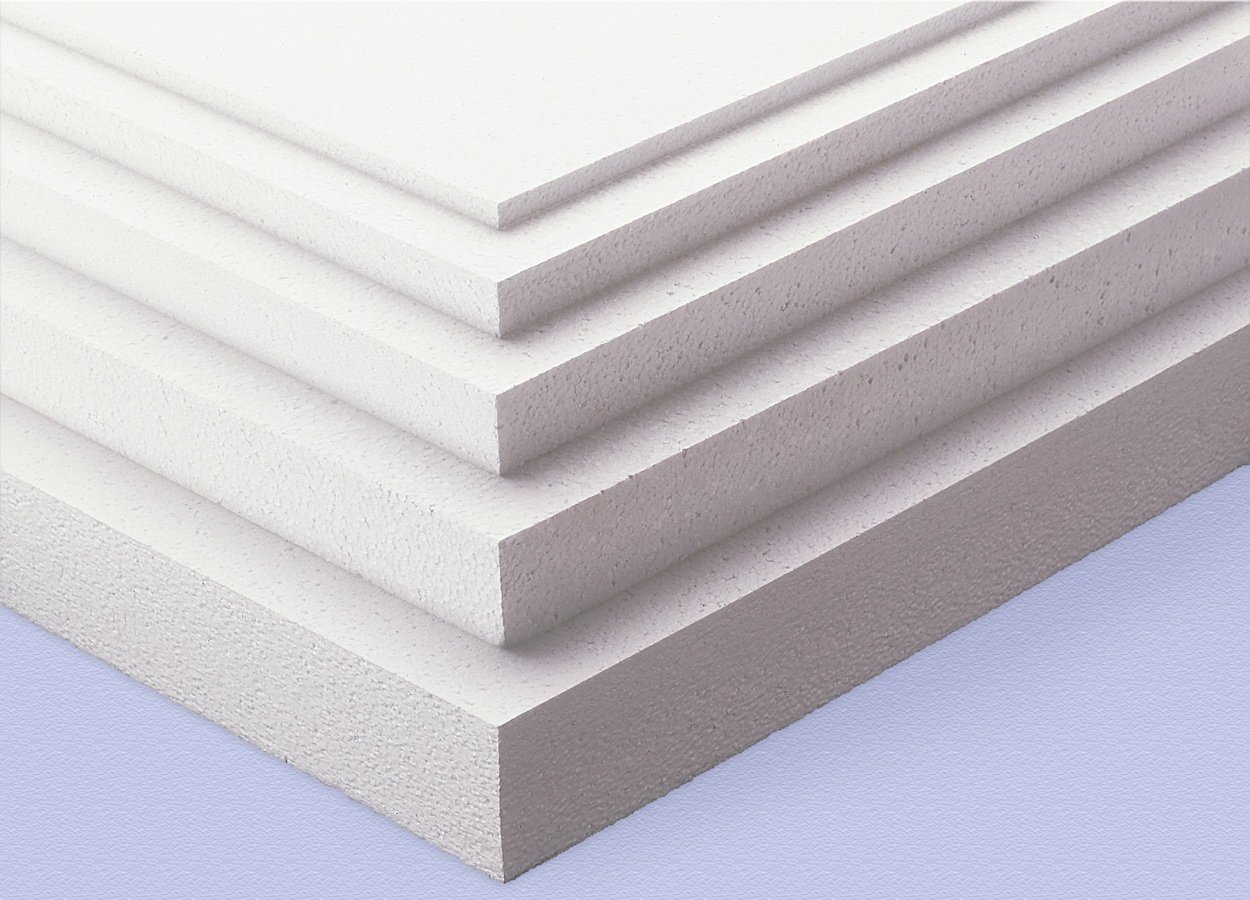
In my opinion, expanded polystyrene will be the best choice, or, as it is popularly called, polystyrene (although this is not very correct). In addition to the low price, which I already mentioned, this thermal insulation material has several additional advantages, which I will describe in the table below.
| Characteristic | Description |
| Good heat-retaining properties | The material has a very low coefficient of thermal conductivity, therefore, for effective thermal insulation of a city apartment, it is enough to use sheets with a thickness of 5, maximum - 10 cm. |
| Hydrophobicity | Insulation made of sealed polystyrene cells practically does not absorb water, therefore, during installation and operation, it does not need additional waterproofing. |
| Light weight | Thermal insulation does not put a lot of stress on the building envelope. |
| Antiseptic | The material has antiseptic properties, mold, fungi and other microorganisms do not develop on its surface and inside. |
| Durability | If the operating conditions are observed, the insulation retains its properties for at least 30 years. |
| Ease of installation | Expanded polystyrene can be easily mounted on insulated surfaces without the use of sophisticated engineering equipment. |
Of course, sheet building polystyrene foam is not devoid of drawbacks, however, they are fully justified by the affordable cost.
So, as we found out, foam made on the basis of polystyrene (marked with PS) by the non-pressing method (marked with B) is best suited for work. To increase fire safety, it is necessary to purchase a heater with fire retardants added to the raw material (marked with C).
As for the density, a material with a density of 25 kg per cubic meter is suitable for thermal insulation of walls inside a room, since after installation it will not experience external mechanical stress.
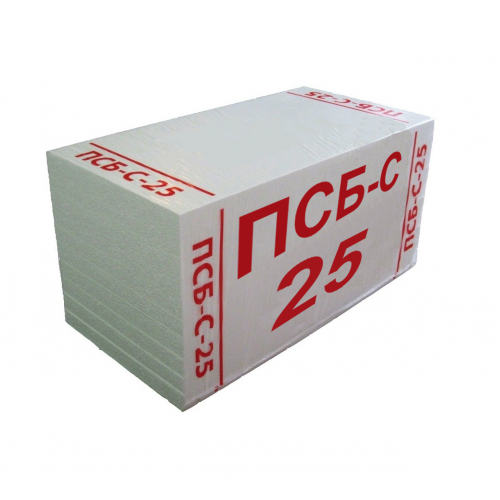
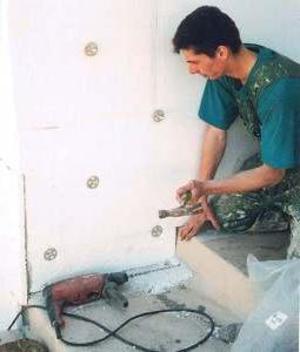
In the photo - a wall insulation with fire-fighting properties with a density of 25 kg per cubic meter.
To summarize. For internal wall insulation, you need to use PSB-S-25 expanded polystyrene. The manufacturer of the material is absolutely irrelevant.
- all granules of the material are of approximately the same size;
- the length, width, and most importantly - the thickness, of individual sheets of expanded polystyrene must match;
- the foam must not emit unusual odors that indicate a violation of the production process;
- the packaging of the material must be marked, and together with the expanded polystyrene, the seller must provide the necessary technical documentation.
Tools and materials
In addition to expanded polystyrene, the following additional materials are required:
- Antiseptic concrete primer.
- Foam adhesive.
- Plastic dowels with wide caps.
- Polyurethane foam adhesive.
- Fiberglass alkali-resistant mesh.
- Reinforcing corners.

From the tools, you will need a perforator (since you will have to drill a large number of holes in a concrete wall) and graters for working with cement-based glue (needed with even and jagged edges). And, of course, a standard set of plumbing tools - a hammer, wire cutters, scissors, and so on.
Insulation technology
How to insulate walls from the inside with foam plastic? The instruction, which is outlined below, consists of several sequential steps, which are shown in the diagram:

Step 1 - preparing the walls
I always start by preparing the insulated surfaces for work:
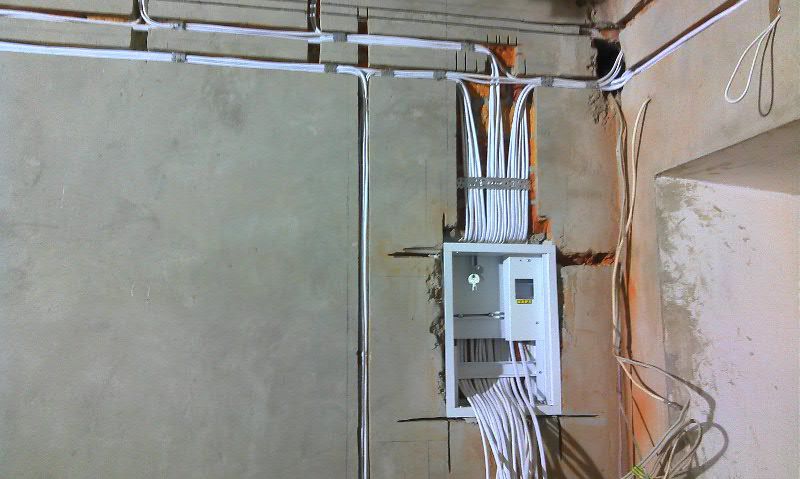
- I install the necessary engineering communications. Most often we are talking about air conditioning air ducts and electrical wiring. Less often - about water supply and sewerage:
- The air ducts connecting the internal and external blocks of the split systems must be laid in the pre-made grooves, insulated with foamed polyethylene shells, and then putty flush with the main wall.
- The electrical wiring must also be laid inside the strobe. There is another option - to fix the wires on the wall surface in polymeric fireproof channels, and then make recesses in the foam plastic, where the wires will be hidden.
- Plumbing pipes with detachable connections must not be hidden in an insulating layer and concrete walls, as they can leak. It is necessary to use only plastic products connected by gluing or soldering.
- In general, sewer pipes should be laid only in an open way.
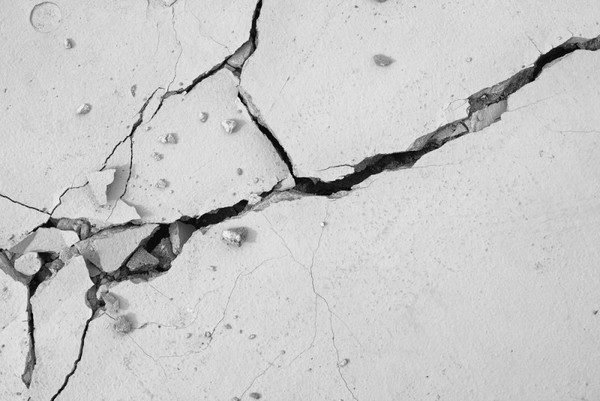
- I eliminate defects in reinforced concrete walls. They must be repaired before gluing the styrofoam:
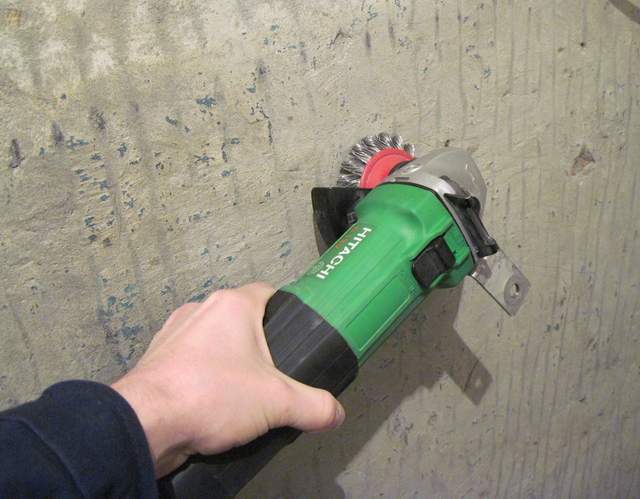
- Small cracks should be sawed off with a grinder and a diamond wheel, and then sealed with polyurethane foam. After hardening, cut off the excess composition with a knife flush with the wall.
- Large defects should be repaired with cement mortar. If a piece of reinforcement is visible inside the recess, it must be cleaned with emery paper from traces of corrosion, after which it should be well smeared with a rust converter.
- I clean the wall from the remnants of mortar, debris and dust. Be sure to use a perforator or a hammer with a chisel to eliminate the build-up of the installation mortar, which can interfere with the leveling of the expanded polystyrene plates. Dust can be removed with a brush.
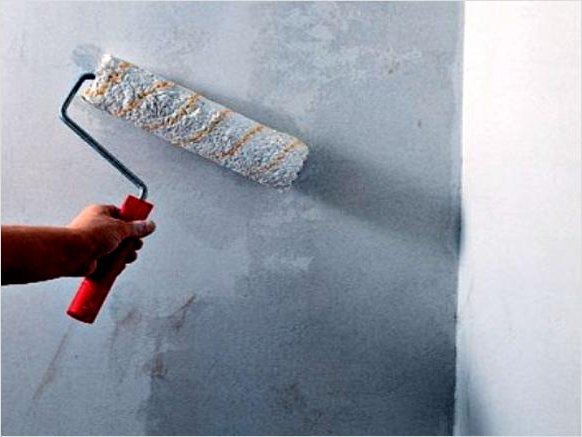
- Dirt concrete walls. It is better to do this in two layers:
- Dilute the primer with clean water in a ratio of 1 to 1 and treat all the walls to be insulated with it. If the volume of work is large, it is better to use a spray bottle.
- The second layer is applied after the first has dried partially. In this case, it is not necessary to dilute the primer, but for application it is better to use a scrubber, with which to carefully rub the primer liquid into the walls.
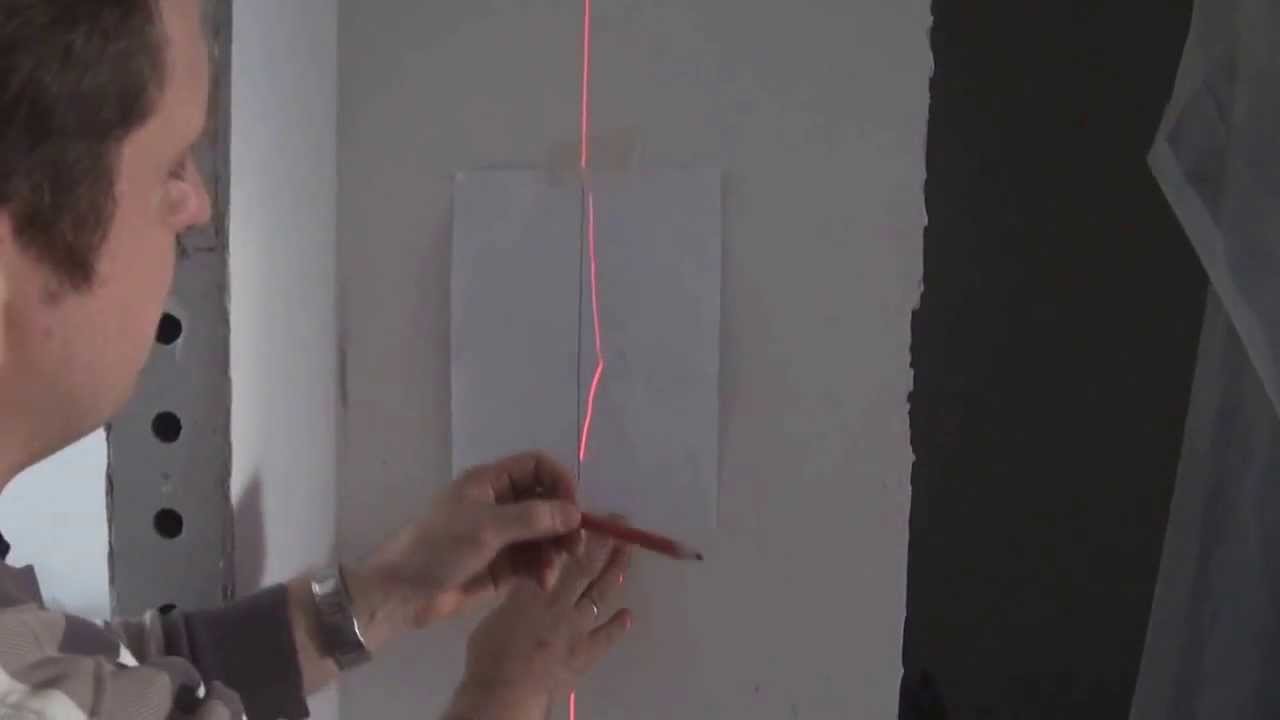
- I mark the walls. It is necessary to mark the horizontal and pull the landmarks along which the expanded polystyrene will be glued:
- At a height of about 52 cm from the floor (50 cm - the width of the expanded polystyrene sheet), it is necessary to make a notch, then draw a strictly horizontal line through this mark using a water or laser level, along which the first row of plates will be glued.
- Drill a hole near the ceiling near the corner of the room where you can drive in a metal bar. After that, at a distance of 11-12 cm from the wall, tie a rope to it, on which to hang a weight. It will hang strictly vertically.
- Install a similar rod near the floor, and then tie a rope to it so that it continues to hang vertically.
- Repeat the operation at the opposite corner of the wall.
- Pull the horizontal one between the two vertical ropes. She will serve as a guide for leveling the plates. It can be moved up and down along the guides installed in the corners.
Step 2 - Installation of insulation
Installation of insulation sheets is carried out in the following sequence:
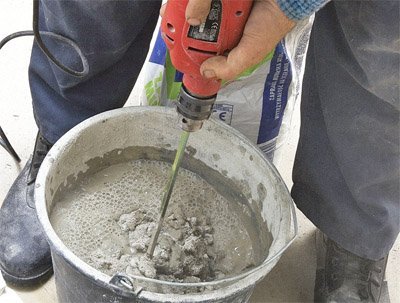
- I am preparing an adhesive composition. For this, a previously purchased dry mixture is used. Mixing the solution:
- A strictly defined amount of water is poured into a clean bucket or trough (indicated on the package with glue), where dry powder is added.
- The mixture is mixed using a low-speed drill and a mixer attachment.
- After mixing, the solution should stand for about 5 minutes for a chemical reaction between the additives and plasticizers that make up the glue to begin.
- After the set pause, the finished glue is mixed again.
- If necessary, I cut sheets of expanded polystyrene. The beauty of this material is that you don't need to use complex or expensive equipment to process it:
- The necessary parts are separated from the pieces of insulation using a hacksaw or sharp clerical.
- For cutting, you can also use a special nichrome wire, which is heated with an electric current. Thus, you can cut polystyrene foam not only across, but also along.
- After trimming, the edges must be processed with a foam trowel (with holes) or coarse sandpaper.
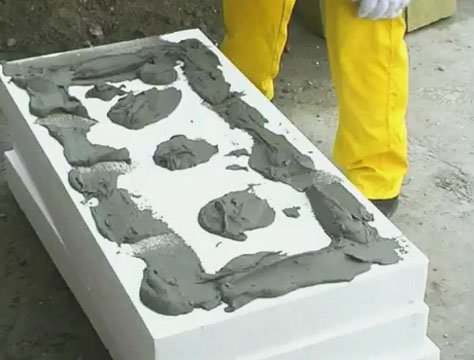
- I spread a sheet of polystyrene with glue. This must be done immediately before installing on the wall, however, in this paragraph I will tell you about the general rules:
- First, it is necessary to form a roller around the edges of the slab with a thickness of about 2 cm from the glue. At the same time, it is necessary to ensure that the cement composition does not fall on the end of the expanded polystyrene (where the tile seam will be).
- Then you need to put 2-3 lumps of glue in the middle of the sheet, which will hold the plate on the wall.
- Carry out test gluing. Place the slab against the wall, press down and then tear off. The distributed glue must cover at least 40-60% of the expanded polystyrene board (the exact figure is indicated in the documentation for the thermal insulation).
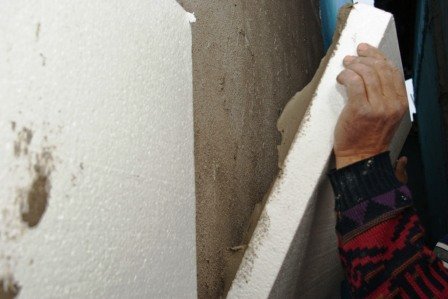
- I glue sheets of expanded polystyrene. The work starts from the bottom row, which is mounted strictly along the drawn line and continues from top to bottom:
- Insulation plates on the inner and outer corners are installed using the gearing method. This means that the slab of the upper row should hang over the slab of the lower one and so alternately up to the very top.
- The vertical seams on the bottom row must not line up with the seams on the top. They should be displaced relative to each other by at least 15 cm.
- Vertical seams should not be a continuation of the window and doorway. In the corners, specially cut L-shaped parts should be installed.
- It is better to start gluing the second and subsequent layers after the first row of foam boards in the room is glued and the glue has hardened for at least a day.
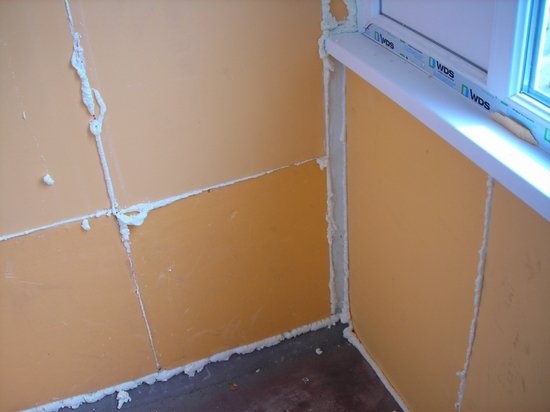
- I seal the seams between the foam sheets. This is done using polyurethane glue. This operation eliminates the appearance of cold bridges in the insulating layer, which worsen the heat-retaining properties of the walls. The operation is performed taking into account the following features:
- Seams with a thickness of 1 mm or more are subject to sealing.
- If the gap between the plates is large, you first need to insert a small piece of expanded polystyrene there, and only then fill everything with polyurethane foam.
- The foam dispenser should be positioned so that it fills the entire thickness of the gap and is not just on top.
- After hardening, the protruding parts of the glue are cut off flush with the insulating layer using a clerical knife.
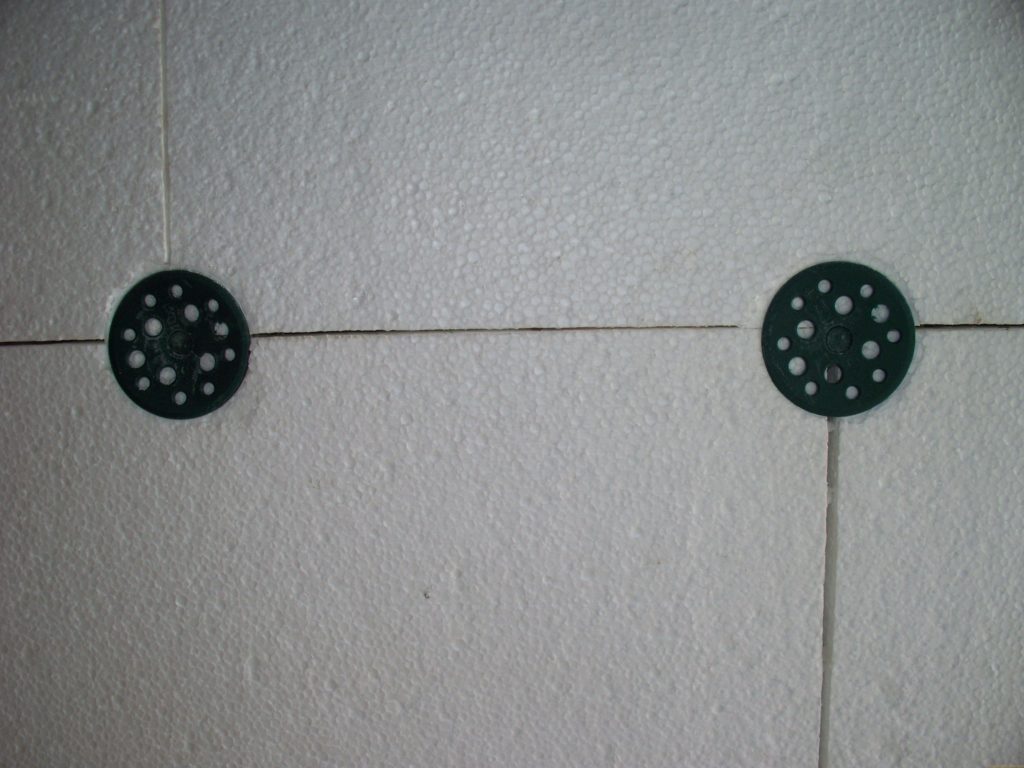
- I fix the expanded polystyrene with dowels with hats. I used a dowel with a plastic driven core, which has a lower thermal conductivity:
- A ruler is installed on the perforator in such a way that, after passing the foam and glue, the drill is buried into a reinforced concrete wall to a depth of 6 cm.
- Holes are drilled through the foam. Considering that the insulation will not experience wind loads (as on the facade of a building), in order to securely hold the thermal insulation, it is enough to use 2-3 dowels per sheet of expanded polystyrene.
- After making a hole, a dowel is inserted into it, and then the core is clogged in such a way that the cap is slightly recessed into polystyrene foam, without rising above the surface.
Step 3 - Reinforcement
Finishing of expanded polystyrene with a reinforcing mixture is performed as follows:
- Window and door blocks are being designed. For this, special parts are used that are glued to the window trim or door block. The scheme of work is as follows:
- The surface of a window or door block is cleaned of debris, dust and residues of adhesive solution, if it somehow ended up there.
- The door trim or window block is degreased using any alcohol-containing solution.
- Reinforcement corners are trimmed to the desired length at an angle of 45 degrees so that they can be docked together.
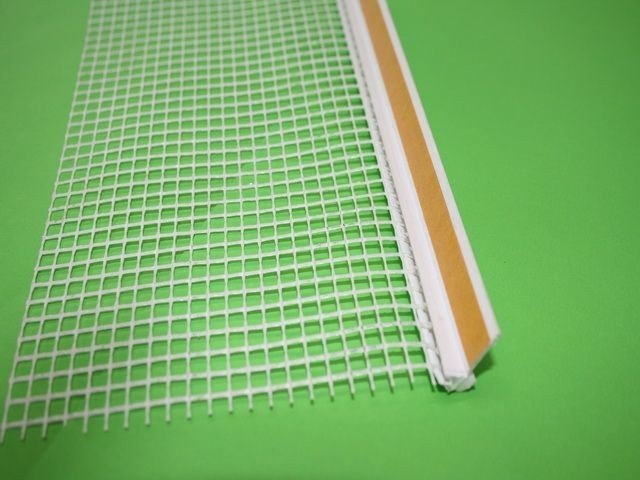
- A strip of protective paper is removed from the adhesive layer, after which the reinforcing corner is glued to the door or cone block.
- After that, a small layer of glue is applied to the slope of the window or door, a mesh is applied to it, connected to the corner, which is then embedded in the glue with a trowel to work with plaster mortar.
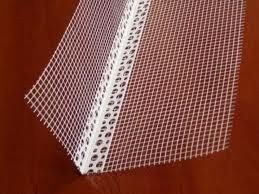
- The outer corners of the window and door opening are made out. For this, perforated corners with a mesh installed on both sides are suitable. They also need to be pressed into the pre-applied glue and smoothed with a trowel.
- At the corners of window and door openings, kerchiefs are glued to the walls - mesh segments measuring 20 by 40 cm at an angle of 45 degrees to the horizontal.
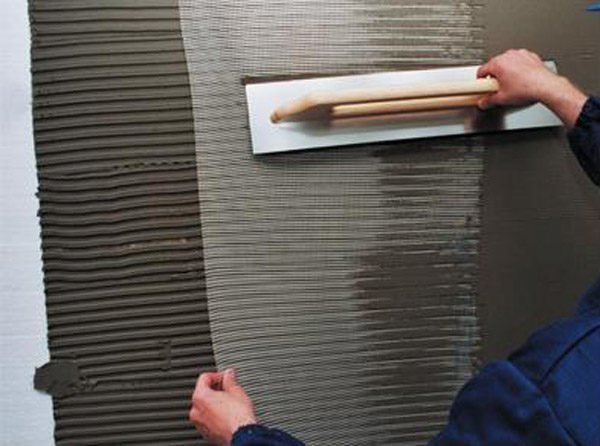
- I perform continuous reinforcement of the wall surface with fiberglass mesh:
- Glue is applied to the surface of the foam, after which it is evenly distributed over the entire surface of the wall from ceiling to floor using a notched trowel. You need to cover the wall with glue for the width of one roll of fiberglass mesh.
- After distributing the glue, the fiberglass mesh is pressed to the wall surface and embedded in the reinforcing mixture with a plaster float.
- A small amount of glue is additionally applied on top, which is distributed over the surface of the insulation so that the mesh is completely hidden by the solution.
- Adjacent mesh canvases are mounted overlapping each other at a distance of 10 cm.
- In the inner corners of the room, the mesh should be positioned so that it runs onto another wall at a distance of 10 cm. When smoothing it, it is necessary to work only with the blunt end of the float, making movements outward so as not to break the mesh.
- I leave the wall to dry. It is necessary to dry not until the strength is completely gained, but only by 75% so that the surface can be cleaned (more on this in the next section). If the room temperature is too high, I recommend slightly dampening the surface to ensure proper dehydration of the solution.
Step 4 - decorative finishing
Now you can proceed to the next step:
- I clean the surface of the wall with a float. In no case should this be done with sandpaper, since you can tear the mesh installed on the expanded polystyrene. You can only act with the end of the plaster float, cleaning off the influx of mortar.
- I measure the wall with a rule to detect and eliminate irregularities. Problem areas must first be marked with a pencil, and then additionally repaired with a reinforcing compound.
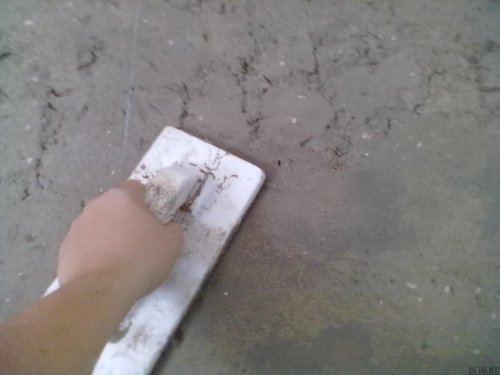
- I putty the surface with starting putty. After the reinforcing layer has completely dried (the exact time required for this is indicated on the package with glue), it should be putty with a starting putty to eliminate minor defects in the base.
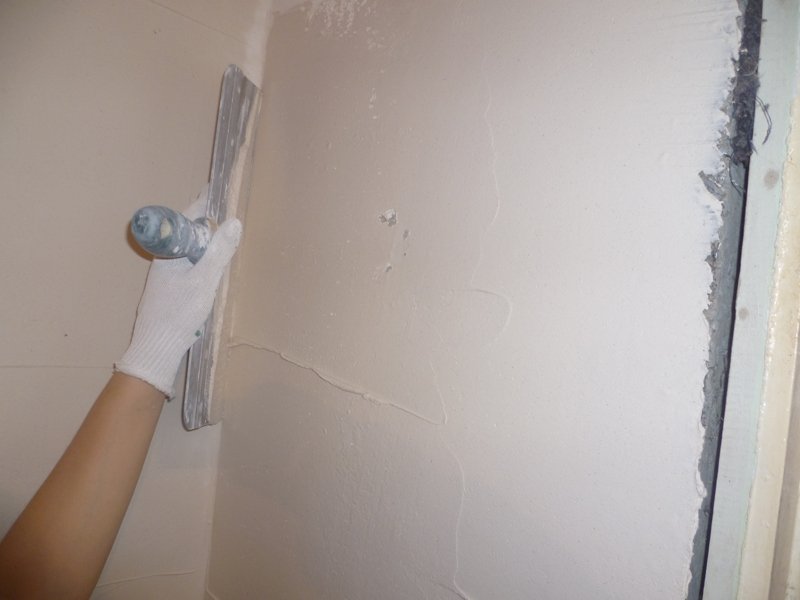
- I level the wall with finishing putty. This composition will eliminate the slightest irregularities in the base and prepare the walls for further painting or wallpapering. After the putty hardens, you need to clean the walls.
- Dirt walls. The primer at this stage will reduce the absorbency of the surfaces and improve adhesion to paint or wallpaper glue.
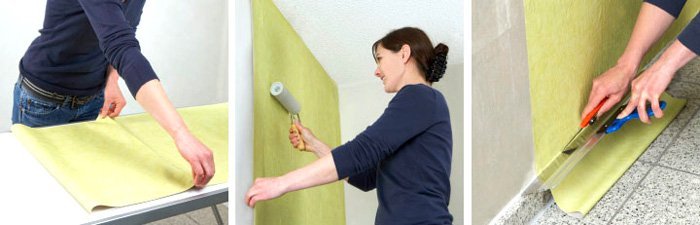
After that, you can carry out the final decorative finish.
Summary
Now you know how to increase the energy efficiency of your own apartment with the help of expanded polystyrene. By the way, this material is quite versatile, so you can use it to insulate the attic from the inside with your own hands. You can learn more about this technology in the video in this article.
You can leave your opinion on the information contained in the material in the comments.
September 7, 2016If you want to express gratitude, add clarification or objection, ask the author something - add a comment or say thank you!


