Today we will analyze in detail how to properly insulate walls in a wooden house. After all, this is both the comfort of the room and the extension of the life of the wood.
How to insulate walls in a wooden house largely depends on the structure itself and the materials used. Indeed, at first glance, a simple task should be performed according to certain rules, and here a lot will have to be taken into account. In the video in this article and in the photo, you can find additional necessary information that will help you do everything right.
Wall insulation for a wooden house is attached in several stages, each of which is important. Indeed, if the technology is not followed, the end result will be negative. The instructions below describe the entire course of work, point by point.
Preparation for work
Before starting work, it is necessary to make measurements and calculate the material. And also, it is necessary to make calculations for the further selection of an insulating material, taking into account, among other things, its properties (thermal conductivity). Do not forget that during such work, membranes are used (insulating and waterproofing steam).
When calculating, it is established:
- Dew point output... This is one of the most important points in this type of work. Everything is explained very simply - how much, in the end, it will be humid in the room, directly depends on this, even in cases of high-quality material, and well-done work. The location of the membranes, and their properties (they may differ from different manufacturers), and of course the properties of the insulation (density, resistance to wetting) are taken into account.
- Calculation of the total area of the room, taking into account that it will decrease... It may not be a comparison (an increase in slopes, and if there is a stove, the safe distance between the wall and the stove will change, which is unacceptable, for fire safety).
Attention: The need for work to establish the dew point is not discussed. It is an inseparable part that ultimately provides the meaning of all work. It must be understood that the humidity of the room depends on the location of the dew point, and the humidity is rotting, smell, and in the end it is premature decay.
Choosing the right material
Internal thermal insulation of a wooden wall can be made with many materials, they are different in their characteristics and installation methods. You just have to make the right choice.
Let's determine what are the necessary requirements for the quality and properties of insulation:
How to insulate the wooden walls of the house will largely depend on the material chosen. This is interrelated, since the method and method directly depends on the type of material.
Of the possible methods used indoors - use:
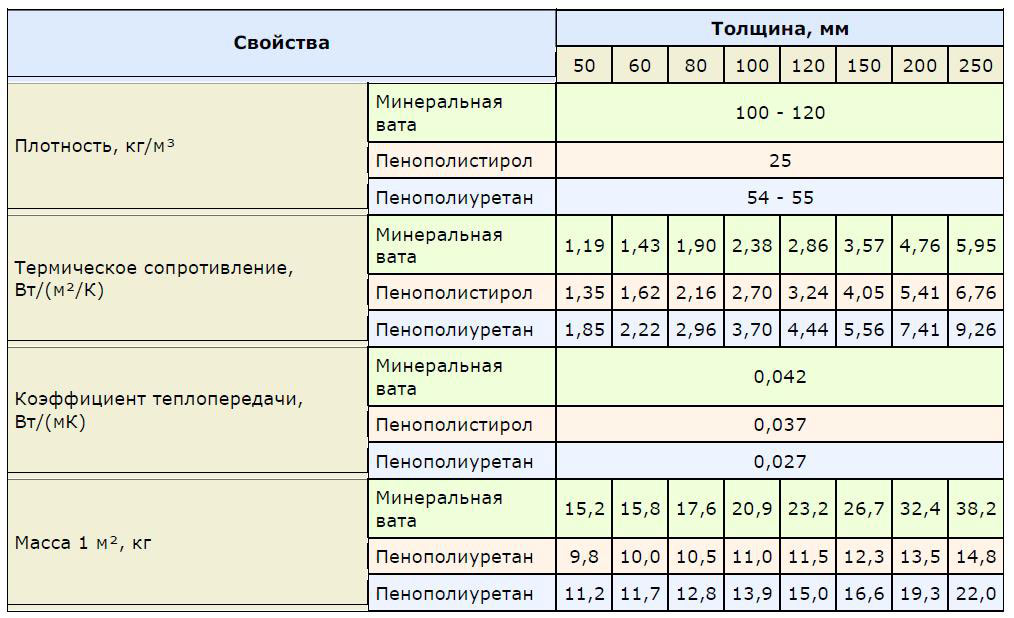
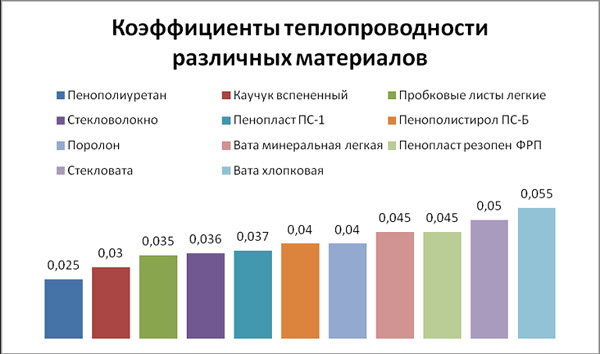
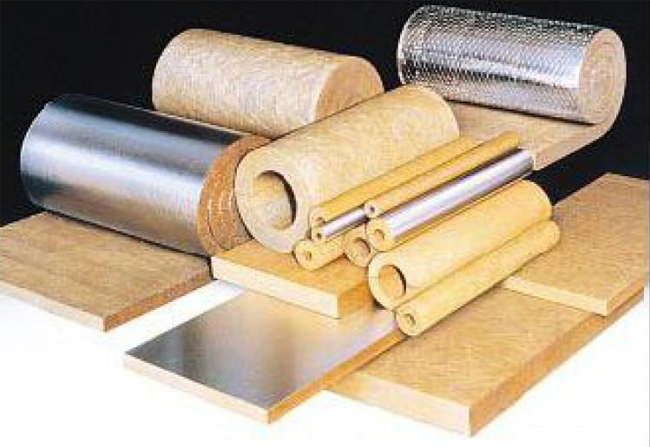
| Mineral wool
| It comes in slabs and rolls, of various densities. In fact, there is almost no difference in application. Any of these materials, assumes - a closed type of application, that is, after laying, it must be closed (finishing material in the form of plates, sheets, boards and slats). Such insulation does not burn, is non-toxic, and has low thermal conductivity. But he is afraid of moisture, which means it is necessary to use insulating membranes (insulating films). |
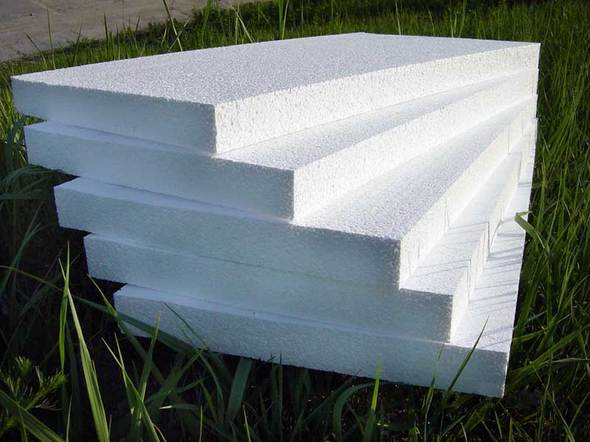
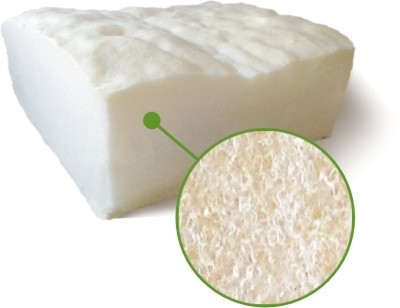
| Foam plates (expanded polystyrene)
| They are not recommended for indoor use due to possible toxic emissions (hydrogen cyanide, styrenes, etc.). It is possible to use extruded polystyrene foam (see), but such a material is also designed for laying with subsequent closing. |
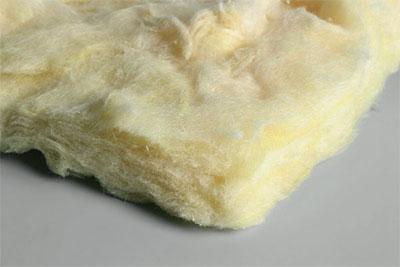
| Glass wool
| A relatively inexpensive material, slightly higher thermal conductivity than mineral wool (a thicker layer will be needed). There is a special option for interior work, and with the obligatory use of films for covering. When working, it is also necessary to observe safety measures (protect the respiratory tract from small particles, use protective equipment). After laying, it must be closed. |
| Isolet
| This material is environmentally friendly, it consists of flax fibers and wood shavings.
|
| Polyurethane foam
| It is used using special equipment, it itself does not burn, but at high temperatures, toxic substances are released.
|
Sealing gaps, preparing the surface for insulation
Insulation for the walls of a wooden house must be airtight, otherwise heat loss cannot be avoided. Indeed, from the moment of construction of the building, during its operation, the wood dries up, the house "shrinks", the constant movement of materials. As a result, cracks and cracks are formed, which must be repaired to stop the loss of heat.
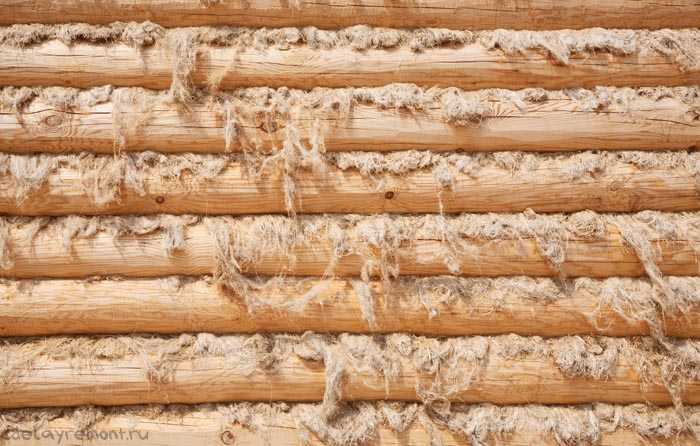
Joints, between logs (or beams) - caulk. This is done with an accessible material, or with the same thing that was done before (tow, jute, sealant). As a result, the loss of heat must be stopped.
Attention: Do not rely on the fact that the house is relatively old (or new), cracks may appear throughout the entire "life" of the building. It is imperative to check the condition of the wall (plywood, lining, will not solve the problem with cracks).
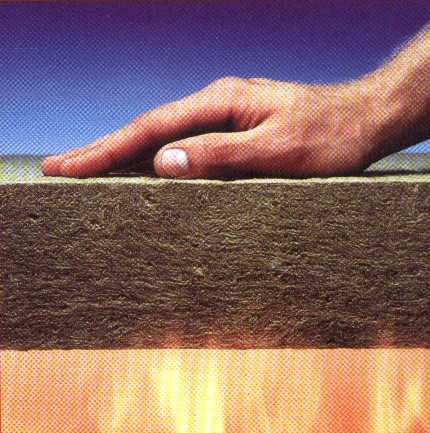
Treatment of wood with a composition that prevents combustion and decay
We must not forget about fire safety. To prevent a possible fire, there are special formulations.
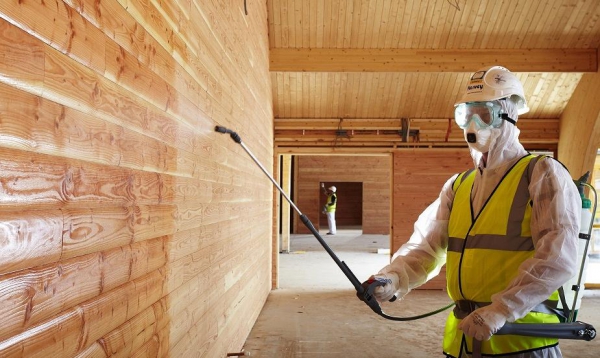
- These are liquids, possibly combining - and antifungal composition, and fire-fighting. They treat both a wooden wall and a boom structure with it. Such a composition is selected, taking into account the old age of the treated surface.
- You can cover the timber with liquid in any way possible. For example, paint with a brush or roller. If possible, you can also use a paint spray. After that, you need to dry the treated beams, spreading them evenly, on "beds", pressing on top with something heavy (boards, other building materials).
Insulation ventilation
Insulation of a wooden wall from the inside is done with mandatory ventilation passages. The tree must breathe.
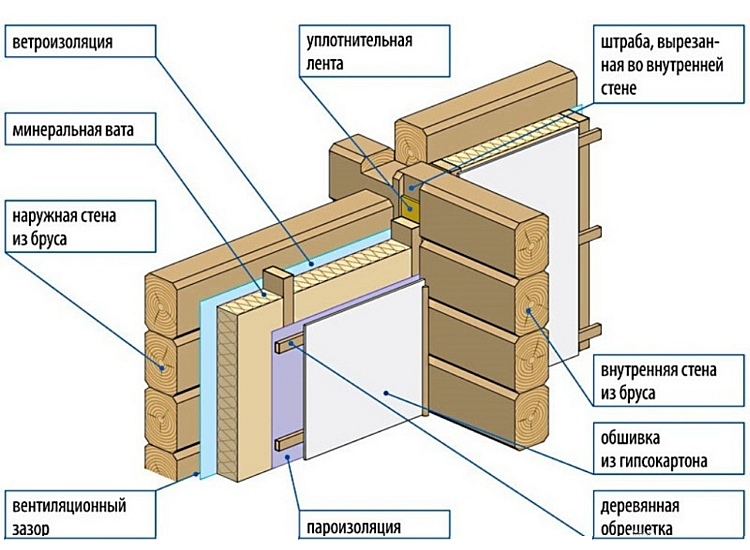
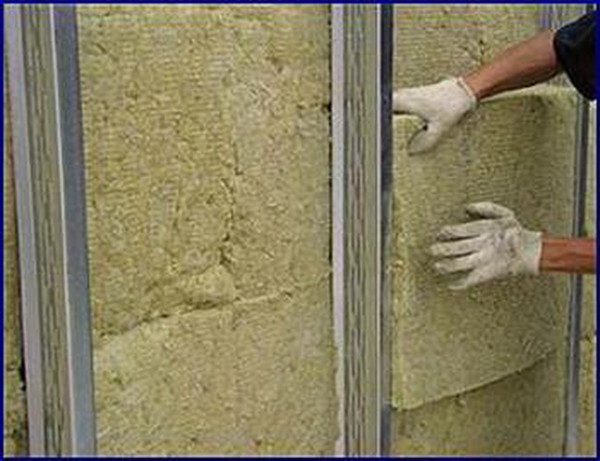
- Considering that all the slots are closed, the free circulation of air masses also stops, which ultimately leads to "perspiration". This can be avoided in a tricky way by arranging a ventilation "duct" between the wall and the steam with an insulating film. This is done this way - not a wall, thin slats (2-2.5 mm) are attached, then, on them, a pair of insulation is stretched. In this way, a "vent" for air is formed. If the house is made of "round timber" - the slats are not needed.
- The membrane of vapor insulation must be installed when using materials that easily absorb moisture (glass wool, basalt). Fastened with a styler, on rails nailed to the wall. The film is attached with a 10 cm lash. The joints are glued with double-sided tape. In the event that a moisture-repellent material (extruded polystyrene foam) is used, a membrane is not required.
Fastening the battens and insulation
We will now figure out how to insulate wooden walls in stages. After all, preparations have already been made for the conduct of work and all materials have been purchased. All work is done in the following order.
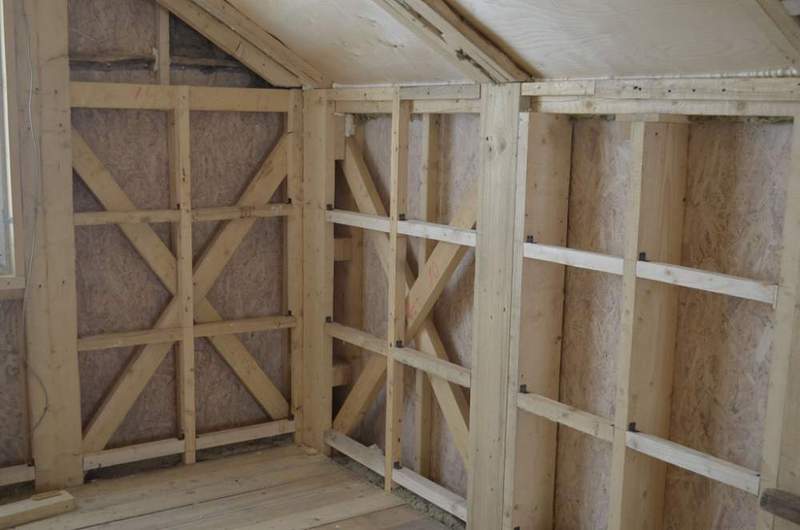
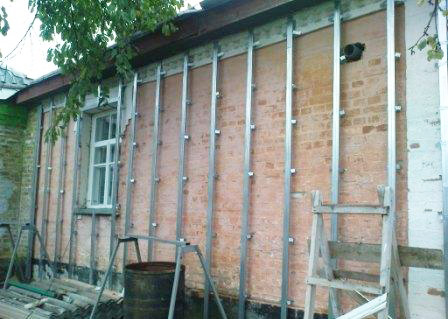
Lathing
The construction of thermal insulation of wooden walls involves the installation of lathing.
It can be made of two materials:
| Wooden
| The wood grate is easy to install. And the fastening of the material is much easier, here you can do everything without any problems with your own hands. You can easily adjust it, because it is cut with a simple wood saw.
|
| Metal
| Metal for these purposes is covered with galvanized coating, so for outdoor insulation this will be the best option. After all, he is not afraid of moisture. The negative part is the inconvenience of fastening. Here it will be much more difficult to fit the crate in hard-to-reach places. And its price will be higher from a tree. |
So:
- The fence is mounted vertically, the distance between the bars is made depending on the insulation material. For example - soft material (glass wool, mineral wool) - the distance is made smaller, so that the insulation "sits" tightly, but at the same time does not wrinkle when laying.
- A material such as (from boards, extruded polystyrene foam) does not require a decrease in the gap, but it fits without gaps. The crate itself is made from a bar of 50x50 mm.
Attention: In cases where the ventilation rail has been nailed, the timber is attached directly to them, ensuring the preservation of the ventilation space.
- A wooden beam, in fact, also plays the role of insulation, which is why it is more often used, however, when planning, in the future, it is permissible to fasten a steel profile (on suspensions). In this case, the insulating material is also laid under the profile.
- While insulating the floor and ceiling, the principle remains the same, but when planning such work, you need an insulating film to be brought out on a whip of 10-15 cm (on the floor and ceiling), in order to connect it to the ceiling and floor in the future. On the floor, the crate plays the role of a lag, on which, then, the floor itself is attached, therefore, the thickness of the beam, and the step, is largely determined by this.
Laying insulation material
With a sustained distance, between the bars, the insulation "becomes" tight, usually more strengthening is not required. But when working, it is much more convenient when everything is held securely. Especially if the work is carried out with a ceiling.
| Insulation fit
| The insulation must lie tightly in the crate and at the same time not deform, otherwise it will lose its properties. You fasten the beam according to the width of the insulation. In places that are not standard, it must be cut into the desired size. |
| Insulation laying
| Laying is done on panels. First you need to try them on and only then lay them down. You never need to fix it right away. |
| Fastening insulation
| The attachment is done with plastic parachutes. They should fit snugly into the hole. |

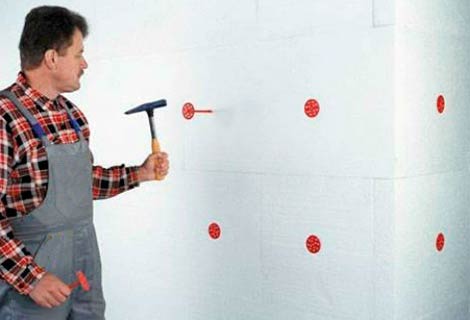
- It is recommended to additionally strengthen the material in the middle, with one self-tapping screw (special, with a large head). In cases where foam is used, all remaining gaps are compensated with polyurethane foam (preferably on a wet surface).
- The rolled version of the insulation is fixed at the top, then, gradually going down to the bottom, it is attached directly to the wall, at a distance of 1 meter. One-piece material is used, all "cutoffs" are started up for revision (embedding, manuals).
Finishing insulation
After completing the installation of the insulation, it is covered with a vapor barrier film. This is done for all types of insulation, with the exception of foam. Very carefully, you should examine the purchased insulation.
It works in one direction (steam and moisture passes there, but not back). Different manufacturers have different side markings (red stripe, rough side, mesh cage application).
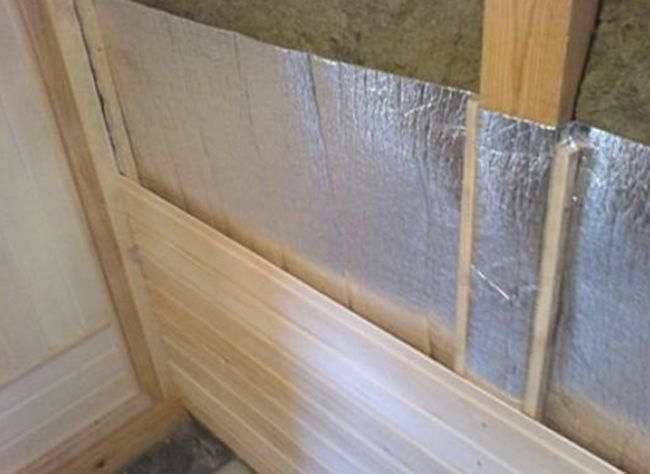
- It is important not to be confused. To do this, you need to understand the principle of operation, or remember - it is necessary, in this case, to ensure that moisture from the insulation enters the room, then it is equalized with the humidity of the room, thereby excluding the temperature drop, which means the appearance of condensation. It is fastened, similarly to the one on the wall, with a stapler, from bottom to top, with an overlap of 10 cm. The joints must be glued with double-sided tape.
- Contact with the insulation must not be allowed, therefore sometimes it is necessary to correct it so that it does not protrude beyond the edges of the crate and does not touch the film. This design is suitable for almost any finishing materials. Be it drywall, or panels, "lining", or just plywood sheets. The difference is not big, in the location of the crate (horizontally or vertically). This point must be taken into account when planning.
It is undoubtedly possible to insulate a wall in an apartment with a tree, you just ate a lining, then its thickness will still not allow you to make decent insulation. Therefore, it is better to use other materials as insulation.


