How to insulate walls with foam outside
If the walls of the house are not able to retain heat, then no supermodern heating systems will be able to warm it up. At a low temperature in the room, the humidity rises sharply and fungus and mold rapidly develop, affecting not only things and furniture, but also the building itself. Experts say that up to 30% of the heat is lost through the walls, so you should take care of their insulation in a timely manner.
Features of working with foam
Polyfoam is one of the most popular and inexpensive materials. It is an excellent heat insulator, is not afraid of moisture, does not rot and is easily cut with the simplest tools. However, this material very quickly loses its properties under the influence of ultraviolet radiation, so walls lined with foam are never left open.
Another significant disadvantage of foam is flammability. That is why it is used most often in the so-called wet facade systems when the foam layer is covered with a layer of plaster fixed to the reinforcement mesh. This technology has gained great popularity due to its ease of decoration and low cost.
Important! Any tree is capable of absorbing and evaporating moisture, i.e. "breathe". Polyfoam, on the other hand, has a low vapor permeability, so it is not used for cladding a wooden house. In this case, it is better to use glass or basalt wool.
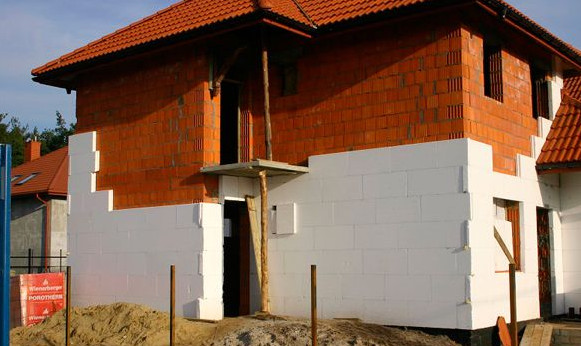
House decoration with foam plastic with further plastering (system of "wet" facade)
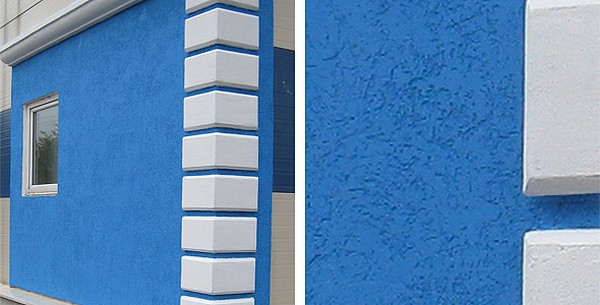
Wet facade system with decorative plaster layer
Expendable materials
For wall cladding with foam you will need:primer: savings are inappropriate here, it will not only reduce the consumption of glue and prevent the development of fungus, but also strengthen the surface and improve adhesion;
insulation: when laying polystyrene, part of the slab goes for trimming, therefore, for 1 sq. m of the facade will need about 1.05 sq. m of foam; its thickness depends on the climatic zone;
glue;
dowels 6 mm for fixing the profile;
dowels-umbrellas ("fungi"): 1 sq. m will need 5-8 pcs.;
basement (for the bottom of the wall) and corner profiles;
reinforcing mesh: 1.35 sq. m per 1 sq. m of the facade; it is better to take a mesh with a density of 140-160;
a knife for cutting foam;
building level;
putty knife;
plaster: its consumption is indicated on the package, but it should be noted that another 10% will be spent on processing the slopes;
paint for facade works;
scaffolding, ladder, trestle or scaffolding.
Preparing the walls
Even a perfectly laid thermal insulation material will not help to avoid heat loss in the presence of open air channels. Therefore, before starting work, you should carefully plaster or fill with polyurethane foam all existing cracks. In order for the solution to penetrate inside, they are pre-expanded to the desired size.Tap the wall to detect peeling sections of the wall. Loose plaster, soot and mold layers are removed with a metal brush. You can also use a special grinder attachment. In order for the foam to lie flat, too protruding parts of the wall get lost. Greasy stains are treated with a solvent. On oil-painted walls, it is better to make small notches with an ax to improve adhesion.
Wall priming
Concrete and brick walls are best treated with outdoor epoxy compounds that can penetrate deeply into the surface of the walls. For their priming, you can also use mineral acrylic mixtures for building facades, which provide good adhesion.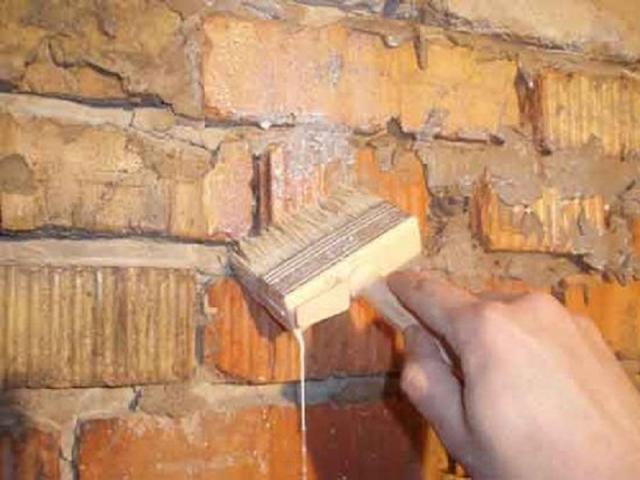
Wall priming
Adhesive selection
You can glue the foam to any walls: concrete, brick, plywood, etc. Before starting work, it is better check the quality of the glue... To do this, smear a small sheet with it, press it against the wall for a few seconds and leave it to dry completely. If, after drying, the foam does not peel off the wall well and its small pieces remain on it, then the glue is of high quality and is chosen correctly.Important! You should carefully study the instructions for use: the glue must be frost and moisture resistant.
For work with foam, you can take any facade adhesives, silicone sealants or liquid nails. For tile joints, polyurethane foam is used. The composition for fixing the foam must not contain organic solvents (acetone, gasoline, ethers, etc.).
The most suitable glue is special compound for gluing foam... There are several varieties of it:
1. Universal for foam, which is suitable for both gluing and reinforcement.
2. Glue for gluing. Possesses high plasticity and stickiness, when using it, the foam sheets do not slip during the drying process.
3. Adhesive for foam reinforcement: has high strength, but less ductility.
Foam bonding
Wall markings
Corner alignment is not always possible. they may have slight variations. It is better to do the markup in the old old-fashioned way: using plumb lines (lighthouses)... A load is tied to a twine suspended on a dowel at a distance of 5-7 mm from the wall. After it stops swinging, the string is secured.If irregularities are found that do not allow the twine with a load to lie flat, they must be knocked down. Glue or construction foam can be applied to the "dips" of the wall. Cross (horizontal) markings can be applied using hydro level and twine.
Aligning the wall with the beacons
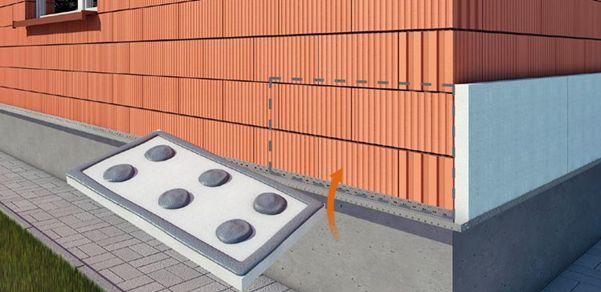
Setting up a start profile
A metal profile is attached to the bottom of the wall to support the slabs. In addition, it is able to protect the foam from mice that like to settle in the foam.The size of the profile is selected according to the thickness of the insulation. Fastening is carried out with dowels 6 mm with washers at intervals of 30-40 cm. The corners of the profile are joined by the method of oblique cuts or using a corner connector.
Fastening the starter profile
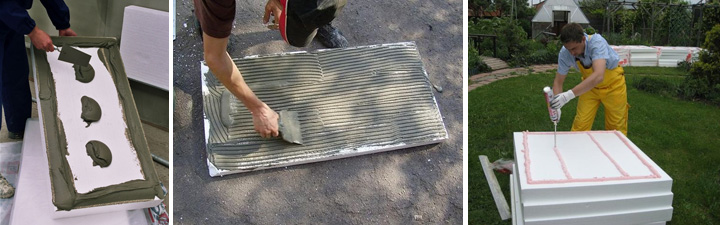
Methods for applying glue
You can glue the sheet in the following ways:for uneven walls, it is better to apply a sufficiently large layer of glue around the perimeter of the sheet, as well as in several places along its center;
with a spatula with teeth, distribute the glue in a small layer evenly over the entire sheet, in this way the foam is glued on even walls;
special adhesive for foam, sold in cylinders, is applied around the perimeter and center of the sheet.
Foam insulation
Before starting work the walls must be dry... If you glue the foam on damp, not dry after winter walls, the glue joint will be fragile. When working in the summer heat, changes in day and night temperatures will also not have the best effect on the strength of the not yet dried adhesive composition.All work should be carried out in the spring, about a week after the heating in the houses is turned off. You can also glue the foam in the fall, when the ambient temperature drops to + 17-18 ° C. You should not start work in warm windy weather, as the glue will set too quickly.
It is not recommended to use too brittle foam in the work: it is better to choose a material with a density of 20 kg / m3. Thermal insulation of denser sheets is less, therefore it is better not to use them for insulation of external walls.
Finishing procedure
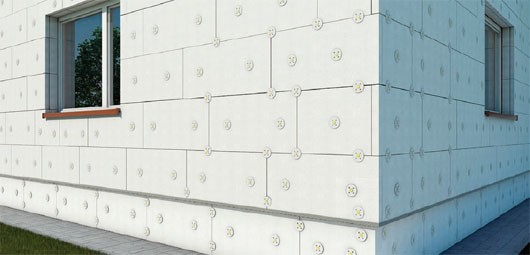
You can start gluing the foam one day after applying the primer. Plates are laid with the long side of the sheet down, starting from the bottom corner... The second row should go with an offset, as when laying bricks (see photo). To do this, the first sheets of odd rows adjacent to the corners are cut in half. Slabs with a size of 0.5 × 1 m and a thickness of 5 cm are most convenient to use.
The gaps between the sheets are sealed with foam. Gaps that are too large can be sealed with styrofoam trimmings.
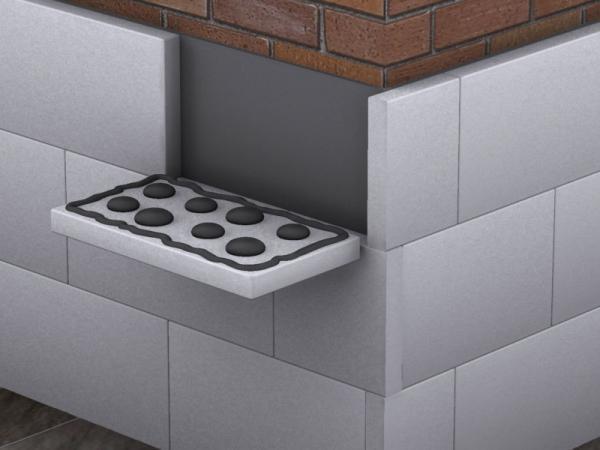
Styrofoam gluing scheme
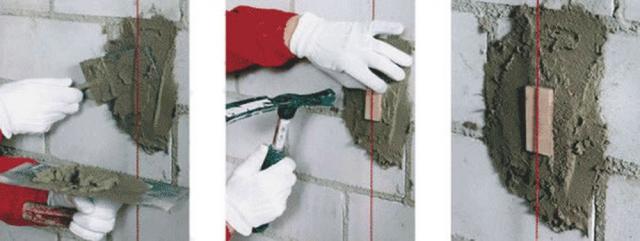
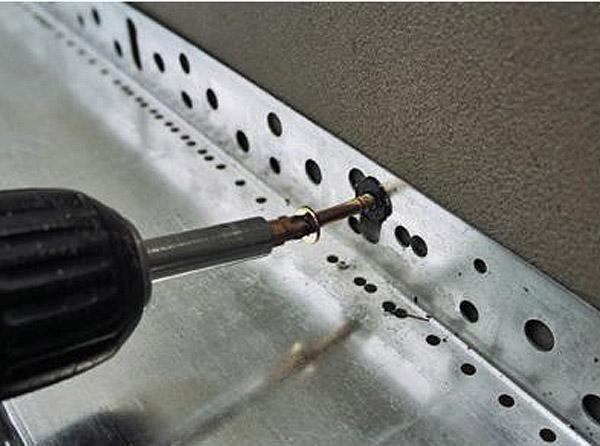
Additional fixation of foam
For this, "umbrellas" are used - special dowels for foam having a plastic head. Their length is selected taking into account the thickness of the slabs. Metal fasteners that can damage fragile plastic are not used. In addition, the metal has a different coefficient of expansion.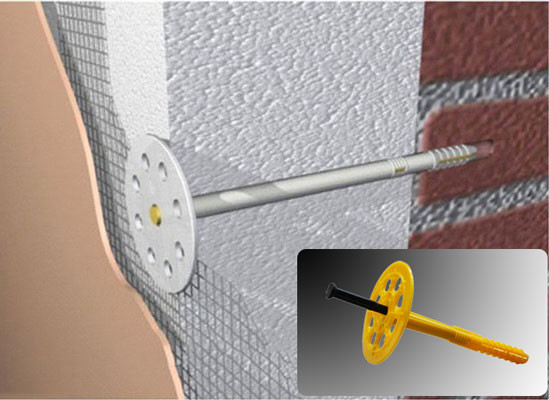
Foam dowels
To install the dowels, holes of the appropriate depth are made in the wall glued with foam plastic, into which the dowels are inserted. They should fit into the foam by 1.5-2 mm.
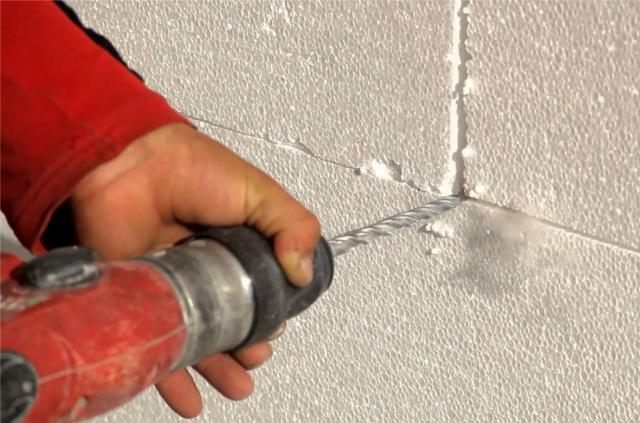
Dowel holes
The "umbrellas" are fastened with an envelope: at the corners of the sheet and in the center. Thus, 5 dowels are required to secure each sheet. The dowels must go into the concrete base to a depth of 50 mm, into a brick wall by 90 mm. For example, with a foam plastic width of 8 cm, “umbrellas” measuring 13-17 cm are used. After inserting them, they are additionally knocked out with a rubber hammer so that each of them is sunk into the foam plastic by a couple of millimeters.
Creation of a decorative and protective layer
A day after laying the foam, it is leveled with a grater. The corners of the house are additionally protected with a reinforced mesh with a corner. It is attached to the glue and pressed tightly against the jamb with an angled spatula.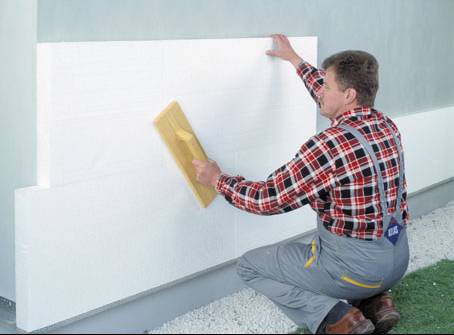
Styrofoam grout
Important! Walls insulated with foam should not be left without finishing for a long time. Even after 2 weeks, ultraviolet rays are already capable of damaging its top layer. If this nevertheless happened, the damaged surface is removed with a float, and only then the wall is lined with mesh.
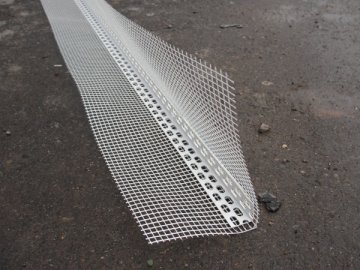
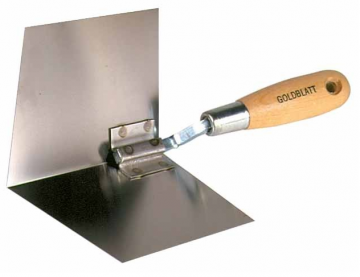
Reinforced corner and corner trowel
Reinforcement of walls insulated with foam is made using a mesh with cells of 3-5 mm. The mesh is cut into strips of the desired width. A special reinforcement glue is applied to the wall so that the mesh sinks into it. Its edges are fixed last. After fixing the mesh on the wall with a spatula, it is leveled and excess glue is removed. Too large a layer can lead to cracking.
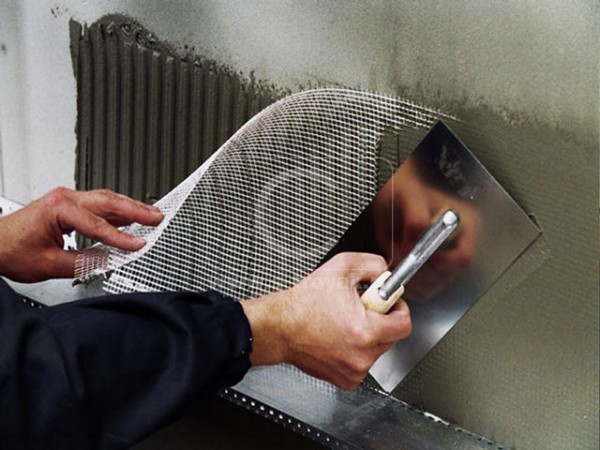
Applying reinforced mesh
The second layer of glue is applied only after the first has dried. After 3 days, the reinforced layer is primed, plastered, and then a layer of facade paint is applied to the wall.


