Ordinary corrugated asbestos-cement slate sheets are allowed to cover the roofs of any buildings. The slate roof is characterized by durability, practicality, relatively low cost and ease of installation, for this reason this material in the presence of more modern alternatives, it is still too early to write off.
Features of laying slate
If necessary, remember the smoothness of the outer side of the slate sheets.
Based on this, they are laid as follows:
- in the transverse direction, the sheets are laid from right to left, ensuring the overlap of one of the sheets by one wave;
- as for the longitudinal direction, here they are laid from bottom to top, ensuring the overlap of the row laid below by 140 mm sheet laid on the level above.
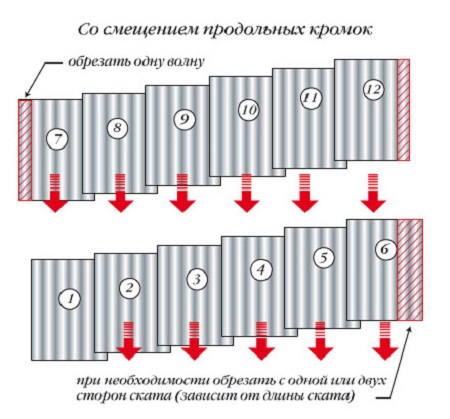
Before you cover the roof with slate with your own hands, you need to know that there are two ways of laying slate sheets in relation to each other:
- the first method involves displacement of the longitudinal edges of the slate sheets by one wave relative to the sheets laid down below;
- the second way is the alignment of the longitudinal edges in all sheets stacked above.
In the first case, it is assumed that a certain number of sheets covering the surface from the eaves to the ridge of the roof along the edge of the roof are cut by 1-3 waves.
The second case involves cutting the corners of the sheets, while ensuring the straightness of the joint line.
Preparation of the battens for laying slate roofs
Before covering the roof with slate, it is necessary to prepare a competent and reliable foundation.
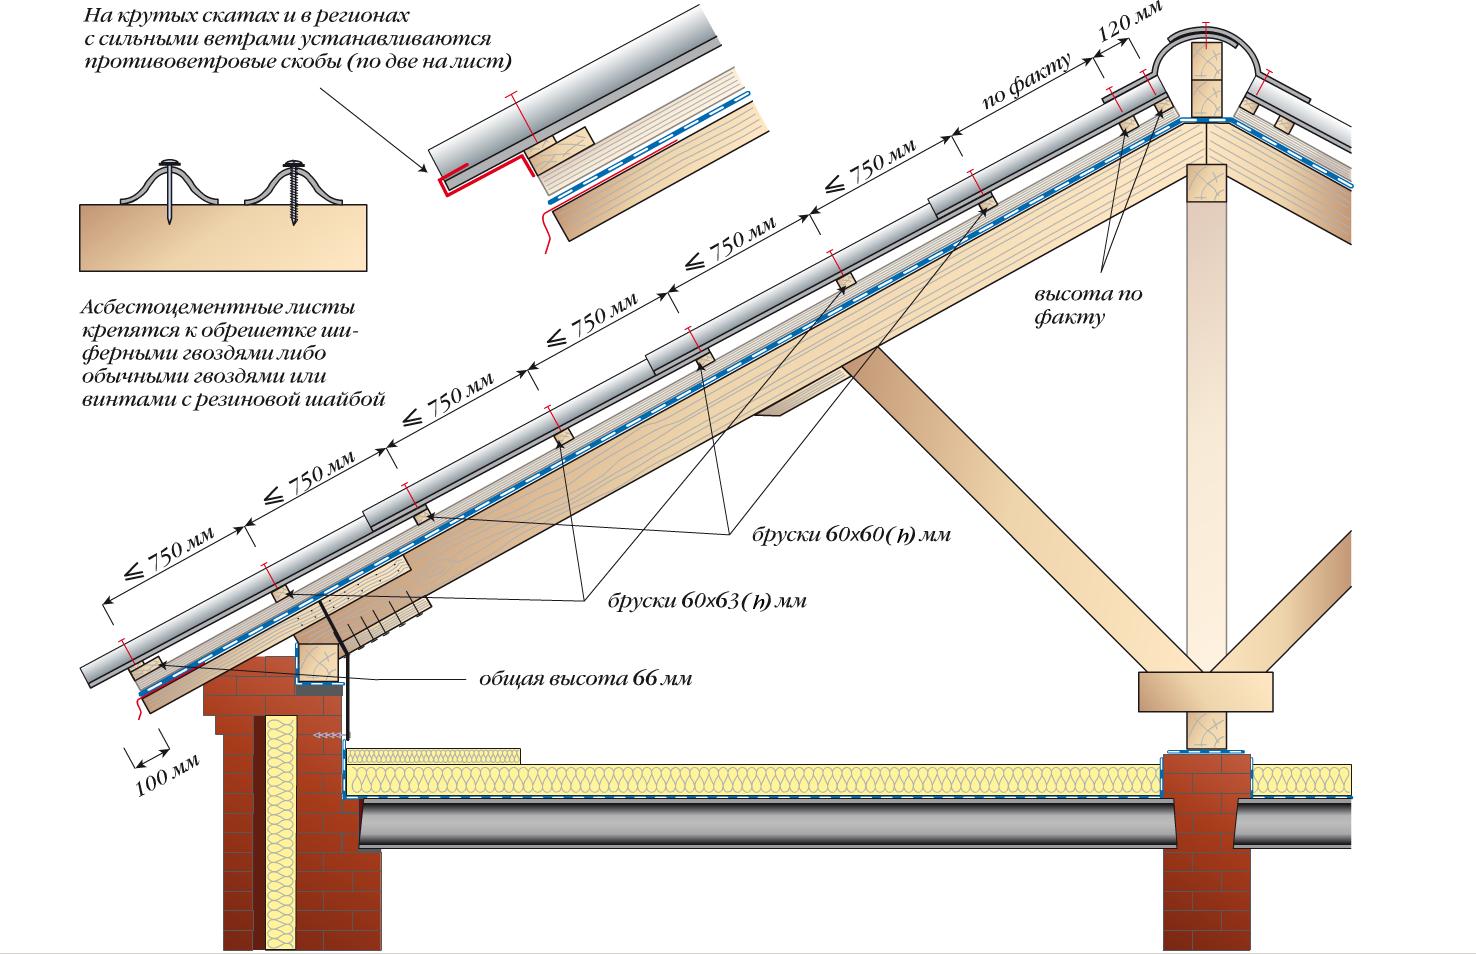
The base for the installation of asbestos-cement slate sheets is a crate made of wooden blocks with a cross section of 60 x 60 mm.
The layout of the bars is made in such a way as to ensure their alternation in height - odd ones were 60mm high, even ones were 63mm high.
Since the bars are of the same size, the even ones must be built up with wood strips 3 mm thick. This will ensure the tightness of the longitudinal overlap of the sheets.
The lathing bars are laid out and attached with a step of 530mm from the eaves to the ridge. They are fastened with screws, nails, as well as anti-wind brackets.
The dimensions of the lathing should ensure the possibility of laying a whole number of sheets in both the longitudinal and transverse directions. If it is impossible to comply with this rule, the penultimate sheets located in the transverse rows are cut off at the pediment overhang, and in the longitudinal direction, the sheets are cut off at the ridge.
Installation of slate roof

Correct installation of slate - staggered installation
Before being installed in place, the asbestos-cement sheets are checked for damage and factory defects, for compliance with the declared width and length, after which the corners or longitudinal strips of the sheets are trimmed.
Slate roofing is performed as follows:
- The sheets are raised to the roof one at a time and reinforced starting from the lower right edge of the roof slope. Rows of sheets are stacked one after the other ensuring the required overlaps.
- Holes for screws or nails are drilled with an electric or hand drill at the attachment point. The drill diameter is selected 2mm larger than the diameter of the fastener.
- A nail with a metal or rubber washer, which is coated on both sides with a composition on natural linseed oil, is inserted into the prepared hole and hammered into the block with hammer blows. For fastening, nails with an assembly head measuring 4 x 100 mm, a rubber or metal washer with a diameter of 18 mm are used.
- The nail is hammered until the excess of the coating compound protrudes from under the washer. The head of the nail is coated with a similar composition, which is painted to match the general color scheme of slate sheets at the end of the drying of the composition.
Slate roof ridge device
The slate roof provides for the careful execution of the roof ridge construction. A wooden bar is mounted on the ridge, and on both sides of it 2 battens are attached along the entire length.
After covering both slopes with slate, brackets are mounted on a wooden beam installed on the ridge, on which walking portable bridges are then attached, as well as a ridge block.
Before covering the roof with a ridge slate, the upper edge of this bar is rounded off according to the radius of the ridge slate used.
The bar is covered with roll material along the entire length, after which the ridge slate can be laid.
First, the ridge KPO1 is laid, and it is located to the pediment with a wide bell. Then it is covered from the side of the adjoining slope with a KPO2 ridge.
Here, the holes for the fasteners are marked. Two holes are drilled through both skates along the longitudinal axis of the wave, as well as two holes on the flat tops of each of the ordinary skates.
The openings on the cuffs must also pass through the wave crests of the slate sheets of the main roof covering.
The roof slope adjacent to the rib is covered with wedges (oblique parts of the sheets), the dimensions of which are determined on the spot. They fit tightly to the edge beam and are attached to the crate in the same way as ordinary sheets - with screws or nails.
On the edge of the lathing, a strip of rolled material 35 cm wide is fixed, after which the KPO skates are stacked in pairs from bottom to top. They are strengthened in the same way as on a skate.
Now you know how to cover the roof with slate. It remains to find out what is the prevention of the durability of such a coating, as well as to voice the methods of troubleshooting slate roofing.
Slate painting
Slate roof installation scheme
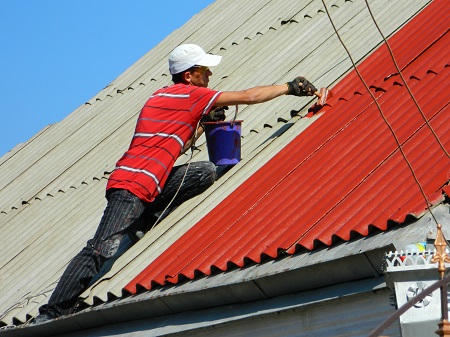
It is not enough just to cover the roof with slate. After the installation of the slate roof is over, you need to think about painting the coating.
As is known, asbestos-cement slate it is produced mainly in gray color, the appearance of which is rather boring and monotonous.
To improve the decorative qualities of the roof, as well as significantly extend the service life of the slate coating, slate sheets are painted with acrylic paint, which is highly resistant to weathering.
After applying acrylic paint, the slate forms protective layer, which resists the destruction and absorption of water by the material, and also increases its frost resistance. In addition, the paint will protect the coating from the growth of mosses and lichens.
Repair of an old slate roof
With long-term operation of slate roofs, chips and cracks may appear on the sheets, which, if ignored, can lead to roof leaks during precipitation.
Repair of a slate roof in such cases can be carried out by the method of filling cracks:
- The first step is to make a putty solution using drying oil and chalk.
- Problem areas are coated with putty, after which bitumen mastic is applied to the cracks, and after it dries, it is painted over with oil paint.
- The previous method is suitable for small cracks, but as for large ones, it is recommended to stick fabric patches on them. Before repairing a slate roof in this way, it is necessary to pre-clean and prime the place of application with drying oil.
- For gluing the patch, thick-grated oil paint is used. The size of the patch should slightly exceed the dimensions of the damaged area (by about 10 cm), while the staining area should only exceed the size of the patch by 2-3 centimeters.
Advice! To putty holes in slate, cement mortar is used, made in a ratio of 1: 1 to sand. The solution is smoothed, primed, then dried and colored.
If the slate roof is still leaking, then you should seriously think about replacing the damaged slate sheet with a new element.
To remove the damaged sheet, the fastening of the surrounding slate sheets is loosened by partially removing the nails.
As for the structural element itself, all fixing nails are completely removed from it using a nail puller, after which the sheet is removed.
When installing a new sheet, one of the installers must lift the weakened sheets from the side and top of the place of installation, and the second puts the new sheet on the edge of the sheet located on the side, and then moves it in the direction of the ridge under the sheet on top of it.
After the sheet has accepted the position in which the replaced one was, it is attached, after which the weakened nails return to their original position, and can be considered complete.
The slate roof should now stop leaking.
In Russia, a slate roof is a widespread phenomenon, although in Europe the production of asbestos-cement slate sheets was actually prohibited due to their carcinogenicity. But over time, technologies have improved, and now there is no need to be afraid of good slate. This article will tell you about the features of slate, its use, and let's not forget about slate nails.
So what is slate?
Natural slate is a tile obtained by splitting clay shale. Natural slate is rightfully considered one of the most ancient building materials... Roofing slate tiles were used in the Middle Ages, and some of those buildings have survived to this day!
On this moment real slate as a roofing material is used extremely rarely, and asbestos-cement sheets are now called slate.
After and others roofing materials with a form in the form of corrugated sheets began to be called slate. So, there are asbestos-free slate, euro-slate (corrugated byitum sheets), metal slate (corrugated metal sheets).
Asbestos-cement slate is an inexpensive and easy-to-install material. It is cheaper than tiles and tin at times. It is very important that such a slate has low thermal conductivity, high frost resistance, resistance to adverse environmental influences, and is fireproof.
There are the following modifications of asbestos-cement slate :
- corrugated slate with an ordinary profile (VO). Sheets of the correct rectangular shape;
- corrugated slate with reinforced profile (WU). Suitable for the construction of industrial facilities;
- corrugated slate with a unified profile (UV). The dimensions of the sheet are larger than VO, but less than VU. Thanks to this, the number of joints is almost halved.
Some features of using slate
Roofing with slate must be accompanied by constant attention to the smoothness of the outside of the slate sheet.
The slate is laid like this:
- slate sheets are laid from right to left in the transverse direction, so as to ensure the overlap of one of the sheets by one wave;
- in the longitudinal direction, the slate should be placed from the bottom up, keeping an eye on the overlap of the row laid below by the top sheets (by 14 cm).
Do-it-yourself slate painting can be done after laying the slate in one of the following ways:
- with a shift of the longitudinal edges of the slate by one wave relative to the sheets located below (you will need to trim a certain number of sheets by 1-3 waves);
- with the alignment of the longitudinal edges of all sheets located below (it will be necessary to cut the corners of the sheets to ensure the straightness of the joint lines).
Slate roof: creating the lathing
Before proceeding with the installation of slate, the roof must be prepared by creating a reliable, strong foundation on it. The best base for installing asbestos cement is a crate made of wooden beams with a section of 6 by 6 cm.
The bars are laid out so that they have alternation in height: for odd ones, the height is 60 mm, for even ones - 63 mm. Since all our bars are of the same size, the even ones will have to be built up with wooden planks with a thickness of 3 mm. Thanks to this, we will ensure the tightness of the longitudinal overlap of the slate.
The lathing beams are laid out and fixed, usually in 53 cm steps, starting from the eaves to the ridge. They are fastened with screws, nails and wind protection brackets.
The dimensions of the lathing are designed to ensure the laying of a whole number of slate sheets in both the transverse and longitudinal directions.
If it is impossible to observe the above principle, the penultimate sheets in the transverse rows are cut off near the pediment overhang, and in the longitudinal direction the sheets are cut off near the ridge.
The beginning of the installation of the slate roof on the roof
Before proceeding with the installation of asbestos-cement sheets in place, they are checked for damage or marriage, as well as for compliance with the declared dimensions, after which the corners or longitudinal stripes of the sheets are trimmed.
The roof of the roof is performed as follows (this is how it is erected and pitched roof from slate, and any other):
- each sheet is individually lifted to the roof and fixed (slate nails will help with this), starting from the right side of the lower border of the roof slope. The rows are overlapped;
- holes for fasteners are drilled with a hand or electric drill. Their diameter should be 2 mm larger than that of the fasteners (screws, slate nails or other fasteners - there is only one rule);
- nails should have a metal or rubber washer, which should be coated with drying oil on all sides. Then they are inserted into the prepared holes and hammered in with a hammer;
For fastening, it is optimal to use slate nails with an assembly head and dimensions of 4 by 10 cm, a washer diameter of 18 mm is required. The nail must be driven in until the excess grease comes out from under the washer.
- after drying linseed, the heads of the nails are smeared, and on top, after complete drying, they are painted over in the color of slate sheets.
Arrangement of a ridge for a slate roof
The slate roof predetermines the accurate and careful execution of the roofing ridge. It is necessary to place a wooden beam on the ridge, and attach two lathing beams on both sides of it along the entire length.
After both slopes are covered with slate, brackets are installed on a wooden beam mounted on the ridge, and walking portable bridges and a ridge block are attached to them.
Before covering the roof with a roof for the ridge, the upper edge of the installed bar is rounded according to the radius of the ridge slate. The bar is covered with roll material along its entire length, and now you can start laying the ridge slate.
If you're installing slate on a single slope roof, it's even easier. Here the ridge is placed to the pediment with the side of a wide socket and covered with a second ridge.
Next, markings are made for the mounting holes. After that, both skates are drilled along the longitudinal axis, and I also make holes on the cuffs of each skate (they should pass through the wave crests of the slate sheets of the main coating).
The roof slope, which is adjacent to the rib, must be covered with wedges - these are the slanting parts of the sheets with dimensions determined at the installation site. THEM are laid very tightly to the edge beam and fixed on the crate in the same way as ordinary sheets - with screws or slate nails.
On the edges of the sheathing, a tape of roll material with a width of 35 cm is reinforced, after which the skates are laid in pairs from the bottom up. They are strengthened in the same way as on the skate itself.
Slate roof painting
Covering the roof with slate is often not enough. Immediately after finishing the installation of the slate roof, you need to think about painting the coating.
Everyone knows that most often asbestos-cement slate is produced gray (although now the range of colors has expanded noticeably).
To decorate the roof, as well as significantly increase the service life of the slate coating, the sheets are painted over with acrylic paint, which is very resistant to any weathering.
After you apply acrylic paint, a special protective layer forms on the roof, which will resist the destruction and absorption of water by the material; in addition, we usually increase the frost resistance by painting. The paint protects the slate coating from the appearance of moss and lichens on it.
Slate roof repair
With prolonged operation of a slate roof, chips and cracks may appear on the material, which can lead to roof leakage during precipitation.
In this case, you must immediately make renovation work... The easiest way is to putty the individual cracks that appear.
First you need to make a special putty solution using drying oil and chalk. All defective places must be thoroughly smeared with ready-made putty, after that, apply bituminous mastic to the cracks, and after it has dried, paint over with any oil paint. This method is good for small damage.
If a large area of \u200b\u200bthe roof has flaws, it is best to make fabric patches, and before installing them, first clean and prime the damaged area with drying oil. To glue the patches, it is best to apply a thick oil paint. The size of the patch should be slightly larger than the size of the destroyed area (by about 10-15 cm), and the place of staining should exceed the size of the patch by about 2-3 centimeters.
To repair holes in slate, use a cement mortar prepared in a 1: 1 ratio with sand. The solution must be smoothed, primed, and then wait until it is completely dry and painted.
If the roof has already started leaking, replace the damaged slate element with a new one as soon as possible. To remove the damaged sheet, the fastenings of the surrounding elements of the roof are loosened by partially removing the nails.
Slate nails are completely removed from the damaged element using a nail puller, after which the entire sheet is removed.
When installing a new sheet, one of the builders should slightly lift the loosened elements from the side and from the top of the installation site, while the other should lay the new sheet along the edge of the sheet located on the side at this time. After that, the sheet is shifted towards the ridge under the sheet placed on top of it.
After the sheet occupies the desired position (in which the replaced element was previously located), it is securely attached, and after that the weakened fasteners are returned to their original place, and the direct repair of the roof can already be completed.
Slate roofing - the material is popular, but before you decide on it, you should carefully weigh all its pros and cons. Low cost, low weight, ease of installation bribe developers, but do not rush into the pool with your head - compare all possible options for roofing.
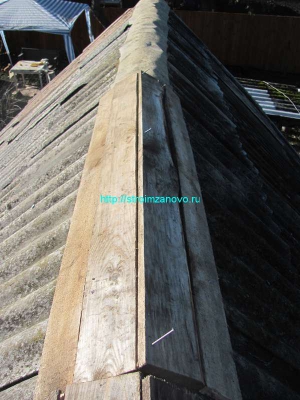
When we insulated the chicken coop on summer cottage, noticed that small puddles appear in the attic after rain. Until fresh planks were put on the ceiling, this was not noticeable. I had to revise the roof. Climbing upstairs and examining the roof, we came to the conclusion that the ridge of the roof, made of wooden gaps, became unusable and did not cope with its tasks. Not only did the boards rot, but also the roofing material that protected the attic from moisture was leaking. Since the replacement of the roof in the next year was not included in our plans, we decided to promptly carry out roof ridge repairdo it yourself... You will learn what came of this by reading this article.
We got the chicken coop together with. It was made in Soviet times, from budget materials. The walls are filled with a mixture of flour with a small addition of cement, the roof is slate and the top is a wooden ridge. Such sheds and chicken coops were built in almost all villages and towns of the Soviet Union. In general, cheap and cheerful.
Since it was part of our plans, we did not demolish the chicken coop. On the contrary, they made repairs: replaced them, carried out insulation. In the nearest annual prospects - roof repair. But until we replace the slate, it is necessary to exclude the ingress of rainwater into the shed. For this you need to spendrepairs roof ridge do it yourselfMoreover, it is not difficult to do this.
RIDGE REPAIR
To get to the roof of the chicken coop, we will make a roof ladder.
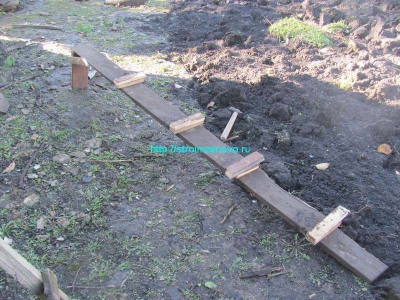
It is done like this: to a board 20-30 cm wide, equal to the length of one roof slope, nibbaembruski every 25-30 cm. We will climb up along them. At the end of the gully at an angle of about 60 degrees, we nail a small piece of plank so that they can hook onto the roof. We fasten the board with two bars so that it does not fall off under the weight of the master doing the repair. We raise the ladder to the roof and hook it. You can start repairingdo it yourself.
As already noted above, the gaps that were at the top have rotted.
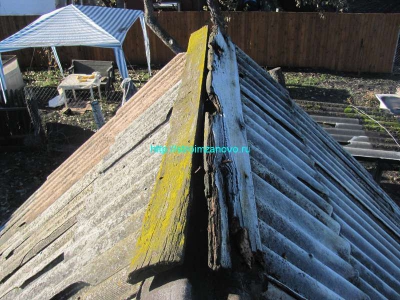
With a nail puller, carefully so as not to damage the slate, dismantle them. Now it became clear why puddles were forming on the ceiling - the roofing material, lying under the gaps, turned out to be full of holes. We also delete it.
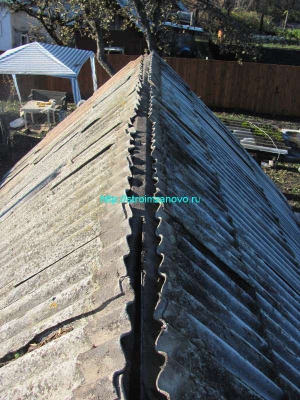
We get down to the ground and cut new pieces of roofing material, 35-40 cm wide, along the length of the barn.
We climb up again, taking with us the cut pieces, a hammer and nails.
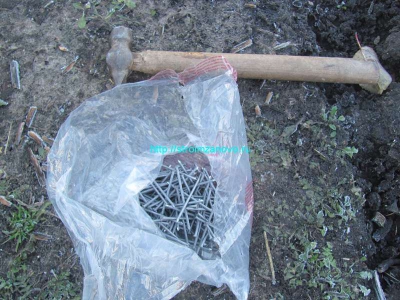
Starting from the edge, we nail the roofing material to the boards through the sheets of slate. For this we need nails at least 80 mm long.water it will definitely not get inside the chicken coop, but will flow down the slate.
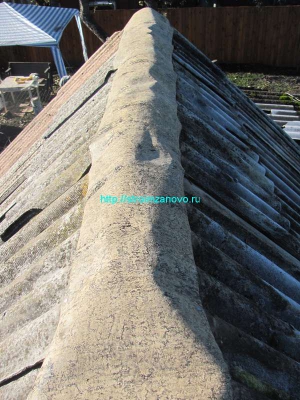
But if you leave it as it is, the roofing material will blow off the roof when there is a strong wind. To fix it more securely, we will make a new skate.
Of course, it's much easier to buy a ready-made iron skate in a store and cover it with slate. Then you do not need to nail the roofing material. But it costs money. The metal ridge element is now dorog. Therefore, buying it separately in order to repair a slate roof is too expensive. When we change the roof completely, then we will set it to the color of the coating. Today our goal is to carry out budgetary roof repairsdo it yourself from scrap materials. We didn't even buy roofing material. A small piece was enough that remained from the waterproofingpillarswhich we did at.
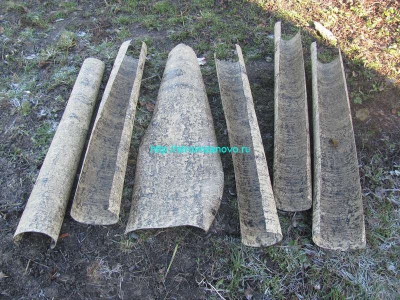
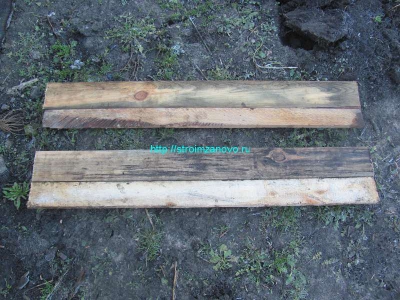
The ridge will be made from the boards that we used for construction. To do this, we will use the old-fashioned method. We need gaps, at least 20 cm wide. Since we have them 10 cm wide, we cut them off with a hacksaw of the same length and beat each other with nails.
Let's take the knocked down gaps and climb up the stairs. Let's lean one gut against the slate so that it hangs over it. We will nail it straight through the slate with two nails.
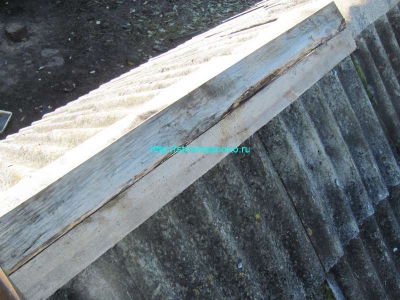
Now we take the second board, press it with the end to the first and knock both gaps between ourselves with nails.