Your repost will change the internet :)
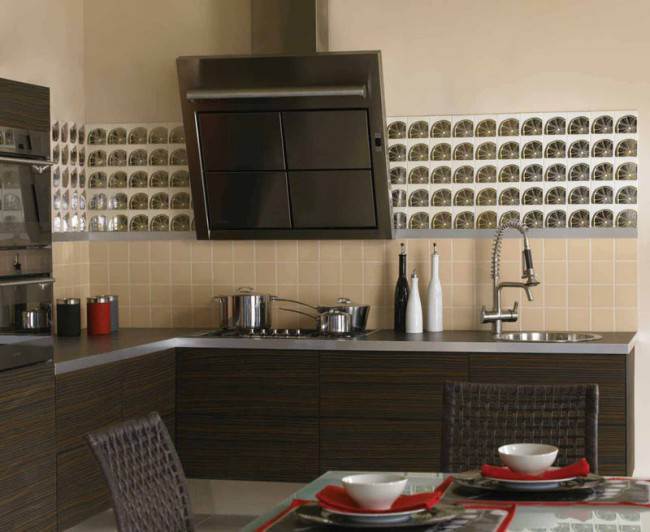
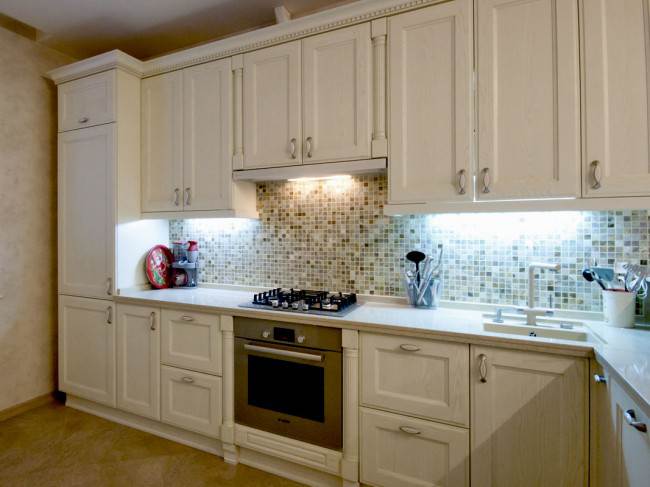
Where to start choosing ceramics? Firstly, study the assortment in the salons, listen to the opinion of experts about the manufacturers and determine the style of the future interior. In this article, we will look at photos of completed renovations, in which tiles were used to create an apron in the kitchen.
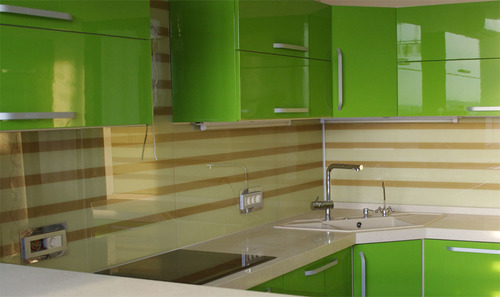
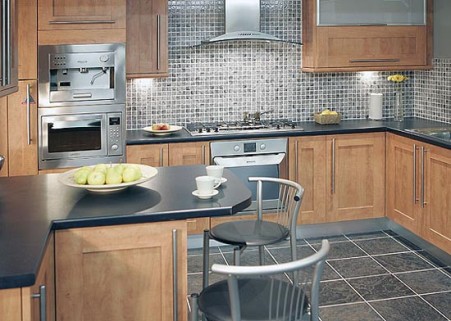
The apron is the epicenter of shades in the room. Furniture, background color of walls, floor and ceiling are designed in natural colors. In the salons, ready-made versions of decorative panels are often presented, an individual approach is also possible when creating a drawing (on order).
Main selection criteria
1. Glossy surface.
It is easier to care for such ceramics, the material reflects light, visually adding volume to the room. However, the gloss shows streaks and traces of detergent and water drops.
2. Lack of relief.
Despite the visual appeal of the relief decor, it should be remembered that it is more difficult to remove dirt from the surface of bulk ceramics.
3. Protective layer.
Transparent coating protects the material from penetration chemical compositions during cleaning. Packaging with the designation A or AA is what you need.
4. Purchase products in one batch.
To avoid confusion, pay attention to the lot number of each package. If the shade markings differ, compare the products visually.
5. Dimensions.
Check the caliber of the slab batch. This parameter denotes the error of actual dimensions, relative to the declared values \u200b\u200b(0-exact match).
Selection principle: the size of the packages should be the same or different by no more than one unit.
6. The quality of the coating.
The glaze layer should be solid - no cracks, chips or abrasions.
Observe the rules for storing ceramics. The products must be stored in a dry room, as the clay surface does not get wet. If you use damp material, cracks will appear on the apron after lining.
Laying methods
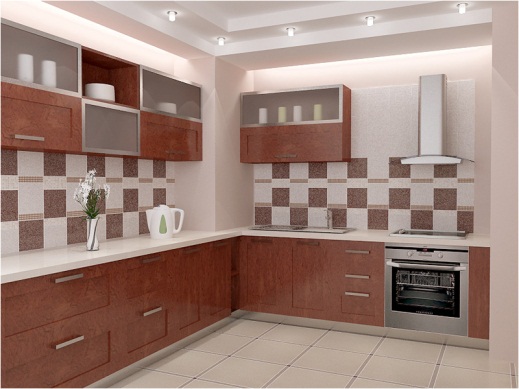
Depending on the type of layout, the perception of the tile in the apron area changes. Sometimes they combine fragments of different sizes on the same wall, embodying the design idea.
1. Standard
The seam-to-seam laying technique is the optimal installation method, which ensures minimum material consumption. The positions of elements in adjacent rows are the same.
Tip: Considering the size, select the tile in such a way as to avoid trimming.
2. Diagonal
A universal way for any shape.
Combination of straight and diagonal layout.
A diagonal and straight layout in a country style kitchen.
3. With offset
Installation "whipping" is quite simple: we shift each fragment of the new row by half of the body.
Vertical cladding version "scattered". The disadvantage of styling is trimming some of the parts that complete the row.
4. Herringbone
The tiles fit together at right angles. This scheme looks unusual even in a monochromatic version. A light grout emphasizes the direction of the masonry.
1.10x10 cm
The main advantage of the format is a minimum of trimming during the surface cladding process.
Size 10x10 cm visually enlarges a small kitchen area. Such elements look harmonious in combination with a compact headset.
Polish collection Inwencija - 100x100 mm. Manufacturer: Opoczno. A combination of two series - "Lemonka" and "Bez".
The small shape allows you to design hard-to-reach surfaces. This format can be conveniently combined with decorative panels.
Please note that the installation of ceramics 10x10 cm requires certain skills. The inter-tile seam will turn out to be larger than when joining large tiles.
Some manufacturers produce an imitation of such a tile, combining several elements in one (200x200, 200x300, 300x300, 300x400 mm). The veneering time is reduced in this case. The process becomes less time consuming (available not only to professional builders).
2. Boar
Such ceramics resemble brickwork... "Pig" is suitable for interior decoration in neoclassic, modern or classic style.
Size range:65x120, 75x150, 85x285, 100x200, 100x250, 150x450 mm.
The most common repair options are 75x150 and 100x200 mm.
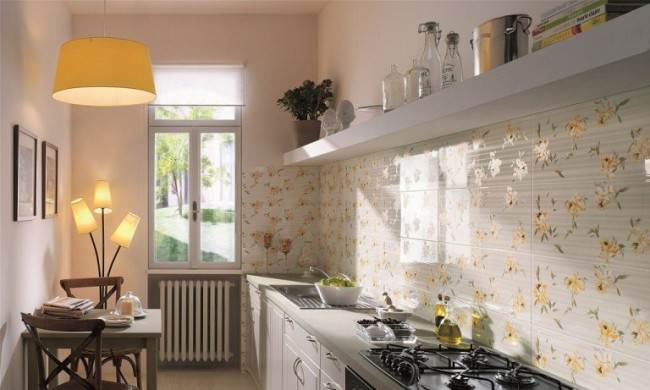
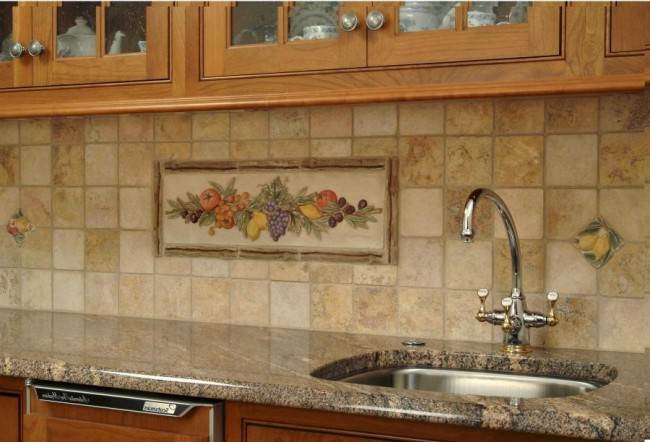
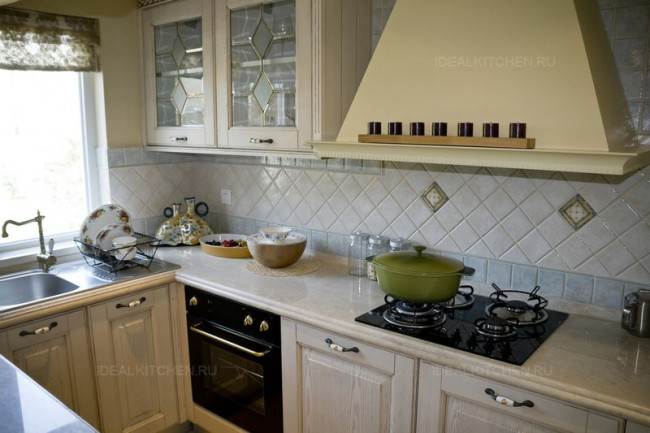
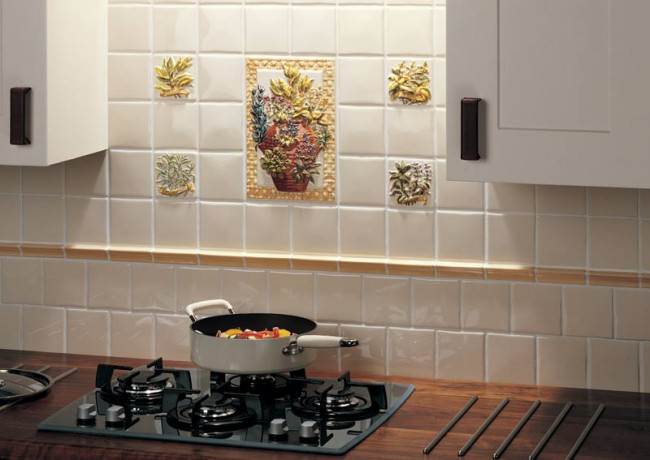
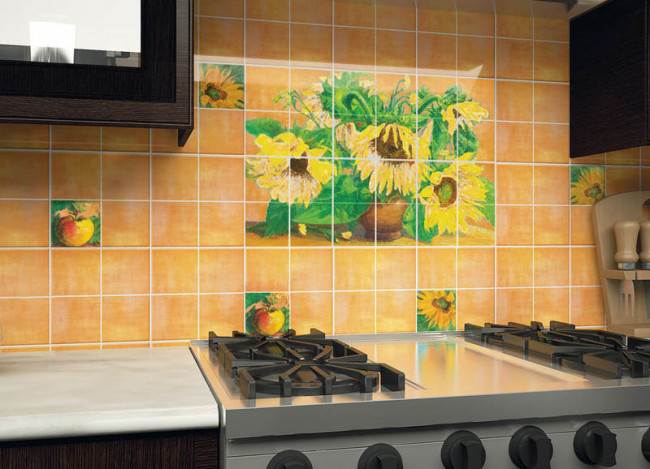
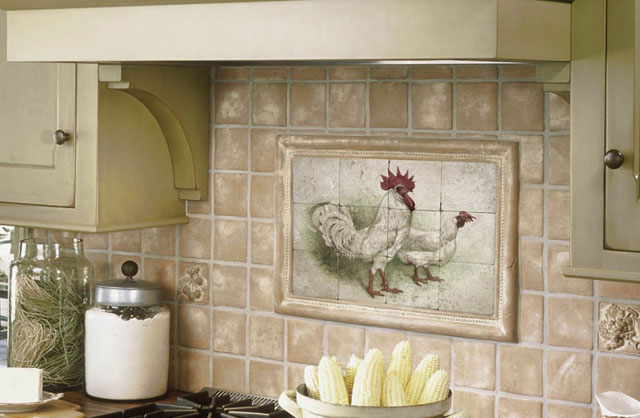
White "hog" is chosen more often than other shades. Basically, the tiles are plain and glossy. The color can be rich, but not flashy. There are also collections with photo printing. Often on decorative elements depict berries, grass, flowers, fruits and other symbols that complement the culinary theme.
If you are doing repairs yourself, opt for a large format that combines several bricks on one element. Facing with such material is available even for beginners.
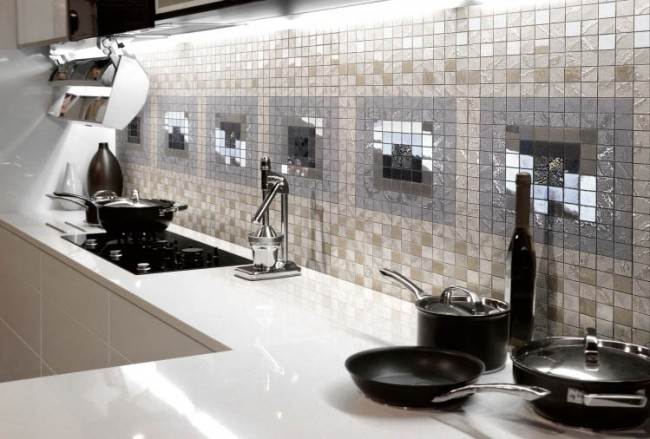
3. Mosaic
It is better to entrust the installation of a classic mosaic to specialists so that the surface is spectacular, with neat seams. For do-it-yourself cladding, purchase ceramics for a mosaic, or fixed on a grid.
The design of the mosaic can be different: square, rectangular, round, futuristic, in the form of a polygon, fragments or natural stones.
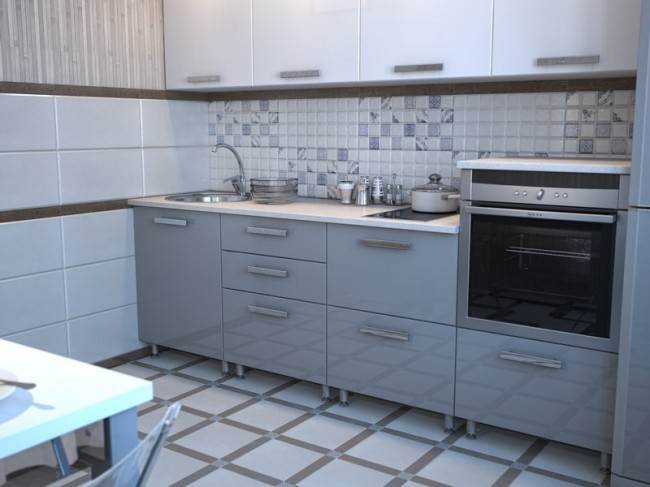
4. Medium format
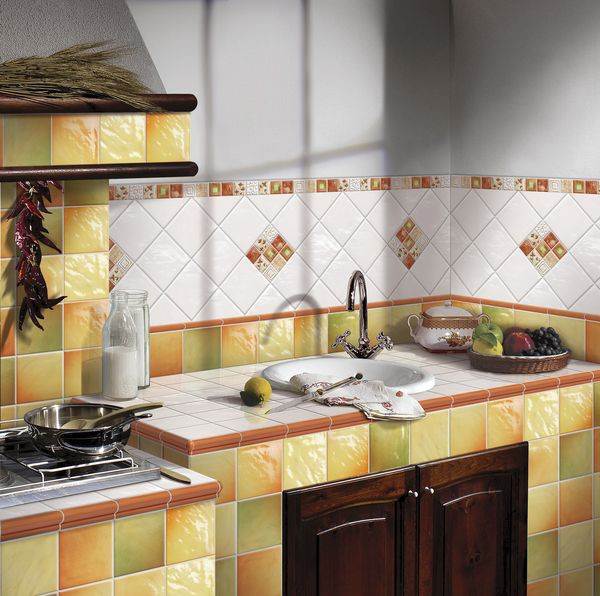
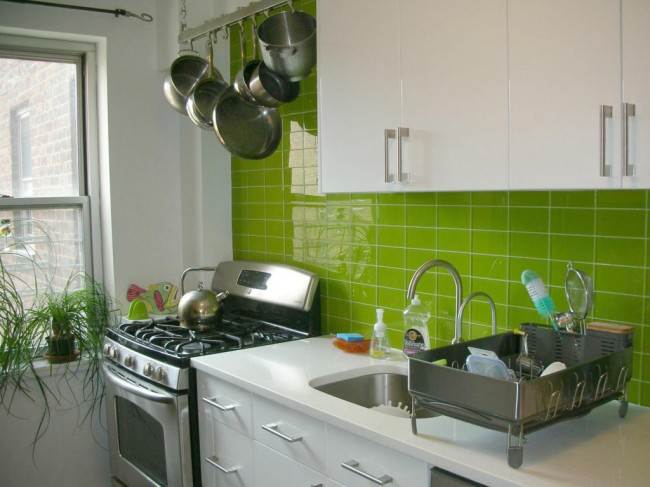
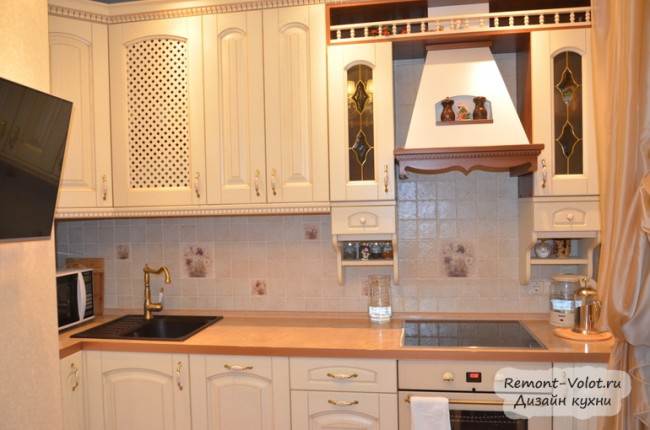
The main background is light tiles. When choosing a large format for finishing, do not overload the surface with color. Interesting details in this version are decorative inserts and pastel stripes. The color of the grout unites the ceramic cloth.
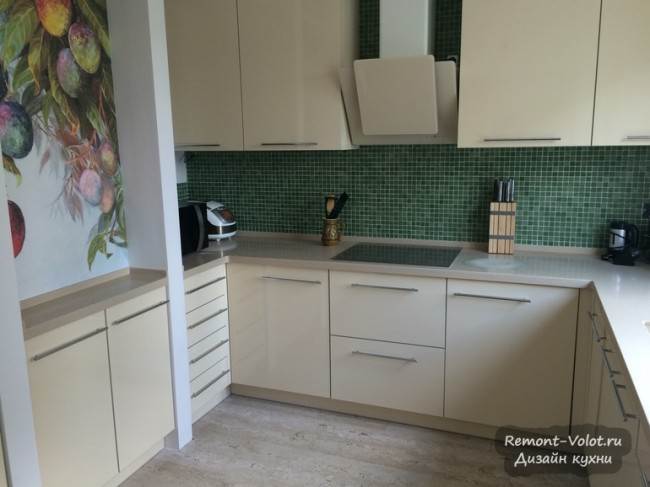
The white apron dilutes the green lines of the mosaic.
Large and medium sized items are not suitable for a miniature kitchen. This finish will only enhance the feeling of tightness in the room.
Design options
Pastel scale
Minimalism in the kitchen: laconic handleless facades, glossy surfaces, wood texture, stone countertops, creamy beige interior.
Neoclassicism in monochrome shades.
Mint walls, stone flooring and creamy furniture. Tall furniture does not look bulky due to the light shade.
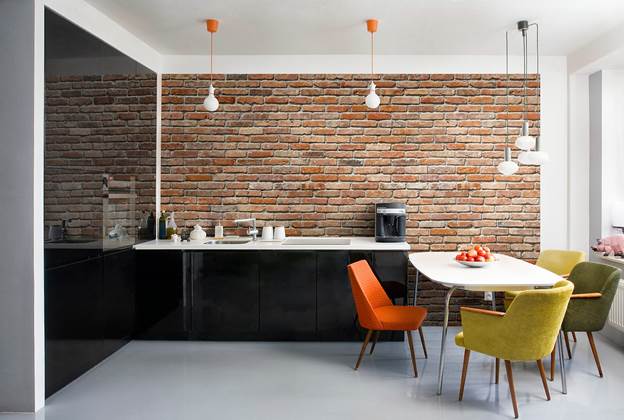
LED lighting brings out the relief of the ceramic bricks, revealing the volume of the masonry.
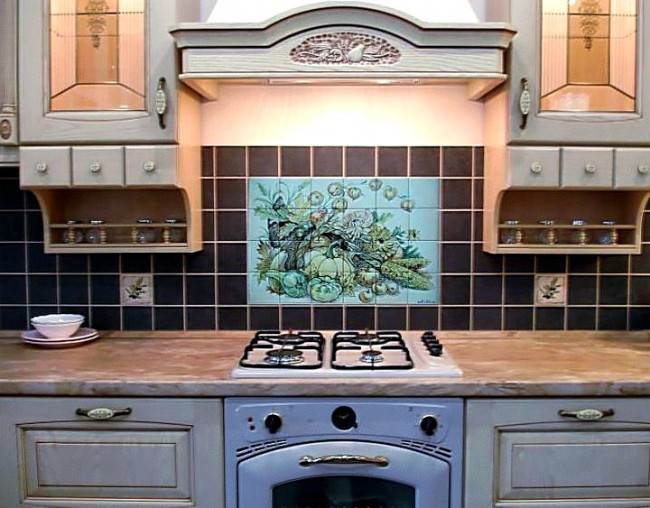
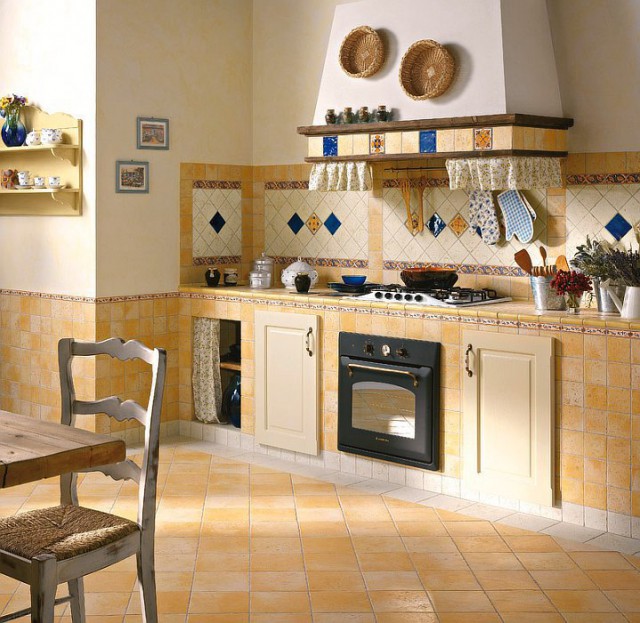
Diagonal layout combined with decorative panels. The finish imitates aged stone. This combination suits the classic style.
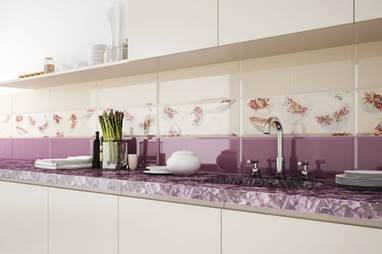
Rich colors
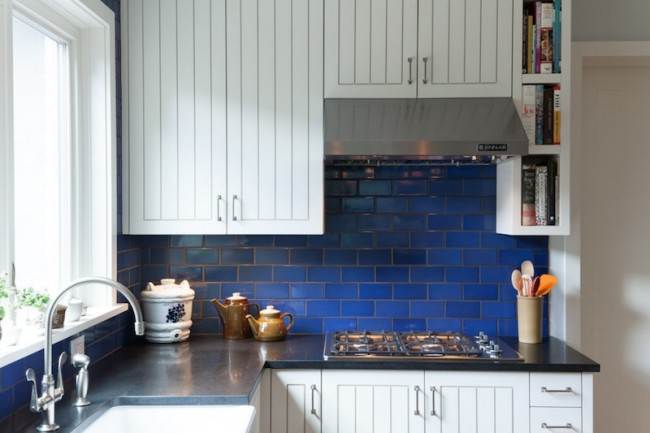
Blue accent in black and white interior kitchen.
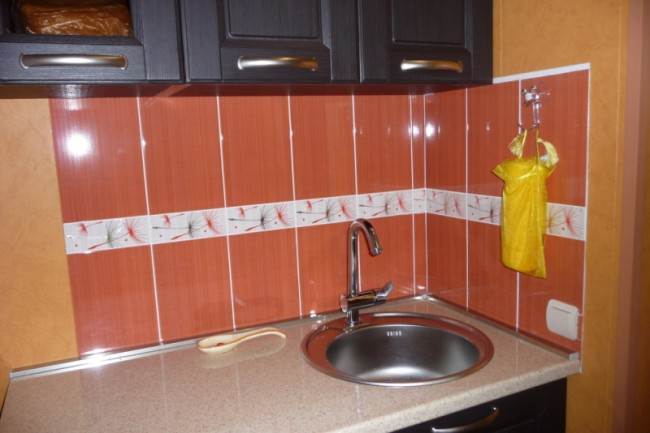
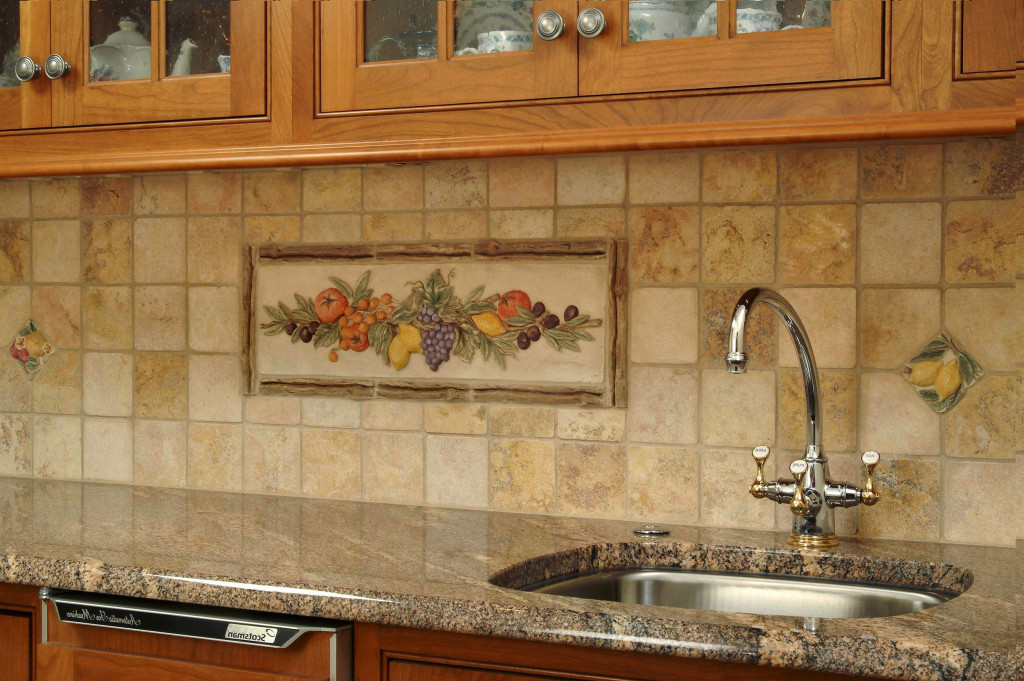
A terracotta tile screen protects the walls from moisture in the sink area.
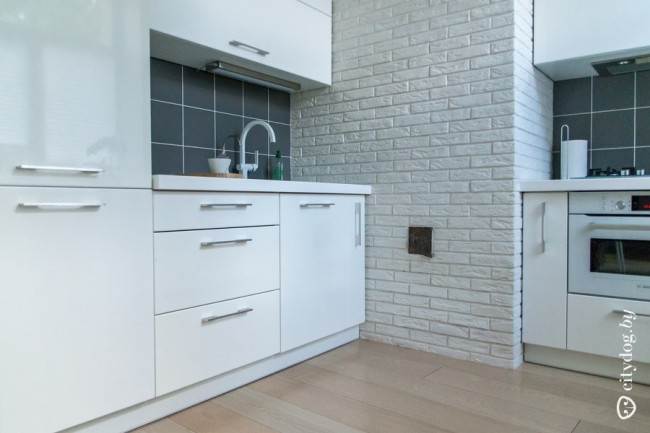
Black accent on the background of a light interior.
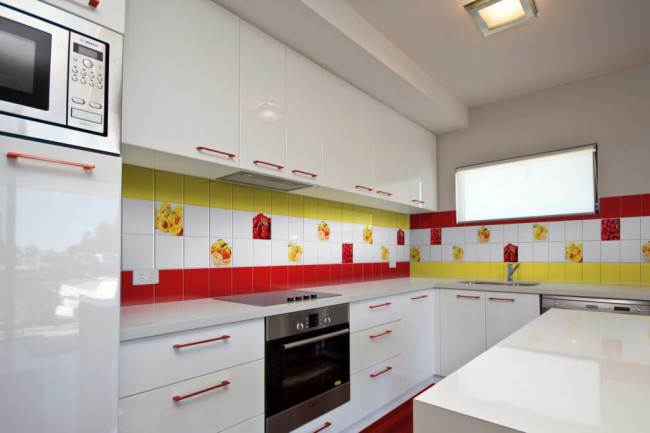
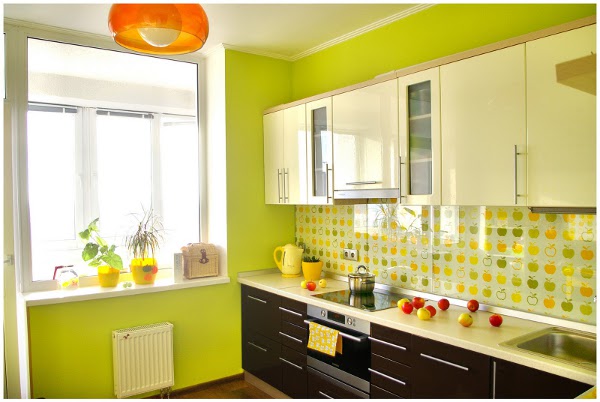
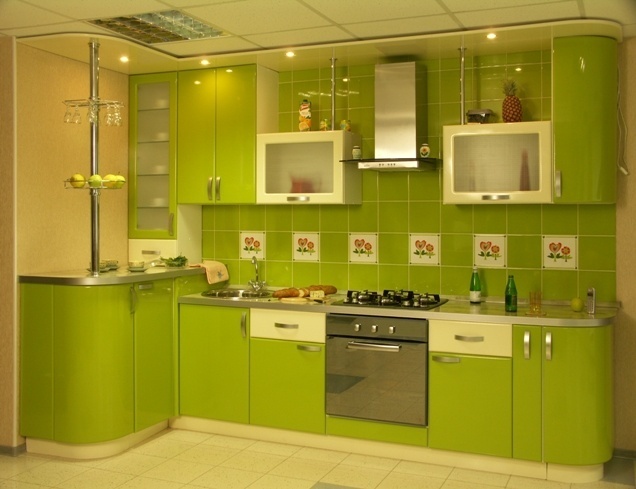
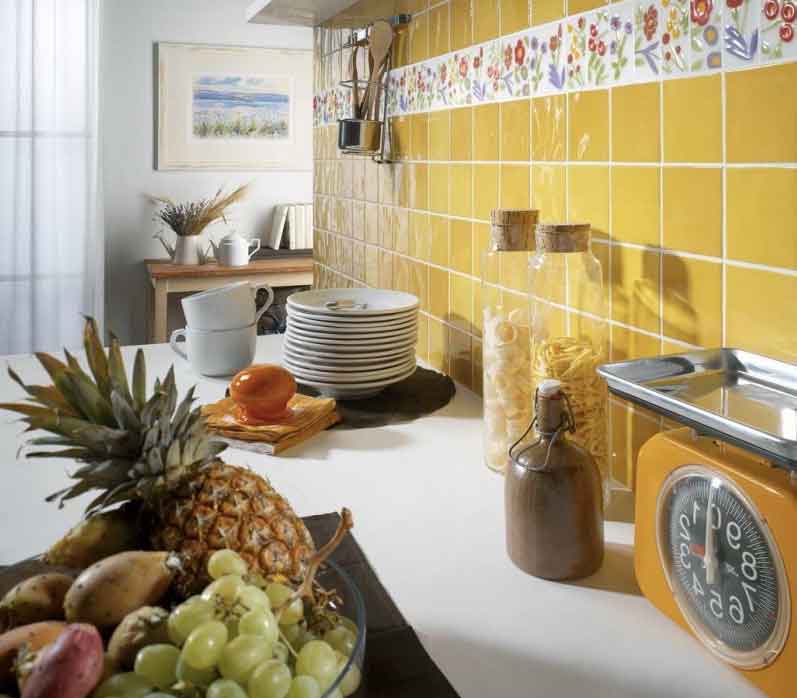
Bright collections
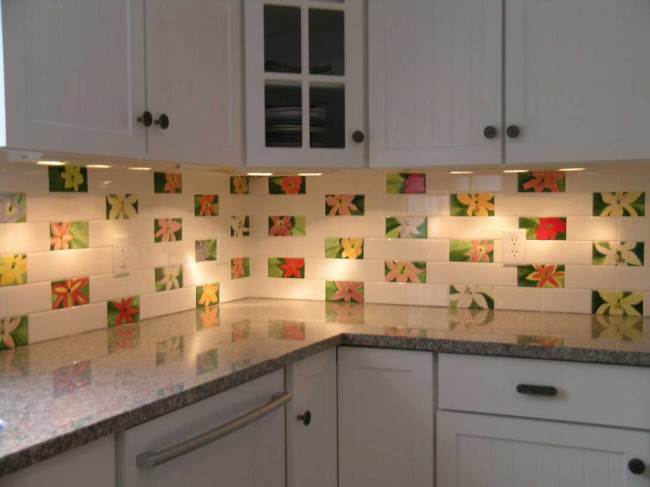
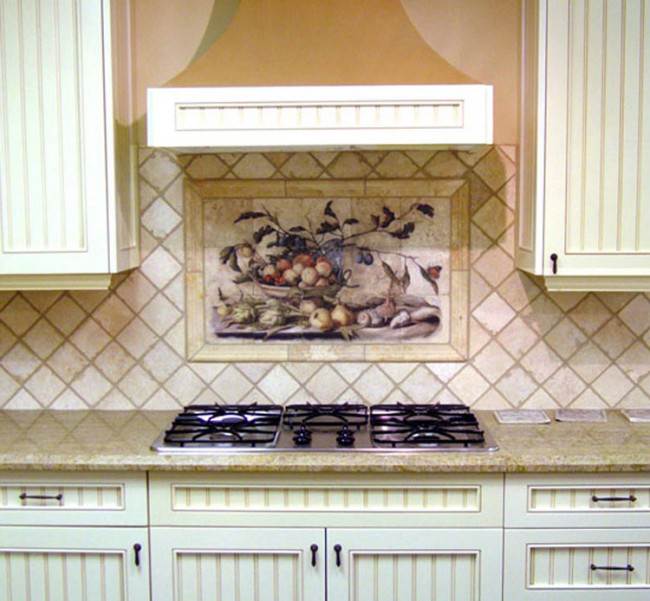
Fruit inserts are in harmony with the background tone and bright stripes of tiles. Most manufacturers have similar collections. The decor can be dispersed along the entire length, or concentrated in one piece.
Sometimes the decor is chosen from another collection. The main thing is that the thickness of the adjacent parts coincides - in this case, the surface will look uniform.
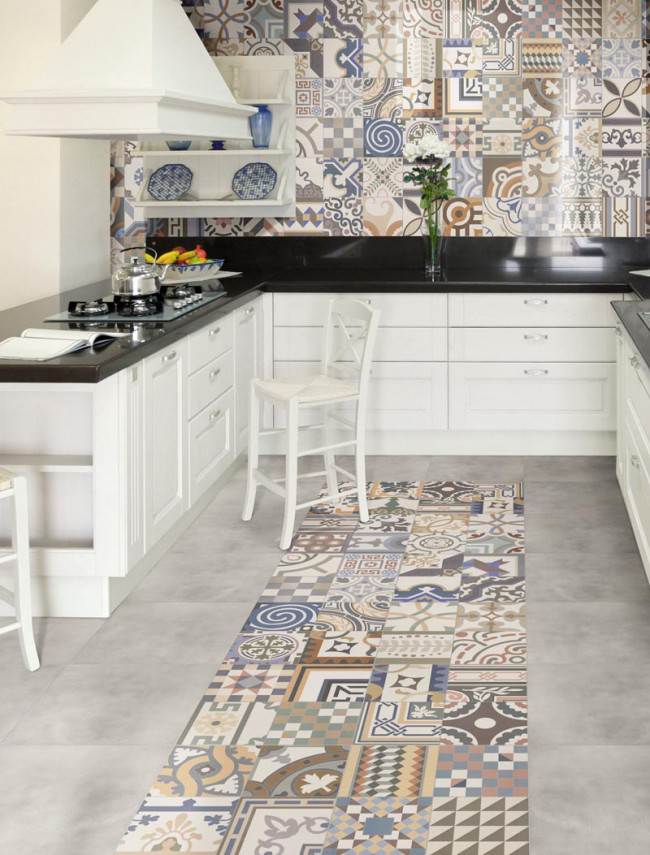
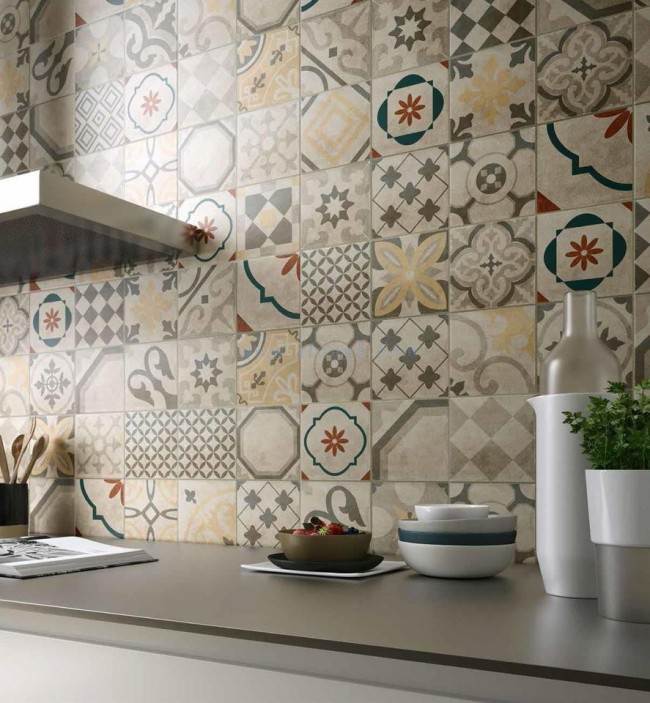
Patchwork ornament should be used with care. The variegated pattern can be irritating if the veneer covers a large area. In this interior, the patchwork adorns the walls and the insert on the floor, the other part of the decoration and the kitchen furniture are kept in strict colors. In such a room, there is no feeling of fatigue from the abundance of color.
Mixing of different formats and colors. The complex design looks harmonious due to the use of two basic shades.

Mosaic apron with bright segments. The walls and floor support the tone of the mosaic.
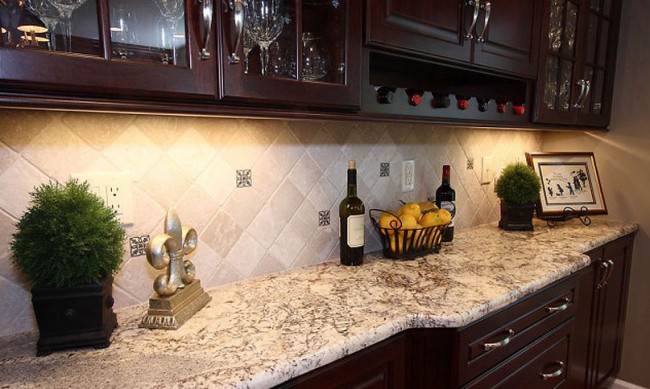
Decorative inserts
The decor is usually more expensive than the background material. Despite the cost, there is definitely a point in such a solution. Decorative details adorn the apron, diluting the monotonous color.
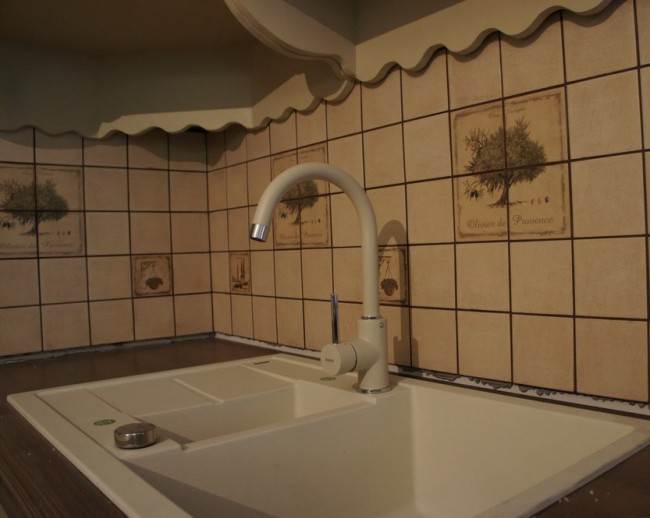
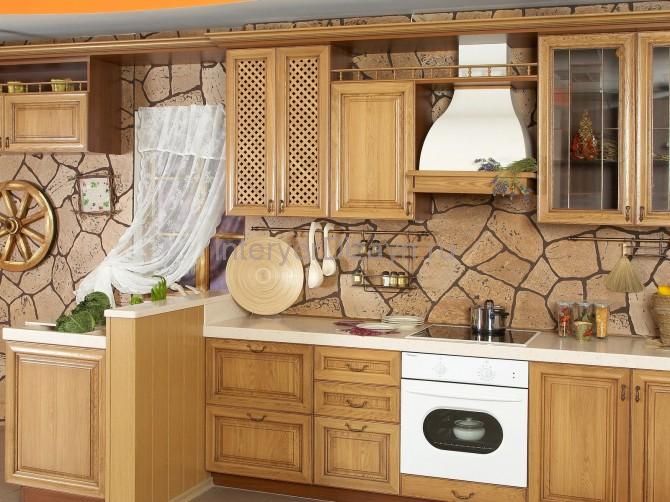
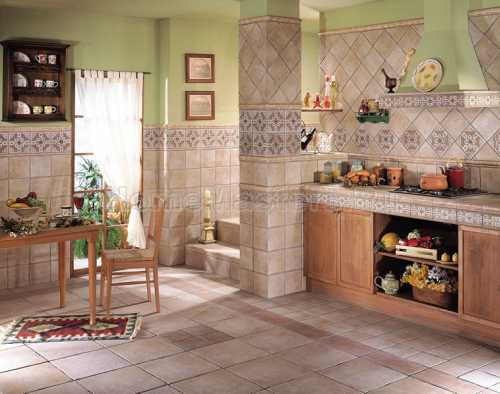
Uneven contours, imitation of aged clay tiles or stone are suitable for country and Provence style headsets.
Decor that illustrates nature. The sepia of the images echoes the tone of the facades.
Mosaic panels are suitable for any style of kitchen. The most important thing is to choose the right ornament and scale.
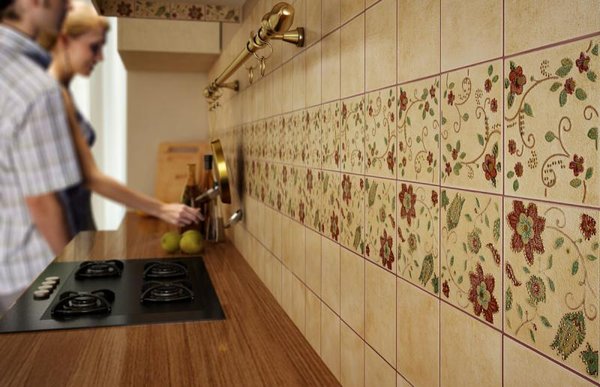
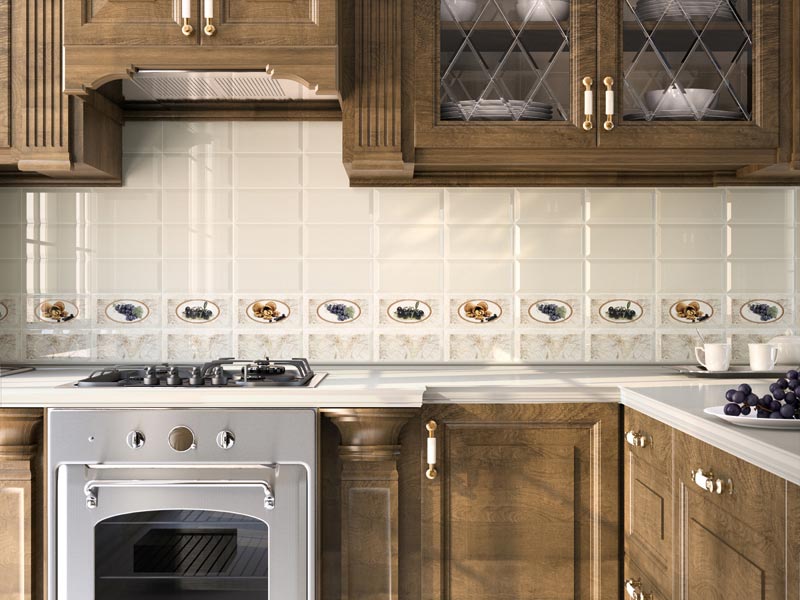
Decorative inserts with floral ornaments are often found in classic collections of ceramics, provence and country. The drawing is applied to one tile, or to several elements (4-6 pieces).
Common dimensions of decors: 500x300, 600x400, 600x600, 800x600 mm.
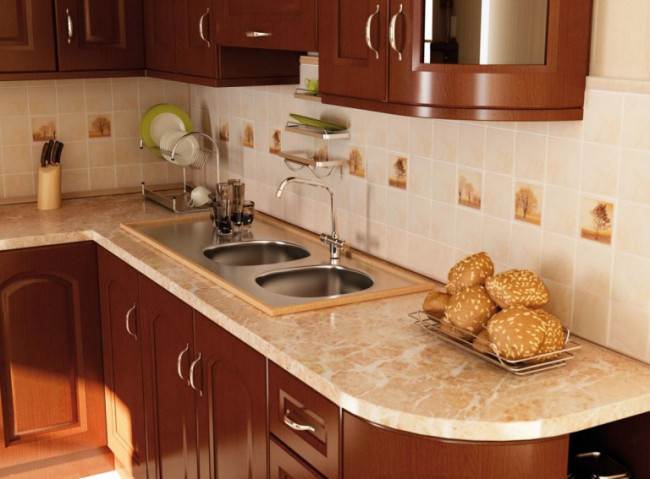
Photo tiles with abstraction, cityscapes and stylized culinary images are suitable for modern interiors.
Materials
Ceramic
Glass
Mirror. Such material will visually increase the area, but the constant reflection of objects can create discomfort in everyday life.
Metallic. Ferrum Style metallized series. Manufacturer: STS-Trading company. Floors, walls, facades, stairs, columns, plinths of buildings, fireplaces will be faced with such tiles.

Brands
Russia and Belarus. Factories in Russia and Belarus focus on the economical buyer and the middle segment. The design is inferior to Italian products, but the cost of finishing materials is much lower.
Popular brands: Atlas Concorde Russia, Kerama Marazzi, Uralkeramika, Cersanit, Italon, Keramin, Sokol, Azori, Estima, etc.
Series "Provence" (Kerama Marazzi, Russia).
Italon Artwork, Patchwork (300x300x8 mm). Country Russia.
Provence from Keramin (27.5x40 cm). Country of origin: Belarus.
Poland. The most popular factories for a Russian buyer: Paradyz, Opoczno, Tubadzin, etc.
China. The popularity of Chinese products in the construction market is great. Basically, Chinese firms supply mosaics that copy Spanish and Italian products not only externally, but also in manufacturing technology. This approach allows you to purchase a fairly good product inexpensively.
Spain. The main indicator of this country is quality. The neutral range is popular for Spanish tiles. Also, Spanish manufacturers seek the authenticity of natural textures - stone, wood or concrete. The product contains a lot of decor - panels, borders or small inserts of 4-6 elements.
Popular brands: Porelanosa, STN Ceramica, TAU, Ceracasa, etc.
Italy. Advantages of Italian products: spectacular design, large color palette, unusual shapes. The main disadvantage is the cost.
Brands: Atlas Concorde, Cisa, Fap Ceramiche, Tagina, Marazzi.
Photo: currentkitchendesignideas.com, growinggarden.ru, iappfind.com, photonshouse..com, spb.kvartirakrasivo.ru, stokvadratov.ru, idealkitchen.ru, freemarket.kiev.ua, gres.ru, hvosty.ru, idezz.ru , img.homeportfolio.com, interierkuhni.com, keendecor.com, keramograd.ru, kitchensinteriors.ru, koffkindom.ru, kuhnyagid.ru, lyncho.com, mr-build.ru, museum-design.ru, obzorkuhni.ru , plitkaatlas.ru, poshinteriors.ru, pro-gres.ru, remontgde.ru, remontt.net, hgtvhome.sndimg.com, rikshop.ru, ndelo.spb.ru, spbkafel.ru, afonya-spb.ru
We remind you that Remont-Volot.ru is in
IN modern design kitchens cannot do without ceramic tiles. This finishing material gives the kitchen an aesthetic look. It is very practical. It is unlikely that you can find another one that, according to its characteristics, is capable of replacing ceramic tiles. Very often, tiles are used not only for facing the apron, but also completely for walls and floors.
The tile reliably protects the wall surface from moisture, temperature changes, and contamination. It is very easy to care for, washes well without losing its qualities. When choosing a tile, you must familiarize yourself with all the advantages:
- does not give in to moisture;
- very good heat resistance and resistance to temperature extremes;
- use of cleaning products during cleaning;
- the tile is absolutely indifferent to the effects of sunlight;
- durability in operation;
- a variety of colors and ornaments.
The photo shows an interesting interior solution with wallpaper for tiles:
![]()
But, despite the many positive characteristics, there are still disadvantages:
- the price is quite high compared to other options;
- do-it-yourself installation is problematic without a special tool;
- rapid design changes are difficult to implement.
Choosing ceramic tiles
It is necessary to decide on the purchase for kitchen cladding after you are completely sure of the choice of design. Only after a complete determination of the color scheme, pattern and cladding plan, you can proceed to the next stage. It is necessary to accurately measure the dimensions of the area for tiling, and calculate the amount the right material... Do not forget that the design of ceramic tiles must be successfully combined with kitchen furniture and other decorative elements.
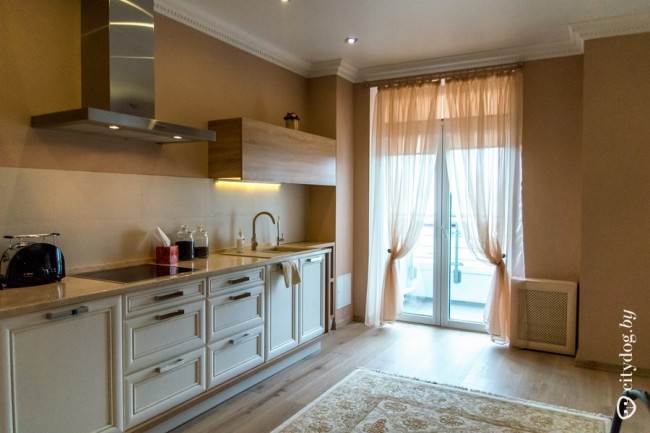
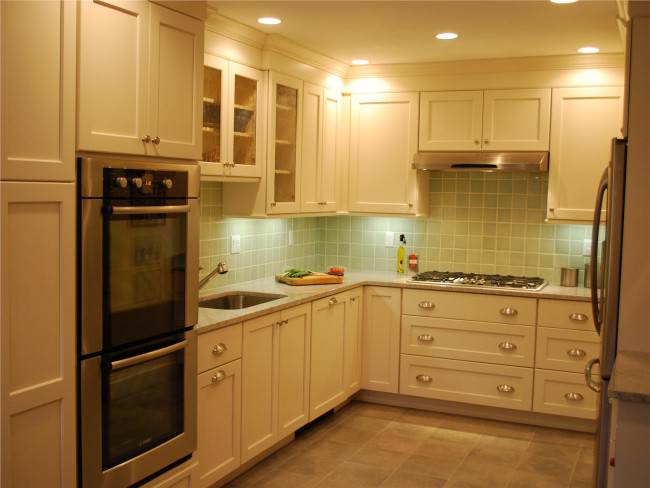
This is well shown in the photo.
Also in this photo.
When purchasing material, try to buy a little more than the dimensions of the treated surface show. The fact is that you will definitely have to cut the tiles, there will be scraps that are not suitable for further use. Their area should be excluded. And if you buy a tile back to back, it may happen that you have to buy it.
Important! You should buy ceramic tiles with a margin - plus 10% to the calculated area.
Extra tiles are also not needed. You should be serious about calculating the required finishing material.
Wallpaper on the walls of the kitchen
Considering the variety of wallpapers, almost all of them are suitable for use in the kitchen. Moreover, wallpaper in combination with ceramic tiles looks absolutely appropriate. Such an ensemble is also advantageous in that, due to the high prices for ceramics, you can save money and get a rather stylish kitchen design. Here are some examples of kitchen wall decoration with different types of coatings. They are shown in the photo.
A kitchen is a room that is submitted to all kinds of tests in the form of splashes of grease, drops of water while washing dishes and other important factors. Therefore, it is not recommended to use liquid wallpaper. It is best to use tiles or, in extreme cases, washing wallpaper for problem areas in the kitchen. Such options are shown in the photo.
So, in order to choose a wallpaper material for the kitchen, you need to take into account some factors:
- the size of the room or areas covered with wallpaper;
- design style;
- interior of kitchen furniture;
- intended lighting;
- the tastes of the inhabitants.
Types of wallpaper for the kitchen
In order to decide on the wallpaper for the kitchen, you should take into account the factors that are inherent in this particular room. Do not forget about its functional purpose. It is exposed to a lot of moisture, temperature extremes and contamination during cooking. Kitchen coatings should not be easily soiled and have all the properties that can withstand all the above loads. And most importantly, they must be beautiful and suitable in design.
Paper wallpaper
Positive characteristics:
- relatively low price;
- a large selection of colors and patterns;
- are highly environmentally friendly.
But not the most suitable for finishing the kitchen. Paper wallpapers can be damaged very easily, they cannot be washed.
But if you use ceramic tiles to finish all work surfaces, and stick wallpaper on areas remote from the sink and stove, then, in principle, you can get a good economical option.
Important! Due to the low cost of paper wallpaper, it is easy to replace them with new ones.
Non-woven wallpaper
Wallpaper with a textured pattern on a non-woven base. They have the following advantages:
- They are very convenient and easy to stick. To stick them on, it is enough to apply glue only to the walls. This is especially convenient for beginners.
- They have a fairly dense structure, so they are able to hide minor wall defects or cracks.
- Their staining is possible and repeated. With this, you can change the style of the kitchen.
- They do not allow air to pass through, therefore excludes the occurrence of mold under them.
- Resistant to moisture, so you can wash them periodically.
- Resistant to sunlight.
An interesting solution with dark wallpaper in the kitchen can be seen in the photo below:
The disadvantages of non-woven wallpaper include:
- Since they have a textured base, they easily collect dust and will often have to be cleaned, vacuumed and washed.
- The surface is quite easy to damage, and if there are animals in the house, then it is best to finish the panels with tiles.
Wallpaper for the kitchen under decorative rock presented in the photo:
Important! For non-woven wallpaper, use a water-based paint.
Vinyl wallpapers
This wallpaper has a vinyl backing on a non-woven or paper backing. Vinyl coverings come in many varieties: foam, smooth, flat and hard. To decorate the kitchen, you can use any, except for foamed vinyl covering.
Wallpapers have many advantages, which we will now get to know:
The disadvantages include the following factors:
- They do not breathe, therefore it is necessary to provide systematic ventilation of the room.
- If the wallpaper is on a non-woven basis, then the surface should be uniform. This is due to the fact that the base has a certain degree of transparency and all the imperfections of the walls can appear.
- Installation of such wallpaper is much more difficult compared to non-woven wallpaper. The glue is applied to both the wall and the canvas. Quite heavy, and you need to use special glue when gluing.
- The cost is quite high compared to other types.
Wallpaper with imitation tiles
Very often a combination of wallpaper and tiles is used for wall decoration. But this process should be taken seriously and be sure to choose the right materials for each other.
Recently, wallpapers for tiles or decorative stones have appeared on the market. Their distinctive characteristics:
- the surface is covered with an image and after the installation process absolutely imitates wallpaper;
- ceramic chips are applied to the polymer sheet, which gives a high degree of strength and increases durability in operation.
The advantages are evident even in the photo.
You can also use vinyl-based canvases that imitate tiles. These wallpapers are embossed for a better look and less distinction from tiles.
It is easy to work with them, but you should carefully select the pattern and connect the strips at the joints so as not to violate the integrity of the surface.
Decorating the kitchen with stone and wallpaper
The combination of wallpaper with stone, both natural and artificial, looks very good in kitchen design. The latter type of decorative stone is much easier to work with. Since it is very easy to cut the desired shape from it. Again, its cost is almost two times cheaper than natural.

Decorating a kitchen with decorative stone has several advantages:
In any case, no matter what to choose for finishing the kitchen along with wallpaper: a ceramic plate or decorative stone, or maybe wallpaper for tiles, do not be afraid to experiment, remembering to pay attention to the properties of the material. Then you don't have to make repairs in the kitchen again after a short period of time.
How the decorative stone looks in the interior can be seen in the video:
Today, during the change of the interior of the kitchen, the tiling is unchanged. Often, when a kitchen is found without ceramic tiles, a feeling of incompleteness and unfamiliarity is created. Despite this, it is worth noting that there are some subtleties and features when decorating a kitchen with tiles. If you follow the installation rules, an excellent result will be achieved.
Kitchen in tiles - beautiful, high quality, durable.
Kitchen decoration: general information and space zoning
Tile is a versatile facing material, as it can be used to finish any surface. When the entire kitchen is tiled with tiles, it should be borne in mind that it must have zoning. There is nothing strange here, since most designers recommend dividing it into separate zones to create comfort in the kitchen. These areas include:
- Work zone. This space includes a stove, sink and refrigerator.
- Apron. It is he who can be faced with other tiles to form an interesting interior.
- Floor. The rest of the territory.
When covering the kitchen with tiles, focus on the apron.
The most interesting thing will be that zoning involves laying tiles of various shades on each zone. Therefore, in order to know the approximate result, the designer has a portfolio with photos of various styling. Thanks to the photo, you can choose a suitable design. Also in the photo you can see how the result will look. From these photos it will be seen that all zones are decorated in different ways. Not only the color is different in the photo, but also the options for laying ceramic tiles. Zoning the space of the kitchen area makes it not only comfortable, but also interesting. Therefore, do not limit yourself to one shade of tiles. The photos provided will help you choose the right color and styling option.
The kitchen is visually divided into zones using tiles.
What you need to know about choosing a tile for kitchen decoration?
Finishing the kitchen also means purchasing high-quality cladding material. The kind of tiles you use on the walls and floors in the kitchen will affect its durability, strength and comfort. The tile is different. Mostly different specifications... There is a dense, durable and durable tile. It is this tile that is perfect for decorating the floor in the kitchen.
Kitchen flooring is essential.
The first step in buying a tile is to pay attention to its surface. If you are going to tiled the floor in the kitchen, then give preference to matte cladding rather than polished. The fact is that the matte surface does not slip, therefore, the probability of falling is excluded. Among other things, these tiles are waterproof and withstand a wide variety of chemical cleaning agents.
It is worth choosing the size, starting from the area of \u200b\u200bthe room. Sure, large tiles will look ugly and bring disharmony to the room. Therefore, experts recommend purchasing 15x15 material or even a mosaic. The work is difficult, time consuming, but the result will be amazing. A harmonious combination will be ensured.
The modern variety of tiles allows you to choose both in quality and design.
Kitchen tiling technology
The process of tiling the kitchen itself is not particularly difficult. The main task is to prepare the surface of the base. It should not have any irregularities, holes. It must be completely dry and free from dirt (dust). If the walls in the kitchen are uneven, plaster can be applied first. Self-leveling compounds can be used to prepare the subfloor.
After cleaning and leveling the base, priming begins. Only after the primer has completely dried is the glue applied. Typically, the adhesive is sold as a dry powder, which must be dissolved in a liquid to form the adhesive. Using the instructions, we carry out the correct glue spreading.
Instead of a stand-out apron in the kitchen, you can make a small interesting braid.
Tiling the kitchen has the following sequence:
- The adhesive solution is applied to a small area of \u200b\u200bthe surface and leveled with a notched trowel. The glue should be applied precisely to a small area; you should not cover the entire surface of the base with it.
- Using a level and a plumb line, the tiles placed on the glue are leveled. If necessary, you can knock on it with a rubber hammer for a firm grip with the base. To ensure that the gaps are the same size, crosses are used, which are installed between the tiles.
- After the glue has dried, apply the grout to the joints.
Modern kitchen tiling options
Today there are a huge number of options for finishing the kitchen area with tiles. Depending on the area of \u200b\u200bthe kitchen and location, it is worth choosing a styling option. The classic option is considered to be a simple tile laying seam in seam. Any person can do this on their own.
Kitchen in a tile with a finished picture.
For a diagonal layout, you need to have skills and experience. Therefore, it is better to invite a specialist for such work. Remember that you should not choose this styling option for a small kitchen, since a diagonal layout will visually increase the space only in a large room. Another finishing method is staggered stacking. Then you need two basic shades. Don't limit yourself to black and white.
If you want to make an unusual design, then you should choose a complex floor tile pattern. For this, a special computer program is used. Only professional designers use it. If you want to do it yourself, you can draw the layout on graph paper.
- Materials and tools for finishing works
- Kitchen cladding progress
When decorating a kitchen, it is important to achieve a harmony of appearance with its functionality. The walls, ceiling and floor in it must be beautiful, but this beauty must be resistant to various aggressive environments and substances released during cooking and contributing to pollution.
The best choice here may be ceramic tile.
Most often, it is the kitchen tiling that guarantees not only reliable protection from moisture, grease and dirt, but also a pleasant interior.
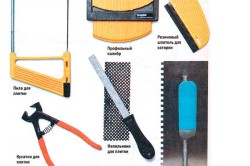
Materials and tools for finishing works
Kitchen decoration is carried out with the following tools and devices:
- Tile cutter (glass cutter, center punch).
- Nippers (needle-nose pliers).
- Materok for tiling.
- Notched trowel.
- Rubber hammer.
- File.
- Building level.
- Meter (measuring tape).
- Capacity for the preparation of adhesive solution.
Back to the table of contents
Kitchen cladding progress
There is a certain tradition in kitchen decoration. In particular, it is recommended to cover it not all completely, but only partially, avoiding not very good associations with a hospital or a public catering unit. Typically, ceramic tiles are mounted on the wall in the places where the cutting tables and sink are located. This area even got the name - the apron. It is here that the tiles show their best sanitary and aesthetic qualities.
Facing the kitchen with tiles should be started by marking the wall and placing an emphasis under the bottom row. Most often, the work area is the part of the wall between the top edge of the table (sink) and the bottom edge of the wall cabinets. Having previously marked the area that begins at a height of 70-80 cm, an emphasis is attached to the wall along a horizontal line set using a building level for the entire length of the lower border of the future cladding.
As this device, a flat metal profile for drywall, a wooden lath or a rule is used. It is designed to prevent the tiles from slipping until the adhesive layer dries. The next step is to make sure that the treated area of \u200b\u200bthe future working area is even and, if necessary, prepare it (align vertically) with plaster or tile glue.
Further, after the "dry" layout of the tiles, counting the number of rows and tiles in them, it's time to start gluing the facing material. Finishing is done from edge to corner of the room. The adhesive is applied to the wall with a notched trowel, and the same adhesive is applied to the back of the tile. It should be borne in mind that in some cases the glue is applied to dry tiles, in others to pre-soaked tiles; in each case, the instructions of the tile manufacturer must be followed.
At the same time, the outer tiles should be solid: they look better, and the row - smoother. If a solid tile does not fit in the corner, it is sealed with fragments pre-cut to size. Fastening the cladding to the wall is done either with a rubber hammer or with smooth, pressing movements of the hands. Approximately the same amount of mortar is applied to all tiles to ensure an even adhesive layer.
The planting of each next tile should be carried out until the moment it aligns with the previous one. Immediately after attaching the next tile, it is recommended to check its correct position with a low level. If irregularities, snags at corners or distortions are found, until the mortar has seized, it is necessary to correct the alignment of the ceramic products.
After setting the bottom row according to all the rules, the master only has to continue working in the same spirit, gluing each next row from bottom to top in strict accordance with the basis. Plastic crosses are used to form uniform seams between horizontal and vertical rows. At the end of the finish and after the glue has hardened, the seams are cleaned of mortar or glue influxes and filled with colored grout. The lower stop is removed.
Thus, following the indicated simple rules, finish working area almost anyone with skillful hands and a thoughtful head can do their own kitchen.
Ceramics is a material that will never go out of style. It just so happened that ceramic tiles have no worthy competitors even nowadays, when leading corporations create truly amazing materials that previously could only be dreamed of. Ceramics is also a versatile resource that can be safely used in almost any space.
Manufacturers of ceramic finishing materials actually offer a huge range of products. It is especially important these days to pay attention to personal orders. Each owner can turn to one or another manufacturer to release just such a tile that meets a number of requirements. We can talk not only about the dimensions of the material, but also about images that are easily applied to the karmic surface.
Today, the most common places for wall decoration with ceramic tiles are the kitchen and bathroom. These two spaces are ideal for using ceramics. In this article, we will consider the main features of ceramic tiles, as well as analyze all stages of wall decoration with this material. We can safely say that finishing works even people without experience in the repair business will be able to do it. All thanks to the practicality and many other positive aspects of ceramic tiles.
Features of ceramic tiles
As we have already said, ceramic tiles are the undisputed leader among finishing materials. Of course, for last years a lot of new resources have appeared that make it possible to make the wall surfaces truly unique, but the ceramic material simply does not have direct competitors. Moreover, ceramic tiles are gradually being improved, and first of all, this concerns the appearance of the material, since its characteristics have been ideal for many decades already for most of the conditions in which this resource is used.
The versatility of ceramics is simply amazing. Wall tiles can be used in almost any room. For example, even in the bedroom, the walls can be finished with this material, but this solution is rarely used for obvious reasons. Thus, it is better to consider in detail all the strengths and weaknesses of ceramic tiles. Running a little ahead, it can be noted that this finishing resource also has disadvantages, and in some cases they can have a significantly greater weight than dozens of advantages.
Advantages and disadvantages of ceramic tiles
Let's start with the strengths of the ceramic resource:
- Wear resistance. A reliable ceramic tile coating can actually last for many years. Even in the harshest conditions in which the room is located, the tiles will delight with their original appearance for for long years... Of course, it is still recommended to take some care of the material, however, the wear resistance of ceramic tiles is striking, and this advantage is especially well seen against the background of many modern materials.
- Strength. People who have experience with many finishing materials know perfectly well that only a natural stone... The rest of the materials do not even come close to matching the strength of ceramics. It is quite possible to damage the tiles only with blows with heavy objects, however, practice shows that such situations happen by chance very rarely. Another popular wall decoration material - PVC panels - is damaged even from minimal impacts. Thus, in terms of strength, ceramics simply have no equal, and this situation has been happening for many years.
- Water resistance. For most rooms where ceramics are used, this characteristic is extremely important. In the framework of the bathroom, ceramics are completely irreplaceable. In this article, we will consider finishing with ceramic tiles in the kitchen, and it is to this space that the material is excellent for most parameters. Under the influence of moisture, the tile can become covered with fungus and other bacteria, but all this can be elementarily cleaned. It should be borne in mind that today, among the materials, it is ceramics that is the easiest to clean. To make the surface clean, it is enough to use a high pressure of water.
- Huge range of products. Ceramic tiles, despite their long existence, are the very basis that allows you to create new options for products, both in terms of appearance and other characteristics. Most often, the owners pay attention to the style of the tile, and this is what they start from when choosing a finishing material. Also, the product range also applies to the dimensions of the material. You can easily choose exactly the tiles that best fit into the available space. It can also be noted that, if necessary, ceramic tiles can be easily cut, while the material itself does not lose its most important properties. All the above features, which include the advantages of the assortment, are not available for most similar materials.
- The tiles are non-flammable. Many materials made on the basis of plastic and some other resources, under the influence of an ignition source, immediately begin to burn, and actively. This is an extremely bad situation, since in any room, even the most specific, there must be complete security. Ceramic tiles are not flammable, and that is why this material is advisable to use in the kitchen and similar spaces. In addition, under the influence of direct sunlight, the tiles will not lose their rich color of the surface, and in frosty weather the material will never crack.
Consider also the main disadvantages of ceramic tiles:
- Low level of thermal insulation. It is safe to say that in a room where the walls are tiled with ceramic tiles, it will be difficult to keep warm during the cooler seasons. It is important to keep in mind that during the summer this disadvantage becomes an advantage, since it will always be relatively cool in such a room. Low thermal insulation is often the very disadvantage due to which the owners refuse ceramic tiles. In this situation, it is necessary to consider all sorts of insulation options, up to laying mineral wool under a layer of ceramic surface. If the tiles are laid on the floor, then it will not be very pleasant to walk on such a surface with bare feet at any time of the year, and this must be remembered. At the same time, you can install a warm floor system on the surface without hesitation, and ceramics conducts heat in the best way. In the case of walls, it's best not to do anything like this.
- The complexity of the cladding. It should be borne in mind that ceramic tiles are a heavy material, which is quite difficult for surface cladding. At the same time, the material can only be laid on a perfectly flat base, otherwise problems will certainly not be avoided. It should be borne in mind that for wall cladding in a room that has a large area, it is advisable to use the services of specialists. Unlike wallpaper, PVC panels and other finishing materials, ceramic tiles are not an easy-to-use finishing resource. Of course, there are a wide variety of conditions, in some of which it may be quite simple to produce surface cladding.
Separately, it can be noted that a rather large price tag for ceramic products can become a disadvantage for many owners. However, in construction supermarkets and wholesalers, you can easily find inexpensive tile options. Yes, these products may not look too solid, but we are guaranteed a durable and reliable surface with many other benefits. Do not forget that minimalism is now in vogue, so simple tiles often look gorgeous in any room.
![]()
Tile selection
People who go to buy tiles for the first time in order to later clad walls are not always guided in the main issues related to the choice of material. In the end, it turns out that the tile does not meet the basic requirements that were dictated at the very beginning. Thus, we will consider the most important issues related to the features of the tile:
- To begin with, if the tile is chosen specifically for the kitchen, you need to pay attention to its thermal resistance. If the material does not have the required level of resistance to high temperatures, then gradually cracks will begin to form on the surface of the tile, which cannot be eliminated. Unfortunately, these cracks often make the room look extremely unattractive, so you will eventually have to remove the tiles from the walls and throw them away.
- Also, various aggressive substances that get on its surface negatively affect the state of the tile. This is an especially dangerous situation when the material has increased porosity, and in this situation, the tile begins to collapse, losing its most important properties and attractive appearance.
- When choosing a tile, you should pay attention to the type of its surface. For the kitchen, it is better to use matte tiles, which if they start to get dirty, the surface will not look too bad. Often, the owners give preference to light glossy tiles, on which not only dirt, but also ordinary fingerprints are clearly visible.
- You can safely combine different tile options. For example, for the kitchen it can be white tiles and green. The main thing is to ensure the combination of the selected colors with the existing items in the interior.
- And, of course, you cannot ignore the side of the tile manufacturer. It is advisable to make a choice in favor of proven companies that have been producing tiles for many years. It is also not worth overpaying for a well-known brand, as often it just doesn't make sense.
There are also some other details worth paying attention to. For example, if the room is too small, you should not use dark tiles, as the visual space will become too tiny. In addition, floor tiles cannot be used as wall cladding, as the option for vertical surfaces is much thinner and lighter. Tiles with a lot of weight on the wall will collapse sooner or later.
Well, you also need to understand that the main thing in the tile is the correctness of the geometric shapes, since otherwise the material will not be combined with each other, and the process of laying the tiles can turn into a real test.
Ceramic tile kitchen wall decoration process
Preparatory activities
- First of all, you need to prepare the base for tiling the walls. First you need to clean the surface of dirt, dust and other contaminants that can be removed with a rag or brush. Often there is too weak plaster on the wall surface, which it is advisable to remove at the same stage.
- Right after that, a tool called a rule comes in handy. We apply it to the wall and check all the irregularities that may exist. Accordingly, if "gaps" appear between the rule and the wall, it is necessary to react. Experts recommend leveling the walls only if the unevenness of the wall is more than 5 mm. If the deviations are less than this value, then you can safely proceed to the facing.
- As for leveling the wall, here it is necessary to note as many as 2 process options. The first is full alignment and the second is partial alignment. In the first case, a complete replacement of the plaster layer occurs when using beacons. In addition, instead of applying plaster, drywall sheets can be used, which must be additionally attached to the base surface of the wall (since drywall can deform under the influence of the weight of the tile). Partial leveling of the wall is often carried out using tile glue, which will later be used to fix the ceramic material.
- Separately, it should be noted that the surfaces of lime plasters must be strengthened. If you carry out a primer, then any decoration Materials will adhere better to the surface. If we have an aerated concrete surface, then as many as 2 layers of primer are required. The first is an emulsion diluted with water and the second is an undiluted primer mixture.
- In the event that the owners aim to tile the surface with tiles over the old material, then, first of all, it is worth analyzing the state of the old material. If the tile is in good condition, and the surface itself is flat, then it is enough just to thoroughly clean the wall, and then boldly apply a new layer of tile.
- If the facing is planned on gypsum plasterboard sheets, then it is advisable to create a waterproofing layer.
Wall markings
Today the owners have the opportunity to fix the tiles on the basis of the wall exactly as they wish. It is about placing tiles horizontally, vertically, and even diagonally. The most important thing is reliable fasteningas well as the visual appeal of the walls.
The tiles are laid from the bottom up, and it is from this information that you need to build on when marking. Often the multiplicity of tile sizes does not correspond to the multiplicity of the dimensions of the walls, therefore, it is highly likely that the material will need to be cut. Often, trimmed tiles are used for laying in the inner corners of the room.
Based on the above information, you can make a small markup using a regular construction pencil. However, it must be remembered that many owners prefer to create gaps between the tiles, and cross beacons are often used for this business. These small indents also need to be taken into account when marking up.
Also, experts note that if not the entire wall is tiled with the help of tiles, but only part of it, then it is necessary to lay the material from top to bottom. The thing is that in this situation, the cut tiles will only be on the lower level (basement row). The appearance of such a tiled insert will be very attractive.

Wall tiling process
- First of all, you need to prepare an adhesive solution. For this case, you need to study the information specified in the instructions for the glue. The glue is applied to the wall surface with the smooth side of the trowel, after which a uniform distribution of the bonding material is carried out using the notched side of the tool.
- It must be remembered that the glue dries very quickly, so it is necessary to apply the glue to a small wall area - up to 1 square meter... Often, a small layer of glue dries up to 30 minutes. If the glue has dried up, but the tile has not been fixed, you will have to make an effort to remove this layer from the wall, and then apply a new one.
- The larger the tile size, the larger the trowel should be.
- Most attention should be paid to tiles that have some irregularities on their surface. It can be homemade material, or a mosaic that does not always correspond to some rigid geometric parameters. Thus, in order to securely attach the material to the wall surface, it is also necessary to apply glue to the tile itself. Most often, two thin layers of bonding material on the tile and wall are sufficient to ensure that the cladding is held securely for many years.
- Tiling starts at the bottom and continues vertically. Starting from the lower level, 3-4 tiles are laid to the upper part of the wall, after which we move left or right and carry out the same manipulations. Thus, the installation proceeds from the corner and evenly proceeds to the opposite upper corner of the wall.
- The most important thing is to check the horizontal and vertical position of the material with a building level after laying each tile unit. Any, even the smallest deviations that will definitely exist, should be corrected immediately. If location inaccuracies do appear, the previously created markup may not correspond to the current situation.
- Of course, we must not forget about the seams, which are often used by specialists to create a fixed distance between cladding units. After the finishing process is completed, the crosses can be simply removed from the surface.
- After laying the tiles, it is necessary to press it a little against the wall in order for the highest quality adhesion to the surface to occur. For greater reliability, you can use a rubber mallet, which is tapped on the tile when the glue is still wet. If excess glue appears around the tile, it must be removed immediately with a regular cloth. Unfortunately, it will be very difficult to remove traces of dried glue later.
- It is also worth remembering that in the room where the cladding takes place, there are definitely sockets, pipes or other communications for which the tiles need to be adapted. Accordingly, you need to use special ceramic cutters to cut circles or semicircles. Such manipulations must be done carefully, since it is extremely simple to damage the whole tile, and it is not recommended to use damaged material.
Grouting the joints between tiles
If in the process crosses were used to create seams between the tiles, then at the very end these crosses must be removed, and then the seams must be filled with the appropriate grout.
To prepare the grout, the dry mass of the solution is often kneaded together with water in a small container. After thoroughly mixing, after 10 minutes, the grout becomes homogeneous, and it can be safely used to fill the joints. The joints are filled with a rubber trowel, and it is advisable to remove excess material with a regular damp cloth.


