Lightening the ends is a great solution for those who don't want to completely change their hair color. This coloring is called ombre, it allows you to cut the ends if necessary. To achieve a good result, you need to strictly follow the instructions.
Stage 1. Training
- Start preparing your hair 10 days in advance. Make nourishing masks, rinse with herbal decoction.
- If you use commercial cosmetics, give preference to a natural formulation without impurities and sulfates.
- A few weeks before the procedure, give up shampoos and conditioners for colored hair, otherwise the lightening result will greatly surprise you.
- The ombre will look natural if the difference between the ends and base hair color is slight. Choose mild dyes or toners.
- Determine where the ombre will start. Do not dye close to the root zone, even if you have short hair, otherwise you will get the effect of regrown roots. The ideal transition from natural hair to lightened ends is in the middle of the neck.
- Even though the ombre is made with light pigments, wear old clothes or a hairdresser's apron.
- Always use plastic, rubber, or silicone gloves. They are usually found in a pack of paint. Otherwise, the skin of the hands will be severely damaged by the bleaching ingredients. Prepare a brush or sponge for application in advance.
- Comb the hair thoroughly with a wide-toothed comb or natural bristle brush. Start at the tips and work your way up.
Stage 2. Clarification process

- Prepare a bleach or hair dye that will be used for the procedure. Keep in mind that bleach is very harsh, but it gives much better results. The paint is distinguished by its gentle attitude to the hair and scalp. Use a 20% hydrogen peroxide solution mixed with a commercially available hair whitening powder in equal proportions as the brightening ingredient. Combine the components into a homogeneous composition. Be sure to carry out the procedure with open windows.
- Run the comb over your head, parting it straight. Tie your hair in two ponytails. First, dissolve one and divide it into 7 strands, then do the same with the second. Use small elastic bands to separate the strands together. For owners of thick hair, it is recommended to increase the number of sections to 10. Now you need to take a flat comb with a lot of teeth and comb each strand in the place where the ombre will begin. This method will help to make the transition smooth, due to which the lightening will look harmonious.
- Proceed to apply the bleach directly. Take some of the makeup with a brush or sponge and go over the strand, starting at the ends. Your movements should be smooth, barely noticeable. Do not take a large amount of the drug, otherwise the clarification will turn out to be uneven and ugly. After the first stroke, do a second, but more thorough. Smear the ends well so that there are no unpainted areas. Climb higher, gently apply clarifier to the transition. Go to the next strands, covering them also in 2 touches. Use a mirror if your hair is short and you are working on the back of the head. Before finishing the application, make sure that the transition line is smeared, it should not be clearly visible. Cut the foil into rectangular pieces and wrap all the lightened strands with them. Grab some of the base color curl.
- Now you need to withstand the clarifier for a certain amount of time. If you wish to lighten the ends strongly, leave the bleach on for 30 minutes. In cases where you need to make your hair 1 tone lighter, keep it on for 20 minutes. Check the result periodically by removing the preparation from a small area of \u200b\u200bthe curl. When you get the shade you want, go straight to the wash. Rinse each strand thoroughly, otherwise the bleach will remain on your hair and continue to lighten. Do not remove gloves until the end of the procedure. After rinsing with running water, use shampoo. Do not use masks and balms for 6 hours.
White onion. Take 4 onions, chop them in a food processor, blender or grate them to make juice. Mix the mixture with 200 ml. lemon juice and apply to the ends. Wrap the strands in foil, wait 5 hours. Don't worry about your hair starting to smell. Lemon completely eliminates the smell.

Kefir. Take 100 gr. cognac, 5 quail yolks, 100 gr. kefir, 180 ml. lemon juice, 70 gr. regular store-bought balm. Combine the ingredients into one composition and mix with a mixer. Apply to the ends of the hair, wrap in foil so that the liquid does not flow out. Wait 9 to 12 hours depending on the desired result.
The method is good because the procedure can be carried out even on very dull, brittle and damaged hair. Kefir strengthens hair follicles, promotes accelerated growth and saves hair from split ends.
Vinegar. Take 150 gr. honey, 3 lemons, 100 gr. vodka, 600 ml. vinegar, 60 gr. rhubarb root. Pour vinegar over the rhubarb, let it simmer for 45 minutes, stir constantly. Squeeze the juice out of the lemon, grate the zest and add to the broth. Cook for another 10 minutes. After the time has passed, add honey and vodka, stir and apply the mixture to the ends. Keep it on for 15-30 minutes.
Want to change your look and brighten the ends? Perfect solution! Buy a 20% peroxide solution from your pharmacy and mix it with your bleaching powder. You can also purchase a dye that is more gentle on the hair. Use folk remedies that are no worse than cosmetic products to cope with the task.
Video: how to lighten hair without damage
Conquer yourself and win thousands of battles
Lightening dark hair. Types of clarification. Technique
Girls have two quirks that no man will ever understand. So, the first fad: curly hair must certainly be straightened, and straight curled into tight curls.

Quirk two: lighten dark hair, dye light hair into dark.This article will focus on the second quirk. Consider how you can make hair lightening with paint, the reviews of our readers became the basis for this article.
Introduction
There are several ways to lighten hair. You can lighten the entire length, and then we will achieve some uniform light color. Or you can make a partial lightening of your hair, in this case, dream up and come up with something very unusual and extraordinary, something that is right for you!
Tips
Readers often send us letters in which they ask what the lightening of the hair ends is called. Let's figure it out. It is called differently, depending on which technique was used: dip dye or.
About 10 years ago, these techniques were not so common; they were made only by pop divas, famous models, as well as everyone who could afford it. Today it is available to almost everyone.
The point of these techniques is that the brightening agent is applied selectively to the strands, while receding from the roots, depending on what length you have. Lightening the ends of the hair is suitable for all girls, without exception. But, as with any coloring, you need to take into account some tricky moments and nuances. It's about shades.
Professional stylists and hairdressers claim that:
- it is better to paint the ends in lilac shades;
- - in shades of ocher or amber;
- It is better for languid brown-haired women to use creamy colors;
- Better to beware of strong contrasts and use all brown colors.
But the opinion of experts is not the ultimate truth, all the most fashionable and interesting is created by those who go beyond. If you have a very creative stylist or hairdresser who has completed hairdressing courses, think together, what if you achieve some interesting result and then share with us.
Of course, many will now think: "What a stylist or hairdresser, I always do lightening of the ends of my hair at home." And it is not surprising, because many girls are by nature craftswomen and wizards.
Having studied this issue in detail on the Internet, after reading reviews and having seen enough of the girls bloggers on youtube, you can make quite a successful lightening of the ends of the house at the highest level.
Here is a good example, where the lightening of the hair ends is photographed, the photo may not convey all the beauty, but it is still fascinating.
Interesting fact: the ombre effect was brought into fashion by surfers. They did it quite by accident, the girls were resting all summer, riding the waves, sunbathing and swimming, meanwhile the hair color became lighter and lighter every day. In winter, when the roots began to grow, the girls noticed such an interesting result.
Strands
Lightening strands of hair appeared much earlier than lightening the ends. Remember the time when almost everyone went with highlighting, now it is less common, and it looks more aesthetically pleasing. Most likely, this is due to the improvement of technology and the emergence of a varied number of coloring agents.
Lightening strands on dark hair is of interest to more brown-haired girls and brunette girls. It looks advantageous under several conditions:
- Your hair is well-groomed;
- They don't look like "straw";
- The main color is even.
Otherwise, it is better to trim the tips and heal, and then proceed to aggressive influences in the form of lightening. You should also choose the right shade. Most often used are dark nut, coffee, dark brown, copper, light brown and other shades close to those listed. How many strands to lighten, and how thick they should be, depends on what kind of result you want to achieve.
Gradual hair lightening
If lightening the ends and strands is not enough for you, you can lighten your hair from dark to light. Before starting this procedure at home, you need to choose the right brightening agent. After all, the hair structure is a very fragile system that can be easily damaged.
Of course, you can always turn, as if by magic, from a burning brunette to a pretty blonde. However, the hair will never thank you for such a transformation, for them it is very stressful.
In order to make gradual lightening with minimal harm, several means have been invented:
- Masks that are applied before washing;
- Gradual effect paint;
- (for blondes who dyed dark, but decided to return themselves to their former self).
In any case, whichever method you choose, carefully study the levels of hair lightening so as not to be mistaken with the shade.
Conclusion
Modern methods of coloring provide a wonderful opportunity to radically change without causing severe harm to our hair. Lightening the ends, strands, or gradually lightening hair are gentle ways to change something about your appearance. Lightening hair can be safe, the main thing is to be smart about this issue and take your time.


This year, various techniques for partial lightening of strands are especially popular with the fair sex. By these concepts, professionals mean the lightening of the ends of the hair, which outwardly strongly resembles natural burnout in the sun.
 A procedure such as lightening the hair ends has a number of undeniable advantages:

Video: Lightening the ends of the strands
Home lightening hair ends
 Due to the increased popularity of partial discoloration, that is, lightening the ends of modern women of fashion, they are interested in whether such a procedure can be carried out at home. The answer to this question is positive, because there is nothing complicated in the procedure, which means that it is quite possible to cope with such a procedure at home. First, let's look at how to lighten the ends of your hair using the Ombre technique:
- apply dark paint to the roots, as shown in the photo;
- in 10 minutes. apply the remnants of this paint to the curls exactly to the middle;
- further, as shown in the photo, you need to take a paint of a lighter tone and apply it to the tips. Then wrap them in foil;
- after that, you need to wait for the time specified in the instructions and wash off the dye.
 If the lightening of the tips using the Ombre technique does not appeal to you for some reason, you can try this lightening using the Balayazh technique at home:
- to do this, first you need to tilt your head, then make an even parting and take the strands forward;
- after that, it is necessary to process the ends with light paint;
- the painted ends will need to be wrapped in foil immediately;
- after the hair lightens to the desired shade, they will need to be combed. Thanks to this, a sharp border will be removed, and the color will smoothly flow from darker to light;
- to fix the result obtained, you must again close the clarified areas with foil and wait a while;
- at the end, you just have to rinse off the brightening composition and style your hair.
Summing up, we can say that home conditions are not an obstacle to the procedure for lightening the tips. After all, the end result does not depend on whether the conditions were at home, but rather on the attentiveness of the person himself and the quality of the brightening agent.
Video: DIY Ombre
Adalind Koss
After the ombre fashion trend came to us from France, the beauties seriously wondered how to lighten the ends of the hair on their own. Every salon offers a similar procedure. Ombre allows you to get a smooth transition from the main color to light without radical recoloring. But you can try to create this effect at home.
Paint selection
Before you start lightening the tips, you need to make the right choice of paint for this purpose. It is preferable, of course, to use natural products.
The L'Oreal company produces a special line of Ombre paints, which will help dye curls in different tones. It looks like a simple paint, but when it hits the curls, it changes their color from dark to light at the ends with a gradual transition. It's hard to believe, but those who have tried the Ombre effect from L'Oreal claim that really one paint can do it. Healthy hair is the only prerequisite.
When choosing a finished paint, give preference to trusted manufacturers with a rich palette of shades.
In addition, the effect of lightened ends is obtained by applying several products. Any high quality paint is suitable for this. Brightening is achieved with Essential Color from Schwarzkopf. There is no ammonia in the paint, so there is minimal damage to the hair.
With the right shades of Garnier Color & Shine, you can achieve an interesting result.

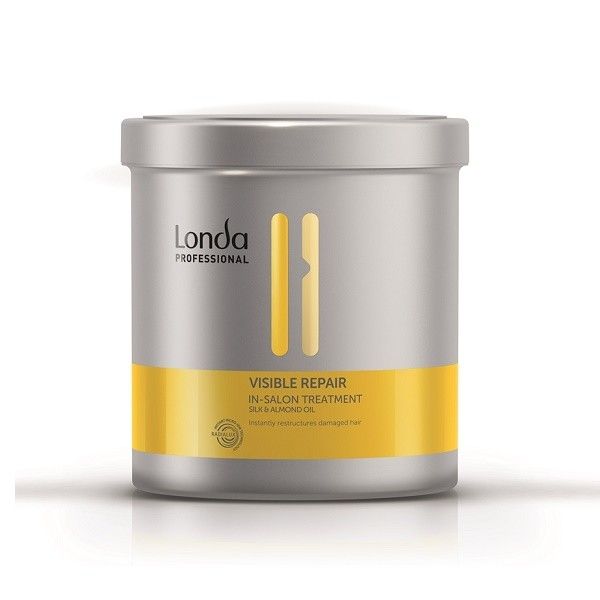
Wella offers over 70 different shades. The Londa line is a little poorer, but there is no ammonia in its products, they are almost harmless. Matrix products are great for lightening the ends on dyed hair.
Ombre varieties
It is worth noting that there are many varieties of the popular dyeing technique with lightened ends. So, ombre happens:
traditional two-tone. It is supposed to use 2 shades, but the border between them should be indistinct, the color seems to be stretched along the length. In this case, shades close to the native are suitable: chestnut, light brown;
traditional inverted. In this case, the hair, on the contrary, is lightened near the roots, and darkened at the ends;
vintage ombre. The emphasis is on the visibility of regrown hair. Very similar to traditional, but the line of shades is thinner;
pony tail. In this case, the hair is lightened in the ponytail. Suitable for owners of long curls. If there are bangs, it is lightened entirely;
transverse ombre. There is a very gradual transition from light to dark. There is a multi-tonal version with a multi-stage overflow;
framing the contour. This coloring will help emphasize the shape of the flaky haircut;
scandinavian ombre. An excellent choice for fair-haired fairer sex. Platinum curls flow to darker ends;
monochrome. Sounds like the Scandinavian variety, but the line must be clear. This is sometimes called the technology of highlighting some strands at the ends.
You can also lighten the ends on short to medium hair. More often, the emphasis is on highlights at the ends parallel to the parting or in any order.

Of course, every beauty who wants to move away from the usual hair dyeing techniques will find a suitable option for lightening her hair. Salon stylists choose the shade based on many factors. But at home you can achieve a fashionable color. Even if the attempt fails, it is always possible to even out the color.
Do it yourself ombre tips
So, to lighten the tips using the ombre technique, you need to choose a paint. There are special ombre products available in stores. In addition, you can take a clarifier. It is worth carefully reading the instructions before use. Dilute the paint in a glass or plastic bowl. Do not use enamel cookware! Wear gloves while painting:
apply to the ends of the stain with a brush, about 5 cm long. Let the stain work for 10 minutes and apply again. Here it is important to capture not only the ends with the paint, but also the area above them;
thus, in stages, with an interval of 10 minutes, cover the hair zone by zone, climbing higher each time;
using a fine-toothed comb, distribute the product evenly. Wrap your hair in foil and hold for a quarter of an hour;
rinse off paint, apply conditioner.
The fashion trend of balayage and ombre can be created on your hair yourself. To do this, it is enough to follow the basic rules of staining.
Remember that when the tips are brightened in this way, they are more negatively affected by the paint than with traditional coloring. If yours is too much, then you should not resort to this method.
Lighten hair ends in balayage style
The technique of lightening hair ends using the balayage technique is somewhat different from the ombre. Here comes the effect of the depth of the hair near the roots. This creates a visual volume with a very smooth transition to the lightened ends.
The paint is applied with vertical brush strokes. Don't worry that there won't be a smooth transition of tone. This technique is easy to do at home, because it is much easier than it seems:
if you have a short haircut, then the hair should be combed, so that they do not fall off under the weight of the paint, divide them into identical bundles;
treat each part from the ends with paint, not reaching the root by 2-3 cm;
after 10 minutes, it is required to apply and shade a new layer of the product, already a little closer to the base (up to 1 cm should be left);
after 20 minutes, the staining agent is washed off.
If your hair is medium in length, then instead of combing it, collect it in ponytails.
Hair lightening with peroxide
To lighten hair with peroxide you will need:
peroxide solution 3%. You can not use the product more than 3%, because this will lead to damage to the curls;
container with a spray bottle;
clamps;
crest;
cotton pads;
towel;
balm;
foil;
hair wash.

Instructions:
prepare for the process first. You will need safety glasses and gloves to protect yourself from the negative effects of peroxide;
before using peroxide to remove dirt;
dry with a towel;
detangle your hair well to avoid knots. This is important because they will have a different shade;
fill a container with a spray bottle with a peroxide solution, or dilute it with water in a 1: 1 ratio;
if you need to lighten several strands, then dip a cotton pad in the product and lubricate some curls. Another option is to spray the solution in a thin layer over the hair;
in order to color all hair, divide them into parts, apply a solution to each;
after carrying out the manipulations, leave the product on the curls for a while to achieve the desired result. The duration depends on the original color and the desired;
the average duration of the procedure is about 45-60 minutes. After 30 minutes, try rinsing some curls and checking the shade. If it fits, then rinse all your hair, if not, then wait another quarter of an hour or half an hour;
after rinsing off the peroxide, lubricate the curls with balm. This will help to regenerate softness and radiance. Keep the balm for 30 minutes;
repeat the manipulations until you get the desired shade. Peroxide brightens curls well, but not immediately. Perform new procedures every other day;
temperature will speed up the clarification process. If hair is intact, use hot air to stimulate color.
The use of peroxide gives a positive result only if the instructions are followed. The indicated holding time and percentage must not be exceeded.
While the process of coloring with peroxide is in progress, you can go out into the sun to strengthen the whitening effect. To do this, in the process of being under ultraviolet light, comb the curls. A hairdryer is also suitable to speed up the procedure. From the strands, make a bun at the top. Wrap in foil and heat it with a hair dryer for no more than 15 minutes.
To lighten the ends or individual strands, take a solution of 3% peroxide mixed with water. Water should be 30% of the total solution. You can add balm. After creating the solution with a spray bottle, spray it onto the ends. To get a light shade, you will need at least 3 procedures.
Dip Dye Tips
We all loved to paint pictures with bright colors. Shades of green, purple, blue are captivating. Contrary to the trend of naturalness and naturalness, there is a fashion for dyeing the tips in the Dip Dye style. It gives extraordinary fashionistas the opportunity to get ankle strands.

It is easier for fair-haired girls to make such coloring. The color is bright and deep. For dark hair, a stronger fixer is required. The painting process can be simplified by lightening the ends. Of course, such a hairstyle is not suitable for everyone for every day, therefore pastel crayons have been invented to create a temporary effect.
This temporary dyeing option is that the ends of the hair are painted with pastels or special crayons. The first hair wash eliminates this image. Pastels are produced in the form of jars of powder. Their use is convenient. The strand should be twisted into a bundle and painted to the required length.
The Dip Dye effect looks best when curled. Thus, bright shades play with all colors.
Coloring the ends with food coloring
Curls of different colors can cheer you up. The vibrant colors add a festive feel to any day. But what to do if you need to create a mood right now, but there are no pastels at hand? Food coloring comes to the rescue. It is a harmless analogue of Dip Dye paints. So, you need:
white balm;
bowl;
brush or brush;
dye.

Mix 100 grams of balm and 2 packets of dye in a container. Brush paint on ends or specific curls. In order not to dye too much, pin your hair high. Another option is to twist the colored strands into foil. After 30 minutes, gently wash off the color.
When using it, remember that there is almost no chemistry in such a dye. Because of this, it is safe for hair. But no one canceled the causticity, therefore, if it gets on the skin, it is difficult to wash it off. To avoid trouble, cover your shoulders and neck with a towel and put gloves on your hands.
April 25, 2014 2:33 pmLightening hair is a rather complicated procedure, if done correctly, the hair will become lighter as a result. Difficult, because initially the hair can be both natural and previously dyed, dark or light, what result is needed, how much lighter. First, let's figure out what bleaching and bleaching are, what kind of hair you need to choose. Then how to choose techniques, dyes and whether folk lightening methods work.
What is the difference between lightening and desaturation?
- Lighten hair with dye, and bleach with powder.
- Lightening and discoloration have different mechanisms of action.
Lightening is a procedure in which the natural hair pigment, melanin, is lightened, and it is performed with dye on natural undyed hair. The lightening dye cannot do anything with the artificial pigment molecules of previously colored hair. And hair bleaching is knocking out (washing off) natural and artificial pigment from the hair using a bleaching powder. This procedure can be done on both natural and colored hair. The pigment is located inside the hair in its protein layer, therefore, when bleaching, the structure of the hair is severely damaged, it becomes "empty".
Therefore, lightening is a more gentle procedure than discoloration, but also traumatic.
What to choose to get brighter?
Which one to choose depends on:

When lightening, the dye lightens the natural pigment of the hair and simultaneously introduces an artificial pigment, so there is no need to tint afterwards. But it happens that the result is too yellow or red, then, in order to muffle these shades, you can tint your hair (see below "Toning").
Lightening dyes can lighten hair color by 3-5 tones. To obtain a blond, fair-haired and brown-haired are ideal (5, 6 and 7 levels of tone depth).
For maximum lightening it is necessary to take super-lightening series of dyes, they are also called "superblond" or "special blond". Oxidizing agents for them are 9% and 12%. Standard table for holding time and oxide selection:
The mixing ratio is 1: 2 or 1: 1.5, depending on the brand of dye. Apply the dye to dry hair. Moisture from wet hair will change the pH of the mixture and lightening may be worse.
Bleaching
Hair is bleached with a lightening powder. Its other names are: supra, powder, blond. Usually it is a light or blue powder. It is a highly alkaline product that brightens everything: both natural and colored hair.


It must be diluted with oxide in a ratio of 1: 2 (or 1: 1.5). Oxide percentage selection:
- 6% - standard percentage for natural and colored hair
- 3% - for fine, damaged or previously bleached hair
- 9% and 12% - only for open techniques. These percentages of oxide with powder (with paint you can) cannot be used on the scalp and in foil.
https://youtu.be/vEv9iXTvhsM
Technique:
- Clarification of regrown roots. The dye must be applied only to the regrown hair roots, wait for the exposure time and rinse.
- Completely (from roots to tips).
- In strands, adding a gradient, highlights on the hair or lightening only the ends of the hair.
Lightening the entire mass of hair for the first time
For an even hair color along the entire length, it is necessary to dye the length, then the hair roots, because they brighten much better. Stages:
- Dilute the dye lengthwise, taking the oxide 1 step higher than the roots. Step back 1.5-2 cm from the hair roots and apply the paint to the length.
- Wait 25-30 minutes. Apply a new mixture to the roots with oxide 1 step lower than the length. And withstand the full staining time. Usually the roots need 30-40 grams of dye.
For example, when lightening with paint, a lightening dye and 12% oxide are taken for the length, and 9% for the roots. Then, as a result, there will be no "overexposed roots", but a uniform color along the length. When bleaching with powder, 6% oxide is taken for length, 3% for roots.
Brighten the ends or strands
At home, it is very difficult to apply the dye correctly and get a beautiful result. The basic rule in application is to apply more composition to the tips and less to the roots, and also blend the dye to the roots so that the line is smooth. The application scheme can be different.
Lightening strands
Https://youtu.be/MrtyHpN5mjU To lighten the strands, you will need foil or film to separate the colored strands from the rest of the hair. When creating highlights on the hair, the ombre effect looks beautiful and natural, when the strands of the face are lightened more, I eat the rest.
- Select the strands diagonally or in a zigzag fashion.
- Apply the dye with shading.
- We apply it with foil or film so that the dye does not cause light spots on the rest of the hair.
https://youtu.be/05UBHUrRFE0
Tips on tails
- We tie 4 tails. It is advisable to tie them higher on the face.
- We paint the tails, shading the border.
- We keep the exposure time and wash off.

On the fleece
- Instead of tying ponytails, we comb the strands or braid the braids. This will create a jagged border and the transition will be more uniform.
- We paint the tips with a lightening agent.

Is it possible to paint after clarification
- When lightened with paint... Since lightening dyes lighten and artificial pigment is introduced, it is not necessary to tint the strands afterwards. But it happens that the color turns out to be too yellow or red. In this case, it is not recommended to immediately re-brighten, because hair quality will suffer greatly. It is better to tint the hair on a small oxide (1.5-1.9%) with dye, but not with a lightening dye, but without ammonia.
- When clarified with supra (powder).After bleaching with powder, toning is necessary, because the pigment is knocked out of the hair, and you need to fill it with artificial tinting pigment.
Toning after lightening
Depending on the color after lightening (red, yellow-orange or yellow), it is necessary to correctly select the level of the dye (the first digit in the number on the package) and the direction that or. 
- It is necessary to paint over the redhead after lightening with a dye at level 7 with an ash-purple direction. Ash and purple contains blue, which will neutralize the orange pigment, and some of the red pigment from purple will prevent possible greenness.
- If the hair is bright orange after bleaching, i.e. contain a red-orange pigment, you need to remove it with a dye at level 6 with. Ashes contain both blue, neutralizing orange, and green, neutralizing red.
- A dye with a violet direction will help get rid of yellow hair after lightening. In dyes of various brands, it can be designated as nacreous, pearl. Depending on the brightness of the yellow tint, you need to choose a tone depth level from 8 (with bright yellow) to 10 (light yellow). The picture and table will help you with this.
| Color after lightening | Depth tone level | Dye selection |
| Red orange | 6 | Dark blond ash or ash purple. For example, 6/16 WELLA ILLUMINA |
| Orange | 7 | The blond is ash-purple. For example, 7/16 Estel De Luxe |
| Yellow | 8 | Light blond purple or pearl. For example 8/81 Londa |
| Light yellow | 9 | Light blond pearl (pearl, pearl-ash). For example, 9/1 Constant Delight |
| Light yellow | 10 | Ash blonde violet (pearl, pearl). For example, 10/6 Wella Color Touch |
Mixing ratio 1: 2 or 1: 1.5. The holding time is 15-20 minutes. If only the roots are too yellow or red, then tint should be applied only to them. Already before washing off the dye, you can comb the tint lengthwise.
Brightening paints
Typically, lightening series are marked by manufacturers with a special marking, for example, 12th row Special Blond, super lightening series, etc.
Londa
The lightening dye in Londa Professional is designated as Special Blonds. This dye is in 7 shades, the first number in the designation is 12 (12th row). Lightens up to 5 tones. The proportion is 1: 2. 
Estelle
Estelle's professional line includes two types of super-lightening products:
- ULTRA BLOND (lightening 3-4 tones).
- Вlond Вar Сouture (up to 5 tones). In this series there are 2 types of dye Rich Color (more saturated tones), Light Color (more transparent colors). The usual proportion is 1: 2.

| Natural base (original color) | Mixing ratio | Holding time | |
| Haute Couture Blond Bar: Oxidant 12% | |||
| Rich color | Light Color | 50 minutes | |
| 4, 5 | 1:2 | 1:3 | |
| 6 | 1:3 | 1:4 | |
| 7 | 1:4 | 1:5 | |
Igora
In the game, the brightening series is called Royal Highlifts. Mix with oxide in a 1 to 2 ratio. 
Garneier
 Garnier will lighten previously colored hair with Decllorant. It contains a bleaching powder that adds to the paint. It can be used on natural hair too. https://youtu.be/FnLDnryNWYA For natural hair and regrown roots, the super lightening series is suitable.
Brightening powder
There are bleaching products in every professional paint series and in some household paints. By the form of release there are:
- Classic white or blue powder.

- Powder for open techniques. After dilution with oxide, it has a more viscous texture, convenient for application using open staining techniques (shatush, balayazh, etc.).


- Color bleaching cream. Differs from powder in creamy texture and more gentle lightening formula.


Home lightening
You can do all the stages of lightening at home yourself, but much more difficult. A professional will do, based on experience, an analysis of the original color, quality and the desired result and select the most optimal staining option. But if you decide to do the lightening at home, then here are some rules:
- Dye lightening is suitable only for natural hair. The rule of coloring applies: “paint does not lighten paint”. And you can bleach both natural and dyed hair. When leaving the dark color, the situation is different, read about it in this article.
- For permanent lightening (e.g. roots), do not apply lightening dye to previously colored hair. This traumatizes them very much.
- A few days or a nourishing mask is recommended before lightening
- For sensitive scalp, do not wash your hair for 1-2 days before coloring. The sebum that is released during this time will protect the skin during lightening.
- If possible, use professional dyes, not household dyes. Their formula is more gentle and gentle.
- Try to apply the brightening mixture quickly, spending no more than 15 minutes, so that the first strands applied are not too long with the paint and the mixture does not lose its activity.
- Do not increase the exposure time more than what is written in the instructions, the hair will no longer lighten, but will deteriorate thoroughly.
Hair lightening with hydrogen peroxide and hydroperite
Homemade clarification with hydrogen peroxide or hydroperite may have some effect. BUT!
- Hair quality will be damaged. Yes, dyes also contain hydrogen peroxide, but it has a polymer base containing care components.
- The result will be worse than lightening with paint, because you need an alkaline medium (ammonia), which would open the cuticle for peroxide to penetrate into the hair. If the hair is porous, then the peroxide can do its job without ammonia, but if it is good quality hair, the lightening effect will not be particularly noticeable. If you use hydroperite diluted in water, then it contains urea, which helps to open the cuticle, but the quality of the hair will be much worse.
- Only the background color of the highlighting will turn out (brown, red, orange, yellow), because there are no artificial pigments to neutralize it.
Brightening spray
Such a product is offered by the John Frieda brand. Her Sheer Blonde Go Blonder spray contains hydrogen peroxide and promises gradual lightening up to one and a half tones.  How does he work:
- Apply to clean, damp hair
- Use extra heat from a hair dryer or straightener.
There is logic in this, and there will really be a tone and a half lightening, because the extra heat opens the cuticle, the hair is clean, and the dirt does not block the penetration of peroxide for lightening.
But the quality of hair after all thermal and chemical influences suffers greatly, they become dry, weakened, for some, with intensive use of the spray, the hair begins to fall off. If you decide to try a lightening spray, then you should pay special attention to hair care.
Folk remedies
It should be said right away that natural dyes henna, chamomile, honey, cinnamon, kefir, etc. cannot lighten previously colored hair. They can only slightly change the color of natural hair.
Why is there an opinion that natural remedies can lighten?
- Because cold shades are visually perceived as darker than warm ones, then visually it may seem that the hair, which has become more yellow after chamomile, has lightened. The blue pigment that gives the hair a cold shade is very fragile, both natural and artificial. Even ultraviolet rays from the sun can destroy it. The recipe for clarification with lemon is based on this, in which the strands must be smeared with lemon juice and go out into the sun.
- Some products, such as lemon juice, kefir, vinegar, have an acidic pH, under the influence of which the cuticle (the upper scaly layer of the hair) begins to adhere more tightly to the shaft. From this, the hair becomes smoother and shinier, reflects light better and therefore visually changes color. The danger is that with frequent exposure to very acidic compounds, the hair becomes brittle and brittle. Balms and conditioners also have an acidic pH, but one that smoothes the cuticle scales without damaging them.
Benefits of natural lightening:
- Do not damage hair
- Make the structure more dense
Disadvantages:
- They are not able to radically change the color, only give it a direction.
- They can significantly complicate the staining in the future, because can give unpredictable results in the form of greenery.
- Very acidic formulations with long-term use make hair weak and brittle.
- Some organic substances, for example, from kefir, mayonnaise, eggs, etc. does not wash out of the hair and begins to deteriorate naturally. From this, in the long term, with the constant use of such products, the hair deteriorates.
If the result of lightening with folk remedies suits, and the consequences are not scary, then here are some recipes.
Clarification with lemon
It is good to carry out this procedure on vacation in the summer, when you are in the sun a lot.
- Squeeze lemon juice
- Add ¼ part of warm water. If juice is 100ml, then water is 25ml.
- Apply to hair or individual strands. For convenience, you can use a spray bottle.
- Go out in the sun for 30-60 minutes. Wash off the composition.
Chamomile infusion for clarification
- Pour half a glass of medicinal chamomile flowers with 2 glasses of warm water (70-80 degrees). Leave to infuse for half an hour.
- Rinse hair with this infusion.

White henna
White henna is just a natural name for a synthetic product that contains hydrogen peroxide, ammonium persulfate, etc. A very dubious product in terms of hair color and quality. We do not recommend it for lightening. 
What to do after clarification?
After clarification, the following problems may arise:
- Hair will become dry and damaged, may frizzy, break off.
- Gradually, the color will wash out to the background, yellowness or reddishness will appear.
Care and recovery
After lightening, hair requires:
- Gentle cleansing. It is advisable to use mild sulfate-free shampoos or series for colored hair. Harsh alkaline shampoos will wash out color faster and make hair even stiffer.


- Use a hair mask 2 times a week. It is advisable to do a nourishing regenerating mask once, and a moisturizing mask the second time. The mask should be applied to damp hair washed with shampoo, under a cap and a warm towel. So the care will penetrate deep into the hair.

- Use conditioner and balm after every wash.
- After washing, apply indelible conditioners or serums to damaged ends or lengths.


- Before thermal exposure (drying with a hairdryer, straightening, curling), it is imperative to apply a thermal protective agent.


- It is advisable to do after the lightening procedure Olaplex "Active protection" care with, or use Olaplex No. 3 at home. This is a protector that will restore some of the disulfite bonds inside the hair, destroyed by lightening.
Maintaining color
Proper care will help prolong the life of a beautiful color. the better the quality of the hair, the better the color retention. A shampoo with purple pigment or a toning mask-corrector will help to remove the appearing yellowness. All corrective shampoos are highly alkaline. without this, they will not be able to slightly open the cuticle for the introduction of neutralizing violet pigment onto the surface. It is better to use them 1-2 times a week, not more often.


The toning mask is able to slightly correct the color and improve the quality of the hair. Apply it on damp hair for 3-10 minutes. The Estelle mask is available in 2 types: a bottle with a dispenser and a tube.


