An interesting trend in Moscow: garage cooperatives are turning into residential areas. The owners rent out their boxes as apartments for rent to nonresidents.
And today I will tell you and show you the process of building one garage-house in which they will live for 5 years.
Preamble. In the early spring of 2006, I came to work in Moscow. Like others who came in large numbers, he started with a rented apartment. By 2008, the prices and condition of this housing, as well as the "services" of realtors, I was pretty much fed up ... fed up. I started looking for an alternative. I will not bore the reader with a description of all the options and factors I have considered and calculated, but by the fall of 2008, the idea was formed in its final form: - buy the cheapest garage, in the place closest to work and comfortable for living, - design and build housing (project will depend on the specific conditions of the construction site), - costs should be minimal (since it is unreasonable to make large investments in a pilot project) and phased (since it is unreasonable to spend the entire budget at once), - the planned budget of the project is about 300 thousand rubles. Yes, that's right - approximately the annual cost of renting housing in Moscow.
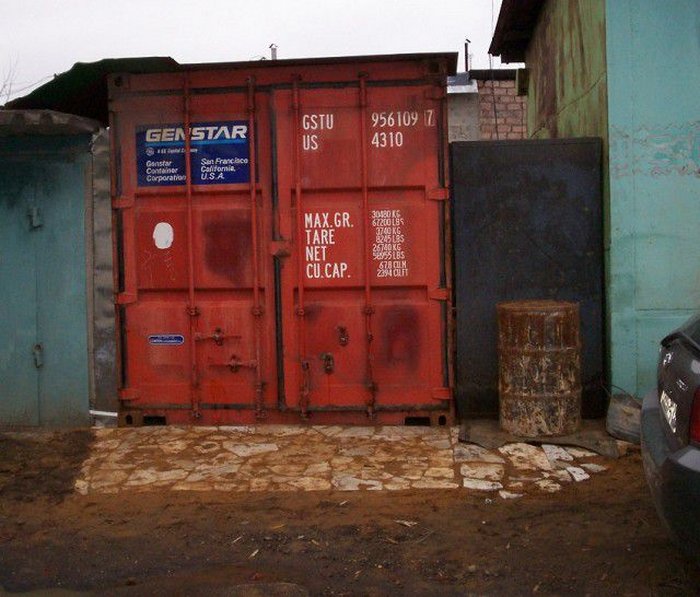
Choosing a construction site is simple. I looked through all the ads for the sale of garages, chose the cheapest options, examined them (immediately with an eye to the possibility of restructuring into housing), carried out reconnaissance of the area and interviewed the aborigines (for other interesting options, the nature of the environment, the possibilities of connecting to electricity, the prospects for demolition, etc. etc.). As a result, on September 27, 2008, a metal garage was selected and purchased for only 45,000 rubles, 10 minutes walk from the metro, in a prestigious area of \u200b\u200bthe capital, 9 km away. from work and only 10 km. from the Kremlin. One of the local inhabitants was spinning at the gate, waiting for the "spacer".

Construction was carried out on weekends, on its own (1 person). An excellent warm-up after a week of office work at the computer! So, the advantages of the project include savings on visits to the gym. In the active phase of construction, the phrase was relevant for me: "Oh-oh-oh, finally Monday !!!" We disassemble (and in some places - just break) the old garage. We carefully store the released metal nearby - it will still be useful to us.
Back view

Clearing a construction site for a new building ...

And level the ground.

We are importing KAMAZ of sand ...

And align the sand cushion under the design mark.

Oh, I am already describing the progress of construction, but I forgot to acquaint an inquisitive reader with the project. So what am I building here? And I am building, no less than a two-story modular cottage, with fully autonomous life support systems. Two-story - understandable. Modular - made up of modules that can be quickly and easily relocated. After all, at that time I did not know all the risks of the project, so I preferred to have a backup option in case, say, the demolition of garages, problems with the environment, etc. There would be problems - I would load the modules with a crane into two trucks and move to another site. Fully autonomous life support systems mean complete freedom from all centralized communications and "bindings" to a specific place, using only its own and imported resources and, therefore, owing nothing to anyone. My project was flawless, including legally: the site was allocated to me as a member of the garage cooperative (which is documented), I will install on it, without a foundation, on the ground, two modules, which are essentially steel cubes (this is the permitted use of the site). I have documents for the cubes and their contents. These cubes cannot be covered by any laws regarding real estate or housing (since they are simply neither the one nor the other). Thus, to the question of the legality of living in the garage, I answer - no laws have been violated, no one lives in the garage, and no one has the right, in any way to restrict the owner of the iron cube, in his right to be inside this cube or to store various objects and liquids in it ... Except for those directly prohibited by law - such as weapons, drugs, explosives, etc. That is, the complete autonomy of life support systems is also a factor in the legality of placing such a structure on a site that is not equipped with either water supply or sewerage. However, for 5 years, no one made any claims to me, did not ask any questions, did not check the legality of my residence. But nevertheless, I was ready for any surprises. Probably, the reader has already guessed that with such a serious approach to business and careful consideration of all the details, the project was doomed to success? Yes, that's right. But a little later.
In the meantime, the future successful Muscovite poses after a hard day of work to throw sand with a shovel and level it, against the backdrop of a future den of luxury and comfort. I asked to take a picture of a passing pedestrian. He hid his face - why do I need extra popularity?

On the leveled sand, we lay sheets of metal from the roof of the dismantled garage. The result is a perfectly horizontal platform with a hard (steel!) Coating. The first module can be installed. Surprise! In addition to a detailed PHOTO report, I also have a detailed financial report and timing. How else? An investment project is not a horseradish! An accurate assessment of its economic performance is required. Thus, reader, very soon you will receive an accurate and comprehensive answer to the question "How to build yourself a house in Moscow for 300 thousand rubles?", Troubling "Muscovites spoiled by the housing problem", at least since the creative heyday of the author of the quoted phrase. Here is the chronology and costs at the time the site is ready (I apologize for the destruction of formatting when transferring data from Excel): 09/27/2008 Purchase of a garage 45,000 Entry fee to GSK, payment for 2008 2,000 10/04/2008 Flashlight, battery packs 97 10/04/2008 Ax 156 05.10 .2008 Bayonet shovel 160 11.10.2008 Scrap, shovel shovel, boots, mittens, plumb line, bucket. 900 23.10.2008 Galvanized profiles 3 m. 3 pcs. 420 Spirit level 1.5 m. 550 Scissors for metal 300 Plumb line 200 10/25/2008 Padlock 78 Pit sand 8 m3 6,000 Total, as of October 25, 2008 55 861 rubles were invested.

We brought and assemble the first module.

And here it is - a standard 20-foot container, 6x2.5x2.5 meters, sealed, with a sealed door, capable of withstanding a multi-ton load from above and a multi-point storm.

The beauty. We do the cleaning inside, lay cardboard on the floor ...

Now there is a place to put tools, building materials, overalls! There is where to change clothes, shelter from the rain or relax. My own premises in Moscow! Hurrah! Hurrah! Hurrah! Let's count, dear moles. © 26.10.2008 20-foot container. 38 000 Loading and unloading, transportation of the container 9 600 Transportation of the container by GSK 100 01.11.2008 Water canister 10 liters. 3 pieces 270 Water canister 20 liters 159 Mop 61 Terry towel 2 pieces 34 Gloves with latex 2 pairs 32 Rubber gloves 32 Respirator U-2K 22 Garbage bags 60 Broom 49 Folding chair 300 02.11.2008 Marble transportation 50 Payment for garbage collection 200 03.11 .2008 Galvanized 2 m2 thick. 0.45 mm. 400 Bolts 15 pcs. 100 Hacksaw for wood 200 Total costs for 1 module - 49 669 rubles.

We sew up galvanized gaps between the adjacent garage and my garage, lay out the area in front of the gate with marble (found in the dump, of which there are plenty of them near the territory). At the site of the future main entrance, there is a steel panel from the old garage, supported by a rusty barrel.
We collect back wallusing the details of the old garage. By the way, the exit to the backyard is ready - the gate in the gate from the old garage is quite functional. And the former gate itself is now just part of the wall.

Top view of the fenced-in area. My construction site is now 7 x 3.5 meters.

We are taking the second module.

Installed. With a cantilever ledge from the facade - both an increase in area and a canopy over the gate.


So, the second module is a factory-assembled BK-00 block-container, external dimensions: width 2.45 m, length 5.85 m, height 2.45, supporting frame - welded metal, frame - wooden, roof - flat welded from sheet 0, 8mm, outer sheathing - galvanized corrugated board С10-40-1150, interior decoration – plastic panels, wooden floor, window with bars, door. We install it on the gaskets, sawn from the board, foaming the joint of the modules.

Costs: 11/15/2008 Boards 25 320 Nails 180 Hinged lock 147 11/23/2008 Wadded jacket 277 11/29/2008 Residential block container 68,500 11/30/2008 Winter assembly foam 2 bottles 220 12/06/2008 Galvanized 3.125 m2 thick. 0.5 mm. 650 Self-tapping screws 800 gr. 120 07.12.2008 Transportation, installation of a block container 9 500 Transportation of a container by GSK 100 Total, costs for 2 module - 80,014 rubles. The total construction budget by 07.12.2008 amounted to 186 thousand rubles. Ok, it looks like we'll meet the planned budget! By the way, as a tip: Never buy READY block containers. The quality of their workmanship, and especially the insulation, is full of zizzdets! I had to remove the cladding and practically re-lay the heat and wind insulation. To the crooked position, IN PLACES, 5 cm. foam, added 5 cm. layer ISOVER 11. As a result, the total thickness of the insulation became 100 mm and all gaps were eliminated. The result is an "Arctic" modification of the block container! In general, it was necessary to buy only a frame with an external plasterboard, insulate it on its own, lay the floor and make the wall and ceiling cladding made of gypsum board and wallpaper. In terms of price, in the end, it would have turned out almost the same, but in quality - incomparably better. So, the core of the structure is ready, the fate of the project now depends only on the creation of reliable and autonomous systems life support. The issue with the heating system was resolved unexpectedly simply - it turns out that the European bourgeoisie have been producing perfect solution Problems autonomous heating small buildings - gas convector. Who is interested in technical details - google yourself, but to be honest - they shocked me!
This convector + propane tank \u003d reliable, stable, comfortable heat in any shed for mere pennies. Piezo ignition, thermostat, burner extinguishing protection. Air intake and exhaust of combustion products are from outside, through a coaxial pipe, which is also a heat exchanger that heats the incoming air with the heat of the exhaust gases (+ 10% to efficiency). The combustion chamber is completely isolated from the room, so even in the worst (almost unbelievable) case, the gas will not penetrate into the room, but go out through the pipe and dissipate. I applaud the bourgeois engineers and manufacturers, and buy this miracle of engineering for 10,000 rubles. Isn't he beautiful?

We install, strictly following the instructions and showing our own ingenuity and ingenuity. By the way, as it turned out, sheathing (even a plastic one!) Wall with galvanized coating was unnecessary. This device does not heat up the wall on which it hangs at all. I put a galvanized sheet under it, misunderstanding the word "CONVECTOR" in its name. Note: Wikipedia kindly informs us that "CONVECTOR - heater, in which heat from the heat carrier or heating element is transferred to the heated room by CONVECTION. Natural convection, in which warm air, already heated by contact with a coolant or heating element, rises upward, and its place is taken by colder room air, is enhanced by the design of the convector. "I get up and once again applaud the bourgeois engineers!

And finally, the long-awaited moment! Turning the knob, clicking the piezo ignition button - through the viewing window we observe how a blue light flashed above the burner.

The heat exchanger has begun to heat up (black housing with a viewing window). Now it is scorching hot. I put in place a beautiful white case - a stream of warm air begins to flow through its holes. After about half an hour it gets hot in my sweatshirt and I undress. After another half hour, the room temperature reaches room temperature.

Windscreen at the end of the coaxial pipe of the convector (Coaxial means that the exhaust pipe is located in the center of the air intake pipe).

On the street - minus 10. The heating system is completely ready and tested. I no longer have to change clothes in the cold in wet, frozen overalls. December 27, 2008. Soon New Year... I am leaving for my homeland for the Christmas holidays, and will continue my Moscow construction after my return. Happy everyone! Good luck to us in 2009!


January 2009. I am laying linoleum. Install (lay out) furniture


Pumping up furniture. Making the bed. Judging by the size of the bed, I am an optimist and I am sure that Muscovites will appreciate the comfort of my home and my own merits and will be frequent guests (at least) or roommates (ideally) here. As it says: "A man's self-esteem can be judged by the number of condoms he takes on a date. Even if this date is the first."

Heating is working, bed is available. I make a test night. Alone. In a steel box, in the middle of a strange, deserted area filled with assorted garages. Fine. During the night, the house warmed up well, in the morning it was warm and cozy. I have breakfast with cookies and water from a bottle. If you want hot tea, you urgently need to get a stove. But it's not a problem. On the agenda, the most critical issue for the project is autonomous water supply and sewerage, a workable shower and sink. If this issue cannot be resolved, this is not a residential cottage, but just a heated barn. I solve the problem with the sink simply - I use the time-tested, "village" system. It should be noted that I was born and raised in a village, so I do not experience a culture shock at the sight of a washstand. The advantages of the washstand are its simplicity and super-efficiency in water consumption. After all, for the first 17 years of my life I only used the washstand, millions of Russian villagers and summer residents still use them, and no one complains. With a shower, the question is more complicated. I am an office worker - a daily shower, shaving and a clean shirt are a must. I know that a person with short hair, 10 liters are enough for washing warm water... In order to properly wash with such an amount of water, it is necessary that its thin stream flows from above and can be quickly adjusted and overlapped. A compact shower stall with a reservoir of warm water on top and a faucet looms. Storage electric water heater for the ceiling? Not an option - you cannot rely on an uninterrupted power supply, a low ceiling and a high shower tray do not leave space for a water heater, in addition, you need to ensure that the water can be easily drained from the system. To be able to completely turn off the heating in winter, for periods of my long absence. I choose a simpler, ultra-reliable and non-volatile option: water is heated to the required temperature in a 15-liter enamelled tank on a gas stove (readiness time 15-20 minutes), then pumped into a compact supply tank above the shower stall, from where it is consumed by gravity as needed. Ended - an additional portion is pumped from the tank. So, a week per person will need 60-70 liters of tap water and about 10 liters of drinking water (I have breakfast and lunch at work, in the evenings only tea. Well, on weekends, soup). Thus, to ensure water supply, I have to buy 2 five-liter bottles of drinking water in Ashan (for 100 rubles) and fill 2 twenty-liter canisters and 3 ten-liter cans with tap water free of charge. Bullshit question - in the nearest shopping center I load the cans into the cart, fill it with water from any water tap I find and move the cart to the car. I overload the cans into the trunk, then I transfer the cans from the trunk to the house for 15 meters. A little physical activity is very beneficial for office plankton! You can also fill up with water at work, or with friends, but anywhere. One "BUT", the car becomes part of the water supply system (and gas supply - too), its loss for a long time is very critical - you will have to transport gas and water by taxi.
I buy a shower stall and start assembling it. The pallet and walls are assembled.

Other components (sink, washstand, gas stove)

We sculpt "from that" a consumable reservoir with a tap. We connect the components with hoses.

The "heart" of the system is a dacha shower-trample. Its energy independence and the highest technical and economic characteristics make it the undisputed leader among all other possible pump options. Pumping 10 liters of water is only 20 times (without being distracted from washing) to massage elastic red "boobs" with your heels (which for a man, you must admit, is not at all difficult, but rather pleasant :)


Washstand, sink, gas stove are ready. A hose hanging behind the washstand is connected to the pump. It is necessary to lower its end into the tank with warm waterstanding on a tile. And you can go to the shower.


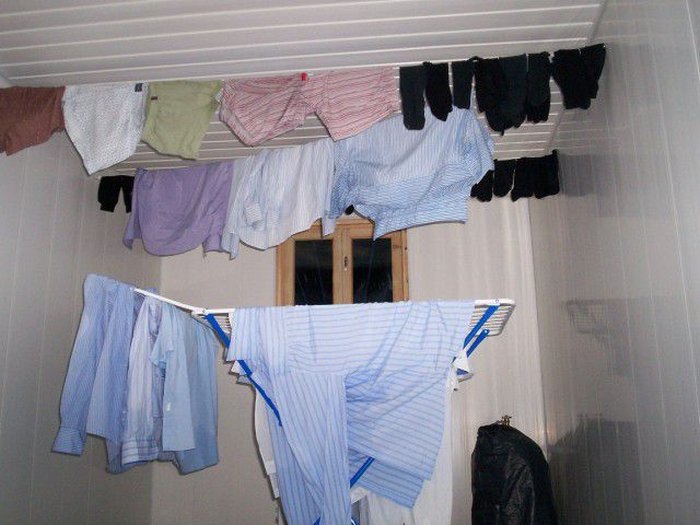
You ask: "What about the washing?" I answer: "As long as there are self-service laundries in Moscow, it is easier to go and wash in rented washing machines than to build an autonomous one and bring water for it" 200 rubles is 1 wash in a 8 kg machine. linen. I just bought 30 shirts and 30 pairs of socks and only did it once a month. Loaded 3 cars at the same time. In total, the cost of washing was approximately 600 rubles per month. I watched TV a little while waiting for the wash to finish. He put the damp, washed laundry in bags and took them home. He hung up, completely opened the ventilation and added the temperature with the heater thermostat. After a few hours, the laundry was dry. Imagine the amount of moisture evaporated from SUCH volume of laundry and estimate the power reserve of the heater and ventilation system. In the photo - about a fifth of the usual washing volume is being dried.
Sewerage. Initially - in cans. From the washstand: in winter - into the 10-liter under the sink,

In the summer - in a 30-liter shower canister outside.

Why not there in winter? A one-time powerful discharge of warm water comes from the shower and the pipe does not freeze - all the water flows out of it before the heated pipe freezes. The drain at the washstand is sluggish - the pipes will not warm up and the water in them will gradually freeze. As I already wrote above, draining the sewer into canisters allows me to declare about the autonomy of the building and the absence of its impact on the surrounding area. In case of any attempts to claim me, I could demonstrate the twisting of sewer canisters with plugs, loading them into a car and taking them out for disposal in an unknown direction. However, since no claims were made, and soapy water does not belong to highly toxic waste, there were no problems with its disposal on the contaminated territory of the garage cooperative. About a couple of times a week (and only in winter), you need to empty the washbasin canister. Once every 2 days (in summer) - shower canister. In winter, instead of a canister, a plastic bucket is placed and an ice pack in the form of this bucket is kicked along its bottom, in the nearest snowdrift. It will melt in the spring. For cheetoplugs who want to shout about "Dirty Moscow" I recommend walking through the garages and admiring the puddles of engine oil, dumps of oil canisters, waste filters, bottles, bags, corpses of stray dogs (and their future followers, who are also not engaged in cleaning territory), etc. This is really a problem. And given that garbage containers are scattered everywhere, the reason for this is the banal laziness and indifference of the aborigines. I repeat once again, the construction of my building provides for the removal and disposal of waste. Of course, haha, I took out liquid waste and handed it over to a specialized company for disposal. If necessary, I will even present supporting documents. Law and order come first! So, the main life support systems are ready (in addition to those described, there is also a ventilation system and later there will be an air conditioner). I will not describe the toilet, since I do not see any problems with its device. There are dozens of ready-made solutions - from an elementary plastic bottle and bucket to dry closets of various designs, shapes and sizes. And then there is just an excellent solution - an autonomous sewage system. This is by far the most optimal way to purify domestic wastewater. After all, if you, the reader, cannot independently solve the problem of disposing of several hundred grams of your own excrement, then what, kid, are you doing on this site? And where is your mommy looking?
From the end of March 2009, I started permanent residence in their new home, while completing it. All the same - exclusively on weekends. Interior situation in 2009


I hung a thermometer with an external sensor on the wall. Above - the temperature inside, below - outside.

In June 2009 I connected to electricity, got used to it, got accustomed ... 
And construction has intensified.

From the remnants of an old garage, I added a rear facade.

I bought an inverter welding machine and a "grinder". And the work began to boil.

The annex is attached to the modules with screws - to preserve the ability to quickly disassemble and transport the building.

I decided to practice making steel doors from the emergency exit of the 2nd floor (to the roof of a neighbor). Considering I just learned how to weld on the Internet, not bad for the first door. Only having welded a kilogram of electrodes did I begin to feel a little the essence of electric arc welding - to understand the dependence of the set current strength on the thickness of the metal being welded, the position of the seam, etc. It seems that experience is important in welding - the longer and more you cook, the better the weld.

General view of the emergency exit door.

Summer landscape from the backyard - why not a village idyll?

Having trained in welding, we move on to the main facade.

The main entrance door from the inside ...

And outside

I'm starting to paint the facade. To work with the upper part of the facade, from the last remnants of the old garage (pediments), I built additional scaffolding. With a fenced work platform! Working from the stairs is too dangerous, and becoming disabled was not part of my plans. Non-observance of safety precautions is the cause of injury! And given the specifics of the construction industry, injuries could be severe, even fatal. So flying down the stairs could easily have ended both this project and my ability to be active.

Painted main facade.

The fence was built from the remnants of material so that passing cars would not spray mud from a puddle on the freshly painted facade and on the gate.

Working out the east wall

The roof is already ready

And the sealed joint of the western wall with the roof of the neighbor is also ready.

SUDDENLY! A film crew came in large numbers, set up props, cameras, actors and began filming a series about cops and bandits! Apparently the brutality of our landscape did not leave the filmmakers indifferent! Thus, the freshly painted facade of my house made its modest contribution to Russian cinema. Alas, this bright film debut went unnoticed for the general public. It was in vain that I suspended my work, so as not to disturb the filmmakers with the noise of the "grinder".

A couple of hours later the filmmakers moved on to shoot shootings on the roofs of neighboring garages, while I continued to work on the eastern facade. I welded a window with a strong grate and a door for another emergency exit.


Inside made interfloor overlap plywood on steel beams from the corner


I will be replacing this temporary ladder with a new one soon.

Another window with a lattice (on the north facade)

It's outside

I'm making a new staircase. Steel ...

With wooden ...

In steps.

Let's take a look at what's in the first module. Warehouse. Just a warehouse for tools, building materials, households. utensils. Illuminated by a spotlight.

It's already November. It's time to end the 2009 construction season. It's cold and rainy. The window of the welding mask fogs up with breath. The building perimeter is closed. Ready for winter.

Inside, too, almost everything is built. Finishing remained.


Let's sum up the results of the outgoing 2009. This year was the main one in the fate of the house. During this year, I turned the house from a vague project into my cozy and favorite home. I didn't have to push in the metro - the road to work took me about 15-20 minutes of a quiet car ride through the most beautiful places in Moscow, on roads not prone to "traffic jams". My parking space (and even several), right under the window, was always free. I didn't have noisy neighbors, guitarists and drunks didn't gather under the window. In short, I lived in an idyll, not feeling in any way the problems that bother Muscovites. My neighbors (and only appearing during the day) were the owners of garages and workers of various car services, located in abundance on the territory. Excellent men, often surpassing me in straight-handedness, experience and passion. The only difference is that their passion was about various transport, and mine was about building a house. I am also interested in automotive technology, but my Toyota, being very reliable, did not often indulge me with the opportunity to show my ability to repair it. Still, it was great to have auto-special friends around with all sorts of tools, knowledge and experience. Observe the progress of their work, the progress of their auto projects, inspect and discuss their mega-creations. The neighbors repeatedly helped me out with advice, tools, details, and even once - the first medical aid (I injured my hand during careless work with the "grinder"). Thank you neighbors! Let's calculate the costs for 2009: 01/17/2009 Linoleum, 13.2 sq.m. 3 023 Laminate underlay 13 rm x 1m 156 Folgoizol 10mm x 0.6 x 3.2 r.m. 720 Linoleum knife 42 01/24/2009 Batteries, lantern. 224 Mattress pump 119 Screws-hooks 3 pcs. 29 Cover for the convector pipe 210 31.01.2009 Shower cabin AquaBoom HX-166 10 000 Sealant 110 Gun for sealant 100 Corrugation for the sink 100 Screwdriver 38 01.02.2009 Shower "Toptun" 1 150 Plastic washbasins 2 pieces 400 Cordless drill-driver 799 Hooks- screws 32 Metal hacksaw 72 02/07/2009 Propane cylinder, propane 11kg / 27L 1 750 02/14/2009 Kitchen furniture (sink and cabinet) 3 750 Swivel-squeeze mirror 299 Crane, fitting, gaskets, hose connectors, transparent hose, clamps, nuts 490 15.02.2009 Furniture legs. 2 pcs, bolts М10х20 4 pcs. 140 Hose connectors 2 pcs. 38 Sink outlet 199 Set of drills 189 Gas reducer with hose 399 02/18/2009 Gefest desktop gas stove (Brest) PNS 700-03 1 540 02/21/2009 Propane 21kg / 50l. 630 02/22/2009 Teapot of enamels. 2 p. 290 Frost's stool 199 Plastic canister 10 l. 99 Soap dish, mug, ladle 85 02/23/2009 Enamelled tank 15 l. 500 28.02.2009 Propane 20 l. 207 07.03.2009 Lantern "Kosmos-3031" 149 Bucket 24 liters. 279 Plastic canister 31 l. 329 Ventilation pipes 307 Garbage bags 51 08.03.2009 Ventilation pipes 98 Tray for shoes 129 09.03.2009 Thermal insulation for a pipe 50x2 m. 60 Penoizol 1 lm. 140 Scotch tape silver 2 pcs. 136 Propane 40 l. 400 28.03.2009 Propane 20 liters. 210 03/30/2009 Payment of GSK for the 2nd quarter. 2009 900 04.04.2009 Hanger hooks 9 pcs. 211 Furniture panel for a coat hanger 120x30 129 Hook for a coat hanger, folding 369 Bend 50 25 Hook-ring 6x35 2 pcs. 39 Wadded mattress 140x190 1 080 09.04.2009 Water-scraper 40 Scotch tape 33 Polypropylene cord 15 m. 60 11.04.2009 Metal rack MS-234 (1x2x0.3) 2 399 Bayonet shovels, shovels and broom 420 12.04.2009 Propane 41 l. 415 13.04.2009 Lantern "ERA L50" \u200b\u200bwith infra-sensor 335 20.04.2009 Propane 23 HP 240 06/20/2009 Switch 2 pcs., Socket 4 pcs., Junction box 2 pcs., Channel 6 pcs., Electrical tape, terminal block. 542 Luminescent lamp T8L18 / 765 55 Copper wire PUNP 2x2.5 20 m. 399 Copper wire ShVVP 2x0.75 20 m. 179 21.06.2009 El. counters "Mercury-201.5" 2 pcs. 1 400 Automatic switch ABB double 32A 300 Cable alumin. 2x6 150 m 2 250 06/22/2009 For connection to power supply 4000 Electricity 16 rubles / kWh 1000 06/23/2009 Automatic switch ABB 10A 149 06/24/2009 Angle grinder MSHU-1,8 2 450 06/27/2009 Clamp SU-100 407 Lamp ARCTIC 1х18 IP65 698 Cable socket with cover IP44 204 Extension cord "Universal" E-303 5m, 3 roses. 192 Protective shield NBT GM238-000-11 132 Cut-off wheels Meadows 2 pcs. 78 Cutting disc Bosch 1 pc. 129 06/27/2009 Bench hammer 100 gr. 79 Blue PVC insulating tape 19 06/27/2009 Payment of GSK for 3 sq. 2009 900 06/29/2009 Progress-Instrument perforator PE-26/900 2 910 07/01/2009 Drills 10 and 13 mm. 150 Stud 12mm, 2 m. 4 nuts, 4 washers, cut-off wheel 300 07/04/2009 Welder's suit 596 Welding shield NBT 86 Comforter Norman 71 Suede leggings 119 Hacksaw for metal 93 Cut-off wheels Meadows 2 pcs. 64 07/06/2009 BlueWeld 6 390 welding inverter 07/09/2009 Polyurethane foam 2 cylinders Polifoam 241 07/11/2009 MR-3C electrodes 2 mm., 2 pack. 1 kg each. 278 Cut-off wheels Bosch 2 pcs. 261 11.07.2009 Corner 50x50 12 lm 840 Corner 40x40 36 lm 2 160 Corner 32x32 24 lm 1 200 Sheet 3 mm. 1.25x2.50 3 600 Galvanized 0.45 mm. 2 sheets 1x2 600 Metal transportation 1 300 07/17/2009 Cutting wheels Meadows 3 pcs. 80 Scythe 250 Espagnolettes 2 pcs. 180 07/22/2009 Drill 12 mm. 100 07/25/2009 Sheds 2 pcs., Latch 340 07/26/2009 Cutting wheels (Luga 6 pcs. + 1 eng) 250 08/01/2009 Overhead garage lock ZGTs Selmash 665 Cutting wheels ATAKA 2 pcs. 78 Electrodes МР-3С 3 mm., 1 pack 5 kg each. 450 Electrodes МР-3С 2 mm., 1 pack 1 kg each. 150 Roofing screws 75 pcs. 300 Light filters, glasses for welding mask. 100 20.08.2009 Overhead garage lock ZGTs Selmash 607 Blinds 115x85 480 08/22/2009 Propane - refueling 2 cylinders 850 Hummingbird-PF antenna, cable - 5 m. 535 08/23/2009 Paint, sealant, brushes, rust converter, masking tape 1 790 Syringe for sealant 80 08/25/2009 Painting tape, 4 brushes, gloves 146 08/28/2009 Cutting discs Meadows 3 pcs. 100 30.08.2009 Electrodes MP-3C 2 mm 150 Cleaning brush for grinder 250 03.09.2009 Cut-off wheels Meadows 6 pcs. 180 05.09.2009 Mastic "Rabex-M" 20 kg. 1 900 Spatula 200 09/06/2009 Rope 10 m. 250 09/08/2009 Assembly foam 6 cylinders 871 09/11/2009 Respirator 25 09/17/2009 Assembly foam 1 cylinder 123 Paint 3 l., Red - 1 l. 500 09/20/2009 Paint 3 l., Brush 440 09/22/2009 Mastic can 2 l., Self-adhesive paper 104 09/23/2009 Sheds 2 pcs., latch 240 09/26/2009 "Masker", seal D, knife blades 188 09/27/2009 Payment of GSK for 4 sq. 2009 900 10.10.2009 Propane - refueling 40 liters. 500 10/17/2009 Drills 6 mm. 3 pcs. 70 Corner 40x40 6 lm 360 24.10.2009 Corner 40x40 18 lm 1 080 Corner 25x25 36 lm 1 260 Plywood FC 18mm, 1250x1250, 4 sheets 2 200 Floor boards, 110x32x3000, 6 pcs. 980 Transportation of building materials Gazelle 1 000 25.10.2009 Drills 3 pcs-5mm, 2 pcs-6mm. 100 Screws 400 gr. + 7 pcs. 70 26.10.2009 Spotlight 150 W with stand 350 Spotlight 150 W wall mounted 150 27.10.2009 Stud, nuts, pipe clamps, duct. 140 31.10.2009 Propane - filling 40 l. 525 Door seal 40mm 52 11/07/2009 Cutting discs Meadows 3 pcs. 90 Cutting disc 1 pc. 80 Grinding wheel 1 pc. 50 Self-tapping screws for roofing. 30 13.10.2009 Cutting discs Meadows 4 pcs. 120 11/14/2009 Propane - a new filled cylinder 660 Electrodes MR-3, 2mm., 1 kg. 125 15. 11.2009 Insulation for pipes 2m x 40mm. 2 pcs. 80 Self-tapping screws for roofing 60mm. 10 pieces. 40 Shoe tray 129 11/21/2009 Propane - refueling 39 liters. 525 27.11.2009 Cut-off wheels Meadows 3 pcs. 90 Assembly foam 1 cylinder 123 11/29/2009 Self-tapping screws 10 pcs. 30 05.12.2009 Propane - refueling 39 liters. 525 Electricity 16 rubles / kWh advance payment 1 000 11.12.2009 Round basin 24 liters. 140 13.12.2009 Payment of GSK for 1 sq. 2010, roads, etc. 1 800 15.12.2009 Propane - refueling 40 liters. 460 26.12.2009 Gas hose 2 m. 189 Propane - filling 40 l. 480 27.12.2009 Propane - filling 20 liters. 250 Total for 2009 (taking into account the sale of unnecessary tools and surplus building materials) - 92,880 rubles. Total costs as of December 31, 2009 - 297,319 rubles. The budget is almost exhausted, but the building is almost complete. Besides, it has been used for a long time and already saves me a lot of money. It is necessary to revise the budget upwards next year - the house is about to become self-sufficient. All with the coming 2010! Good luck in the next (abnormally hot) year.
Winter 2010. The dream of living in a house with the woman you love has not yet come true. You have to live not with a woman, but with three gas cylinders. One feeds the heater, another one is in reserve. The third (small) is for the stove.

In the frosty periods of January-February, the balloon lasts for 8-9 days. One ends - I connect another, and next weekend I am taking an empty bottle to refuel. I store the filled cylinder on the street, put it inside shortly before replacing it. Certified and tested cylinders. The safety instructions for using gas appliances have been re-read several times. But you have to break it for a more complete production of gas from cylinders. Emergency exits are cleared of snow. Suffocating, exploding or burning up is not part of my plans. Let's break through. To heat the house, it is required to burn 17 cylinders of propane during the year. Most of them fall on frosty January-February.
February 2010. A fierce blizzard. I watch the skidding cars from the window. Then he took a shovel and went to dig out the poor fellows. For them - freedom from the snow captivity, for me - useful physical activity in the fresh air. And why are they getting stuck there? Why gas like that? I am driving my typewriter (it is in the foreground of the photo) in any snowfall I pass there. Vnatyag.

I built a new shelf for the TV - you can install shelves at any height and add more (if necessary)

I made a sealed ceiling in the shower stall and replaced the supply tank with a more advanced model. The shower stall should be as tight as possible - less steam emissions and warmer.

Spring 2010 has come - I finished painting the facade.
![]()
We paint in the same color scheme and in our favorite "industrial" design.

The exterior decoration of the building is completed.

I'm getting down to interior decoration.

The favorite color looks good inside too.


Dangerous steep steps are marked in red with a signal. I didn’t do the railings - they would interfere with carrying gas cylinders, for which a year later, in the spring of 2011, I paid for it — stumbling down the stairs on my tailbone. It was very, very painful. Received a memorable lesson about the need to strictly adhere to building codes and regulations.

Sewerage pipes are insulated.

Lined with linoleum in the corridor of the 2nd floor


I installed an air conditioner.

Inside view of the air conditioner. I bought it for next to nothing, back in May, even before the heat wave and fires of 2010 began. Therefore, I did not suffer especially in the heat - I slept wrapped in a cotton blanket, blown by a fresh, cool breeze. Was it really hard in Moscow in the summer of 2010?

We register the entrance paving slabs (adhering to the chosen color scheme) and a wooden platform.

Lay out the floor of the 1st floor with the same tiles.

Actually, that's all. This completes the construction, the object is ready. July 10, 2010. Costs for this date 328,669 rubles. We can consider them as the final construction budget. Although, if you take a closer look at the costs, there are already a lot of operating and household costs among the costs. So I propose to assume that I have met the promised 300 thousand. And considering that I have been living in the house for over a year, the amount of savings on rental housing has already exceeded construction costs. That is, the project has ALREADY fully paid off and I "came out a plus"! In one year! How do you like these investment indicators?
October 2010. It's time to take care of the comfort. Yes, and he hesitated to constantly pump up this inflatable mattress. I bought a new one, orthopedic.


January 2011. In the absence of other physical work, I have fun cleaning snow from my own and neighboring roofs. And also a kind of ice sculpture - in the photo there is a snow sofa for ... yes, fig knows it ...

March 2011. Sometimes I dabble in welding.

For example, I welded a bracket.

September 2011. Painted window and grill. Updated the color of the fence. I covered the roof with a fresh layer of mastic. All. Other works are not trumpeted. Boredom.

November 2011. Problem. The power supply has been cut off. In principle, the project initially included little dependence on external communications. After thinking, counting, I bought a gasoline electric generator. 1 kW, digital, soundproofed.

I put it on the next roof. Rumbles slowly on the street ...

And in the house it is light and electrical appliances are working.

Winter 2012 Apparently, I long for female love and there is an excess of unspent energy - how else to explain the creation of this snow sculpture in front of the house? Look how the chest, waist, hips, lips are accentuated on the statue! Old man Freud, probably, could tell a lot about me, looking at this creation))

The generator has been moved inside, its summer terrace (and the door to it) is covered with abundant snow. I dispose of the exhaust gases outside through a chimney.

And inside it is warm, light, clean and comfortable.

In April 2012, I decided to radically upgrade my power system. An electric power converter and a special accumulator for 100 Ah, allow you to start the generator once a week to charge the battery. Then no hassle - the power supply is enough for a week of laptop power and lighting.

Russian development. I applaud the Russian engineers and manufacturers of this device! Technical details - Google yourself.

The immediate plans were to buy solar panels and a controller for them (by the way, also Russian). It would turn my house into a truly autonomous one. And solar panels on the roof would add +100500 to the brutality and pretentiousness. But the plans were not destined to come true - in June 2012 a new supplier of grid electricity appeared on the territory, I connected to it and curtailed the program for the development of my own, alternative, solar energy. Therefore, alas, dear reader, you will not learn about the successful implementation of this undoubtedly most interesting program. Although no obstacles to its completion were foreseen - the components are being released. And although the price of these components is quite decent, for a project whose budget surplus exceeded one million rubles by 2012, this did not seem difficult. The photo shows also a modular, self-contained, residential building with solar panels. 80 lvl

This is where my story comes to a happy end. For 5 years of living in this house, I have saved about one and a half million rubles on rent, thereby significantly accelerating the process of accumulating the funds necessary to buy a Moscow apartment. Adding money from the sale of my apartment in the Zamkadny N-sk to my savings, I bought an excellent apartment in a beautiful place in Moscow, 7 minutes walk from the metro. Therefore, in July 2013, I moved from the house to my new apartment... In a year I plan to complete the repairs in it, and given the planned repair budget (many times higher than the budget of the above experiment) and my enthusiasm for this business, the result promises to be amazing! Only this is a completely different story ...
I conclude my story with photographs of an empty house. In this form, it should go to a new owner. At the moment (October 2013), the house is put up for sale for 400 thousand rubles - i.e. practically at the cost of construction costs.


WP_Query Object (\u003d\u003e Array (\u003d\u003e 1 \u003d\u003e rand) \u003d\u003e Array (\u003d\u003e 1 \u003d\u003e rand \u003d\u003e [m] \u003d\u003e [p] \u003d\u003e 0 \u003d\u003e \u003d\u003e \u003d\u003e \u003d\u003e \u003d\u003e 0 \u003d\u003e \u003d\u003e \u003d\u003e \u003d\u003e 0 \u003d\u003e \u003d\u003e \u003d\u003e \u003d\u003e 0 \u003d\u003e 0 \u003d\u003e 0 [w] \u003d\u003e 0 \u003d\u003e \u003d\u003e \u003d\u003e \u003d\u003e \u003d\u003e \u003d\u003e \u003d\u003e \u003d\u003e \u003d\u003e 0 \u003d\u003e \u003d \u003e \u003d\u003e [s] \u003d\u003e \u003d\u003e \u003d\u003e \u003d\u003e \u003d\u003e \u003d\u003e \u003d\u003e Array () \u003d\u003e Array () \u003d\u003e Array () \u003d\u003e Array () \u003d\u003e Array () \u003d\u003e Array () \u003d\u003e Array () \u003d\u003e Array () \u003d\u003e Array () \u003d\u003e Array () \u003d\u003e Array () \u003d\u003e Array () \u003d\u003e Array () \u003d\u003e Array () \u003d\u003e Array () \u003d\u003e \u003d\u003e \u003d\u003e 1 \u003d\u003e 1 \u003d\u003e 1 \u003d\u003e 1 \u003d\u003e \u003d\u003e \u003d\u003e 50 \u003d\u003e \u003d\u003e) \u003d\u003e WP_Tax_Query Object (\u003d\u003e Array () \u003d\u003e AND \u003d\u003e Array () \u003d\u003e Array () \u003d\u003e wp_posts \u003d\u003e ID ) \u003d\u003e WP_Meta_Query Object (\u003d\u003e Array () \u003d\u003e \u003d\u003e \u003d\u003e \u003d\u003e \u003d\u003e \u003d\u003e Array () \u003d\u003e Array () \u003d\u003e) \u003d\u003e \u003d\u003e SELECT SQL_CALC_FOUND_ROWS wp_posts.ID FROM wp_posts WHERE 1 \u003d 1 AND wp_posts.post_type \u003d "post" AND (wp_posts.post_status \u003d "publish") ORDER BY RAND () LIMIT 0, 1 \u003d\u003e Array (\u003d\u003e WP_Post Object (\u003d\u003e 1403 \u003d\u003e 2 \u003d\u003e 2015-07-16 18:28:00 \u003d\u003e 2015-07-16 14:28:00 \u003d\u003e


- The shops
- Studio
- Tourist agency
- Office
- Items
- For a sports club
- stairs
- the corridor
- entrance
Own business in the basement of a multi-storey building
Long-term rent or help to save money for a private entrepreneur. It is much more profitable than renting an apartment or renting an office. But you need to know the rules for maintaining residential buildings and basements. The scheme of the basement of a residential building should also be studied. Establishing a business in a basement is a profitable business, but first you should take care of the correct legal registration. Own business So: - First, you need to obtain the consent of the basement owners (house tenants or municipal institution).
- There are some activity restrictions that can be set up in the basement. Machine production with the generation of toxic waste is prohibited by law. High noise levels or loud music can turn the residents of the house against you, which will inevitably lead to a large number of complaints to the relevant authorities.
- Before starting, it is necessary to draw up an estimate of the costs of bringing the premises into proper form. In accordance with sanitary and epidemiological standards.
The law is allowed to engage in the following activities
In case this is your private house, then there are practically no restrictions. The situation is different in a multi-storey building in which a large number of people live.Attention: For medium and small businesses, the range of rented area ranges from 30 to 250 sq. m. This area will be enough to open an office, shop or workshop.
Store in the basement of a residential building So: - By law, the leased area for a store cannot exceed 400 sq. m. Excluding the premises set aside for utility rooms and warehouses. A beauty salon must be located on an area of \u200b\u200bno more than 300 sq. m
- But it is unlikely that you can find a basement for rent in the city of such an area. This means that it is necessary to look after premises of smaller areas. And based on its size, make plans to open a business.
- The most logical business activity seems to be related to the provision of services to people living in this house, or not far from it.
Making an atelier in the basement of a residential building - The shops various directions, pharmacies, points of sale of specialized goods.
- Studio for clothing repair, service centers for the repair of personal computers and office equipment.
- Tourist agency, a point for receiving orders, a photo studio and rooms for organizing art exhibitions, a gallery.
- Office for receiving pre-orders, with the production taken out outside the residential building.
- Items for the collection of secondary raw materials (paper, scrap metal, glass).
- For a sports club or a gym, you need a room of at least 100 sq. m. Hairdressing salon, massage room, billiard room. also. realizable subject to all requirements
Requirements for non-prohibited business activities in the basement
The rules for maintaining basements in residential buildings have certain requirements. You need to know this first of all:- Based on the fact that the basement is located in the immediate vicinity of residential apartments, the entrepreneur must take care of the comfort of the people living. ;
- In the case of organizing a cafe, the limit on the number of people simultaneously in the room should not exceed 50. Loud music exceeding sanitary standards is prohibited. The opening hours of such an institution should end no later than 11 pm, and begin no earlier than 8.00 am.
Prohibited activities
A business in the basement of a residential building can be legally closed, and there are several reasons for this:- Limits on the level of noise and loud music prevent the opening of a nightclub and similar establishments. This also includes a gym in the basement of a residential building.
- Production with unpleasant odors, loud noises and pollution environment, also banned. This means that opening a laundry or dry cleaning is also prohibited.
- The ban also applies to the conduct of medical activities, the opening of a sauna or pool.
- The opening of a funeral office or the provision of funeral services is prohibited by law.
- Wholesale or small-scale warehouses are prohibited. An important aspect that must be strictly observed is the observance of fire safety rules and sanitary and hygienic standards when doing business in a rented premises.
Attention: When making a sports club in the basement, you should take care that there is the necessary soundproofing. The basement is also designed as a non-residential premises.Adjoining premises that border the basement, such as:
- stairs
- the corridor
- entrance
Legal registration of the premises
Basement or basement room multi-storey building cannot be bought or rented for life:Attention: Only the actual owner of the property, whose living area is adjacent to the basement, can privatize it.
- For starting an indoor business technical purpose, first of all, it is necessary to conclude a lease agreement with the board of tenants (who own the premises in an equal share) or a municipal enterprise.
- If the basement belongs to the shared ownership of the residents of the building, signatures of the residents are first collected.
- Often not everyone voluntarily provides these signatures. In this case, the tenant must show diplomatic ability, according to the dissenting opinion.
- It is reasoned to prove that his business will not cause inconvenience. As a demonstration, a potential tenant can carry out work on the improvement of the adjacent territory. Lay asphalt, or insulate the wall of the facade of the house. If necessary, you can focus on the fact that the rent for tenants will be reduced due to the use of tenants of premises rented to them.
Registration and submission of documents
To rent a room for rent, you must write an application to the housing office or the municipal authority, depending on the type of ownership of this room.Attention: It is important to indicate in the application the time for which the rent will take place and the type of activity. Direct registration takes place with the assistance of the fire, communal and sanitary-epidemiological services. They work together to determine if the space is suitable for the desired activity.So:
- The next step is to sign an agreement with the district administration. The contract must clearly indicate the price and duration of the lease.
- Legal relationships under the jurisdiction of the Civil Code, if this clause is not described separately in the contract. Non-residential premises, which is owned by the residents of the house, is drawn up directly at the ZhEK. As soon as the tenant's application was submitted, the housing office must notify the tenants as soon as possible.
- If necessary, the tenants of the house will vote on the provision of rent
- When all the formalities are settled, it is necessary to conclude an agreement with the accounting department of the utility service. The money earned in this way by the housing office should be spent on the improvement of the adjacent territory to the house and on paying bills for water, electricity and gas in rented premises.
- The entrepreneur must take care in advance of obtaining a license for the desired activity. Study the requirements for the premises in which it can be done. Be ready, if the basement has never been rented, to carry out high-quality repairs on the rented area at your own expense (see).
Attention: To rebuild the basement, you need to get a document from the BTI, it will give you the opportunity to re-plan the premises. To arrange technical documentation you can contact specialized firms working with city services. With the help of them, you can easily and quickly settle all legal issues.
Repair work and technical check
Almost all basements that have not been rented out earlier do not correspond sanitary standards and fire safety rules. Basements are uncomfortable, cold rooms that are periodically heated by groundwater. Having limited the rented area, the tenant proceeds to fulfill renovation works according to plan. First of all, it is the waterproofing of the rental area:- High humidity serves as a favorable environment for the growth of fungi. And they, in turn, cause various allergic diseases in people in this room.
- Secondly, it is necessary to resolve the issue of sufficient room lighting, since the basements or basements have practically no windows. It would be logical to use new energy-saving lamps for lighting to reduce energy consumption.
- The third important point in improving the conditions is supply and exhaust ventilation. It will remove excess moisture and provide fresh air to all rented premises.
- When opening a small cafe with its own kitchen, you should take care that smoke does not go towards the staircase or the apartments of the residents of the house. If there is a congestion of a large number of visitors and the presence of a quiet musical accompaniment in the basement, it is necessary to carry out additional noise insulation of the premises. This type of work must be performed at the very first pre-repair stage.
- When choosing premises for rent, one of the key points is the cost of one square meter of area. The cheaper it is possible to find a room, which means that more funds will remain for its repair and improvement. You should not neglect a thorough technical assessment of the premises, at the pre-rental stage. Experienced specialists will help to identify hidden flaws rented area.
Features and risks of doing business in the basement
In any basement of a residential building, there is a large number of electrical wires, collector pipes and heating systems.Attention: The tenant, first of all, should take care of unimpeded access of the ZhEK repairmen, in the event of an accident, to the basement. After all, it is no secret to anyone, in the event of a pipe rupture or other breakdown, the tenant will incur the greatest damage from what happened.So:
- In the event of a fire, it may be difficult to evacuate visitors or service personnel. Indeed, in fact, there is only one way out of the basement.
- Sometimes, lengthy legal disputes arise between the tenant and one of the tenants of the house or a group of residents. But they can be avoided by clearly fulfilling all oral and written agreements assumed.
The owner of a small plot of land is especially interested in its rational use. Construction of a detached or attached "caravan" in such conditions is an unforgivable waste, because you will have to sacrifice at least 30 sq.m. precious space. This is where the useful experience of foreign neighbors comes to the rescue, for a long time already practicing the construction of underground garages, both for low-rise and high-rise buildings. The benefit is obvious: the "car stable" is the ground floor of the main building, thereby significantly saving space on the site.
But, despite all the attractiveness of this garage design, many car owners have quite logical doubts:
- How much more will the subway cost?
- How to properly provide comfortable conditions for a car and a person in it?
- How to build an underground garage so that they are not afraid to use the premises in bad weather conditions (snow, ice, rain)?
The questions are serious and require detailed familiarization with the topic. We hasten to reassure you: a solid individual underground garage built with your own hands is not a dream, but a completely feasible project. Of course, if you approach it from the standpoint of strict implementation of all prescribed building canons.
Thinking and choosing: project of a house with an underground garage
If you are looking for a suitable project for a private house with an underground garage, then most likely you have already reviewed a lot of photos of finished samples on the Internet. In order not to be distracted by design "tricks" and architectural "gadgets", we will help you summarize the search results. There are two ways of arranging an “autodistribution”:
- The underground garage is located completely underground
- The underground garage is partially "recessed" into the ground (usually 1/2 or 2/3 of its height)
The second option is more popular among the people, as it is cheaper and more practical from the point of view of the implementation of the plan. the main problem underground rooms - fight against dampness. The deeper the garage is hidden, the more "obstacles" are: increased ground pressure and negative impact groundwater (especially considering that the average depth of the aquifer for our region is 1.5-2 m).
ATTENTION!
Where can I find all the requirements for the planned construction? In SNiP, underground garages are described in detail: all key conditions are indicated under which their normal operation is guaranteed. Recommendations for the wiring of all utilities are also documented here (SNiP 21-02-99 “Car Parking”).
We would like to draw your attention to an important aspect of the CORRECT project of a house with an underground garage:
- The room located above the underground "caravan" must be fenced with a thicker and additionally reinforced floor slab. It cannot be equipped as a RESIDENTIAL ROOM
Unfortunately, a large proportion of virtual projects posted on the Internet for all to see ignore this norm. Bedrooms are placed above the "subway", which is grossly contrary to safety standards. The garage belongs to the category of explosive premises, therefore, a residential building with such a technical area is planned so that in the event of an emergency, people will not be injured in any way.
As for the possibility of arranging a combined dwelling of a person and a machine, there is a clear rule in which such a neighborhood is impossible:
- Gas vehicles cannot be stored in public buildings, including individual underground garages
As can be seen from the two mentioned standards, the rules pay great attention to the fire safety of the technical room. The SNiP indicates the levels of fire resistance for walls and gates of an underground garage: EI 90 and EI 60, respectively.
The next rule for normal operation of the "subway" is the correct entry into its interior. If in a virtual picture everything can look compact and very beautiful, then in practice the car owner will feel all the inconveniences of a wrongly designed road path.
What should be the entrance to an underground garage?
The main decoration of a private house is a beautifully furnished garden plot. When building an underground garage, the car owner is trying to save free space for the landscape, so he decides to equip a steep short entrance to the parking lot. If in summer and dry weather the car calmly copes with the obstacle, then in snowy winter or rainy autumn the "barrier" may not be taken. Snow will quickly fill up the "hole", and streams of water will flow into such an alluring "reservoir".
Here are a number of requirements for entering the "subway", having fulfilled which you will not face any difficulties during its year-round operation:
- The slope of the entrance road should not exceed a certain value
- The deeper the underground garage is in the ground, the longer the driveway
- The entrance is a broken path
- The roadway is made of non-slip materials
- It is imperative to provide a walkway with a handrail along the wall
- A storm sewer must be provided at the gate of the underground garage.
- Retaining walls are installed on the sides of the entrance
It is clear that the steeper down, the less space the technical area will take. Don't overdo it! The maximum slope of the driveway for an underground garage is 140-150 (or 25% as a percentage). An increase in the angle will lead to problems during its operation in the autumn-winter-spring period.
A sufficient length of the "finish" will help to avoid all weather troubles. Almost no one adheres to the ideal entry parameters, because the bar is high: for example, for an underground garage lowered by 1.30 m, the entrance should be 14.4 m long! A clear calculation makes it possible to shorten it by almost half (up to 8.4 m, of which 3 m is the "starting" horizontal zone).
The minimum length of an entrance garage road is divided into three mandatory sections:
- "starting" zone: 3 meters with an inclination of 00-20
- zone "X": part of the path with a maximum slope of 140-150 (50% of the total length of the entrance)
- "red" zone: mandatory 1.20 m of the horizontal section in front of the garage door
All drops should be smooth, without sharp boundaries.
For an ideal entrance to the "subway", before and after the section with a maximum slope, you should equip sections of the path with an average slope (70-80). In length, they should be slightly shorter than the "X" zone (≈75-80% of it).
It is advisable to supplement it with special serifs that help to overcome the route when the track is icy. Special brake strips for wheels are popular.
The pedestrian path will help the driver get to the “surface” quickly and without injuries, even on an icy road.
The sewer grate, into which the water goes, should be located in front of the gate on a straight section of the entrance (there should be at least 0.5 m of a straight section of the path before it), which will protect the garage from falling into the middle of rain streams. The storm sewer with a siphon is equipped with a heating cable that prevents it from freezing.
They protect the entrance road from destruction and soil collapse. According to the rules of SNiP, an earth drop of more than 80 requires such a protective structure.
To effectively solve the problem of icing on the road, it is advisable to install a system that prevents the formation of ice on the road section. Do not forget to provide entrance lighting for convenience.
How to build an underground garage driveway?
The construction process is divided into the following stages:
To avoid failure of the road surface, the geometry of the road is formed without adding soil. To do this, each "step" is carefully cut to the desired level, guided by the prepared mark (stretched line).
The prepared and "cut" area is covered with rubble with a layer of 15 cm and carefully tamped
The carrier layer is made of B10 grade concrete with a thickness of 12-15 cm. The solution is mixed thick and viscous. After the first setting, the surface is constantly moisturized and protected from the sun
Then comes any topcoat
We have dealt with the entrance in detail, and now we will move on to arranging the very premises of the underground garage, namely, protecting it from a water "attack".
How to effectively protect the subway from dampness?
STEP # 1: WATERPROOFING THE UNDERGROUND GARAGE
The construction of the built-in "subway" implies additional stress on the foundation of the house. Usually, the owner prefers to lower the entire floor down, rather than part of the building, dividing the entire space into several technical zones (parking, workshop, gym, etc.).
Most often, a slab ribbed foundation is provided in the project, which increases the stability of the building. But everything depends on the main building material and the architect's design calculations (we once again insist that the design should be performed by a specialized specialist). 
When building an underground garage with his own hands, the car owner must take care of comfortable living conditions for his iron friend. It is necessary to protect the premises from the slightest water "attacks", because excess moisture is harmful to the car.
How to waterproof an underground garage?
The walls of the "subway" are designed by analogy with retaining walls: a drainage system is arranged along the outer contour of the room, and the entire outer surface is waterproofed with fused waterproofing (for example, roofing material or its modern analogues). Additionally, a massive filter cushion is formed under the floor and on the sides of the "subway".
The complexity of the drainage system is determined by the results of survey work, which determine the type of soil and the level of the aquifer. Geo-prospecting will prompt whether or not to build an "underground" rationally, because if the groundwater is too high, you will have to drain the site and complicate the drainage scheme. And these are additional considerable expenses.
ATTENTION!
Liquid waterproofing for indoor spaces - not a panacea for all problems. With its help, it is impossible to equip an effective water barrier. It only plays the role of an aid. If after the construction of an underground garage water appeared in it, then no amount of putty will correct the situation.
STEP # 2: VENTILATION OF THE UNDERGROUND GARAGE
You can often hear complaints about the unpleasant smell of gasoline and other chemicals getting into the living area due to the built-in underground "caravan". To prevent the garage "poisoning" your life, you should take care of a constant vortex of air for this technical room.
The norms of the intensity of air exchange in the "motorhome" are prescribed in the SNiP: 180 cubic meters. m per hour for one passenger car. Abroad, the requirements are even higher - 360 cubic meters. m per hour. Only a well-coordinated supply and exhaust ventilation can provide such a "wind". Brief ventilation under the gate opener will not solve the problem.
Ventilation not only protects against exhaust gases, but also removes excess moisture from the room. This is especially true for heated garages, where the temperature difference between a cold car and a relatively warm room (no more than + 50C) will inevitably cause condensation on the body. A steady supply of fresh air will quickly remove dampness and save the machine from premature corrosion.
Since the level of the underground garage is below the ground, forced mechanisms are required for efficient ventilation. There are two options for arranging it:
1. Monoblock
In this device, two units are connected, which are responsible for the supply and extract of air. The monoblock is distinguished by its compact size and ease of installation, but expensive (from $ 2000). But the atmosphere inside the room is perfect.
2. Modular design
Consists of two separate units responsible for air supply and air extraction. Their joint work is established using sensors that monitor the microclimate of the technical room.
ATTENTION!
All cables in an underground "motorhome" must be covered with a special layer of insulation that prevents combustion. The car owner is also obliged to install a fire alarm.
An underground garage in a private house is an excellent solution for those who value square meters your land plot. However, a car owner who is planning to build an underground will probably have some questions:
How to build a garage under the house, convenient in terms of operation? How much more expensive will the work be compared to building a conventional garage? and etc.
Pros and cons
Photos of underground brick garages
First, consider the pros and cons of an underground garage.
- Saving space;
- Ease of use;
- The least susceptibility to hacking (statistically).
Unfortunately, there are some negative aspects.:
- The construction of the subway is more expensive than the construction of a conventional garage.
- It is possible to build an underground garage under the house only at the stage of construction of the main building.
- If the groundwater is high, then it will be difficult to build an underground cottage garage. Careful calculations and a responsible approach to waterproofing and drainage systems are required, otherwise there is a risk of flooding the premises.
Layout
The process of planning and creating a project is important.

Planning your underground garage correctly
The underground garage design will depend on how high the water table is. Their level will determine how deep underground the garage will be built. It can be placed completely underground or partially (immersed in the ground at 1/2 or 2/3 of the height).
Partially recessed garages are most often used, because their construction is more economical and easier. In addition, building a garage completely underground is usually not allowed by the water table.
How to build an underground garage? Conditions, rules and requirements for such construction can be found in regulatory documents (SNiP 21-02-99).
When choosing a project for a future house with a garage, it should be remembered that the premises above the subway cannot be used as residential in any way, but in any case, the overlap between them must be additionally reinforced.

Cottage project with underground garage
However, as practice shows, in large quantities finished projects norms are not respected and BEDROOMS are designed above the garage. The garage is an explosive room, and such a gross violation can lead to human casualties.
The walls and gates of the underground garage must be made of material with a high degree of fire resistance.
When drawing up a plan for an underground garage, attention should be paid to the design of the driveway. When saving space, it's important not to overdo it. Of course, if the entrance is steep, it will take up a minimum of area. In the summer, this rise will not create any particular problems, but in the winter it can become an insurmountable obstacle. In addition, the steeper the slope, the more likely it is that water will flow into the garage in rainy weather.
Exit road

So that during the period of operation the road does not collapse due to soil subsidence, it is necessary to avoid adding soil when forming the path. The earth must be carefully cut to the required level, which is marked in advance with marks.
Then the future road is covered with gravel and well tamped. The layer of such a coating should be at least 15 cm.
A layer of concrete with a thickness of at least 12 cm is placed on the crushed stone. The mortar for the supporting layer should be viscous and sufficiently thick.
After the concrete has completely dried, the topcoat is applied.
To avoid problems with the exit, when arranging the entrance road, you must comply with some requirements:
- The slope of the exit path should not exceed 25%.
- The length of the path depends on how deep the garage is. For example, if the subway is drowned by 140 cm, the entrance road should be 14.5 m.But with careful calculations, it can be reduced to 8.5 m.
- The path should consist of sections:
- Start area (horizontal section not less than 3 m);
- Main zone (inclined);
- The area in front of the gate (horizontal section 120 cm).
- An anti-slip material must be used for the driveway. You can additionally use braking strips.
- It is advisable to arrange a footpath with handrails.
- Directly in front of the gate, a storm drain is installed, at a distance of at least 50 cm from the beginning of the ascent. The sewage system should be equipped with a heating cable to protect it from freezing.
- A wall is built on the sides of the entrance road (by analogy with the walls of a garage) to prevent ground falls.
Construction and arrangement

Arrangement of an underground garage
An underground garage in a private house begins to be built with the excavation of a pit. Its bottom is covered with a mixture of sand and gravel, and waterproofed with a special material, roofing material, for example. After that, reinforced concrete slabs are placed on this filtering pad.
The walls, they are also the foundation of the underground garage and the future house, as well as the ceiling, are laid out in the same way with reinforced concrete slabs. A so-called sand and gravel cushion is laid between the wall slabs and the ground, it will serve as a drainage system, and a waterproofing material is placed on top.
The floor and wall surfaces are covered with roofing material, the joints are covered with liquid waterproofing material.
Further, the room must be insulated with mineral wool or foam. After laying a layer of thermal insulation, the surface is reinforced with a special mesh. Then you can start finishing: plastering or sheathing.
Ventilation device

ventilation of underground garages: scheme
A ventilation system must be installed to protect the living areas above and around the garage and to prevent the accumulation of large amounts of moisture in the garage.
In an underground garage, the ventilation system will be effective only if forced mechanisms are installed, such as:
- Monoblock (two connected blocks providing supply and exhaust);
- Modular design (two separate supply and exhaust units).
The installation of the garage door and electricity supply is carried out last. All wires and cables must be insulated with fire-resistant material. Installation of a fire alarm is required.
So, an underground garage with your own hands is not a dream, but a completely feasible idea. The main thing, as in any construction, is to comply with the norms and requirements, strictly follow the project, be attentive to all the little things and try to make as few errors as possible.
One of the simplest permanent storage facilities for crops and homework . The well-ventilated cellar, reliably protected from atmospheric precipitation and groundwater, maintains a constant temperature and humidity regime. In such storage, products do not rot or dry out for a long time, and also do not lose taste and smell.
Previously, most often they built free-standing cellars, but today, in order to save the usable area of \u200b\u200bthe land plot, they try to place the cellar under a garage, an outbuilding, for example, a summer kitchen or a barn, or directly under a residential building.
Such a cellar under a garden house or outbuilding has several advantages:
- it is easy to use and does not occupy a separate place on the land plot;
- if desired, it can have an entrance, both from the premises and outside;
- requires less money for construction, since it is part of another building.
At the same time, it is possible to make a cellar in the bottom of a house only with a low level of groundwater or with their periodic rise. And with a high level of groundwater, it is almost impossible to protect the cellar under the house from dampness. In this case, you can build a free-standing vegetable store with your own hands, for example.
Features of the construction of a cellar under the garage
The cellar under the garage does not occupy a separate place on the land plot. It is not covered with snow, which makes it easier to access in winter. In addition, it can be used as a viewing pit for a car. Construction features:

How to build a cellar-basement under a garden house
A basement is understood as a recessed room in a house, the floor of which is below ground level (blind area, sidewalk) by more than half its height. If the premises are located like this, then most of it is above ground level, it is called a semi-basement or basement. How to build with your own hands:

- the cellar-basement under the garden house can be small. In this case, its depth is equal to the height;
- the earthen base of the cellar-basement is rammed and the floor is poured over it with a layer of 60-80 mm thick;
- the walls of the cellar-basement are plastered with cement and whitewashed with lime;
- for waterproofing, 2 layers of roofing material are used, glued to hot bitumen, as well as;
- ventilation - through the windows located in the basement of the house;
- entrance to the cellar-basement through a hatch in the floor of the house. Manhole cover - double made of floorboards with insulation, equipped with an iron ring as a handle, closed in secret;
- convenient to build garden house and a cellar-basement underneath, located at different levels. In this case, the entrance to the basement with a cellar is arranged from the street (see figure).

Cellar under the summer kitchen
A well-deserved popularity among amateur gardeners is the cellar dug under the summer kitchen or other outbuildings. Such a cellar can have a hatch / entrance from the summer kitchen, it is easy to use and does not require a separate place on the land. To build it:

- a pit is pulled out, the size of which exceeds the size of the future cellar by 0.6 m on each side. This will facilitate the implementation of concrete, stone and waterproofing works;
- it is preferable to dig the pit by hand, as this will preserve the natural;
- on the base of the pit for the cellar, a layer (brick breakage, etc.) with a thickness of 0.8-0.1 m is poured (at the rate of 0.1 m 3 for each 1 m 2 of the base);
- the laid layer of crushed stone is rammed and impregnated with hot bitumen at the rate of 4-5 kg \u200b\u200b/ m 2. The impregnation will protect the crushed stone preparation from capillary moisture. Instead of bitumen, you can use another type of waterproofing;
- the walls of the cellar are made of heavy concrete with reinforcement. - 0.2-0.3 m;
- after with concrete walls they are plastered with a cement-sand (1: 2) mortar on both sides and smoothed. The plaster layer should be 10-20 mm thick;
- if desired, the walls of the cellar can be used as a foundation for a summer kitchen (another outbuilding);
- in the upper part of the walls of the cellar, which serve as the basement of an outbuilding (summer kitchen), are laid horizontal waterproofing from 2 layers of roofing material.
Below are 2 video clips on how to transform a basement and make with your own hands a beautiful, convenient and functional, in a word, an ideal cellar - a basement under the house:
Video 1
Video 2


