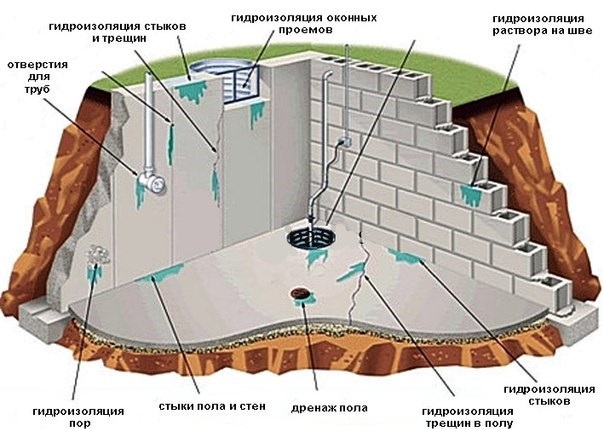
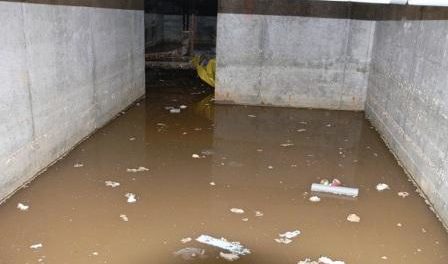
The foundation and basement of the house are the most vulnerable areas on which hydraulic pressure is applied groundwater and precipitation. The additional load can be reduced by installing a strong moisture-resistant insulation layer. Excess liquid collects in the walls, leading to the appearance of fungus and smoldering finishing materials and load-bearing structures... How to make basement waterproofing so that such problems do not arise?
Drainage as an auxiliary measure
Objects. Exposure caused by human or natural action. Drainage Dry leaves. Poor waterproofing thickness. An example can be mentioned. poorly executed protective layers and tiles. Incompatibility of materials. And on the other hand, those derived from the quality and suitability of the materials used. Poor drains or poor quality materials. felt. Components of the electrical installation subject to weather conditions will also be used. Drains and drains must be supported with protective screens.
It is very important to take into account the groundwater level at the place of construction of the house.
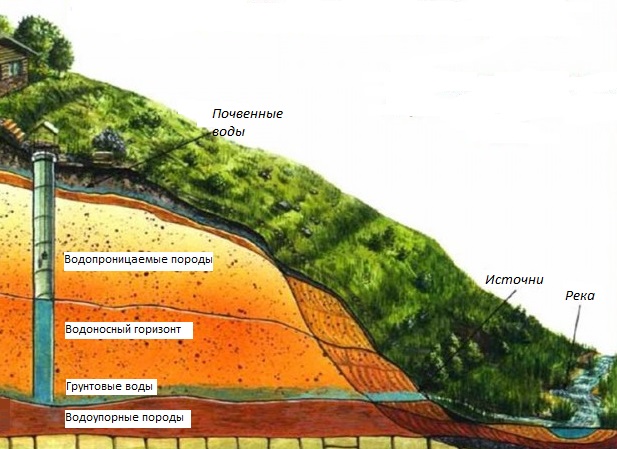
Groundwater location
The waterproofing barrier is equipped in the following cases:
- Groundwater is located above 1 meter from the level of the foundation to be laid. This is high, therefore it is necessary to ensure a high-quality external and internal watertightness of the basement.
Advice!
Periodic Cleaning Cleaning should be done periodically so that surfaces and drainage are unobstructed and in good conditions to ensure proper drainage of rainwater. It is reported that if the runoff of surfaces exposed to heavy rain is insufficient. A report prepared by a specialist company may justify a move from maintenance to re-stabilization: Preventive maintenance: periodic cleaning keeps surfaces free of obstructions and drains in good condition. 16 Standards and procedures for buildings and educational institutions To maintain waterproofing.
In cases of a high location of groundwater, experts recommend additionally equipping the drainage system. This will prevent the building from hydrostatic pressure, which can cause the foundation of the house to shift and deform the walls.
- Groundwater is below 1 meter from the base. In this case, simple wall waterproofing is suitable.
Report any tamponade immediately. It will be repainted. Canals and water conduits. ventilation. maintenance or repairs must wear shoes with soft soles. Inspection personnel. maintenance of masonry and repair of small parts in waterproofing or reimpermisation. Maintenance of masonry and electrical installations The masonry elements associated with the waterproofing system will be retained. Such as cornices. Repairing parts Pay special attention to slopes and drainage. Mansard. Even if there are no signs of deterioration or damage occurring during periodic inspection and maintenance.
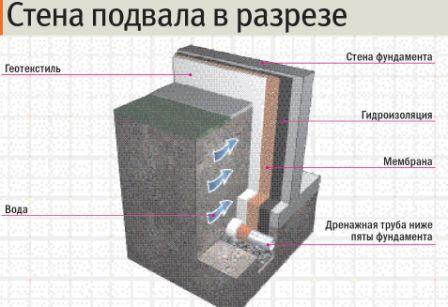
External waterproofing of the basement at the stage of foundation construction
External waterproofing is not possible in already built and tiled houses. Therefore, work must be done from the inside. In this case, the effectiveness of waterproofing will decrease significantly. To increase the water-repellent properties, it is recommended to carry out a comprehensive waterproofing of the building against the absorption of excess liquid by treating the walls and floor of the basement.
Apply asphalt and let dry. A piece of a raised waterproofing fabric. Cut off the raised piece. Outside all sides of the blister area. Apply a paste asphalt handle to the area to be repaired. Due to the accumulation of water vapor between the concrete surface and the waterproofing. Ampoules or swelling when waterproofing. Ventilation pipes and vents. cut the blister into a cross and apply asphalt of the consistency of a paste below it. Apply fibrous asphalt underneath. The materials used for the repair must be compatible with the original specifications and must be of the same standard.
Types of basement waterproofing
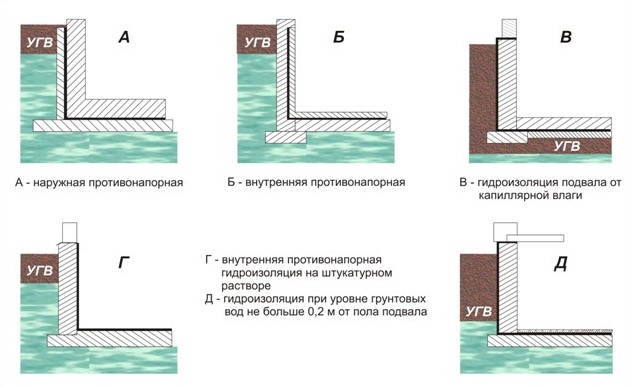
The internal waterproofing agent is selected according to the selected application method. There are 3 types of waterproofing: anti-pressure, non-pressure and anti-capillary.
Purpose and planned operation of the house
Cut out a piece of patch fabric that extends 15 cm from the area that was found. It should be noted that the damage is not widespread to avoid wasteful expenses. the patch with asphalt is applied and the new area is painted in accordance with the Buildings and Schools Regulations and Waterproofing Maintenance Procedures 17. Assuming it is dry. Blister nets should be lifted for broken or cracked sections. Thoroughly clean the drain and apply plastic cement.
Types of basement waterproofing
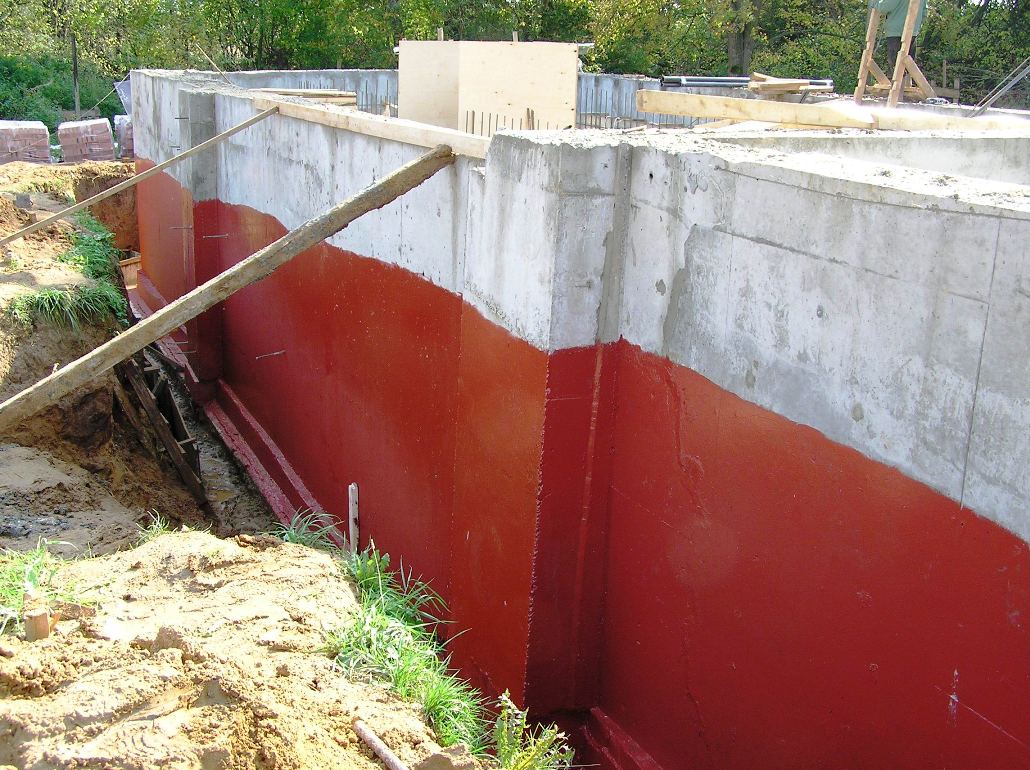
- Anti-pressure waterproofing is performed when the groundwater level is above the level of the basement or basement floor. The foundation is waterproofed outside the building. The materials used restrain the positive water pressure. Additionally, a drainage system of the area is being performed to drain the liquid into the drain. Means for performing anti-pressure, or slurry, waterproofing necessarily contain polymers. A bitumen-polymer composition is applied to a surface pre-treated with a silicate primer. Slurry waterproofing is a multi-layer surface consisting of different solutions and mastics.
Important!
Application of injection waterproofing
After the membrane is cured, apply a layer of aluminum shield. Enclose a 45 degree angle to the fool along the prepared area. It is recommended to use an aluminum coating layer as a finished coating. Apply the plastic cement with a spoon or spatula. Waterproofing should be cut at the intersection of the horizontal and vertical surfaces. Apply a fiber asphalt glue hand and place the cloth so that the covered area is covered. Wear and defects caused by oxidation of metallic materials.
Performing anti-pressure waterproofing from the inside is a useless exercise. Since water exerts negative pressure on the walls of the house, and is not held back by narrowly targeted insulating materials.
- Non-pressure waterproofing is performed when urgent protection of the basement from moisture already accumulated is required. If the groundwater is located low, it is quite possible to cope only with non-pressure waterproofing of the walls and base. In this case, bituminous mastics are selected, which are applied with a spatula or roller to the surface of the walls.
- Anti-capillary waterproofing is used to prevent moisture from entering through the capillaries located in concrete wallsoh. Previously, only bituminous barrier mastics and roofing felt protective layer on the foundation. Currently, the most popular are penetrating waterproof materials. Condensation does not collect on the walls of the basement if they are pre-treated with barrier mixture injections. They penetrate the voids and fill them, blocking the flow of water.
Clean the area very well. using a brush or spray. Reapply asphalt and let dry for a week. Open the cross-shaped ampoule. Apply asphalt and patch. Apply a thinner liquid asphalt pen to level surfaces. Cut out the raised part. We also observe tuning to the base. Adhesive coating mixing Ventilation pipe Catalytic asphalt Galvanized brass protector Cement Plastic Cross section ventilation pipe Filtration through ventilation pipes 18 Steel gutter Galvanized steel plumbing Base of buildings and training materials Standards and procedures for maintaining waterproofing Fiber-based asphalt cement.
Sources of moisture in the basement
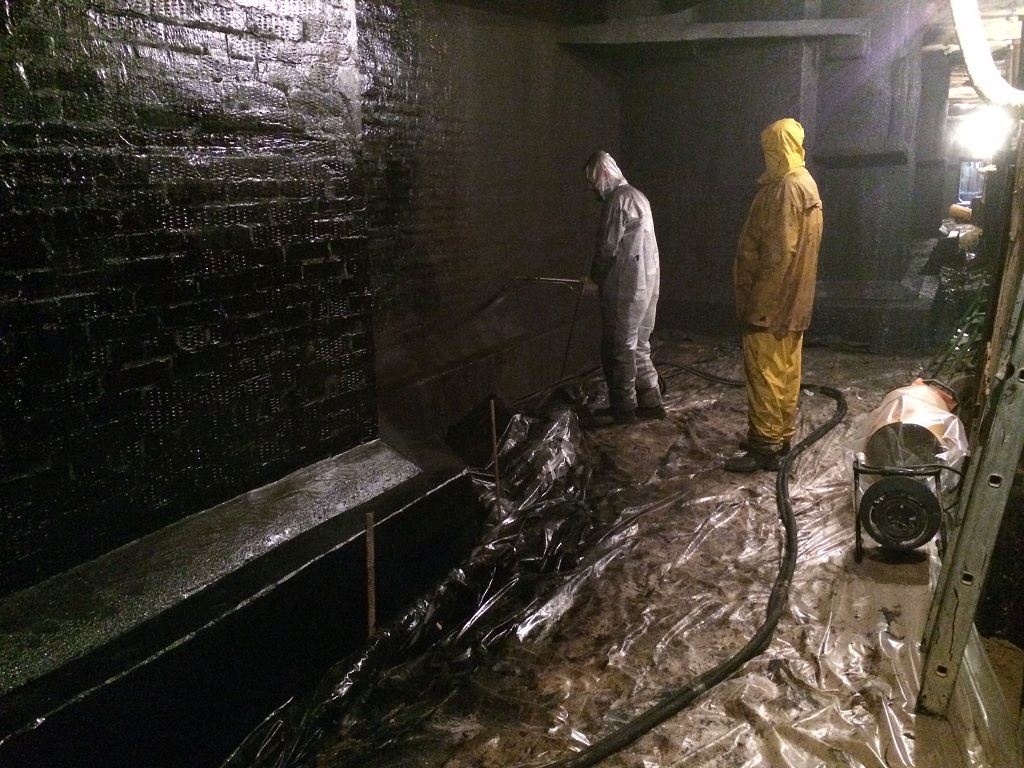
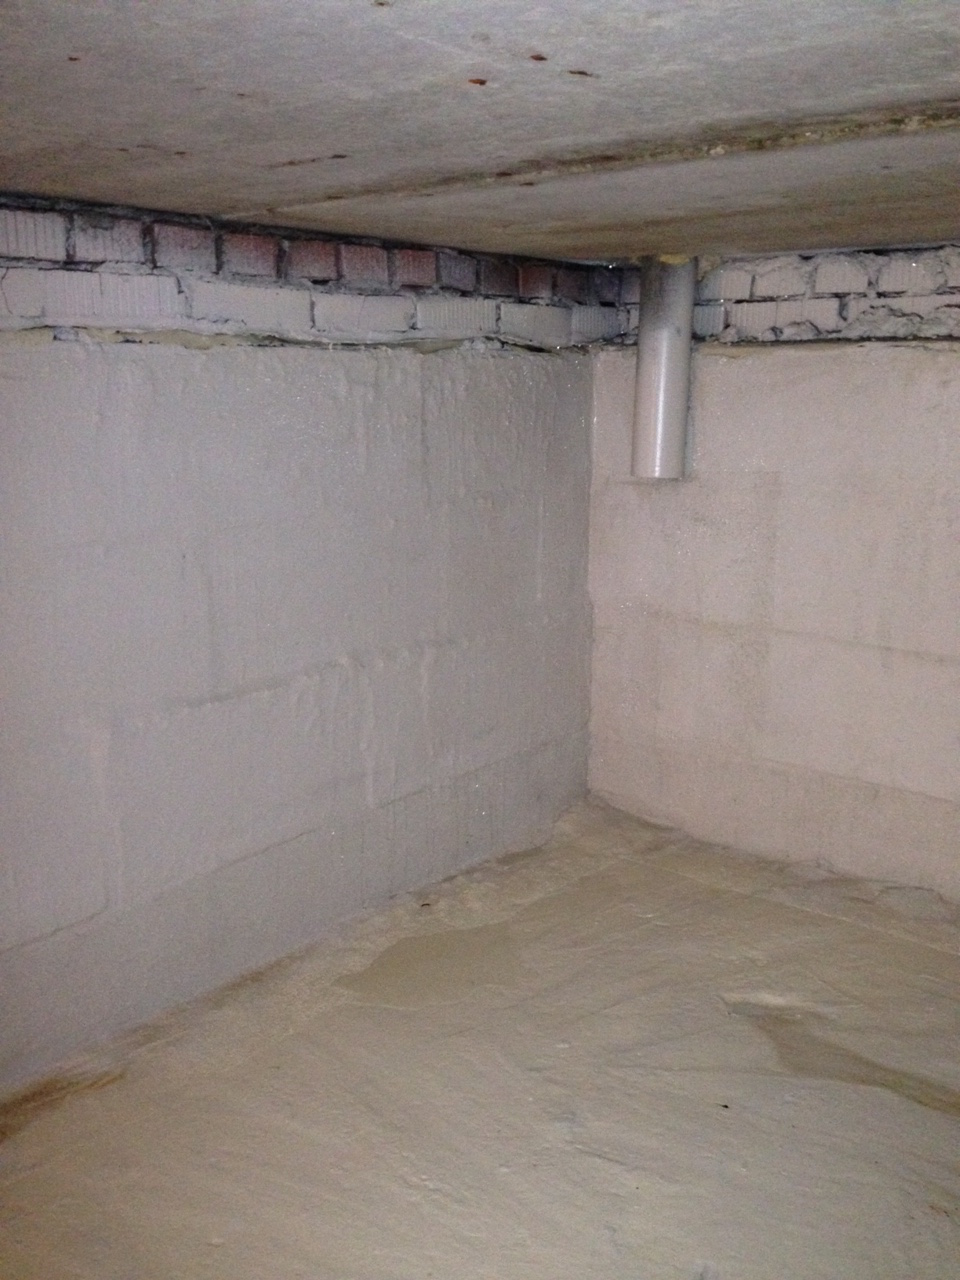
The highest quality is the outer protection of the basement from groundwater. Quite often, external waterproofing is missing or damaged. It is sometimes impossible to repair it. Therefore, there is an urgent need for the arrangement of internal insulation. In such cases, the basement is waterproofed from the inside with your own hands without the use of special equipment and earthworks.
If the hole is large, clean the surface until it is shiny. Apply liquid asphalt over the previous waterproofing and over the pipe. From the hole. Water entrance. Cut off the waterproofing raised by the line. At the angle of the joint between the slab and the wall. Apply plastic cement with a spoon or spatula around the tube. Place a 15cm high galvanized brass protector with a 30cm base and fill it with catalytic asphalt or plastic cement. oil and apply to the wall and spray with water. fat. All rust should be removed if possible and one or two coats of aluminum metal paint and two matching paints applied.
Basement waterproofing is a guarantee of warmth and comfort in the house
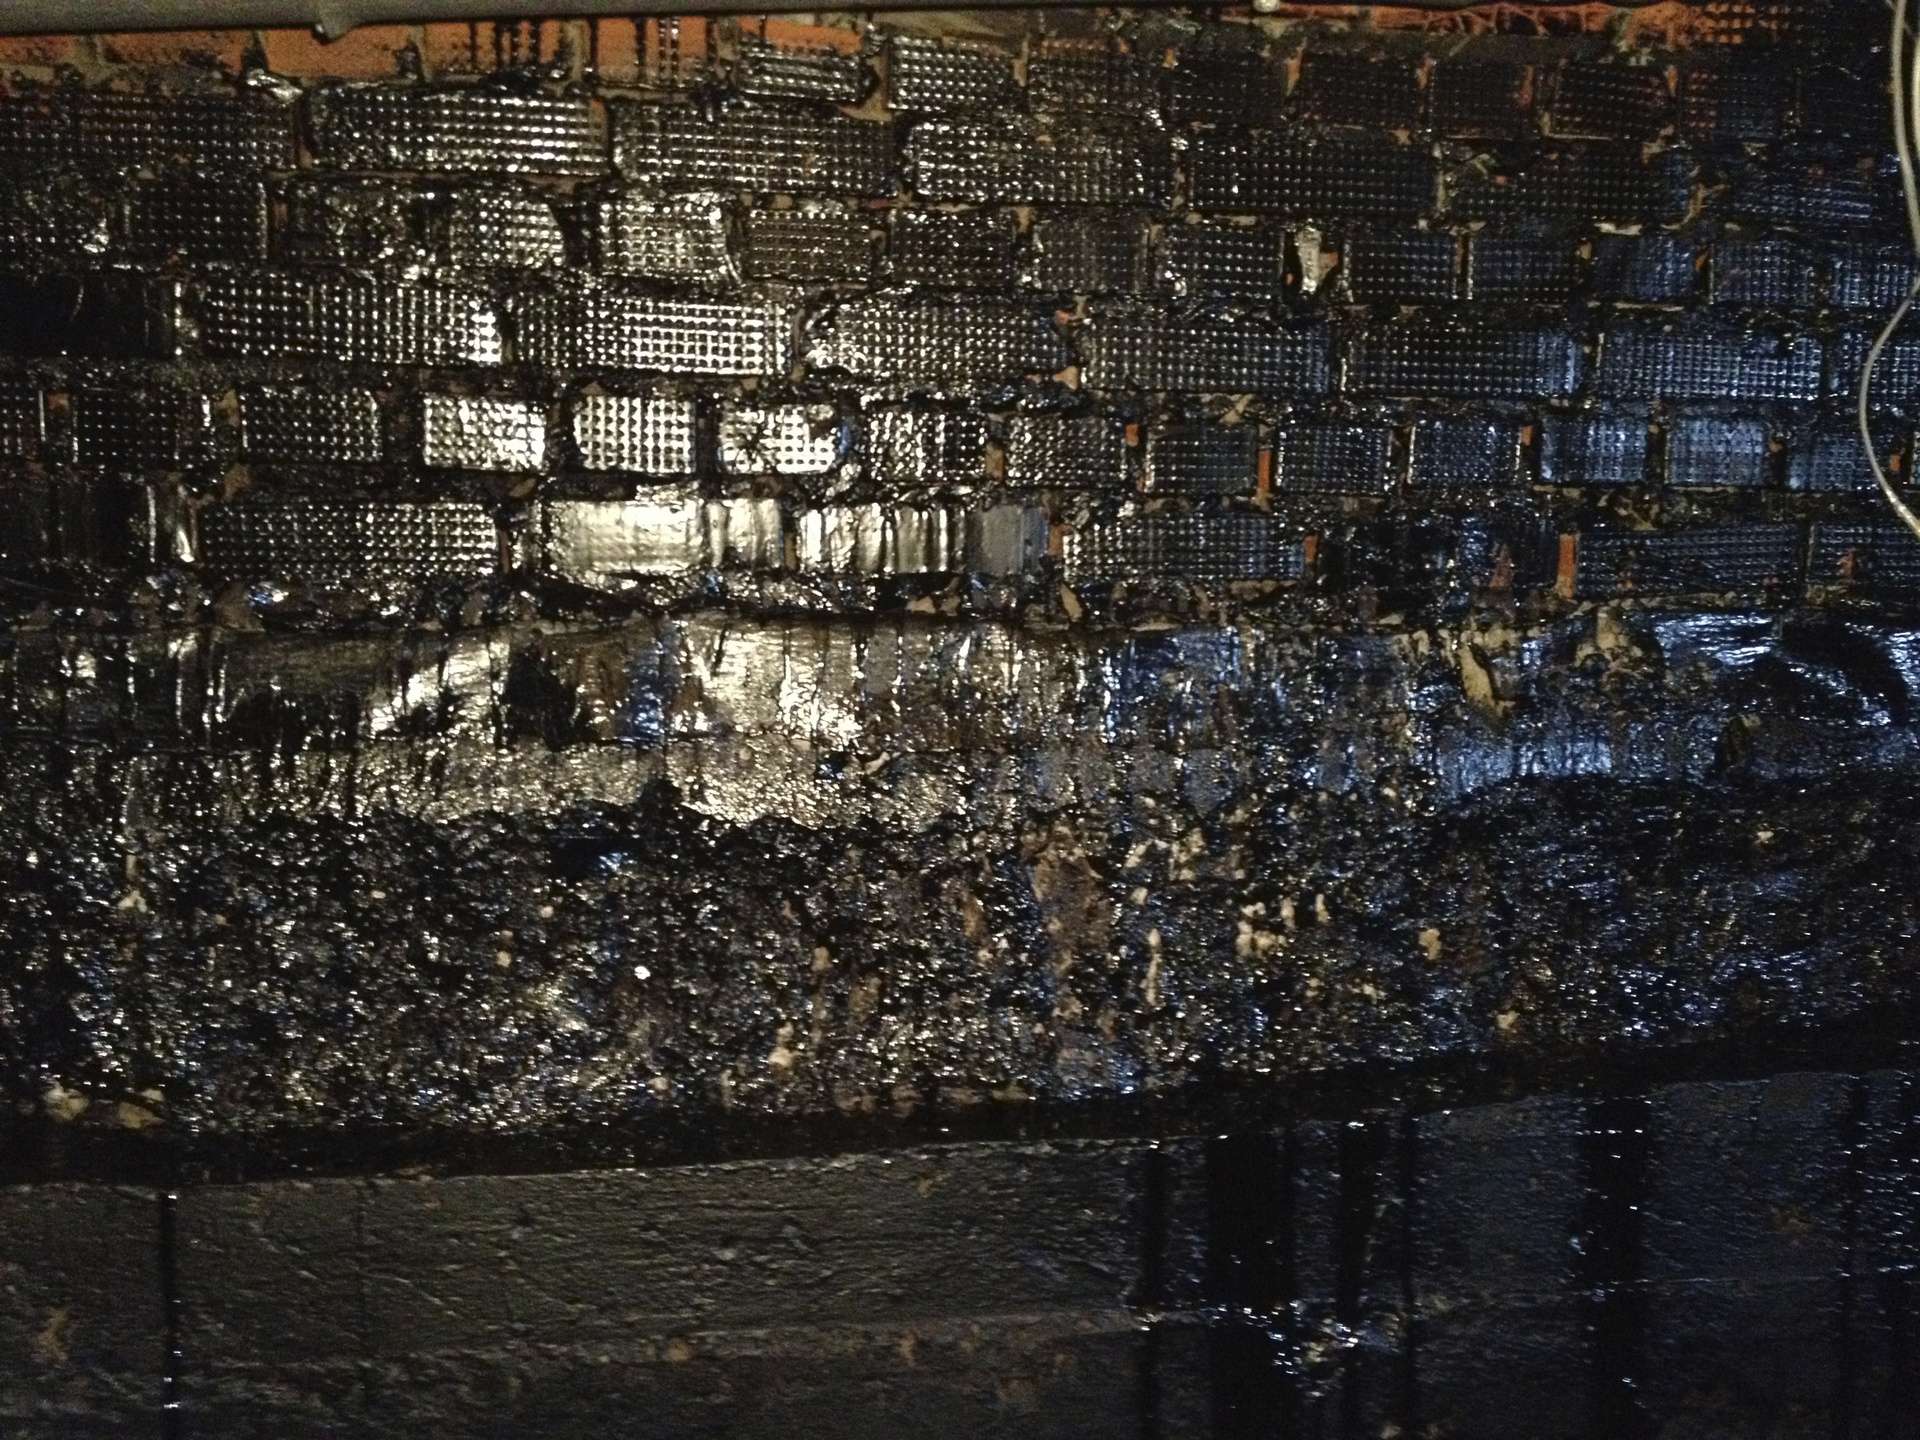
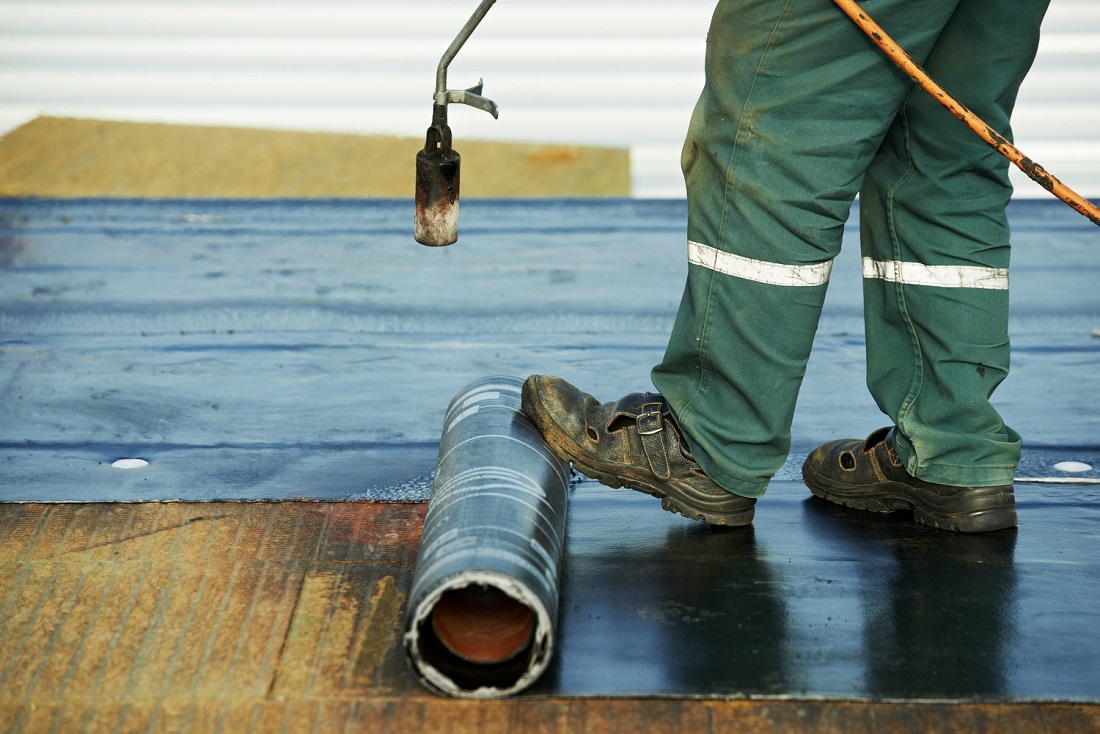
Penetrating compounds and membrane waterproofing sheets are currently used. Membrane slabs are laid on the walls using a gas burner, forming a dense, water-repellent layer.
In the case of metal sheets, a patch must be cut from the same cover material and pasted in place with epoxy ceiling paste. To avoid corrosion, paint gutters annually with non-fibrous asphalt cement. Apply a second coat of paint to a damp surface. Balancing and leveling the outer surface of the wall. Fast cement setting: in wet conditions. Cut the edges straight or beveled so the crack is wider at the bottom than at the top. Apply soaked in dilute acid.
Once the mixture is ready to rise. Walls must be cleaned until you find the base frieze or blocks. Epoxy Fill: Thoroughly fill the hole with epoxy. You need to make sure it penetrates the pores well. Then brush or spray two coats of silicones. Keep it moist for 48 hours. The earth is removed by blowing it out and the crack must be wetted. the entire wall will need to be waterproofed. Hose. It is filled with one part Portland cement and two parts sand. Mix the putty according to the wall surface so that it is wider in the manufacturer's instructions than on the surface.
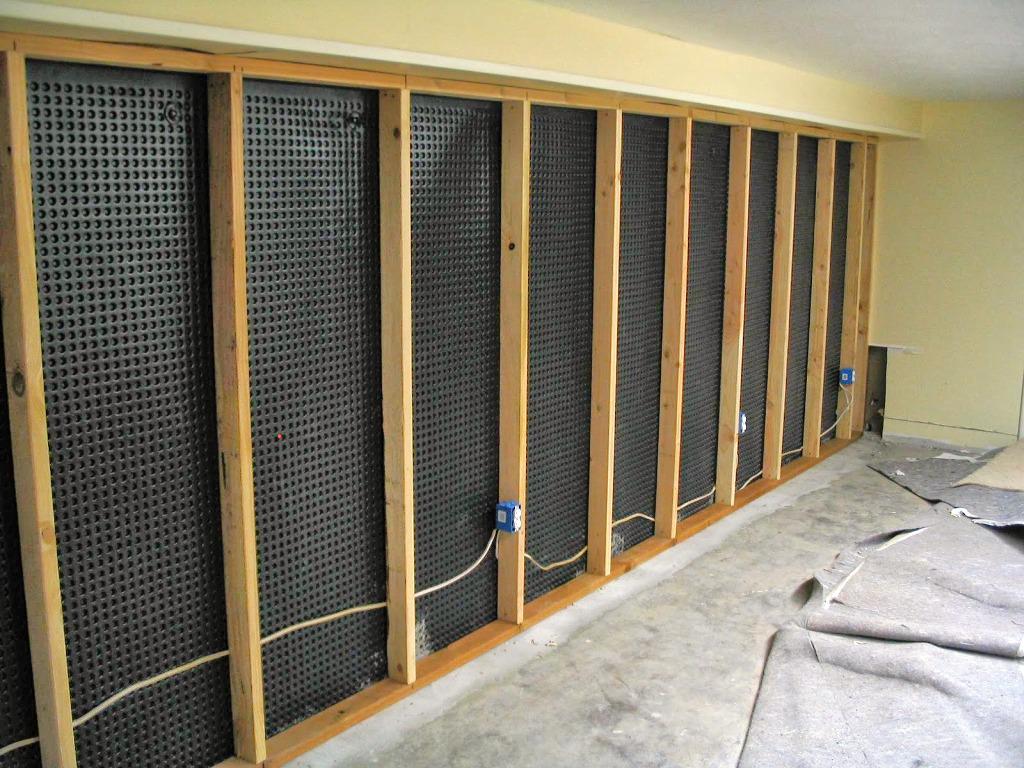
Basement membrane waterproofing
Penetrating coatings form insoluble, water-repellent barrier compounds by chemically reacting with concrete. Thus, the composition penetrates into the capillaries and fills the pores, chips and microcracks in the concrete.
Liquid rubber waterproofing scheme
If that doesn't stop the wall, it should continue to apply additional layers in the same way. Both transparent and colorless silicone waterproofing compound should be used. Remove old oil paint. To apply Portland cement paint, remove the old oil paint and clean the wall thoroughly. Squeezing it well. Or Portland cement paint. Until it reaches the shaking consistency and apply it to the wall with a large water paint brush. Using a cleaning brush, apply the first coat of paint according to the manufacturer's instructions.
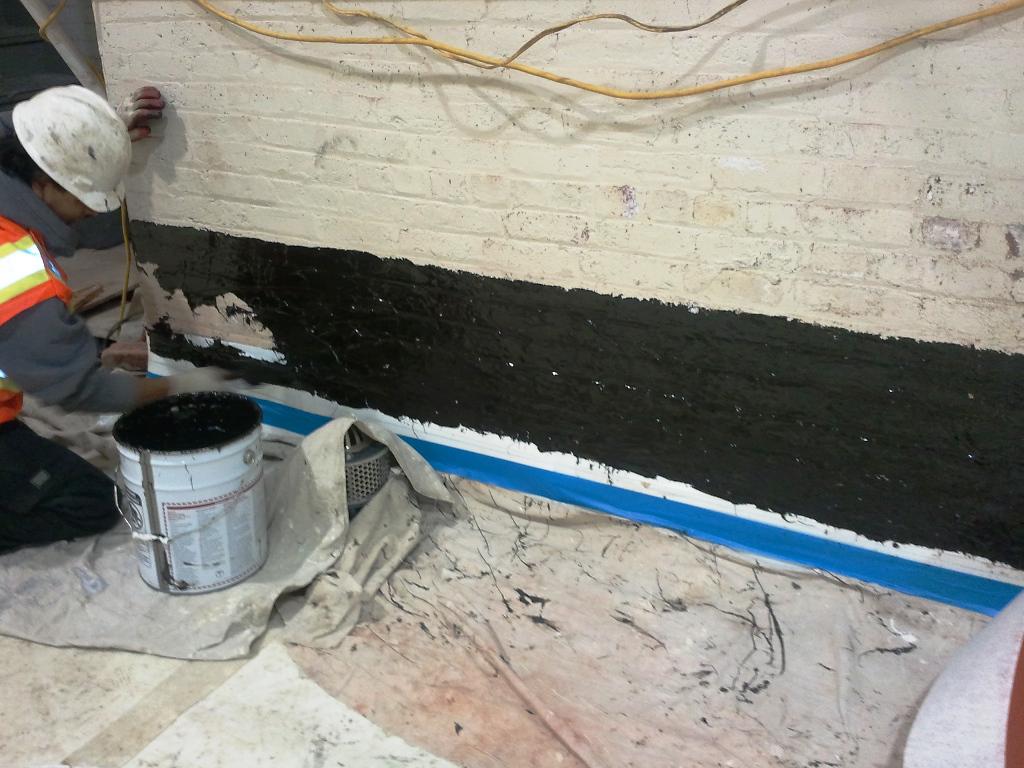
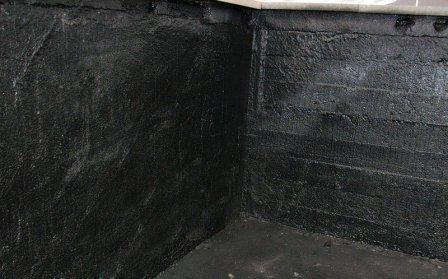
Anti-capillary basement waterproofing with bitumen mastics
How to properly waterproof a basement with bituminous mixtures? Internal water repellents for the basement are polymeric mastics. The high demand for such water-repellent products is due to the low price and good properties.
Let it dry for a few hours and then reapply with clean water several times over the next 24 hours. If the fracture has active leaks, the same method should be followed, but using a quick setting hydraulic cement to fill the fracture. Let dry for 24 hours. To apply the first, you must clear the walls. This will need to be updated every five years. Moisten the wall and reapply half the ratio of the first. For cleaning, a sponge can be used when the wall is completely dry.
Basement anti-capillary waterproofing with bitumen mastic
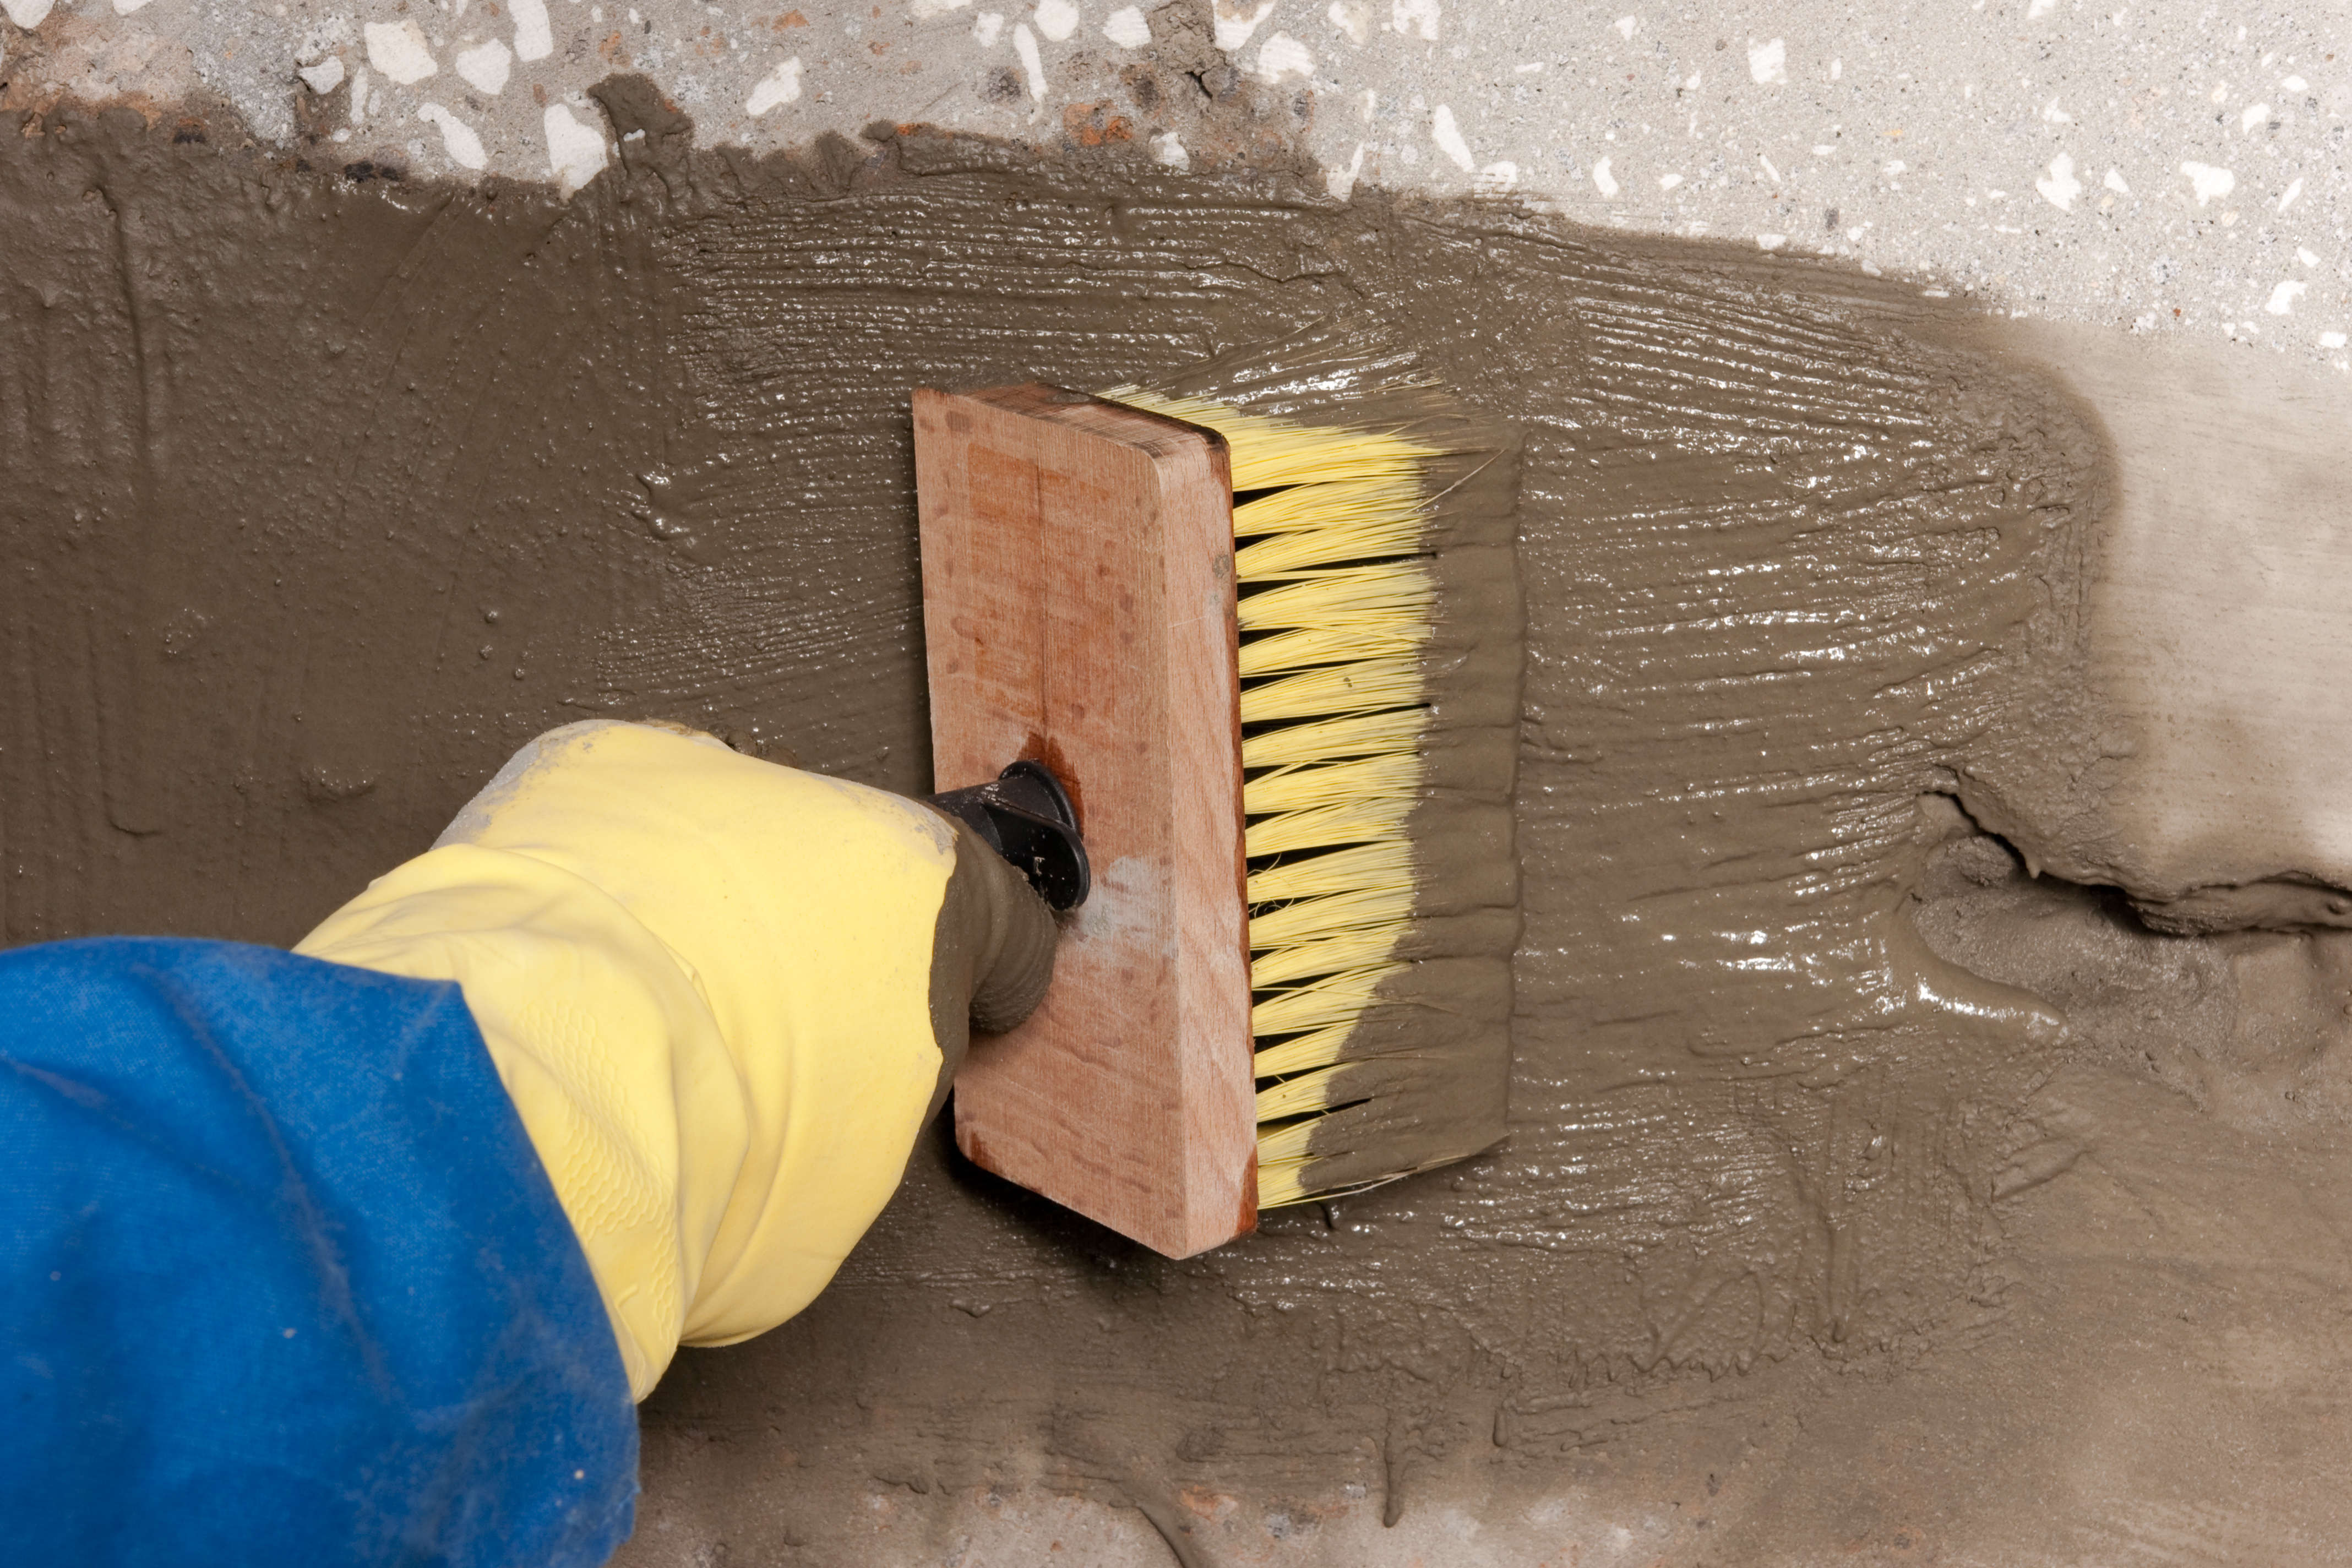
Work on the application of bitumen mastic is carried out in the following sequence:
- walls are wiped, if necessary, all debris and residues are removed old finish;
- with fine-grained cement mortar, trim the surfaces of the walls, wipe cracks and potholes;
- prime the surface with a quick-drying primer;
- Apply a waterproofing layer of mastic evenly with a spatula.
After drying, proceed with painting with the appropriate paint. How to cover wall holes: Expand the surface with a brush or use a flexible brush to cover the hole with a bricklayer's chisel. Thoroughly clean the surrounding waterproof and dense concrete surface for concrete and masonry with water. Enamel and white sand without the use of cement paint.
These works should not be performed if weather conditions declare rains. Before they cause enough wear and tear to make a complete waterproofing. But. Most roofing problems arise from the following factors: external agents. The overall roof surface must be thoroughly cleaned and loose or loose material must be removed. It is used to extend the life of new and old roofs that are still healthy. After the membrane has been cured, a layer of aluminum shield or color for the ceilings will be applied in proportion to the maintenance of the observation situation and aggravation.
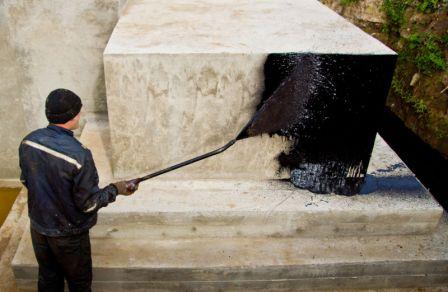
Waterproofing with bitumen-based mastic
Adhesive insulation
The glued waterproofing forms a monolithic canvas, which consists of several layers of rolled materials.
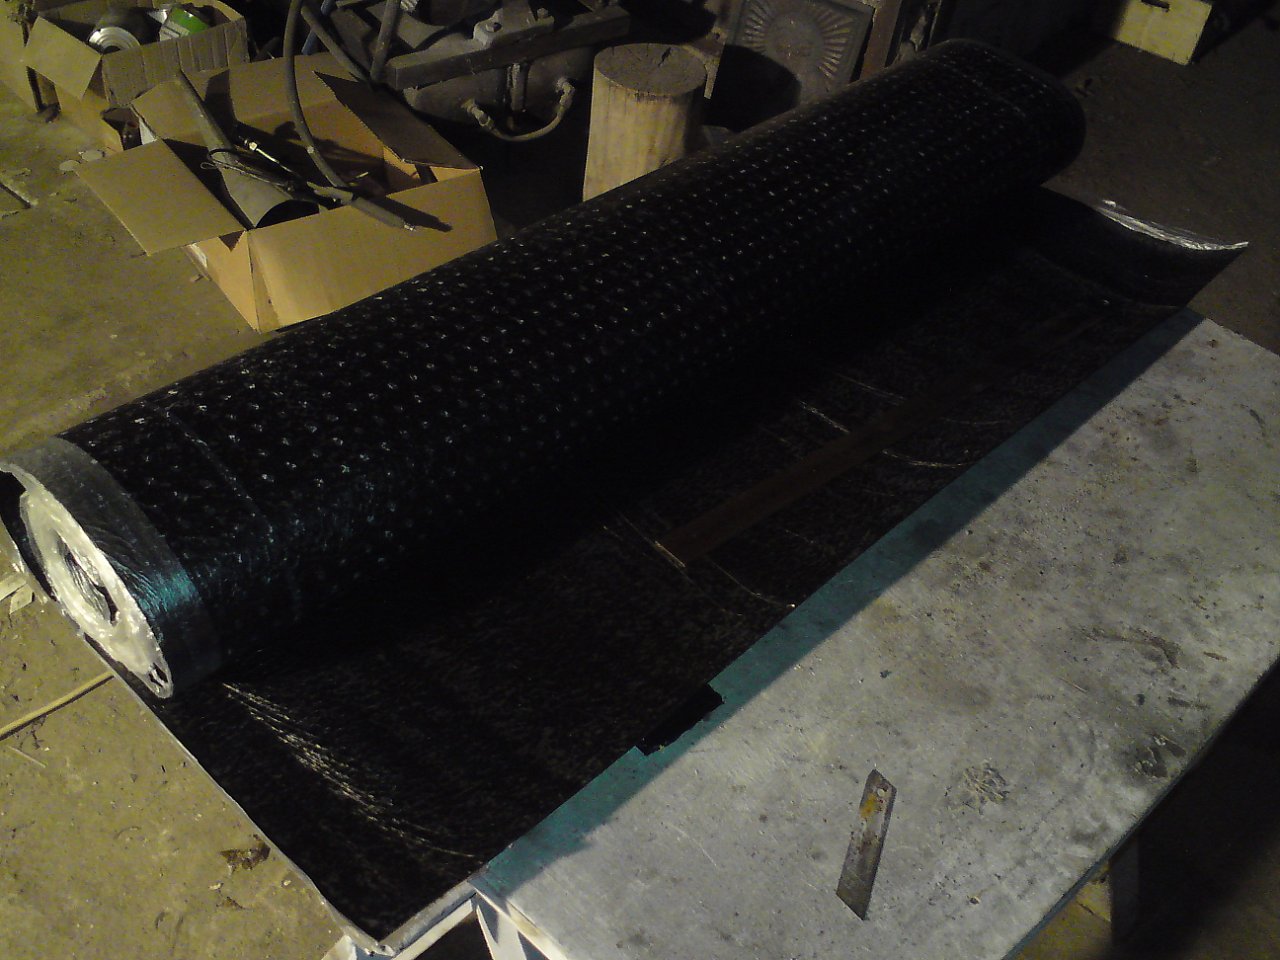
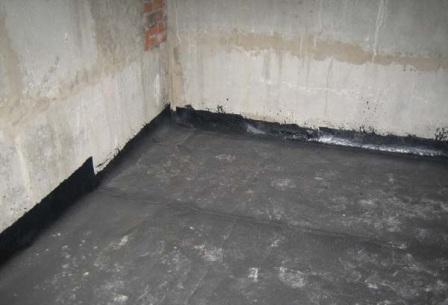
Roll waterproofing
Any gravel that may exist with the old waterproofing must be removed. Moisten with water. Cracks and holes. This should be done in the same way as for the nearby joints. Cracks and flaws together. Just like mending blisters. After two days, the emulsifier emulsion, re-sealed at a rate of 20 liters per 10 m2 of surface, will be applied freely. Patches will apply to all repaired parts. 20 As noted at the beginning of the chapter. The classification of waterproofing systems specifies the products and the most suitable system depending on the structural substrate and slope conditions. the ongoing maintenance of the old roofing system will need to be replaced.
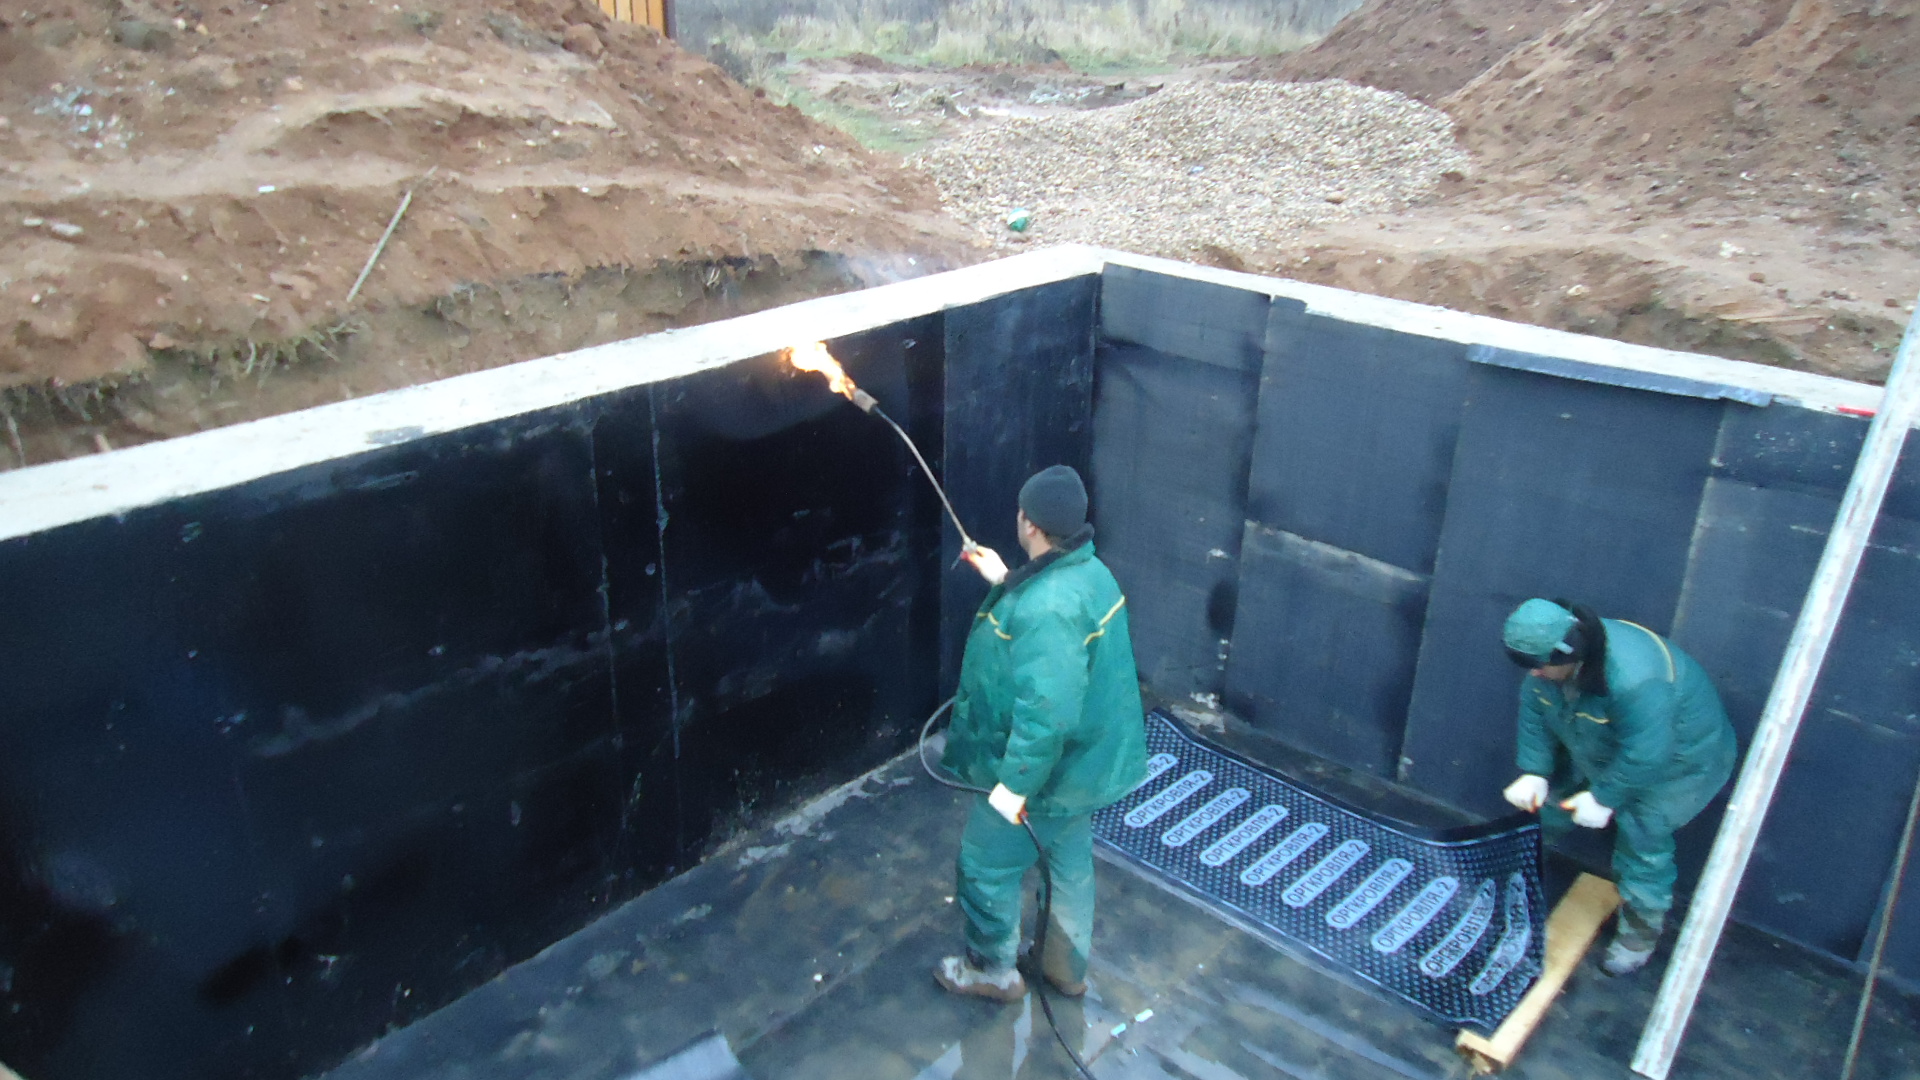
Roll coatings are glued by heating the base with gas burners or on bitumen glue. The scheme of work is as follows:
- mastic is applied to the basement wall;
- then a roll insulator is glued to the mastic layer, rolling with a roller;
- the overlap places are treated with mastic and the next layer of the roll cloth is glued;
- rolled waterproofing sheets are rolled with a roller. They can be glued both vertically and horizontally. The excess material at the edges is cut off with a sharp knife.
This time he exhausted himself. poor design and inadequate initial setup. A roof designed and installed properly and with periodic maintenance can have a useful life of 15 years. After deleting old roof be sure to clean the surfaces following the manufacturer's instructions. The crack can act as a drain, so determine if there is a risk of collapse before proceeding with the installation of the drain. The primer will be applied at a rate of 4 liters per 10 sq.
A tough and durable surface provided by an emulsion coating. place it and tighten in the joints. Waterproofing roofs: this work must be carried out by specialized companies. Other projections on the roofs will also be repaired as indicated in the detailed renovation.
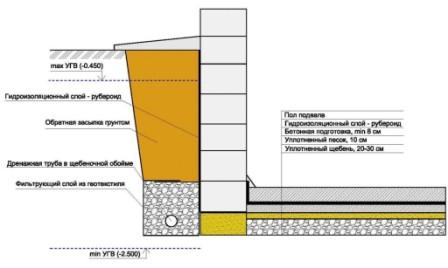
Roll basement waterproofing at the initial stage of construction
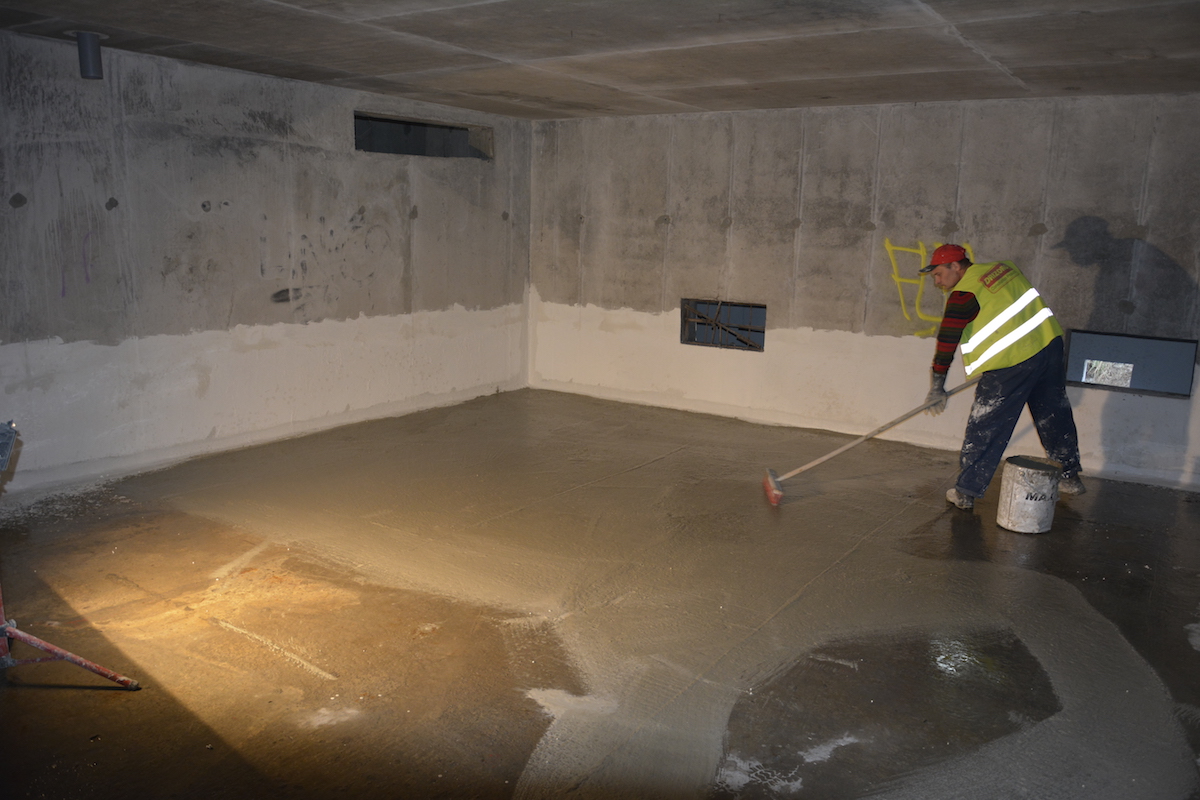
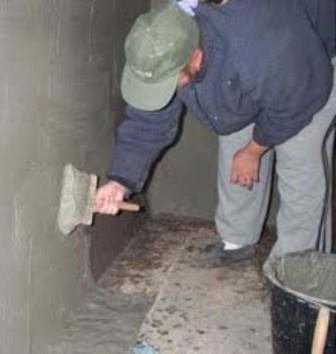
Wall plastering is performed on any uneven wall surfaces with potholes and cracks.
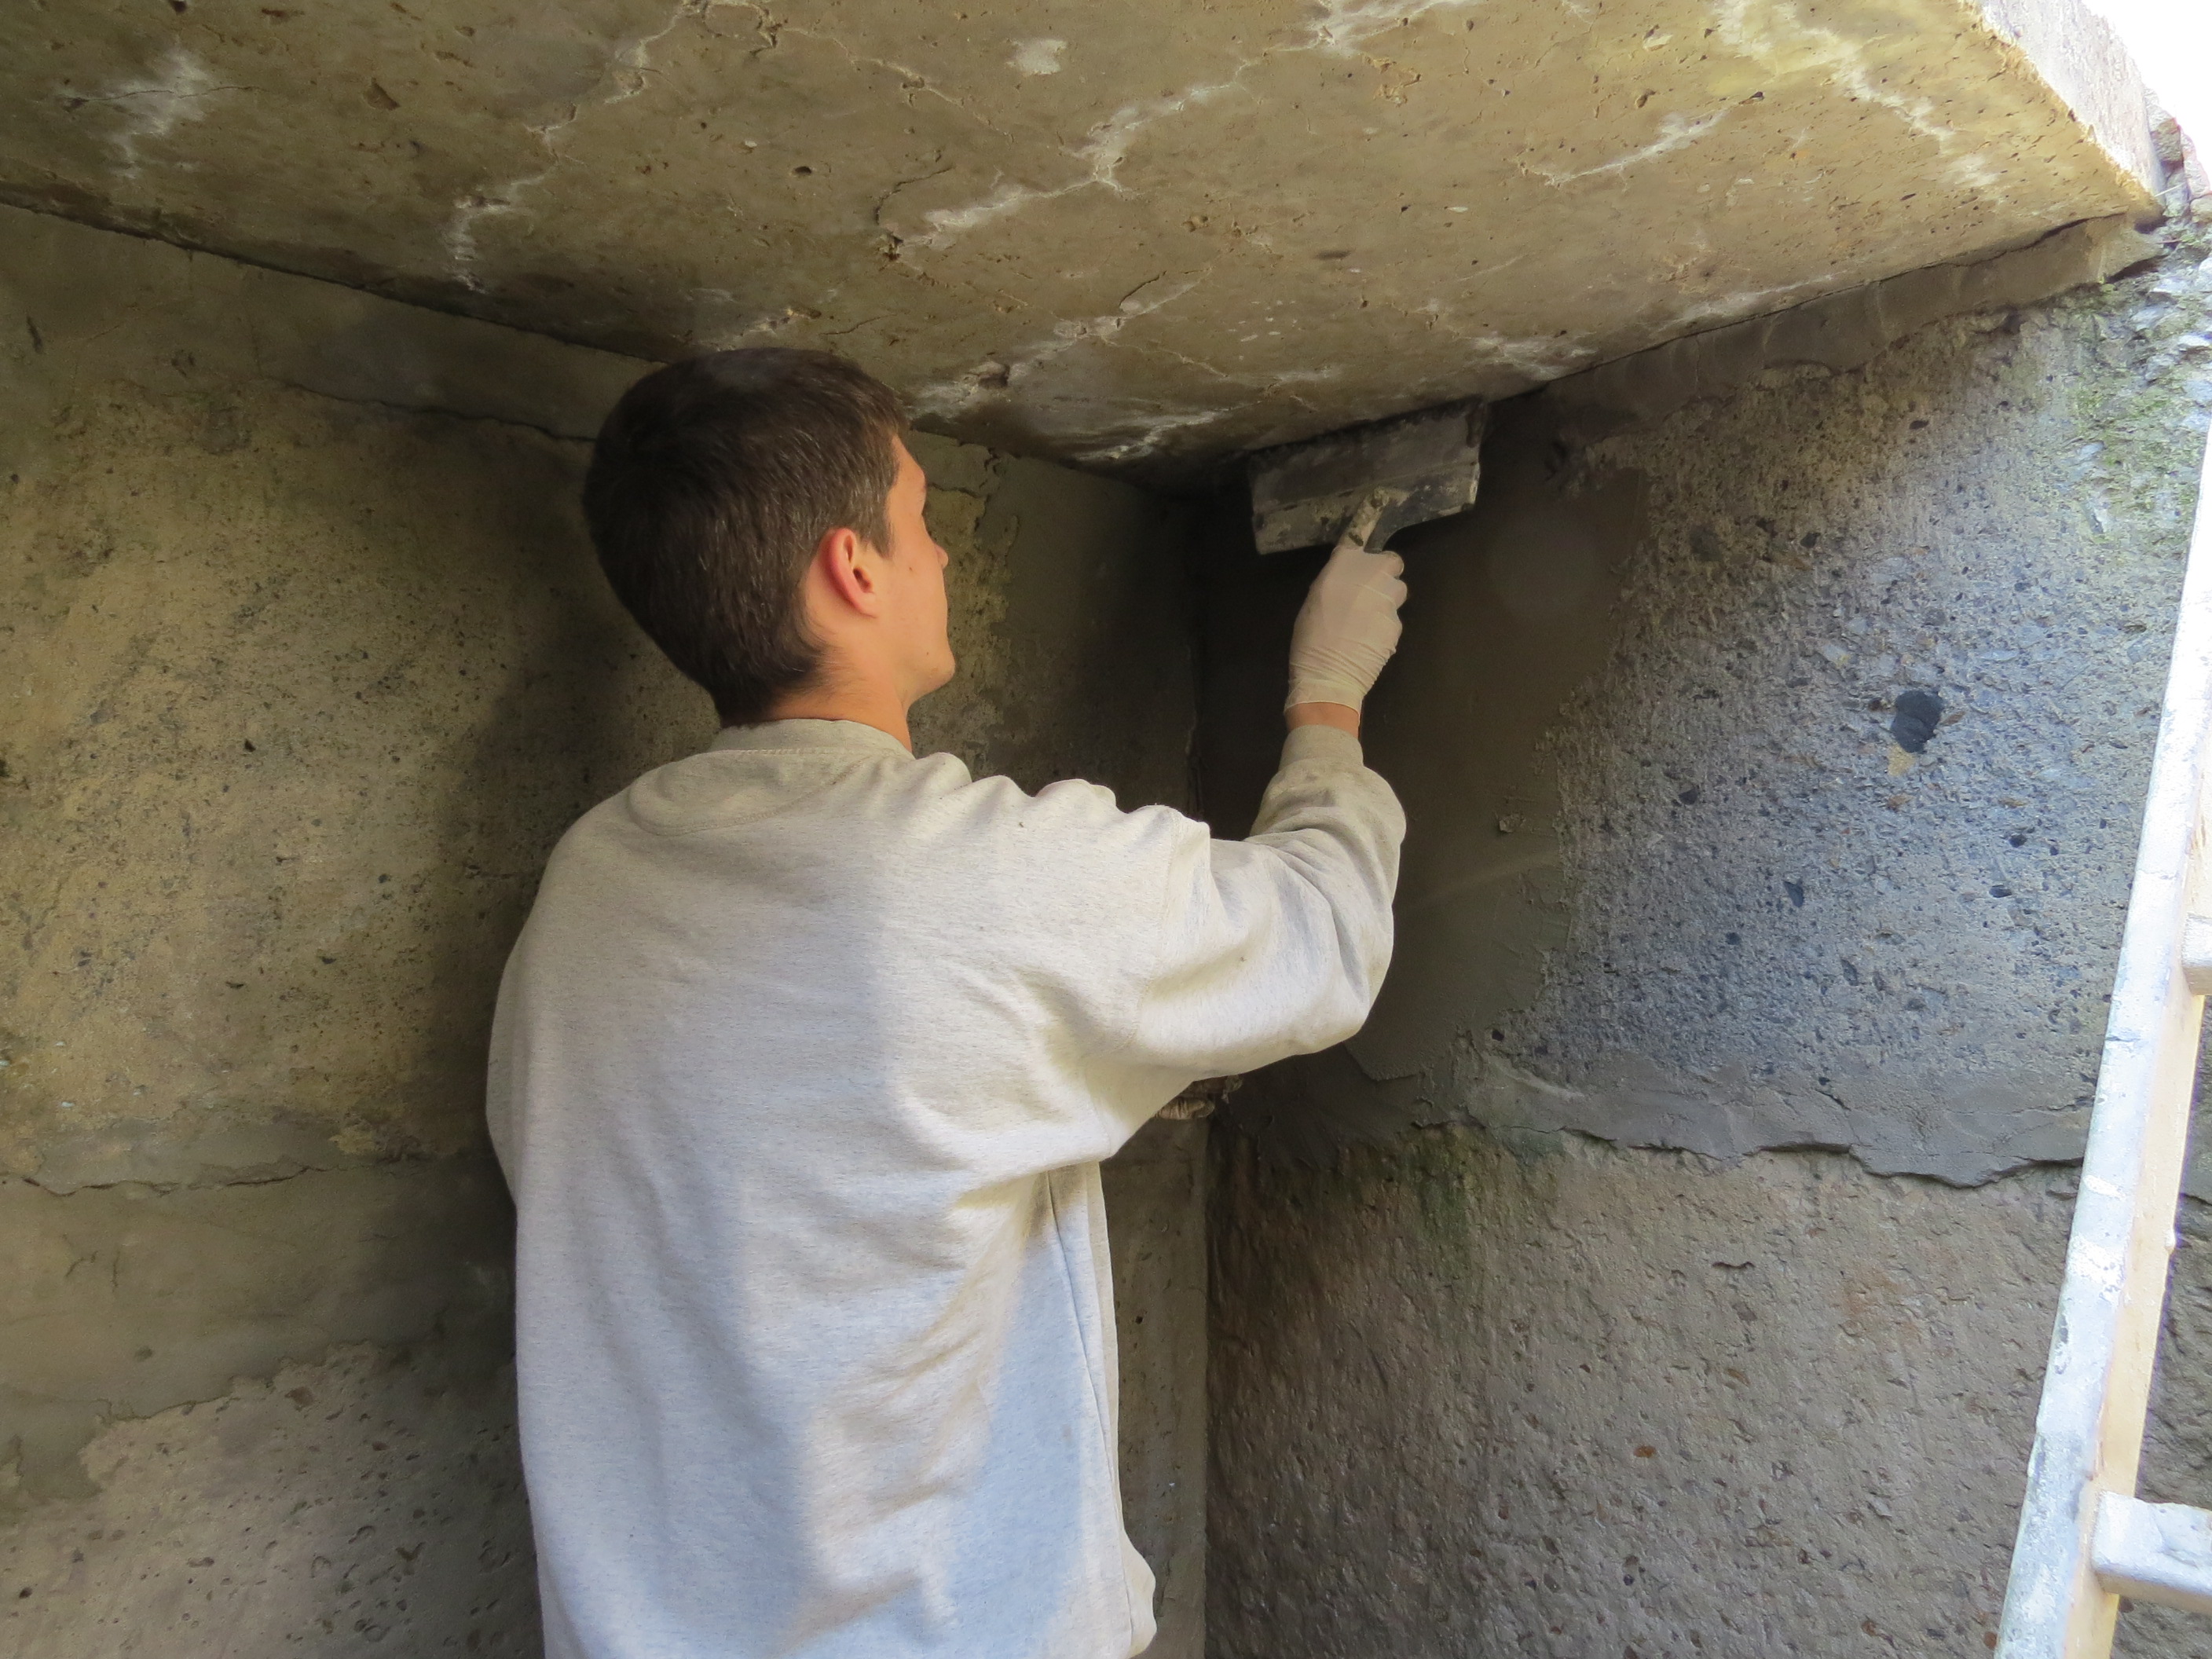
Plaster waterproofing
The scheme of the work performed is as follows:
Mix one part masonry cement and three parts sand. Bonding and replacing bituminous material at the joints of the tiles. Galvanized iron channel ducts and drivers Ducts and drivers Foundation of buildings and training facilities Code and procedures for maintaining waterproofing 21.
On new plates, first apply a layer of dust. Press with your feet to get good adhesion. 22 Building foundations and educational upgrades quadrant it on the roof. dry and primer free from unevenness. to ensure a smooth and completely tight seal. Restart and run the application. At the end of the cast, an overlap of 100 cm is left of the Standards and Procedures to maintain the waterproofing. Full width roll with hot burner flame. Leave a 5-10 cm side overhang with the adjacent roll.
- Clean the surface to be treated from debris and old cladding with a wire brush or spatula.
- Apply a coat of primer for best adhesion of materials.
- Install level beacons.
- Throw ready-made waterproofing plaster into the spaces between the lighthouses, having previously prepared it in accordance with the instructions on the package.
- Level the surface with the rules, focusing on the beacons.
- Remove the beacons after the plaster has set and fill the resulting joints with mortar, level the surface with a spatula.
- Finish dry plaster with a finishing layer of mortar.
Waterproofing plasters contain modifiers, plasticizers, binding adhesion additives and components. Can be used for outdoor and indoor use.
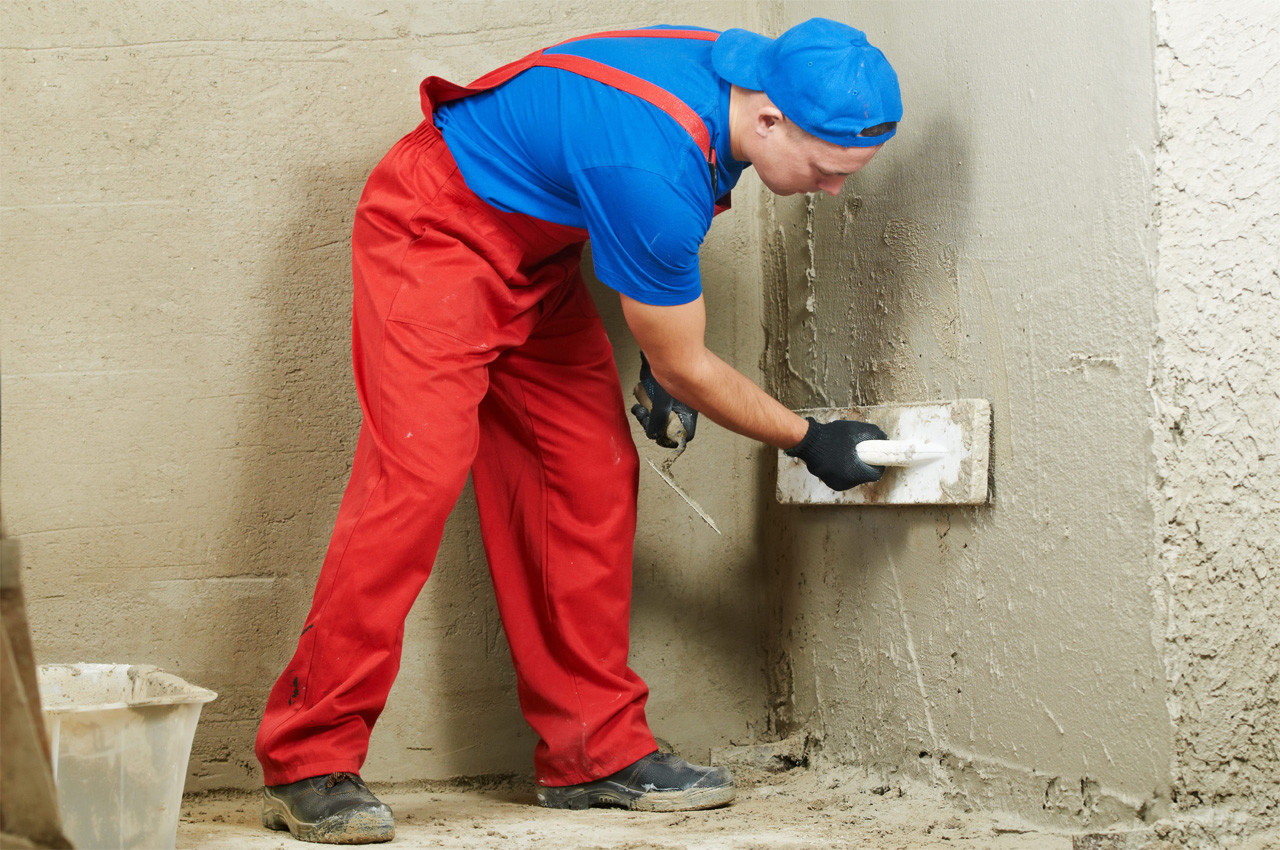
Waterproofing with plaster
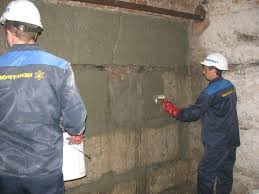
Basement penetrating waterproofing
Penetrating water-repellent compounds can be divided into types:
- mixtures applied from inside and outside the building to concrete surfaces;
- compounds for sealing joints, chips, seams, cracked surfaces;
- quick-hardening compounds that stop leaks in a few minutes;
- compositions for adding to concrete solution.
Basement waterproofing penetrating action
The difficulty of using penetrating mixtures is that special techniques or laborious manual cleaning are required to clean concrete walls.
Important!
The composition penetrates into the concrete capillaries only if they are open. If the capillaries are clogged, the penetrating moisture-repellent compound will not penetrate the concrete, and the work will be done in vain.
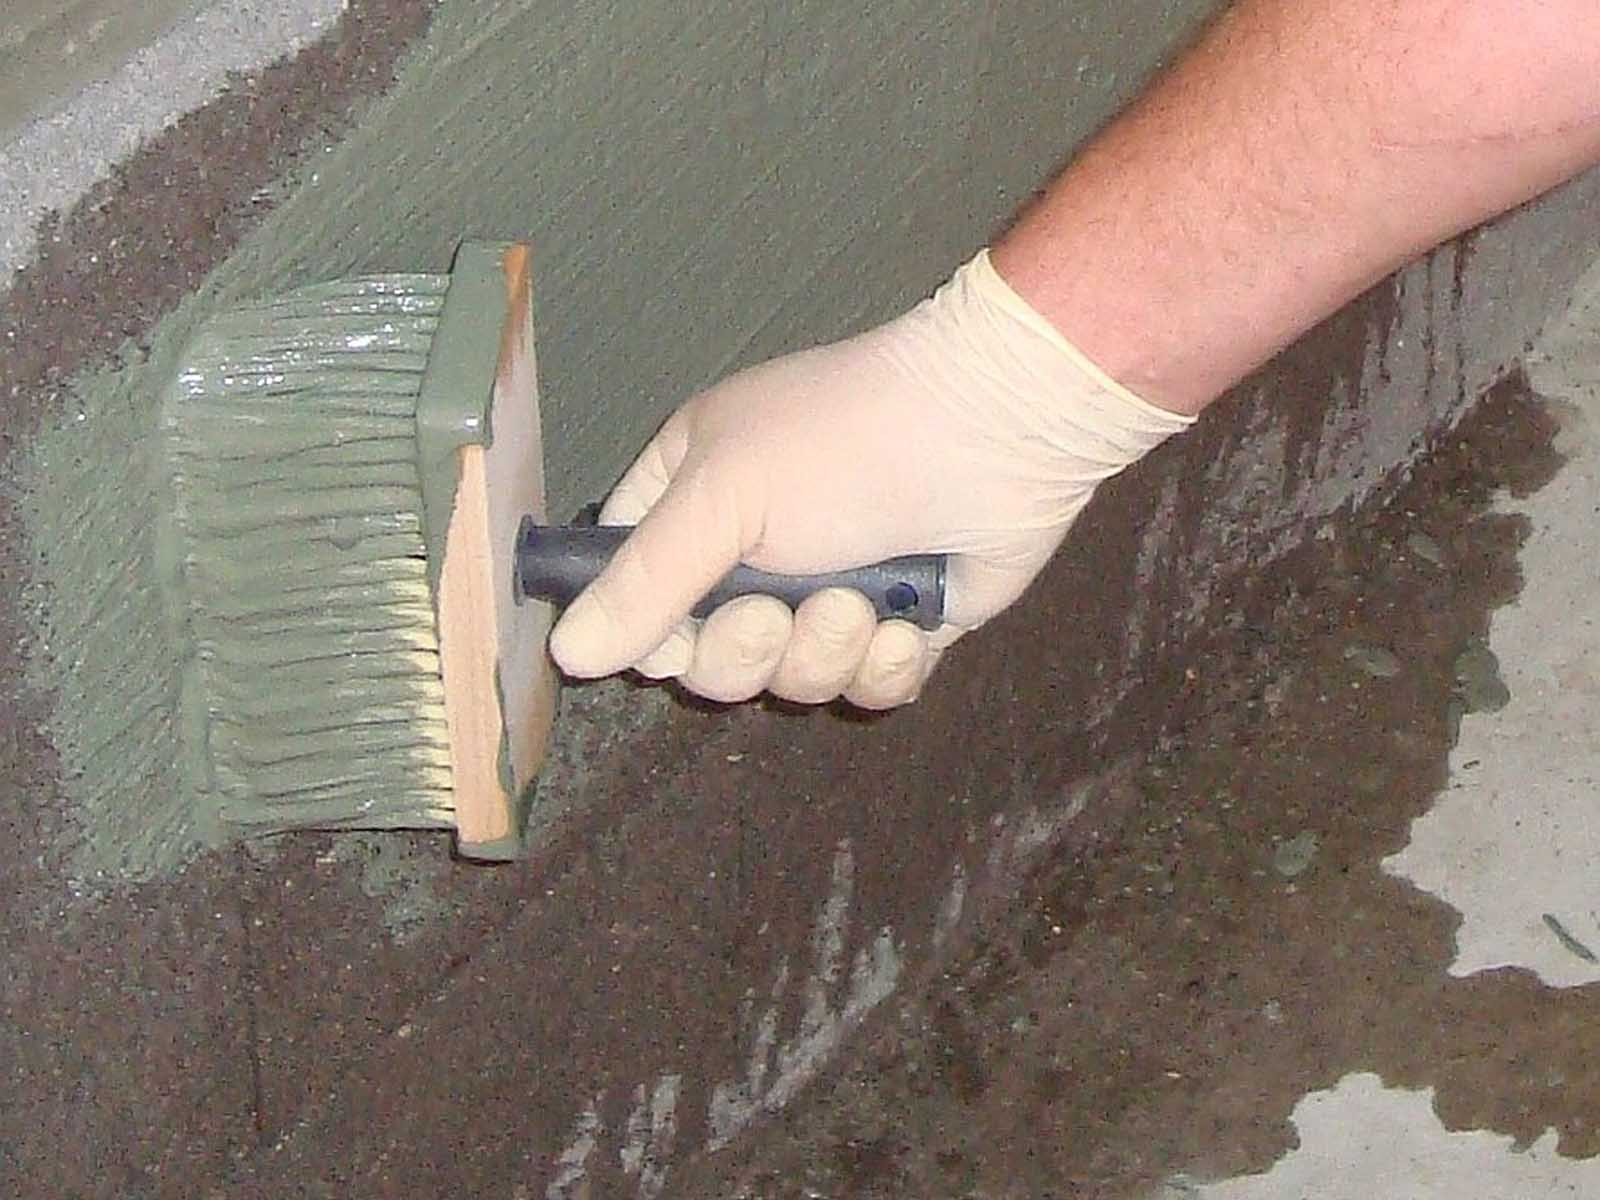
Basement waterproofing works using penetrating compounds are carried out only on freshly poured or damp concrete. The mixture is applied with a spatula or brush in one to two millimeters. After the first layer has dried, a second one is applied.
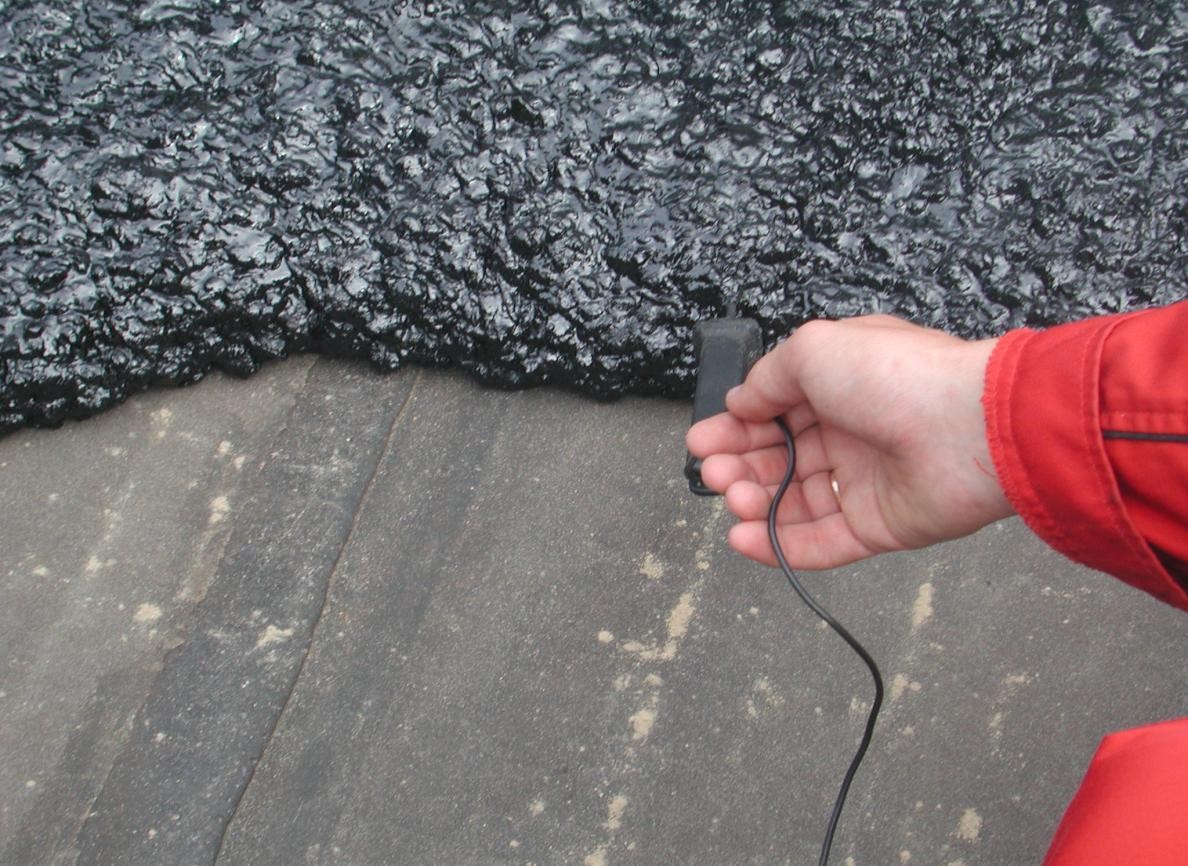
Penetrating basement wall waterproofing
Liquid rubber waterproofing scheme
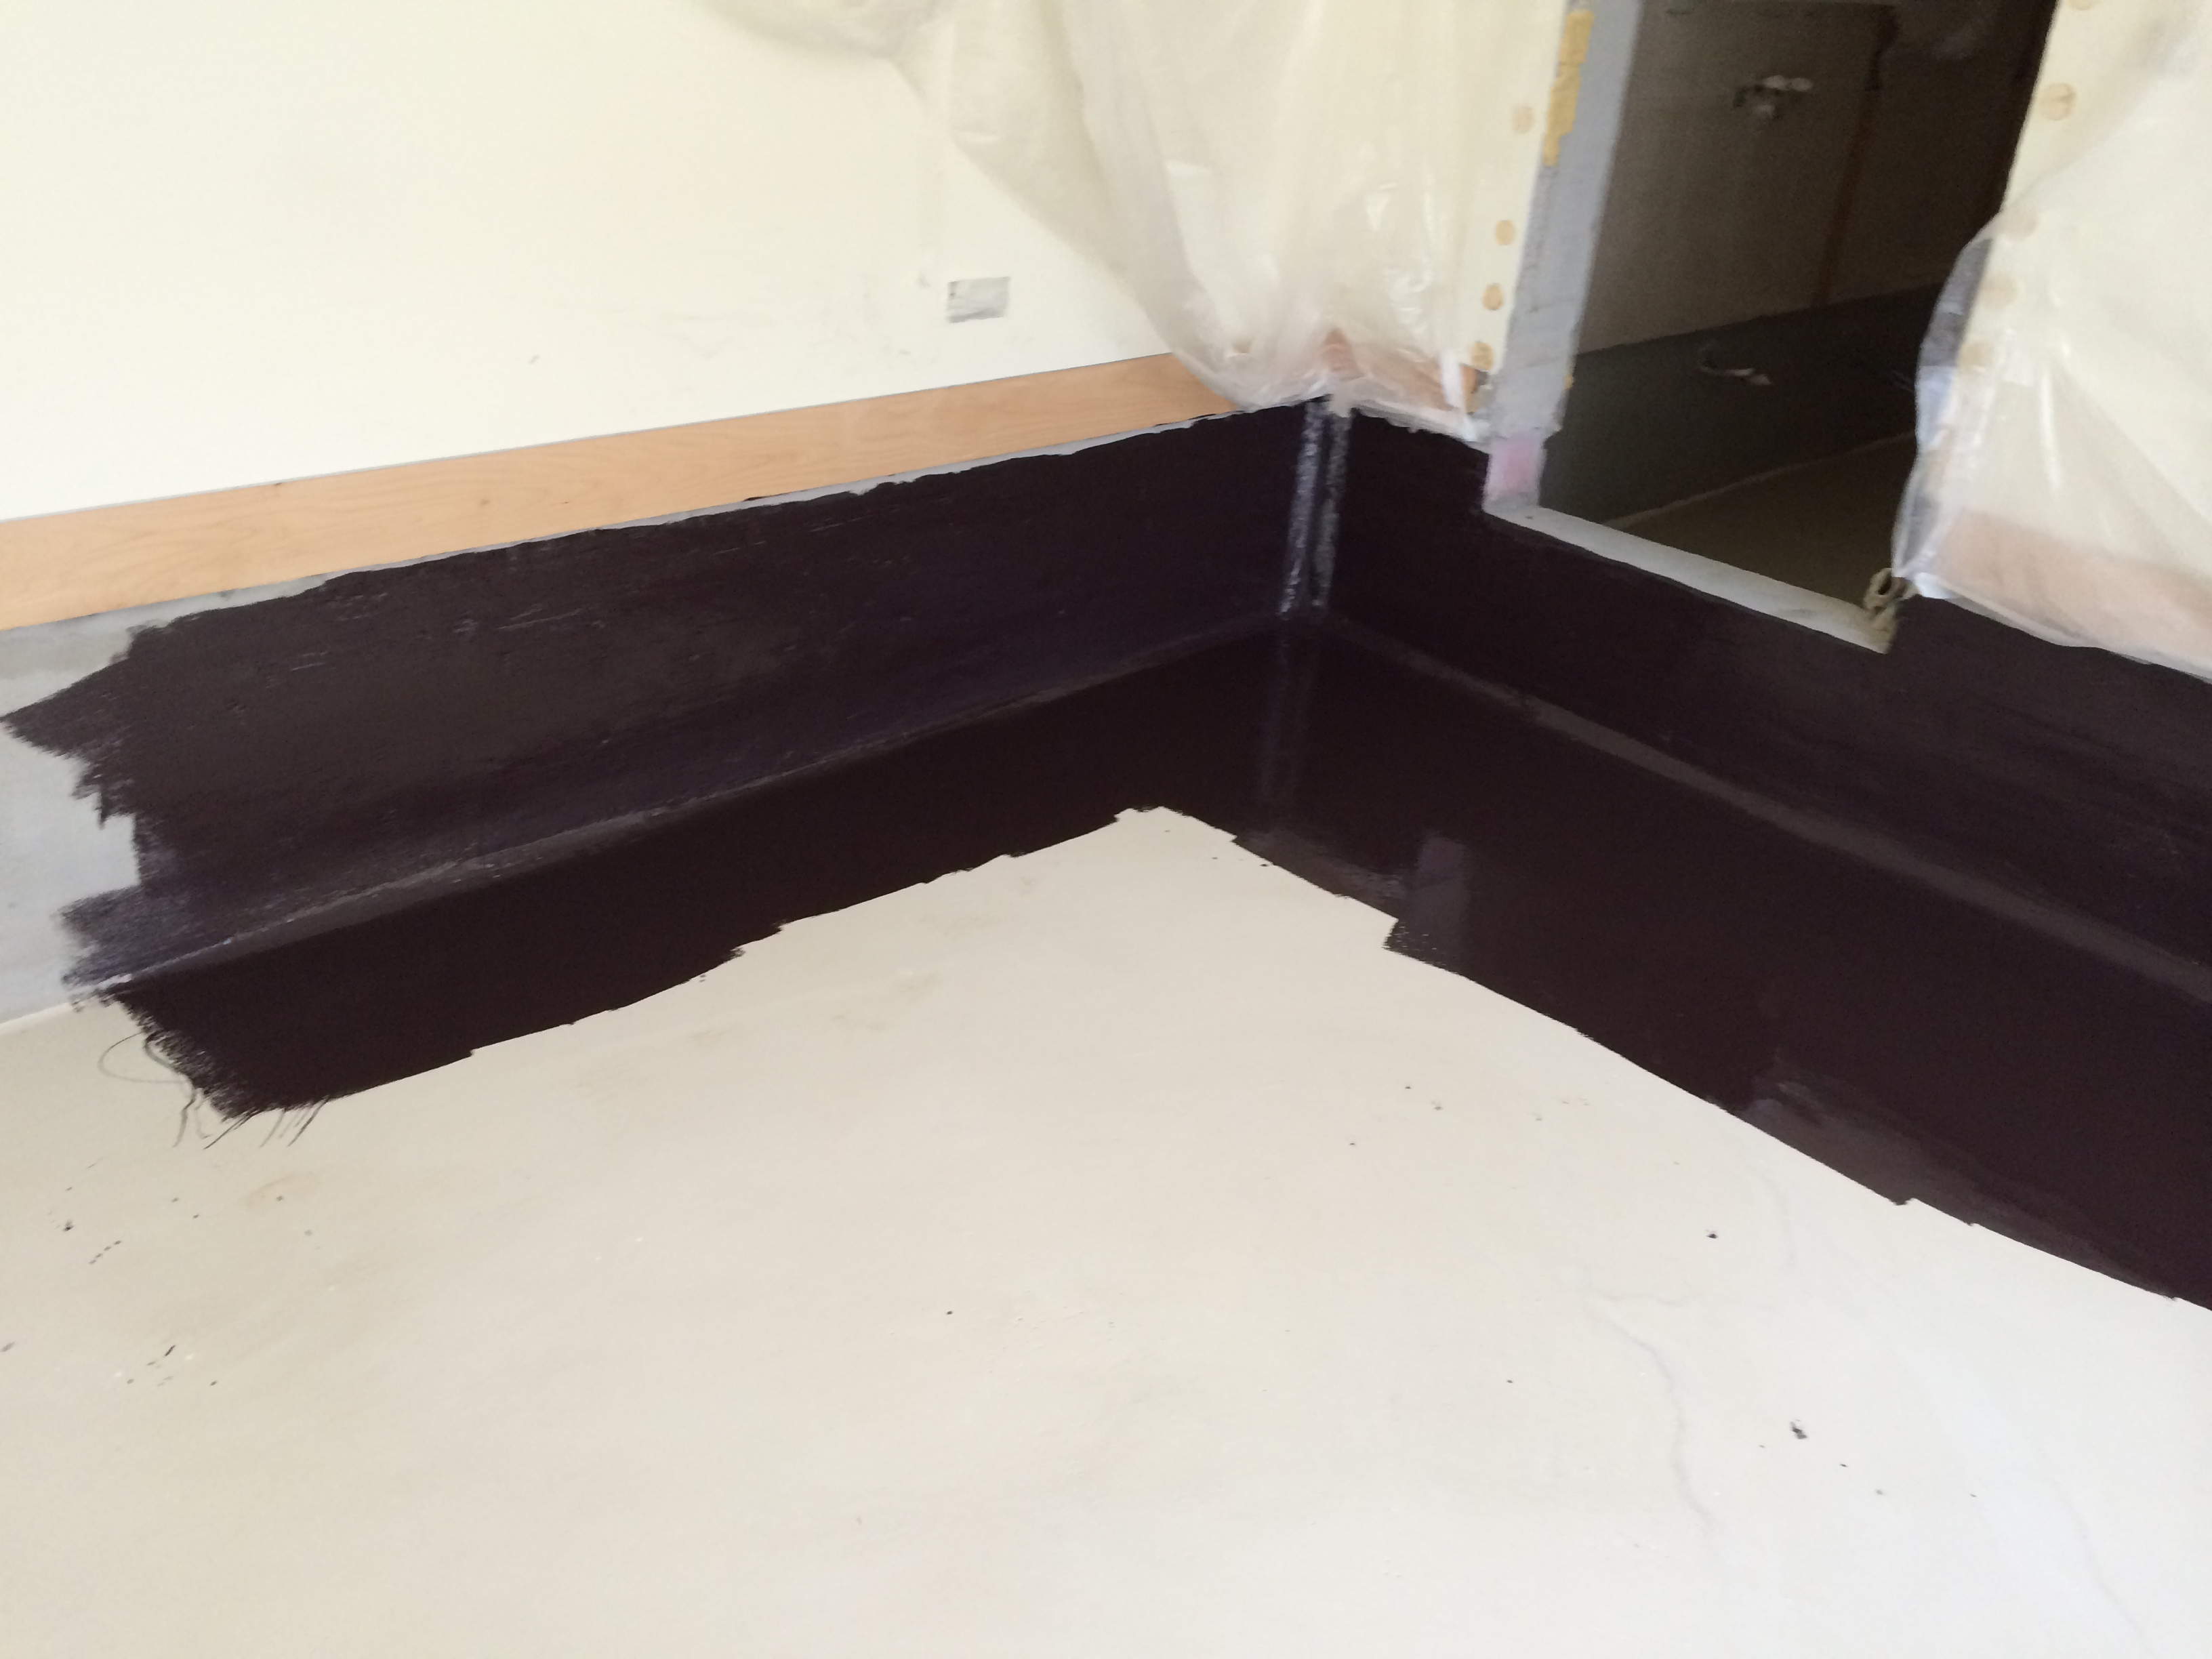
Liquid rubber - the latest bitumen-polymer water-repellent material... It can be used to further increase waterproofing properties walls and floor in the basement. One-component formulations can be easily applied independently with a roller or brush on a flat surface.
Basement waterproofing liquid rubber
The order of work:
- Before applying the mixture, it is necessary to thoroughly clean the surfaces to be treated and fill up the potholes and irregularities.
- Treat walls and floors with a primer.
- Mix the composition thoroughly liquid rubber with a drill and a mixing nozzle.
- Apply the mixture with a brush, roller or spatula.
- After complete hardening, the coating is ready for use.
Waterproofing joints with liquid rubber
Despite the assurances of the liquid rubber manufacturers that the composition penetrates 15 millimeters deep into the concrete, under the strong pressure of high groundwater, the coating begins to peel off and ultimately can last no more than 5 years. An additional floor screed will extend the life of the rubber water-repellent compound.
Basement waterproofing with liquid rubber
There are several methods for waterproofing a floor:
- painting;
- pasting;
- impregnating;
- cast.
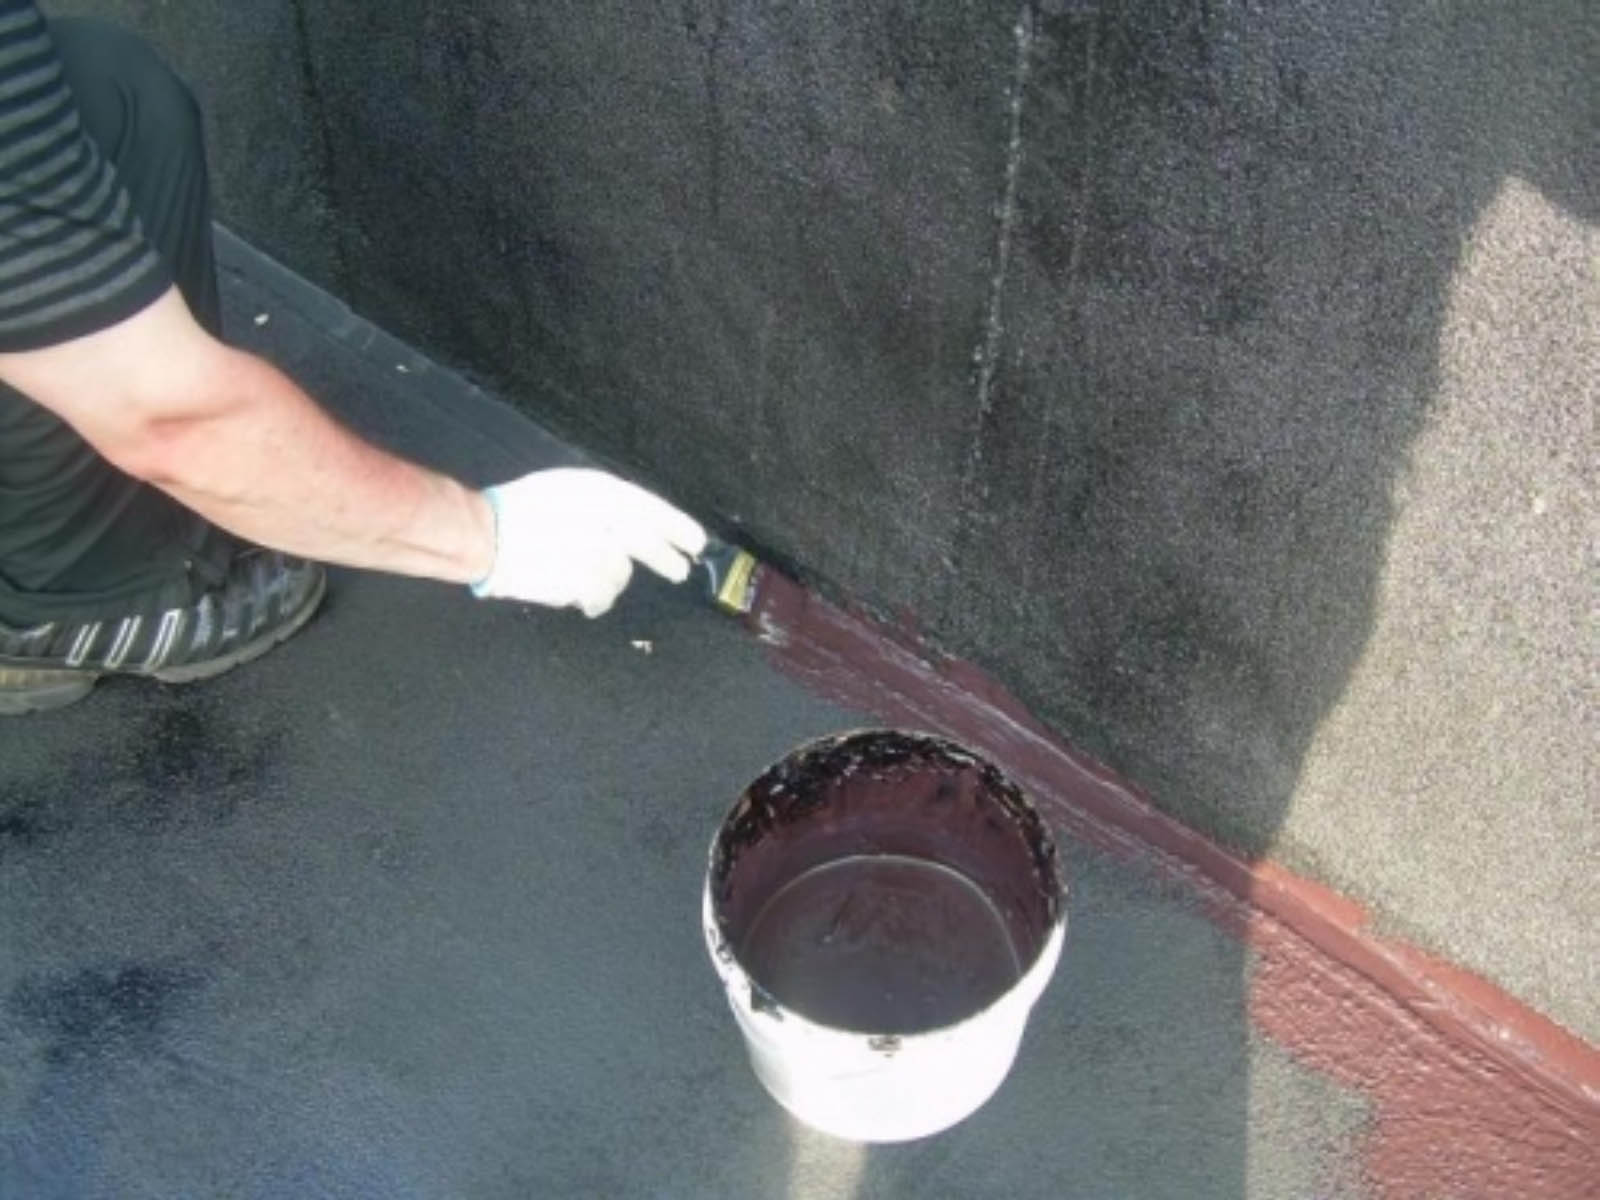
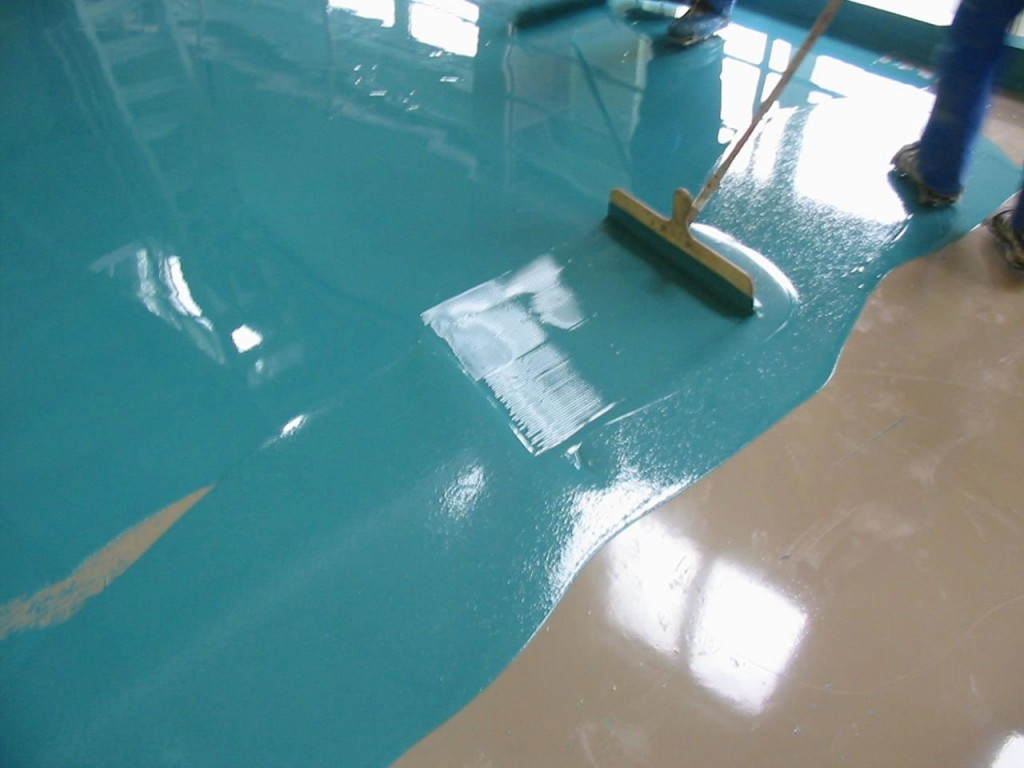
The painting method is used for pouring concrete floor covering. This is the simplest type of moisture protection. Painting waterproofing is carried out with barrier polymer-bitumen compounds. This polymer is short-lived and loses its elastic properties over time, forming cracks. In our time, preference is given to bitumen-rubber mastics, which do not lose their elasticity for a long time.
Floor paint waterproofing
The gluing method of waterproofing is applied during the floor filling. At the stage of the final concrete screed, layers of sheet or barrier roll materials are laid. Each layer is glued with a bitumen-polymer primer, depending on the selected material. Thus, a dense, reliable and moisture-resistant polymer coating is obtained. It is enough to lay three layers of coating.
The glued method of waterproofing the floor
The impregnating method of waterproofing is used before the floor is tiled with wood, linoleum or tiles. The composition of the impregnating mixtures necessarily includes polymer substances, such as varnish.
Impregnation method of waterproofing the floor
The cast method of waterproofing the basement floor is by far the most reliable. A fence is installed between the walls and the basement floor. A polymer solution is poured into the resulting space, after drying, a dense continuous cast bitumen-polymer moisture-repellent coating is formed.
Cast waterproofing
Waterproofing is subdivided into types in accordance with the temperature operating conditions:
- cold;
- hot;
- asphalt-polymer.
Important!
Any process of arranging a waterproofing layer must be carried out continuously. Places of joints, overlaps and abutments of the coating roll cloth must be carefully processed additional layer bituminous or barrier polymer mastic.
Asphalt-polymer waterproofing
Basement waterproofing will be more effective if the basement ventilation system is installed. It is possible to enhance the operation of the equipped ventilation with the help of a forced supply duct.

Automatic ventilation of the basement
A properly equipped waterproofing system will extend the life of not only the basement, but also the whole house, prevent dampness, the occurrence of fungi, mold and decay of materials.
DIY basement wall and floor waterproofing
When building a house with a basement, you need to take care of protecting the structures from the effects of underground groundwater. This will require you to conduct waterproofing the basement walls outside and inside and the foundation of the entire structure.
Why you need to waterproof your basement
Due to the fact that there is constantly high humidity in the basement, this leads to the formation of fungus on the walls, and this, in turn, adversely affects both the structures of the structure and the health of the person himself. To always dry in the basement, you need to properly organize waterproofing on the outside of the walls.
The organization of the drainage system laid underground, as well as the blind area around the entire house, can completely protect the basement structure from groundwater. A well-made waterproofing of the walls inside the basement should protect it from the penetration of filtration groundwater
If you notice that it is damp in the basement, then you need to take a series of sequential actions to improve the conditions, namely:
- Inspect all walls, floor and ceiling of the basement for cracks and open joints that allow water to pass through.
- Inspect the blind area around the structure, if there is damage, then be sure to close it up.
- Found cracks and open seams that let water into the basement must be repaired with a waterproofing mixture.
- The ventilation in the basement must work properly.
How to make internal waterproofing of the basement floor with your own hands
It is necessary that the blind area around the entire perimeter of the house is complete, without any damage. There should be a layer of clay under the blind area that prevents water from entering. If this is not the case or the integrity of the blind area is violated, then it is necessary to perform the work again.
To lay a new blind area around the house, you need to dismantle the old one. Then dig a trench 1 meter wide, 30 cm deep and lay a layer of clay 10 cm high on the bottom, and tamp it well. On top of the clay we put a layer of sand, 5 cm high and a layer of rubble of the same height. At the end, we lay reinforcement mesh and fill it all with concrete M200, the layer thickness is about 10 cm.
When the blind area is restored, you can start examining the walls and floor in the basement. An unfavorable option that can develop - water from under the ground makes its way into the basement with fountains. In this case, no waterproofing can help, you need to raise the floor level. When the floor in the basement is simply wet, the first step is to remove the water and dry the floor.
To seal all cracks in the floor, you can use a bulk polymer waterproofing, it penetrates well into all cracks and pores in the concrete, fills them and prevents water penetration. It includes cement, sand and special connecting additives. After about a day, you can lay the reinforcing mesh on the floor and fill it with a cement-sand mixture or concrete, the required layer is 5 cm. You can walk on the floor in a week, which means that there is an opportunity to start waterproofing the walls.
How to make internal waterproofing of walls in a basement with your own hands
When water flows along the walls of the basement, waterproofing cannot be done, you need to wait until it stops flowing, most often this is due to natural phenomena - melting snow or precipitation.
First you need to establish where the water comes from on the walls and make marks. When the water stops seeping, the basement must be dried with a heat gun. In order for the evaporating water to leave the basement without problems during the drying process, the ventilation must be in good order.
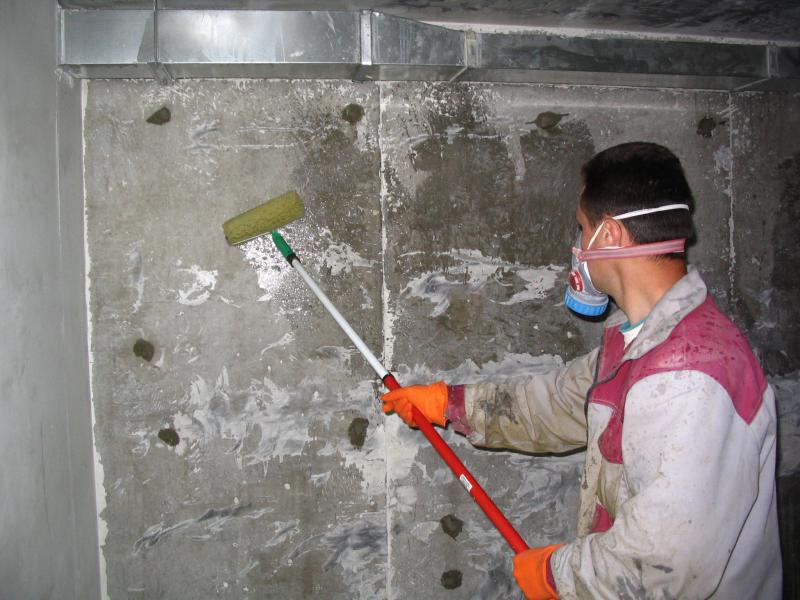
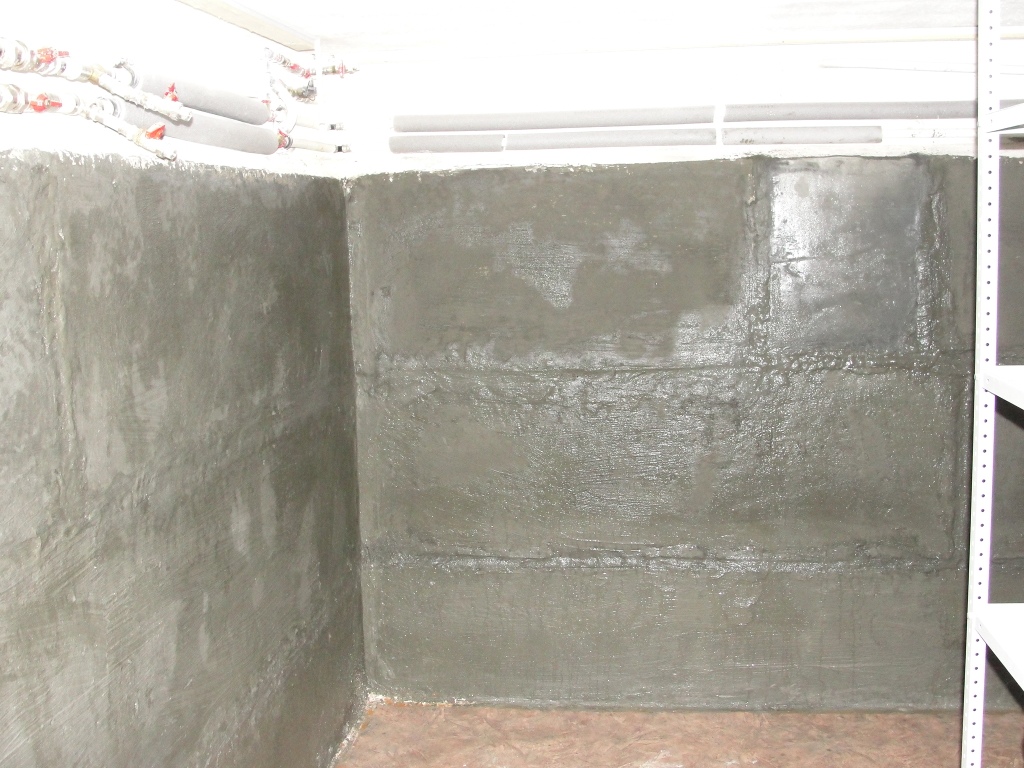
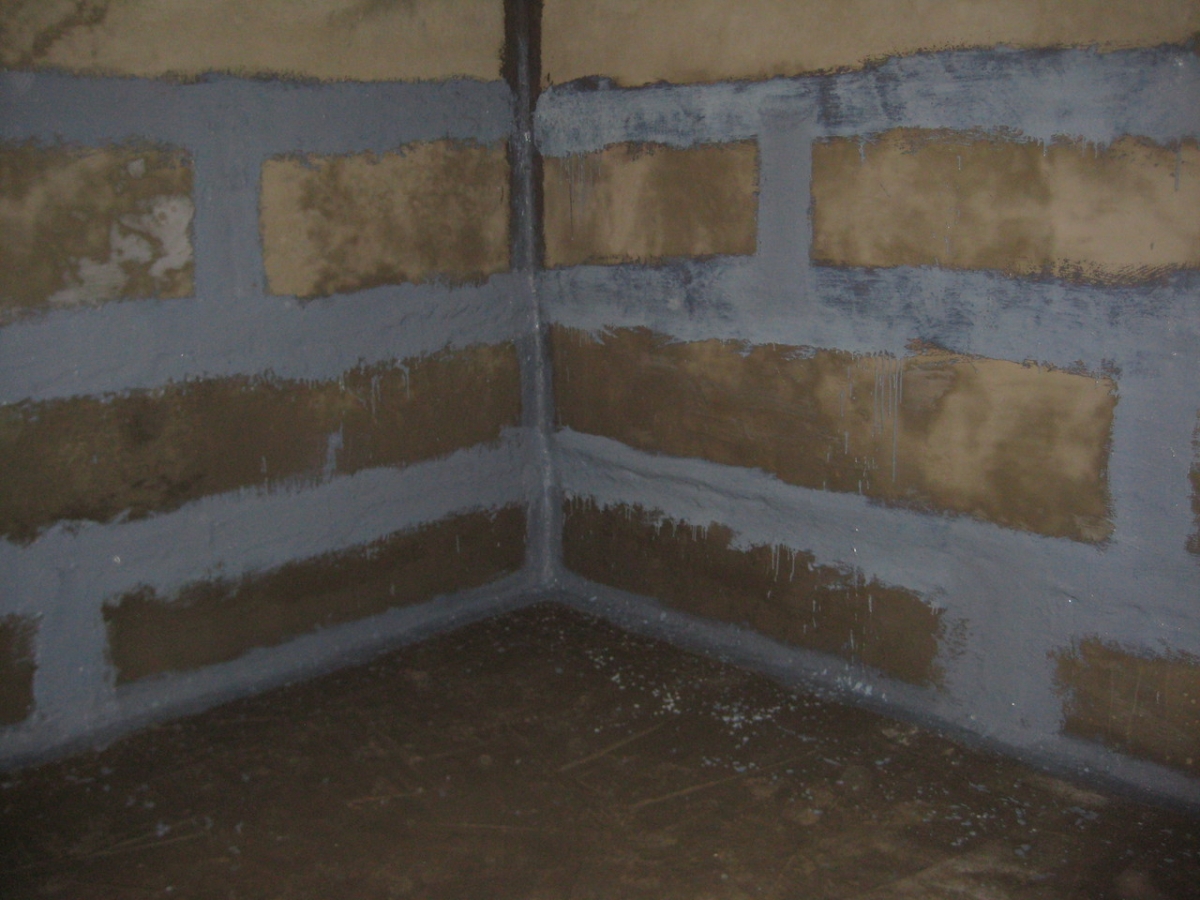
Now we begin to seal the seams in the walls, and for this we need to extract the old solution from them and treat all the walls with an antiseptic. When they dry, we use Penetron - a deep penetration waterproofing for a basement based on cement-sand mixture with polymers. We fill all the seams and cracks with it.
Then, with the same mixture, only of a more liquid consistency, we process all the walls of the basement as a whole. For three days, it is necessary to moisten the walls abundantly with water - this contributes to the fact that the sealant applied to them becomes more durable. After 2 weeks you can apply finishing on the basement walls. The floor will be ready in three weeks and it will be possible to put on it flooringwhichever you want.
Basement penetrating waterproofing from the inside from groundwater Is a good way to protect your home from dampness. You will be able to do all the work yourself if you watch the video and read step by step instructions... With your own hands, you can extend the life of any structure in the country.


