Uninsulated corner apartments are cheaper, simply because they are cold. Two adjacent walls in contact with the street, and between them a freezing corner from the inside ... - horror for the residents. There may be two such rooms in a corner apartment.
Insulation from the inside is not the best option solutions to the problems of a corner apartment, but sometimes only he remains. This method also manages to solve main problem corner apartment - cold.
First of all, it is advisable to weigh the pros and cons. External insulation of a corner apartment will not be cheap.
But even the inner one cannot be called a pleasant waste - it is expensive, the hassle is many times greater, and doubts about the correctness of actions will remain.
Outside or inside?
But if these arguments are still not interesting, then it remains to consider how to properly insulate a corner apartment from the inside, so as not to dissolve dampness and mold inside the room and not bring on other troubles ...

First, choose insulation and plan
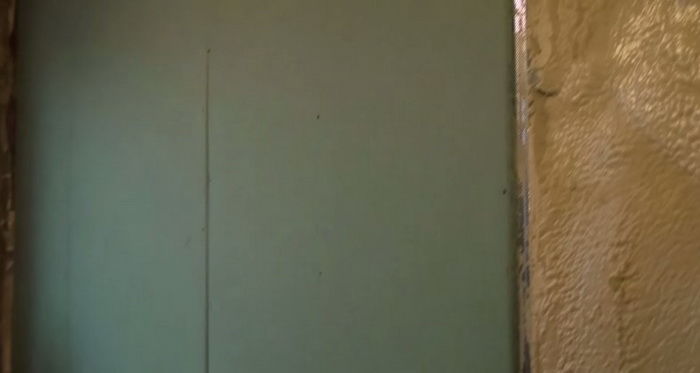
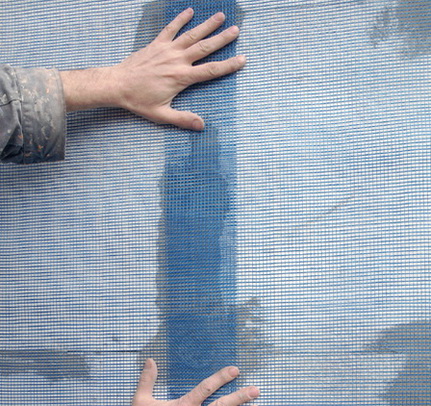
To insulate a corner apartment from the inside, you need to choose a heater. In this case, the only option is acceptable - extruded polystyrene foam. It does not allow steam to pass through and does not accumulate water. And if it is tightly glued to the wall, it insulates the wall from steam, condensation inside the room will not occur.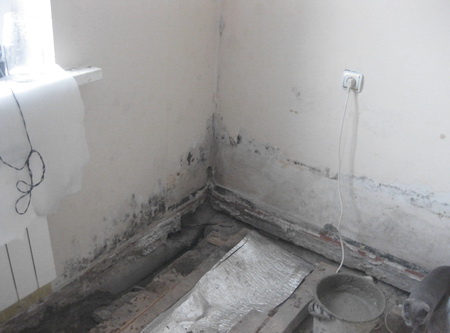
It is necessary to be wary of the recommendations to use some other insulation for insulation from the inside, enclosing it simply with plastic wrap. The insulation will still pick up water and the wall will be wet. In any case, the risk is very high as there is no ventilation.
The thickness of the insulation should be sufficient - from 8 cm for a temperate climate.
Prepare the walls, dismantle
As a rule, in a corner apartment, even on walls without windows, they are placed heating devices, pipeline. All heating needs to be redone - move away from the wall by the thickness of the insulation and decoration.We'll have to dismantle the sockets, close up the niches, extend the wires to the overhead sockets above the insulation. Or dismantle all electrical wiring and re-lay over the finish.
The walls are clearing old finish and fragile plaster. The surfaces adjacent to them are also cleared of all finishing by 10 cm - the insulation will be glued there.
On the wall with a window, the window sill is removed, the slopes are cleaned. Naturally, the windows must first be replaced with insulated modern ones, both for internal and external insulation.
Next, the walls need to be aligned with cement mix so that a sheet of insulation in any place adjoins them completely. And if the walls are not even, then you will have to apply a thick layer of plaster, which, perhaps, will nullify all the savings from insulation from the inside in a corner apartment ...
Insulation laying
Before gluing the insulation, the walls must be dry, even, primed, and the temperature must not be lower than + 5 degrees. Any deep penetration primer will work without antifungal additives.Glue is purchased for foam on concrete and extruded polystyrene foam of sufficient thickness, with a groove-groove along the edges of the sheets. For gluing at the joints, sealing seams, gaps, a sealant is needed, or better a foaming polyurethane-based adhesive in a can. 
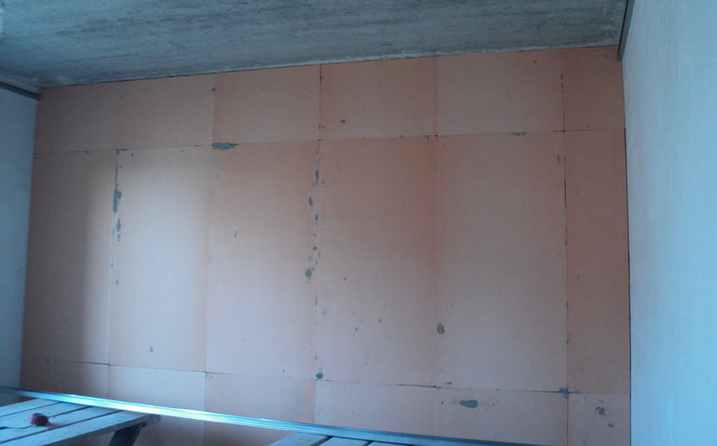
Glue for concrete is prepared in accordance with the instructions, applied to the expanded polystyrene sheet in an even layer with a notched trowel, then the sheet is glued with pressure on the wall. They start from the floor itself, while on the floor, and on other adjacent structures, glue is also applied so that there are no gaps with insulation.
A sealant is applied to the seams between the sheets of insulation. The dressing of the seams in the rows is observed. In a freezing corner, the dressing of the seams can not be done, but it is better to apply the insulation of one wall to the insulation of the other end-to-end with polyurethane glue - you will get a thickening of the layer at the corner.
Fastening with dowels, with internal insulation - an unacceptable action. The continuity of the insulation-vapor barrier must not be violated. All cracks are sealed with polystyrene foam particles and polyurethane glue. Polyurethane foam is not allowed, as it is saturated with water.
Finishing for internal thermal insulation
The next stage is finishing with insulation. A fiberglass plaster mesh with a density of 160 grams per square meter is purchased. and above, cell no more than 5 mm, alkali-resistant (ask - for the reinforcement of heaters). Then the glue is applied to the insulation with a thickness of 3 mm, the mesh is recessed in strips into it. It strengthens all angles. On the slopes, special corners with an attached mesh are used. The mesh is smoothed with a layer of glue.

Any plaster finish... But it is better to glue drywall sheets with a thickness of 20 mm or more. Expanded polystyrene indoors must be hidden behind a firewall with flame resistance for at least 30 minutes.
Also, it is not allowed for the expanded polystyrene to come into contact with the wiring or hot piping. These systems will have to be fenced at the stage of gluing the insulation with mineral wool barriers with a minimum thickness of 50 mm, closed from the side of the room with a vapor barrier on the sealant.
In general, there will be a lot of work and costs. Insulation from the inside of a corner apartment cannot be called simple. But, in spite of everything, the cold walls will be hidden behind a durable warm layer. In a corner apartment it will become "an order of magnitude" warmer in winter ... But it only remains to think again about the correctness of external insulation ...
Conventional heating cannot always cope with its task, especially if the apartment is corner. In such an apartment, both walls are in contact with the street, so the cold penetrates inside to a greater extent than when placing an apartment in the middle of the house.
Even heating batteries cannot cope with such a problem. In this case, owners need to properly insulate their home. This can be done both from the outside of the walls and from the inside. This article will consider the question of how to insulate a wall in a corner apartment from the inside.
 It is often very cold in corner apartments
Corner rooms always freeze more strongly, unlike rooms that are located in the middle of the house. Due to this, heat losses occur, it becomes quite cold in the room in winter, even the appearance of dampness, mold and other troubles is possible.
In corner rooms, 2 batteries are often installed to maintain the required temperature, but the walls can freeze through. Condensation appears on it, which leads to the following troubles:
To avoid such problems and stay in a warm room in the winter, wall insulation from the inside will help. Before starting work, you need to determine and correctly select the materials that will be used.
 For insulation today there are a lot of materials, but they are all designed for different jobs.
Some are used only for external work, others are used exclusively inside the building.
How to insulate depends on many factors. There are no universal materials, all heaters have their own pros and cons. All heaters must be:
- With high thermal conductivity.
- Airtight.
- Moisture wicking.
- Eco-friendly.
- Resistant to combustion.
- With a high operational life.
| Name | Description | Advantages | disadvantages |
|---|---|---|---|
| Mineral wool | The most common insulation made from basalt. | It does not give in to combustion, and if it comes into contact with fire, it does not emit harmful substances. Easy to assemble without special skills and experience, the material is plastic. | Mineral wool is quite weighty, and after a while it can deform. Susceptibility to moisture. |
| Expanded polystyrene | Insulation plates are lightweight and safe for humans. The material can be used for indoor and outdoor use. | Low material cost and ease of installation. Withstands strong temperature changes and retains its properties in the range from -180 to +80 degrees. The service life is several decades. | It can create condensation inside, which means it is not suitable for wood. The insulation burns very well. |
| Polyurethane foam | This is a foam that retains heat well, because most of its composition is gas. Applied from special equipmentspraying on the wall. | High noise insulation performance, does not burn. The operational period is measured in tens of years. | Compared to other materials, it has a high cost. Polyurethane foam is applied from special equipment directly to the wall in liquid form, after which it hardens. For insulation, you will need to hire specialists. |
Having studied the features of the materials and choosing the best option for yourself, you can start to insulate the corner apartment. The instructions for working in panel and brick houses are described below.
Performing self-installation, you need to carefully lay each layer of insulation. Any slip can provoke mold on the walls.
Thermal insulation of internal walls in a panel house
 Lay the insulation panels on the waterproofing layer
 To carry out the work, you will need to prepare the walls and gain access to the base. It is recommended to carry out work before starting the repair.
If the insulation is carried out after the appropriate work, then tiles, wallpaper and other finishing materials are removed from the walls.
The laying of mineral wool is carried out in 2-3 layers, this will allow the seams of the first layer to be closed with a slab of the next layer.
Thermal insulation of internal walls in a brick house
 Insulation is mounted on glue
 Working in a brick building has some differences compared to a panel house, but the technology is simple and does not require special skills to perform.
Consider the option of wall insulation inside the room using expanded polystyrene:
- Initially, the walls need to be prepared. There should be plaster on the bricks, if there is no such mixture, then you need to plaster the bricks.
- The walls need to be leveled and all existing defects removed. Further, the base is primed with agents to which antiseptics are added, you can use a special primer.
- The expanded polystyrene adhesive must be diluted according to the instructions on the package. The finished mixture is applied to the walls using a conventional and notched trowel.
- Sheets of insulation are glued to the wall and pressed tightly to the base. When insulating interior walls it is not required to use dowels to fix the boards.
- The slabs are stacked tightly to one another. There should be no gaps between them. The tighter the material is pressed against the wall and against each other, the better the thermal insulation properties will be. During installation, use a level to bring out a flat plane. For more information on how to insulate from the inside, see this video:
In case of gaps between the plates, they must be filled with polyurethane foam.
 Before starting the insulation of rooms in a corner apartment, it is necessary to choose the material depending on the material of the walls.
For brick, the installation procedure and insulation is different from panel buildings.
After reviewing the information in the article, it will be possible to carry out the work quickly and without paying for the services of expensive craftsmen.
Insulation of an apartment from the inside most often becomes necessary in houses with panel walls, since they are of insufficient thickness, quickly cool down, the heating system cannot fully cope with its tasks, and the temperature in the premises drops. How to insulate a wall inside an apartment, and what methods and materials to use - this question arises before most homeowners in concrete high-rise buildings. External walls in such houses become cold especially quickly, and often, due to temperature changes, they begin to damp and become moldy.
Sometimes, when there is such an opportunity, the thermal insulation of the walls is carried out from the outside, since this — more effective method keeping warm. However, this option is very expensive due to the complexity of its implementation, and it is impossible to independently carry out such events, without using special equipment, if the apartment is located above the first or second floor. Therefore, a decision is made to insulate the walls from the inside, to the detriment of the total usable area. But, be that as it may, a warm apartment with a slightly smaller area is better than large cold rooms. Internal work may well be done by hand, without the involvement of specialists. The main thing is to find the right material and have the right tools.
If equipment is installed in the apartment autonomous heating, then wall insulation will help save energy, which are very expensive today.
Compared to the external thermal insulation of walls, the internal insulation of an apartment has its own rather significant disadvantages:
- The insulated wall does not accumulate and does not retain heat, and heat losses range from 8 to 15%.
With internal insulation, the "dew point" may be inside the insulation, which leads to dampness
- The "dew point" with internal thermal insulation is located between the insulation and the wall, sometimes inside the insulation layer. This leads to the formation of condensation and the appearance of mold colonies. .
- An incorrectly insulated wall from the inside will freeze through all the time, and this inevitably causes irreversible destructive processes in the thickness of the material over time.
Correct insulation
So that condensation does not form under the thermal insulation layer due to temperature changes in winter, and, as a consequence, mold spots do not appear on the walls, all technological recommendations for insulation must be carefully followed concrete walls from inside the apartment.
An important element in the structure of the thermal insulation “pie” is a high-quality vapor barrier. It must protect the insulation from moisture penetration, which will allow the entire structure to effectively perform its functions for a long time.
What kind of work is required to achieve this goal?
- It is necessary to purchase a high quality vapor barrier film and waterproof tape to seal the seams at the joint of its sheets.
- For the insulation layer, you need to choose a material that has a low vapor permeability. It is desirable that this indicator be lower than the vapor permeability of the wall material. In this case, moisture evaporation will occur towards the street, and not inside the apartment.
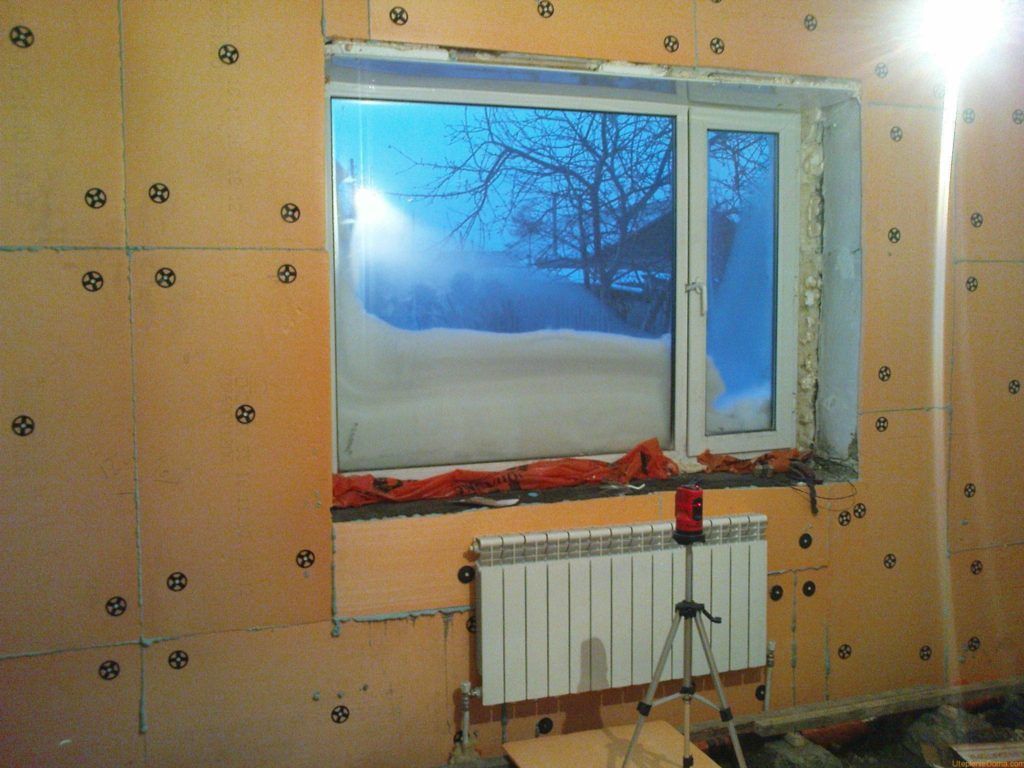
- When gluing the insulation, its surface is completely coated with glue using comb-spatula, and it is very tightly pressed against the wall surface, so that even small cavities do not remain between them.
- To avoid unnecessarily high relative humidity indoors, they must be equipped with additional ventilation of natural or forced type. For example, for this, valves are installed on the window frames through which air will enter the room.
- Further, it is necessary to accurately calculate the required thickness of the insulation. It will depend on the average daily temperature in the region during the winter. The thickness of the thermal insulation material should not be less than the parameters that were obtained during the calculations, otherwise the steam-thermal balance will be violated.
- Before installing the insulation system, the walls must be treated with special primers. They will "cure" the wall, prevent mold colonies from forming on it, and also increase the adhesion when gluing thermal insulation.
- Installation of insulation can be started only after the wall is completely dry.
- Formations of "cold bridges" should not be allowed, which can negate the entire insulation process. The risk of their occurrence is especially great at the joints of walls and floors.
What insulation and how are they used?
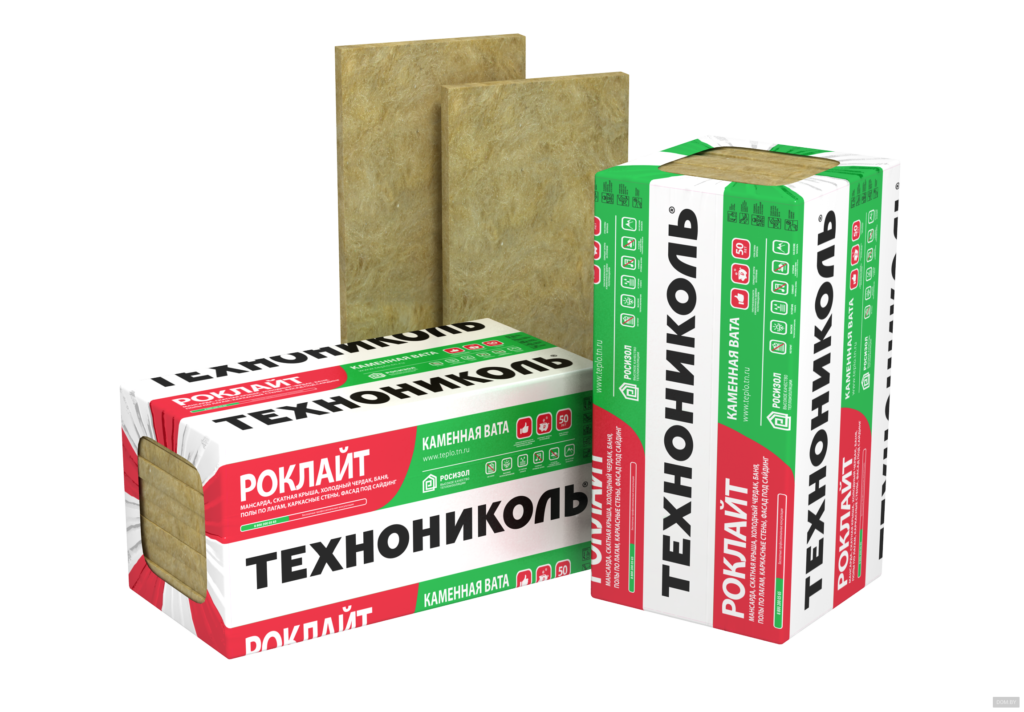
For the process of wall insulation from the inside, several types of insulation are applicable. Which one to choose is up to the homeowner, after he gets to know more about their characteristics and installation methods.
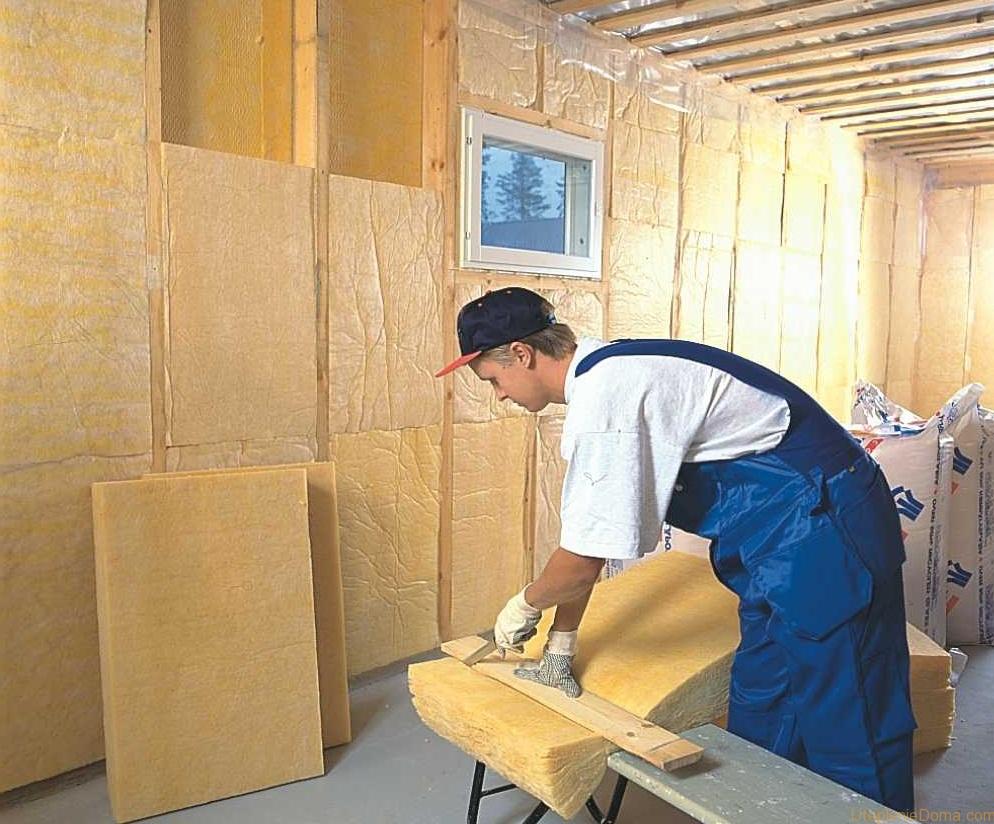
Mineral wool
Minvata is a traditional material for interior insulation work, but for concrete exterior walls, you need to choose a type of thermal insulator that has a very high density - this creates vapor tightness, which is necessary in this case. The property of mineral wool to allow air to pass through, i.e. "Breathing" in this situation, rather, is harmful, since when the temperature drops on the wall condensation will form. To avoid this, it is necessary to choose mineral wool with a high density, comparable to expanded polystyrene.
In addition, a high-quality installation of a vapor barrier is required. If all these conditions are not met, the work will be done in vain, since after the appearance of the fungus and the smell of dampness in the premises, the structure will have to be dismantled. Therefore, to insulate external walls that are not insulated from the street, it is better to refuse the use of mineral wool, or use only its dense types with the creation of the necessary air gap for ventilation. More about this - in the proposed video:
Video: wall insulation inside using mineral wool
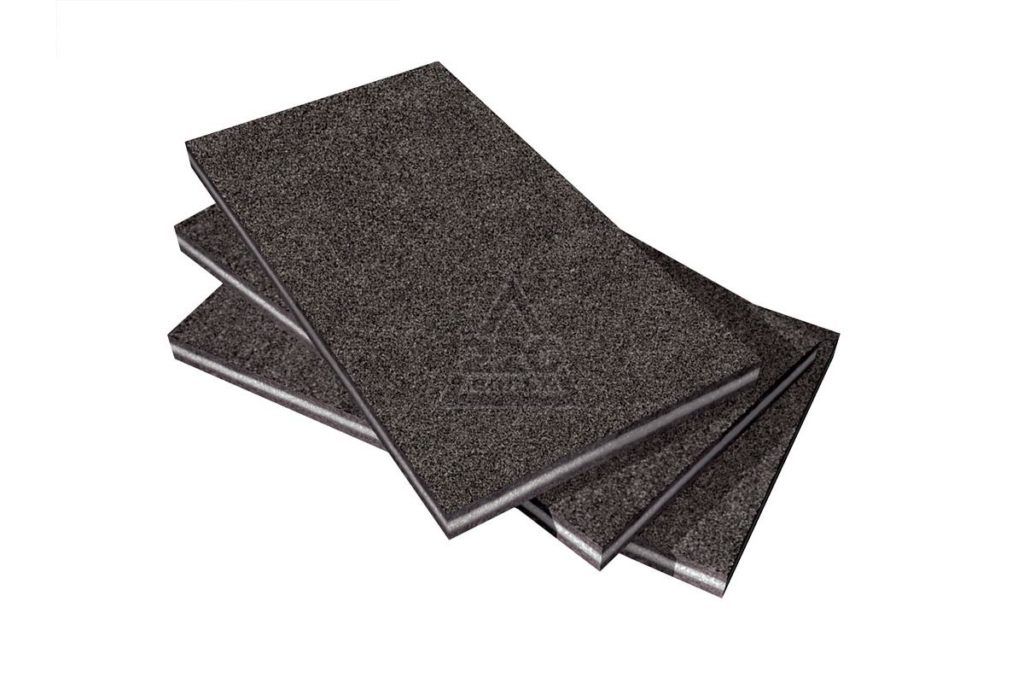
Expanded polystyrene
Polyfoam, expanded polystyrene or polystyrene foam are more suitable for insulating external walls from inside the apartment. These materials have all the necessary properties, the main of which is low thermal conductivity. In addition to this quality, other important characteristics are inherent in expanded polystyrene, which predetermine the possibility of its use specifically for internal thermal insulation works:
Extruded polystyrene foam is an excellent insulation, but "eats up" a lot of usable area
- The mass of the material is small, and this facilitates installation. In addition, the hard and level surface allows it to be well fixed to the wall.
- Expanded polystyrene is easy to process - it, if necessary, can be cut with a construction knife.
- The material is able to withstand the bursting forces and strong compression that often occur in walls, for example, due to temperature extremes or structural shrinkage.
Since ordinary or extruded polystyrene foam practically does not absorb moisture, it will not allow it to enter the "dew point", therefore, using this material, you can not use a vapor barrier. At the joints of walls and floor slabs, cold bridges can be insulated with polyurethane foam. You can also fix the slabs to the wall surface with foam - it, expanding, will fill all the gaps between insulation plates and a wall, making the surface airtight. Special locking grooves and spikes on the plates of extruded polystyrene foam will help to make the surface solid.
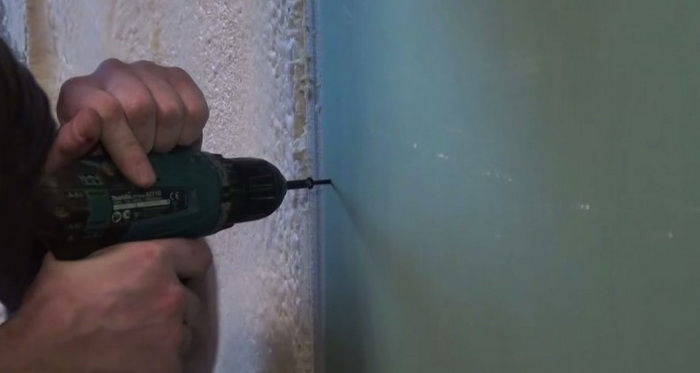
Having installed a number of slabs, they are attached to the wall using special fasteners - "fungi". To do this, the mounted panels are drilled through, making a hole in the wall, and then hammer the fasteners into it.
It should be noted that the foam does not drown out noise enough and this is one of its disadvantages. In addition, any type of expanded polystyrene is flammable, to one degree or another, and, when ignited, releases substances hazardous to human health.
After installing the boards and "sealing" all cracks and joints, the thermal insulation layer can be plastered or covered with sheets of drywall.
Video: insulation of the inner wall with expanded polystyrene panels
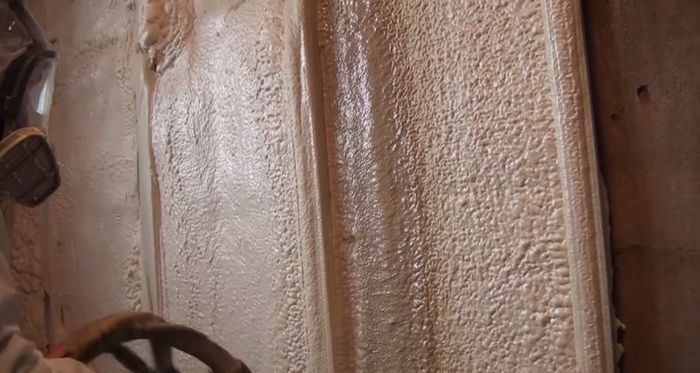
Polyurethane foam
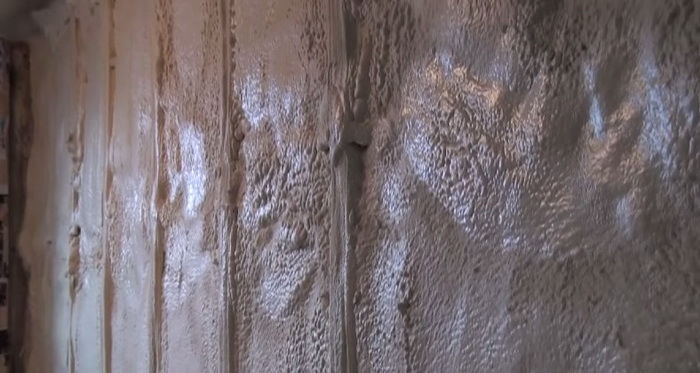
Polyurethane foam is one of the forms of all foaming polymers, which is sprayed with the help of special equipment on the prepared wall. At the household level, almost everyone met with him if they used polyurethane foam.
A crate made of a wooden bar is fixed in advance on the wall to be insulated, which will serve as support guides for the sprayed material, as well as the basis for fastening decorative finishing or plasterboard sheathing.
Polyurethane foam is good because it penetrates into all cracks and irregularities, creating a seamless, sealed surface that fits tightly, without any "pockets" and voids bearing wallleaving no cavities for condensate accumulation.
This material is moisture resistant and has a very low thermal conductivity. When deciding to use specifically polyurethane foam, you can safely abandon the hydro and vapor barrier.
The installation of polyurethane foam is carried out quite quickly, but without special equipment it will not work to make it on your own, so you will have to invite specialists.
Insulation with polyurethane foam is very effective, but only specialists can carry it out
In addition to the above positive qualities of this material, the following can be called:
- After spraying, the polyurethane foam quickly acquires volumetric forms and hardens. Thus, after installing such a thermal insulation layer, the very next day you can safely proceed with the installation of drywall.
- The insulation perfectly seals the "cold bridges" at the joints of the planes.
- Polyurethane foam has good adhesion properties to any, even and uneven surfaces and perfectly insulates the dew point from moisture penetration to it from the inside.
- The material is convenient for insulating rooms with non-standard shapes, for example, if the transition from wall to ceiling has an arch structure or walls are made in a curved configuration.
- Such a coating can have any - plasterboard or plaster exterior finish, at the choice of owners of insulated housing.
Video: wall insulation from the inside by spraying polyurethane foam
Bung
Another material for insulation, the installation of which can be done independently, is cork.
Cork is excellent natural material for thermal insulation
Such a thermal insulator is made in the form of slabs or rolls from the bark of a special type of oak - cork. Therefore, it is an environmentally friendly safe insulation, which is very important for interior decoration premises.
Using high quality material, three problems can be solved at once - these are noise and sound insulation, as well as decorative wall decoration.
An important condition for the installation of a cork covering is the evenness of the wall, therefore, before proceeding with gluing it, it is necessary to carefully prepare the surface. This process pr
Leveling walls with plaster
- The next step is to level the surface with plaster.
- You can refine the walls with drywall, but in this case, the sheet should be completely smeared with waterproof glue or polyurethane foam, so that there are no voids left under it. Drywall is firmly pressed against the wall and is additionally fixed with anchors or plastic "fungi".
- Cork can be glued to a dry wall. To do this, use a special glue designed for such purposes.
The positive qualities of the material, in addition to its environmental friendliness, low thermal conductivity and good noise absorption, include:
- Ease of installation of cork wall covering while observing accuracy in work.
- Aesthetically attractive respectable look.
- The surface of the material is always warm and pleasant to the touch.
- A variety of release forms, textured patterns and shades.
Cork is not only an excellent thermal insulator. She will give the room a special decorative effect.
- Cork insulation is not very thick, therefore it does not make the area of \u200b\u200bthe room smaller - with this quality it compares favorably with other thermal insulation materials.
Penofol
Penofol, in essence, is a roll of foamed polyethylene with a thickness of 2 to 10 mm, on one side of which a foil coating is applied, which contributes to the reflection of heat into the interior of the room.
Penofol - foamed polyethylene foam
- Before its installation, the surface is prepared in the same way as for cork.
- Penofol can be fixed on smooth walls with construction double-sided tape. Under any circumstances, the material is placed with the foil side in the room. This creates a kind of thermos for efficient heat retention.
- Stripes penofol stacked end-to-end. They are glued together with a special tape, also having a foil-coated reflective surface, since everyone installs a crate made of strips, bars or galvanized metal profiles against the wall of the foam foam. This frame has a base for mounting lining or wall cladding with plasterboard sheets. The gypsum plasterboard surface can subsequently be covered with plaster, pasted over with wallpaper, or thoroughly putty and sanded, and then painted.
- It is very important when installing drywall or lining on the top and bottom of the structure to leave a gap that will serve as a ventilation hole for air circulation so that moisture does not accumulate.
Despite its small thickness, penofol is an excellent heat and sound insulator. It is used as a separate insulation, but it is quite possible to use it in combination with other materials. It attracts with its simplicity and speed of installation on walls, floors or ceilings, as well as a long service life.
Video: insulation of internal walls with foil material
When choosing a material for insulating a dwelling from the inside, you must first inspect all surfaces of the walls on which the thermal insulation will be installed. If the wall is dry and there are no mold spots on it, then you can start preparing the surface and purchase insulation material. It is strictly forbidden to carry out such work on an unprepared basis. Not only will such insulation not give the desired effect - you can thoroughly spoil the apartment atmosphere, make it damp, unhealthy, since the spores of many types of mold or fungus are extremely dangerous to human health, especially for those suffering from chronic respiratory diseases or a predisposition to allergic reactions ...
In general, any of the methods of insulating an apartment from the inside presented in the publication will not require any complex additional equipment, and this technological process is quite possible to carry out independently.
Instructions
There are two most optimal ways to insulate walls: using mineral insulation (Rockwool, Isover, URSA, etc.) and gypsum cardboard, and using expanded polystyrene (hard foam). If in the first case you only need to putty the finished drywall walls, then in the second you will have to plaster the walls, paying special attention to alignment. Wall insulation with expanded polystyrene is considered more effective.
Method one
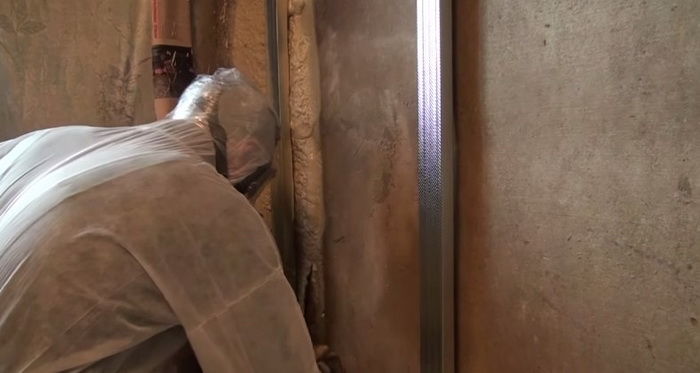
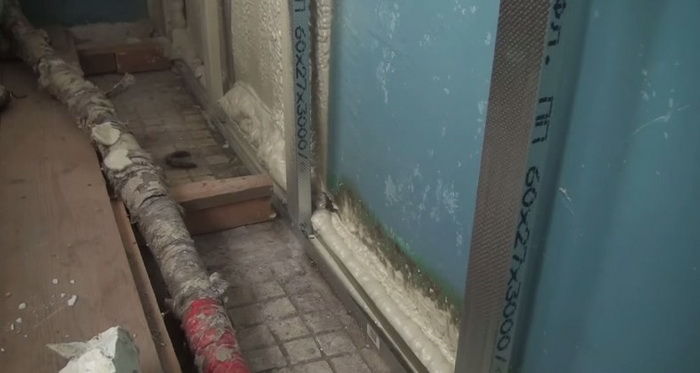
Start by pasting the wall with quality polypropylene foam insulation. Then proceed to install the horizontal metal framing rails for the plasterboard wall. They should be fixed to the floor and ceiling at a distance of 40-60 mm from the wall. Install the profile in the guides, in increments of 600 mm.
Fill the space between the wall and the profile with mineral insulation. This should be done as carefully as possible, avoiding the formation of voids. After that, you can install horizontal profile strips with a step of 600 mm. As a result, you should get a metal rigid frame, which will serve as the basis for the drywall sheets.
Secure the drywall sheets to metal frame... Install whole sheets first. Their typical size will allow you to avoid inconsistencies if you installed the profile in 600 mm steps, adhering to the level. Finally, trim the sheets, and attach them to the profile in places where it is impossible to install whole sheets.
Prime the erected the wall, and after drying, glue all joints with a serpyanka or paper tape. After that, it is necessary to putty all joints with elastic gypsum plaster like Pufas or Uniflot. This will eliminate the formation of cracks on the wall at the joints.
At the final stage, putty should be done with base, and then with finishing putty. After this, the walls must be carefully sanded, primed and painted or pasted over with wallpaper.
Method two
Start by preparing the walls for work. Peel them of wallpaper, loose filler and paint. Prime the walls and wait for the surface to dry. Using tile adhesive, glue the expanded polystyrene boards to the wall. Select in advance such slabs that have joint grooves at the edges - this will avoid the formation of gaps between the slabs.
After finishing pasting the walls with expanded polystyrene, plaster the walls using tools for leveling large surfaces. After finishing the plaster, putty, sand, primer and proceed to wallpapering or painting the walls.
When it becomes necessary to insulate a wall in a corner room, you first need to decide how much you are willing to invest in this event. Based on this, choose insulation and other materials suitable for self-assembly.
You will need
- - insulation;
- - profile / timber;
- - drywall;
- - tools.
Alexey Shamborsky, 05/07/2015
Many apartment residents have an urgent question about its insulation. What prompts such a decision? Of course, the occurrence of mold, darkening of wall sections, cold rooms. It is believed that the most balanced option is external insulation, but it is not always possible and does not always justify itself in full. In this article, we'll talk about the option of insulating an apartment from the inside. Consider the walls first, then the floor.
It should be noted that one of the most common cases is the insulation of a corner apartment, since the external environment covers a large area. It is necessary to take into account the fact that in this sense the lower and upper floors, therefore, we will dwell further on this moment (see photo, video).
How to insulate a wall in an apartment
The first step is to choose one of the most relevant methods of insulation. Currently, two materials are most in demand: polyurethane foam and expanded polystyrene. These are synthetic materials with high characteristics - thermal insulation, water repellency, elimination of biological activity (that is, mold does not appear, insects do not start). Sometimes a combination finish is used: two dissimilar layers. The latter method has many controversial points, but at the same time, such insulation is called the most powerful.
Important! - the inner plane of the wall should be as dry as possible. Therefore, it is recommended to carry out work in the warm season or in a stably warm room (which is rare).
Wallpaper is removed from the wall, grinding and leveling occurs. How well the insulation will take depends on cleanliness and evenness. Used by sandpaper and other auxiliary means, brushes, etc. Experts advise to pay special attention to those parts of the walls that were affected by mold or darkened from dampness.
Further, the surface is treated with antiseptics. These are special solutions for removing mold and mildew. It is difficult to advise something specific, since the choice of such liquids and mixtures is great. Masters advise to give preference to those with whom you can least contact (you do not need to additionally pour, stir, etc.) This is due to the fact that chemical composition funds are quite active.
Next, you need to let the walls dry. The next step is priming. The use of deep penetrating primers is recommended, as only then can a satisfactory result be guaranteed. The plaster is applied in an even layer, then it must dry naturally. In some cases, re-primer is required.
In the case of using polyurethane foam, a special formwork is installed, divided into cells, into each of which quick-drying foam is poured. This method is not recommended to be implemented on your own, as you need an understanding of the technology and experience in working with foam.