To create a comfortable design during the renovation, it is necessary to choose only high-quality finishing materials. This is the only way to create a truly dignified look in the room. Many different types of finishing materials are offered for renovation in the kitchen. The choice is made according to many criteria: from pricing to personal preferences. One of the most popular types is finishing with plastic kitchen panels, made of polyvinyl chloride. This view confidently pushed the painting and plastering method into the past.
What is PVC panel
PVC panels are strips or squares with a longitudinal internal structure, mounted on timber, metal or lined walls.
The panels are made of economical and environmentally friendly material, which is a pleasant combination of advantages:
- The price of the material is low enough that any consumer can purchase it.
- Polyvinyl chloride is a colorless, transparent raw material, which is known to us as a plastic that is resistant to external influences (there will be no damage to the surface either from acid, or from solvents or household products), and has thermal stability.
- The material is safe for use in residential premises.
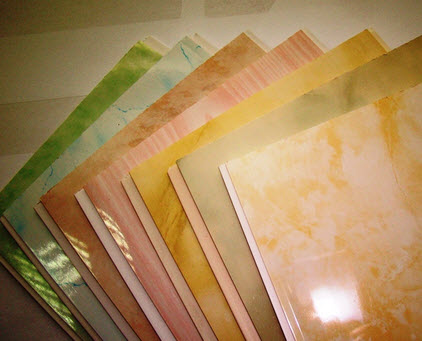
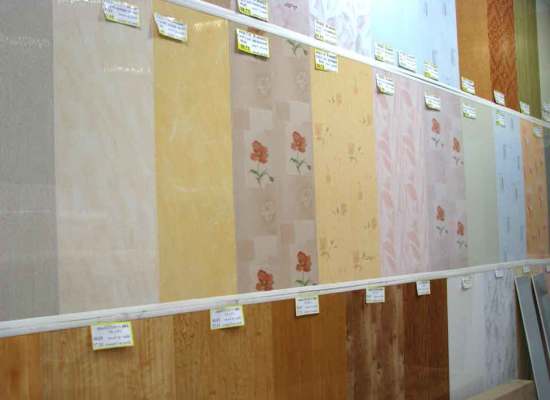
- Plastic panels for kitchen decoration are distinguished by a variety of textures, which is achieved by laminating the outer surface of products.
- Fashionable textures are made in such a way that you can choose an ornament for every taste.
Note. Lamination allows you to turn ordinary plastic into a highly artistic finish, which is realized with texture photographs, prints that imitate any surface from sea pebbles to elegant Italian plaster.
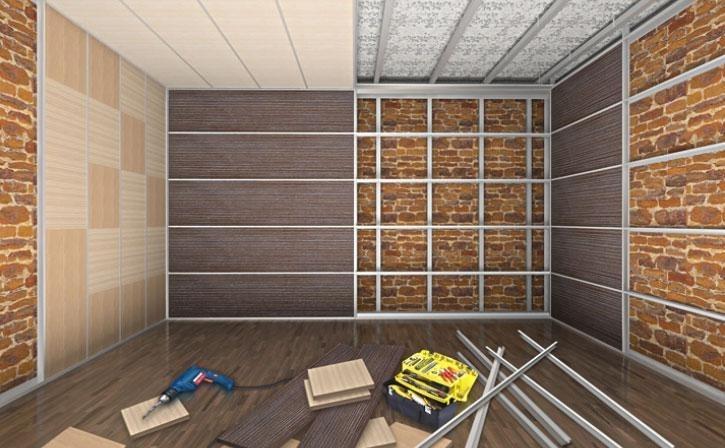
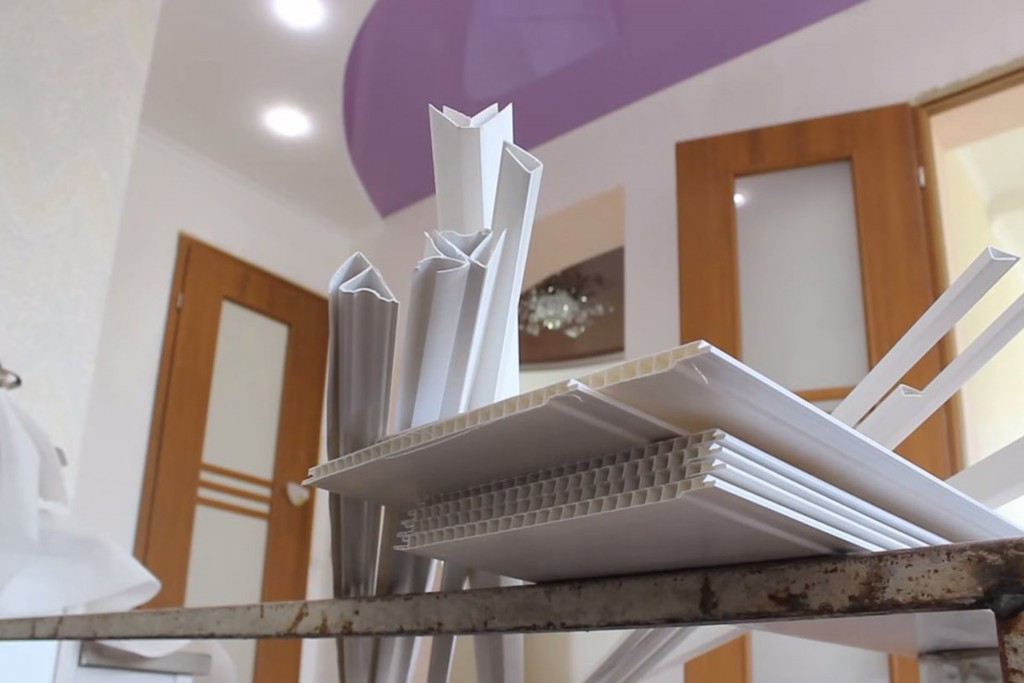
Types of plastic wall panels
|
Name: |
Parameters: |
|
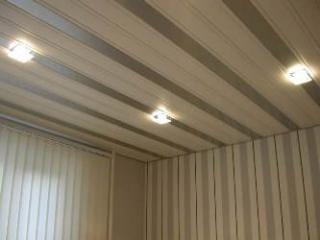
Rack narrow typesetting PVC panels |
Width: 25-50 cm, wall length: 2.6-3 m Has similar features to the clapboard. Fastened to wood or aluminum battens or walls with a prepared, even surface. The joints are equipped with moldings. |
|
PVC square tiles |
Width: 30-8 cm, length: 30-98 cm, thickness: 8-25 mm. Used for the decorative layout of drawings and patterns. Fasteners are made on wood lathing. Slabs are assembled using the tongue-and-groove method. |
|
PVC sheet panel for kitchen walls |
Size: 1.22-2.44m, thickness: 3-6mm. Used to collect pictures and patterns that simulate photographs. The joints are filled with sealant or equipped with a rack profile. |
Properties plastic panels PVC for the kitchen:
- Finishing wall panels kitchens will allow you to get heat-resistant walls with increased security.
- Material harmlessness, there are no environmentally harmful components.
- Durable finishing with kitchen panels is realized with resistance to moisture, temperature drop.
- Excellent thermal conductivity and excellent sound insulation.
- Kitchen paneling is carried out using a low-porous material that stays clean for a long time and is easy to clean.
No physical changes to the plastic. Ease of installation.
DIY PVC paneling in the kitchen
First of all, you need to make a crate, on which the kitchen will be finished with PVC panels. The most commonly used frame is wooden slats, which are attached depending on how the panels will be installed. Consider installation with vertical panel installation.
Frame fabrication:
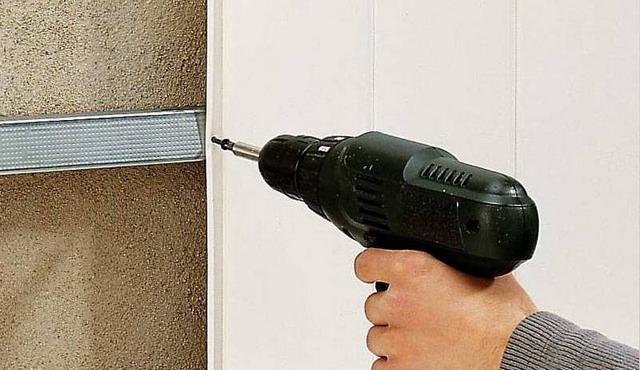
- First you need to mark the horizontal lines with a thread at a distance of 60 cm, you can mark directly along the wall. Metal brackets are screwed along the marked lines using dowels or screws. An important aspect is the presence of a row of brackets at the top and bottom of the walls. The staples are bent into a U-shape.
- Further, with self-tapping screws of 25 mm on wood, a wooden rail 20x50 mm is screwed into the middle of the staples with exact observance of the plane.
Council. The staples that stick out need to be straightened to the sides. If desired, an aluminum profile can be used for the frame. For a more detailed study of the process, you can watch a thematic video.
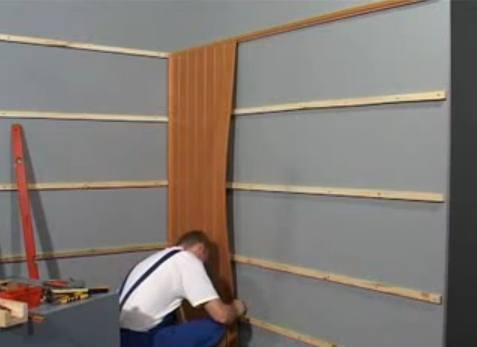
Sheathing the frame with panels:
- The L-shaped profile is fixed along the perimeter, the wall turns are equipped with an internal or external profile, possibly an angle one. Optionally, you can use a profile skirting board. Before fixing the panels for finishing the walls of the kitchen, you need to calculate the length: the distance between the outer sides of the profile is measured and 5 mm is subtracted from the resulting distance. Having installed the first strip, you need to cut the chamfer so that the subsequent strips sit tightly.
- The installed panel is fixed with a construction stapler. If the frame is made of aluminum, then the panels are screwed with metal screws. The next strip is cut off, like the first, and the manipulations are repeated.
Council. Before installing the last strip, you need to measure the width of the last sheet: the distance from the last panel to the outer edge of the profile is measured. The edge of the chamfer is captured during measurement. We equip the last panel in profile, and then in the chamfer of the previous strip.
- Decorating a kitchen with PVC panels takes about one to two days with a professional approach.
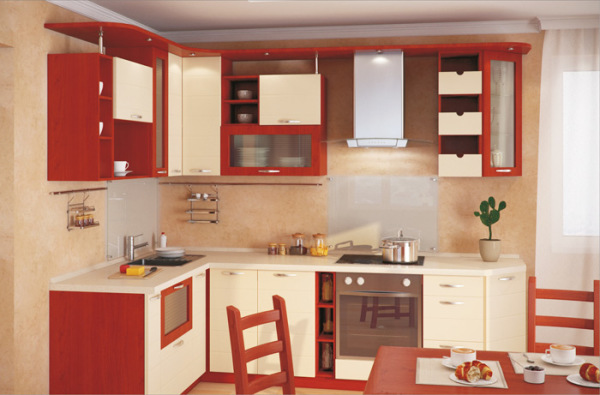
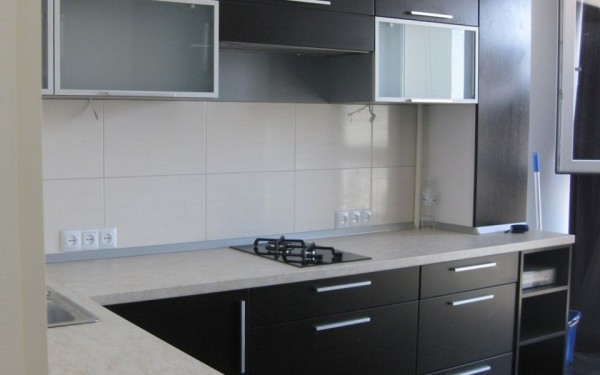
Kitchen decoration with PVC panels is one of the most famous and economical forms of decoration, which allows you to realize your desires to the fullest at a reasonable price. The practicality and attractiveness of the development, which was not used by contemporaries for a long time, gave it a second life. And on this moment PVC kitchen paneling has come to meet the requirements thanks to lamination with a variety of images.
Plastic kitchen panels are a great, more budget-friendly alternative to tiling this space. Thanks to the use of PVC panels, you can make inexpensive and beautiful decoration of walls, a backsplash in the kitchen and a ceiling. At the same time, it is not at all necessary to hire a team of workers to install this material, since the finishing process is quite simple and you can handle it yourself. It is only important to follow the execution technology and be careful. In this case, the paneling in the kitchen will decorate this room for many years.
Is a material that has found its application in surface finishing. The main advantage of this building product is its resistance to a humid environment and an easy installation process. A consequence of this, as well as the low cost of the material, he managed to gain popularity and today is actively used in the repair of kitchens and bathrooms.
Material advantages
PVC panels are sufficient original material, which has both advantages and disadvantages. Very often, many people have ambiguous feelings about the panels, however, in order to make the right decision about whether it is worth finishing with such a product, it is necessary to get acquainted with the advantages of the panels. The advantages of the material are:
Of the shortcomings, it is essential that fat and soot settle and accumulate on the panels quite quickly, so cleaning in the kitchen is carried out constantly.
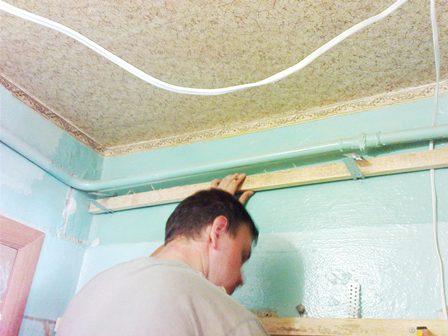
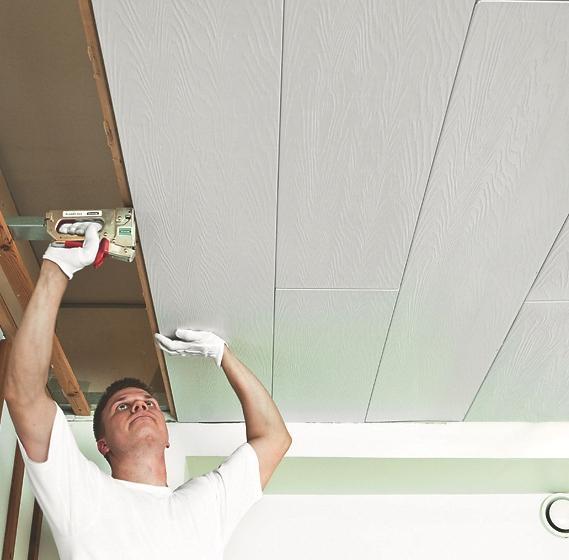
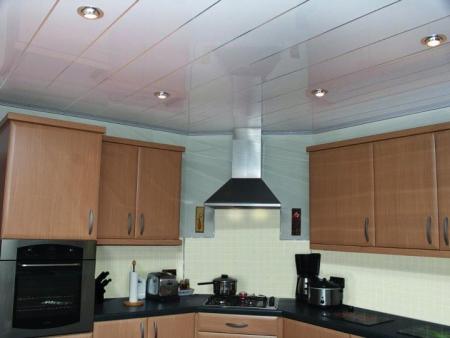
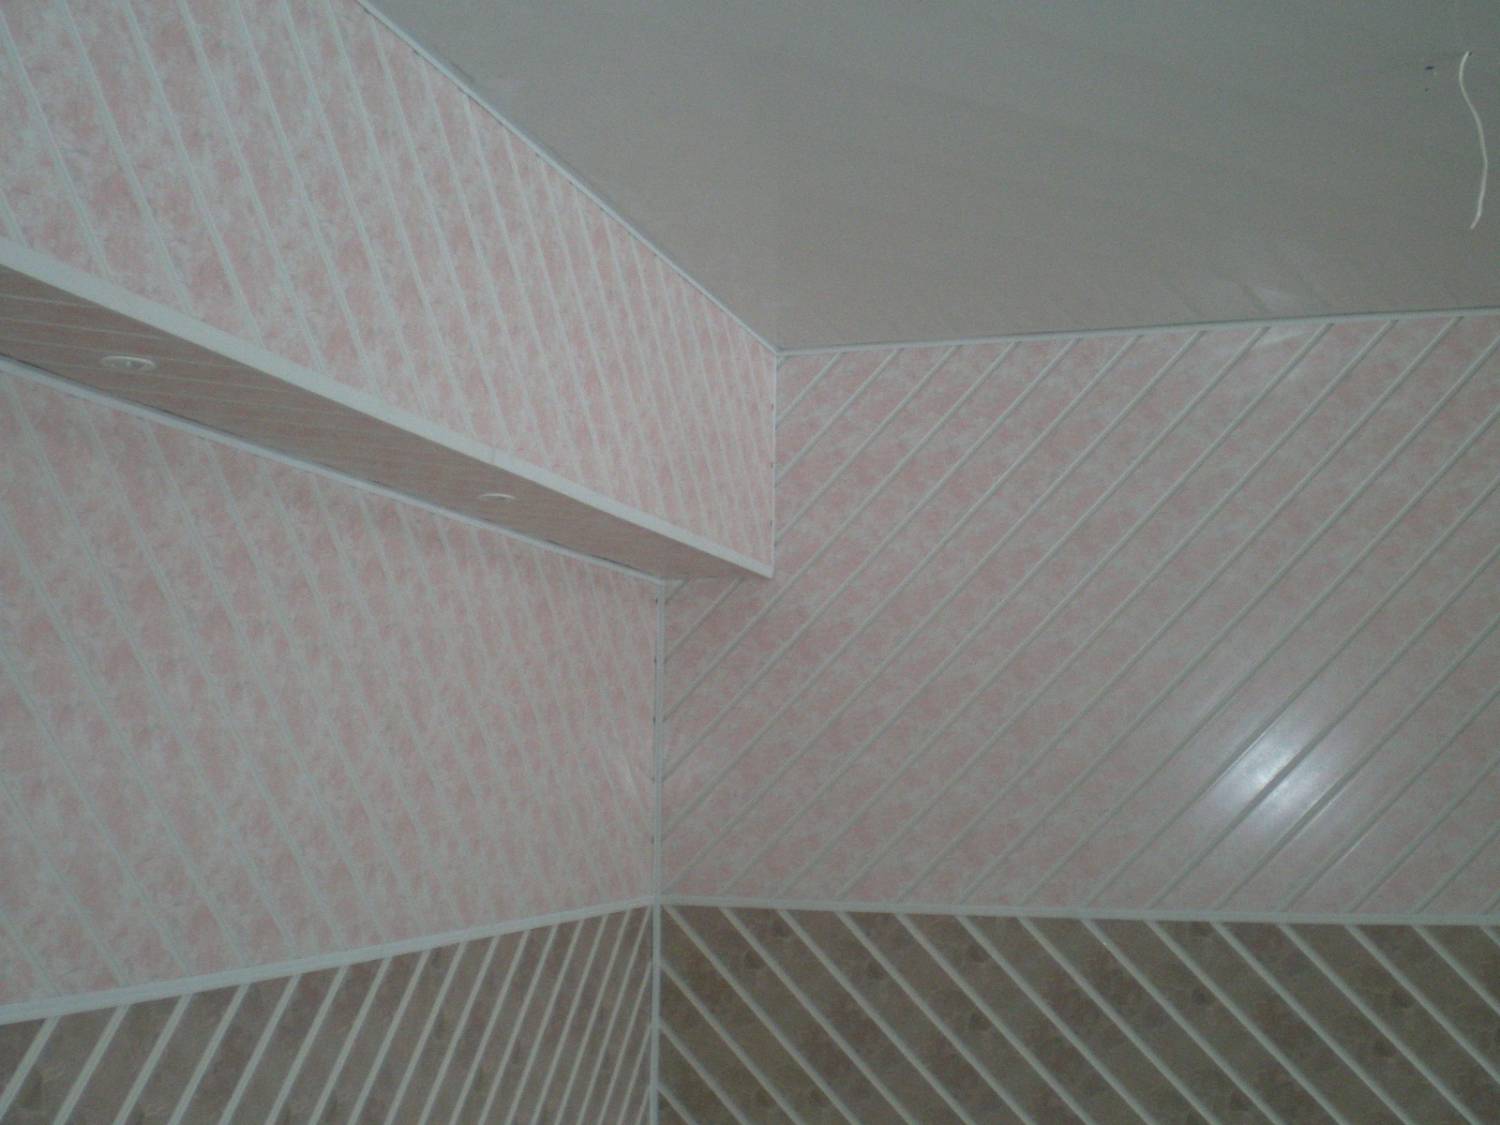
Finishing the ceiling in the kitchen with plastic panels
Decorating the kitchen with plastic panels, as usual, begins with work on the ceiling. Very often, PVC panels are used for sheathing the ceiling, even though the walls in the room are finished with tiles. This version of the ceiling is universal, since even if condensation and moisture accumulate on it, the material does not deteriorate from this and continues to serve its owner faithfully.
In general, the entire technology of work on the installation of PVC panels on the ceiling is divided into two main stages - this is the construction of the frame and its sheathing with material. The ceiling in the kitchen made of plastic panels is made in this way:
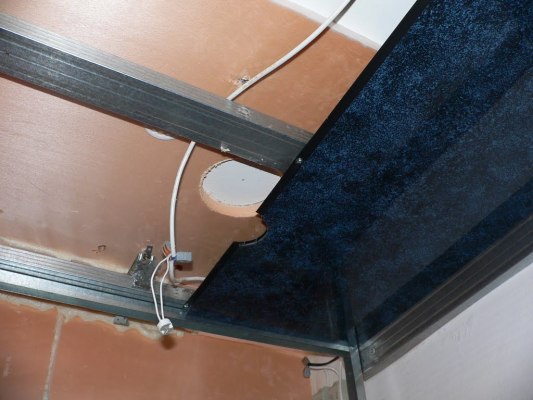
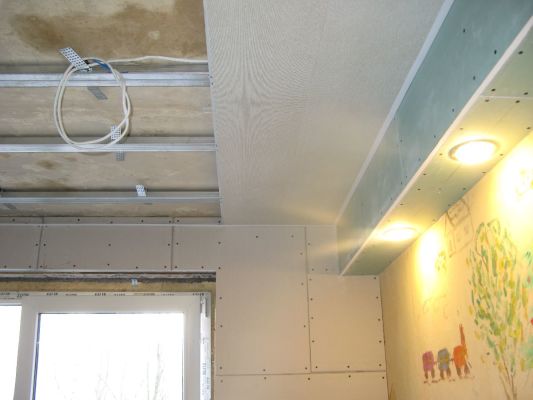
Often, during the sheathing of the kitchen ceiling, the installation of the panels on the frame is carried out along with the laying of the wiring, or rather, with the installation of spotlights. This must be taken care of in advance. So, before starting the sheathing, it is necessary to determine in what places the lamps will be located, and to bring wires to these places. After all the panels are installed, a small hole is drilled at the locations of the future luminaires so that you can get the wires to which the luminaires are then connected. Below are options for plastic panels for the kitchen photo.
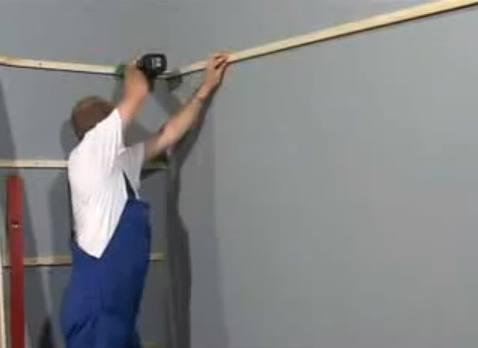
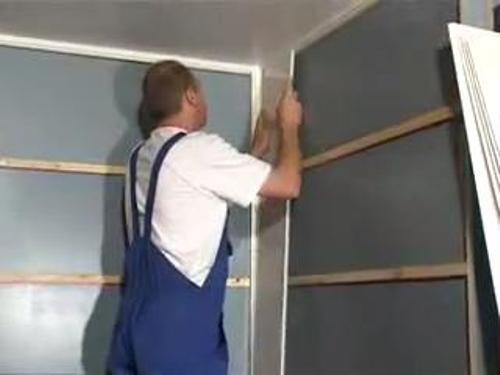
Installation of panels on walls
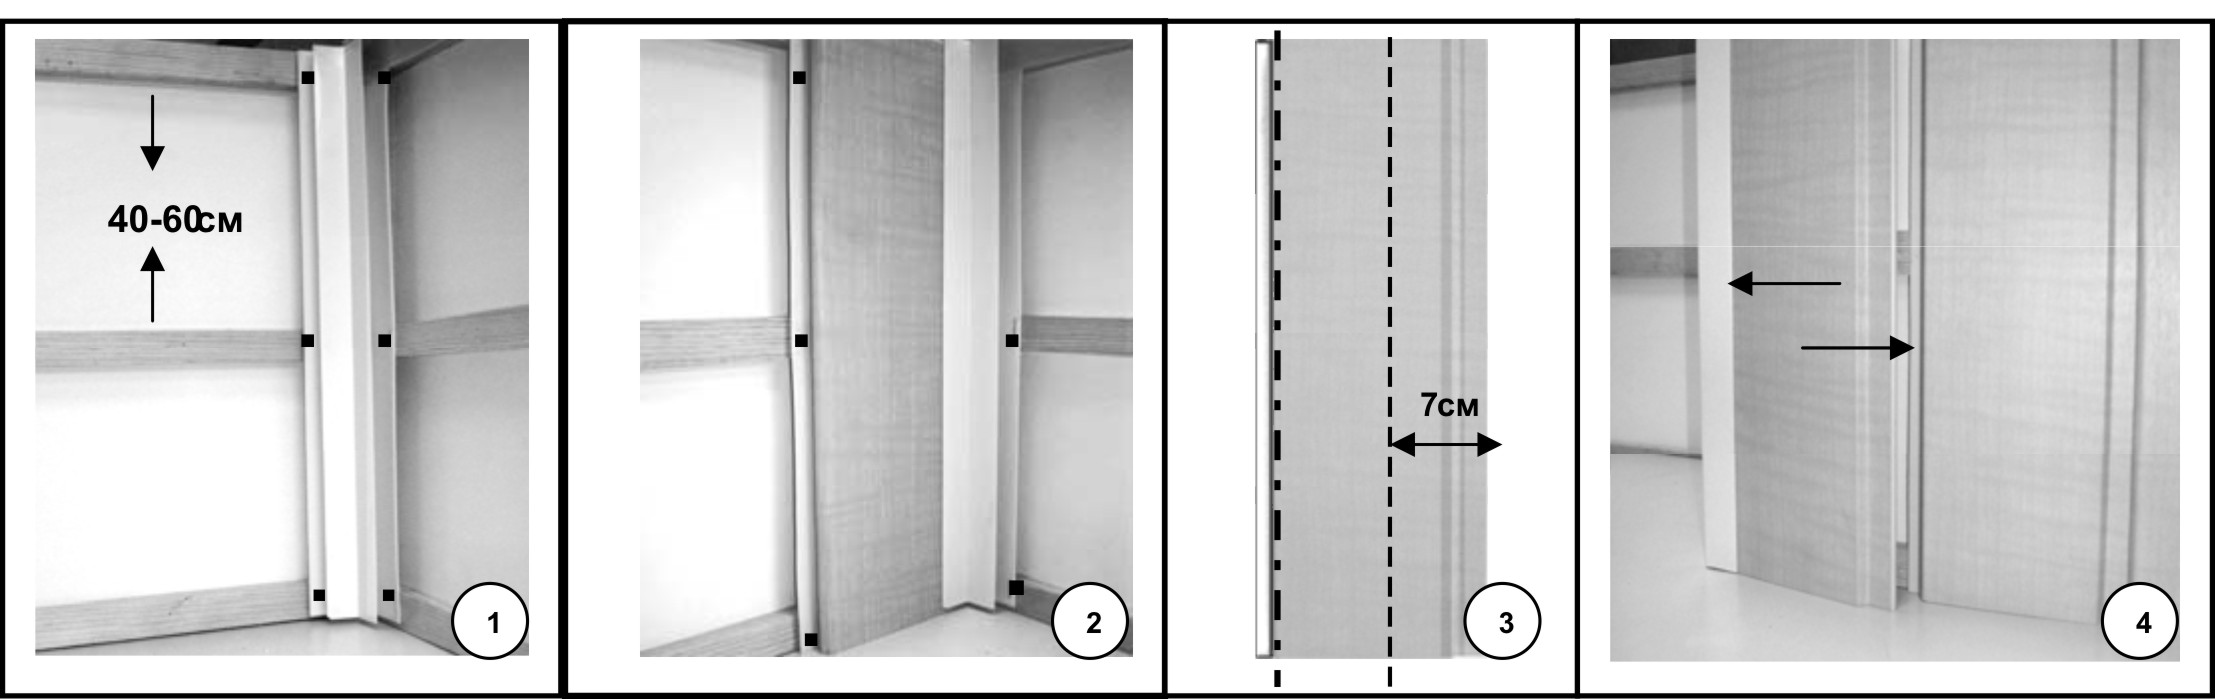
Plastic wall panels for the kitchen are slightly different from those used for finishing the ceiling, and, accordingly, the plating process is somewhat different. As well as when finishing the ceiling, first of all, it is necessary to make a frame - a crate. For a more economical option, instead of a profile, you can use ordinary wooden slats. An important point: if the frame is made of wood, then it must be thoroughly dried... Installation should start from the top and bottom of the wall where the first strips or profile are to be installed. The intermediate frame elements are installed at a distance of sixty centimeters. It is necessary to fasten all elements to each other by means of self-tapping screws. Such a mount in this case will be the most reliable. The process of installing panels on walls is carried out as follows:
- the first panel should be mounted vertically, securing it with a stapler;
- if the panel is installed evenly, then you can fix it with self-tapping screws. It is necessary to purchase special small self-tapping screws. The installation of subsequent parts will depend on how correctly the first panel is installed;
- further, all elements are fastened one after another using self-tapping screws.
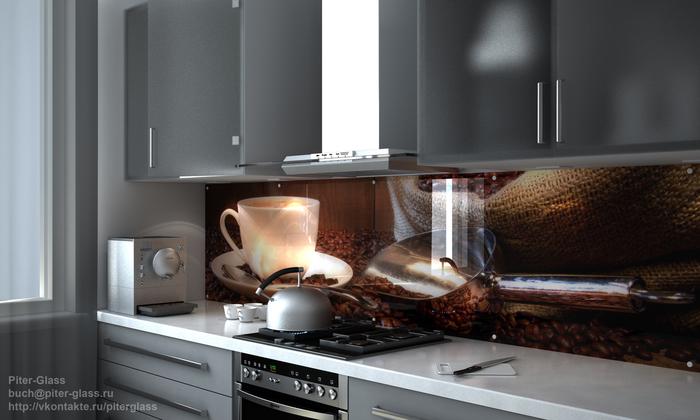
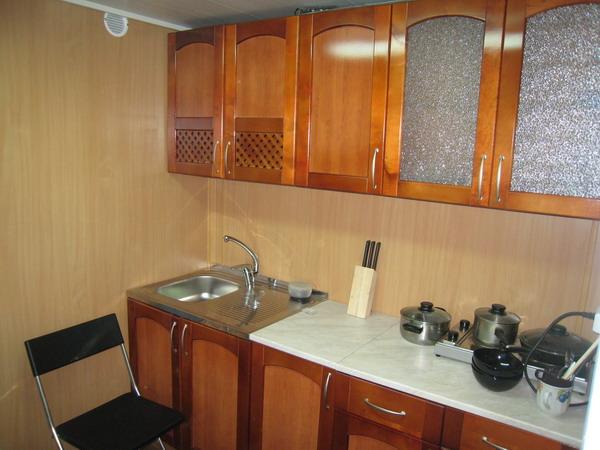
An important point: you can also use special staples for wall cladding. With their help, fixing the material will be much easier and more convenient than using self-tapping screws. Below is how a plastic kitchen panel and an apron on the wall made of this material were used.
Material design
On the market building materials kitchen panels are presented in a wide variety. Therefore, even with the help of such material, you can transform the kitchen beyond recognition and give it the necessary style. If you wish, you can choose panels for decorating your kitchen in a minimalist style. Below you can see how the decoration of the kitchen with plastic panels looks like a photo design of minimalism.
In addition, you can combine panels with mosaic tiles, which looks very interesting and is suitable for the ultra-modern high-tech style. There are a lot of options for decorating a kitchen with plastic panels. Everything here is not limited to a banal color choice. Due to the ease of installation and reasonable cost, such material can be combined with various other materials.
Video of finishing the kitchen with PVC panels
The choice of materials for kitchen renovation is striking in its variety: different kinds tiles, wallpaper, lining, a wide range of wall panels. What is right for you depends on your taste and budget.
I propose to consider the option of how to renovate the kitchen with wall panels. It looks attractive, is reliable, easy to install. Does not require large material investments. Repairs can be done on your own without inviting specialists.
Wall panels suitable for kitchen renovation can be made from various materials:
After you have decided on the choice of material, made measurements, it's time to think about the immediate process of finishing.
Installation of wall panels
MDF, PVC:
Option 1
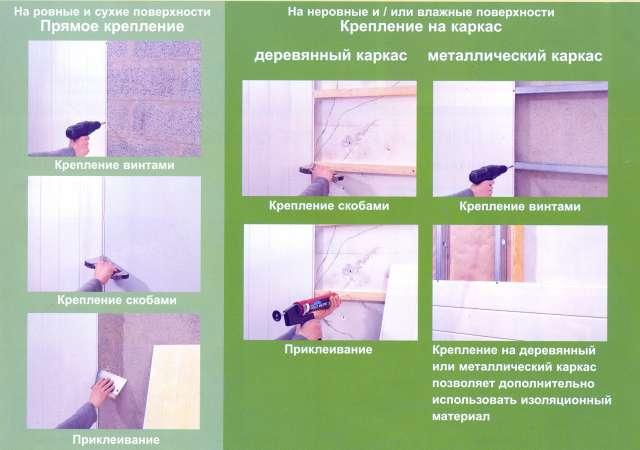
Provided that the walls of the room are even, almost perfect, do not have cracks, protrusions, the panels can be mounted on adhesive composition or liquid nails. The easiest option, but it has pitfalls. When you consider updating your renovation, it will be difficult to peel off old panels. 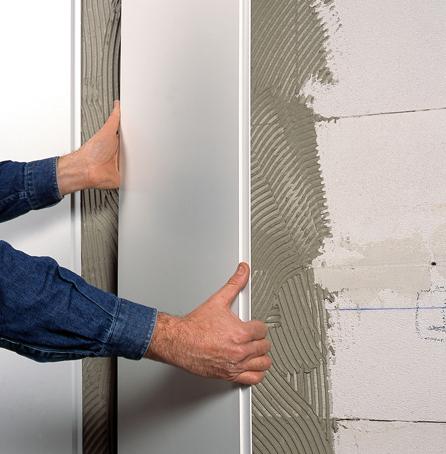
Option 2
Wall panel repairs are a great solution when the walls are uneven. The material is attached to the frame, which will allow not only to decorate the walls or ceiling, but also to align them.
Stage 1
Preparation of the premises. We clean the walls from the old finish.
Stage 2
Check availability necessary tools... You will need: a ruler, a plumb line, a level, nails, screws, a drill, a hammer.
Stage 3
Stage 4
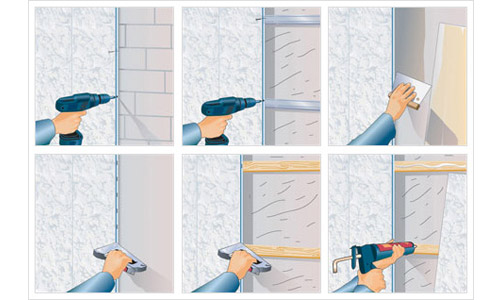
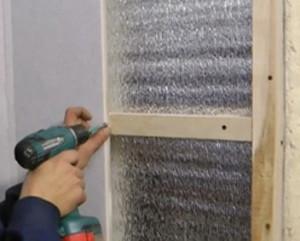
Installing the frame. The structure on which the panels will be attached can be made of wooden beams, slats, plastic or metal profiles.
If you chose wooden frame, do not forget to pre-coat the slats with a composition that protects against mold and mildew. The solution is usually toxic. Better to do this outdoors.
The profile of the batten is attached to the wall using self-tapping screws. Step from 30 to 50 cm to keep the structure strong. It is important to set the frame planks as evenly as possible. A plumb line, level will help with this.
If you have a desire to insulate a room or improve sound insulation, then an insulating material is laid between the crate.
Starting from the left corner, farthest from the window, mount the panels. We set the first copy in a corner, fasten it to the frame bar with small nails. If you have a furniture stapler, you can use it.
For the required panel length, leave about 10mm to the floor and ceiling. Over time, the material tends to expand slightly. The trims are useful for installation in the area of \u200b\u200bwindows, doors, mezzanines. The next panel will be attached to the previous one using a special lock already thought out by the manufacturer. We fix each panel to the frame with nails.
The last copy is not fastened with nails, but inserted into the lock between two adjacent panels
We install the necessary accessories. Corners, curbs, skirting boards. They can be fixed with liquid nails or with small regular nails.
The locations of the battens must be marked. It is on them that shelves, cabinets, hooks will then be attached.
The panels can be installed in any direction: vertically, horizontally, diagonally. It must be remembered that the frame strips must always be perpendicular to the panels. This installation pattern is suitable for walls and ceilings. The only difference is that it is better to choose thicker panels for walls, as they are subject to physical stress. The tighter the better. There is no such need for the ceiling.
Stage 6
After renovation with panels, the room is easy to clean. No cement dust, plaster, paint smell. Enjoy a beautiful new finish that is as easy to use as it is to install.
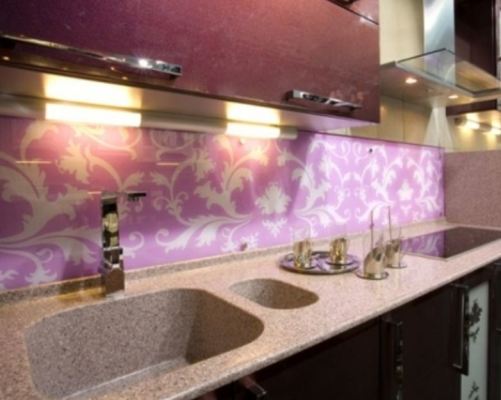
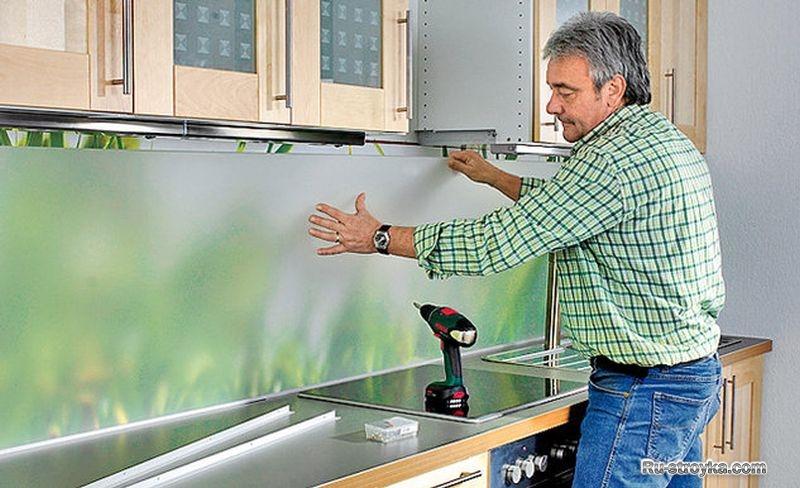
Glass wall panels
A great alternative to a kitchen backsplash from a tile can be a skinned or in other words a glass panel. Fastened with glue or by screwing. Doesn't require leveling walls. The screw-in method is considered the most reliable. The manufacturer provides for holes in the panel through which screws are inserted, the material is attached to the wall. Then the screw is closed from above with a decorative plug. It looks organic, not striking.
Video tutorials on how to repair a kitchen with wall panels with your own hands:
If this is your first time hearing about this type of finish, such as PVC panels for the kitchen, then it is useful to know that the material itself is a chemical compound of hydrogen, carbon and chlorine. The composition contains 43% ethylene and 57% combined chlorine. The stabilizer in this case is bound lead, which is not biologically active, and, accordingly, is not harmful to human health. One of the advantages of finishing the kitchen with PVC products is that no harmful substances are emitted during combustion, the combustion process is very poorly supported by the material.
Types of material
Wall decoration in the kitchen using PVC elements is permissible. Proof of this is the hygienic / mechanical properties that allow the finishing elements to be used in the living environment. The design of the material pleases with its diversity, all this is ensured by the used technology of lamination of the outer surfaces. There are many original textures with texture images. Looking through photos of PVC panels for the kitchen, it can be noted that they often resemble wall mosaics. A similar solution can be successfully used in design.
Modern manufacturers offer 3 types of products:
- lath narrow type-setting elements - the minimum / maximum width is 25/50 cm. Products are produced in lengths of 2.6-3 m. This type of material is more reminiscent of lining, and not only in appearance, but also in the way of installation. Ideally, wall decoration should be carried out with the preliminary installation of lathing made of aluminum, wood. You can do without this, but then the walls should be perfectly flat;
- sheet PVC panels for the kitchen as in the photo - they look like monolithic sheets of large sizes (1.22 * 2.44) and density. Their design can be different, for example, include applying an ultra-fashionable print, with an imitation of a real photo. The maximum sheet thickness is 6 mm, there is no need for additional use of accessories. A sealant, rack profile is used as a finishing of the seams;
- square tiles made of polyvinyl chloride are products with a size of 30 * 30/98 * 98, which may well be used for decoration kitchen apron... With their help, you can create an interesting pattern. The fastening method involves the construction of a lathing, the assembly is carried out in accordance with the groove-tongue technology.
By choosing the right PVC wall panels for the kitchen using a photo, you can successfully highlight the overall design of the kitchen space.
Polyvinyl chloride and temperature changes
Attention! Not everyone knows that pVC material is able to expand in conditions of an increase in temperature indicators up to 40 degrees Celsius. For example, a three-meter product can change its length by 10 mm.
When making a design from a photo using PVC panels for the kitchen in the cool season, remember: the extreme parts should be trimmed so that a gap of at least 0.5 cm remains in the grooves of the profile, top and bottom.This way you will protect the trim elements from changing shape during temperature extremes. And in the kitchen you can't do without them.
Experienced specialists also recommend: if you started repairs in the winter season, then after you brought finishing material in a warm room, let it rest for a couple of days, especially if in the future it will need to be glued. This will allow the boards to warm up to room temperature and obtain optimal expansion properties. The same rule applies in the heat.
Those who renovate the kitchen with panels in the summer should be prepared for the fact that when it gets colder, gaps can form between them. This is not very scary, because next summer they will disappear again. The best time to update your kitchen space is during the off-season.
What do you need to know about selection and installation?
Before starting the finishing process, you need to buy the appropriate material. It is with a trip to a hardware store that any repair begins. It is best to look for design inspiration with the help of photo PVC panels for the kitchen on the ceiling or walls, you will find them on the pages of online stores, thematic sites. If you want to place an order on the Internet, then choose suppliers of finished products offering photo examples in good quality... This will allow you to understand how the finish will look like in reality.
Interesting! You can always successfully combine different colors, textures on the same plane. For example, as an option, the lower part of the walls can be sheathed with products in dark shades, and the upper one with a pattern.
Before ordering, make sure that the material you choose can be used in the kitchen. Further, taking into account the quadrature of the vertical surfaces, it will be necessary to calculate the number of panels. Do not forget that the product description always indicates the finishing width, i.e. the size of the face of the element, the dimensions of the ridge are not taken into account.
We proceed to the construction of the lathing, it will be cheaper if you use slats with a section of 25 * 40 mm, made of wood. But they must be pre-dried in accordance with the rules. The upper and lower profile is set clearly horizontally, for this use a level. The intermediate elements are fixed at a distance of 60 cm from each other. The entire lathing is screwed with self-tapping screws with hiding heads.
SAMSUNG


