After installing new windows, it seems to you that something is missing? Of course - you need to finish the slopes. And there is nothing difficult in installing plastic slopes with your own hands!
1 Why is it better to stay on plastic slopes?
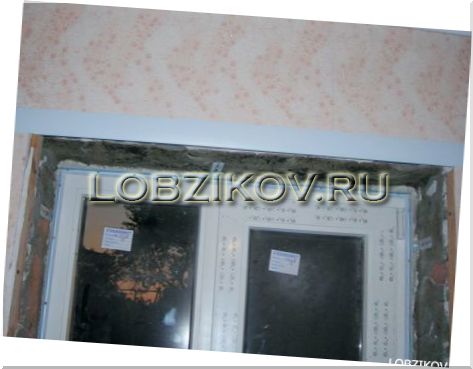
If you decide that the time has come to replace the old windows with new PVC windows, then you will have to carry out additional work to install new slopes. The slope is the space that lies between the window and the wall. Just a couple of years ago, practically no attention was paid to this part of the window opening - most often the space was simply plastered and whitewashed. However, today it became clear that such a volume of work is not enough.
Indeed, without well-treated slopes in the rooms it will be damp, warm air will go out through unsealed cracks and cracks, and mold may appear in the corners of the windows due to dampness and temperature differences. High-quality processing of slopes will save you from such problems, especially since the cost of modern products is quite pleasant. In addition, plastic products have other benefits. So, they include:
- low cost of products;
- easy installation plastic slopes with your own hands;
- a wide range of colors, thanks to which you can choose the panels that fit the design of the room;
- practicality and long service life.
In addition, we must not forget that such slopes will fully correspond to the material of the window, which is very important. For example, plaster slopes, due to a mismatch in characteristics, may begin to flake off after a few years. Although, we must admit, there are disadvantages. So, such products are characterized by low resistance to damage, and therefore all work must be carried out as accurately as possible.

But this disadvantage is easily "covered" by significant advantages. Thus, choosing from the mass of existing options (wooden and plaster slopes,), it is preferable to focus on PVC products.
2 Do-it-yourself plastic slopes - execution technology
Did you decide from plastic with your own hands? In fact, there is nothing difficult in this work, and absolutely anyone who knows how to hold construction tools in hand. The main thing is to follow our instructions exactly.
How to install plastic slopes with your own hands - a step by step diagram
Step 1: surface preparation
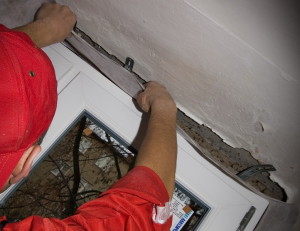
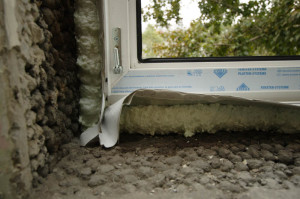
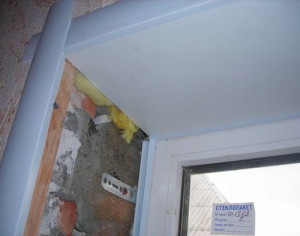
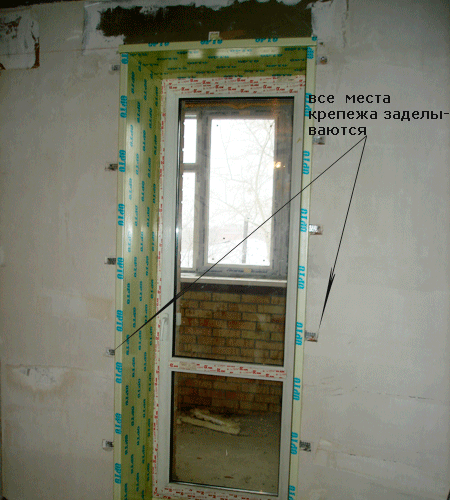
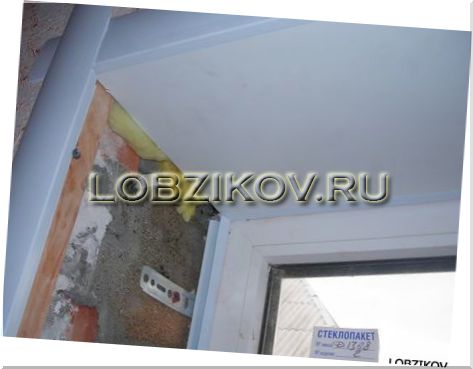
After the installation of windows, dust and dirt often remains that must be removed. In addition, do not forget about the need to remove excess polyurethane foam. At this stage, you should also stick the vapor barrier tape (inside the room) and waterproofing tape (outside), especially for those who have installed wooden frames... Otherwise, in a couple of years, even the highest quality windows will begin to freeze.
Step 2: applying the primer
On the entire surface of future slopes, we apply a primer or a special antifungal solution, which can be purchased at a hardware store. You can start the next stage only after the mixture is completely dry.
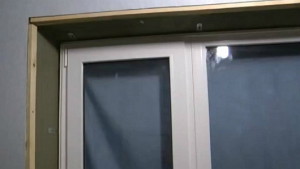
Step 3: Setting up the startup profile
A starter profile is a product that allows you to install slopes without the use of materials such as glue or silicone. It is attached either to the leveling rail or to the window itself - as it is more convenient for anyone. However, experts prefer to choose the first option, considering it more reliable and practical. To install the leveling rail, measure the length along the inside of the slope. Next, we cut off the block according to the specified parameters and fasten it with self-tapping screws along the contour of the window.
After mounting the rail, attach the starting profile to it. For this, it is preferable to use a construction stapler. If you decide not to install a leveling bar, then the starting profile is attached to the window using self-tapping screws in increments of up to 20 cm.
Step 4: Install the battens
To create the lathing, we use 2 * 4 cm bars, which are attached to the outer edge of the slope with nails. To check the correctness of the installation, it is advisable to use the building level.
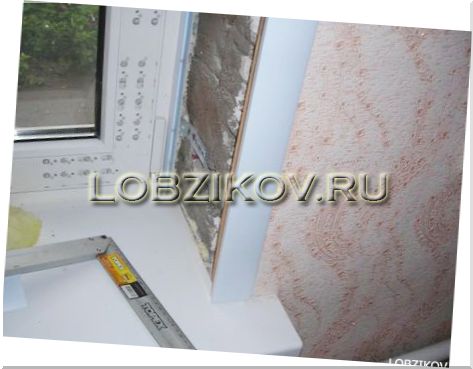
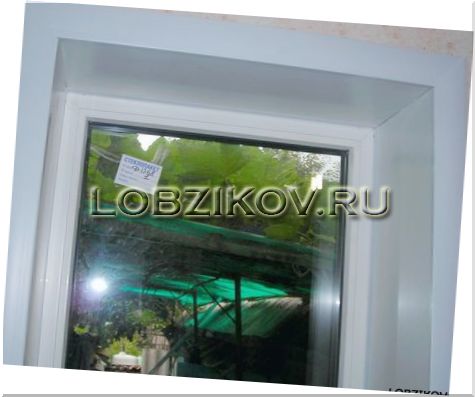
Step 5: install plastic slopes
Installation of slopes starts with the installation of the upper plank. To begin with, we cut the product to length, then carefully insert it into the starting profile and align it in width, cutting off the unnecessary. After the product has fallen into place, we fill the space between the wall and the slope with foam. Do not forget that the foam expands a little after drying - if you do not leave a little room for the foam, the slope may deform after a while. Next, we press the product to the crate and fix it with self-tapping screws. The installation of side slopes is carried out in the same way.
Important: it is best to use a jigsaw to trim the product. As a last resort, you can use a metal file, the main thing is that it is equipped with small teeth - this way the risks of damage to plastic materials are minimized.
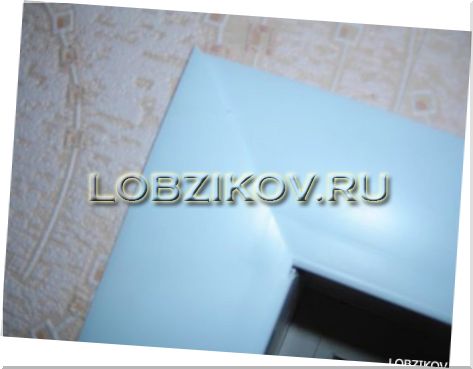
Step 6: Install platbands
Platbands are products that perform several tasks at once after installing slopes. Their main function is to connect two mating surfaces so that the appearance of the window and wall looks complete. In addition, it is the platbands that protect the connecting seams from moisture, sunlight, dust and dirt.

We measure the required platband length and cut it off using a hacksaw. By the way, it is undesirable to use a jigsaw for this operation, which can lead to damage to the product. Carefully insert the profile into the ends plastic products without the use of any connecting materials.
Step 7: finishing stage
At this stage, we need to carry out work to prevent the ingress of fine debris and moisture between the slope and the window: it is better to seal all joints with white sealant. For its high-quality application, use a construction syringe, and carefully remove the remnants of the material with a help that will not scratch the PVC slopes.
3 Proper surface care - no repairs needed
Now you know how to install plastic slopes with your own hands. But it should be noted that, despite all their positive qualities, PVC slopes and other window elements require care and maintenance. Only in this case can we talk about their long service life.

- Glasses and frames can be cleaned with normal cleaning agents. The main thing is that they do not contain "aggressive" ingredients (for example, alkali, acetone, solvents). You can also find special care products for PVC surfaces on sale.
- All moving parts of the window should be lubricated at least twice a year with a resin-free technical means. This will extend the life of the products.
- All seals should be rinsed with clean water to remove dirt and treated with glycerin-containing cleaning agents.
If you want the windows to serve you as long as possible, the following expert advice should be considered:
- Do not block the warm air flow from the radiators to avoid fogging the windows.
- Ventilate the room frequently. Thanks to this, moisture in the form of condensation will not collect on the insulating glass units, which can lead to rapid deterioration of the products.
Buying expensive PVC windows, many strive to save at least something. Slopes often become the subject of economy - they say, they are only for beauty. However, in addition to the aesthetic side, there is also sound and heat insulation. Plastic slopes are a modern finishing option, which has a lot of advantages, including cost savings.
1 Plastic panels for window slopes - should you trust?
For many years, external and internal slopes in houses and apartments were finished with plaster, then drywall appeared, which was also adapted for these purposes. The question arises: why reinvent the wheel? Believe me, it makes sense. With the advent of PVC windows, plaster and drywall are far from the most convenient options.
They have a lot of disadvantages. They take a long time to make, create a lot of dirt and dust, crack due to shrinkage processes and changes in temperature conditions, and most importantly, the components of the plaster do not create the necessary adhesion to the plastic, which is why slopes can peel off from PVC windows over time.
Drywall allows you to make the slopes faster and warmer. However, even the moisture-resistant type of this building material does not withstand frequent temperature changes and constant exposure to condensation for long. In addition, it is necessary to paint or putty, or better, both.
The plastic version, especially in combination with plastic windows, looks much more attractive. But the appearance is far from the only advantage of the panels.
Of course, even in a barrel of honey there is a fly in the ointment. In case of plastic panels this "spoon" is the impossibility of partial repair - in case of damage, the entire panel will have to be replaced. However, modern slopes are not so easy to damage.
2 Plastic window slopes - types and possibilities
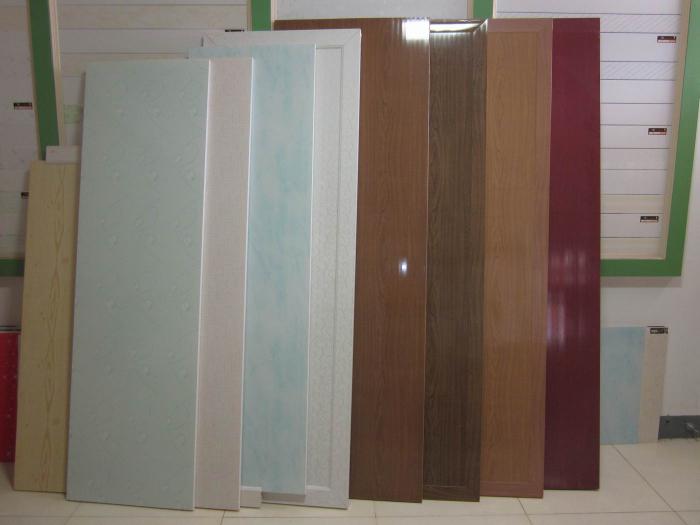
Today, there are two types of plastic slopes on the market: sandwich panels and wall products. The best choice are precisely sandwich panels, since they consist of two or even three sheets of plastic, between which there is a foam insulation and stiffeners. Unlike wall panels, this option is much more frost-resistant.

Of course, with plastic panels, it is still recommended to lay another layer of insulation under them or apply polyurethane foam. In the second case, you will also receive additional adhesion of the slopes to the surface.
If you focus on external parameters, you can highlight glossy and matte products. On the gloss, stains and fingerprints will be better visible, so if the window is in a room with children or a lot of traffic, it is better to install a matte version - it will have to be washed less often.

Plastic products do not delaminate and do not require additional painting. However, if after a while you get tired of their appearance, you can change it thanks to the self-adhesive film. The film can imitate almost any material or have a special pattern - a lot of printing companies are engaged in printing patterns, photographs or drawings on self-adhesive.
3 Sheathing slopes with plastic - how does it happen?
Today, many companies that produce plastic windows also offer a number of additional products, ready-made and adapted to the parameters of the window frame. We recommend buying slopes, window sills, corners and other elements in one place - this will save you a lot of time and nerves. Manufacturers take into account the wishes of the customers and the parameters of the walls around the windows, so that you do not have to adjust the size of the panels to the width of the openings.
The installation begins with the removal of the protruding excess of polyurethane foam around the window block, as well as leveling those places where the edges of the slope will adjoin the walls.
If the panels were not pre-adjusted to the width of the walls, strips of the required length are cut from the purchased sheets. A jigsaw is best used for cutting. The panels are fixed to the cleaned surface using a special glue for PVC or liquid nails. The first option is preferable.
If the panels have special grooves, then the installation process is reduced to fixing a special rail with a special corner that snaps into place. You just need to insert the panels and fix them in the desired position.
If there are no such grooves, then you can get by with ordinary wooden slats, which are pre-attached to the wall by means of dowels or self-tapping screws. The panels are fixed to the rails with brackets, which are closed with special corners. By the way, they perform another pleasant function - they protect wallpaper or other finishes from being ripped off by children and animals.
Usually the slopes are made the next day after the windows are installed. It is quite obvious that you can carry out all the work yourself, saving on wages to employees.
4 Maintenance of plastic slopes - to make windows shine
Although plastic is much more reliable than plaster or drywall, nevertheless, it has a shelf life. However, it is impossible to give exact numbers - it all depends on how the slopes will be looked after. Fortunately, leaving is not difficult - such work will be a joy to you.
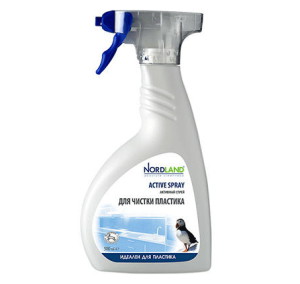
It is best to find special plastic detergents. With their help, you can wash not only the slopes, but also the window frames. If you have not found the necessary chemistry, you can get by with an ordinary soap solution. But what you should not do is use detergents with abrasive particles - plastic, especially glossy, can be scratched.

Microfiber cloths are ideal for polishing glass and glossy edges. Also, do not forget to periodically lubricate rubber and silicone seals with special agents - this will keep them firm and elastic.

To prevent condensation from accumulating on slopes and glass, you can use a little trick - wipe the windows with a mixture of glycerin and alcohol. It is quite simple to prepare this product - in any pharmacy there are the necessary components. One part of glycerin needs 20 parts of alcohol.
In the conditions of urban life (and in many villages), plastic windows have long turned from a symbol of prosperity into an everyday occurrence. The installation of windows is carried out by specialists, since there are nuances during the installation process that are unknown to the common man in the street. But you can finish the design of the new opening yourself - by installing plastic slopes on the windows.
This case is complicated only at first glance. When available detailed instructions and a list of materials / tools, every home owner can easily cope with the task.
When you need to make slopes on the windows
Often, after installing windows, the owners do not agree to a professional one. This is due to the considerable price of the service. You can often hear that the window will not suffer from the fact that for some time "live" without proper design. However, this opinion is misleading. Few people manage to independently strengthen the slopes made of plastic soon after the installation of structures. That time is not enough, then laziness, but you never know what kind of interference may arise ...
In fact, every truly knowledgeable specialist will name more than one reason why the window should be "brought to mind" as quickly as possible:
- polyurethane foam, which is poured into slots and gaps after installation, quickly collapses under the influence of sunlight;
- moisture easily gets into the foam, due to its porous structure, which can both lead to the appearance of mold and, when frozen, destroy the treated area;
- over time, due to atmospheric influences, gaps may appear between the foam and the window frame, and all the efforts of the professionals will be in vain;
- bare foam quickly loses its thermal insulation properties.
This is not the whole list of reasons, but it is also enough to understand that plastic slopes (with your own hands or with the help of professionals - it is not important) must be built without putting things on the back burner.
Selection of materials for slopes
Slopes created from plastic are used for interior and exterior decoration building. For each type of work, you will need certain tools and materials. It would be best to collect everything you need in one place in advance. So, the list of materials:
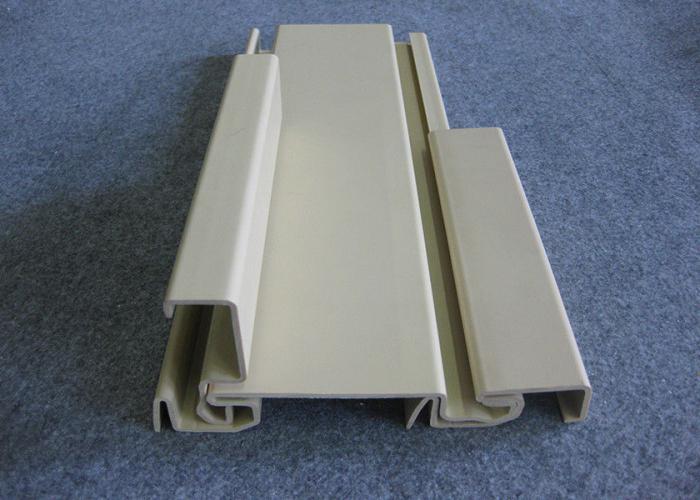
- Directly PVC panels. When choosing them, you need to know exactly including the depth by which the width of the panel is determined.
- plastic will require the purchase of an F-profile to flip the outer side.
- The adjacent side is edged with a U-profile (it may not be useful if the foam area around the entire perimeter of the opening is wider than 2 cm).
- Scotch tape for painting.
- Polyurethane foam - a pair of cylinders.
- Quick drying adhesive.
- White acrylic silicone.
Required tools
Here is a list of tools with which we will sew up the slopes with plastic. With your own hands you can not only bring window openings to mind - build a palace! There would be a desire, and, of course, certain skills. So, for work we need:
- Triangle, pencil and tape measure - for precise measurements and outlining corners.
- A special gun applied to cylinders with (it is not needed if the cylinder has a nozzle).
- "Bulgarian" or hacksaw for metal - to quickly cut out of plastic slopes of the desired size. Although, with a great desire and the absence of such tools, you can use a large clerical knife - just prepare more spare blades for it.
- A gun for extruding silicone and sealants from tubes.
When everything is ready, you can proceed to a detailed study of the instructions on the stages of work.
Outside slope processing
You can choose how to close up the slope from the outside of the house. Tips for using silicone-based sealants or self-expanding polyurethane sealing tape are common on the Internet.
This is not a bad method, but the adhesion of the facade paint to the sealants is poor, and over time, the substrates can peel off from each other, depriving the foam of the necessary protection. This must be taken into account when deciding on the embedding of external slopes.
The best option is to plaster with tile adhesive. Its resistance to moisture and frost will be the ideal argument in favor of this particular method of slope processing.
Internal slopes
From the side of the living room itself, you can close up the slope different ways... Previously, all windows were finished with plaster due to the simplicity of its application and the low cost of the material. Unfortunately, plaster can lead to overcooling of the slope and the accumulation of condensation. Therefore, nowadays, slopes made of plastic are increasingly preferred.
The main stages of manufacturing
At the first stage, there are two options:
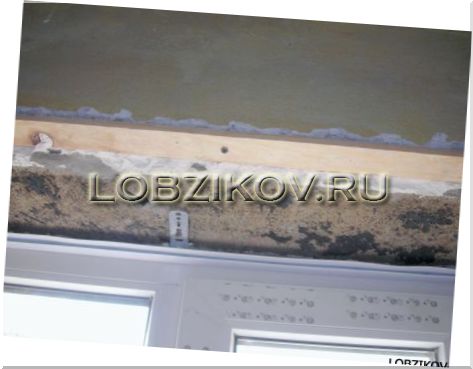
- When the gap between the wall and the window opening is wider than two centimeters, the unevenness of the poured foam is cut off, and a groove is made in it, the thickness of which corresponds to the plastic panel. This is how the entire perimeter of the box is prepared.
- If the width of the gap is limited to two centimeters or less, then remove only those areas of frozen foam that may interfere with installation.
Stage two. Preparation of panels for installation begins. It is necessary to decide in what way the panels will be joined - at a right angle or at an angle of 45⁰. An acute-angled joint looks more aesthetically pleasing. The necessary measurements are made (here a tape measure, a simple pencil and a triangle will come in handy). Then, with the existing tool, we cut off the future slopes. You can verify the correctness of measurements by applying to the desired installation site.
The third stage of work involves the installation of plastic blanks. The panels are attached either to the glue applied in the groove or inserted into the U-profile glued to the box. The remaining gaps between the wall and the slopes are filled with foam, which will hold the structure well.
Wherein this material applied in a thin strip, which will expand in the process (the percentage of expansion is indicated on the balloons). If you overdo it with foam, it, increasing, deforms the plastic.
To prevent this from happening, and the slopes are smooth, plastic panels are attached to the wall
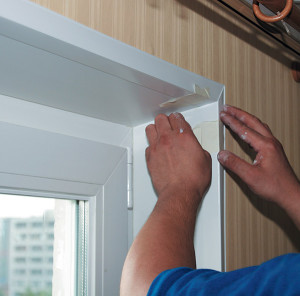
After the foam has dried, the fourth stage of fixing the slopes begins. It consists in gluing the F-profile along the perimeter of the opening.

The final stage is grouting the joints with silicone. It is gently applied to the seams and smoothed with a damp cloth.
Summing up, it will be useful to say a few words about the merits and demerits of such slopes.
Benefits of using plastic panels
- PVC materials have a very long service life.
- The total costs for all products will not hit the family budget, since plastic panels are distinguished by an affordable price.
- Ease of installation and short installation time (one slope is mounted about 60 minutes).
- Simplicity of care. They wipe or wash without problems warm water with a mild detergent.

What are the disadvantages
- Plastic is known for its softness and resistance to mechanical damage. If a dent or crack appears, you will have to replace the entire panel.
- PVC products are not classified as environmentally friendly. Comments are superfluous.
- Plastic is extremely flammable and toxic when burning.
Now that everything is prepared, the characteristics of the material and instructions for working with it have been studied, there should be no questions about whether it is made of plastic.
This article describes the most common technique for finalizing openings. plastic windows... It is simple to implement and does not require a lot of consumables.
In this post I want to tell you how you can independently install internal slopes on plastic windows. It is no secret that firms ask for a lot of money for the installation of internal slopes, and the quality often does not correspond to this money. Therefore, if you have your hands, as they say, in place, after reading this article, you can install internal slopes quite professionally without any problems, paying only for the material itself and for the rental of the tool (if there is no one at home).
So, first you need to decide what material we will work with. I advise you to install windowsill slopes. Such slopes will "sit" like a glove. They are very durable, difficult to scratch, and the folded edge will save you from peeling wallpaper at the joints with the slope. The slope installers always offer the customer to supply the slopes from sandwich panels - this material is thin and during the installation process, the slope often does not have an ideal plane, but with bulges or concave sections. At the joints with the wall, installers always recommend installing plastic corners in order to avoid the inevitable peeling of wallpaper in these places. But such corners are often peeled off afterwards and are not always perfectly docked together.
First we need necessary tool - a saw with a sharp tooth, an e / jigsaw, an assembly gun for foam, an impact drill or hammer drill, a screwdriver. If there is no such tool, then it can be rented, in your city such services are probably available. It remains only to go to the construction market or to the construction hypermarket to purchase window sills. I think it will not be difficult to calculate how much material is needed. Measure the length of the slopes and window sills on each window, balcony door and already on the spot, together with the seller, you can accurately determine the number of window sills you need for installation. You should also count the plugs for the cut ends - one end cap for two ends.

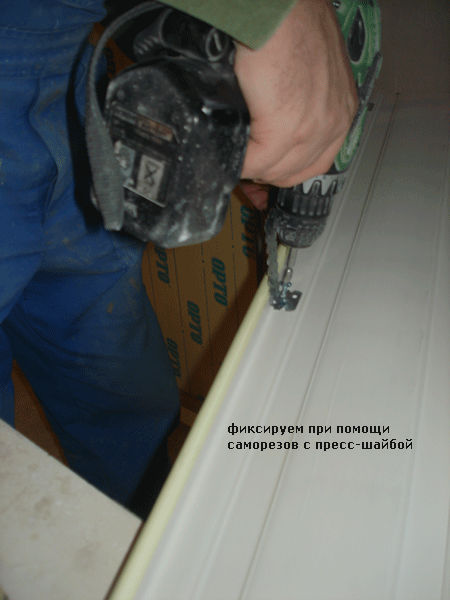
You will also need professional mounting foam, dowel-nails 6x40 pieces 50-100, depending on the number of windows, straight hangers for profiles - also depending on the number of slopes - for each slope 2-4 hangers. Self-tapping screws with a press washer (bugs) 16 mm - 50-100 pcs.
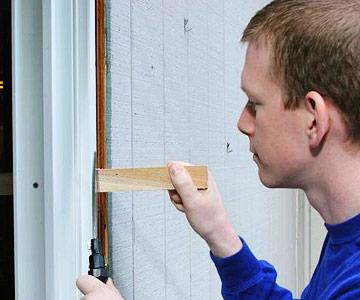
Now that everything you need is at your fingertips, you can start installation. First you need to prepare the windows - trim excess foam so that you can get the slope and the window sill behind the window frame. The window sill is installed first. We measure the width of the window sill - naturally, it should be with an overlap - the length of the overlap is arbitrary, as they say, to your taste. When the window sill is marked and sawn off, we take a mounting gun, moisten the entire area that will be closed by the window sill and carefully apply foam with longitudinal stripes, the distance between which should be no more than 5 cm.
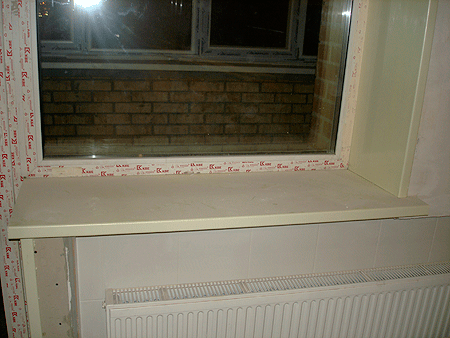
Then we take the window sill and put it under the window frame and press it tightly against the foam. In order for the foam to adhere well, you need to put a load on the windowsill and leave it for 3-4 hours.
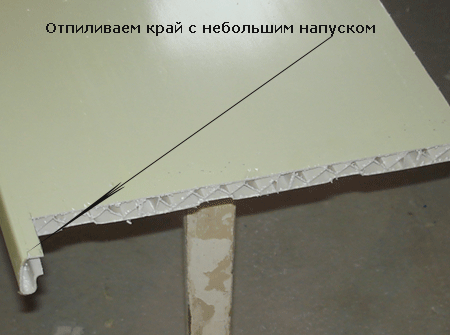
Then comes the turn of the upper slope. We carefully measure the distance from the frame to the wall and add 4 cm to start the slope behind the frame. We cut it out with a jigsaw, leaving a small margin of overlap on the wall.


After the slope has been cut, we proceed to fastening the fixing elements to it. For this we need straight hangers that were purchased in advance.
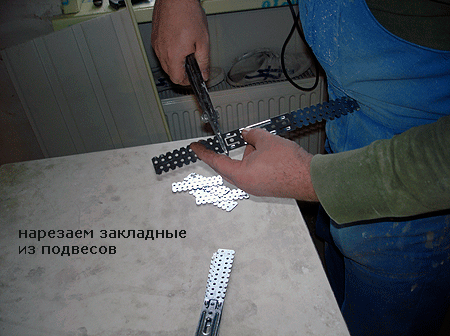
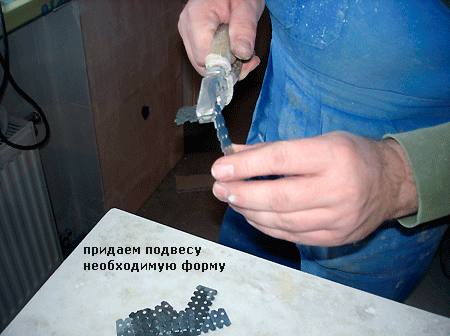
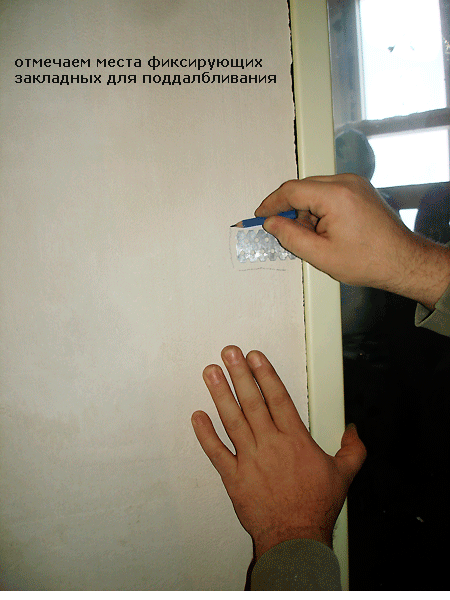
From each suspension, two corners are obtained that attach the slope to the wall. We fix the corners at a distance of 30-40 cm from each other using self-tapping screws with a press washer. For the upper slope, if it is small, one bracket is sufficient.
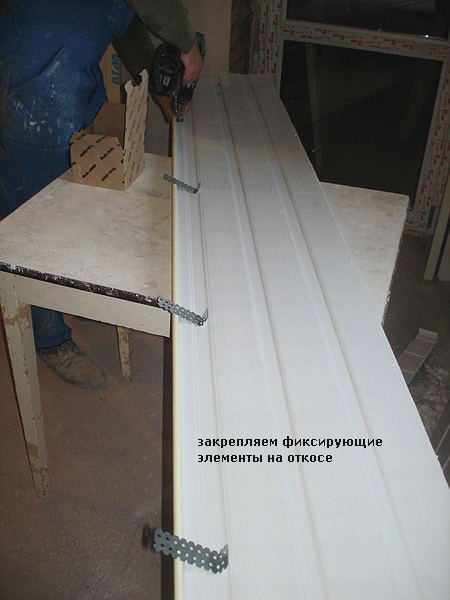


When all the corners are fixed, it is necessary to try on the slope in place and mark the location of the fastening angle on the wall. This is necessary in order to poke this place and drown the corner, which subsequently needs to be plastered

Now it is necessary to apply foam to the frame with the help of an assembly gun, not forgetting to wet the treated surfaces first.

After the foam has been applied, we carefully start the slope behind the frame and fix the corner with a hammer drill or puncher on the dowel-nail.
Then we proceed to the side slopes. If you want to "open up" the slopes a little, it is necessary to draw a perpendicular along the upper slope and the window sill with the help of a large square and draw the side slopes at the same distance from this straight line. When the slopes are "open" they look better than at right angles to the window frame. We carry out the fastening of the slopes in the same way as described above. I want to note that due to their rigidity, these slopes do not need spacers and other devices, which must be used in the case of using slopes from sandwich panels.


Nowadays, it is difficult to find an apartment without plastic windows. Yes, plastic windows have firmly entered our life, but their installation includes not only the correct installation directly, but also the treatment of slopes. For those who don't know, the slopes are the part between the wall and the window itself.
They are of two types:
1. Internal, which are located inside;
2. External, which are located on the outside of the window.
Why do you need to do them, because the distance between the window and the wall is completely foamed, for beauty or what? The fact that they need to be done for beauty is a correct assumption, but not the main reason.
- Firstly, the foam absorbs moisture and, accordingly, swells, thereby it can deform, in addition, when temperature drops, the foam begins to collapse. They can prevent all this.
- In addition, they are useful in that they provide non-penetration, and also do not start the cold and do not let heat through, and they reliably hide the traces of the installation of plastic windows. Hopefully you now understand how important they are in your installation.
Plaster slopes
It will take a long time to make the slopes, while they will not have the necessary properties, that is, they will not protect against noise and cold. In addition, any structure tends to settle over time, and this can lead to the fact that they can move away from the wall. They also lose their properties under the influence of the sun and with temperature changes.
They are made in several layers, while each layer must be given time to completely dry out, after which they need further refinement, because they will need to be primed, putty and painted.
The slopes of their drywall
They can also be made from drywall. It's over the best optionThan plaster.
Why are they better?
- First, they will last longer.
- Secondly, if you insulate them, then the apartment will be warm.
Minuses
But with all these pluses, there is a big minus.
This disadvantage is that it is exposed to moisture. That is, it is destroyed under this influence. Therefore, your room should always be dry and with a low level of humidity. In terms of installation, the plasterboard slopes do not go far from the plaster ones. Not only do you need to be able to install them exactly, they will also need to be primed, putty and painted.
Plastic slopes
But now the time has come for plastic. They are fairly easy to install, although they require some skill. But this is not difficult to learn.
Plastic slopes will not take much time during installation. They will last you much longer than plaster or drywall, while they are not affected by moisture, sun and temperature changes. And what can I say, they will also look better with plastic windows. Can be used to provide additional thermal insulation. It will also prevent. Now you understand why we advise you to install plastic.
What we need to install
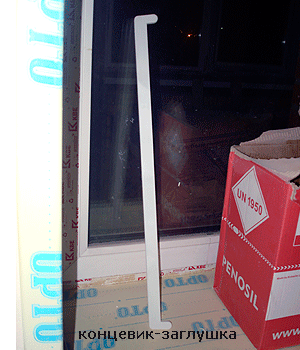
Let's start our lessons by giving you a list of the tools and things you need. First, you will need to purchase plastic 8 mm thick, 6 meters long; U-shaped plastic, it is also called the starting strip; And finally, F-shaped plastic.

If you do not have, then buy or ask friends for a drill or hammer drill, metal scissors and a knife. You can also buy mineral wool along the way.

Well, the last thing you need for installation is 9.5 centimeters self-tapping screws, about 15 pieces, bugs, the so-called small self-tapping screws No. 4.5, and silicone, but it should not be transparent, but white.
Installation process
Before proceeding directly to the installation, I would like to remind you that until you finish everything assembly work, it is not necessary to remove the protective film from plastic windows, as you can scratch them if you carelessly.
In order for there to be plastic to what to attach, it is necessary over the entire surface, where we will attach the wooden slats to the wall. They should be fixed with self-tapping screws 9.5 centimeters. Here you will need a punch to drill holes in the wall so that there is something to attach the slats to. In this case, the slats must be installed evenly so that the plastic holds more rigidly. You can align the slats with the help of bars, placing them between the rail and the wall. And in order to find out whether the rake is exactly worth it or not, the level will help you. See pictures below.
1. The left slope.

2.Verhny slope.
3. How to level with bars. 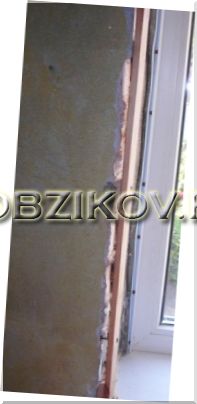
4. How to check the level of the evenness of the rail. ![]()
This completes the first part of the work, and you can see the result in the picture below. 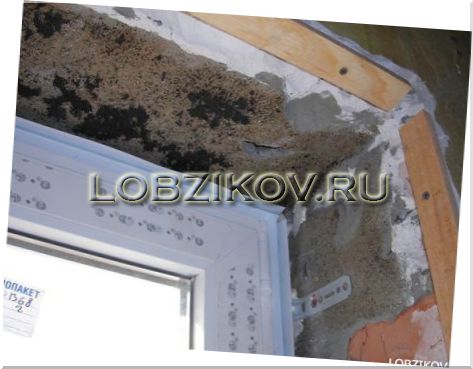

Now it's time for the starting strip. It must be attached to the slats. First, using a spirit level, draw a vertical on the side rails and a horizontal on the top rail. Using these marks, you attach the starter strip using self-tapping bedbugs. At the same time, make sure that the starting strip is tightly pressed against the slats. Unlike rails, you should pay more attention to the joints of the starting strips. (see fig)
![]()
Now look at what you should get after setting the starting strips. 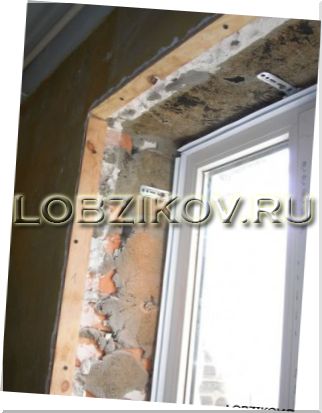
If you are already tired of fiddling with slopes, you can temporarily distract yourself from them by tearing off the protective film from the windows, and also in passing and wallpaper the room. We all say this, because in the further stages of installing plastic, you will no longer litter much.
Now the turn of the F-shaped plastic has come. Measure exactly the height of the slope, and cut the same size of the F-profile. The remaining piece of the profile must be cut as follows. (see fig)


After that, the F-shaped profile should be stuffed so that in the end you get such an overlap. (see fig)

Looking at the picture above, we can conclude that when cutting the F-shaped profile, you need to leave the start, and the resulting overlap can be removed using metal scissors. (see fig)
How do you attach the F-profile? To do this, you need a steeler with brackets, and the profile should be attached to the rail. (see fig)

We do all this for a reason, because thanks to this you do not need to glue wallpaper around the window, since the profile hides all the flaws.
And now the climax comes, we begin to fix the plastic itself, but at the same time do not forget about the insulation. Take the plastic and put it at one end in the starting strip, which is located on the far edge of the slope. After that, insert cotton wool inside, and attach the plastic to the F-shaped profile. (see fig)


It may turn out like this (especially if you make plastic slopes in the first place) that the plastic will not do so well with each other. It doesn't matter, because white silicone will come to your aid, which needs to wipe out all the errors.


