"Where are the pipes?"
With inner satisfaction, joy and emotion, we look at the shiny handles and taps of the brand new plumbing, admire the overflow of tiles under the glitter of electricity, lovingly wipe them, getting up under the jets of a brand new shower.
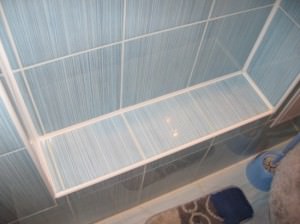
Agree, against the background of this splendor, it is stupid to leave open pipes of hot and cold water supply, whether they are at least three times made of metal-plastic, and even more so - sewage pipes. Therefore, in the bathroom, boxes are made of plasterboard, plastic, wood, or they use plumbing shutters in order to close, hide the pipes in the bathroom.
Masking pipes by painting

Painting pipes is the easiest and cheapest way to "mask" them
Most simple solution - it is, or rather, to disguise them. When there is no money for tiles, the walls are painted with water-based or oil paint. In this case, you can add color to the paint for pipes to match the walls, so that the pipes will not stand out against the general background, and will become almost invisible. Beforehand, they need to be well cleaned with sandpaper to remove smudges of old paint.
It is not necessary to completely remove it, it is enough to walk a couple of times along the entire length of the pipe to fly off the old paint, which has come off over time.
Insulation can be put on pipes with cold water (it is sold in hardware stores of the required diameter), since they tend to become covered with condensation, especially on the lower floors.
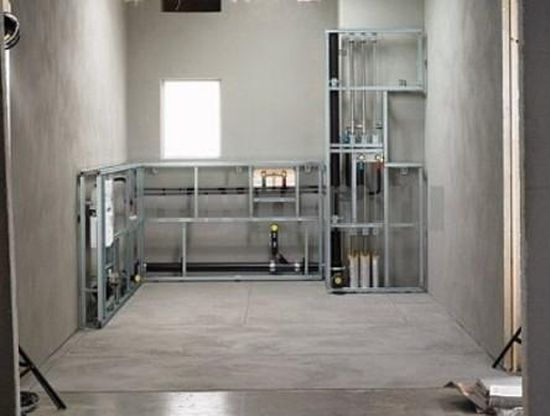
Tiled construction
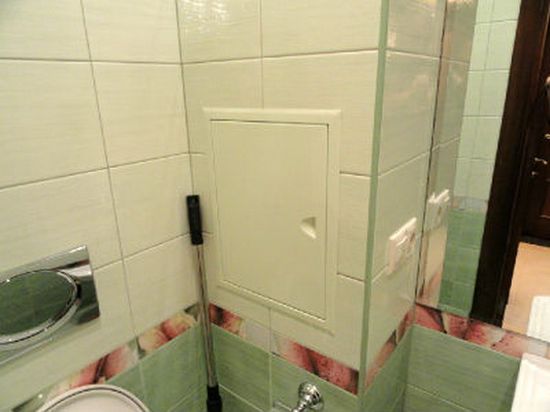
Plasterboard box will hide pipes and water meters
Required set for drywall box:
- metal profile
- drywall
- self-tapping screws for metal
If you use a bar instead of a profile, then self-tapping screws are needed for wood. A profile is set according to the level, drilled to the walls and ceiling (or bars), the frame of the intended box is made near the pipes.
Then the structure is sheathed with plasterboard, subsequently it is pasted over tiled tiles... Access to the plumbing is provided by a hatch that can be closed in one of many ways. You can make a shield that is also tiled and makes the hole almost invisible. Plastic doors and shields are sold in all sizes.
You can make roller shutters in a box, a sanitary overhead hatch, at least 80x50 in size. Lattices are used, both wooden and metal. There are many options.
Flexible and practical solution

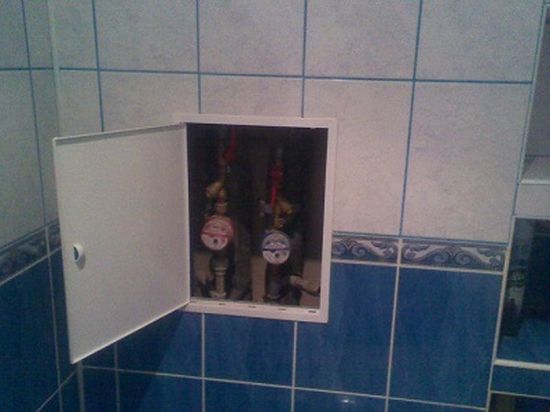
Plastic box for hiding water pipes in the bathroom and toilet
- 1 mm blade, metal hacksaw
- tape measure, pencil
- self-tapping screws, silicone glue
- hammer, nails, bars and the plastic itself
Manufacturing process:
- After marking, the plastic panels are cut with a hacksaw.
- The panels are fixed along the grooves, then inserted into one another to the required width.
- The first and the last are fastened with nails or screws.
- Put some silicone on the attachment points to keep them dry.
In either case, a spare door is made in the box, which can be mounted on magnets, can be opened with the usual handle, or it can be tiled (if the box is made of plasterboard), so that it can hardly be seen against the background of the general decoration. In this case, the door hatch is more suitable, it is also made of plastic. These are all standard solutions. A non-standard solution will be a bathroom, not just tiled, but designed in the same style.
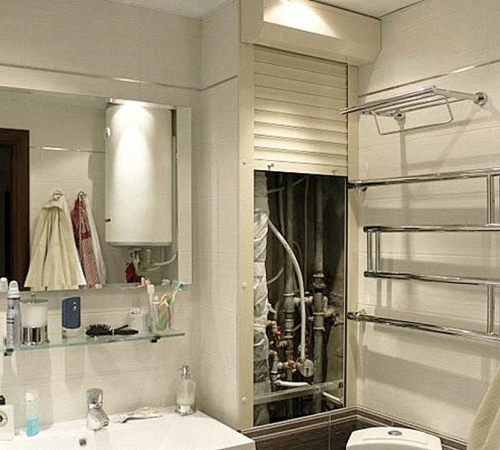
Hiding pipes in the wall and high-tech bathroom

Roller shutters are the easiest access to meters fixed to pipes in the toilet
The high-tech style assumes the most modern technological solutions, the use of interior items and sanitary ware according to the latest modern design, for example, the installation of a steel bathtub. But even here you cannot avoid the standard box. Only you will need to close it with chrome grilles. This solution has the advantage of being quickly disassembled in the event of an emergency. Or again turn to the box, but made of metal.
- Metal sheets are attached to the frame from the profile.
- They are fixed with self-tapping screws for metal.
- The required access hole is made in advance. His plumbing hatch is closed by a door, which is hung on hinges.
- As a last resort, the box is closed with the same plasterboard, but pasted over with non-standard tiles with a pattern that is opposite in style to the main pattern of the walls and floor.
- If space permits, instead of a box, you can make a cabinet that will not only solve the problems of masking water pipes and the junction of the sewer and the toilet, but will also be functional: you can put things in it.
Roller shutters are also suitable for such a bathroom. They perfectly complement the style, save space and allow, if necessary, to quickly open the communications hidden behind them.
AT modern design more often they go the other way: they remove the pipes into the walls and the floor, so that the space seems completely free from any hints of pipes: plumbing and sewer. The screed will allow you to hide the pipes in the floor. In the walls, chipping is done with a perforator to the desired depth, and then they are sealed together with pipes, then covering them with tiles or other material on top.
Wood in the solution of hiding pipes
It is possible to hide pipes in a bathroom or toilet using wood (but the popularity of the method is still low)
You will need:
- boards (lining) - from 10 to 20 mm wide.
- bars
- hammer, tape measure
- hacksaw and drill
- wooden corks, nails
Manufacturing process:
- The bars are fixed to the wall using drilled holes and wooden plugs driven into them. Thus, a frame is made, which is then sewn up with boards.
- Mark the plugs by drawing a line from them with a pencil (from the middle to the side), so it will be easy to hit them by nailing a block.
- Boards for the width of the box must be sawed off with a margin of 2 cm.The distance is measured from the wall to the pipe from the front side.
- The height of the boards is determined by the height of the bathroom.
- Remember to make holes for the hoses if necessary. You also need to make a technological hatch on the box if it closes the necessary connections, taps or water meters.
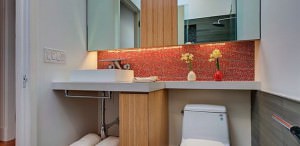
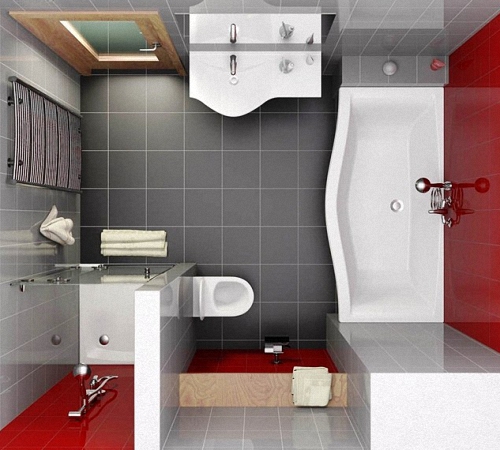
Japanese style bathroom
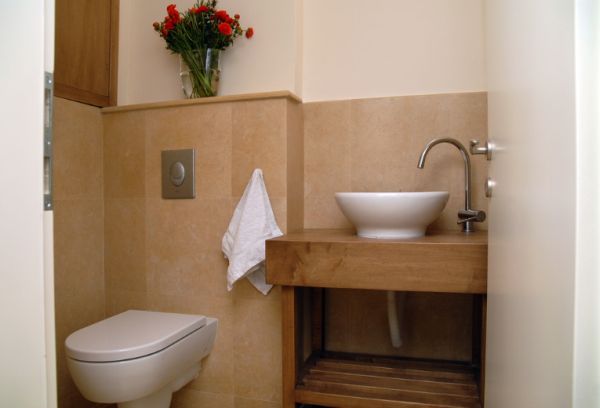
I would like to say a little about the bathroom, in which there is a minimum of color and a maximum of harmony. This is a Japanese-style bathroom where wood is preferred and even the bathroom in such a house is wooden, made of cedar, larch or other, more valuable species of wood.
Plumbing in such a bathroom is also original. Here is the sink, which is located in a wooden countertop. The pipes are in the wall and the supply hoses are also located in the worktop. A standard strobe is also used here, when the pipes supplying water are hidden in the wall. The connecting hoses are located in the worktop. The color scheme of such a bathroom is calmness and moderation, sustained in pastel colors. If there are spots of paint, then they are very thoughtful, located only in blotches, details, and in very small quantities.
In such a bathroom, the question of how to close (hide) the pipes in the bathroom somehow does not come to mind. It seems that they were not here, and not.
Pipes are an indispensable element of the bathroom, the location of which directly affects the overall attractiveness of the interior. Do you want to improve the look of your bathroom at a low cost? Learn about the basic ways to mask pipes.
Requirements for installing pipes in the bathroom
The water supply system is arranged in such a way as to prevent a simultaneous decrease in pressure in different sections of the pipes. To assemble the plumbing, experienced plumbers use pipes of various diameters.
Trunk sections are laid using pipes with a diameter of ¾, and for branches they are laid with ½ inch lines.

There are two ways to lay the plumbing in the bathroom:
- open;
- hidden.
The first option is based on the installation of pipes, after finishing the walls, floor and ceiling. The pipes, in this case, are outside and worsen the appearance of the room.
Concealed mounting is more complicated. Pipes are installed under finishing, behind furniture, behind plasterboard boxes. The appearance of the premises remains unchanged.
Check out the basic requirements for installing pipes in a hidden bathroom:
1. Reliable operation. When hiding the wiring in the bathroom, make sure that all fasteners are secure. Pipes installed inside a drywall box or wall are carefully sealed to prevent leaks.
2. Condensation will not form inside the walls, as mold and mildew will appear in the inter-wall space under the influence of high humidity. Install insulation on the pipes,
Experienced foremen recommend using the hidden method of installing the water supply in the bathroom. Follow the pipe installation technique carefully. The open method only allows you to save money on the purchase of high-quality materials. In the winter season, condensation forms on such pipes.
Ways to mask pipes in the bathroom: features and benefits
There are several ways to mask the plumbing in the bathroom. Pipes located in a horizontal position are installed in the wall using the strobing method. Further, the walls are covered with plaster mortar and tiles.
In order to have access to the pipes in the bathroom, for the purpose of camouflage, a special box of plywood or drywall is constructed. Some craftsmen hide pipes in special structures in the form of cabinets. Additionally, devices perform the function of storing things.
Use your imagination and decorate pipes:
- flowers;
- painted:
- mosaics:
- stucco.
Installation of a water supply system inside the wall is carried out in the case of using copper or polypropylene pipes... At the same time, the joints between the parts must be strong and tight.
To hide horizontal pipe sections, place corrugations on them, and then place them inside the wall. Cover the floor with plaster or concrete screed. Further actions depend on the individual preferences of the owners.
Please note that the pipes may only be put into operation after the concrete solution has completely dried. Premature water supply will lead to cracking. This method of hiding pipes is more suitable for new apartments or when carrying out major repairs. In other cases, we recommend hiding the pipeline behind furniture or other parts of the interior.
Before you start strobing, make a project that clearly identifies all pipe-laying channels. When working on drawings, consider the diameter and size of each pipe, its thickness, and the need for reinforcement. In the places where taps, adapters and other repair parts are installed, build a viewing window. In a panel house, strobing cannot be performed.

We hide pipes under the tiles with our own hands
Hiding pipes under tiles is a long and laborious process, before performing which you need to carefully consider all the pros and cons of such a repair. Initially, plan for installing pipes under the tiles. The drawings clearly indicate the places of passage of pipes, determine the repair boxes.
Next, build a frame on which the tiles will be fixed. Use a wood or steel frame to make the battens. Wooden structures break down faster and require treatment with antiseptics. Choose metal profiles with anti-corrosion coating. Further, the frame structure is covered with a mesh, which will become the basis for fixing the tiles. First, the front part of the frame is finished. Next, lay the tiles on the end sections and on the top of the structure. Construct a hatch-like opening for permanent access to the system.
Making a tiled box is a complex process. Moreover, it is not practical to operate. Therefore, we still recommend hiding the pipes behind furniture or plasterboard elements. Try to build a collapsible, modular design that will be as durable, convenient and utilitarian as possible.
Types of piping in the bathroom and their characteristics
There are three main types of pipe layouts:
- consistent;
- collector;
- combined.
The first option is widespread in apartments. It is used if the system differs in the minimum number of draw-off points. Tees are used to connect consumers to the pipe. This wiring option is compact, with a minimum number of connections, and, accordingly, a decrease in the possibility of leakage. In addition, the costs for the number of pipes and adapters are reduced, the system is quickly installed and functions well. The only drawback of such a scheme is the variability of the pressure in the system, especially when several sources of water supply are turned on.

The collector method of installing pipes in the bathroom allows you to connect many water points to the main pipe. It is used in large private houses, cottages or mansions. The scheme is based on the presence of two collectors providing hot and cold water supply. Water flows through a separate pipe to each device, so there is no pressure drop. The water supply is shut off without damage to other consumers.
Combined option - connecting some devices through collectors, and others in a sequential scheme. This option is the most optimal for small houses.
In relation to the method of laying pipes, there are three types of wiring:
- open - pipes are located directly on the walls, quickly and easily serviced, the room does not need additional repairs during their installation;
- hidden - installation of pipes inside walls or under the floor;
- combined - pipes are hidden in the room under false boxes or furniture.
How to hide pipes behind furniture
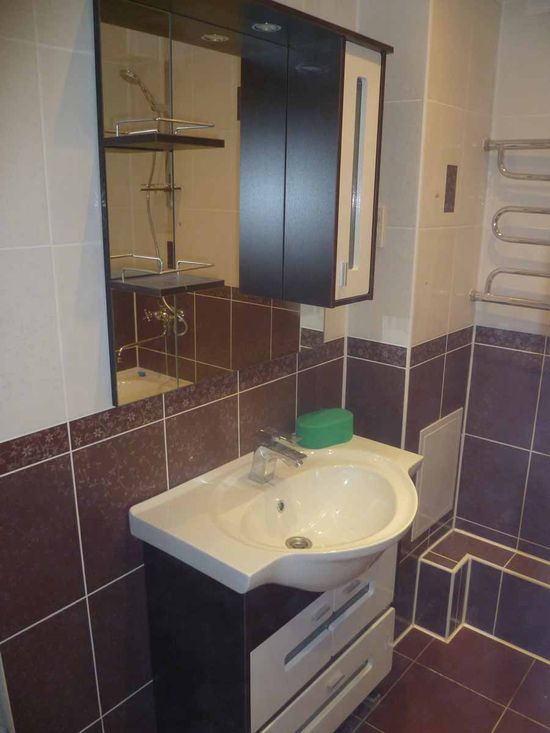
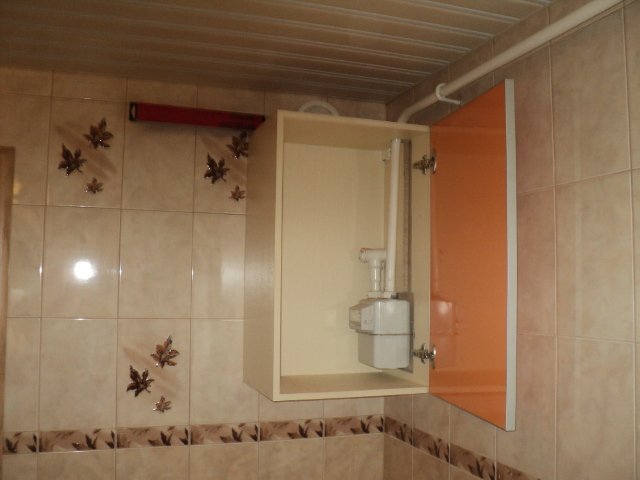
The easiest way to hide pipes is with furniture. Install a cabinet or shelf in the place where communications pass. On the one hand, you get a place to store things, and on the other, an interesting piece of furniture that hides communications in the bathroom.
Make markings on the curbstone first. The pipe is connected to the pipe with precise joining dimensions. All elements are securely fixed to the wall.
Among the disadvantages of this method are the damage to newly acquired furniture, a change in its shape, the difficulty of selecting suitable fittings to hide all pipes. In addition, wooden furniture is more susceptible to wear and tear due to the condensation formed on the pipes.
When choosing this method, use the services of specialists who will develop a furniture project in relation to the individual parameters of the bathroom.
Hide pipes will help stretch ceiling, podium structures and boxes of various sizes. If financial capabilities do not allow you to purchase a previously developed furniture project, make it yourself. Build shelves with your own hands from moisture-resistant drywall.
![]()
We use decorative linings for pipes
Pipes installed in an open way require additional linings. On the one hand, they protect people from burns, in the case of hot water supply, on the other hand, condensation does not form on the pipes and their appearance improves.
The easiest way to hide a pipe is to install a decorative cover on it, which consists of a mounting pipe connected by a locking mechanism. Decorative panels are easy to install in a previously installed system.
The finished panels are selected taking into account the dimensions of the pipe. Before purchasing decorative trims, measure the diameter and length of the piping at different locations.
To make plastic box DIY pipe cover, follow the instructions:
- measure the distance between the wall and the floor;
- in relation to the dimensions obtained, decide on the installation site of the pipe;
- using plastic pads, try to achieve a minimum distance between them and the ceiling;
- install the frame part made of galvanized coating;
- install plastic panels or decorative elements.
The service life of decorative linings is determined by the quality of the plastic panels. When drawing up a diagram, think over the details for access to the shut-off elements, dock the lines in such a way as to prevent leakage or breakthrough.
The option of wrapping the pipes with a jute-based rope is possible. The material has good thermal insulation properties.

DIY bathroom repair with hidden pipes
The repair of pipes in the bathroom was previously based on dismantling old communications and installing new ones. Before starting work, decide on the type of pipes used.
If the pipe is a main pipe, then its diameter should be 110 mm. Internal risers are fitted with pipes with a diameter of about 50 mm. Conduct hot and cold water supply using pipes with a diameter of 1.5 and 2 cm.
We recommend using metal-plastic pipes for installing hot water pipes, and plastic or copper pipes for supplying cold water to the bathroom. Metal pipes with a special zinc coating, although they are distinguished by their high cost, they perfectly resist mechanical damage and do not rust.
Polymer pipe options are easy to install in the bathroom and do not need to be welded. The main condition for their installation is high-quality sealing. Reinforced-plastic pipes we also recommend installing it in a bathroom due to its long service life and resistance to temperature changes. The inner surface of such pipes is smooth, so they can easily pass water.
Before buying pipes, create a scheme for their installation, decide on the type of wiring. All work is carried out sequentially.
DIY bathroom repair video:
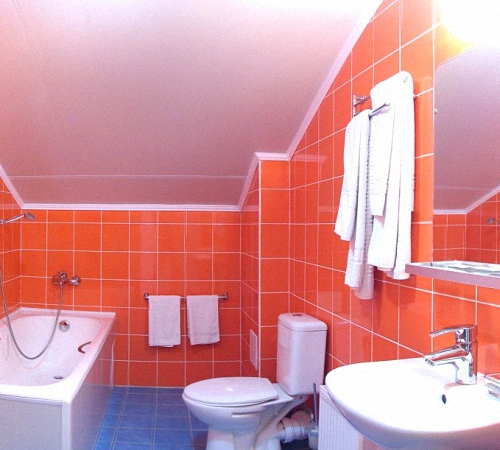
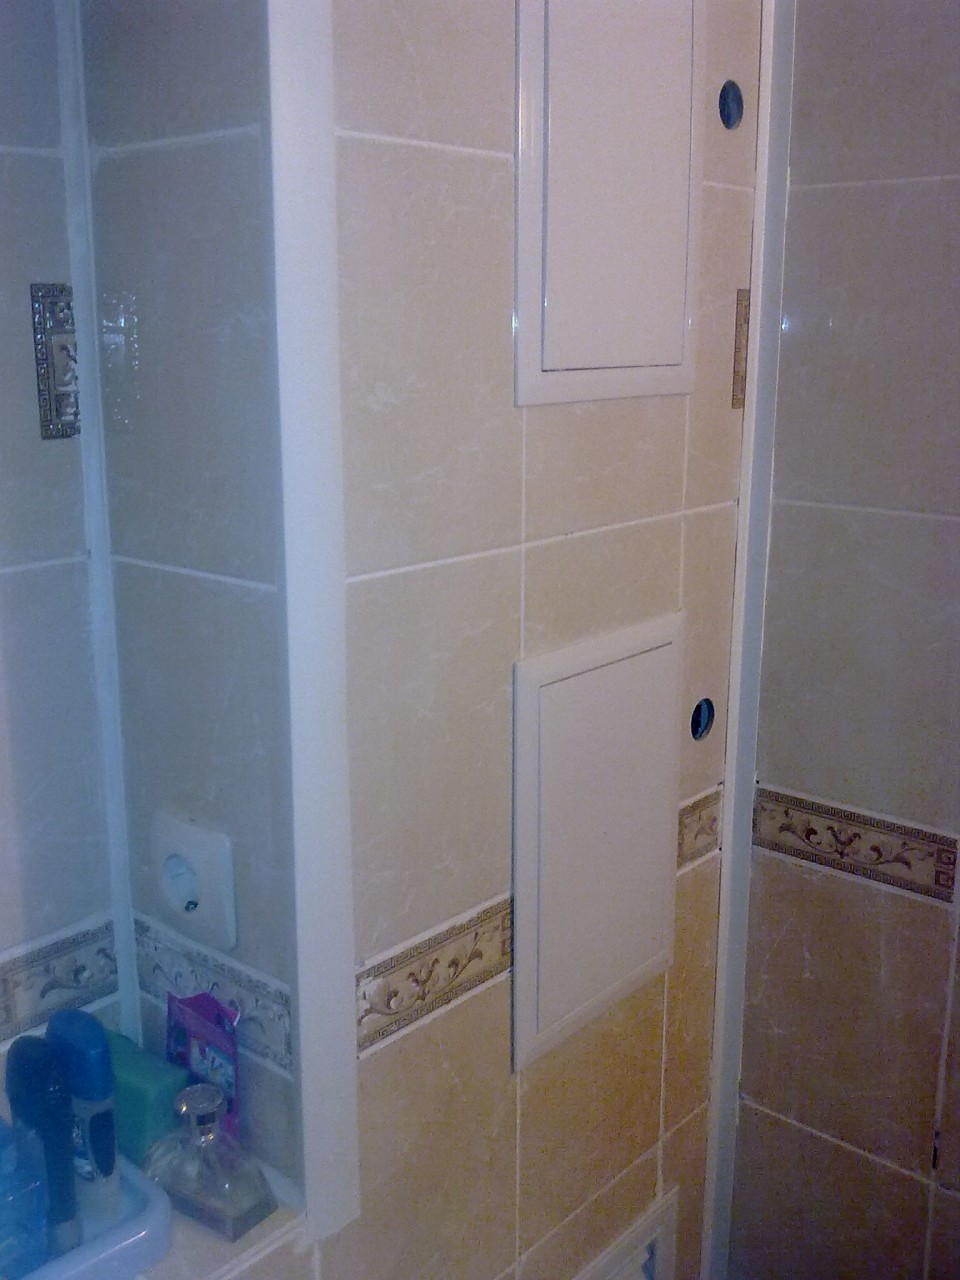
The specificity of bathrooms is such that this room is saturated with unaesthetic elements of communications - plumbing and sewer pipes, water meters, taps and toilet cisterns, if the bathroom is combined with a toilet. No bathroom interior design can be considered complete until these elements are hidden out of sight, as in the photo. Let's look at the basic camouflage options for unsightly interior details.
How to hide pipes under tiles
Tile is the undisputed leader in frequency of use for decorating bathrooms and toilets, so it is quite natural to use it for masking communications. There are two possible options: first - the issue of masking is solved at the time of laying pipes during construction or overhaul of the premises; second, it is necessary to resolve the issue of masking the already laid communications.

The first option is much easier, because doing it right initially is always easier than redoing it. We remove communications directly into the wall. For this, after drawing up a plan of water supply communications in the walls, where pipes will be laid, grooves are hollowed out - special niches. After laying the pipes, the strobes are sheathed with tiles or any other finishing material without any problems.
If we need to hide the already laid communications under the tiles, then we need to assemble a box around them - a structure made of boards or chipboard strips. It is not difficult to do this, two boards or strips of the required width cut out from a chipboard (fiberboard) sheet are enough if the communications are located in the corner; or three, if the pipe is laid in the middle of the wall area.
Having assembled the box, we sheathe it with tiles, taking into account the following points:
- Whether chipboard boards must be treated with moisture-resistant compounds, and then covered with a layer of waterproofing. In no case can you save on protection from moisture - rotting of the wooden base under the tiles will quickly destroy the structure, nullifying all our efforts.
- After waterproofing, the box can be plastered over a metal mesh or, if the surface is sufficiently flat, to fill in individual roughness.
- Depending on the overall design idea, we design the box in the colors of the entire bathroom, or deliberately focus on the "column".

How to hide pipes under drywall
Tile decoration, for all its advantages, also has a significant drawback - it is almost impossible to dismantle it without loss. If you need emergency access to communications, the tiles will have to be broken. You can provide access to communications by disguising communications as drywall.
To do this, we mount a frame made of a metal U-shaped profile (photo). We mount horizontal lintels with a step of no more than 20 cm to the vertical guides verified to be plumb. A layer of vapor-waterproofing is laid on the frame, which will help to avoid the accumulation of moisture under the finish.
After installing the sheets of finishing material and filling the joints, it is also necessary to lay a layer of waterproofing on top, since this material is afraid of moisture, even if we use a special waterproof material. From above, the drywall box can be finished with self-adhesive foil. The order of work can be seen in the photo
Now it will be much easier to get to the pipes if necessary. To do this, you need to disassemble the box in the reverse order. After solving all the problems with communications, the box can be assembled again from the same component parts, it will only be necessary to repeat the filling of the joints.

The advantage of masking pipes with drywall is that this method can be easily combined with others. So you can put tiles on a plasterboard partition.
How to hide pipes under plastic panels.
Plastic panels, unlike drywall, are not afraid of water and do not need external waterproofing. An internal waterproofing layer is still needed in order to avoid moisture getting into the box.
- The frame for the plastic is made in the same way as for the previous finish
- A layer of internal waterproofing is mounted on the frame
- Plastic panels are cut to the required size with a hacksaw or jigsaw.
- We mount plastic panels to the frame with a stapler, nails or self-tapping screws while maintaining the pattern.
- Seal the joints and screw caps with a sealant.
Regardless of the method of "camouflage" when disguising a sewer riser in a bathroom combined with a toilet, it is necessary to consider the issue of thermal insulation, since the riser is a powerful "cold tunnel". If wood or chipboard are good heat insulators in themselves, then in the case of pipe cladding with plastic or drywall, the waterproofer will also have to play the role of insulation.
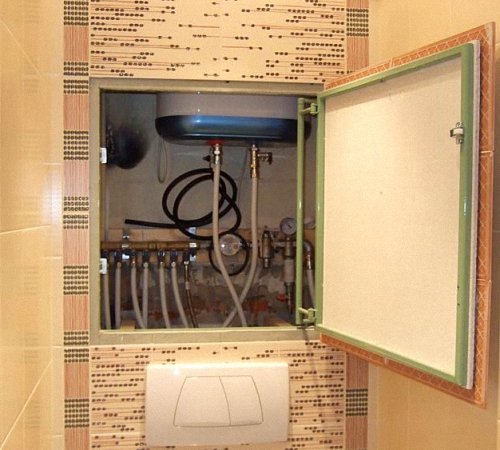
It is imperative to provide for easy access to valves and water meters. For this, doors are mounted in the casing.
Imagine, you go into a newly renovated bathroom in the morning, you have a beautiful mural with dolphins above the bathroom, some expensive Spanish tiles, an exclusive mirror and a backlit shelf, your mood immediately rises, but ... you turn your head further, and there are some then the pipes! The spectacle is not pleasant, nor any aesthetic pleasure, from morning procedures. But this is a room in which we get a portion of vigor for the whole day, and in the evening an element of relaxation.
hidden pipes in the bathroom
Aesthetics is the very first and most important reason why, when carrying out renovation works in bathrooms, almost everyone tries to remove all piping from sight as much as possible. Well, the second reason is the noise from the water in the sewer pipes, which in turn also creates some discomfort.
How to close the pipes in the bathroom.
So how can you properly close the pipes in the bathroom in order to save yourself from an unpleasant sight? To approach this issue correctly, you need to understand at what stage to start, which materials are best to use and how to combine everything with a beautiful design.
For cosmetic repairs, when there is no redevelopment and some global changes, we must check the quality of all communications and connections. And already, if necessary, we make repairs or replacements, so as not to return to this issue in the future.
During major repairs, after preparatory work, first of all it is worth tackling the project of piping in the bathroom. Let's first determine where the bathroom, toilet, washbasin and washing machine will be located. These are the main consumers of water, unless you happen to have exclusive options. We draw up a laying scheme for each consumer. Then we determine from what material the pipes should be used in the bathroom. Their service life depends on this, and if a leak occurs? We don't want to shoot down finishing material and gouge walls to find and repair a leak.
So options for how to hide the bathroom pipes:
- With the help of redevelopment. When there is an opportunity to redevelop the entire room, build an additional niche and hide all communications there and not only.
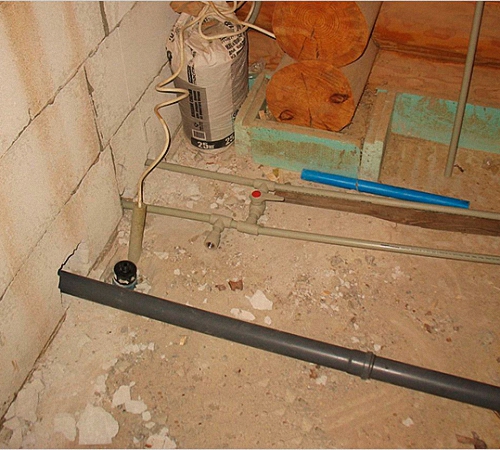
- In the wall or floor. When laid in specially prepared recesses, and then hidden behind a finishing material.
- Build a special pipe box in the bathroom. Can be done with drywall and then covered with finishing material.
- Place below the level of vision. Hide behind furniture and fixtures.

The latter option is suitable for cosmetic repairs. The simplest, but less effective. Of course, most of it is possible to shed, but some part remains visible. The rest of the options, how to close the pipes in the bathroom, are more suitable for a major overhaul, each has its own pros and cons. When redeveloping, when you build an additional niche, you do it at the expense of the space of the room, which is not always possible with a small size.
In the wall or floor. A good option, will save you from unnecessary spectacle, while not at all taking away precious space. It has one drawback: you need to be very careful about the choice of material and installation. For this method, copper and stainless steel pipes with brazed joints are suitable. Threaded connections are not considered in this case. Also suitable for plastic with the same soldered joints. If you do everything right, you won't have to destroy walls and fix breakdowns.

Build a special pipe box in the bathroom. It leaves the option of access to communications, but slightly hides the space and complicates the installation of hanging furniture. The last two options remain the most popular today, but the choice is always yours.

Usually, masking pipes in the bathroom is one of the types of work that relate to decorative finishing... The question of hiding the pipes in the bathroom with their own hands is of concern to those who are repairing the apartment for renovation.
You can hide and hide from prying eyes literally any part of the pipeline that spoils the appearance of the room.
There are several methods of disguise that are considered to be the most effective.
- Behind the built-in furniture.
- Redevelopment of the bathroom.
- Hiding in the thickness of the walls.
This is one of the solutions received most widespread... Subject to certain conditions, all the work can be done by the owner of the house or apartment. What do we need?
- Cladding material.
- Fastening elements.
- The scheme according to which the pipes are laid.
- Tools.
It's easy to figure out how to put pipes into the bathroom wall. First, you need to make small grooves or grooves in the wall. The main thing is that the dimensions of these holes correspond to the pipes that are planned to be hidden inside.

And make a small margin in thickness to take into account possible expansion. We remove the pipeline into the grooves prepared in the wall and fix it using elements prepared in advance.
Polypropylene pipes are most suitable for hiding in walls. You can take metal structures that do not have threaded connections. Then it will be possible to protect the channels that are already covered with finishing material.
This is one of the most simple ways how to hide a pipeline with your own hands in a wall, but it is not without its flaws. They are due to the fact that there will be too much garbage during operation.
Also, when leaks appear, even small ones, almost the entire cladding will have to be removed completely in order to find the place where the damage appeared.
We carry out the screed
This work is just as easy to do with your own hands without any special skills. It is enough to take into account a few essential rules.
- A waterproofing layer for the bathroom screed is required.
- A plastic wrap, which is used in construction, must be laid on the floor.
- It is necessary to use strips of polystyrene foam to separate the screed and walls from each other.
- The pipes are always placed in a corrugation.
- Above them, the floor is poured no less than 2-3 centimeters.
- TO finishing works you can start only after the screed is completely dry. A not dried screed can crack if used to hide heating.
- There should be no right angles on horizontal sections. Otherwise, the sewage system will be clogged.
- It is not recommended to place pipe joints under the screed. If you cannot do without this, it is better to mark difficult places on a map or site plan. Special niches or plumbing hatches will help ensure constant access to these parts.
- if hot water or air moves through them. You can paint the pipes in the bathroom later.

The screed is carried out along the beacons installed in the classical way. The simplest solution is to screw the screws into the floor, at a distance of 60-80 centimeters from each other.
A laser or regular level will help you check if the line is running correctly.
Hide with your own hands using a special box
For this we need the following set:
- Plastic.
- Plywood.
- Drywall
The main requirement for materials is moisture resistance. Otherwise, the structure will not last long enough.
 The stages of work on the construction of the frame are as follows. This is another answer to the question of how to close the pipes in the bathroom.
- We measure structures. We calculate how much galvanized profile is required.
- Euro screws and dowels are used to fasten the profile to the wall. The main thing is that from pipes to the frame there is minimum distance, at least 3 cm.
- The front edge is formed by one or two posts. The number of parts depends on the structure of the box itself. Its own folded edge, hanger will help create a secure fit.
- Further, guide elements are installed along the floor and ceiling.
- With a frame height of more than one and a half meters, several jumpers are additionally mounted. The maximum distance between them is 1 meter. Self-tapping screws or cutters are needed to connect different parts of the profile itself to each other.
After that, it remains only to choose a facing material with suitable properties. This stage will be the last in the work.
Close with your own hands using plastic on the frame

We cover with plasterboard: an option for spacious bathrooms
- Sheets of material prepared in advance are fixed on the surface of the frame.
- A saw or jigsaw is used to get rid of residues.
- Next, you need to cut holes, they are used when arranging the hatch and removing pipes.
- At the next stage, the structure is covered with putty. The main thing is to pre-glue all the joints using a serpyanka.
- After that, proceed to the priming of the walls.
- The last stage is finishing work.
For profile sheathing, a material such as MDF is also used, although quite rarely. Because it takes up even more free space than drywall. And even more than plastic, than both of these materials taken together.


Financially, plywood is considered a more economical solution. Plywood and drywall cladding is carried out on almost the same principles.
A little about the types of wiring
The main rule is that the pipes are laid in a certain sequence. Even those who do it for the first time can easily do this work with their own hands.
Video 1
But have serial wiring there are also a number of disadvantages. The main one is that the pressure on such systems is distributed unevenly. This means that it is not recommended to turn on water in several consumers at once.
About collector wiring
In this case, a separate section of the water supply is used for each device. That contributes to the uniform distribution, movement of water through the system.
No need to worry about people taking a bath if you need to turn on the washing machine or dishwasher.
Manifold wiring assumes that the valve is individually installed on each pipe.
If one section fails, it is not required to dismantle the entire structure.
The main disadvantage is that the arrangement of such systems is not available to beginners. And much more material is required than for serial wiring.
It is better to invite real professionals to solve such problems.
It is necessary to take into account several features, regardless of which method is chosen in this or that case.
- You need to keep the system as consistent as possible.
- There should be a minimum number of bends and knots in the line.
Video 2
It is not recommended to interlace pipes with cold and hot water. The trunk system should look like a whole, like a simple fixture.
Washing machine, hot water tank, sink and bathtub are the main points. One more should be added if the bathroom is combined.
Now you know almost all the ways to hide pipes in the bathroom with your own hands. It remains only to determine the one that suits you and get down to business.


