Baths construction
The bathhouse has been known in Russia since time immemorial, becoming practically a symbol of our culture. In order for the bath to bring as much benefit and pleasure as possible, it should be equipped according to certain rules.
Ideally, the bathhouse should be built away from the road, but next to the water - at a distance of 15-20 meters and fenced off with a fence or any structures from prying eyes. The entrance to the bathhouse should be done from the south side - in winter there are fewer snowdrifts on this side, and therefore the bathhouse is easier to operate.
Bathrooms (like saunas) must be built spacious - at least 1.8 sq. meters per person, as well as think over the lighting system.
The most important element of both baths and saunas is heating. Historically, our ancestors used to heat the bathhouse in a black way, that is, there was no outlet pipe in the bathhouse. Nowadays, electric heaters are increasingly used, which do not smoke the room, and they do not require an outlet pipe. True, the effect of burning firewood in this case is not felt. Therefore, a wood-burning stove is an ideal option for connoisseurs of a Russian bath - it is unpretentious in maintenance and in the choice of fuel it differs from an electric heater only in the source of heat and the presence of an exhaust chimney.
In the process of building a bath, stone, brick, cement, roofing iron, slate, clay, sand, glass, vapor barrier films and sheets, wood, chipboard and fibreboard, organic and mineral insulation and many other materials can be used.
Construction of a bath from a bar
The most common material for building a bath is still wood (usually round coniferous wood), from which you can make absolutely the whole bath - from the foundation to the roof. Such a bath is not only cheaper, but also ecologically cleaner, and just more pleasant. And the most simple option erection wooden bath is the construction of a bath from a bar. Let's start with him.
Even before starting the construction of a bath, you need to clearly define what kind of bath you need: a traditional Russian bath, a Finnish sauna, or maybe a Turkish or Japanese one. But here we will talk about an ordinary Russian bath as the most common option.
Next, you need to decide on the size and location of the bath. Of course, the question of the size of the bath depends on the size and location of the site, and on the financial capabilities of the owner, and on the estimated number of people who will use this bath. The standard version of a small bath is 3.5 by 3.5 m. All the necessary premises will fit in this area: a steam room, a washing room and a dressing room (instead of a dressing room, there can be just a changing room). Again, the standard area ratio of these rooms is 1: 1.5: 2.
The location of the bath on the site is a very important point, since a mistake can lead to the fact that using the bath will be uncomfortable or it will last much less time than it could.
Of course, it is better to build a bathhouse in the depths of the site and away from the road - and it's not just about hiding from prying eyes. Firstly, dust and exhaust gases from passing vehicles will fly off the road, which is already unpleasant and also contrary to the purpose of the bath, and secondly, the same transport will damage the structure itself.
Many owners country houses they want to build a bathhouse as close as possible to a river or lake, but it is better to place it at a decent distance from the reservoir - at least 15 meters.
The bathhouse can be erected as a separate building, or combined with others - a summer kitchen, a barn, and even attached to the house: if the waterproofing is installed correctly, then moisture will not spread to the house.
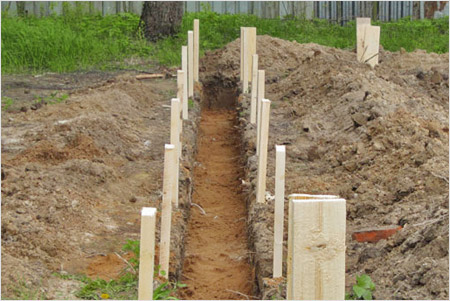
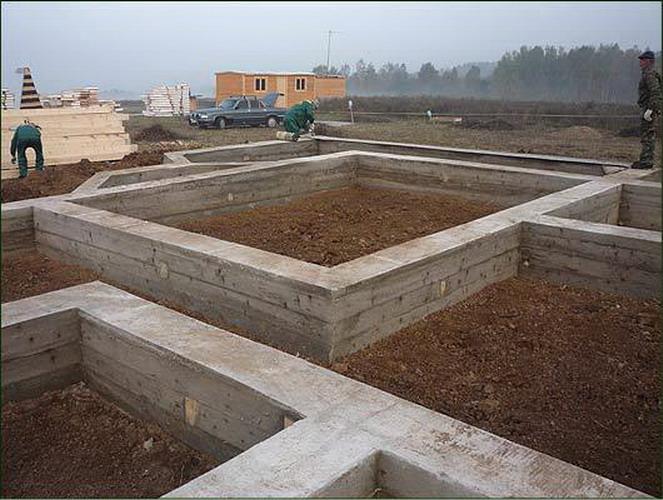
The technology of building a bath is not very different from building a house. Like any building, a bath begins with a foundation. The easiest way to build a bath is to use the simplest strip foundation. However, for some types of soil, it will not work - you will need pile foundation... Since the foundation is almost the most important part of the bath, it is better to consult with a specialist who will tell you what type of foundation to choose, and to what depth to bury it, and will answer all other questions.
After we have figured out the foundation (or better, of course, before that), it is necessary to resolve the issue with the material from which the bath itself will be built. Ideal for our climate conifers - pine and spruce. However, it should be remembered that not any pine or spruce is suitable for the construction of a bath - the durability of the building depends on it.
So, for baths being built in the Leningrad region, it is recommended to choose northern trees - for example, Karelian: they grow in a climate similar to ours, but somewhat slower, from which the wood becomes denser and therefore less moist. But the southern pine is more porous, and therefore after a couple of years, the lower crown of the bath may well begin to rot.
For the construction of baths, glued or profiled beams of 50x180 and 150x150 mm are usually used, already ready for quick and accurate assembly of the building walls.
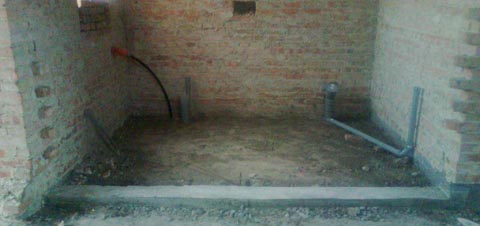
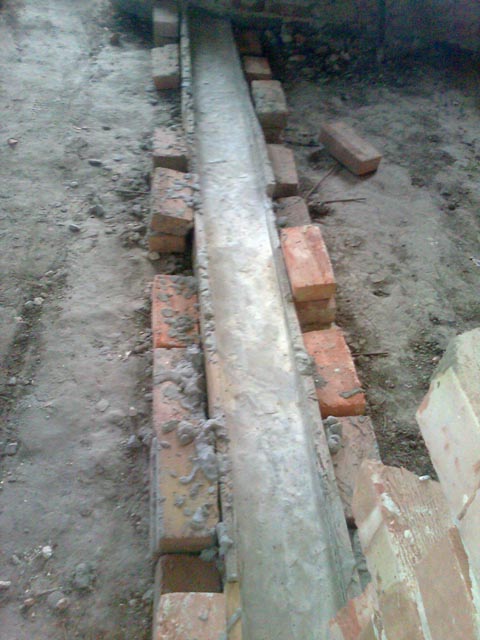
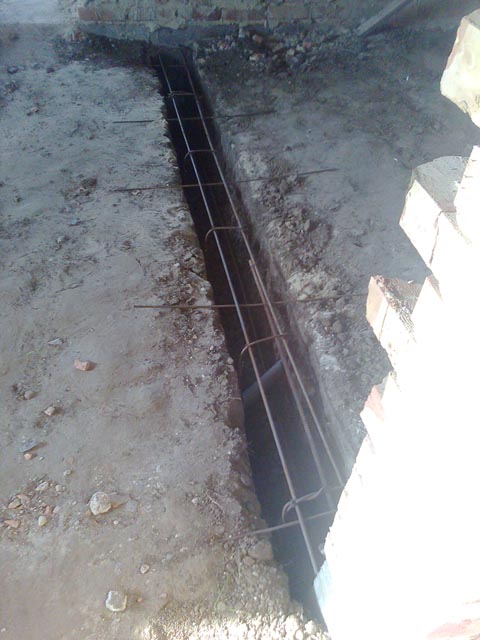
First of all, a concrete or brick base is erected, covered with a layer of waterproofing (most often with roofing material), after which they begin to lay the first crown, into which it is necessary to cut in the floor logs and the timber of the internal partitions.
The floor should have a slope towards the water drain, equipped with a sewerage system and a water lock, so that cold air from the street does not come in.
In the process of building the baths, the bars are placed in the "end tongue" or in the "paw"; it is possible to lay them without tongue-and-groove - using wooden or metal pins mounted in the corners or in the middle of the timber. Between the bars, a mezhventsovy insulation made of flax or jute is laid. The roof of the bath is laid in the same way as the roof of the house.
The most important part of the Russian bath is the stove, which should be positioned as follows: the water tank should be in the washing room, and the firebox - in the steam room. At the same time, the locker room wall should also warm up. A stove-heater is sometimes replaced with either hot water pipes or special electric heating devices. The stove can be folded by yourself if you have the appropriate skills, but it's easier to buy a ready-made one.
The shelf in the steam room should be wooden, its size can be any - for sitting (50-60 cm), for lying with bent legs (1.5 m) and, of course, for lying with outstretched legs (1.8 m). The length of the shelf depends on the size of the bath itself.
Construction of a bath from logs
About the same general requirements there are also the process of construction and log baths - the oldest and still very common type of baths. Although, of course, there are some peculiarities here.
It is very important to find the right logs here. The ideal diameter of a log for a bath is about 20-25 centimeters: if they are thinner, the room will lose heat, and if they are thicker, it will be very inconvenient to mount them.
Nowadays, you can buy a ready-made rounded log, but you can prepare it for construction yourself.
First of all, the log must be sanded so that its top and bottom in diameter differ by no more than 30 cm, after which the log is sawn.
Further, the logs are lined up in separate crowns, laid horizontally and connected with wooden spikes and arranged in a checkerboard pattern. For window openings, select 5 lower rims and 2-3 top ones, and for the door ones - vice versa. At the bottom of the walls of the bath, thicker logs are used, at the top - thinner ones. The upper crowns laid on the foundation should be laid with transverse beams, and the gaps above the foundation are laid with bricks or filled with cement mortar.
A very important point is the insulation of the log bath. The walls of the bath can be dug up, and inside and pasted over with clapboard, which, in addition to having aesthetic properties, also retains heat. As the frame of the bath dries up, the gaps between the logs increase, so they must be treated again with tow or dry moss.
Construction frame bath
A more modern and, perhaps, the simplest and cheapest option for building a bath is the construction of a frame bath. Its one more advantage over a log house is that it does not need to be "defended" whole year for shrinkage - can be trimmed directly and operated.
The general requirements for the construction of a bath are again almost the same as for a bath made of a bar or a log, the difference is quite small.
The frame for the bath, as a rule, is made of a wooden beam 50x100mm, between the inner and outer sheathing, a mineral wool insulation is laid. From the outside and inside, the frame is sheathed with sheet material - OSB or plywood. For interior decoration the bath is used lining, and for the external one - lining, siding or blockhouse, which gives the bath the appearance of a log cabin.
Thermal insulation of such a bath is as follows: first, there is an internal sheathing (lining made of hardwood), then a vapor barrier, then a heater (mineral wool 100 mm), waterproofing and wind insulation, and finally - an external finishing sheathing.
Inside, a vapor barrier film with a layer of foil is used to insulate the house, which must be turned inside the room - the foil will reflect heat, and the bath will warm up faster. The floor and ceiling are insulated with vapor barrier and mineral wool, but in the steam room the floor does not need to be insulated.
Brick bath construction
Recently, the owners of country houses are increasingly building brick baths - this, of course, is more expensive, but such a bath is more durable and, importantly, less fire hazardous. Its main disadvantages are that the bath heats up slowly and has a high thermal conductivity, to reduce which the walls are sheathed from the inside with clapboard, and a thick insulating layer is laid between the clapboard and the wall.
The foundation for a brick bath should be very solid: from rubble, concrete or cinder-concrete stone, or also from brick. Sometimes the foundation is made of reinforced concrete, but this is quite expensive.
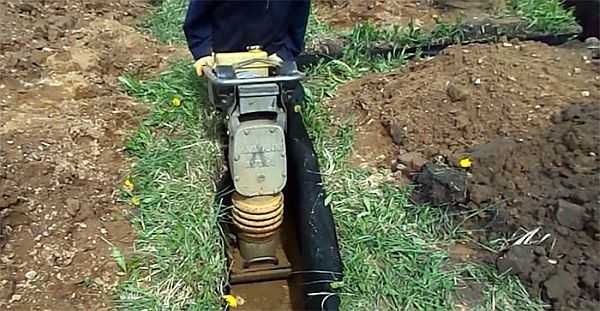
After a trench with a depth of at least 30 cm and a width of 25 cm under the foundation is dug, a 15-20 cm layer of sand is poured onto its bottom, which is spilled with water and rammed. A layer of crushed stone of about the same thickness is laid on top, backing is made and everything is poured with concrete. When the concrete hardens, a layer of roofing material waterproofing is laid on it.
The plinth is constructed of bricks with a masonry height of 4-5 bricks; ventilation vents must be provided in it.
For masonry walls, solid (red or silicate) brick is used. Masonry is usually made in one and a half or two bricks, and partitions - half a brick.
The upper row of bricks is connected to the lower one with a lime mortar, the thickness of the seam should be 12-15 mm.
Masonry begins with the installation of orders, for which a plumb line is used, a cord is pulled for all rows of masonry and punches are laid out in order.
Laying the walls should start from the corners, for which halves or three quarters of the bricks are used, the gaps that arise are smoothed out with a quarter of the brick.
The first row of bricks is laid across - on the waterproofing of the foundation, after which a lightweight masonry is erected from several walls in half a brick, the openings between which are filled with thermal insulation - a mixture of sawdust, fluff lime or light slag.
When building a brick bath, special attention should be paid to hydro and vapor barrier.
Waterproofing can be of several types:
Painting - in places where moisture penetrates, the walls are coated with bitumen mastic from bitumen with the addition of lime and asbestos;
Oleechnaya - any rolled materials (for example, roofing material) are glued to the wall of the house, and all gaps and crevices are sealed and covered up.
For plastering walls, cement-lime mortars are used, containing warm light aggregates - fine slag, expanded clay, pumice. It is desirable to plaster the walls not only from the outside, but also from the inside. But if from the inside the walls are sheathed with clapboard, it is not necessary to plaster them.
Building and equipping a bath or sauna requires serious knowledge and skills. Construction North-West Company has substantial experience in the construction of such baths - one-story and two-story, according to standard and special designs.
Strip foundation - the most common foundation in our country.
One of the varieties of strip foundations is monolithic. Such a foundation is a reinforced concrete monolithic tape located along the perimeter of the house, and still passes where all the load-bearing walls are located.
A monolithic strip foundation is a solid foundation compared to a foundation made of concrete blocks.
The technology of one of the most economical version of a monolithic strip foundation consists of the following stages:
- Digging a trench with rented mini excavator.
- Installation of a sand base under the foundation and its ramming.
- Laying the reinforced film into the trench so that the water from the concrete does not go into the ground.
- Arrangement of a metal structure from reinforcement.
- Pouring and vibrating concrete.
It is important to understand that the foundation project, which was created on the basis of engineering calculations, is a guarantee and reliability of the foundation. If there is an incorrect foundation of the house, then there will be a high risk of cracks in your country house.
Why is the house starting to crack?
The house cracks due to the fact that at one point the foundation rises (due to the swelling of the soil), and at another point it falls due to the shrinkage of the soil. This is how a fracture occurs in the foundation tape. This can be avoided by applying the required reinforcement or concrete class. True, this increases the cost of the foundation. The number, location, diameters and grade of reinforcement depend on the characteristics of the soil and the weight of the house. With the correct calculation of the foundation, you will save money, since you will not need to buy additional materials, or vice versa, you need to buy reinforcement of a higher class for your foundation, you will have to increase the thickness of the foundation walls and take other measures to strengthen the foundation.
Estimate of a monolithic-strip foundation without formwork for a house 10x15 meters
| Name of works | Unit rev. | Qty | Price per one. rev. | Total | |
| 1 | 2 | 3 | 4 | 5 | 6 |
| 1 | Dismantling the soil | m3 | 30,00 | 250,00 | 7500,00 |
| 2 | Devices sand pillow | m3 | 2,00 | 500,00 | 1000,00 |
| 3 | Sand | m3 | 2,00 | 800,00 | 1600,00 |
| 4 | Sand ramming | m2 | 20,00 | 100,00 | 2000,00 |
| 5 | Basement bottom waterproofing | m2 | 250,00 | 30,00 | 7500,00 |
| 6 | Reinforced polyethylene film 200μm 120g / m2 2m x 25m | roll 50 m2 | 5,00 | 1 800,00 | 9000,00 |
| 7 | Device monolithic wall reinforced concrete | m3 | 30,00 | 3 500,00 | 105000,00 |
| 8 | Concrete | m3 | 30,00 | 3 500,00 | 105000,00 |
| 9 | Foundation armature Ф14mm | tone. | 1,00 | 48000,00 | 48 000,00 |
| 10 | Lumber | m3 | 0,50 | 6 000,00 | 3 000,00 |
| 11 | Material delivery | 1,00 | 10 000,00 | 10 000,00 | |
| Total: | 299600,00 | ||||
A strip foundation is a fairly common building element, which is often impossible to do without. Despite the fact that, unlike the pouring of the main supporting structure, it has a clothed structure - the estimate for the strip foundation is included in the design of the building along with the main foundation. The correct formation of the base for the walls is the key to the stability and safety of the erected building.
The structure's resistance to seismic impact and the amount of bearing resource will depend on the quality of the foundation - the maximum allowable weight that a concrete base can withstand is directly proportional to its strength characteristics. Accordingly, the technological part of this process is very important, especially if it is carried out by a non-professional.
This article will provide you with detailed instructions on how to fill the strip foundation with your own hands. It will allow you to correctly carry out this event without the participation of specialists, thereby saving money on hiring labor - according to statistics, on average, the cost of installation services is about 40% of the total cost of the material.
Tape base
The strip foundation belongs to the category of lightweight load-bearing structures - its width can start from 25 cm, and the total height must be at least 40 cm.These parameters do not allow it to be used as a basis for walls that are load-bearing, since it does not have sufficient dimensions to support the total weight of the building.
It should be noted that this type of foundation is a separate type construction works, although at first glance it may seem that the pouring works have a standard structure. First of all, the strip foundation is the rational use of resources - it serves as a lightweight modification of the concrete base when erecting masonry in those places where increased strength is not required.
The device of strip foundations is carried out in cases where the load on the base will be insignificant - fences, interior partitions etc. It plays the role of a connecting element that unites the masonry into one whole. Tall and bulky structures are not erected on it, however, for the above examples, its presence is quite enough for their stable operation.
The main advantage of this type of foundation is its low cost. consumable - the price of the spent resources is reduced by an average of 65% when compared with the main one supporting structure... This is a consequence of the reduced thickness and height, which is a consequence of the lightweight structure.
Material selection
This is an important technological process, on which the stability and durability of the future structure will depend. An important role in its creation is played by right choice material on which the main strength characteristics will depend. The basis of the foundation is concrete mortarwhich consists of cement, filler and water.
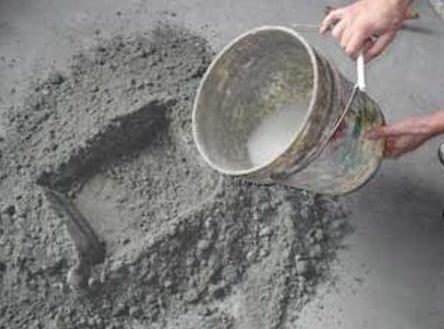
Cement
Most often, Portland cement of the M400 brand is used for pouring a concrete base - its binding characteristics meet all the necessary standards. Since the main parameter of the foundation is strength, special attention should be paid to the choice of the cement component. Lower grades are also appropriate to use, however, in this case, the mass fraction of cement in the concrete solution should be increased.
Filler
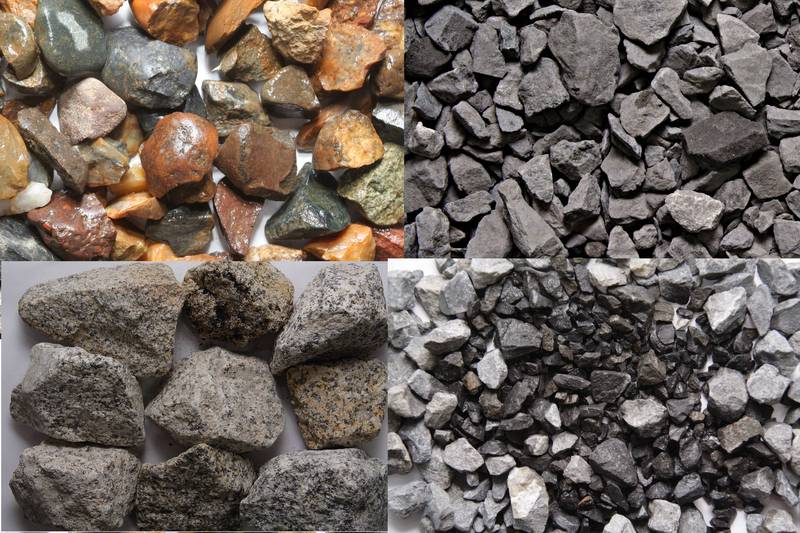
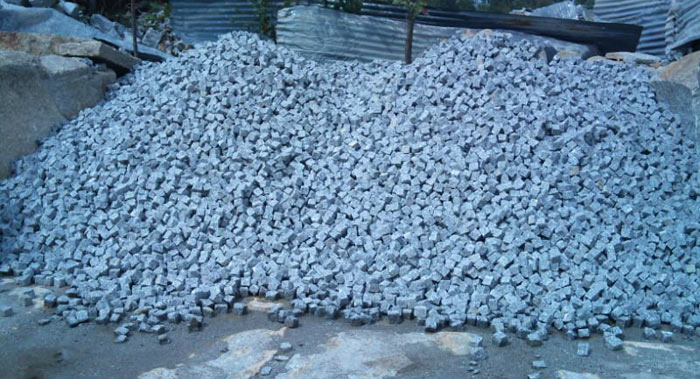
River or quarry sand is used as a filler, which is mixed with cement, as a result of which a concrete solution is formed. Ideally, it is desirable to use clean sand to create a homogeneous structure, however, in this case, the cement consumption will be excessively high, therefore, fine gravel mixed with a sandy component is used to fill the foundation. You can also use crushed stone or wedge for this purpose.
Note! The more sand there is in the engraver or crushed stone, the more reliable the foundation will be, but the cement consumption will increase.
Water
The quality of the water, through which the solution will be prepared, also has a certain value - it must be as pure as possible. If there is a large amount of salt in the groundwater, then after pouring and drying, mineral deposits will be released on the surface of the foundation.
Also, do not use excessively dirty water, in which there is a high content of clay - this will weaken the structure of the foundation.
Surface preparation
![]()
To fill the strip foundation, it is first necessary to dig a trench into which most of it will be immersed. The minimum total height of the foundation should be at least 40 cm, respectively, its lower part should be dug into the ground by about 20 cm.
Parameters such as the width and depth of the trench are determined not only by the dimensions of the foundation itself - one should take into account the presence of such a factor as preliminary backfilling, which is also called “”. It is formed from gravel, rubble or sand - depending on what material you have on hand. The presence of a cushion prevents the base from tilting under the influence of moisture.
Ideally, the width of the filled cushion should be greater than the width of the poured foundation, but in this case, the backfill is acceptable, the width of which will correspond to the parameters of the concrete base. Its thickness is determined by the moisture content and composition of the soil - the minimum allowable value is 20 cm.
Deeper backfilling is carried out if the foundation will be poured on an irrigated area or in similar conditions - under the influence of irrigation or groundwater, the ground under the erected structure will get wet and the wall will roll, which will lead to its collapse. It is necessary to determine to what depth the water penetrates into the ground, remove required amount soil and backfill to the required level.
Note! Deep backfilling is necessary only if the foundation is poured under a street fence, facing brick or similar structures - for wall partitions indoors, a deep pillow is optional.
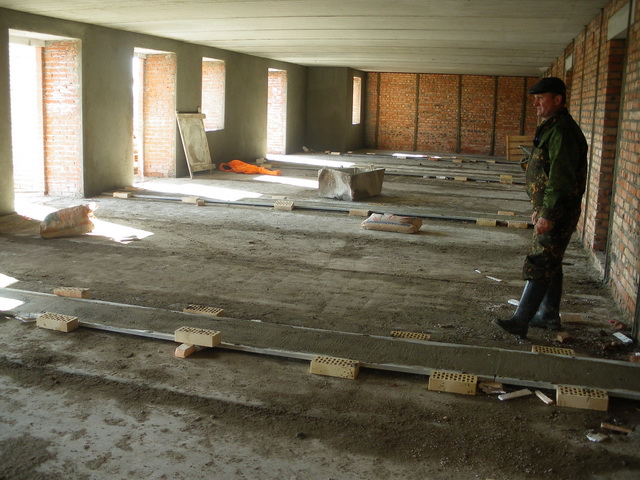
Assembling the formwork
The upper part of the foundation should rise above the ground to a certain height - the minimum allowable value is about 20 cm. To create the necessary gap, formwork of the required height is assembled above the trench. Since the outer height of the base strip often does not exceed 20-30 cm, and the width is also small, there is no need for reinforced formwork.
As a material for formwork, you can use concrete or cinder blocks, through which the required form of the future foundation is laid out. Before you start pouring concrete into this type of mold, it is necessary to protect the inside of the blocks with polyethylene, otherwise the solution will stick to them. Also, as a material for formwork, you can use boards, plywood, fiberboard, etc.
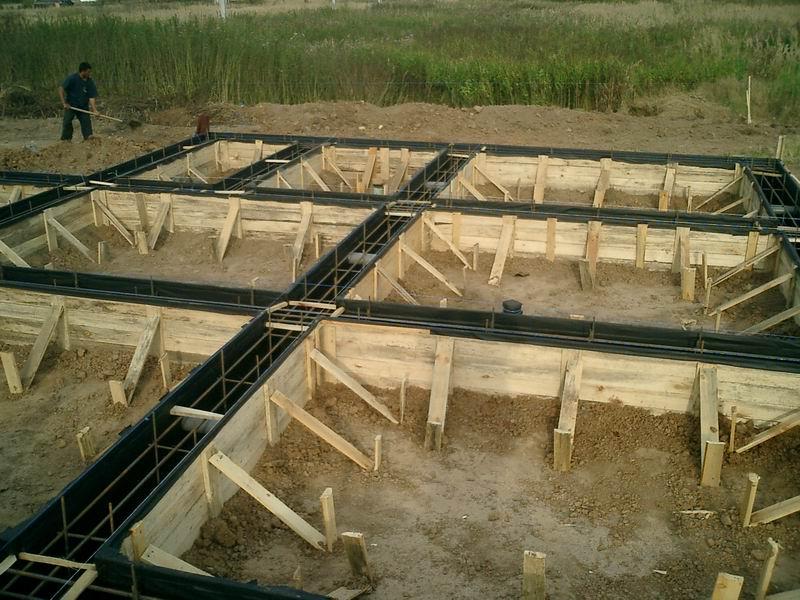
In addition to the even structure of the formwork, it is important to take care of the clamps, which will be responsible for ensuring that it does not “slide down” under the weight of the mortar. Since the dimensions of the foundation are small, there is no need to install any specialized fasteners and spacers, but it is still necessary to reliably support the formwork. The same concrete blocks or wedges can be used as props.
Reinforcement
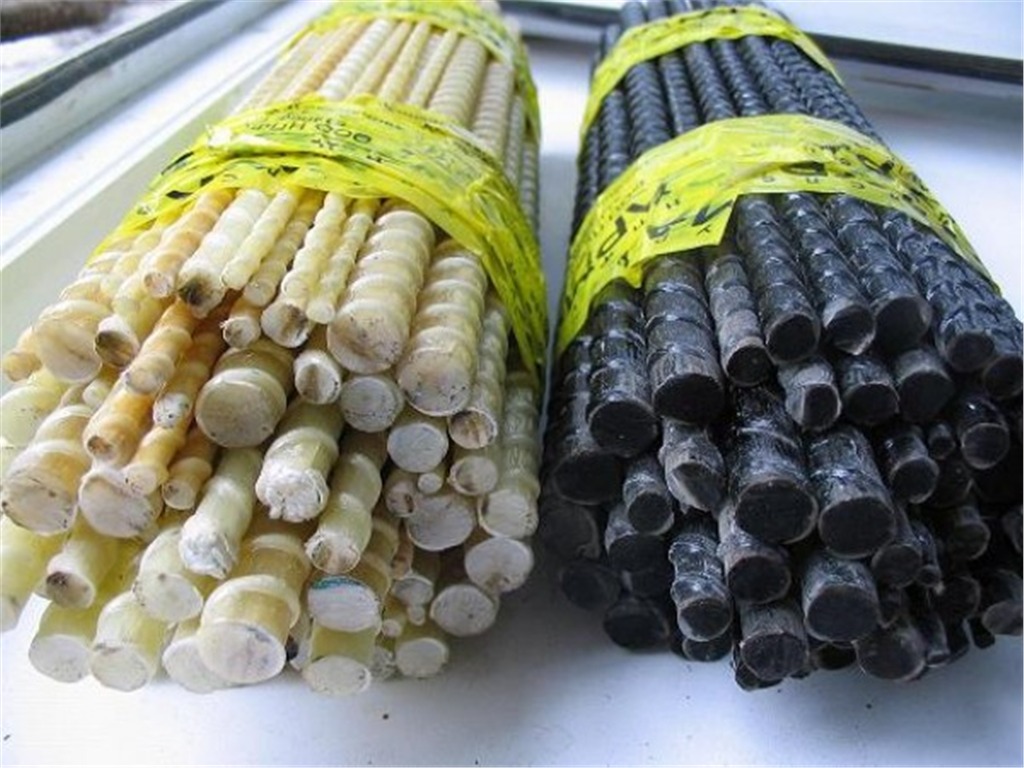
Despite the small thickness, the strip foundation must be reinforced with the same care as more massive analogs - under the influence of its own weight, as well as the weight of the structure erected on it, the foundation can crack. As a reinforcement, a structure of reinforcement welded parallel to each other is used - it can include 2, 3 or 4 rods.
The reinforcement should be in the center of the foundation structure, accordingly, its structure should be smaller than the base itself. Directly in the trench, it is attached to metal pins so that the lower part also spills with concrete.
Pouring the foundation
Once completed preparatory work, you can go directly to the fill.
The technology of the strip foundation device looks like this:
- A relatively flat surface is selected on which the mortar will be mixed - a concrete screed or an iron sheet is suitable. If the mortar will consist of a mixture of sand and crushed stone, you can use a metal construction battle with sides. It is undesirable to knead on the ground, since the presence of earth in the solution will subsequently lead to the formation of voids in the foundation;
- Initially, the filler is poured - as mentioned above, the higher the mass fraction of sand in it, the stronger the foundation will be. Also, the sandy component has a beneficial effect on the appearance of the final result - with the help of sand, the voids between the rubble and stones are filled. If there is little sand in the solution, there will be many unspilled places and an open structure through which the stone component will be visible;
Note! When mixing sand with rubble or gravel, try to mix it evenly. It is not necessary to stir the resulting mixture, it is enough to pre-level the surface of the filler, and the son-in-law evenly pour the sand on top - this way, you will avoid the formation of “bare spots” that are difficult to mix with cement in the future.
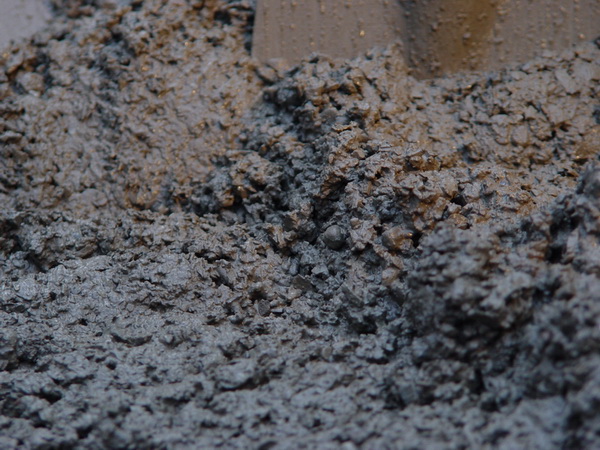
- Having hammered the battle (working surface) with filler, it is necessary to level the formed pile so that the cement is evenly distributed over its surface. Cement consumption is calculated based on the mass of sand, since stones and crushed stone do not need a binder. The ratio of the mass fraction of sand and cement should be at least 4: 1, if its marking is M400.
Note! If you purchased gravel, which was initially mixed with sand, and it is not possible to determine its mass fraction, calculate the approximate amount of cement “by eye” and mix the solution. A properly prepared mortar should have a characteristic cement color without admixtures of a sandy shade.
- In the total mass of the future solution, a depression is made into which water is poured - do not pour too much water. By and large, moisture is required only to get the cement wet and wet the sand - stone and gravel do not need it. After the water is poured - it is necessary to make sure that it does not leak and flow out of the battlefield - together with the water, the cement will "run away";
- After the water is absorbed, you can start mixing a certain part of the solution and directly pouring it. Thorough mixing is an important part of the technical process - there should be no separate occurrences of clean sand or lumps of cement in the finished mortar. The less liquid there is in the solution, the stronger the structure will be;
- Filling should be carried out in one stage, that is, pour one half of the foundation in the morning, and in the evening the other is undesirable, since you get two separate parts, and not monolithic construction... After a significant part of the foundation in a certain area is poured, it is necessary to create vibration in the thickness of the solution in order to fill the voids. For this purpose, you can use scrap iron;
- In order for the foundation surface to be flat, you can stretch the line along the level and use it as a guide. After the end of the pouring process, the surface is leveled with a metal bead or trowel;
Outcome
Correct filling of the base is the key to the stability and reliability of the erected structure. The strip foundation will help you reduce material costs without losing quality and strength (find out here). In the video presented in this article, you will find additional information on this topic.


