Lack of effective waterproofing in bathrooms becomes the reason not only for "flooding" of neighbors, but also for the appearance of fungi. The fungus unnoticed over a long period of time destroys construction Materials, constructions lose their original properties. Removing the fungus is very difficult and expensive. In addition, in most cases you will have to do renovation work to replace the wall cladding. To insure against such cases, it is economically more profitable to immediately do reliable waterproofing... In this way, many unpleasant situations will be avoided.
Plumbing, sewerage systems, faucets and water heaters are sources of leaks, any leakage of the joints causes problems. They can be of varying intensity, but always with negative consequences.
Leaks in the bathroom are fraught with negative consequences.
Do not rely too much on the tightness of ceramic tiles. Over time, the seams form invisible micro-cracks through which water penetrates under the flooring. The presence of additional waterproofing is a prerequisite for preventing trouble. After leaks appear, they will still have to be eliminated, but this will require a complete dismantling of old coatings, repair or replacement of structures damaged by moisture. You can estimate how much such work is more expensive than the cost of modern waterproofing.
Stages of work
After solving the preparatory issues, you can proceed to the selection of materials and the direct production of work.
Types of waterproofing for bathrooms
Currently, the industry offers developers several types of waterproofing, all of them reliably cope with their tasks. We will talk about which type specifically to choose a little below and describe with examples of each material detailed instructions carrying out waterproofing works.
Types and types of waterproofing
| A type | Kinds | Brief characteristics |
|---|---|---|
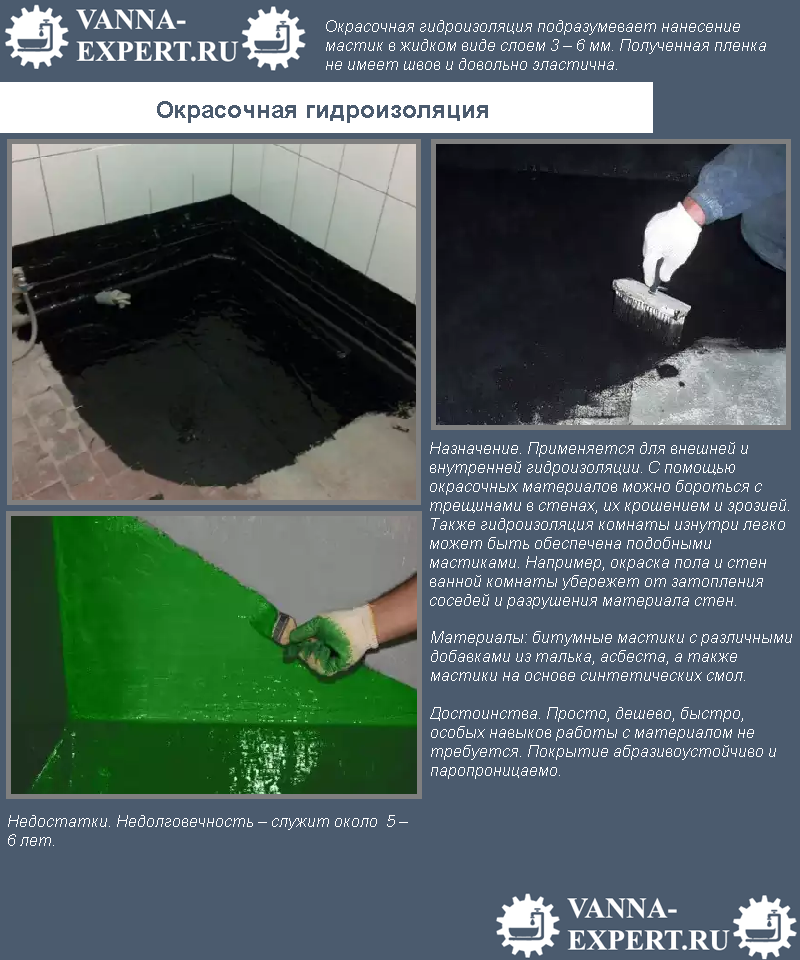
| Paint shop | Bituminous. Acrylic. Rubber. Silicone. Polyurethane. | Forms a thin waterproof film, depending on the specific type, it can be applied in a heated or cold state. Surfaces require a primer, the compounds are applied with a brush or pneumatic control panels. |
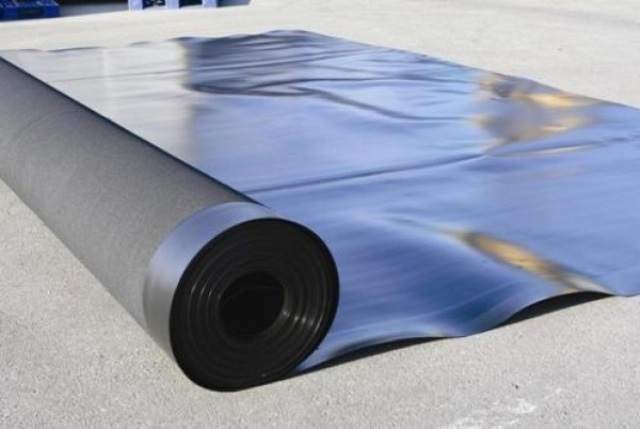
| Okleechnaya | Roll. Synthetic membrane. | Rolls are made of various materials, have several layers of coating with modified bitumen or polymers. Synthetic membranes can be used for waterproofing vertical and horizontal surfaces. |
| Coating | Two-component. One-component. | It is widely used for waterproofing premises, depending on the composition, it can consist of one or two components. Used on concrete or brick structures, it can withstand significant water pressure. |
| Plastering | Cement. Asphalt. | Cast asphalt is used for waterproofing pipe exit points. Plastering - special compounds with polymer additives. |
In addition to these types of waterproofing, penetrating, spray and injection insulation can be used in bathrooms. But their use is justified only in rare cases and is economically inexpedient for an ordinary bath.
Let's consider in detail the technology of production of work with all types of waterproofing. The initial data is assumed that the surfaces have already been prepared in advance. Bathroom material - concrete floor, brick walls or reinforced concrete panels.
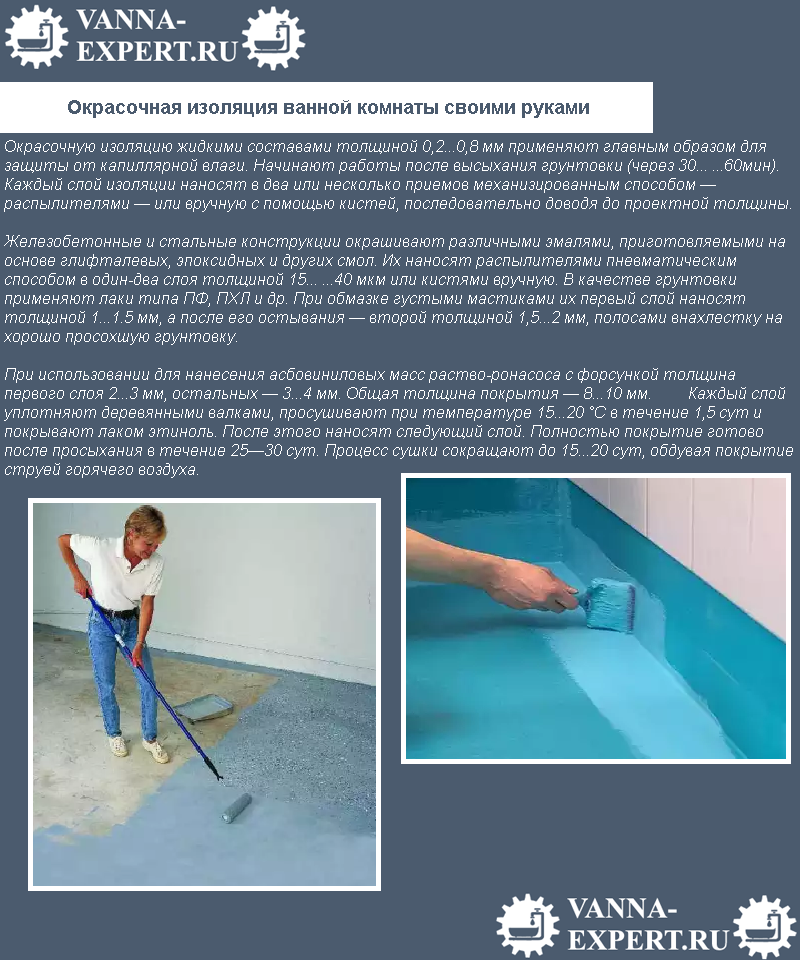
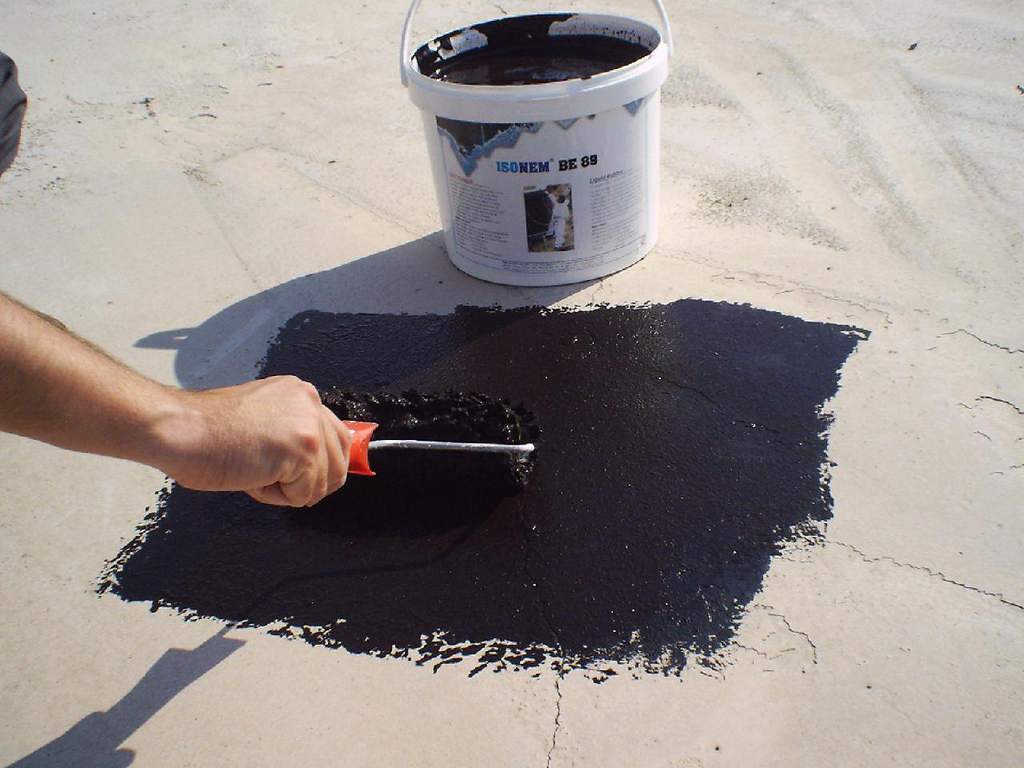
One of the most affordable methods of waterproofing concrete coatings, in terms of cost, refers to the budget option. In terms of efficiency, bathrooms are quite suitable. The total insulation thickness is within 2 mm, it is recommended to apply at least two layers. The materials used are based on polymer varnishes and paints or modified bitumen, liquid rubber. Bitumen can be used with hot or cold technology, for bathrooms it is better to use cold bitumen.
Step 1... Clean the surface from dust and dirt. If there are wet areas, be sure to dry them.
Step 2. If the finish of the floors presupposes a flat surface, then large protrusions should be cut down and recesses should be repaired.
Step 3. Prepare the material according to the manufacturer's recommendations. Do not cook a large amount at once, evaluate your capabilities.
Step 4. Start waterproofing work from the corner farthest from the exit from the room, divide the entire floor area into sections and paint them in turn. Coloring can be done with a roller or brush.
Step 5. After the first coat is completely dry, apply the second. Due to this, it will be possible with a high probability to cover gaps or low-quality sections.
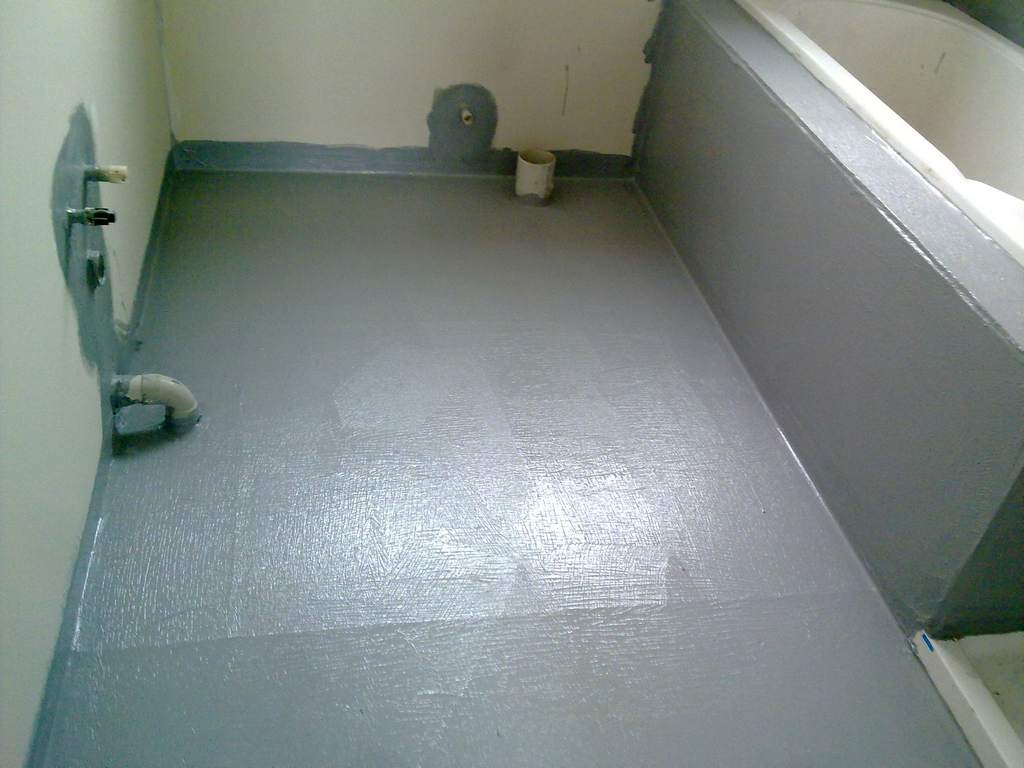
Step 6. When waterproofing the floor, be sure to treat the walls to a height of about 10–20 centimeters.
A universal method of insulating not only bathrooms, but also other rooms to protect against increased moisture. It can be applied cold or hot, the specific technology must be selected taking into account the characteristics of the bathroom. Adhesive insulation has many types, the classification depends on the materials of manufacture.
Types of gluing waterproofing
| Type of waterproofing material | The most famous brands |
|---|---|
| Brizol, Gidroizol, Stekloruberoid, Ruberoid, Izol, Gidrostekloizol. |
| Isoplast, Armobitep, Ekarbit, Bikroplast, Filisol |
| Bernisol, Elastomeric geomembranes, polypropylene and polyethylene films, Elon, Cromel. |
Various mastics are used for gluing. How should it be applied?
Step 1... Spread the prepared surface with mastic. It should be coated in sections to match the size of the waterproofing. Work begins from the farthest section.
Important. Be sure to waterproof the walls near the floor to a height of about ten centimeters.
Step 2. Roll out the insulating layer carefully. Straighten it constantly, avoid creases or air pockets. Over the entire surface, the material should fit snugly against the base. To remove air with a roller, press the insulation against the mastic with sufficient force.
Step 3. Cut off the excess length with a carpenter's knife near the wall. The cut must be even, without mechanical breaks.
Step 4. Apply mastic to the next section of the floor. Make an overlap of the waterproofing layers ≈ 15 cm. The overlaps of the layers are also coated with mastic.
Step 5. If there are risks of leaks, then apply a second layer of waterproofing in a perpendicular direction to the first. The production technology is the same.
The glued waterproofing cannot withstand significant tensile loads. In this regard, it should be absolutely protected. A semi-dry concrete screed can be used. We will describe below how this is done.
Coating waterproofing
Lubricated waterproofing covers the base with a mechanically strong layer, which reliably protects the structure from water penetration. The composition includes cement, fine sand, polymer fillers and chemical plasticizers. The name and ratio of the components depends on the specific brand. Due to plasticizers, the mechanical stability is increased, polymer fillers give elasticity. Lubricating waterproofing materials can be one-component and two-component.
The latter have improved performance, but require more attention during operation. It must be remembered that two-component waterproofing grades must be developed within the time frame specified by the manufacturer. After the end of the polymerization process, they become unsuitable for further use. One-component surfaces should be wetted before application. Use spray guns or wet rollers for this purpose. The thickness of the waterproofing is approximately 2 mm, it must be applied at least two layers. An additional advantage of two-component is that the development of various microorganisms is inhibited. But remember that not all two-component materials are approved for indoor use, carefully read the instructions on the packaging.
Material for universal use, can be applied cold or hot (depending on the specific type) method. Achievements in construction chemistry have made it possible to create unique materials that completely close the cement voids. A carefully selected fractional composition of the components penetrates relatively deep into the concrete and creates a durable waterproof film in the upper part of the cement matrix.
Important. The concrete floors in the bathroom must be allowed to stand for at least three months before insulating, one is enough for the screed. This time is needed for the concrete or mortar to reach a strength of at least 15 MPa, otherwise it may push through and break the tightness of the floor covering.
Step 1... Check the quality of the base, if you find large cracks or irregularities, eliminate problems. The floor must be completely dry and clean, the presence of oily stains is strictly prohibited.
Step 2... To improve the quality of processing, it is recommended to make fillets (roundings) with a radius of 3-4 cm at the corners of the floor. The presence of fillets facilitates the waterproofing process and eliminates gaps. How to make roundings?
- Prepare the required amount of cement-sand mortar based on one part of cement for three parts of sand. The sand must be clean, free of stones and clay.
- Wet the corners between the floor and walls. Moisten liberally, otherwise the adhesive to existing surfaces will not be sufficient.
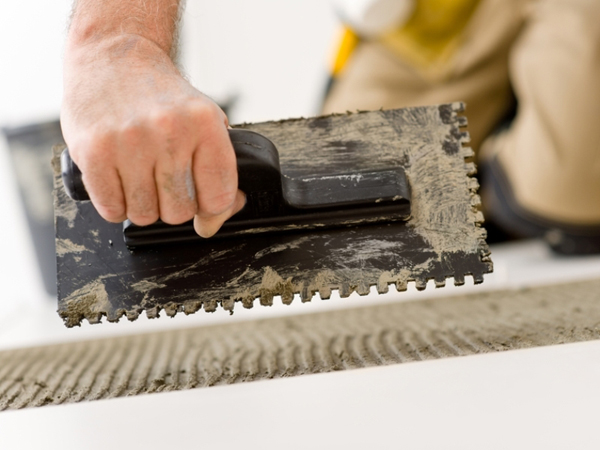
- Press the mortar in the corners with a wide spatula in a circular motion, try to use maximum effort. Remove the protruding solution for future use.
- Allow 1–2 hours for the cement to set. As soon as it hardens a little, remove the marks from the spatula with a damp sponge, make the surfaces smooth. It will take at least two days for the final setting.
Step 3. Cover the substrate with a primer. The specific type does not matter, the main thing is that it should correspond in its properties to the material for making the floor. Please note that there are primers for indoor or outdoor use. Waterproofing is not applied to wet surfaces, let the primer dry well.
Step 4. Prepare a waterproofing solution according to the manufacturer's recommendations. If the material will be applied with a brush or roller, then the solution should be liquid, if you plan to work with a wide spatula, then the consistency should resemble thick sour cream.
Practical advice. In order to minimize the amount of dry lumps, first pour water into the container, and then pour the dry mixture. Stir by hand with a trowel (long, difficult and of poor quality) or with a mixer.
Be sure to let the mixture sit for at least five minutes. During this time, all the cement grains will absorb moisture and chemical reactions of material polymerization will begin to occur. After a pause, stir the mixture thoroughly again.
Important. Do not cook a large amount of the mixture; use it for a maximum of three hours. Otherwise, the polymerization process will end, re-dilution with water is not allowed. The air temperature in the room cannot be lower than + 5 ° С. Drafts and direct sunlight are not allowed.
Waterproofing can be applied in one or several layers, the total thickness can be 1–5 mm. For bathrooms, a 2 mm layer is sufficient. Each subsequent layer can be applied every other day.
Step 5. Glue the corners with special waterproofing tape. These places are the most difficult to handle, it is advisable to use additional waterproofing.
Step 6. Apply a layer of waterproofing material with a brush or trowel. Eliminate gaps, flatten surfaces as much as possible. If you need to apply a second layer, then it should be located perpendicular to the first. If the room temperature is very high and the waterproofing dries quickly, then its surface must be moistened with a spray bottle and covered with a film. The fact is that water is required for high-quality polymerization of the composition. In its absence, the solution will never have factory characteristics.
Step 7. After two days, check the quality of the work performed. If gaps are found, then they should be increased and re-waterproofed.

One of the advantages of this waterproofing method is that ceramic tiles can be installed immediately, cement strainer not required.
It is rarely used due to its high labor intensity and insufficient efficiency by modern standards.

Step 1. Make a cement-sand mortar based on two parts of sand and one part of cement. Mix it thoroughly.
Step 2. Sprinkle prepared floor surfaces with dry cement and sprinkle with water. Stir the cement with water with a broom until a milky mixture forms. In this way, the adhesion coefficient is increased.
Practical advice. You can use modern impregnations, but with a large thickness of the base screed, they are ineffective. It is better to use self-prepared cement milk.
Step 3. Set up beacons. For this, it is undesirable to use factory metal slats. The fact is that after removing them, it is very difficult to hermetically seal the formed recesses. Prepare the lighthouses from a cement-sand mortar according to the following algorithm:
- fill in the grooves from the solution. The distance between them is 15–20 cm less than the length of the rule;
- beat off the zero of the floor with a water or laser level, as a rule, level the surfaces of the grooves at this level. Work carefully, do not allow the formation of depressions;
- between the extreme beacons, pull the rope in several places and install the rest under it;
- to speed up the hardening of the lighthouses, sprinkle with dry cement their sides and upper plane. It will absorb excess moisture, and the curing time will be significantly reduced. Once the cement is wet, scrape it off gently with a trowel. If the beacons are still wet, then repeat this operation;
- check the position of the beacons. Everything is normal - start making the screed.
In specialized hardware stores there are special additives to improve the waterproofing properties of the solution, if you wish - add them during preparation. The amount of additives varies according to the purpose of the room, follow the manufacturer's recommendations.
Waterproofing a bathroom in a wooden house
These works are rather complex and require an individual approach. What are the features of waterproofing a bathroom floor wooden house?
- The presence of wooden structural elements. The tree is very afraid of high humidity, especially in combination with high temperatures.
- It is not always possible to make air vents under the bathroom, which causes additional problems.
- The option of a cement floor just under the bathroom is not always acceptable given the architectural features of the house.
- Wooden houses are constantly "moving". Such features exclude the possibility of using waterproofing with the inclusion of cement.

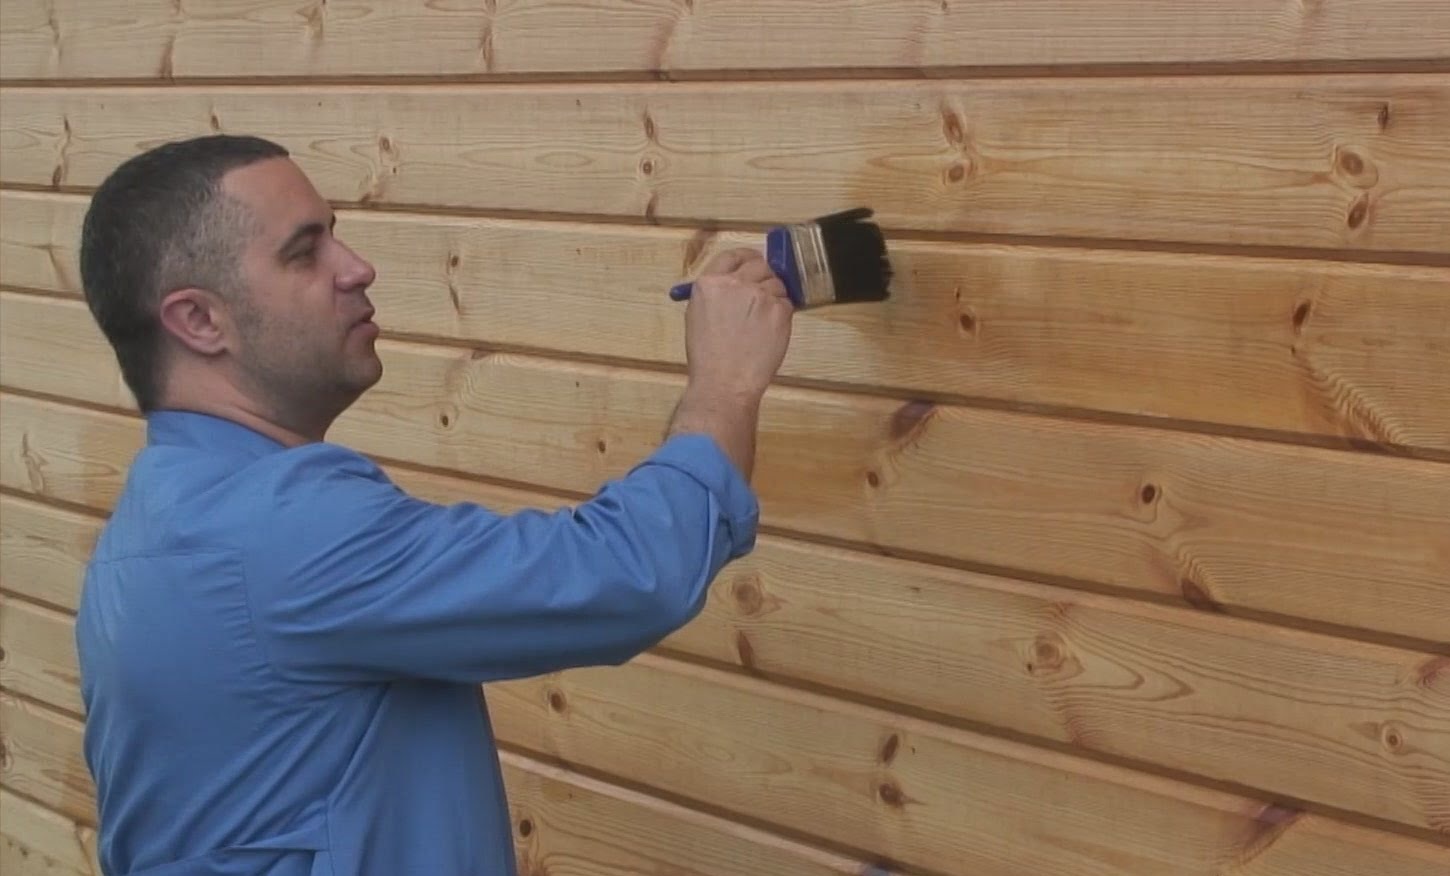
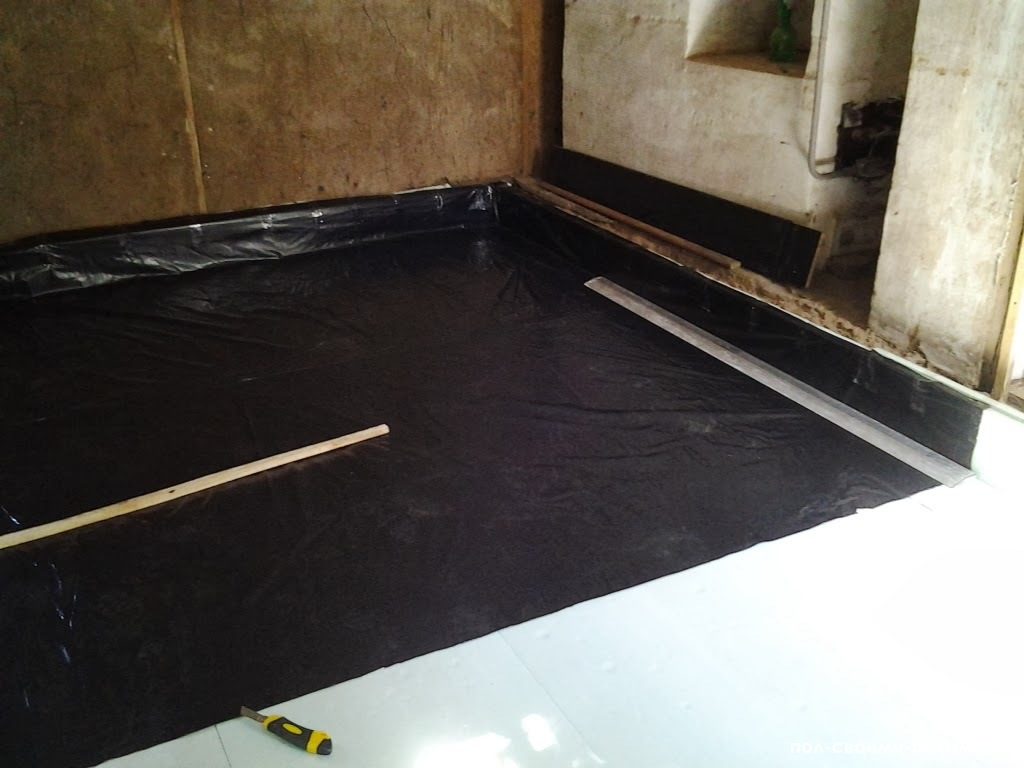
Only plastic (liquid rubber) or roll materials can be used to waterproof premises in wooden houses. Together with the floor, the walls are necessarily processed, moisture should not get under finishing... And one more remark for all cases - wooden bearing elements should always be impregnated with antiseptics.
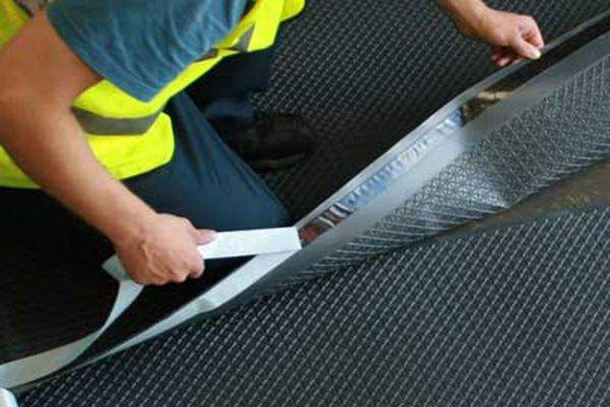
It is allowed to lay a plastic wrap or other waterproof material of this type on the sub floor. The overlap of the joints should be at least 15 cm, glue the joints very carefully. For these purposes, it is better to use any special tape, with the exception of metallized tape. Metallized does not stretch and does not compensate for the inevitable fluctuations in linear dimensions.
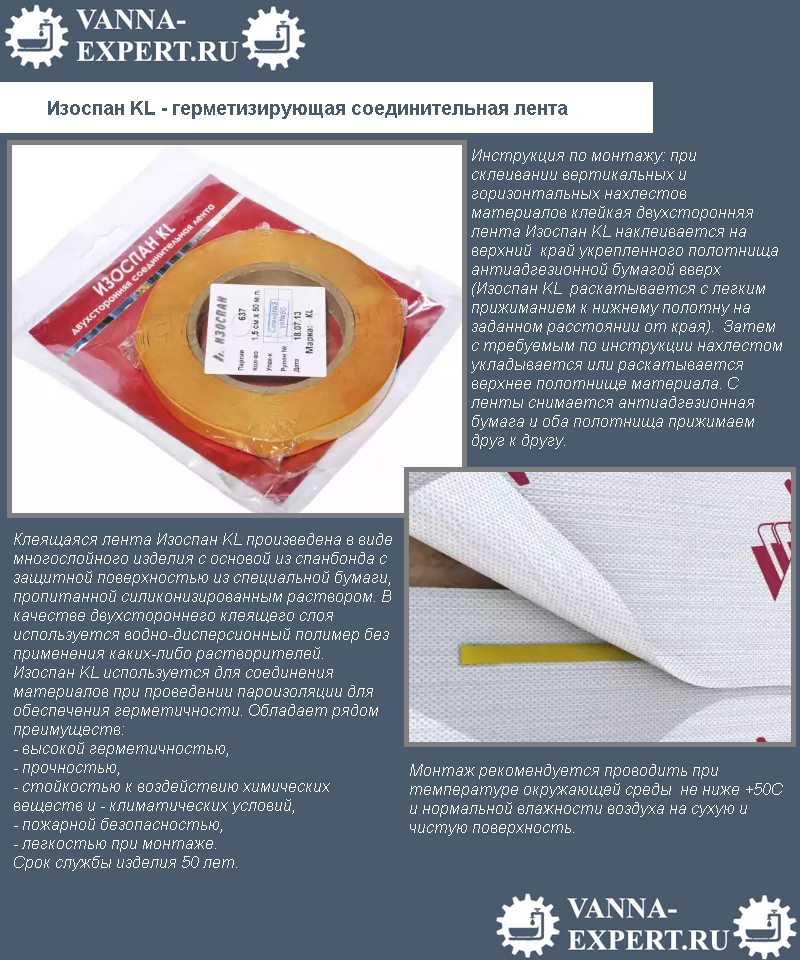
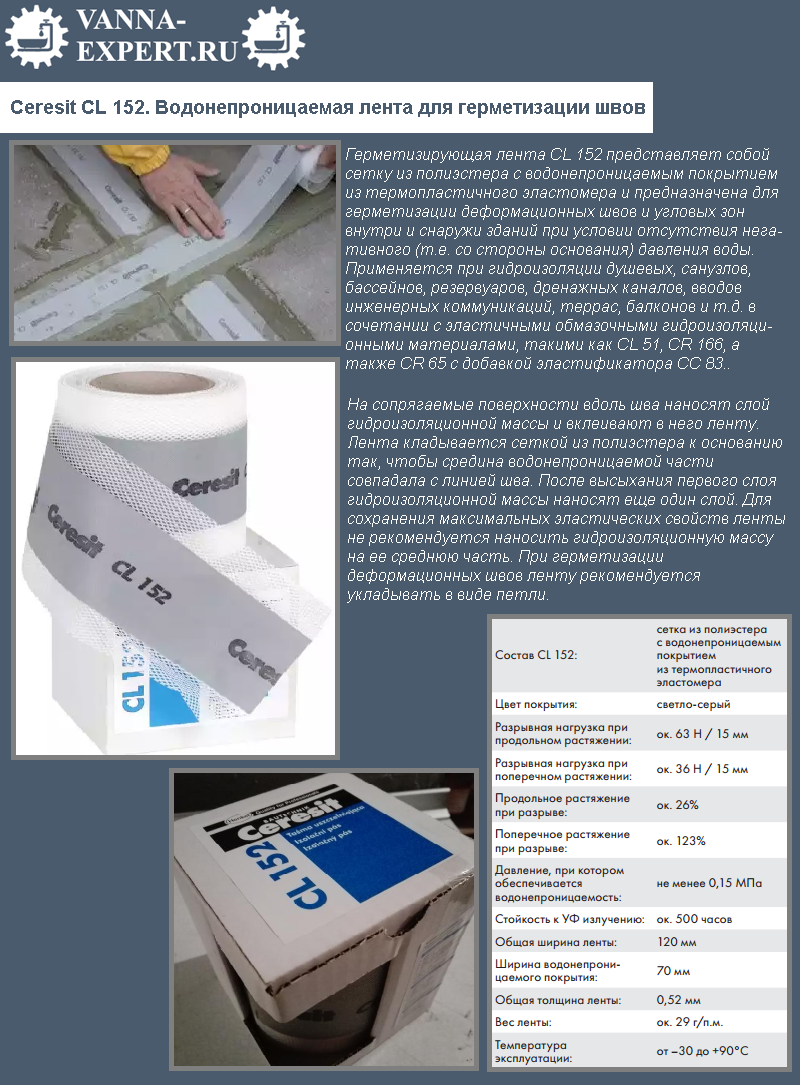
Izospan KL - sealing connecting tape
Try cement screed in bathrooms as soon as possible. It is advisable to provide for this even at the design stage of the house, the cement screed significantly increases the load on the logs; for their manufacture, lumber with large dimensions should be taken.
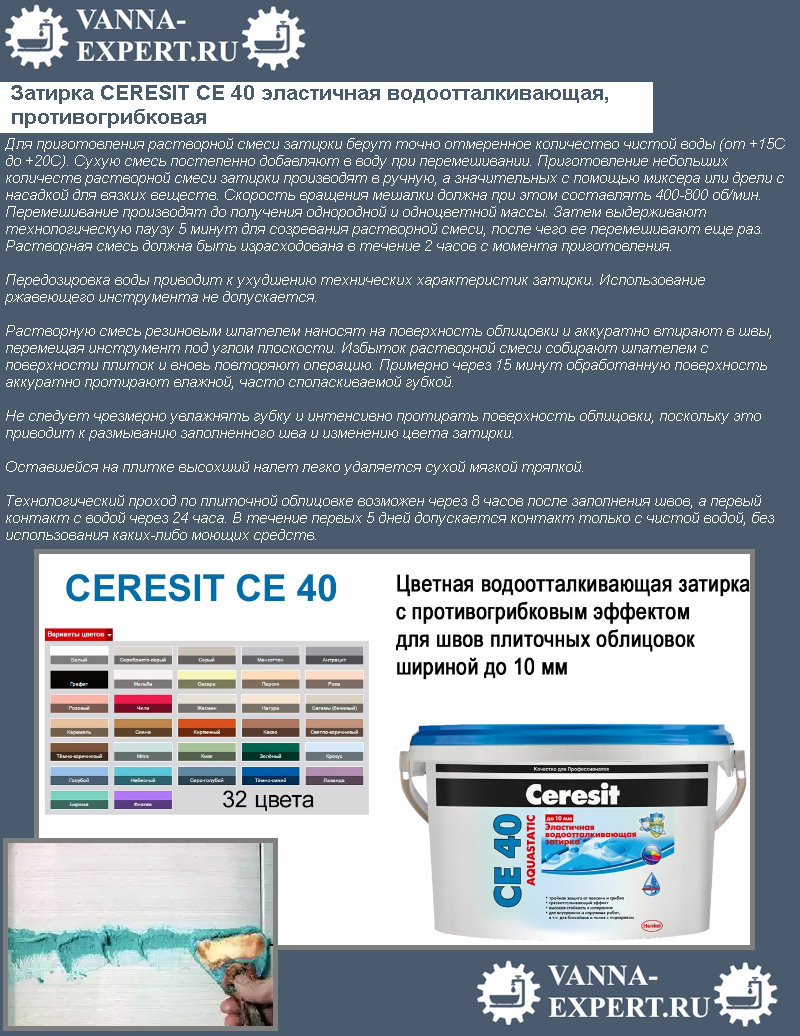
To improve the quality of insulation, the joints between the tiles must be rubbed with special grouting. They should only be plastic and compensate for linear expansion without the formation of microcracks.
And the last thing - the floor should be as stable as possible, use everything construction technologies to improve its bearing characteristics. What if the bathroom floor is wooden?
Step 1. Inspect the standing wood flooring, remove all oily stains and dirt. It is difficult to remove oily stains; they will have to be scraped off, removed with a sandpaper or a cylindrical grinder.
Step 2... Seal the grooves and crevices that appear with a special mastic for wood.

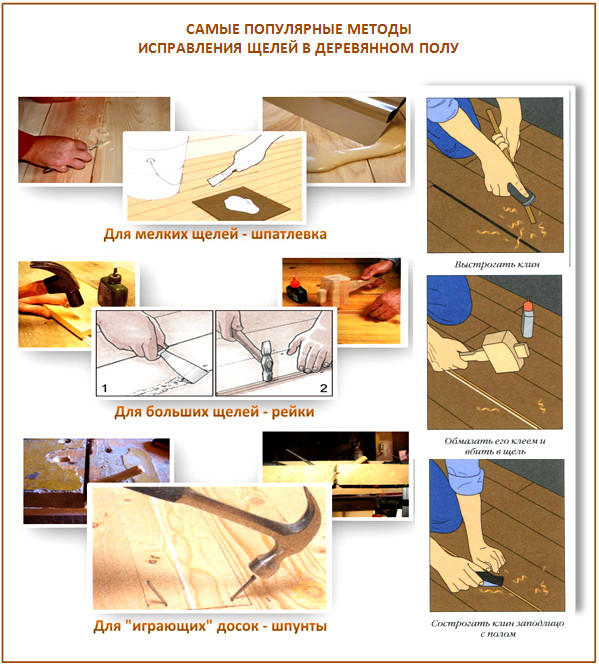
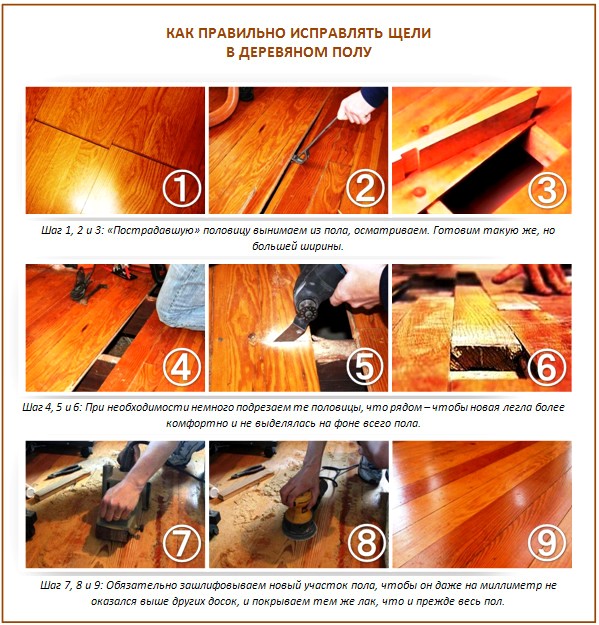
Sand the surface thoroughly, allow time for the floor to dry.
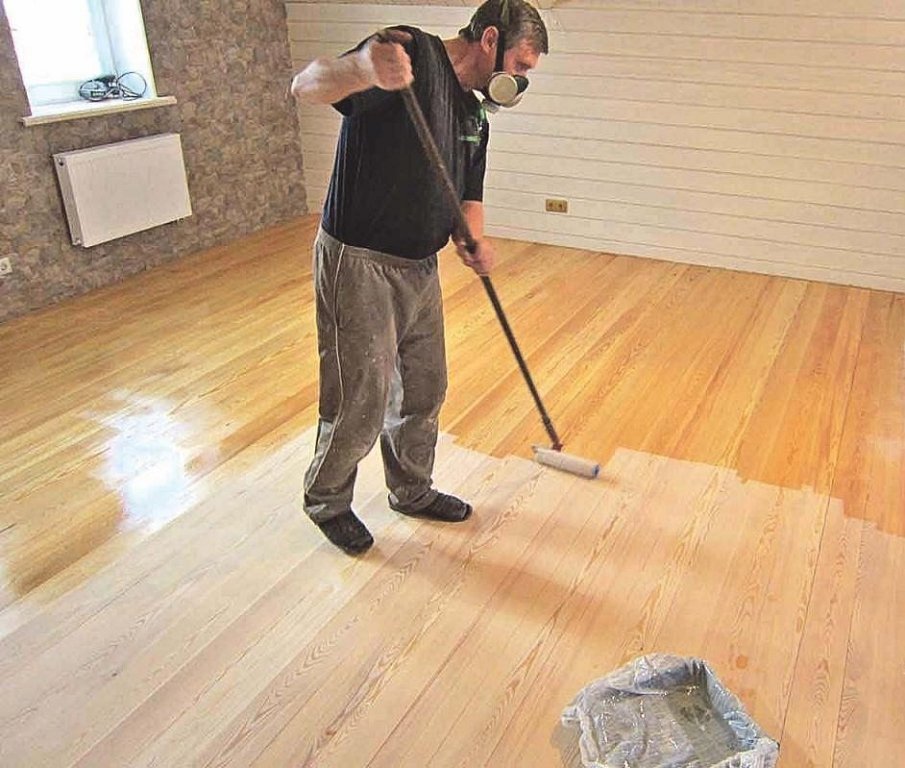
Step 3. Saturate the boards. Prepare the solution exactly as recommended by the manufacturers. You should not experiment for the sake of economy, the consequences of such actions can be very sad.
Step 4. Place waterproof OSB boards on top. Leave a gap of about 1–2 mm between them, seal the gaps with a plastic waterproof wood putty.
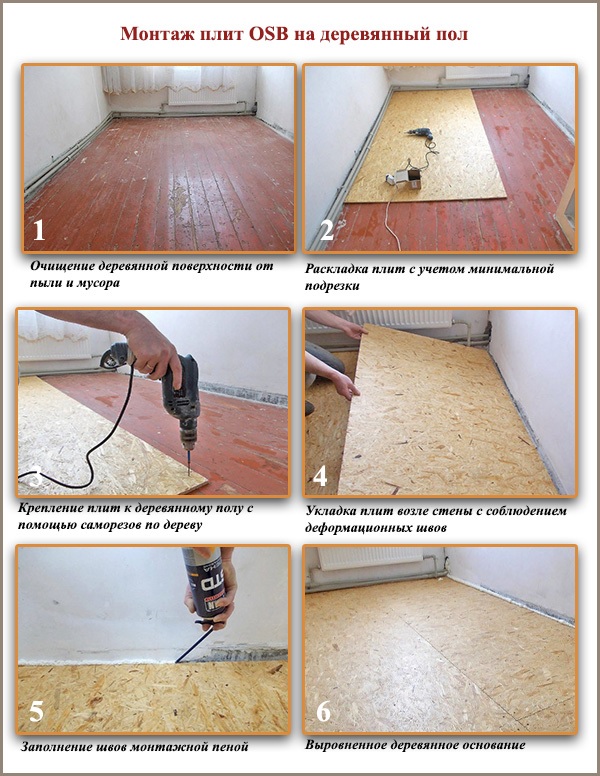
OSB is an excellent material for the floor
The use of bathrooms in wooden houses requires special care. No matter how reliable the waterproofing is, immediately remove the water from the floor. If for some reason it falls under the ceramic tiles, then there will be no chance of drying out. And then unpleasant consequences will inevitably appear.
Is it worth it to waterproof the bathroom walls in a wooden house
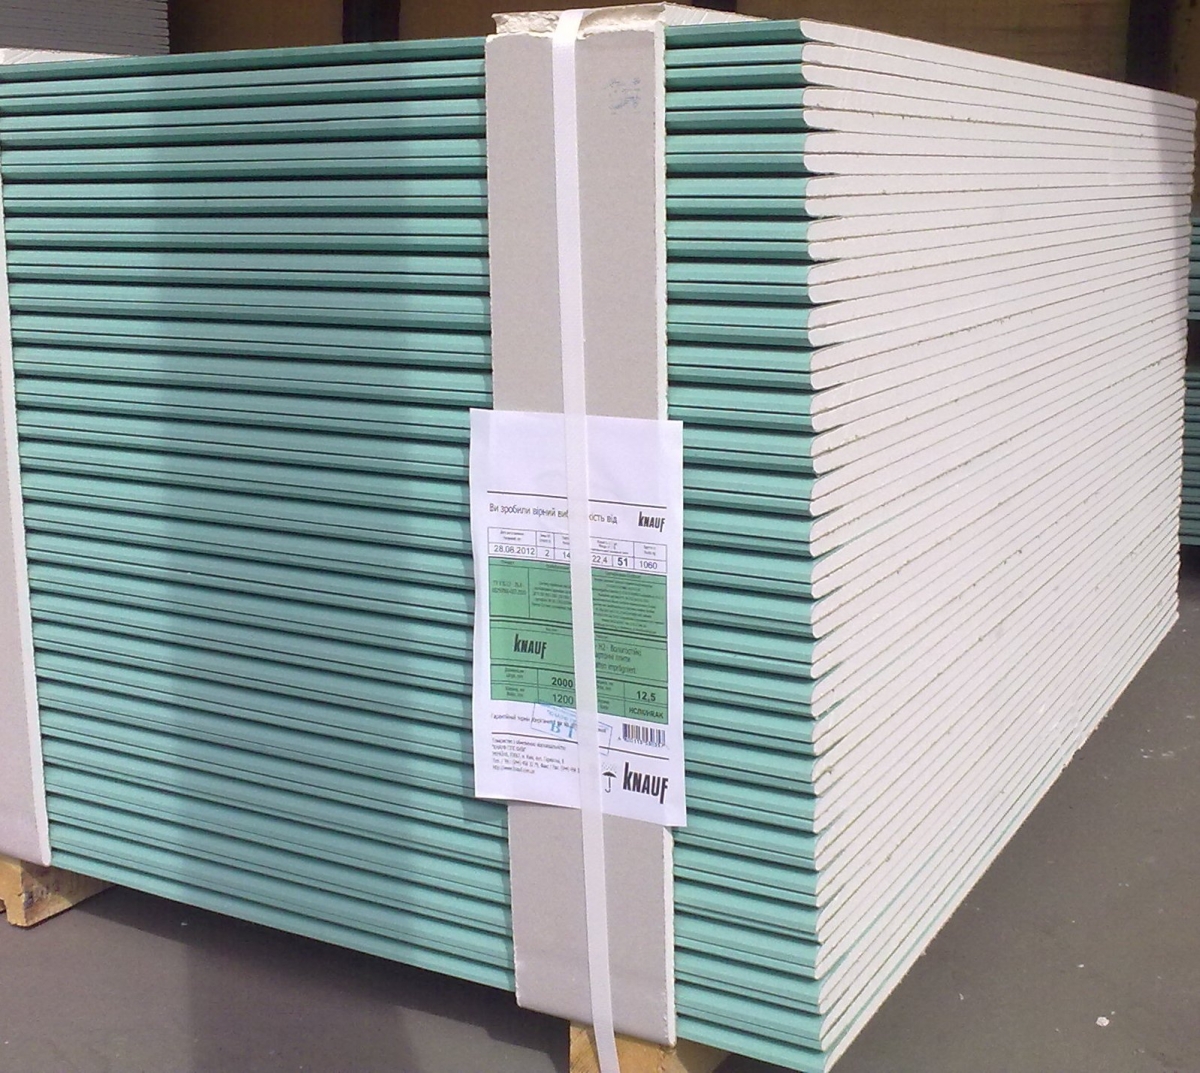
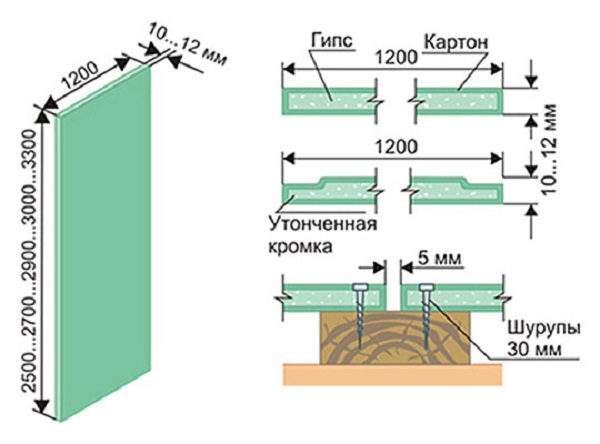
There is definitely no answer, but most professionals advise not to be lazy and waterproof them, regardless of the type of final finishing. For ceramic tiles, you can use moisture-resistant drywall sheets.
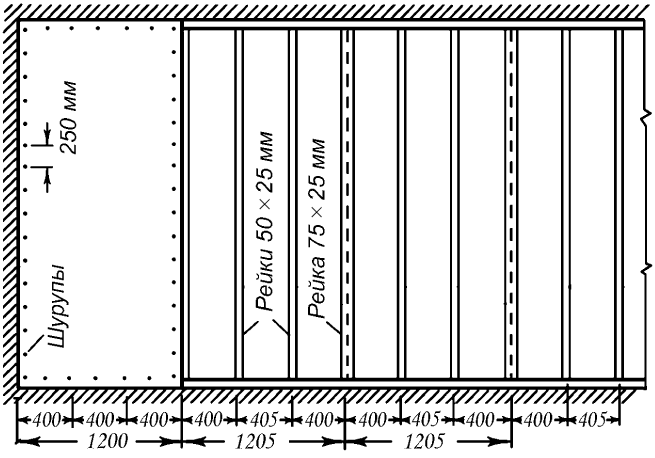
Important. Drywall does not have a high bending strength, even with moderate efforts, it deforms. The glue under the tile does not have plasticity, it cracks during deflections, the tile can fall off. You will have to not only make repairs, but also change the base, and this is expensive and time-consuming. In order to insure against such situations, place the bearing rails at a distance of no more than 20-30 cm. In ordinary cases, the plasterboard rails are installed at a distance of up to 50 centimeters.
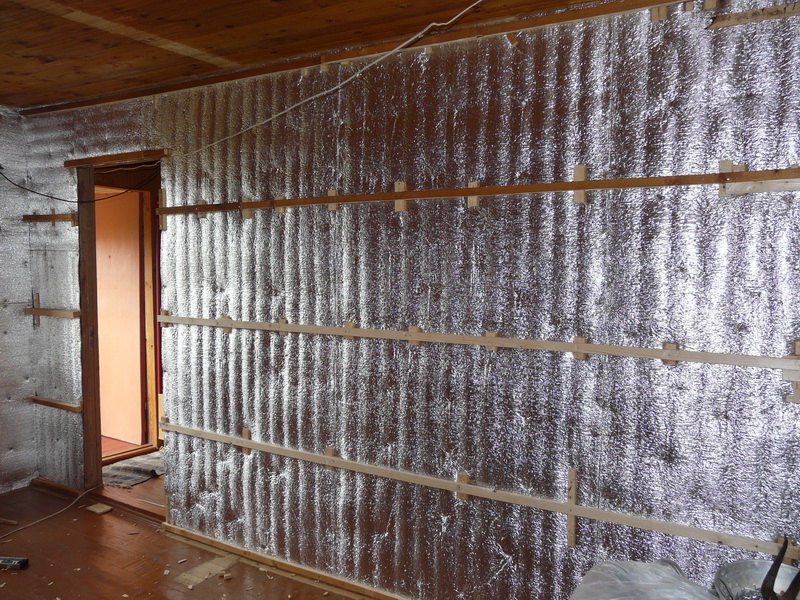
For waterproofing walls, only roll materials, including aluminum foil, can be used. How are they mounted?
Step 1. Measure the length and height of the walls in the bathroom. Keep in mind that the material should be overlapped by about 10-15 cm.
Step 2. Count the number of materials, taking into account overlaps. Trim pieces to the length of the wall. The number of pieces depends on the height of the wall and the width of the waterproofing material.
Step 3. Start fixing from the bottom row. It is desirable to have an assistant, this will greatly speed up the work and improve their quality. Fix the material with a stapler at a distance of about 30 cm. Make sure that it lies flat, without large folds.
Step 4. Tape the joints with tape. The more effective the waterproofing, the more reliable the wooden elements are protected.
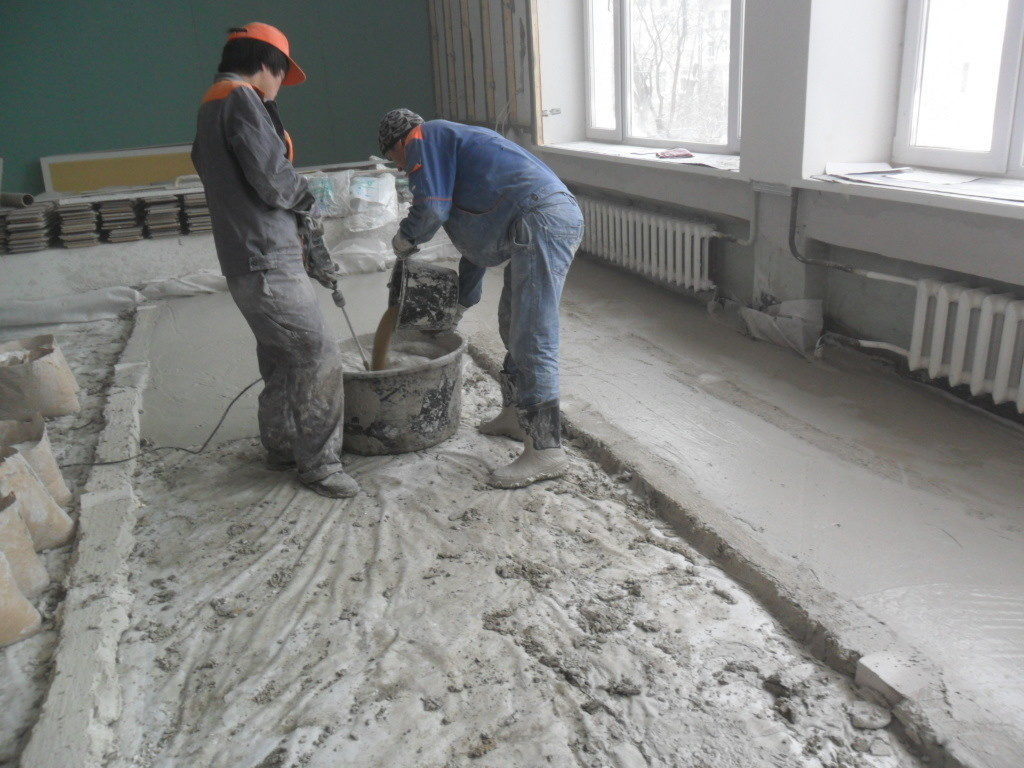
How to make a screed on waterproofing
A very important issue, the technology of applying the screed on different types hydroprotection has its own characteristics. Let's consider the process in detail.
Step 1. Prepare tools and materials.
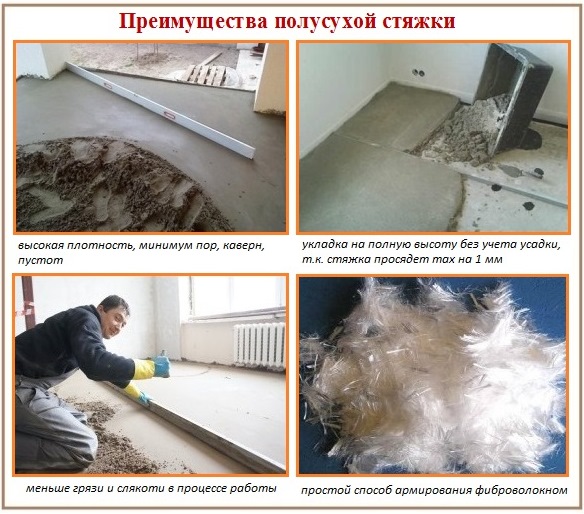
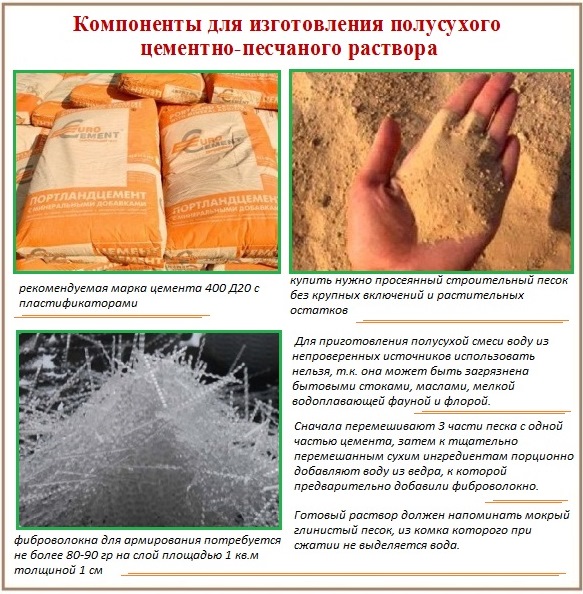
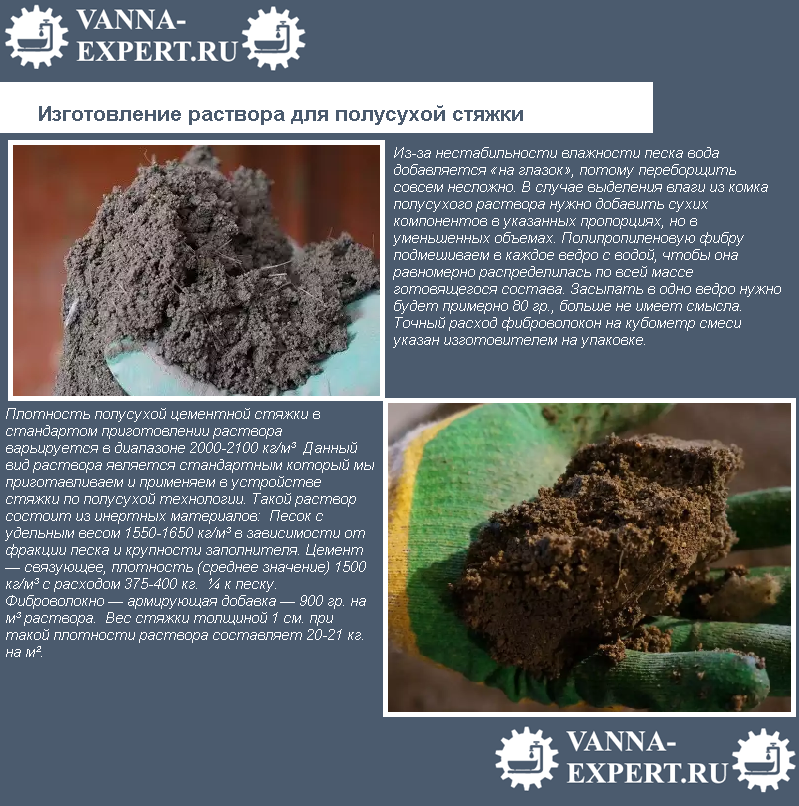
For the screed in the bathroom, we recommend using a semi-dry mortar, thickness within 5–10 cm. To make the mortar, use sand (three parts) and cement of grade M300 at least (one part). Add water in portions, the solution should be well mixed and not have a lot of moisture. Check the consistency with your hand, after squeezing in a fist, water should not show through between the fingers and at the same time maintain its shape.
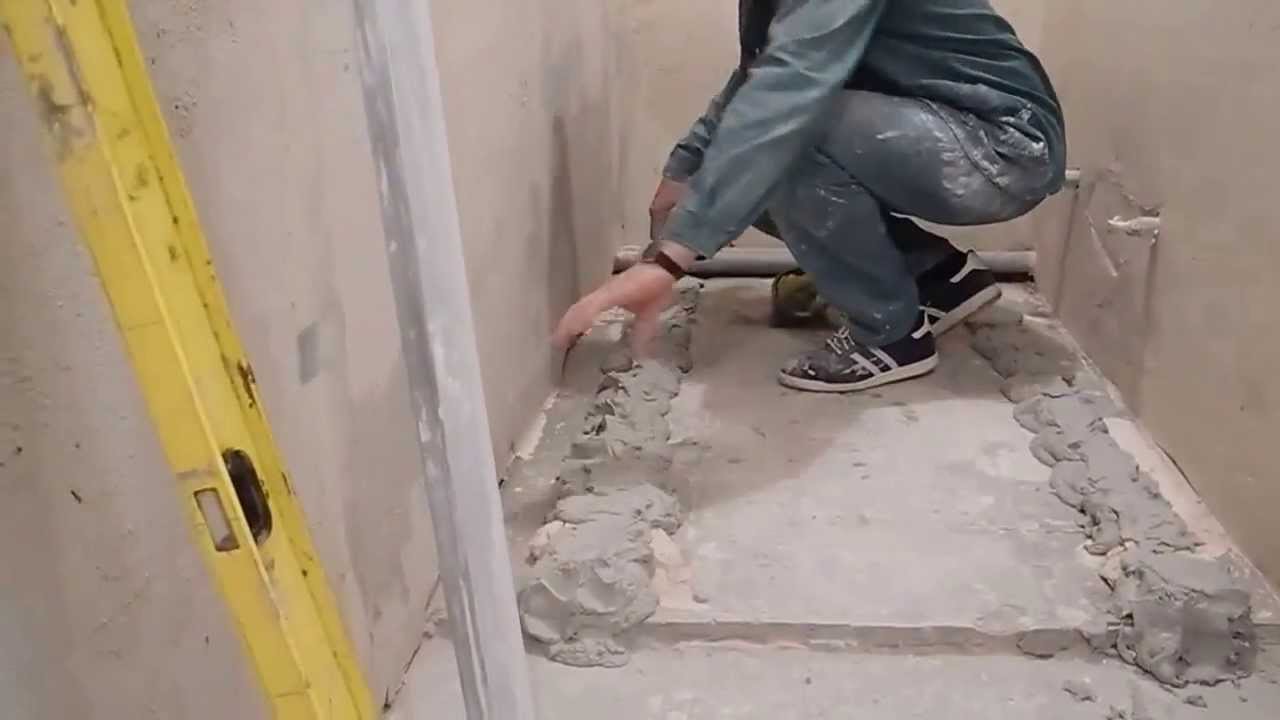
Step 2... Install the beacons carefully. Do not damage the waterproofing; walk on it carefully and with soft shoes. Lighthouses are made by marks.
Mortar beacons for semi-dry screed
Step 3. Using the level and length of the flat batten, determine the highest spot on the bathroom floor. The height of the screed above this area should be about 2-3 cm thick. Beat off a strictly horizontal line at this height with a level on the walls. Beacons can be installed from metal profiles or from cement mix... The first option is preferable, it is easier and faster to work with metal beacons. Count the number of beacons. The distance between them should be 10-15 cm less than the length of the rule.
Step 4. Install the two outermost beacons according to the marks. Constantly control their level, check the correct location again. Walk on the waterproofing carefully, do not damage the integrity of the layer.
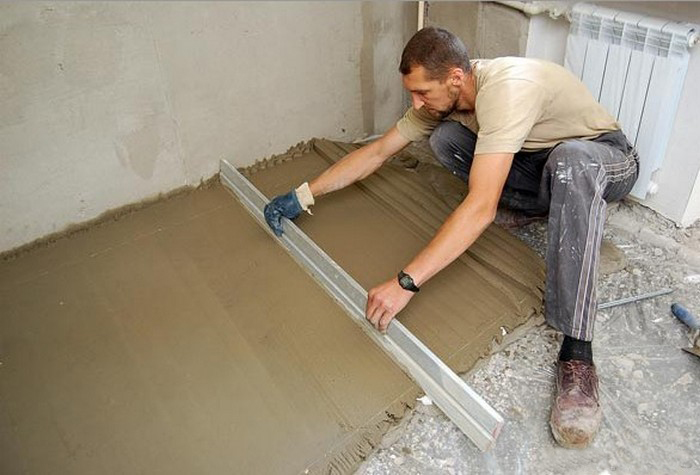
Step 5. Pour the finished solution on the first section; it should be located at the wall farthest from the door. Smooth it out with a trowel. For inexperienced builders, you should not start work on a large area immediately, let it be within one square meter.
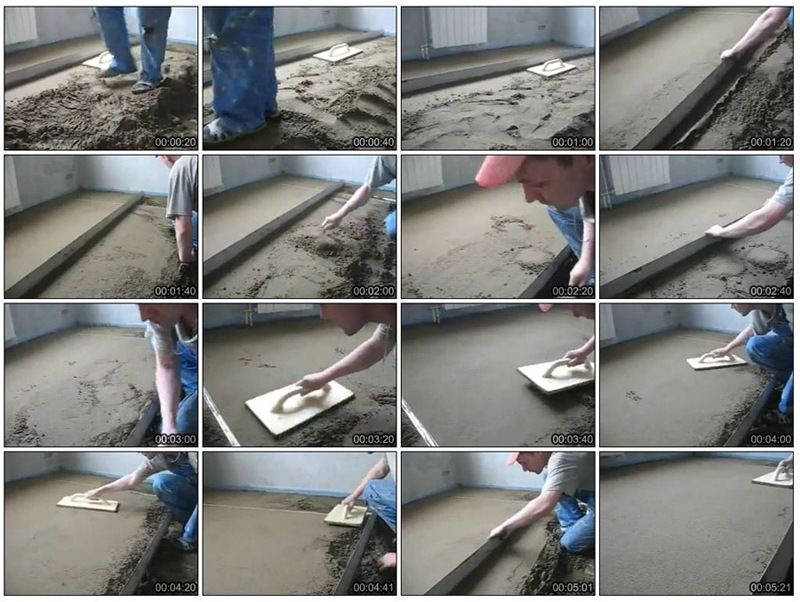
Practical advice. You have to work on your knees. Make a wooden stand for yourself and wrap it with a soft cloth on both sides. The stand will prevent damage to the waterproofing, the knees will be dry, and work will become safer and easier. Always move the stand to a place free from the solution, rest your knees on it.
Step 6... Pre-level the mortar with a trowel; its height should be several centimeters higher than the level of the beacons. It will be difficult to adjust the height the first time, but after a few hours of work, practical skills will appear.
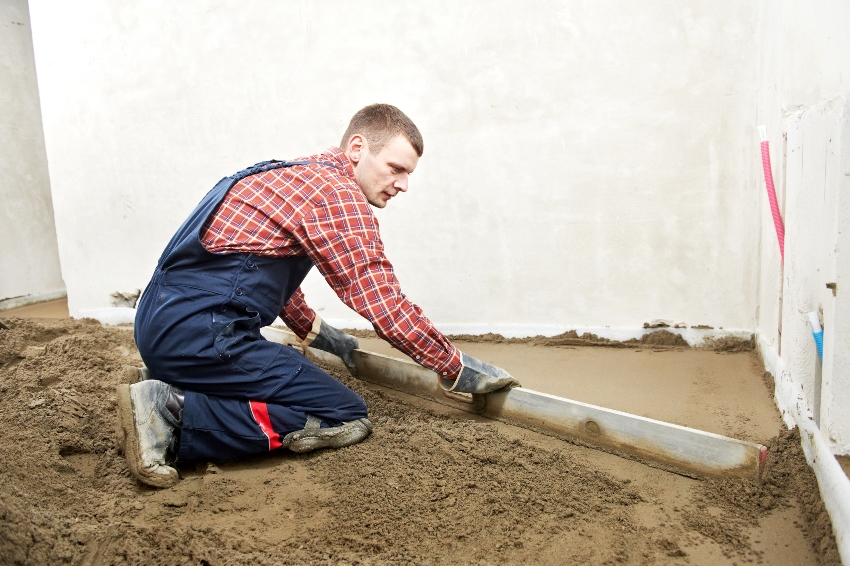
Step 7. Take a rule, put the ends on the beacons. Slowly push it towards you, at the same time make movements left and right. If there are grooves in some places - take the solution by the rule and throw it into the grooves. Level the surface again with the rule. Do not bend over too much, it is very uncomfortable to work in this position.
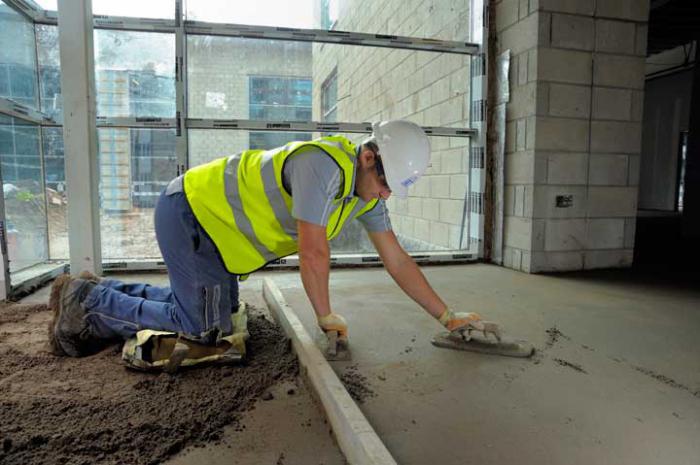
Step 8... After the sketched area is flat, start working with the trowel. With its help, you can not only make the surface smooth, but also slightly compact the top layer of the screed. Do not press too hard on the trowel, make sure that no indentations appear. If such a nuisance occurs, then throw the mortar into the depression and level it again with a trowel. At the beginning, the work will be slow, but over time, confidence and skill will develop.
Step 9. Continue screed all over the bathroom floor. We remind you again - do not damage the top layer of waterproofing. If the plane of the screed has drops of up to two millimeters, it's not scary. These irregularities are filled with ceramic tile adhesive.
The next day, it is advisable to moisten the surface abundantly with water and wait another day. The fact is that a semi-dry solution has insufficient moisture for the normal course of chemical reactions, and this negatively affects the strength indicators. The screed is hard and dry - start laying the tiles.
Practical tips for using some types of waterproofing materials
Coating waterproofing
In all respects, excellent material, but the price is appropriate. In order to improve reliability and reduce the cost of work, use the following tips:
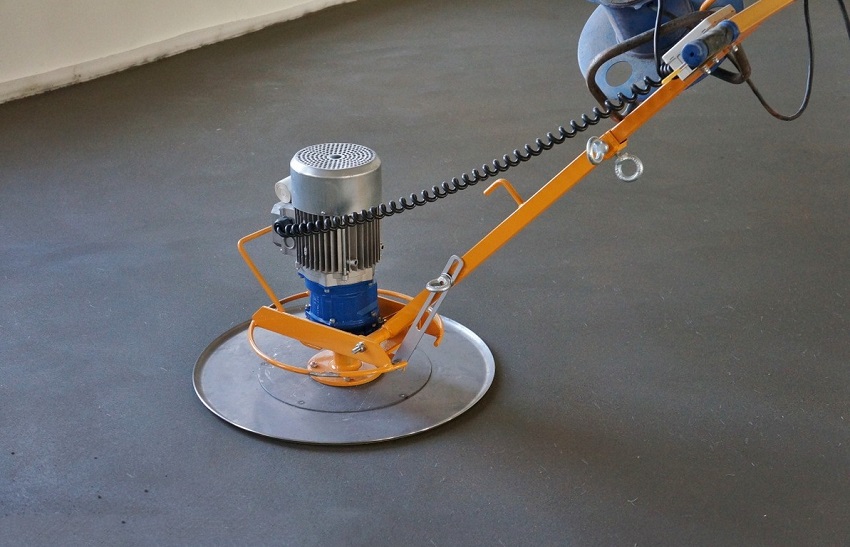
It is best applied with a pneumatic spray gun.
Particles of waterproofing with high speed hit the surface of the floor or wall and fill all micropores. In addition, gaps due to surface irregularities are completely eliminated.
It will not be possible to achieve such a quality of coating with a roller, but with a brush it is very difficult and long. Liquid the insulation and be sure to apply at least spirit layers. Each subsequent one is applied only after the previous one has completely dried.
Choose materials that are physically strong. Bathroom leaks are difficult to detect, but this makes them even more dangerous. Long-term exposure to moisture has an extremely negative effect on the performance of all building materials.
A good option is to use plain plastic wrap.
- Low cost construction works... The film is much cheaper than other materials, and in terms of the quality of protection against moisture penetration, it is in no way inferior to them.
- Manufacturability. Laying the floors with foil is much faster and easier. There is no need to use overlap mastics, they are expensive and time-consuming. In addition, overlaps create additional areas with an increased risk of leakage.
- The width of the film in rolls can reach three meters, and it is produced by a sleeve. After cutting the sleeve, the width of the material doubles. This is enough for the floor surface to have no joints.
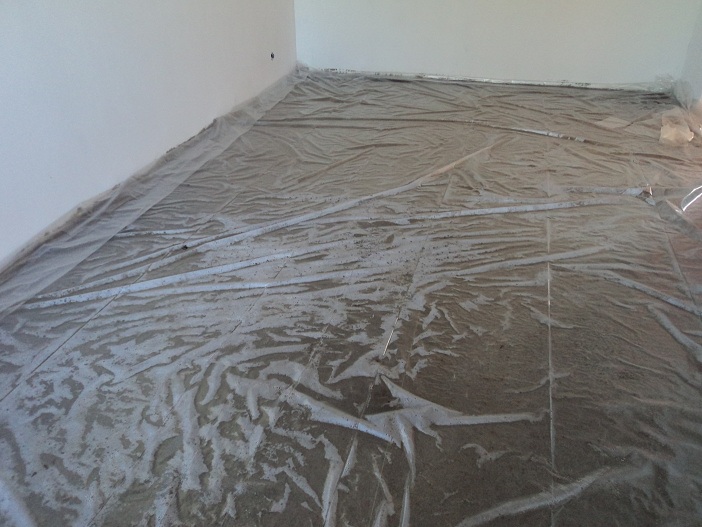
But there are two conditions. First, the film thickness should be at least 45 microns, it is undesirable to take a thinner film, the probability of breakouts is too high. Three times - the surface should not have sharp protrusions. Slight deflections are not critical, the film will stretch and fit tightly over the entire surface.
It is advisable to use it in large bathrooms with high loads on the flooring. It is advisable to add special plastic modifiers to the solution; due to them, the tightness of the coating does not deteriorate even with mechanical damage to the surface.
The reliability of any waterproofing largely depends on the quality of surface preparation. It is advisable to remove dust with a vacuum cleaner.
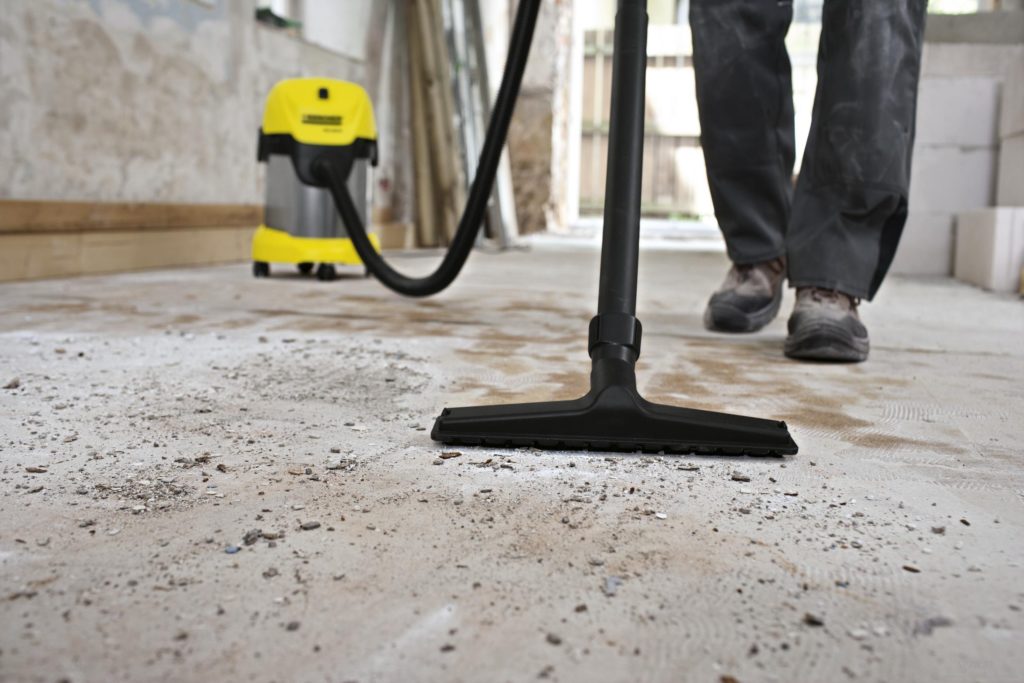
The presence of dust greatly reduces the adhesion coefficient waterproofing materials... In these places, they will necessarily exfoliate or not be absorbed to the required depth (depending on the type). Remember one axiom: careful execution of all technological operations is done much faster than the elimination of defects. There is no need to talk about the cost.
Clean the joints between the tiles from the glue immediately.
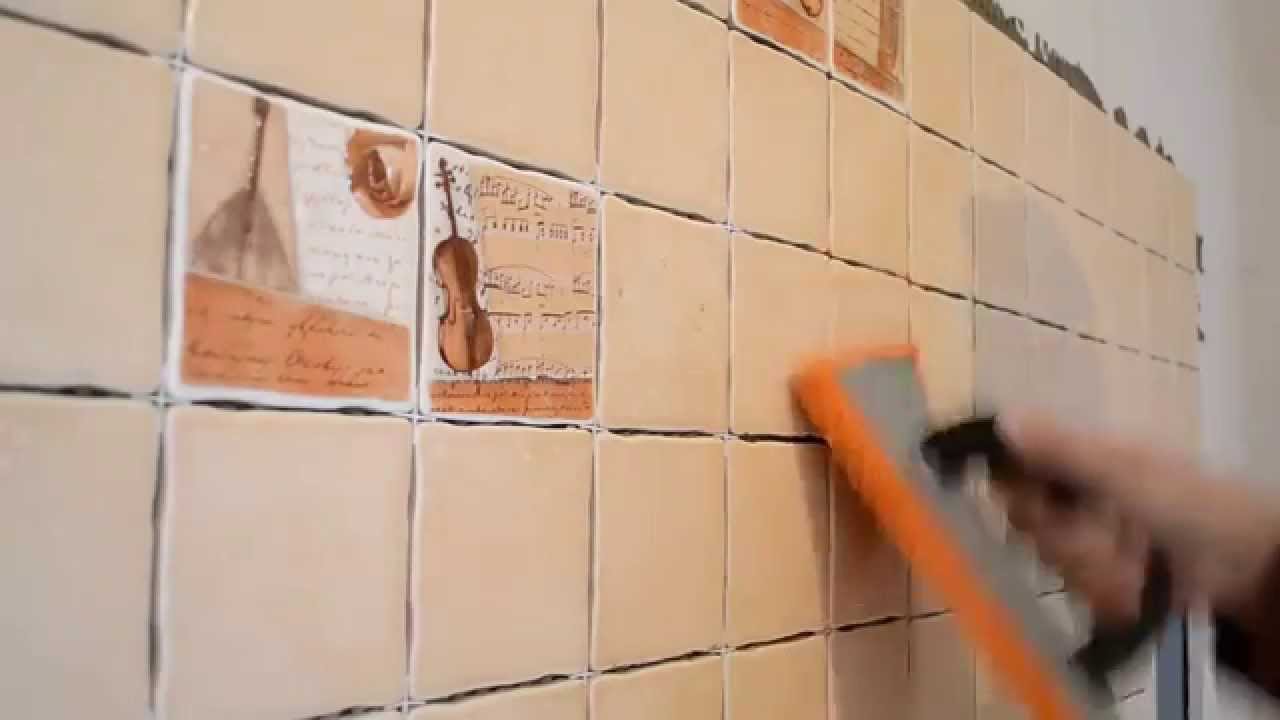
First, the glue can change the color of the grout. Secondly, it does not hold moisture, and you need to rub it with special compounds. The rest of the laying technology does not differ from the usual one.
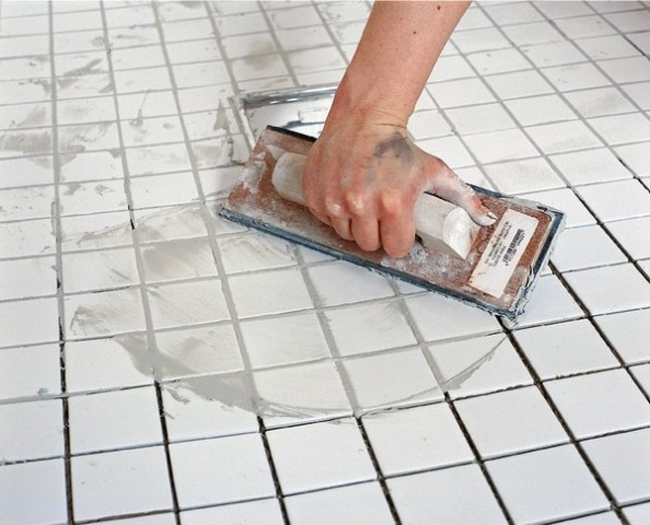
Seal the grout joints with great force. Not always recommended rubber spatulas can create them, it is better to use wooden ones. No factory - use an ordinary thin strip about 5 cm wide. Press the grout into the slots until the excess protrudes along the edges of the spatula. Finishing grouting and surface cleaning is best done after a few hours. During this time, the material will harden slightly and will be easier to remove. Wipe the seams with a damp sponge.
Video - Waterproofing the bathroom with cement coating materials
Waterproofing the bathroom floor, materials for which in a large assortment can be found in any hardware store today, is a mandatory procedure before starting finishing work and installing plumbing.
The bathroom is the wettest room both in a private house and in an apartment, therefore, no matter what material the floors are made of, they need high-quality waterproofing, otherwise during the operation of the room at the joints of the walls and floor, in the places where engineering communications pass through the ceilings leaks. Moreover, there is a great risk of flooding the rooms located below. As you know, moisture, getting into a closed space, inevitably contributes to the formation of mold and mildew, which gradually begin to destroy the structure of the floor and walls, lead to a persistent unpleasant odor of dampness, and can cause a number of diseases in people living in an apartment.
There are many types of waterproofing materials made on various bases and in various forms. To choose the most suitable option, you should consider in advance their characteristics and technology for working with them.
So, according to the type of application, waterproofing is divided into the following types:
- Coating room.
- Okalechnaya.
- Impregnating.
- Cast.
- Plastering.
Which of these waterproofing is best for the bathroom floor is difficult to say, since there is no consensus even among experts on this score. The choice of material and technology for its laying is made taking into account the characteristics of the surface, which should be waterproofed, and the allotted time for the execution of work.
Wash-type waterproofing
Compositions for coating (painting) waterproofing - the easiest to use
Waterproofing compounds are produced on different bases and can be:
- Water-based, acrylic-based;
- Bituminous rubber;
- Bituminous-polymer;
- Cement-polymer;
- Polyurethane;
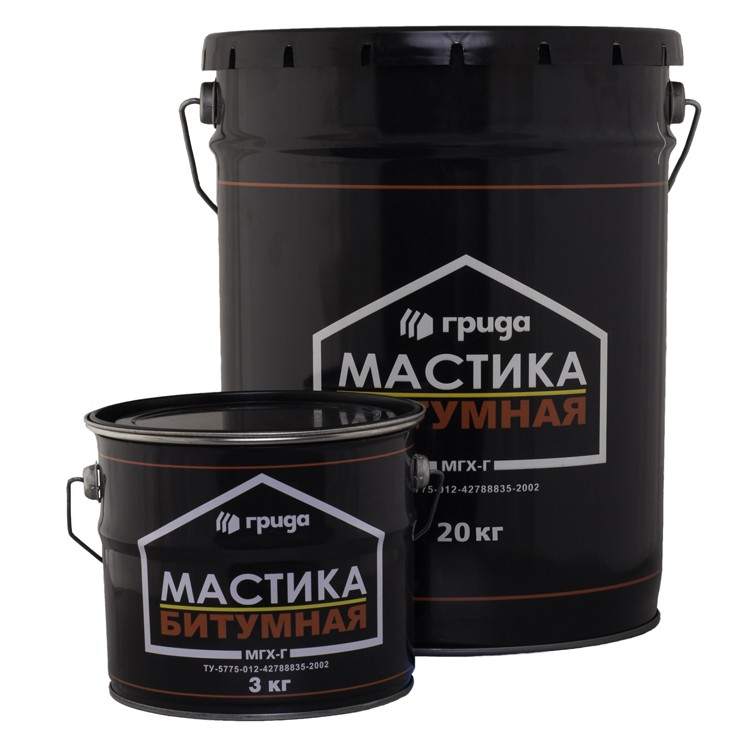
- Bituminous.
Bitumen-based formulations are made with additives from various fillers and organic solvents. Fillers make mastics more elastic, as they use plasticizers, rubber chips or latex.
The mastics have excellent adhesion and are applied to both concrete and wood surfaces.
It should be noted that materials based on bitumen have a number of disadvantages, which include:
- possible cracking and the appearance of chips as a result of temperature fluctuations;
- biological corrosion;
- unpleasant odor during waterproofing works.
But, despite these shortcomings of coating compounds, they are most often used to insulate the bathroom floor, since this is the most affordable way to create protection against moisture penetration.
Cost of mastics coating waterproofing quite affordable, but its service life is no more than five to six years.
Materials made on the basis of polymers have practically no negative qualities, so they can be used without fear.
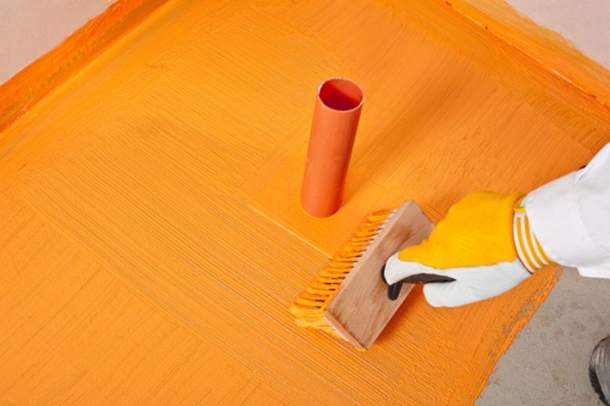
The pluses of the coating compositions include the ease of applying the material to the floor surface and the lower part of the walls, as well as to the corners and joints with a regular brush.
Material consumption depends on the original quality waterproof surface and number of layers. Usually the recommended amount per 1m² area is indicated by the manufacturer of the composition.
How is the coating (paint) waterproofing applied?
There is nothing complicated in the device of this type of waterproofing - the main thing is to do all the work carefully and adhere to the developed technology.
If the coating composition is purchased dry, then the technology for its manufacture can be found on the packaging. The mixture must be uniform. If a liquid component is included in the kit to the dry composition, it is first mixed with water and only then is it poured into the dry mass and mixed into a paste-like mastic. Such waterproofing is called two-component. When the mixture is ready, you need to go straight to work.
- The first thing to do before applying any coating is to thoroughly clean the surface of fine dust and larger debris. The work is carried out using a vacuum cleaner.
- Further, it is necessary to remove the absorbed greasy stains or paint residues from the surfaces, if there are any - to clean off to "healthy" concrete. The same is done with loose areas, where erosion of the concrete slab is noticeable. After cleaning, dust and debris are removed again.
- The next step is to apply a primer (deep penetration composition). The primer can be poured onto the floors and spread with a roller.
The corners and surfaces around the wall outlet and floor drain should be primed with a brush to avoid leaving untreated areas. After the first layer of the solution has dried, another one is applied.
- Next, you can proceed to applying the waterproofing composition. Work begins with mastic covering the corners and all joints of the floor and wall, pipe passages through the floors.
- On freshly applied the mastic is laid with a sealing tape. It is glued with an uncured composition to the walls and floor, so that the joint between it is completely closed, which is always a weak point in case of leaks. A prerequisite is that the tape must be completely straightened, not have waves, bends, folds, voids under it are unacceptable.
When joining the strips, the overlap must be at least 50 ÷ 70 mm (during the initial installation, the overlap must be coated with mastic.).
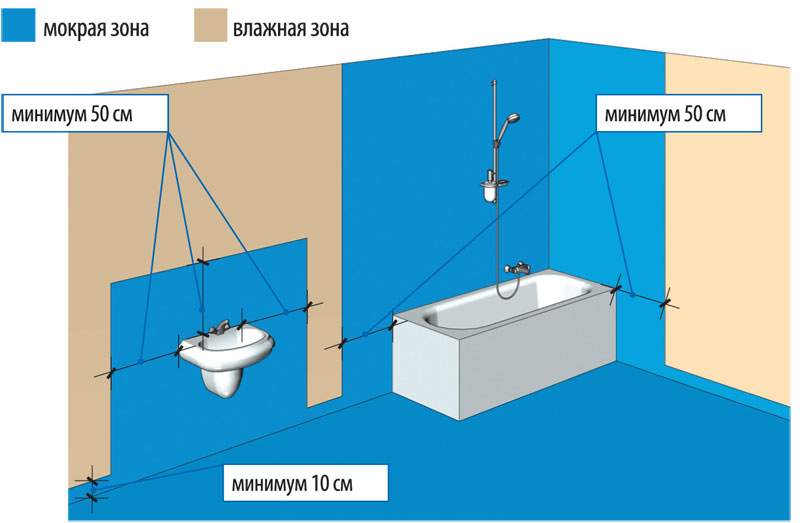
In the bathroom, not only the joints of the floor and walls are processed in the same way, but the corners of the walls, to a height of at least 150 ÷ \u200b\u200b200 mm.
Another layer of waterproofing mastic is applied over the tape.
- Further, it is necessary to glue sealing membranes around the points of supply and drainage of water, that is, pipes or sleeves coming out of the walls and floors with communications laid through them.
Particular attention is paid to waterproofing around pipes, holes, liners in the ceiling, etc.
- Then the entire remaining surface of the bathroom floor and walls is covered with waterproofing mastic to a height of 150 ÷ \u200b\u200b200 mm.
By the way, qualified craftsmen recommend not to spare the material and apply the composition at least 500 ÷ 700 mm from the floor, especially around the bathtub and washbasin - this will protect the walls from fromdampness and mold.
When applied to the floor surface, the mastic does not spread thinly - it should be applied in a thick, uniform layer of the same thickness, approximately 2 mm.
- Waterproofing is carried out, if necessary, in two or even three layers. Education is not allowed uncovered mastic "Islets". Each of the layers is applied in a perpendicular direction relative to the previous, already dried layer, about five to six hours later.
- When the floor waterproofing work is completed, you can start finishing only after a day.
At the end of the section, there is an example of performing a coating waterproofing in a bathroom.
Video: the work of a bathroom waterproofing master
Plaster waterproofing
Plastering waterproofing also belongs to the coating type, but it must be distinguished separately, since materials that differ from the rest are used for work.
Plaster mixes include components such as gypsum, cement and polymers. If the bitumen used for waterproofing the floor, at a temperature of 0 degrees, begins to lose its elasticity, becomes brittle, and cracks can form on it, then temperature changes are not terrible for plastering compounds.
There are many plaster waterproofing mixtures of various manufacturers on sale. The most popular are the compositions of the Knauf and Cerezit companies.
- For example, the KNAUF FLACHENDICHT waterproofing composition includes a component such as synthesized latex, which gives the material a special elasticity. Therefore, the layer applied to the surface, after polymerization, retains its qualities at temperatures from - 18 to + 55 ° С.
After mixing, this composition does not require heating, and is applied to the surface immediately.
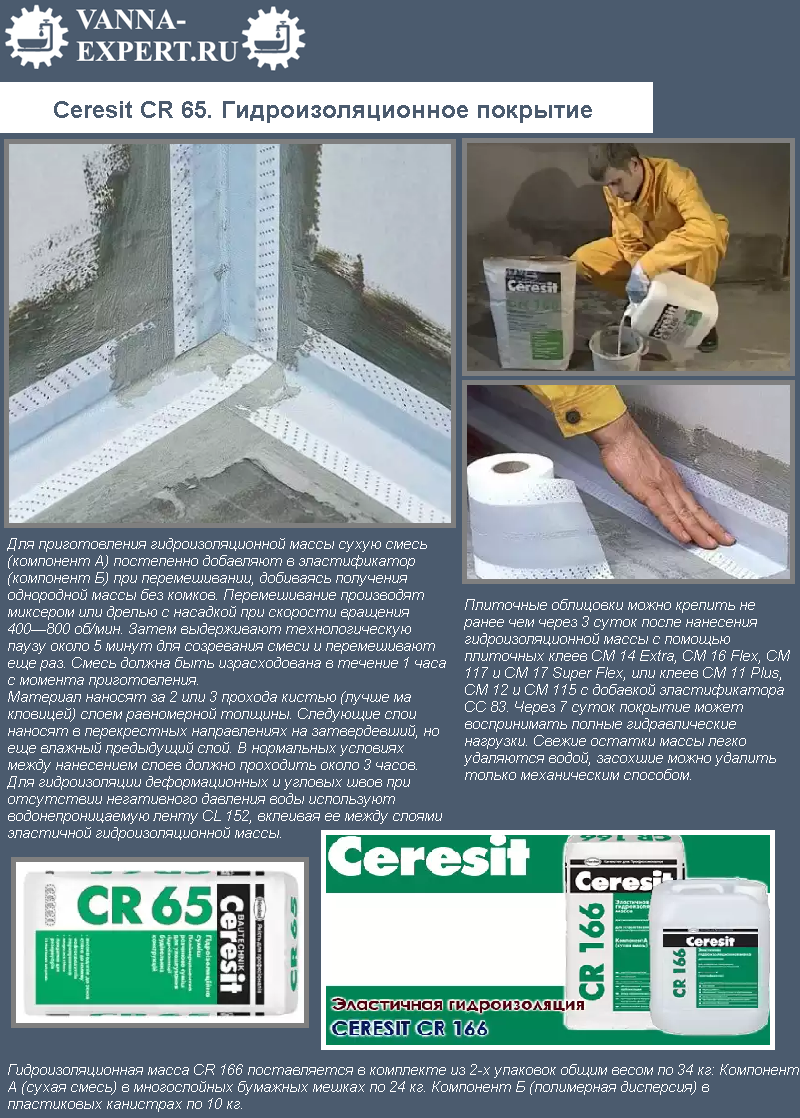
- Another option for high-quality plaster waterproofing is a mixture of the Ceresit CR-65 brand, which has excellent adhesion to surfaces, provided that it is applied to the surface treated with a primer.
One of the most popular formulations is Hydroizol Ceresit CR-65
Plaster mixes are also applied with a brush or roller. The plane joints must be glued with a sealing tape. It is advisable to choose all materials from one manufacturer - they are fully adapted to each other.
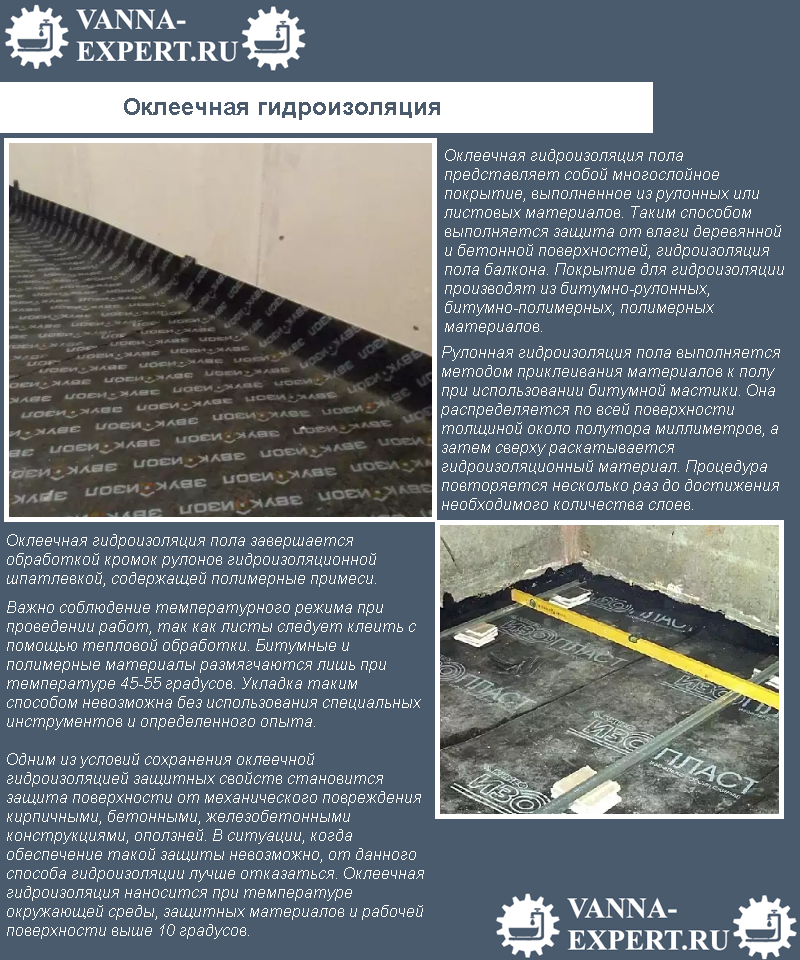
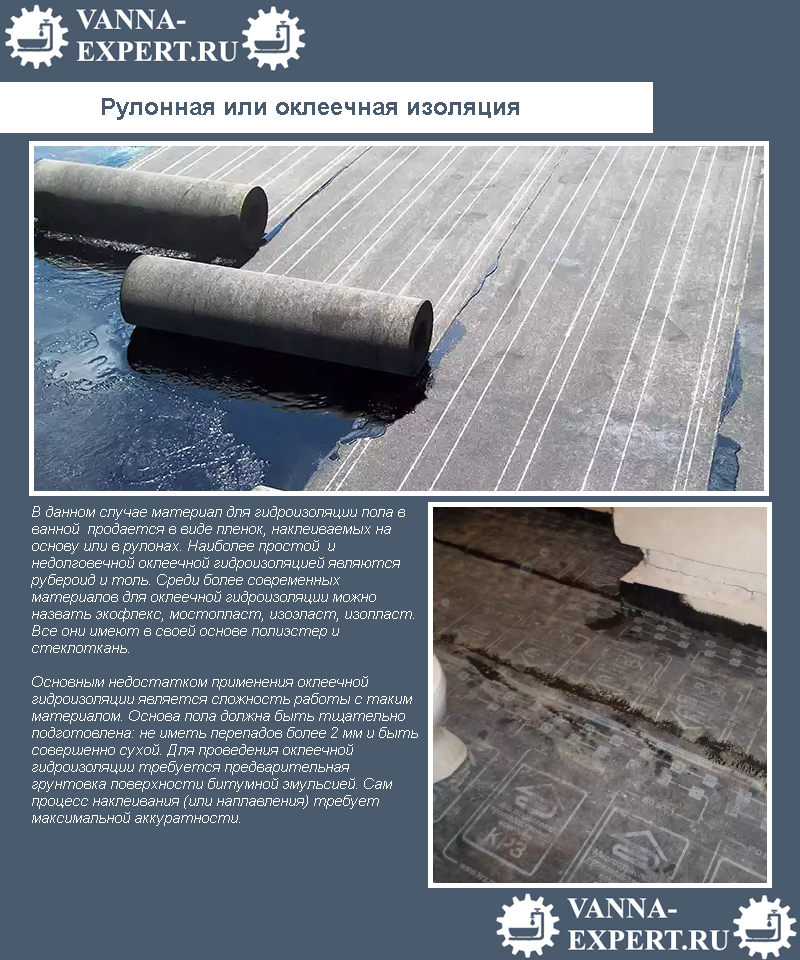
Oleechnaya waterproofing
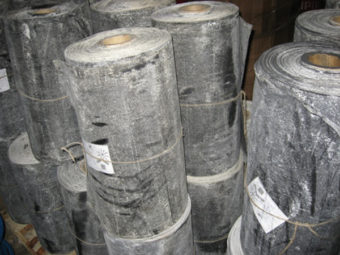
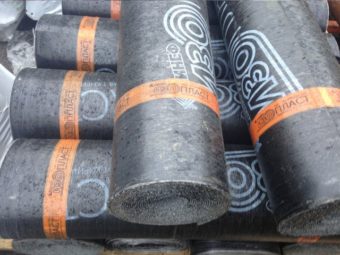
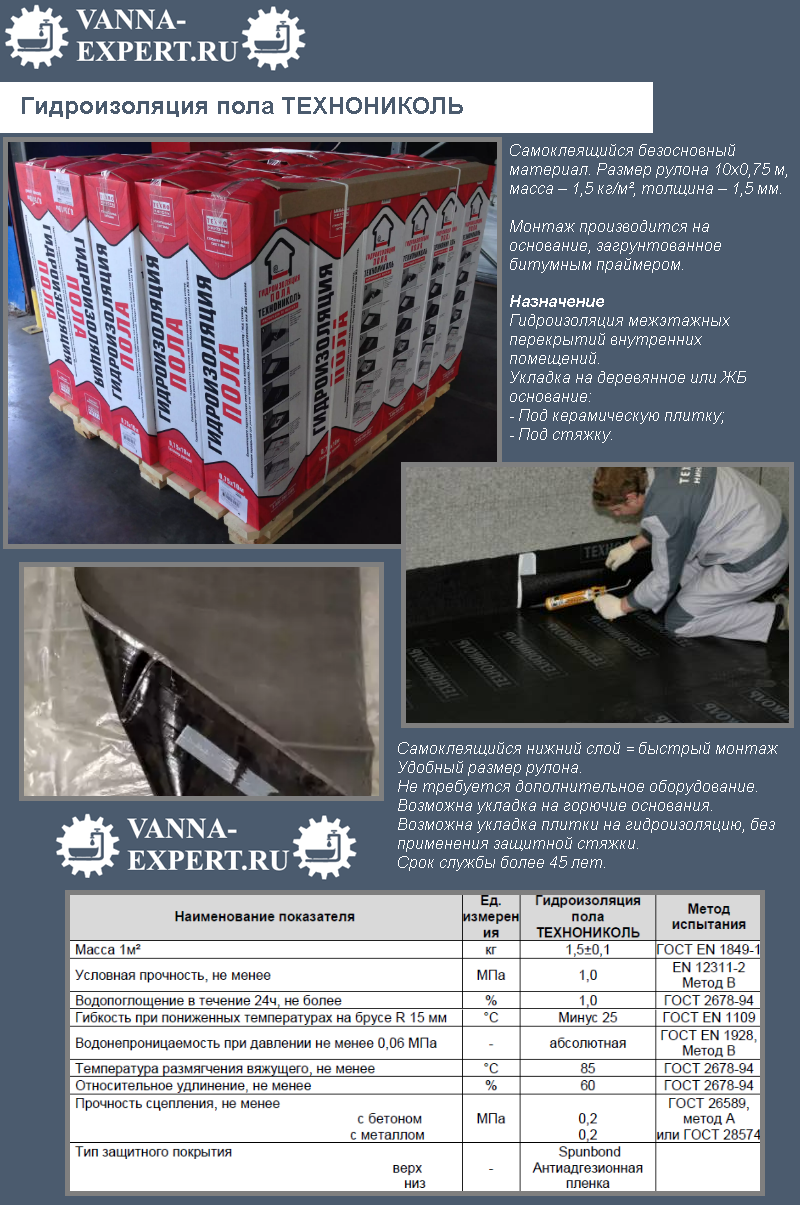
This method of protecting floors from moisture penetration can be called the most effective, but it will be somewhat more difficult to properly lay the materials than with coating compounds. The most popular materials for pasting waterproofing: roofing material, isoplast, ecoflex, iselast, mostoplast, techno-nikol, waterproofing.
Materials are not affected by temperature changes, and if they are laid correctly, according to existing technologies, they will protect the floor surface for many years.
Waterproofing is made in the form of sheets or rolls of waterproof material with good elasticity. But, despite this, in difficult places it is not easy to lay them on your own, for example, in the corners of the room.
Two types of gluing materials are made. Some of them fit on onworn adhesive, others are self-adhesive.
For installation of the first type, bituminous mastic is most often used as an adhesive base. On self-adhesive canvases, in principle, the same mastic is applied to the back surface and protected by a special film that is removed only during installation.
The most widespread until recently, the type of glued waterproofing was an ordinary roofing material, but with the advent of more advanced materials, it is used less and less. Modern types can have a polymer or bitumen base, therefore they differ somewhat in their characteristics.
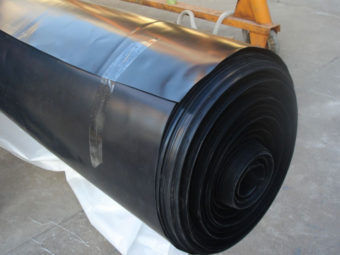
- The polymer material is films and membranes made of vulcanized rubber. Most often, they are already covered with an adhesive.
They are favorably distinguished by:
- small thickness;
- long service life;
- excellent mechanical strength;
- no shrinkage;
- resistance to vibration.
- Bitumen-based gluing waterproofing is used much more often, since it is more affordable. Such materials, for example, include waterproofing, made on the basis of fiberglass impregnated with bitumen, and the plasticizer makes it resistant to cracking and gives it flexibility. This material is not biodegradable or moldy.
It can be produced in one- and two-sided versions.
Double-sided material differs from one-sided by the presence of a polymer protective film on both sides - it melts when exposed to high temperatures when laying. This material is used in the event that a multi-layer waterproofing coating is arranged.
The one-sided material is equipped with a protective coating consisting of mineral chips. - it is usually used for the outer covering of a soft roof.
The glued waterproofing is used not only for concrete coatings, but also for wooden flooring, on which it is laid without melting - on bitumen mastic.
Laying of glued waterproofing
The surface of the bathroom floor must be prepared more carefully before laying the gluing material than when applying coating compounds on it - this nuance must be observed to create a long-term and reliable floor protection.
The work is carried out in the following order:
- Bathroom floors should not have even small protrusions, so they must be removed. The surface is leveled if necessary self-leveling compositions. Then the floor is well dried and cleaned of dust.
- Further, the surface of the floor and the lower part of the walls are covered with primers, which should also dry well.
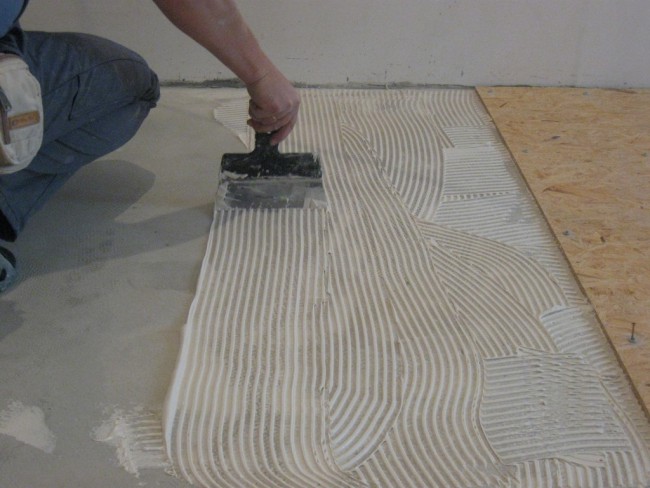
- Then a layer of mastic with a thickness of about 2 mm is applied on the surface of the floor and walls to a height of 200 mm. The mastic can be rubber or polymer-bitumen based.
- Next comes the waterproofing sticker. The first canvas that will find on the wall is laid with a fold, but is glued first to the floor surface, and then to the wall.
The mastic is heated until softened with a gas burner. The surface is closed with a waterproofing sheet, which is then rolled with a roller.
The next sheet is laid on the already laid waterproofing strip with an overlap of 80 ÷ 100 mm. Then there are the third and subsequent stripes.
- If you plan to lay the material in two layers, then mastic is again applied over the first one and waterproofing is laid. The second layer is laid in such a way that the middle of the canvases is at the joints of the strips of the lower layer, then completely overlaps them.
The process of installing TechnoNicol goes in the same way, but its advantage is that the bituminous layer is already present on the material. When laying it, it remains only to heat it up until the protective polymer film melts and roll it to the surface with a roller. It is very important not to overheat the material, since the waterproofing will become fragile from this, and its service life will be significantly reduced.
Hot styling is not a good idea, as it is recommended to avoid using the burner in small enclosed spaces. When heated, the waterproofing material and mastic emit a strong and persistent odor, which is rather poorly eroded. In addition, working independently with a burner without proper experience is rather dangerous, but if it is already decided to stick the waterproofing in this way, then it is better to entrust this process with specialists.
To perform work on your own, it is better to use self-adhesive sheets that do not require the use of a burner - this installation is also called the "cold" method. For such a coating, the concrete floor must be treated with a primer - a special compound made on a bitumen basis.
Using it, you can create an almost seamless sealed coating, since the canvases overlapped by 100 mm are tightly glued together. Before they are fastened, the protective film is removed from the adhesive layer, and the canvas is immediately pressed against the already laid waterproofing sheet.
When using a pasting material, special attention should be paid to water pipes and water drain holes. For them, holes are cut in the waterproofing, where rubber seals are inserted. The contact points are coated with polyurethane or silicone sealant.
Cast waterproofing
Cast waterproofing can also be made of different materials... As the name implies, the installation of these compounds on the surface takes place by pouring them cold or hot.
Hot waterproofing
Hot waterproofing can be asphalt-polymer and asphalt. Consumables hot bitumen, asphalt concrete and pitch are used for it. This material shows good performance indicators - elasticity, high bending resistance, strength and reliability.
The materials are poured onto the surface, where work was done in advance to seal the joints with sealants and mastics.
This type of waterproofing is almost never used for bathrooms in apartments - they are more suitable for the same premises, equipped in private houses.
Laying hot waterproofing
To properly perform waterproofing with a hot method, you need to proceed in the following order:
- The floor surface must be thoroughly cleaned of various contaminants that could remain from repair work.
- The detected cracks, as well as the joints of the planes, are filled with sealing compounds.
- After that, the floor must be well dried - infrared heaters, gas burners and other sufficiently powerful devices are often used for this.
- The primer is in progress. Hot bitumen is used as a primer for this type of waterproofing.
- After that, the primed working surface is separated by the formwork around the perimeter. It is necessary if waterproof only part of the room is needed.
- Heated waterproofing mass - temperature its heating is indicated on the packaging.
- The hot composition is gently poured onto the surface, evenly distributed over it with a squeegee and left until completely solidified.
- If necessary, several layers of waterproofing are poured, but each subsequent one - only after the previous one has completely dried.
Cold cast waterproofing
The cold types of waterproofing include materials such as "liquid" rubber and "liquid" glass. The technology for working with these compounds is similar, but their components are significantly different.
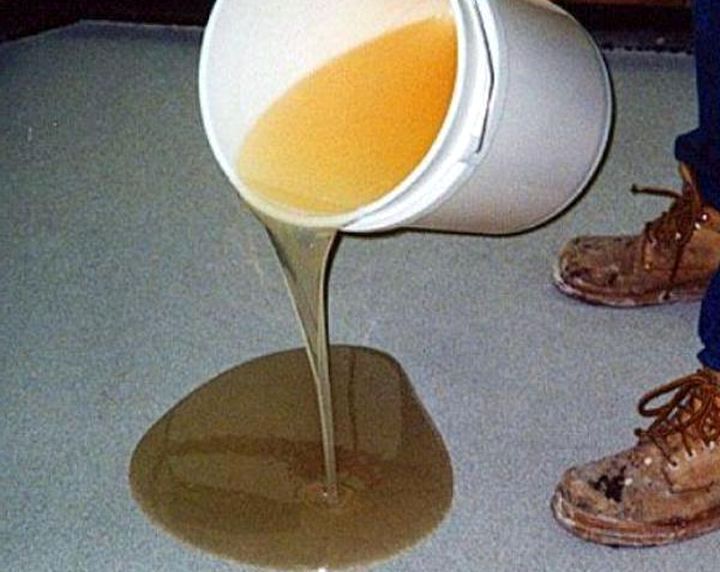
"Liquid rubber
This waterproofing material is made from bitumen and polymer additives, which make the resulting emulsion more wear-resistant and resistant to external influences.
Liquid rubber packaging
Calcium chloride is used as a fixer for bitumen-polymer mixtures, which reduces the density of the material, which makes it possible to install "liquid rubber" by spraying. Before adding to the emulsion, the fixer is diluted with water in proportions of 1:10, and after that the final composition is mixed.
In order for the coating to be successful, it is necessary to adhere to the technology, well prepare the base for it and perform work at a temperature not lower than + 3 ÷ 5 ° С.
"Liquid" rubber is produced in different consistencies, which allows it to be applied to surfaces in different ways:
- Bulk laying method is the most popular, as it does not require special equipment, while the composition fills all small cracks and creates an even, smooth coating.
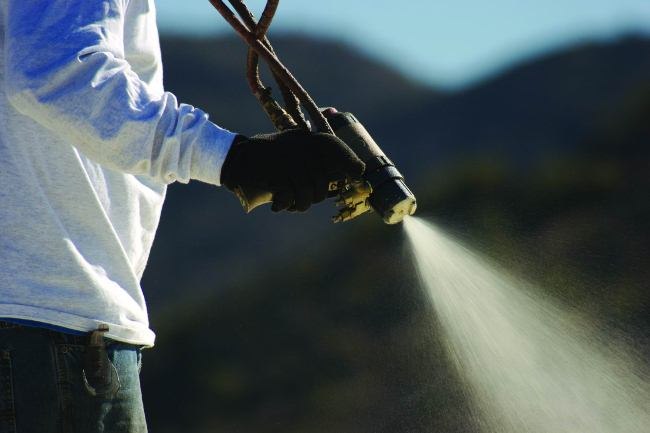
- Spraying is a more complex method as it requires special equipment and skills to work with it. With the correct application of waterproofing by spraying, it turns out to be of better quality than when using other methods, since the composition is supplied under pressure and fills not only cracks, but also microscopic pores of the base.
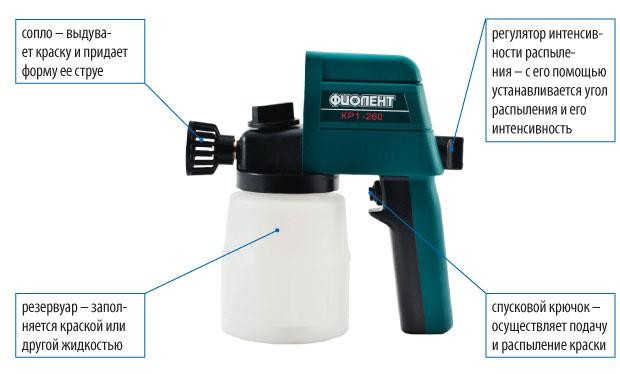
- Painting (coating) technology is the most affordable of all three existing ones. Application differs little from conventional coating insulation, which was already mentioned above. For painting application of waterproofing "liquid" rubber is produced in the form of a paste or solution.
After the floor has been treated with “liquid” rubber, an airtight elastic film should form on the surface, which will reliably protect the floor from moisture.
The table shows the main characteristics of this material:
| Material parameters | Indicators |
|---|---|
| Tensile strength (MPa) | 2E-3 |
| Elongation at break (%) | 1500 |
| Bond strength to concrete surface (MPa) | 1 |
| Density (kg / m³) | 1000 ÷ 1100 |
| The amount of non-volatile substances (%) | 57 ÷ 65 |
| Time of composition hardening after application (hours) | 24 |
| Maximum water absorption in the first 24 hours,% | 0.5 |
| Water permeability at a pressure of 0.01 MPa in 24 hours | No wet spot |
| Average consumption of the main component in the manufacture of floor covering material in 1 mm, in dry matter kg / m² | 1.61 |
The technical and operational characteristics of different brands may vary slightly. But due to the fact that all the components of "liquid" rubber are environmentally friendly, they do not emit harmful vapors during operation and are safe for humans.
The positive qualities of all types of "liquid" rubber include:
- High degree of adhesion to various surfaces.
- Resistant to chemical attack.
- Possibility of applying waterproofing to the old cleaned floor.
- Formation of a continuous seamless surface.
- High elasticity and strength of the material.
A vivid example of the high elasticity and strength of "liquid rubber"
- Endurance at temperature extremes.
- The composition is odorless during installation, therefore it is suitable for waterproofing in closed rooms.
- Long operational life.
How to apply "liquid" rubber
It makes no sense to describe the work with the coating type of "liquid rubber" - it is no different from the usual coating waterproofing. In order not to repeat itself, it is worth considering only the technologies for spraying and pouring a waterproofing composition.
The first step is to t t traditional surface preparation. It is carried out in the same way as for any type of waterproofing. The main condition is the flatness of the floor surface, without protruding fragments, and its cleanliness.
Before applying all types of "liquid" rubber, surfaces must also be primed. A similar primer is used the composition of the polymer-bitumen solution, which will not only create excellent adhesion for the coating, but also enhance its waterproofing properties. The primer is applied with a roller or brush.
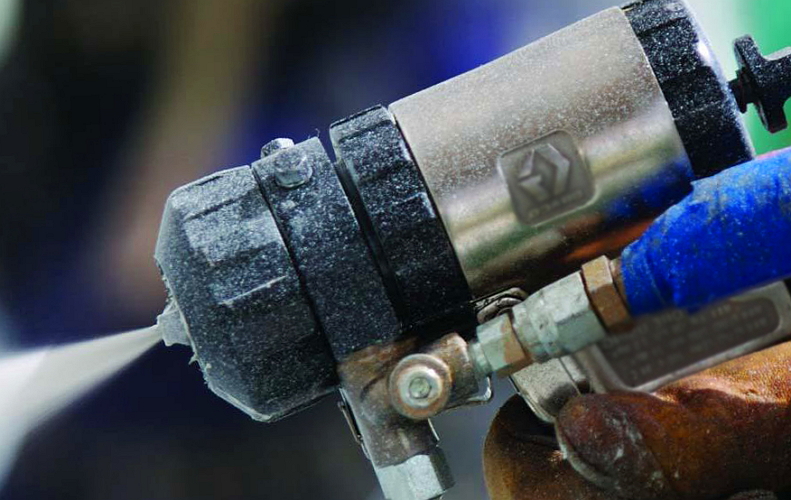
The next step, after the soil has completely dried out, is the application of the waterproofing material. Spraying of "liquid" rubber is carried out using special equipment. Tanks with a bitumen-polymer composition and with fixer - solution calcium chloride. Both components are fed into the atomizer at once, which are mixed and applied to the surface under pressure, forming an elastic membrane with a thickness of 2 ÷ 3 mm. This process is usually trusted by specialists who have the necessary apparatus and experience in working with it.
Spraying process "liquid rubber"
The filling method consists in pouring the finished material onto the floor surface and distributing it using a needle roller, spatula or squeegee. Waterproofing is applied not only to the floor surface, but also, as in previous cases, to the lower part of the wall and around the water pipes.
The approximate consumption of this material per 1 m² is 2.8 ÷ 3 liters. Complete drying of the coating occurs in two days. After this time, you can proceed to further work on the floor.
"Liquid glass"
“Liquid glass” is another type of cold cast waterproofing.
Canister with "liquid glass"
This material resembles "liquid" rubber in its consistency, but is made from other materials. This waterproofer contains sodium or potassium silicate, quartz sand and soda.
"Liquid glass" has excellent characteristics that make it ideal for use in waterproofing works in the bathroom:
- It is an antiseptic, therefore it prevents the appearance of mold on the treated surfaces.
- Water repellent agent capable of creating a seamless, waterproof and water-repellent coating.
- Antistatic - "liquid glass" is not electrified.
- The special properties of the material make the concrete surface stronger and more durable.
- This waterproofing material has high adhesion, when spreading, it penetrates into all the smallest cracks and micropores.
- Using "liquid" glass, you can waterproof not only concrete, but also a well-prepared wooden surface.
- The solution can be added to concrete mortar to enhance its waterproofing properties. Such a composition is made in proportions of 1: 8, that is, one part of "liquid glass" for eight - a concrete solution.
- The economy in application and the affordable price of the material can also be attributed to its advantages.
It is worth mentioning some of the disadvantages of "liquid" glass:
- The material tends to self-destruct over time if it is not covered with a decorative coating. In open form, its service life is limited to 5 years.
- The mortar should not be used to cover brick surfaces, as this can lead to their destruction.
- The coating formed on the surfaces is quite fragile, and this is another reason to be sure to cover it with a finish.
- Pouring "liquid" glass should be carried out in a short time, since it tends to quickly harden, therefore, skills in such work are required.
Waterproofing the floor surface with "liquid glass"
Waterproofing with this material is carried out both in pure form and by adding to the concrete solution.
In a pure, water-diluted form, "liquid glass" is used as a priming impregnation of concrete substrates. In this case, its consumption is on average 150 ÷ \u200b\u200b250 grams per 1m². To obtain deep surface impregnation of 80 ÷ 100 mm, it must be applied in three layers. This procedure helps to close microscopic cracks and pores, to create a protective film on surfaces.
When making concrete or cement waterproofing, "liquid" glass is mixed with mortars in proportions of 1: 8 or 1:10. Such a mixture is also well suited for waterproofing bathroom surfaces, and it is applied to them using the coating method described above.
Waterproofing is carried out by pouring the composition on the floor surface and evenly distributing it with a squeegee, a spatula and a needle roller. When "liquid glass" is applied with a layer of 3-4 mm on a flat surface, it creates a perfectly smooth coating on which decorative finishing will be easy to lay.
On the lower part of the walls, this material is applied very carefully using a wide brush or a small roller.
Impregnating (penetrating) waterproofing
The action of a water-repellent impregnation for a concrete floor consists in filling all microcracks and pores with it to a depth of 150 ÷ \u200b\u200b180 mm. In addition, waterproofing impregnations can prevent the appearance of cracks and efflorescence on the surface.
A considerable amount of waterproofing impregnations, and their characteristics are somewhat different from each other. Let's take one of them as an example.
"Penetron" mixture
Dry mix "Penetron" consists of three components: special cement, quartz fine-grained sand and special additives made on a chemical basis.
Waterproofing of penetrating action - composition "Penetron"
The mixture is penetrating waterproofing and is able to protect concrete structures from moisture and aggressive environments, as well as to increase their strength.
Active additives present in the mixture form moisture-proof barriers inside the concrete structure, which can make the entire thickness of the screed completely insulated from water, since Penetron is able to penetrate into the base 500 mm from the surface. This indicator is considered the best among similar deep penetration impregnations.
After applying the composition to a moistened surface, the components of the material actively penetrate into the concrete. This one passes thanks to the phenomenon osmosis - diffusion mixture molecules in the structure of concrete. There, as a result of a chemical reaction, the solution crystallizes and becomes insoluble in water. Thus, a waterproof surface is created. The more moistened the base to be treated, the more intense the chemical reaction will be.
The advantage of this method of waterproofing is that the newly formed crystals are included in the crystalline lattice of concrete, becoming a single whole, and such a coating is able to withstand even moisture that hits the surface under pressure.
In addition, the particles of the solution that got inside the structure and did not react, remain and remain free, and when microcracks form and moisture gets into them, they begin to "work" - a process occurs with self-recovery of the surface.
In appearance "Penetron" is a gray homogeneous powder, which should not have foreign impurities and lumps. In the dry state, the density of the material is 1170 kg / m³, which is practically comparable to the density of cement.
Processed by "Penetron" concrete surface acquires the following qualities:
- its waterproofing characteristics are improved three times;
- strength increases by 5%;
- there is resistance to the action of various acids and alkaline compositions on concrete.
The prepared mixture is set in 35 ÷ 40 minutes after mixing. The final solidification time of the solution is 2 hours 45 minutes. Finishing work by waterproofed Surface "Penetron" can be carried out not earlier than 2 weeks after the application of the material.
The composition itself, neither during storage nor after application and reaction with concrete, does not notset no environmental threat, safe for humans.
Application of penetrating waterproofing "Penetron"
- Before applying the penetrating compound, the surface must be prepared - all large cracks, joints and seams are repaired. For their sealing it is recommended to use the Penekrit composition, which is produced by the same company.
In addition, the surface before applying "Penetron" must be cleaned of dirt and old coatings, otherwise there will be no proper effect from waterproofing.
- Further, the surface is covered with a solution of 9% acetic acid and left for one hour.
- After this time, concrete base rinsed abundantly with water, as it should be well saturated with moisture.
- A mixture is being prepared - for 1 kg of dry powder "Penetron" you will need 400 gr. water. The result should be a mass that has the consistency of thick sour cream. An amount of solution is made that can be used in 40 minutes, since after this time, the process begins with grabbing. It must be remembered that it is forbidden to add water to the solution mixed according to the instructions.
- The prepared mixture is applied to the surface - this is done with a wide brush or roller.
Applying Penetron with a brush
Penetron is usually applied to the substrate in two layers - this will guarantee maximum protection against moisture penetration. The second layer of waterproofing is applied to the moistened surface after the first one has set.
- Then, within two weeks, it is necessary to moisten the coated surface, since during this period crystallization of the material absorbed into the concrete will take place.
Consumption of "Penetron" for 1m² when covering in one layer will be from 400 to 550 grams. Accordingly, if you plan to apply two layers, then this amount will double.
It must be remembered that it is useless to apply penetrating impregnation for waterproofing stone or brickwork, foam concrete and other materials - it is intended exclusively for strengthening and protecting concrete surfaces.
In conclusion of the article, it should be emphasized that any waterproofed the surface must be covered decorative trim... For the bathroom, the best option would be ceramic tile.
Knowing the characteristics and technology of applying various waterproofing materials, it will be easier to choose the one that is suitable in all parameters and will become available for independent work.
The bathroom is the wettest room in the apartment. Even special curtains and absorbent mats cannot fully protect the surfaces from water ingress, so the walls and floor in the bathroom need special protection. By taking care of the waterproofing for the bathroom, you prevent moisture from penetrating under the finish to the concrete floor slabs and prevent them from premature destruction, leading to the need for major repairs. In addition, high-quality waterproofing of the bathroom will save you from serious financial losses in the event of a pipe break or leak, from which the neighbors below could suffer. It is not so difficult to make waterproofing - you can easily do all the work with your own hands.
Waterproofing methods
To protect the floor from water in the bathroom, you can use special waterproofing materials. They can be divided into two large groups:
- coating;
- lining.
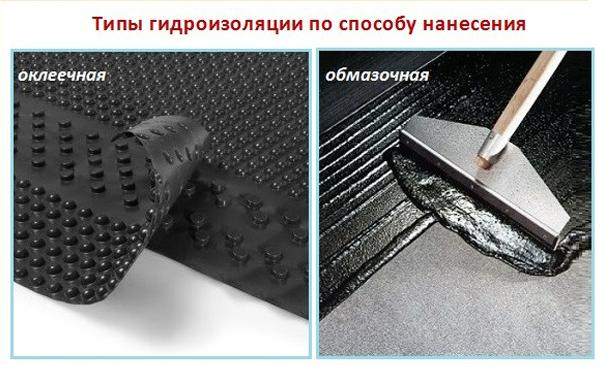
Coating waterproofing
It is a plastic material that forms a waterproof coating after application. Lubricants include:
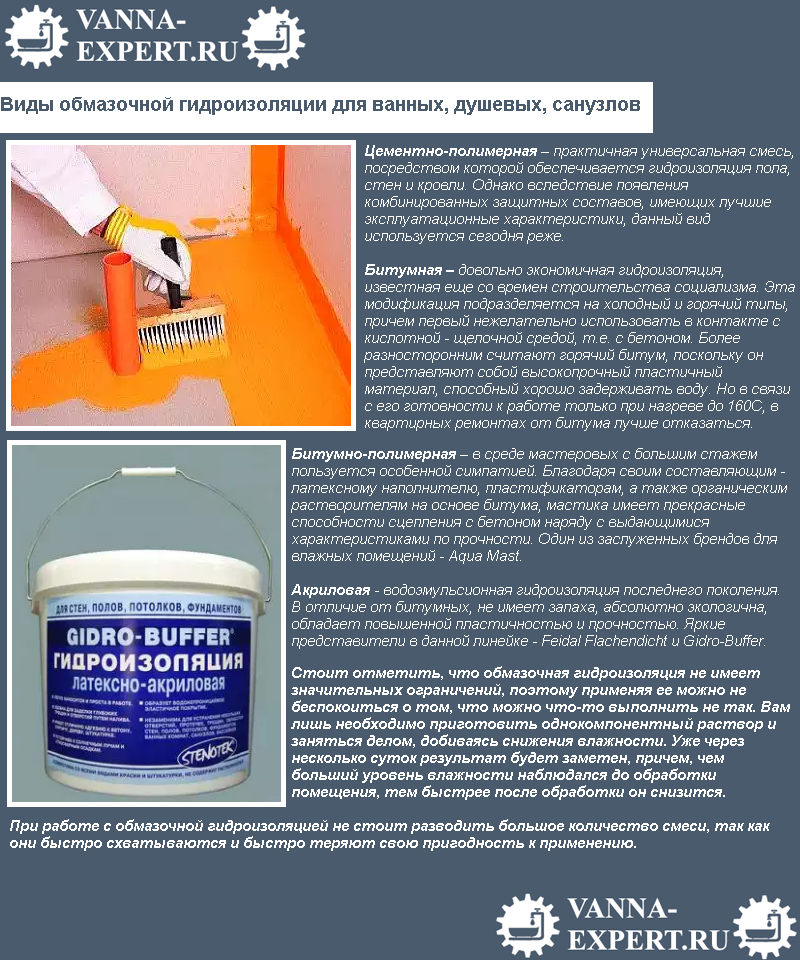
- mastics based on bitumen or polymers with various fillers;
- polyurethane and cement-polymer mixtures;
- liquid acrylic water-based waterproofing.
Advantages of coating type bathroom waterproofing:
- versatility;
- ease and speed of application;
- the ability to protect almost any surface, for example, uneven or vertical.
Disadvantages of bitumen-based mastics:
- instability to temperature extremes, leading to cracking;
- unpleasant smell.
Polymer and polyurethane mixtures have practically no drawbacks, moreover, they have a very aesthetic appearance and are even more convenient in application compared to bituminous compositions.
It is produced in rolls or sheets and, in fact, is the same filled bitumen applied to fiberglass or polyester. This type of waterproofing includes:
- roofing material;
- isoplast;
- ecoflex;
- isoelast and other similar materials.
Advantages of gluing waterproofing materials:
- reliability and durability;
- you can walk on them immediately after installation.
- great care is required in the work;
- labor intensity of the process;
- exactingness to the surface - the differences should not exceed 2 mm.
Foundation preparation
Do-it-yourself bathroom floor waterproofing begins with preparatory work... What should be done at this stage?
- The floor surface must be cleaned down to the concrete base.
- Regardless of which method of applying waterproofing for the bathroom is chosen, the material should be laid on a flat surface. Small depressions can be filled with cement mortar, but in some cases it will be necessary to make a leveling screed.
- The leveled floor is thoroughly swept and washed.
- The surface must be primed without fail. The primer will not only ensure good adhesion of the insulating materials to the substrate, but will also strengthen the waterproofing of the coating.
Important! When choosing a primer, pay attention to its compatibility with the type of waterproofing.
After the primer has dried completely, you can start applying or laying waterproofing materials.
The device of the lubricating hydro-barrier
How to make a DIY waterproofing of the bathroom floor to be of high quality and durable? The algorithm of actions will be as follows:
- The lower corners of the room, where the walls meet the floor, are coated with a layer of bitumen mastic.
- Then a waterproof rubber-based tape is glued to the joints around the entire perimeter.
- The entire floor surface is covered with a continuous layer of mastic. In this case, it is necessary to grip the part of the wall adjacent to the floor to a height of 30–50 cm. It is convenient to use a wide brush or roller to apply the material.
Important! The waterproofing coating is applied in 2-3 layers. After applying each layer, you should take breaks to dry it, each of which should last at least a day.
After the mastic has dried, the surface is primed again, and then the screed is made.
Laying tiles on a cement-adhesive mixture without screed is possible only when using acrylic or cement-based coating materials.
Waterproofing by pasting
Waterproofing in a bathroom by gluing will cost more than using only bitumen mastic. And making it with your own hands will be more difficult. Nevertheless, this method has many fans among the builders.
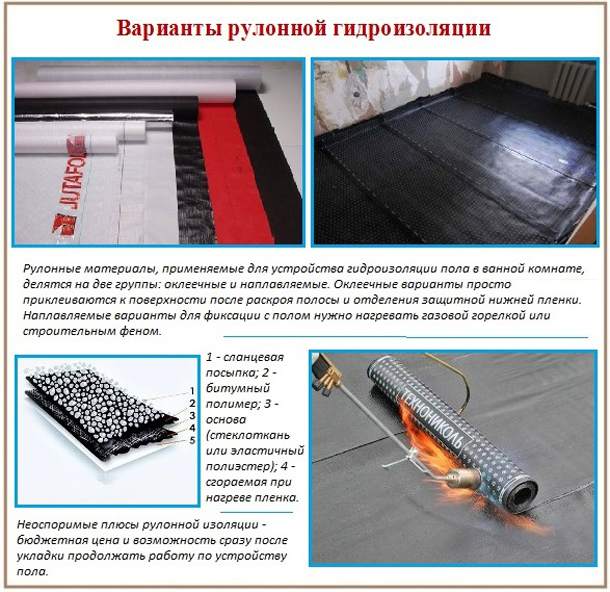
Rolled waterproofing materials can be divided into two types:
- Weldable. For their installation, a gas burner is required, the use of which in an apartment is undesirable.
- Self-adhesive. They fit quite simply, but everything must be done carefully, it will no longer be possible to re-glue in the event of an incorrect location.
Tip: Before installing the roll-on waterproofing for the bathroom, it is recommended to glue all joints with waterproof tape or coat with mastic. For added reliability, you can apply a thin layer of mastic to the entire floor surface, with an approach to walls.
Work progress:
- The material is laid with an overlap. Each subsequent sheet should overlap the previous one by one fifth of the width. In this case, it is necessary to overlap the walls by about 15–20 cm. After cutting the sheet of the required dimensions, the protective film is removed from it. The material is laid on the floor and rolled with a heavy roller. The procedure is repeated for each subsequent sheet.
- The rolled materials to be welded are preheated using a torch, rolling out gradually.
- When laying roll waterproofing, the greatest difficulty is caused by places where pipes and various communications have to be bypassed. The holes for them should be made a little less than the required size to get a kind of side. Also, special rubber seals are used. All places of such joints are additionally coated with mastic and reinforced with a waterproof tape.
After finishing the installation, you can immediately start pouring the final screed under the tiles.
Tip: after laying the tiles, all joints can be sealed before grouting for additional protection - this will allow you to create a multi-layer waterproofing for the bathroom floor with your own hands.
Where else in the bathroom is waterproofing needed?
For high-quality waterproofing of the bathroom, you need to pay attention to the walls, which also often get water. Gradually, moisture will begin to penetrate into the partitions, leading to undesirable consequences. The most problematic areas in need of quality protection are:
- the space around the sink;
- walls adjacent to a bath or shower;
- area near the toilet in a combined bathroom.
The application of waterproofing materials is carried out in the same way as the treatment of a bathroom floor. It is not recommended to use bitumen-based materials for walls. It is fluid and plastic, therefore it is poorly suited for vertical surfaces and is not able to provide high-quality adhesion of the tile to the wall. It is better to use cement-polymer mixtures.
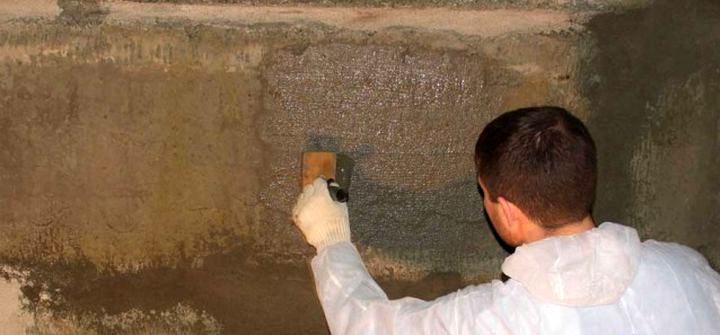
Tip: in order for the ceramic tiles to better adhere to the wall, you can partially drown a reinforcing mesh in a layer of waterproofing material, which will help ensure good adhesion.
Bathroom waterproofing can be done with high quality by hand. It does not require special skills and special tools, but it will help protect structures from the destructive effects of moisture and will avoid serious financial costs in the future.
(votes: 1
, average rating: 5,00
out of 5)
Waterproofing, produced by penetrating compounds, is based on the formation of a protective layer in the thickness of the substrate to be coated, and not on its surface. It is produced by special cement-sand mixtures, which contain chemical additives. Thanks to these components, insoluble crystals are formed in the structure of the cement, filling all the pores and cracks, and creating a durable waterproof layer.
Penetrating compositions are used mainly for treating walls, such a hydro-barrier will well prevent the penetration of moisture into the thickness of structures. For the floor, such waterproofing will not be enough, it may not cope with flooding big amount water.
Liquid glass
It is convenient and practical to use liquid glass for waterproofing the bathroom floor. Containing potassium or sodium silicate, this mortar is a tough and durable coating. Liquid glass, due to its fluidity, penetrates into small pores and cracks, filling them, and is able to provide excellent waterproofing. It has excellent antiseptic properties, so the formation of mold or mildew is minimized.