29 Aug 2016
Floor waterproofing is necessary not only in a private house. There are times when you can't do without it in apartments. If the apartment is on the ground floor above the basement, moisture and mold from the underground space can rise up the walls.
In this case, the floor will be constantly damp and cold, and over time it may even begin to crack and collapse. To avoid these troubles and the constant smell of mold in your apartment, for the first floors it is necessary to arrange the waterproofing of the floor. But there are times, especially in old houses, when even on upper floors the floor and walls are saturated with moisture that penetrates through cracks from the street. In this case, it is also necessary to take care of reliable waterproofing in order to avoid the appearance of mold in the apartment, which is very dangerous to health.
As for private houses, waterproofing the floor in them is mandatory, even if it happened in accordance with all the rules and in compliance with all technologies.
Types of floor waterproofing
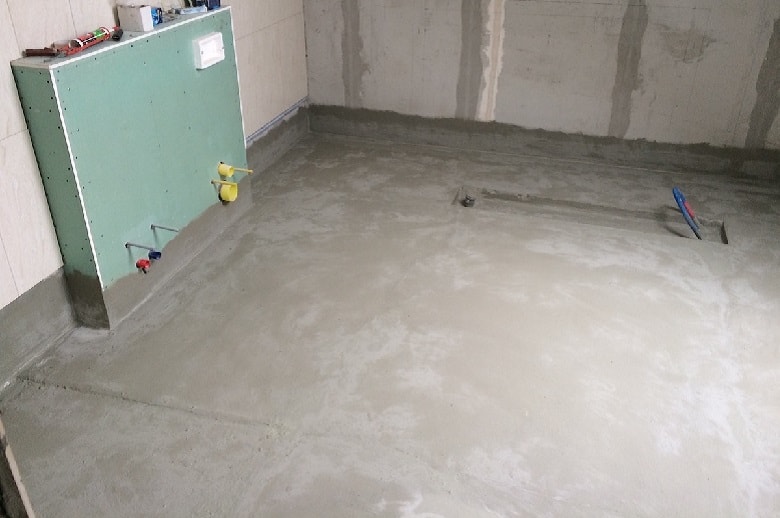
Materials for creating reliable waterproofing are selected taking into account what kind of room it is, how it will be used. In any case, these measures are aimed at creating a dense and reliable waterproof layer on the floor, which also has water-repellent properties. Thanks to this, the floor will be reliably protected from decay and destruction.
Waterproofing according to the field of application is:
- outward
- internal
Depending on the main water-repellent substance, it is divided into:
- bituminous
- polymer
- bitumen-polymer
- based on mineral components
Waterproofing the floor in the house can be done using the following materials:
- film
- roll
- membrane
- penetrating
- lining
- painting
- powder
- plastering
- coating
Film waterproofing materials
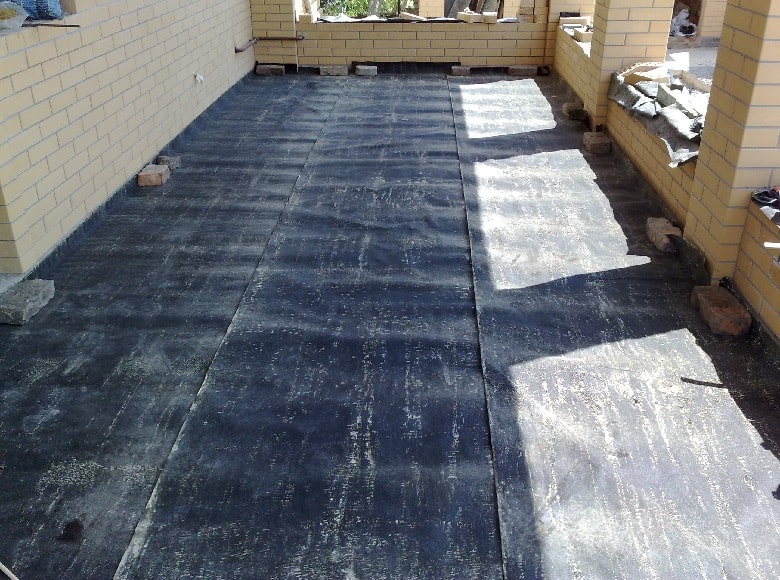
The most popular and familiar to everyone are roofing material, roofing felt and glass roofing material. In the last century, almost everything waterproofing works were carried out with the help of these building materials. They continue to be used in modern times, using not only floors, but also roofs and foundations for reliable protection from moisture. These materials are dense cardboard or fiberglass, which are impregnated during their manufacture with bitumen and basalt chips. The result is a well-known roofing material or roofing felt.
DIY waterproofing with the help of such materials it is quite possible, because no special equipment is needed for their laying. It is very important to ensure that there is no large distance between the joints of the roofing material. Ideally, they should be soldered with a torch.
There are modern film materials that are used for waterproofing. These are multilayer polymer membranes that have, among other things, excellent thermal insulation properties. If waterproofing of a concrete floor is required, polypropylene, polyethylene or polyvinyl chloride films are most often used, all of them are available in rolls. They are laid before starting work on the creation of a cement-sand or dry screed.
Waterproofing mastic
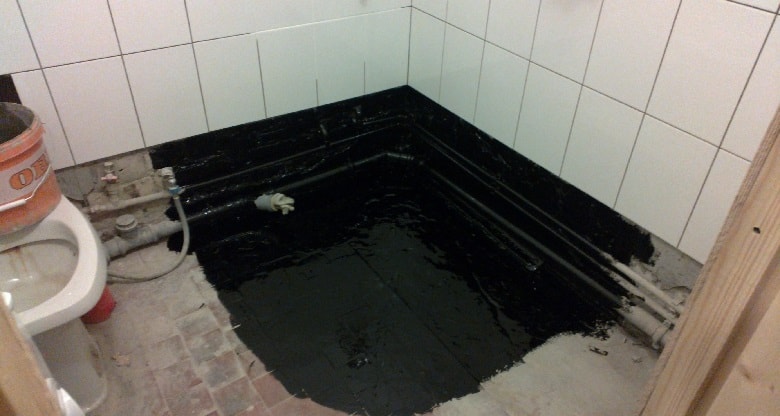
If you are looking for a way to make waterproofing inexpensive and quickly, this building material is right for you. Mastic is a plastic adhesive compositionbased on liquid rubber, bitumen, resins, plasticizers and polymers. It is often used in residential areas to create a dense waterproof layer on the floor. It is also suitable for the processing of joints in bathrooms, kitchens, swimming pools, saunas.
When choosing a mastic, pay attention that they are hot and cold. This material is good because, in addition to forming an elastic and dense waterproof film, it fills all cracks and pores in the material from which the floor is made.
Waterproofing materials, liquid water-repellent
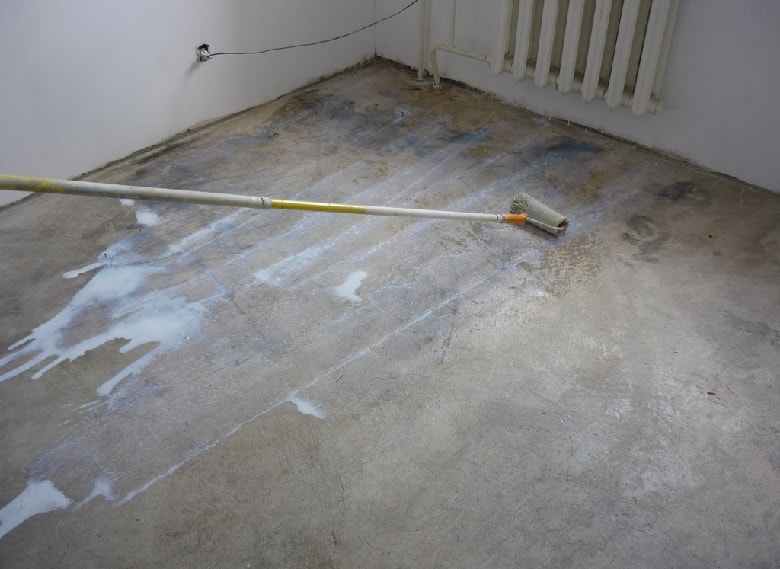
These include all kinds of paints, primers, varnishes, impregnations, injection compositions for local use, which, after hardening, create a dense water-repellent film. If breathable waterproofing of the floor screed is required, there are modern impregnations that penetrate deep into the pores of the material. After drying, they form air-permeable crystals that are completely impervious to water.
If you need waterproofing of a wooden floor, you need to select liquid materialsthat are designed specifically for wood. As a rule, they protect not only from moisture, but also from the development of fungal microorganisms, as well as bark beetles.
Powder waterproofing materials
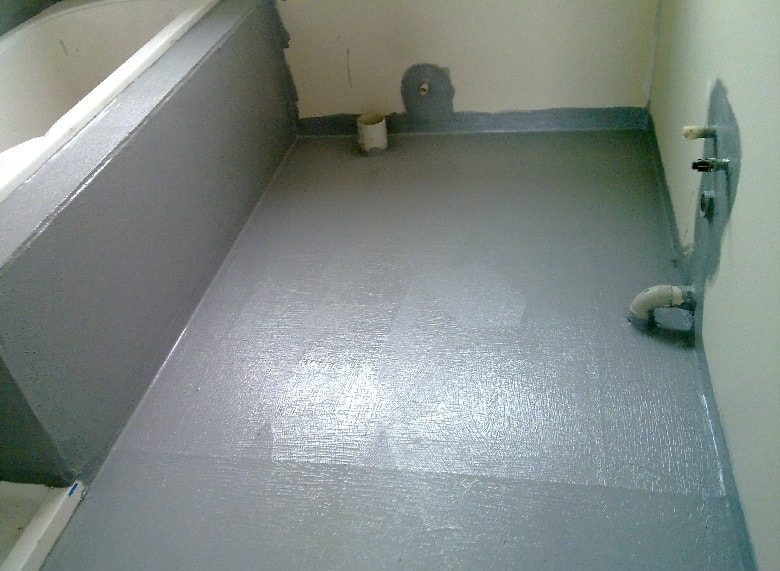
These are all kinds of dry mixes based on cement, glue, plasticizers and binders. With their help, dIY waterproofing, it is only important to carefully read the instructions and follow the application technology. To prepare such a mixture, water must be added to it immediately before starting work. It is only important to observe the indicated proportions, if you are trying to save money and pour more water to get more mixture, the result may disappoint you.Such waterproof mixes are suitable for creating concrete screeds not only in residential premises, but also in basements and bathrooms.
How to make waterproofing correctly
Whichever material you choose for waterproofing, for everyone there is general rule... In all places where the floor joins the walls, as well as with other protruding structures, for example, columns, the waterproofing layer must necessarily rise 30 cm above the floor level without interruption.
How to properly apply liquid waterproofing
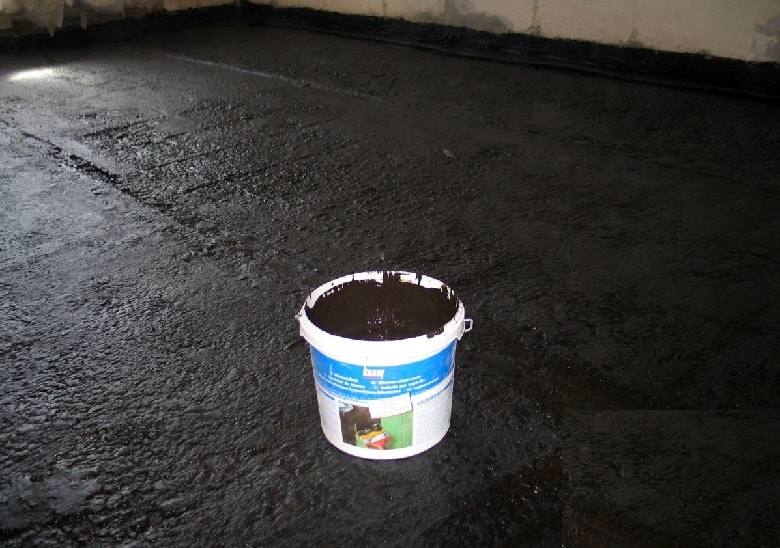
The application technology depends on which material you have chosen, namely, impregnating or cast. Floor screed waterproofing with the help of cast materials, it can well be done independently. An even layer of bituminous or polymer solution is applied to the surface, which, after hardening, will turn into an elastic and dense waterproof film. Bituminous mastic must be preheated to + 120-140 degrees. Then it is poured onto a floor thoroughly cleaned of debris and dust. Using a spatula, it must be well leveled so that the layer is uniform.
Cast waterproofing under the floor is used in cases where it is necessary to protect a monolithic base from moisture before sand is laid on it. cement screed... For reliability, several layers of waterproofing material will be required, if necessary, they can be reinforced with fiberglass or metal mesh. The thickness of the resulting waterproof film should be from 5 to 15 cm. Liquid waterproofing materials can be applied with a brush, but it is very convenient to do this using a spray.
Impregnating floor waterproofing consists in applying special impregnations to the floor surface. It is best to use a spray in this case to evenly distribute waterproofing material all over the floor. But you can also do this with a brush. Depending on the material from which the floor is made, an impregnation with the required penetration depth is selected. After it hardens, a seamless monolithic waterproof membrane is obtained. This modern way waterproofing is very popular now, so it is provided in many already.
Creation of waterproofing using coating and coloring materials
The cast method of waterproofing involves working with heated materials, for example, mastic. The painting or coating method differs in that cold rubber-epoxy or polymer materials are used, as well as varnishes or paints. The composition is applied to the surface using a tool, depending on its viscosity. For this, both ordinary brushes and rollers are suitable.
Whichever material you choose to create a coating or painting waterproofing, remember that it must be applied in a thin layer of about 2-3 mm, but evenly. The result is an excellent waterproof layer that will also serve as antifungal and anti-corrosion protection. The only drawback is the fragility of such waterproofing, it will need to be updated every 5 years.
How to make waterproofing with gluing materials
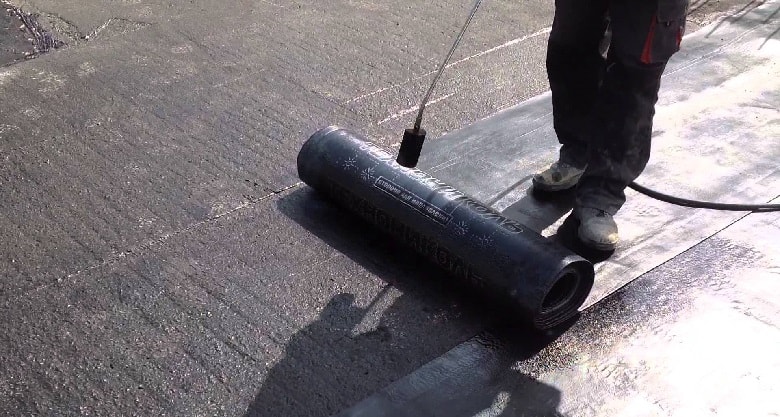
When creating such waterproofing, the selected roll or sheet waterproof building materials are glued to the floor, which is previously well cleaned of dust and treated with a primer.
There are three ways to create a waterproofing coating:
- you can make a simple flooring of materials on the surface, this method is suitable for a dry or cement screed, you can also lay materials under a plywood floor. Waterproofing a wooden floor can also be done in this way.
- Roll materials can be fused to the surface using a torch. This method requires strict adherence to safety standards so that a fire does not happen. It is not recommended to do it yourself; it is better to invite specialists to perform such.
- Roll waterproofing can be glued to the floor using mastic or special glue.
Modern roll-up waterproofing is produced with an adhesive layer, so it is very easy to install it. If you chose materials without such an adhesive layer, you need to buy polymer-bitumen mastic for gluing them. When choosing it, be sure to look in technical characteristics melting point. It is necessary to select a mastic in which this indicator is at least 20 degrees higher than the maximum possible temperature in the room.
Remember that all types of waterproofing lining are very sensitive to tensile and shear loads. Therefore, it is most often used for concrete and brick structures.
Waterproofing with plaster
![]()
This is an old way of protecting the floor from moisture, but it is still used today, as the mixes for plaster have improved. Now you can pick up a mixture in which there will be a high concentration of water-repellent additives, this is ideal for waterproofing.This method is good because with the help of a plastic solution you can quickly and reliably fill absolutely all cracks and crevices in the floor, as well as get rid of irregularities. It is convenient to apply it with a spatula or brush.
Waterproofing with plaster is suitable for wood, concrete, stone, tiles, it can even be applied over paint. There is also a filling mixture for waterproofing, which is considered a type of plaster. It is evenly scattered over the floor, absorbing moisture, it hardens and forms a durable layer.
It takes at least 14 days for the waterproofing layer made with plaster to completely solidify. Care must be taken that it does not dry out, otherwise cracks will form on it. It is very important to moisten it with water every 3 hours during the first days after laying the plaster layer; it is convenient to do this with a sprayer. After that, it is necessary to moisten the layer at least twice a week.
Features of waterproofing warm floor
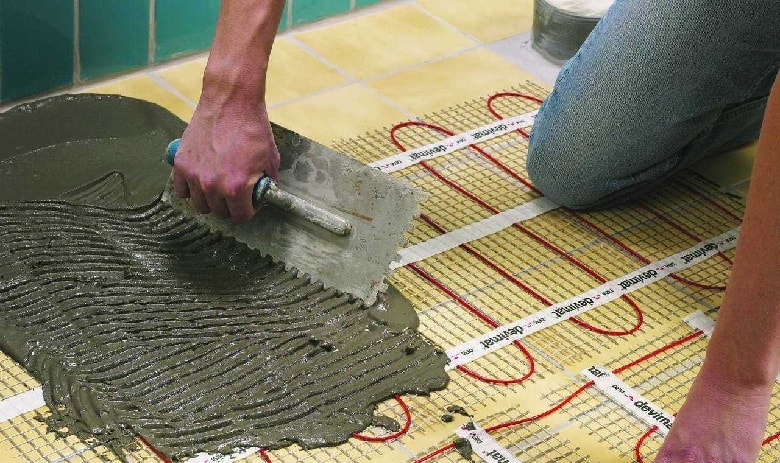
It is very important to observe the technology of creating waterproofing, as it is necessary to ensure reliable protection from water to all elements of the warm floor. Before pouring the screed, you need to treat the base with mastic. You can also use roll materials for this, while it is important to seal up all the seams with bituminous mastic, and also overlap them on the walls of at least 30 cm.
There is also an alternative option. Can be done coating waterproofing, using for this bitumen-polymer, cement-polymer or traditional bitumen mastic. After complete solidification of such a waterproofing layer, you will need to fill cement-sand screed, on which you can put the finishing floor covering. The result is a reliable and durable waterproofing that perfectly protects all elements of the warm floor from corrosion.
Owners country houses try to use the area allocated for construction as efficiently as possible. This is due to the high cost of land in the suburban area, and the desire to reduce the cost of the project, since it is more profitable to build housing in several tiers than to scatter several one-story buildings, which have the same usable area in total. For this reason, in most cases, a basement is made, the outer walls of which is the deepened foundation of the house, made of reinforced concrete monolith or blocks.
In order for the basement to end up with a full-fledged comfortable room with an acceptable microclimate, it should be protected from ground moisture, for which the foundation is waterproofed with our own hands. You can hire someone for these purposes, but if there is an opportunity to save a little at this stage of construction, why not. From the article, you will learn what is the essence of protecting the base of a house from moisture, and how to waterproof the foundation with high quality, inexpensively, while doing it yourself. To consolidate the information received, you will be offered to watch a video on this topic.
Why waterproofing the base of the building?
Why do you need to protect the foundation wall from moisture. Those who are building on wetlands will not understand the question. However, in many localities, underground waters are deep enough; moreover, atmospheric precipitation during the year cannot be called abundant. Is it worth it in this case to make the arrangement of water protection.
It's worth it, and here's why. First, no one can reliably predict how the bed of surface soil currents may change in the near future. There is no guarantee that in a year or two, water from below will not come up in an absolutely dry area. What awaits the owner of the building in this option? You need to forget about the basement, or deal with waterproofing with an already functioning building. And this is very laborious and expensive, besides, we are not talking about doing it yourself.
Secondly, the climate is very changeable now. Where the rains were pouring twenty years ago, now you won't get them, and vice versa. It is not worth expecting that it will always be dry. So, it is much more profitable and convenient to protect underground walls during the construction phase, so as not to return to this problem later.
What does the complex of waterproofing works include?
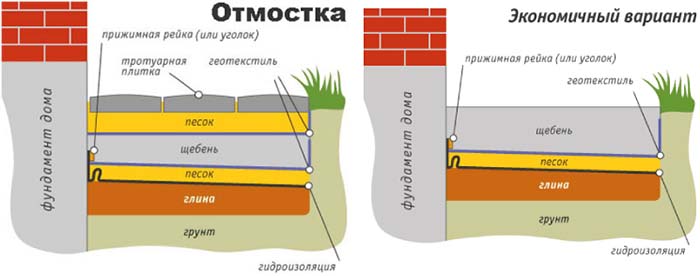
High quality moisture protection underground structure assumes a complex of technological operations aimed at hydrising all surfaces in contact with the ground. Moreover, it is necessary to provide for water protection from water coming from below, as well as from atmospheric moisture. A full range of waterproofing measures consists of the following technological stages:
- horizontal moisture insulation;
- vertical protection against excess ground moisture;
- arrangement of the drainage system;
- installation of high-quality blind area along the perimeter of the building.
The creation of a reliable horizontal hydro-barrier will protect the basement from water coming from below. Groundwater sometimes exerts significant pressure on the basement floor, so the basement floor and basement base must be protected carefully.
Vertical waterproofing is applied to the outer foundation surface and is designed primarily to be a barrier to excess ground moisture that accumulates due to precipitation. When groundwater rises above the base of the structure, a vertical hydro-barrier created using standard technology will be ineffective in this situation. To drain water, drainage is required.
If construction is carried out in a region characterized by heavy rainfall, 50% of the success of vertical moisture protection depends on filling a reliable blind area, which would divert sedimentary water away from the outer foundation surface. So this stage of construction should be given due consideration if there is a desire to keep the basement walls dry. Now we will consider the most common and effective technological methods that can be applied to carry out work on each of the listed waterproofing measures.
Horizontal protection against moisture
It is possible to create a horizontal waterproof cushion, which is the base of the basement floor, before pouring (assembly from blocks) of the foundation, or after. It is better to do this before, as there will be no need to waterproof the foot of the foundation wall. To work, you need the following.
Materials and tools
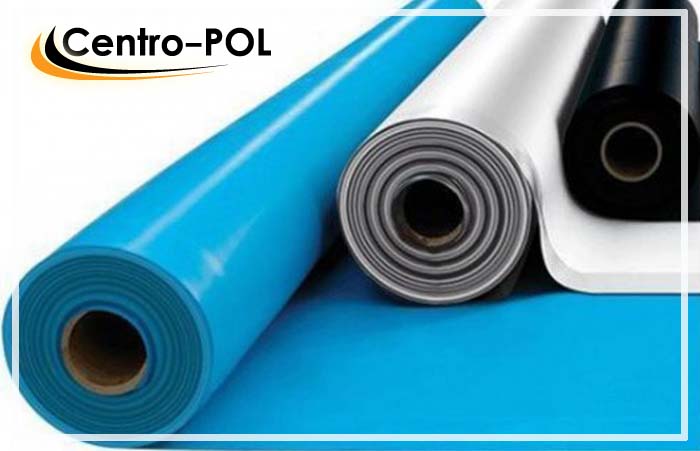
As a hydro-barrier, you can use a thick continuous polyethylene film, or roll waterproofing material, hydroglass insol, for example. As an aid, bitumen or mastic based on it is applied. In addition, you will need:
- concrete, or ingredients for its preparation (fine gravel, sand, portland cement);
- coarse gravel;
- river sand or fine screening (for bedding);
- reinforcement (6-8 mm) or strong reinforcing mesh for the screed.
The tool should be prepared as follows:
- mechanical or manual ramming;
- concrete mixer;
- gas burner (if hydroglass insulation);
- welding machine or tying wire (if fittings).
Sequence of work
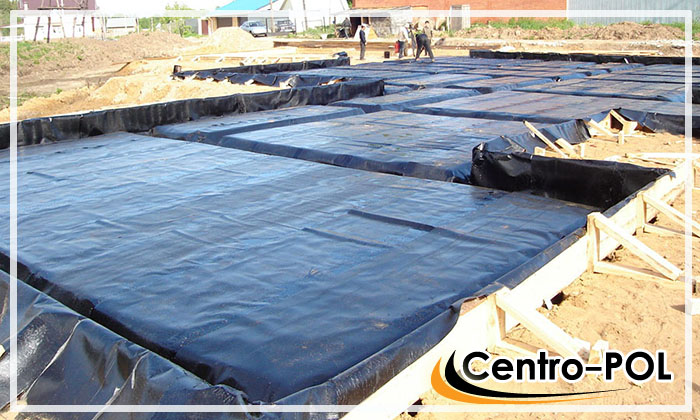
As a result of the work carried out, a horizontal reinforced slab base should be obtained, with an inner moisture-insulating layer protruding about half a meter beyond the outer perimeter of the foundation. That is, the installation of the base of the building will take place on a ready-made slab base protected from water suitable from below.
- The bottom of the pit is leveled and compacted as much as possible;
- Backfilling is made, first with gravel (about 10 cm), then with sand (about 5 cm), after which a rough layer of concrete is poured (up to 10 cm). For greater reliability, you can reinforce the rough slab base;
Important! Before pouring concrete, be sure to saturate the backfill with plenty of water. If this is not done, the moisture from the cement mortar will quickly go down, which will cause the strength of the concrete to be minimal. Moreover, it will be very problematic to level the solution that has lost moisture.
- After the first layer of concrete has set, it is possible to lay the film, if it is provided as a hydro-barrier. In the event that it is planned to apply bituminous mastic in order to glue the roll material, it is necessary to wait for the concrete to dry;
- The polyethylene sheet is laid in one or two layers, after which the reinforcing frame is mounted and poured finishing screed for the entire area of \u200b\u200bthe slab base (preferably for lighthouses);
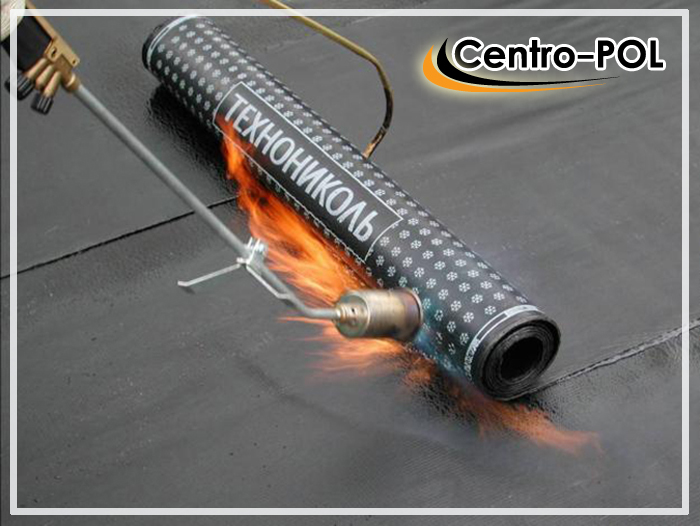
- Installation of rolled waterproofing is done as follows: apply molten bitumen or mastic to the dried base. Application is done with a stiff brush. After the material has set, hydroglass insulation is rolled out continuously (roofing material can be used). During installation, the material is heated with a gas torch or blowtorch and glued to the substrate. They are overlapped tightly, the joints are warmed up and immediately pressed down with a sliding motion. For this, a device in the form of a poker is used.
Important! Installation of a horizontal moisture-proof base can be done after the construction of the foundation structure. The simply described method makes the whole complex of work, which includes waterproofing the foundation with your own hands, less costly, both in terms of material costs and in terms of the laboriousness of the process.
Vertical moisture protection
This type of work involves the application of a hydro-barrier layer on the outside of the foundation wall, which would protect the concrete structure from excess ground moisture. The easiest in terms of self-installation, while it is enough effective method, is the application of roll waterproofing materials. There are several other types of products used for similar purposes, but some of them are ineffective (hydrophobic plaster, for example), or very expensive and requiring knowledge of technology (how to apply), as well as special equipment for this.
In order to clearly understand the rules for waterproofing the foundation, it is recommended to watch the video below, where you can not only see how to apply a hydro-barrier layer, but also hear helpful advice and a description of the nuances of the work from an expert builder. Also in the video, the specialist explains the purpose of the drainage system. We will further figure out how drainage for drainage groundwater build yourself.
How to make a drainage system?
The installation of drainage communications is usually carried out by specialized teams, although, with the necessary information and a great desire, such work during the construction phase can be done independently. Of course, you will have to hire someone to build a drainage well, but laying the system itself is not so difficult.
Tools and materials
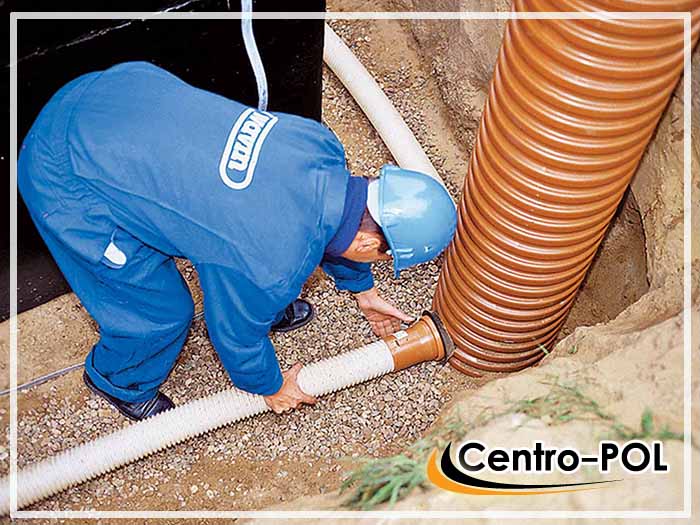
You will need a simple toolkit associated with conducting earthworks (shovels, crowbar, perhaps a puncher will come in handy somewhere). You can use the water level to determine the slope. The following materials will be needed:
- large crushed stone or gravel;
- special perforated drainage pipe;
- pipe fittings.
Work order
The underground drainage system is equipped after the creation of the slab base and the construction of the foundation wall. First, you need to determine the natural slope and, at the lowest point, plan a place for the installation of a sewer. After work, they are performed in the following sequence:
- Dig a trench about 25-30 cm along the perimeter of the foundation (with a bayonet). The width of the recess is arbitrary, within the range of 50-80 cm.
- The trench is covered with gravel to a level that is 10 cm below the slab base (or the base of the foundation, if the horizontal waterproofing was done after the foundation of the house).
- A drainage pipe is laid in the center of the trench along the gravel bed. It is necessary to ensure that the slope from the highest point to the drainage well is constantly maintained along its course.
- After laying the pipe, another layer of coarse gravel is poured, which will protect the drainage pipeline from the pressure of soil layers that will be filled up later.
Now, in the event of an approach of groundwater, they will be discharged into the constructed water intake, not reaching the level of the base of the base. Water can be pumped out of the drainage well at any time.
Upper waterproofing of the foundation (blind area)
The screed around the building protects the underlying foundation surface from excess moisture during heavy rains or when snow melts. An ideal option when a clay castle is created under the blind area to the depth of the base of the building. However, clay tends to condense for a very long time, which can take 2-3 years. Therefore, now few people want to equip a belt made of clay.
Important! Before filling the blind area, you should make sure that the soil filled up around the base of the building is completely compacted. If this does not happen, the screed along the perimeter of the house will crack and eventually collapse completely.
How the blind area is made
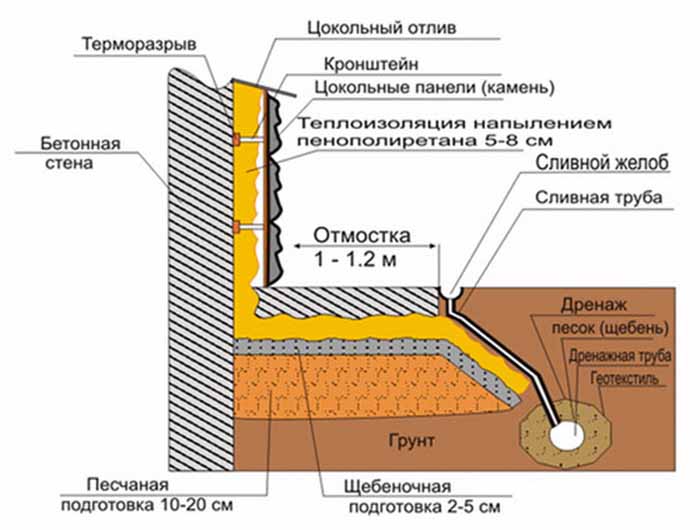
To create a waterproof belt, you will need the same tools as for arranging the screed (a trowel, as a rule, a plaster float), as well as everything you need for earthwork. The materials you will need are:
- concrete;
- crushed stone;
- sand;
- mesh for reinforcement;
- boards for the construction of formwork.
The order of work is as follows.
- A trench is formed around the perimeter of the structure up to 20 cm deep and up to 1 m wide. The soil is carefully compacted;
- The deepening is poured with gravel so that about 8 cm remains to the ground level. A leveling layer of sand is formed on top, slightly missing the upper edge of the trench;
- A vertical formwork is installed along the outer perimeter of the trench;
- Reinforcing elements are laid, the bedding is saturated with water;
- Between the basement of the building and the formwork, concrete is poured and leveled. In order for the surface to be even, after partial setting, it must be rubbed with a plaster float.
Important! When arranging the blind area, you need to control so that there is no slope towards the building. If laying is planned after paving slabs, you need to achieve a horizontal surface. If concrete surface, - the final version, it makes sense to make a bias from the house.
Obviously, there is no unequivocal and comprehensive answer to the question of how to properly waterproof the foundation, since reliable waterproofing of the building base includes a whole range of measures, each of which plays its own role. It is possible to hope that the walls in the basement will always be dry, only if all the waterproofing works provided for by the technology are performed.
A basement can serve many functions country house - technical room, food storage, underground garage... The trouble is if groundwater begins to penetrate into it. It is necessary to make protection against leaks. If such work was not carried out during the construction phase, they can be done at any time from inside the basement.
Why do you need an internal basement waterproofing
If the house is built in an area where groundwater flows shallowly, then in a room located below ground level, flooding is possible. This situation occurs when the protection is poorly made. It is possible that the aquifer has changed its level. It is urgent to correct the situation. If you do not waterproof the basement from the inside from groundwater, it is possible:
- the appearance of a fungus;
- mold development;
- reinforcement corrosion;
- destruction of the foundation;
- spoilage of products;
- violation of the microclimate throughout the house.
Types of waterproofing
The safest thing is to protect it from the outside, then the rising liquid will push it up to the building, providing reliable insulation. If it is necessary to block from the inside from seepage through small pores or cracks, two types of insulation are used - vertical and horizontal. The quality of the barrier is affected by errors during work:
- processing only walls and floors, without overlapping;
- lack of natural ventilation.
Basement wall vertical waterproofing
If the basement walls need to be waterproofed from the inside from groundwater, a vertical method of protection is used. It is used in a situation where liquid seeps through cracks, the joints of the foundation, while the walls of the basement are level with the aquifer. For a vertical barrier against flooding, the following methods are suitable:
- membrane;
- injection;
- coating - applying bituminous mastic;
- plaster with a polymer composition;
- barrier with liquid glass, rubber.
Horizontal
If the basement floor is at the level of the aquifer, liquid can seep into the room, and it is necessary horizontal waterproofing basement floor. It is additionally performed along the walls to a height of 30 centimeters. This protects the basement from the capillary penetration of moisture, the rise of groundwater. Such isolation from leaks is performed:
- roll method;
- by filling with polymer materials.
What materials are used
There are a huge number of materials for insulation. Often, in addition to ground seepage, there is a leakage of communications. When choosing materials, it is necessary to take into account that penetrating protection will save from ground, melt water, capillary flow. In the case of communal accidents, mastics and coating emulsions are effective. Such materials are effective against leaks:
- roll insulation;
- penetrating compounds;
- liquid rubber;
- membrane film;
- liquid glass.
Roll insulation
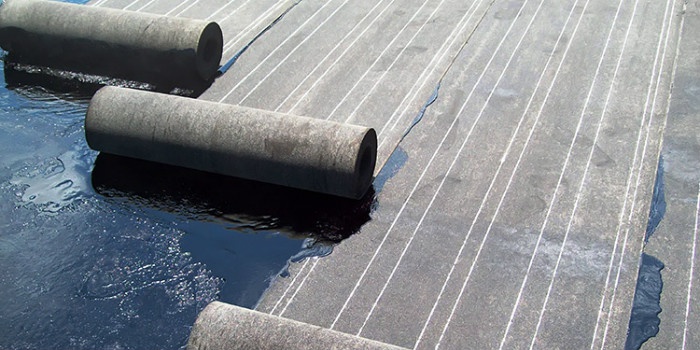
Basement waterproofing from the inside from groundwater, when floor protection is necessary, is done in a roll method. The bitumen-based material is glued with an overlap on the surface, the joints and seams are melted with a blowtorch. Bituminous mastic is used as an adhesive. Subsequent work is carried out depending on the flood situation. If the water rises often, it is coated on top with bitumen in 4 layers, if rarely, two are enough. After drying, a concrete screed is made and the building can be operated. Roll materials for protection:
- roofing material;
- hydroisol;
- linocrome.
Basement penetrating waterproofing
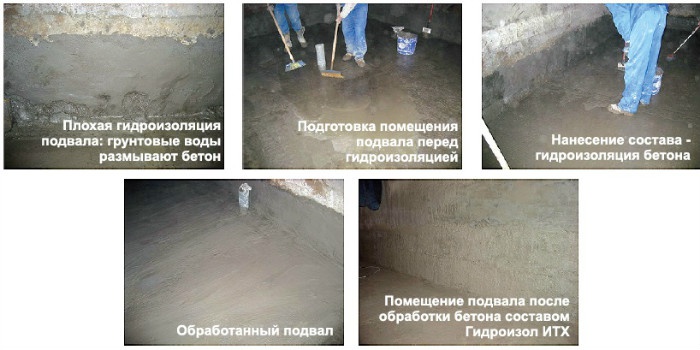
This method is effective when there is a cellar in the house with high groundwater. The basement walls are waterproofed from the inside with a material made from a mixture of cement, fine sand and chemically active components. The composition penetrates 100 mm deep due to its viscous properties, and then crystallizes. This method of protection:
- prevents the rise of liquid through the capillaries;
- reduces corrosion of structures;
- increases frost resistance;
- can be used in rooms with food.
Membrane
Effective waterproofing of the cellar from the inside, made by a membrane method. Lightweight film 2 mm thick does not overload the foundation, has an adhesive layer, and is easy to use. The following types of membrane coatings are used:
- PVC - prevents the penetration of groundwater, fireproof.
- TPO membranes are based on propylene and rubber, the disadvantage is their high cost. Used to protect the bathroom, kitchen, toilet;
- EPDM membrane made of synthetic rubber. They can protect the premises at low temperatures.
Injection
Highly reliable injection insulation not only protects surfaces, but also the entire structure of the building. The execution process is very laborious - it is required to drill a huge number of holes, into which a special composition is pumped with special injectors. The work uses mixtures:
- cement - increase strength characteristics;
- polyurethane - push liquid from the inside during expansion;
- epoxy - used only in the place where it flows;
- methyl acrylate - penetrate deeply, fill cavities.
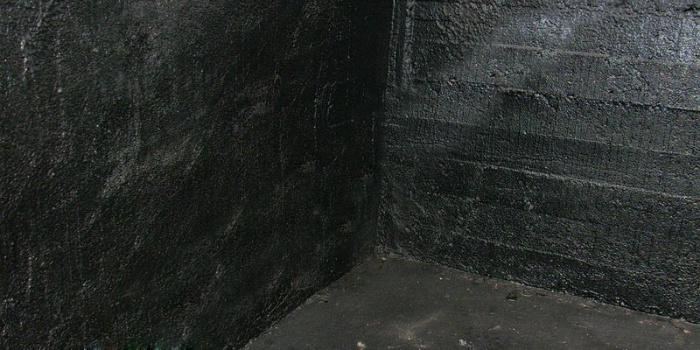
Liquid rubber
If it is necessary to insulate the basement floor, it is good to use liquid rubber. Made on a bitumen base with the addition of latex, it creates a strong film on the surface. The elastic coating can also be applied by coating to walls and ceilings. Enough layer 2 millimeters thick. The isolation technology is as follows:
- a special composition is applied to the cleaned surface for better adhesion;
- coat the surface, filling joints and cracks;
- dry;
- plaster on top to press the film, otherwise the surface under it may collapse.
Liquid glass
The waterproofing of the basement from the inside from groundwater using liquid glass differs in ease of application and low material consumption. Before application, the composition is diluted with water. It fills the pores, crystallizes when solidified, due to this:
- improved resistance to fungi, mold;
- increased structural strength;
- there is no moisture absorption;
- increased resistance to mechanical stress;
- there is good protection for decorative coatings.
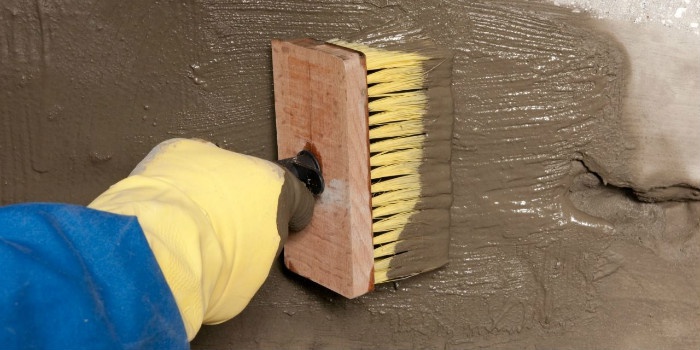
Basement waterproofing from groundwater by Penetron
How to waterproof the basement if moisture appears on the walls? A high-quality coating is guaranteed by the Penetron product. The dry mixture is diluted to a liquid state with water and applied to the surface with a brush. Penetrates into walls 200 millimeters, prevents liquid penetration, but allows steam to pass through. Can protect walls made of stone, brick, withstand any pressure of the aquifer. Features of the solution:
- convenient coating technology;
- does not require special preparation of the walls;
- environmentally friendly;
- applied only to a damp surface in 2 layers.
How to properly waterproof the basement from the inside? You need to adhere to certain recommendations:
- determine the depth of the groundwater;
- inspect the room;
- determine the places where water flows;
- note the presence of cracks;
- pump out water, if necessary;
- clean from dirt, dust;
- expand cracks;
- to treat the surface with a primer to improve adhesion;
- choose the material and method of protection;
- perform isolation;
- dry the room;
- equip a ventilation system.
Prices for waterproofing the basement from the inside
Do-it-yourself basement waterproofing from the inside will cost inexpensively. First you need to choose a method of protection suitable for your premises. Then find the materials required for work in the catalog and buy in the online store. It is better to entrust the performance of insulation of basement rooms from moisture to representatives of specialized firms in the city. The spread of prices in rubles is:
- surface insulation "Penetron" - 900-1400 / m2;
- filling of interblock seams by penetration - 1700-2100 / m / p;
- surface injection - 22000-2500 / m2;
- liquid rubber processing - 900-1200 / m2.
Video: how to waterproof a cellar from groundwater
To maintain the integrity of finishing materials and other elements of the floor structure, it is waterproofed. The absence of moisture in protected objects will prevent the development of fungus, corrosion on them, and help to increase their service life.
Important features of floor waterproofing
If the housing is located in an old house, where repairs have been made several times, then the most successful solution would be to dismantle everything flooring down to the concrete screed or base. If the floor is equipped wooden floors, and they were installed a long time ago, only an expert can establish the need to dismantle them, since they can be decrepit, which can make new repairs short-lived.
The floor must be leveled. To create an even base, a special repair compound is used, sometimes self-leveling mixtures are used. There is no need to use expensive waterproofing materials to seal irregularities, small cracks. However, the floor should be as flat as possible so that the owners have the opportunity to use floor coverings sold in rolls, or quickly install the floor using a polymer filling composition.
If the waterproofing of the floor is part of a large-scale repair, during which redevelopment will be made, you must first dismantle all unnecessary partitions, protrusions, and only then carry out the waterproofing. The layer must be applied hermetically, covering the entire floor or all possible parts of it. Excess items and old structures will not allow the coating to be fully applied, therefore, they can greatly reduce the quality and usefulness of waterproofing in general.
You cannot save on material for waterproofing and ensuring a high level of work. The purpose of the protective cover is to keep moisture out of the room, which is necessary to prevent the accumulation of dampness, deterioration of qualities building materials... For residents of apartments, this aspect is especially important, since if a significant amount of water leaks, for example, in the bathroom, a quarrel with neighbors can occur, there is a possibility of imposing obligations to pay compensation for damaged furniture.
The floor in the bathroom and kitchen, according to building standards, should be located a few centimeters lower than in other rooms. Moisture is retained in a limited area, allowing it to be quickly eliminated. To comply with this parameter, a step is made, sometimes they are limited to stuffing a special border.
How to choose the right material for waterproofing
Depending on the type of floor, the reliability of waterproofing and the method of its application, there are options:
- materials sold in rolls or intended for gluing;
- compounds and mastics, for the application of which you will need a brush or roller;
- pouring mixtures;
- backfill substances;
- penetrating waterproofing, at the same time protecting the floor from aggressive environments;
- plaster;
- polymer compositions for spraying.
For the installation of waterproofing with your own hands, the most suitable are considered coating materialsthat can be applied quickly, but will have to wait for a maximum of several days to dry, and plastering options ready for further flooring the next day. It is more difficult to use roll materials, so non-professionals should first learn how to lay such waterproofing, and then carry out large-scale work in their own home.
Master the technology of use penetrating waterproofing quite simple, however, you will have to read the instructions and strictly follow the instructions covering the correct distribution of the material, care of the drying coating, and follow all the prescribed procedures. In an apartment, the use of penetrating compounds is undesirable, since the base of the floor should be highly moistened before applying them. Such an event can cause water leakage to neighbors and the corresponding proceedings.
Bulk waterproofing used if there is a possibility of creating a screed. It should be remembered that its layer will be quite thick and can visually reduce the height of the ceilings after repair. It is easy to sprinkle the granules on the floor in an even layer and fill them with water, the amount will be indicated on the package. After getting water, the granules will turn into a paste that resembles a gel, it will prevent further flow of water.
They do not need protection from water, since they themselves are not able to retain it. These are often referred to as 3D floors. They look beautiful, it is rather difficult to create them yourself. It is necessary to follow the instructions for application written on the packaging, which can be misunderstood without professional explanation, however, with care and patience, you can create an unusual coating combined with waterproofing at one time. Sprayable polymer coatings require special equipment. You need to stock up on overalls, it is advisable to see how professionals apply this coating.
Need to distinguish decoration Materials from waterproofing. For instance, floor tiles not a reliable barrier against water leakage. Even with the use of polyurethane or silicone grout, which can be used to process the joints, if a significant amount of liquid gets on the floor, there is a risk of its rapid leakage to neighbors or absorption into building materials that are not designed to protect against moisture.
Lacquer and oil paint do not have waterproofing properties. At first, they can be a reliable barrier, however, after 7-10 years, microcracks appear, then significant cracking of the material is visible, therefore, before applying them, any material should be used to ensure durable protection from moisture.
Leveling the floor before installing the insulation
Using a self-leveling compound, carefully level the surface of the concrete base before laying the roll insulation. There should be no gaps between the concrete and the waterproofing coating, so the alignment is carried out carefully. The base of the floor is completely cleaned of dirt, you can use a vacuum cleaner. The clean surface must be primed in one layer.
Depending on the quality of the material, the dry mixture is diluted with water or liquid, which must be purchased separately. The composition is evenly applied to the entire surface of the floor, no gaps should be allowed. If there is a risk of the formation of small air bubbles that may remain inside the coating, the waterproofing is rolled with a roller equipped with a continuous layer of needle nozzles. He simultaneously participates in the correct distribution of the solution and removes all bubbles.
Application of mastic
To protect the floor from moisture with a gluing material, you will need an additional purchase of an adhesive or special mastic. Professionals use an additional coating for the mastic, which differs depending on its composition. For the polymer variety, you can choose options from PVC film, fiberglass or polyisobutelene. If bituminous is used, then brizol, waterproofing and the like can serve as an additional coating.
The prepared base is completely covered with bitumen emulsion. It is recommended to use it, since its composition is the most neutral, does not harm the body of workers, and later on the residents of the building. It is made using ordinary water, after mixing the solution, harmful solvents do not evaporate. The primer must be applied in two equal layers, according to the rules, the second is done perpendicular to the first.
During the drying of the primer, you need to stick a special tape, it should cover the corners, joints with the walls around the perimeter. During gluing, the tape sinks deeply into the material. After this stage of work, the areas covered with tape are carefully covered with a primer again.
Styling
When the preparatory layer is completely dry, the laying of the waterproofing layer begins. Self-adhesive carpets just need to be well leveled and, using a little force, use a roller or hands to press them to the floor.
Waterproofing carpets of a standard type can be fixed by connecting a building hairdryer, in the absence of a burner. The bottom coating melts a little from the outside, after which it is immediately pressed against the base. The overlaps should be straightened out, if necessary, you can re-fix the peeled or wrinkled strips.
When the material has formed a flat surface, you can secure the strips by applying welding. During the work, you need to overlap the walls, preferably at least 25 cm.After making a screed or topcoat, all excess is easily cut off. The corners can be additionally glued with a repeated layer of material, forming patches, they must be reliably sealed.
The result of the work is an absolutely flat, sealed coating through which liquid cannot seep. It is allowed to pour a concrete screed only after the adhesive or bitumen mastic has completely dried, which usually takes no more than a day.
For warm floors, mastic may not be suitable, since with prolonged heating, it can evaporate an unpleasant, characteristic odor. It is safe to use it in the hallway, and other substances should be selected to waterproof the rest of the premises.
Produced dry, similar in consistency to powders, sometimes in the form of mastics and pastes. Before carrying out work, the mixture is diluted with water or an emulsion. Liquid waterproofing or similar in consistency to an ointment, initially sold in a form ready for immediate application after opening the can.
Application of coating waterproofing
Lubricating waterproofing, depending on the consistency, differ in the field of application.
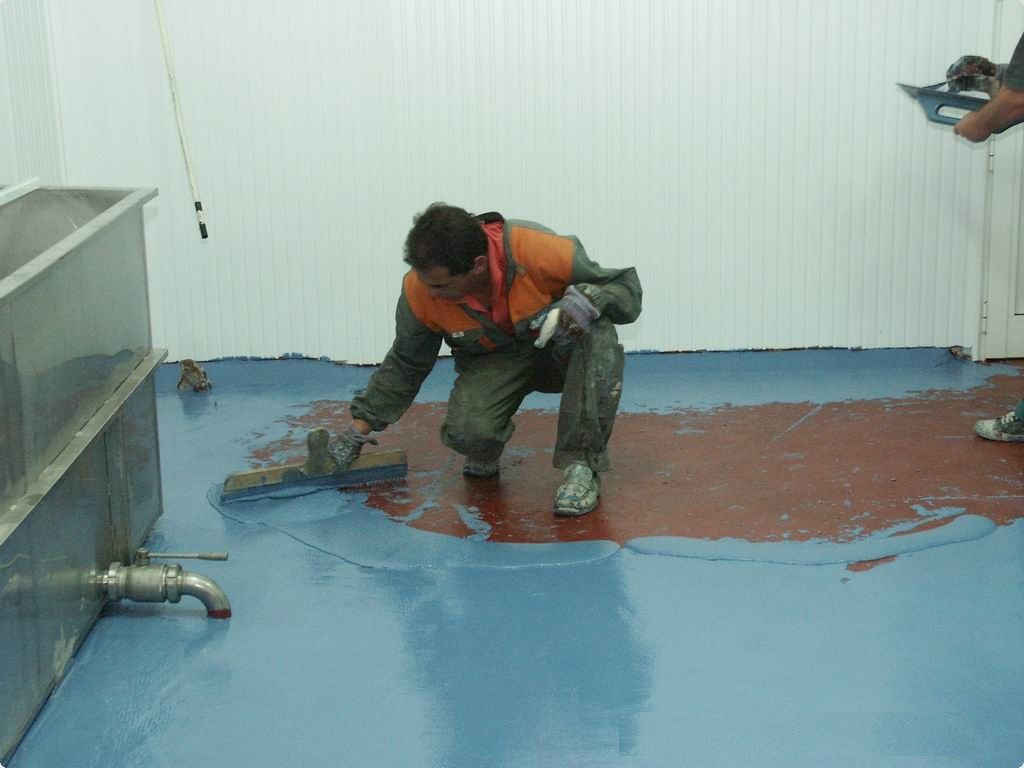
- Liquid formulations must be applied in thick layers, completely sealing the space, at least 2 times. Most often, they are made from oxidized petroleum bitumen of a fairly small thickness: about 1 mm and more. A screed is usually poured onto the coating, therefore, after it dries, you need to check that no damage is formed on the base, there are no damp places. Surface contamination should be avoided, therefore the next coat should be applied as soon as possible. If this is not possible, then the coating can be covered with a film or monitored to maintain its cleanliness.
- Bitumen-containing pastes applied with a layer of 3 mm. They can simultaneously serve as high-quality insulation and replace concrete screed. The material is applied in a sufficiently thick layer, therefore, its reinforcement is necessary. Before application, a PVC mesh is applied and fixed to the entire floor surface. The coating is laid directly on it.
After creating the first layer, you need to wait for it to dry completely, the time of its occurrence is indicated on the production packaging. When the surface has hardened, a second layer is applied, preferably perpendicular to the first. Sometimes the instructions provide for the imposition of a third layer on a still wet surface. In this case, the master needs to purchase special shoes or attachments with thin but frequent spikes so as not to damage the material.
The base is elastic polyester, fiberglass or fiberglass. Bitumen is applied on both sides of the material. To ensure a secure adhesion to the subfloor, an adhesive is located at the bottom. High-quality waterproofing includes a special component on the top, which is activated by interaction with the topcoat adhesive, improving its action.
Sometimes it is necessary to sprinkle the entire top layer of the already installed waterproofing with medium-grained sand on your own. It increases the reliability of adhesion to the adhesive. When the insulating material has hardened enough, it can be swept off the floor.
There are two groups of materials that can be applied with glue. One of them is fixed with a burner or a construction hairdryer. The second is equipped with a system that facilitates installation. It is enough to separate the working part from the film and stick it on a horizontal surface, having previously leveled it.
High-quality waterproofing of the floor allows you to protect its structure from moisture, which can destroy or damage some of its components. For apartment owners, protection against water penetration through the floor will help avoid flooding of neighbors and, as a consequence, the obligation to pay money for repairs.
In contact with
Classmates
IN
any house, apartment, social buildings always have rooms with high humidity (toilets), where floor waterproofing is not only desirable, but necessary. Moreover, considering the increased risk of accidents for such premises, in which a significant amount of water gets on the floor.
Content.
1.
2.
3.
3.1
3.2
4.
5.
6.
7.
8.
8.1
8.2
8.3
9.
General tasks of waterproofing
Do-it-yourself floor waterproofing is required for:
and) protection of materials that lose their properties from water (for example, insulation) or are destroyed;
b) protection of adjacent premises from water ingress, incl. in case of an accident.
Why do you need a waterproofing floor
Waterproofing floors in bathrooms and similar rooms has a dual purpose:
- Protection against the effects of moisture in structures, subfloors (screeds), or floors (if the room is located in a multi-storey building).
- Protection of the underlying room, both from the effects of high humidity and from water ingress in the event of an accident.
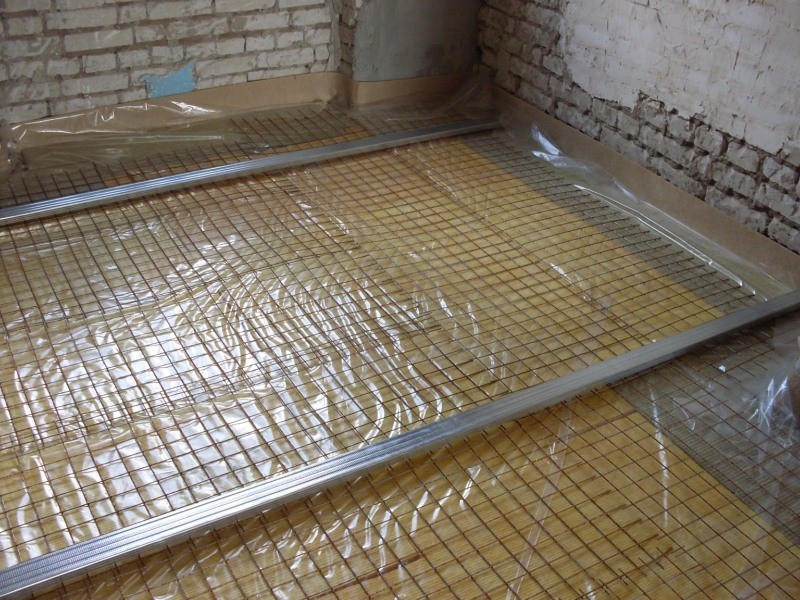
The concrete of the slab or subfloor resists the effects of water quite well, which cannot be said about the reinforcement laid in its thickness, so the question of how to waterproof the floor in front of the screed is quite serious.
When exposed to moisture, the metal begins to rust, gradually reducing its bearing capacity, in addition, the adhesion of the reinforcement to the concrete is lost, and the concrete itself begins to collapse.
Types of floor waterproofing, what materials and tools are needed
Do-it-yourself floor waterproofing, of course, cannot be done without insulating materials and tools for their application.
There are two main types of waterproofing coatings.
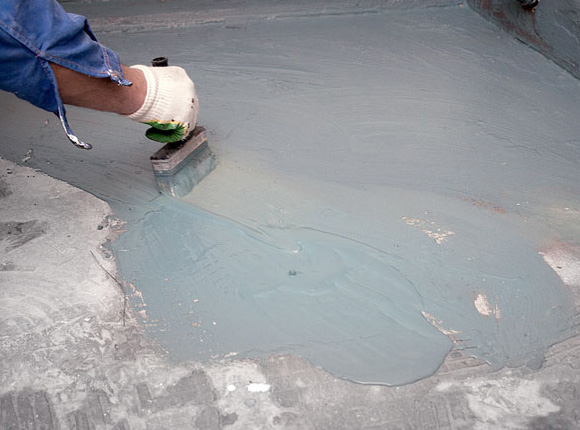
It is represented by various types of mastics, compositions based on cement, magnesian, or bituminous binders, as well as the "penetron" type.
Each material has its own characteristics and although, in most cases, waterproofing of a concrete floor can be performed with any of the types of coating materials, their combination gives the best effect.
Compositions are delivered ready-made or prepared directly at the construction site.
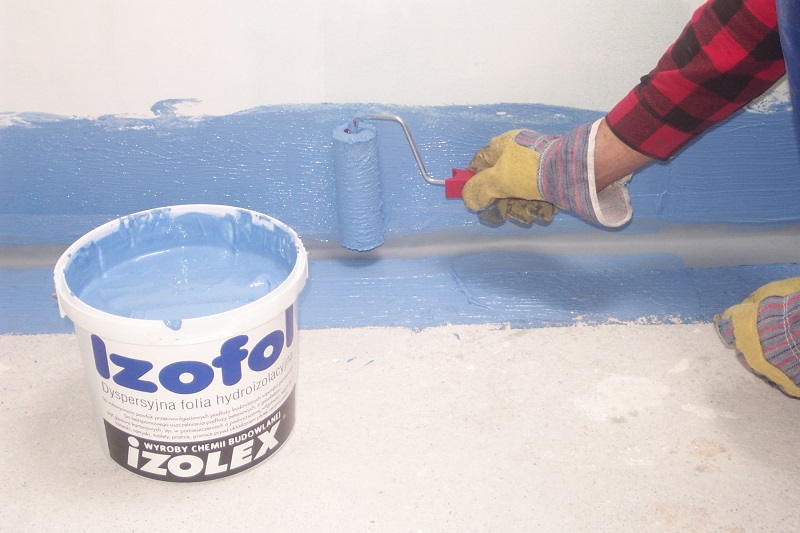
For the preparation of bituminous mastics in significant quantities, special devices are required - bitumen cookers. Small volumes can be made in a bucket or other metal container.
Do-it-yourself waterproofing of a concrete floor using such compounds will require brushes, a roller or a spatula. For large areas, mechanized application installations are used.
Roll (glued) waterproofing of the floor
Roll waterproofing is a relatively thin (up to 2-3 mm) films made of waterproof plastic (polyethylene, polyvinyl chloride, etc.), rather complex composites based on various types of resins (usually based on bitumen).
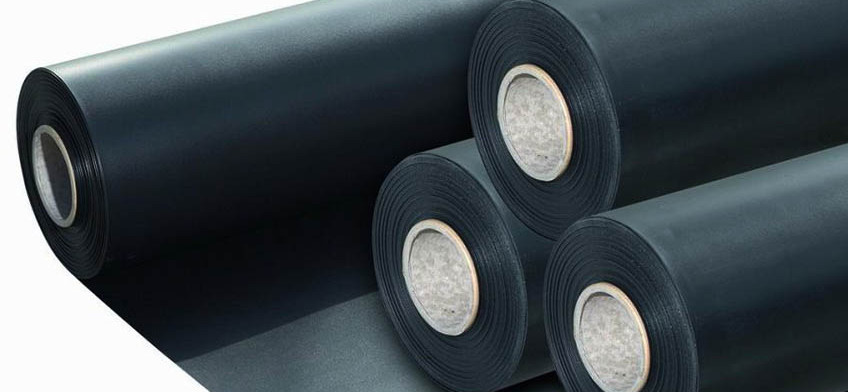
Roll materials used for waterproofing floor screeds, in turn, are divided into basic and non-basic.
Baseless Is a film of uniform composition in its cross section. An example is butyl rubber membranes, plastic films, complex mixtures based on bitumen, various resins.
Basic materials are distinguished by the presence of a base made of fiberglass, synthetic fabrics or paper on which a waterproofing material is applied. They can be successfully used as a waterproofing before the floor screed or over the screed.
For cutting roll materials used different types cutters and assembly knives. The glue is applied with a brush or spatula, and for the materials to be welded, you will need an industrial hair dryer or a burner.
Preparation of premises for waterproofing works
To prepare the room for the waterproofing of the floor, it is necessary to remove all dignity technical equipment interfering with communications. Remove all intermediate layers of floor covering, including old waterproofing.
Along the perimeter of the room to a height of 14-15 cm from the floor, knock down the facing and plaster from the walls.
Preparation of the surface (base) for waterproofing application
In order for the waterproofing of the floor with your own hands to be carried out efficiently, careful preparation of the base is necessary.
Preparation tasks:
and) ensure good adhesion of the structure to the material;
b) ensure uniform and high-quality application of waterproofing;
in) to prevent possible damage to the insulating layer during its application (laying), during the installation of subsequent layers, as well as during operation.
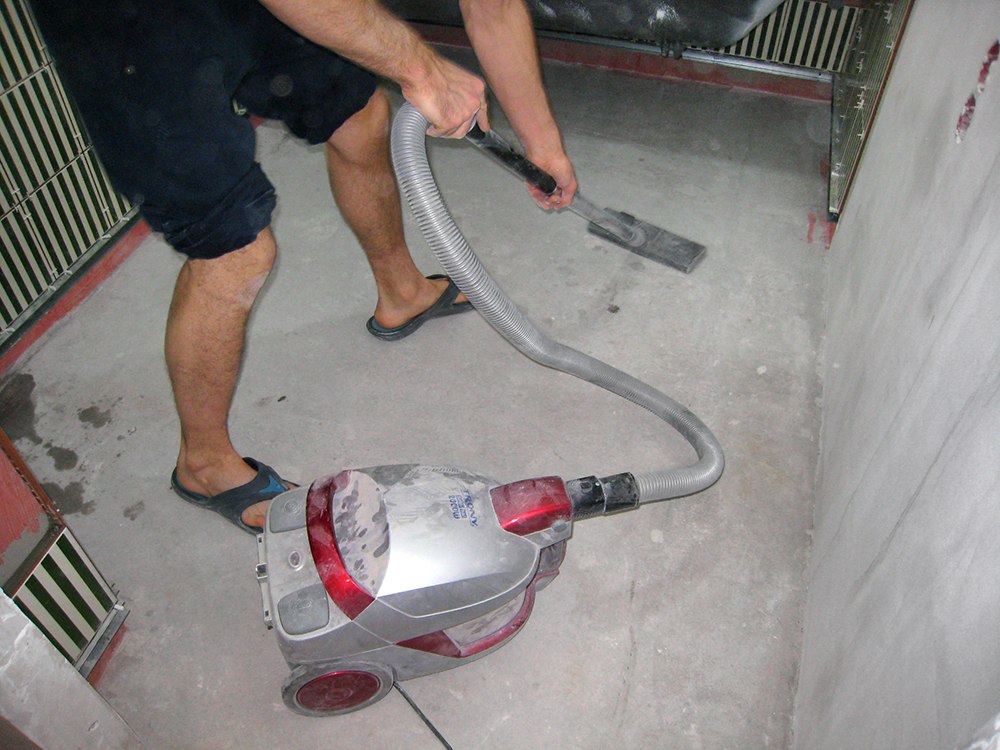
First, with the help of a punch, all the protrusions are knocked off. If it is the metal of the reinforcement or the edges of the embedded parts, they are cut off with a grinder. Cracks are minted.
Immediately before waterproofing the floor, the surface is primed to increase adhesion and dedust. For soil use bituminous primers, acrylate-based penetrating compounds, etc.
Floor waterproofing under the screed and under the tiles
As a rule, in bathrooms and toilets, the floor waterproofing is arranged in front of the screed, on which the tiles are then laid.
When installing a screed over the waterproofing layer, special care should be taken not to damage it. Up to the fact that the screed is done in two steps: first, how protective layer for waterproofing (it must be done at least 3 cm), and the next day, directly leveling, under the device of a clean floor.
As for the question of how to waterproof the floor in the bathroom under the tiles, which sometimes interests people, there is no specificity in the device for waterproofing the floor just before laying the tiles. Both under tiles and under other types of coverings, for example, 3D floors, waterproofing is performed in the same way.
How to make do-it-yourself waterproofing of the floor
Coating insulation is usually a viscous mixture, which is poured onto the prepared substrate and spread with a spatula with slight pressure, achieving an even distribution and equal layer thickness. For more liquid formulations, use a brush.
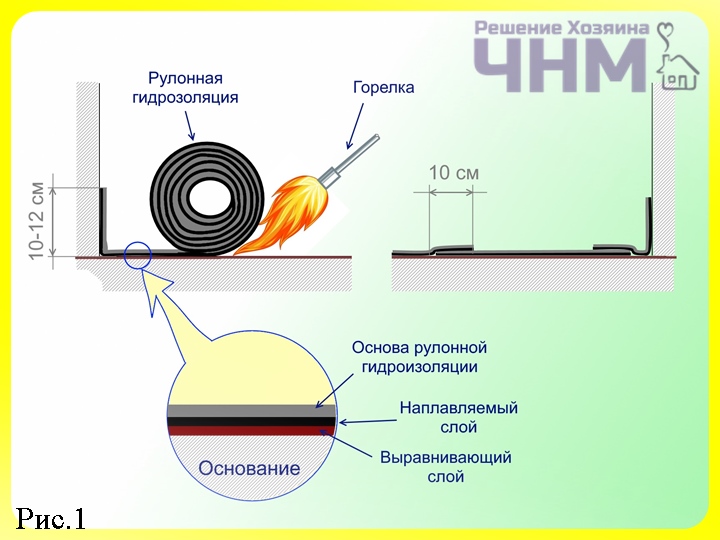
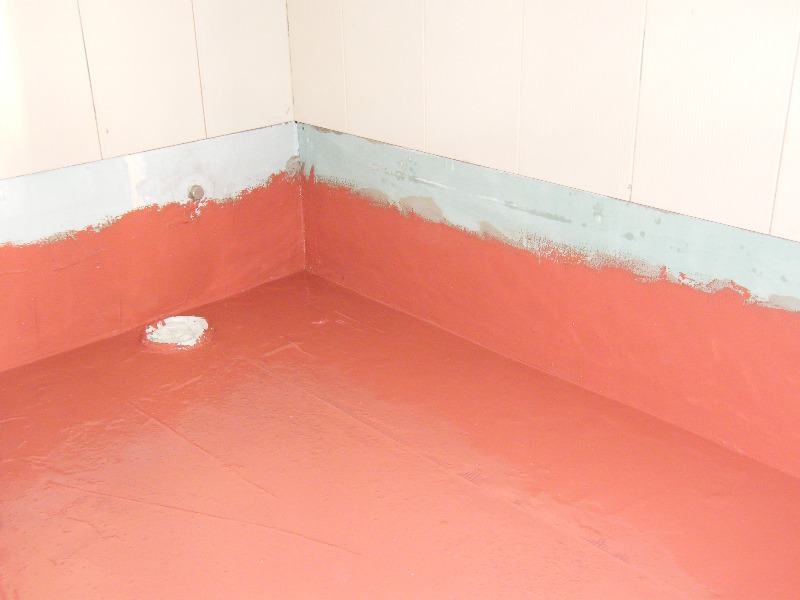
In order to better protect the structures and the underlying premises, the waterproofing of the bathroom floor should extend 10-12 cm onto the walls of the room, forming a kind of "trough" from which water will not pour out, even with a significant leak.
How to make (lay) a roll-up waterproofing floor with your own hands
Roll waterproofing is done with glue or dry. Fusion technology can be a type of glue.
Do-it-yourself floor waterproofing (especially weld-on) is best done together: one rolls out the roll, pressing the tape to the base, the second works with a burner, brings materials, applies glue, etc.
Construction and installation of surfaced waterproofing
When fusing, the adhesive is bitumen applied directly to the material.
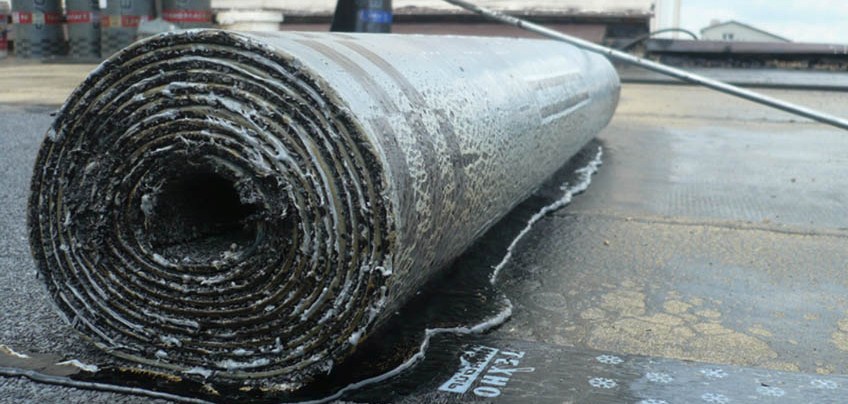
The material is cut to the size of the room, taking into account the overlap on the wall. The cut strips are rolled back into rolls, the weld layer outward. It is very inconvenient to work, rolling and cutting off a ten-meter roll "in place", cutting off the material, every time it will not work out neatly. The cut strips are rolled back into rolls, the weld layer outward.
It is better to cut the whole volume at once, so that you do not have to change tools every time, put the burner aside, etc.
The floor waterproofing strips are laid parallel to the wall. The first roll begins to roll out, stepping back from the wall 2-3 cm so as not to cling to the wall with the edge of the roll.
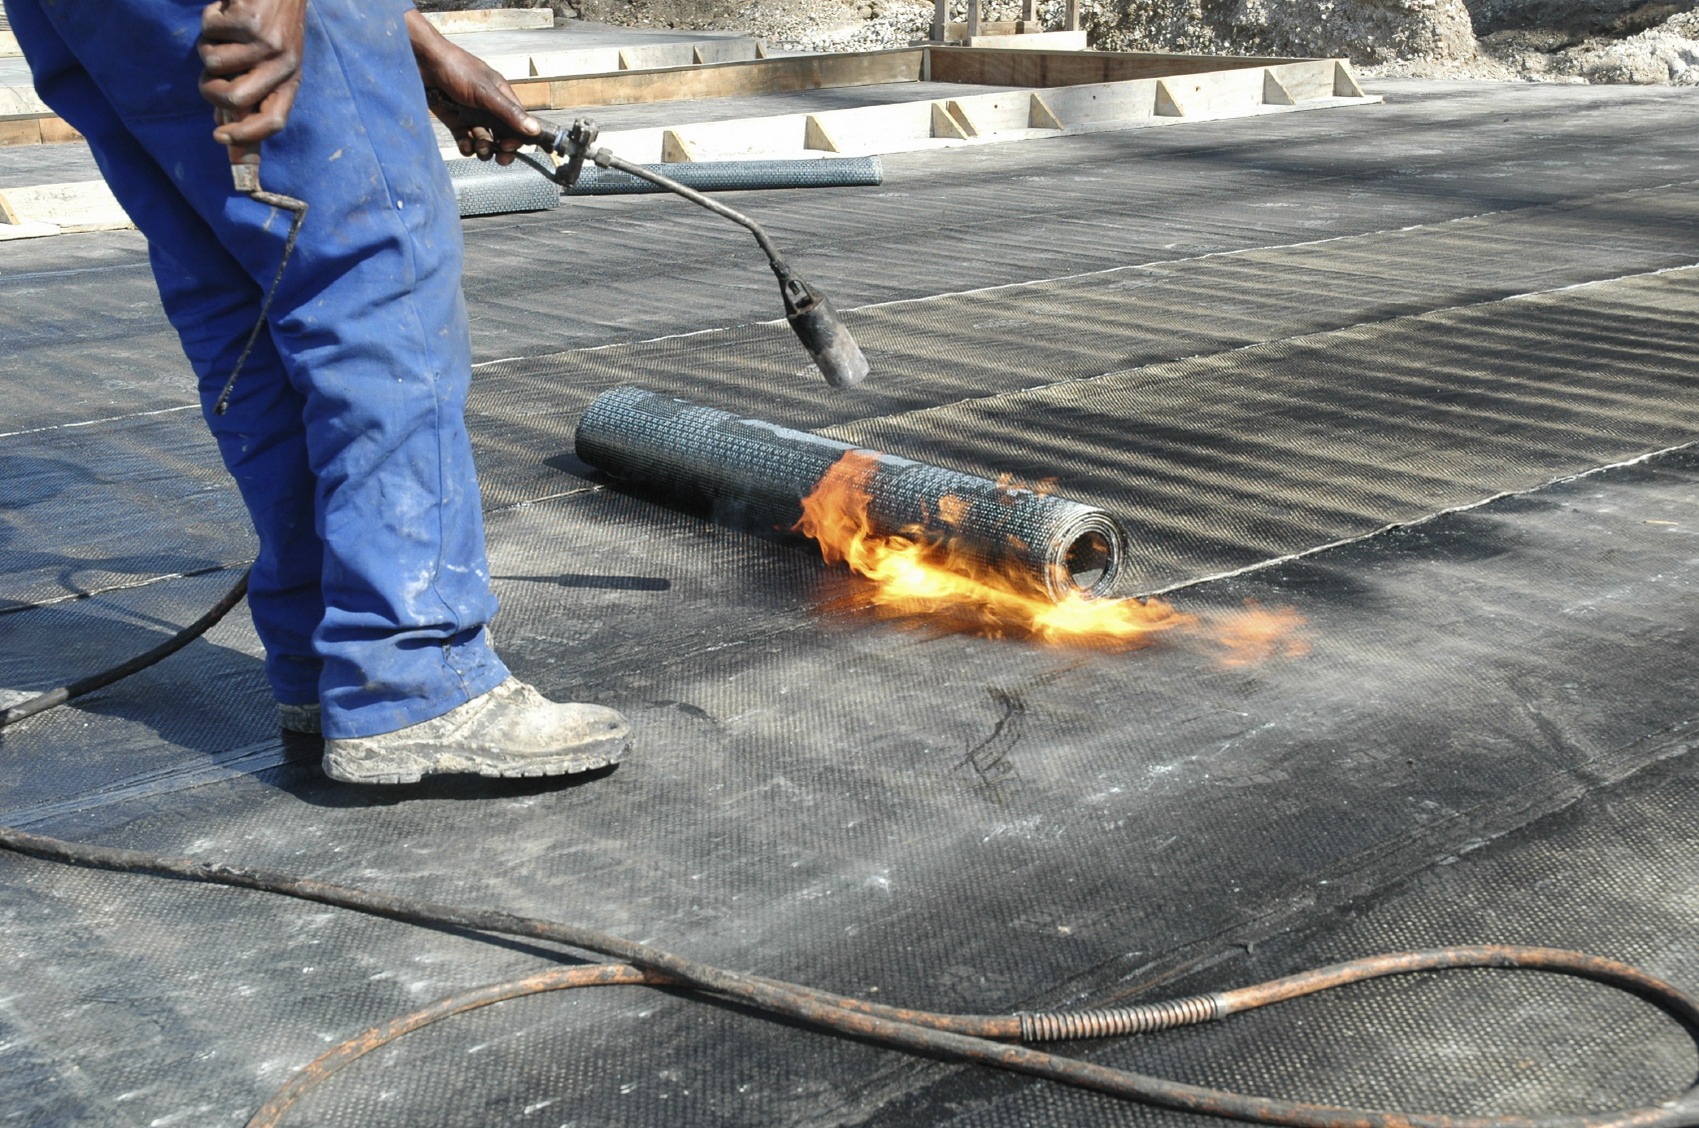
The lower surface is heated until the bitumen coating "melts" with the help of an industrial hair dryer, while heating the surface of the base, at the same time the roll is unrolled, pressing and smoothing the material.
The next strip is laid parallel to the first one with an overlap of 10 cm (the overlap line is marked on the outside of the sheet). After the floor is waterproofed, the corners of the wall and the floor are glued in strips of 20-30 cm, along which the roll was unfolded ().
Particular attention is paid to the corners of the room. For high-quality insulation, bitumen is additionally fused in them, or coated with mastic.
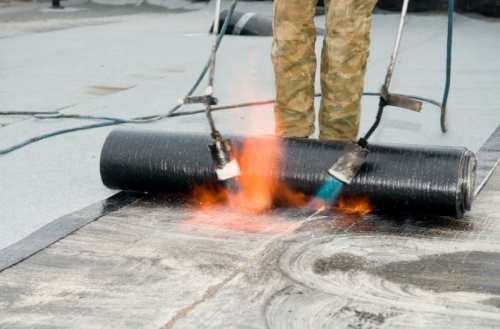
When the strips are mated in the transverse direction (if the strip is not enough), an overlap of at least 15 cm is performed. The place where the transverse seam covers the next strip is additionally sealed by fusing bitumen or mastic.
Laying roll waterproofing on glue
Waterproofing the floor of a bathroom or other rooms with glue is carried out in the same way as melted, but instead of melting the surface of the material with adhesive mastic, the floor surface is smeared.
It is more convenient to lay it on mastic when the floor waterproofing device is required not in one, but in two, three layers.
Dry waterproofing
The easiest way to lay the insulation "dry" without using any glue.
This type of waterproofing is used in rooms where high humidity is not constant and the risk of a significant water spill is low. Therefore, before you do the waterproofing of the floor with your own hands in this way, you need to take into account the mode of using the room.
When waterproofing dry, in the longitudinal direction, the strips are overlapped at least 15, and in the transverse 20 centimeters.
Safety measures for waterproofing the floor
We have considered how to make a waterproofing floor, now a little about.
In the work, rather harmful substances are used based on bitumen, various kinds of synthetics, this first of all requires ensuring good ventilation, especially in small rooms that do not have windows.

The use of burners and even a relatively safe hair dryer requires the mandatory use of personal protective equipment: long-sleeved clothing, protective gloves, glasses.
Take it responsibly, and the work will bring you pleasure from the result, not injury and poisoning. Ask questions either. , photos, we will publish them on the site. Order work for specialists! Support the project! Good luck to you, good to your home!


