To perform high-quality waterproofing of a concrete floor, the quality of the concrete that makes up the base for the floor should be determined. This is important - it is pointless to perform further work without information about the state of the base. It is necessary to find out the level of the location. groundwater... This is especially necessary when working in the basement.
The location of communications must be taken into account. They can run both across and along the concrete surface intended for processing. You should also choose in advance the material for finishing, which will eventually be used.
How to choose concrete
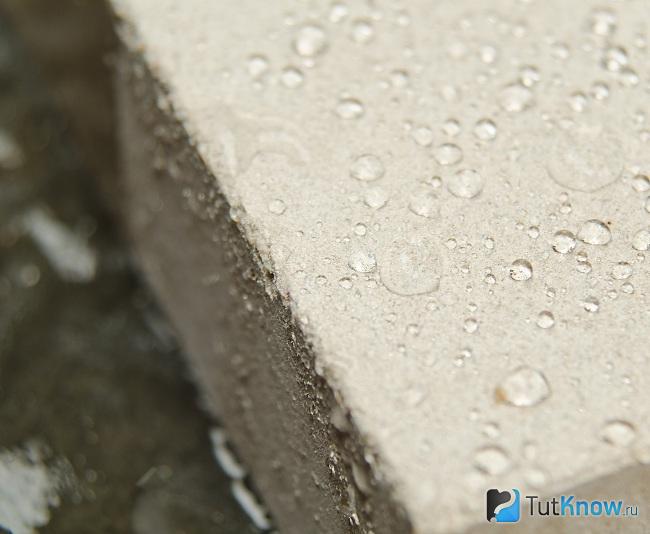
Waterproofing the floor by concrete base good quality from M150 or higher, it is necessary to perform using penetrating compounds. The substance must penetrate into the concrete structure as deeply as possible. A good option it is considered 40 cm. High-quality penetrating waterproofing goes inside to such a depth.
Measures for the creation of waterproofing must be carried out in accordance with the rules of the Technological Regulations.
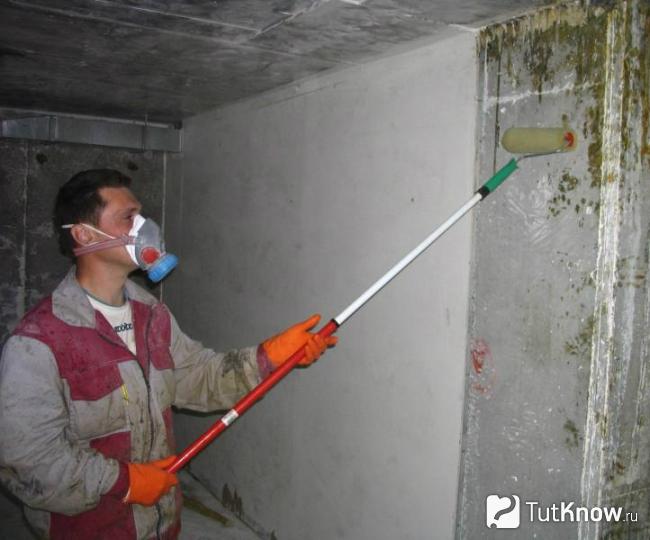
You can use any convenient tool to apply the waterproofing compound to the surface. The composition should be distributed over the surface in the form of a uniform layer - for this you can use a grout, that is, a polisher, or a roller. Finishing work can be carried out no earlier than three weeks after isolation.
Sometimes the quality of the concrete is not particularly good. If the product itself is loose and with multiple cracks, the floor waterproofing will need to be carried out using the monolithic pouring method. A special hydraulic composition should be used. The waterproof performance ranges from W12 to W20.
To give a concrete product of the required quality, special additives must be introduced into them. With their help, you can significantly increase the water resistance.
Features of work
When waterproofing, the thickness of the concrete floor must be taken into account. It must be done no less than 10-12 cm. It is imperative to carry out reinforcement and vibration. The joints of the floor and wall structures must certainly be carefully processed. Failure to do such work will subsequently entail the appearance of areas where moisture will seep.
Perfect for waterproofing the joints of hydro-laying or hydraulic cords. Places where communication inputs are provided are sealed with special sealing compounds. Both the pipes and the electrician should under no circumstances come into contact with moisture.
Penetrating floor insulation can be replaced with injection insulation. Various gels, polymers, and resins are used as working materials. But such events are related to those that are carried out with the help special equipment... It is almost impossible to do this kind of waterproofing on your own.
Do-it-yourself basement wall and floor waterproofing

When building a house with a basement, you need to take care of protecting the structures from the effects of underground groundwater. This will require you to carry out activities for device for waterproofing the walls of the basement outside and inside and the foundation of the entire structure.
Why you need to waterproof your basement
Due to the fact that there is constantly high humidity in the basement, this leads to the formation of fungus on the walls, and this, in turn, adversely affects both the structures of the structure and the health of the person himself. To keep it dry in the basement, you need to properly organize waterproofing on the outside of the walls.

The organization of the drainage system laid underground, as well as the blind area around the entire house, are able to completely protect the basement structure from groundwater. A well-made waterproofing of the walls inside the basement should protect it from the penetration of filtration groundwater
If you notice that it is damp in the basement, then you need to take a series of sequential actions to improve the conditions, namely:
- Examine all walls, floor and ceiling of the basement for cracks and open joints that allow water to pass through.
- Inspect the blind area around the structure, if there is damage, then be sure to close it up.
- Found cracks and open seams that allow water to flow into the basement must be repaired with a waterproofing mixture.
- The ventilation in the basement must work properly.

How to make internal waterproofing of a basement floor with your own hands
It is necessary that the blind area around the entire perimeter of the house is complete, without any damage. There should be a layer of clay under the blind area that prevents water from entering. If this is not the case or the integrity of the blind area is violated, then it is necessary to perform the work again.

To lay a new blind area around the house, you need to dismantle the old one. Then dig a trench 1 meter wide, 30 cm deep and lay a layer of clay 10 cm high on the bottom, and tamp it well. On top of the clay we put a layer of sand, 5 cm high and a layer of rubble of the same height. At the end, we lay reinforcement mesh and fill it all with concrete M200, the layer thickness is about 10 cm.

When the blind area is restored, you can start examining the walls and floor in the basement. An unfavorable option that may arise - water from the ground makes its way into the basement with fountains. In this case, no waterproofing can help, you need to raise the floor level. When the basement floor is just wet, the first step is to remove the water and dry the floor.

To seal all cracks in the floor, you can use a bulk polymer waterproofing, it penetrates well into all cracks and pores in the concrete, fills them and prevents water penetration. It contains cement, sand and special connecting additives. After about a day, you can lay the reinforcing mesh on the floor and fill it with a cement-sand mixture or concrete, the required layer is 5 cm. You can walk on the floor in a week, which means that there is an opportunity to start waterproofing the walls.

How to make internal waterproofing of walls in a basement with your own hands
When water flows along the walls of the basement, waterproofing cannot be done, you need to wait until it stops flowing, most often this is due to natural phenomena - melting snow or precipitation.
First you need to establish where the water comes from on the walls and make marks. When the water stops seeping, the basement must be dried with a heat gun. In order for the evaporating water to leave the basement without problems during the drying process, the ventilation must be in good order.

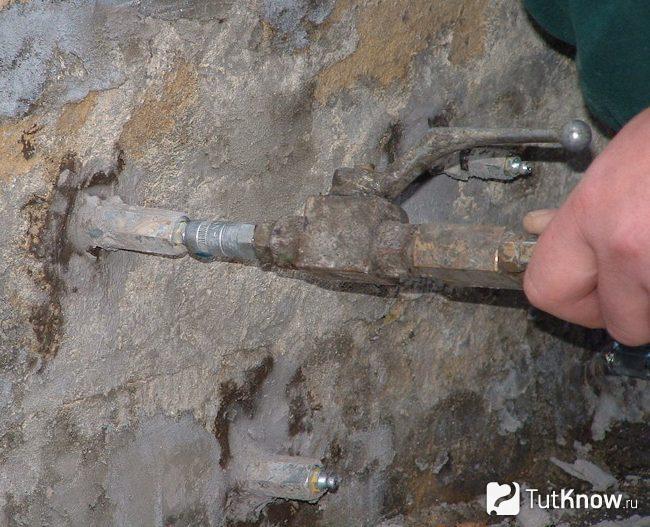
Now we begin to seal the seams in the walls, and for this we need to extract the old solution from them and treat all the walls with an antiseptic. When they dry, we use Penetron - a deep penetration waterproofing for a basement based on cement-sand mixture with polymers. We fill all the seams and cracks with it.

Then, with the same mixture, only of a more liquid consistency, we process all the walls of the basement as a whole. For three days, it is necessary to moisten the walls abundantly with water - this contributes to the fact that the sealant applied to them becomes more durable. After 2 weeks, you can apply finishing on the walls of the basement. The floor will be ready in three weeks and it will be possible to put on it flooringwhichever you want.
Penetrating basement waterproofing from the inside from groundwater Is a good way to protect your home from dampness. You will be able to do all the work yourself if you watch the video and read step by step instructions... With your own hands, you can extend the life of any structure in the country.
- Types of insulation materials
- Coating protection method
Floor waterproofing is the most important step in home improvement. If a person cannot do without moisture, then the structure of the house, and even more so the floor, can and should be without liquid, since for some elements its presence will be destructive. Therefore, the question of how to waterproof the floor is important.
Features of floor waterproofing
If the apartment has a considerable service life, then there is no need to talk about the quality of the floors. The situation is simpler if the base of the floor is reinforced concrete. In this case, dismantle the old floors down to the concrete base. If the base is wooden, then here the owner of the house faces many problems. Wood is a fragile material, it can easily damp and begin to crumble, which raises the question of replacing the entire floor.
As for reinforced concrete pavement, there are several tips for it. The first of them says that special attention should be paid to those places where there is a zone of high humidity. In this case, it is necessary to replace the coating to the base.

Further, it is recommended to level the floor with a self-leveling mixture or a special repair compound. It is worth noting that trying to get rid of irregularities using waterproofing is stupid, just like using roll coatings and self-leveling floors.
If you want to make a redevelopment of rooms, you should remove all interfering partitions. This is due to the fact that when waterproofing, it is necessary to maintain tightness, for which it is recommended to apply the entire coating. It will be difficult to carry out this work under the partitions.
In addition, it is not recommended to partially isolate, as this will reduce all spent funds and efforts to a negative result. Water can enter unprotected areas, which will require additional repairs.
For rooms like the bathroom or kitchen, where water can easily spill onto the floor, there are a number of tricks. To prevent liquid from getting, for example, from a kitchen protected by waterproofing into another room where there is no protection, during construction, the kitchen floor is made slightly lower than the level of other rooms. If this is not possible, then you can get by with a small border between the rooms, which will stop moisture.
Back to the table of contents
Types of insulation materials

It is important not only to know how to properly waterproof the floor, but also to choose the right material for the job. On this moment there are a large number of them, so it is worth talking about them. Materials for waterproofing floors are divided into several categories:
- Glued or rolled.
- Mastics and other coating compounds.
- Bulk products.
- Special-purpose plasters.
- Bulk mixtures.
- Penetrating compounds.
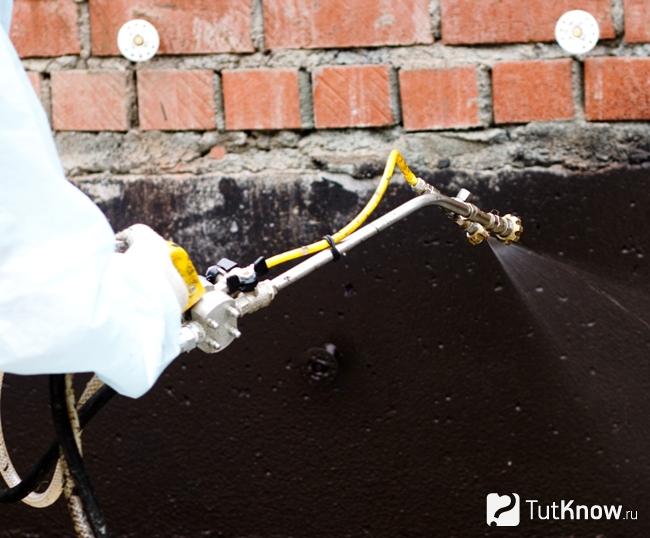
- Sprayed polymers.
If you plan to make waterproofing yourself, then it is recommended to use special plasters or coating agents. For independent work roll products are also suitable, but they are difficult to fasten and lay if you work yourself.
Waterproofing the floor using penetrating agents can also be done by hand, but for this you should follow all the instructions for installation and maintenance in the future. In addition, you need to do some procedures. It is worth noting that the use of such products for isolation must be combined with moisture, which can lead to leakage during operation.

Bulk type of insulation is used under the screed. The material is represented by special granules, which have one feature - when moisture gets on them, the material begins to foam, as a result of which a gel is formed. This gel prevents moisture from passing further.
As for sprayed polymers, it is difficult to make a coating with such insulation on your own. This is due to the fact that for laying the material, a large number of rules and requirements must be followed, which without knowledge and skills can lead to a negative result. Therefore, it is not recommended to try to carry out such isolation without special knowledge and skills.
Some misconceptions should also be said. Surfaces such as floor tilesare not considered insulation. Even if when laying it, polyurethane or silicone grout was used, which is necessary for the joints, then you should not rely on the protection of such a surface. As for the bathroom, even if the floor is waterproofed, moisture can penetrate lower, as it tends to collect on the walls and penetrate into other surfaces.
Back to the table of contents
Waterproofing roll materials

To work, you need the following tools:
- A vacuum cleaner.
- Self-leveling compound.
- Needle roller.
- Polymer or bituminous mastic.
- Building hair dryer.
- Primer.
- Roll material.
Before using this method, it is necessary to make a complete leveling of the floor. This is due to the fact that there should be no free space between the insulation layer and the floor surface. Self-leveling compound should be used for leveling, as it is best suited for this type of work.
After that, you need to clean the floor surface from debris and dust. This work can be done with a vacuum cleaner or just sweep. To ensure better adhesion of the material to the floor, you need to prime the latter. The mixture must be diluted with water or a special compound, which depends on the material used. The resulting mixture must be poured onto the floor.
For better and even distribution of the mixture over the entire surface, it is recommended to use a roller with a needle nozzle. In addition, the use of this roller will allow you to get rid of air bubbles that may form during pouring.
According to the basic rules of the process, insulation with the use of pasting materials is carried out with special-purpose glue or bitumen mastic. In addition, it is advised to use polyisobutylene, PVC film or fiberglass for polymer mastic, while for bitumen mastic - hydroglass, hydroisol and brizol.
Summarizing all of the above, it is necessary to repeat that the floor is cleaned before waterproofing, after which it is treated with a bitumen emulsion.

The emulsion does not emit harmful solvents during operation, since it is made on the basis of water. The primer is applied in two layers, both should be perpendicular to each other. While the first layer has not yet dried, it is necessary to tape the joints and corners. With the next layer, these places need to be well smeared.
After some time, which is necessary for the drying of the primer layer, you can start working. How to properly waterproof in this case? You just need to stick layers of material on the surface. If self-adhesive carpets are used, they must be pressed to the floor.
Regarding ordinary carpets, using them, it is recommended to use a building hair dryer or burner. The bottom surface of the outer layer is melted and then pressed against the floor surface. The places where the overlapping strips converge must also be melted, and then welded together. The material should be overlapped onto the walls by about 20 cm. After the screed is completed, these pieces should be removed. Additional patches need to be glued and the corners, after which it is good to carry out the sealing.
The need for waterproofing basements. Types of insulating materials, their characteristics and advantages. Technologies for performing work on each of the waterproofers.
Why do you need basement waterproofing
Protecting the room from moisture penetration is a task that must be solved when laying the foundation. During the construction of the facility, a number of measures are carried out that create obstacles to the ingress of water into the walls and floor of the basement. The highest quality waterproofing is achieved only at the time of construction. Measures taken in an already constructed room may not give the calculated result. The following types of basement waterproofing are used: anti-pressure, non-pressure, anti-capillary.
Anti-pressure waterproofing is performed in cases where water rises beyond the floor mark, and often reaches the walls of the basement. Then the work is carried out outside the building. Waterproofing inside the basement is not effective, as the water there tends to pull the material away from the wall. In addition to these measures to prevent moisture from entering the basement, it is necessary to make a drainage system around it and drain the existing water into the storm system.
Non-pressure waterproofing is done when the water table is not high and the possibility of flooding is zero. Protect surfaces only from insignificant penetration of atmospheric precipitation into the soil. Here it is more expedient to cover the entire basement with bituminous mastic.
Anti-capillary waterproofing is carried out in order to protect the basement walls from water penetration through capillaries. Previously, bituminous mastic was used for this or covered with sheets of roofing material. Now they use penetrating waterproofing means.
The choice of materials for waterproofing the basement
Waterproofers that are offered to the consumer are usually classified into the following groups:
- Coating... These means include mixtures based on bitumen, they are used cold and with the help of heating. This group also includes cement compositions, mixtures based on polymers, thick-walled bituminous coatings. The base of the solution is bituminous resin with the addition of synthetic rubber. It contains no solvents. It is used on different types surfaces: brick, concrete, stone, plastered. Cement waterproofing is a composition of polymers with the addition of cement. This insulator is vapor-permeable and has high adhesion, therefore it is often used for internal waterproofing works. Considering that it contains polymers, it is flexible in use, its application does not require special knowledge, and its advantage is its affordable price. The main disadvantage of do-it-yourself cement-based waterproofing basement is the fragility of the material.
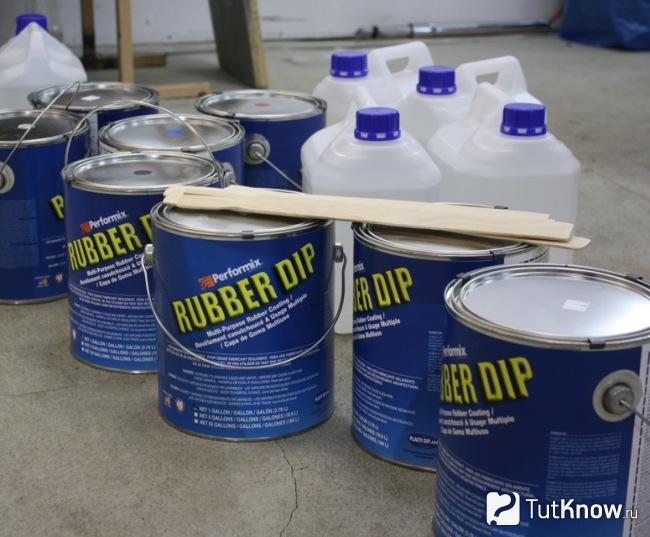
- Liquid rubber... It contains bitumen and various polymers. Its key property is the ability to firmly bond the insulator with the molecules of the treated surface. Liquid rubber is a material that has many positive properties, such as durability, inability to be exposed to microorganisms, temperature extremes, and ultraviolet rays. It is resistant to water pressure, has good adhesion, fire safety, low price and high maintainability.
- Liquid glass... It has the same properties as rubber: hardening, it protects the treated surface from moisture. The main components of the material: sodium silicate with the addition of sand and soda. Available in liquid or dry form, diluted with water and used for basement waterproofing. Differs in high adhesive qualities, corrosion resistance, no need to use special equipment. The disadvantages of the insulator include the inability to use on any type of surfaces.
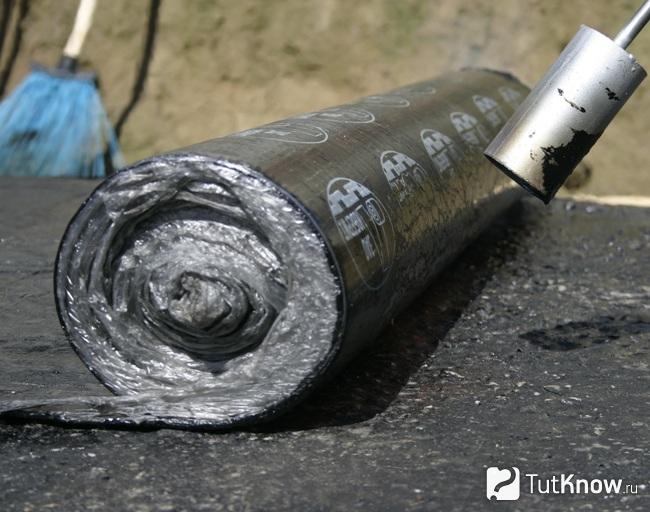
- Roll... The industry offers a large selection of roll insulators, which include bitumen and polymers. The main materials of this group are roofing felt and roofing felt; glass roofing material, brizol, hydroizol, foilgoizol are also on sale. The basis for roll insulators is mastic, which is put in a heated form or used in a cold way, or the material is fixed by melting. Among the positive qualities of roll insulation, we will single out the relatively inexpensive cost of work and the ability to perform gluing on our own. The negative aspects that arise when waterproofing a basement is a loss of quality at low temperatures, the ability to be exposed to microorganisms and mechanical damage.
- Penetrating... The point lies in the reciprocal reaction of the material and the processed plane. The waterproofing agent applied to the surface is absorbed through the capillaries to a depth of 0.4 mm and crystallizes. This process is possible only due to the action of penetrates - special components that are part of the insulator. Therefore, materials for penetrating waterproofing are called Penetron. Silica or aluminum oxide is added to the composition of the substance to impart penetrating properties. The use of Penetron as an insulator is associated with its penetration into the pores of concrete, while waterproof crystals are formed. The mixtures used as penetrating insulation have the following positive qualities: the ability to penetrate to a depth of more than 0.5 mm, which makes it possible to improve the waterproofing of concrete, close any microcracks, and are characterized by a long service life. The treated surfaces are resistant to low temperatures, and the material is easy to use.
- Injection... This waterproofing has excellent penetrating properties. The flowable gel is injected into the holes prepared in advance for this purpose. The product can be used even in damp rooms, and the surfaces are not subject to special preparation. Injections allow you to penetrate into any hard-to-reach places, plus a small investment is required.
Note! Working with injection isolation wards requires certain practical skills and training, unlike other materials.
Basement waterproofing technology
The sequence of work is different depending on what kind of material for waterproofing the basement is chosen.
Application of coating waterproofing
Waterproofing materials include cement coating, rubber mastic, liquid rubber and liquid glass. Consider the application technology for each insulator.
Cement coating
Before starting to apply the cement waterproofing coating, the following tools must be prepared: a working bucket, a brush, a roller or a spatula (it all depends on the consistency of the solution). Materials that will be needed for work: flexible cement paste, water.
The instructions for carrying out the work will be reduced to the following actions:
- All treated surfaces are cleaned from old cement, all kinds of irregularities.
- Regardless of the material (mastic or cement coating), the area is abundantly wetted with water. On a damp surface, the insulator fits better and goes deeper into the pores.
- When applying a cement coating, the dry mixture is diluted with water. The solution must be well moistened, otherwise it will not adhere well to the surface.
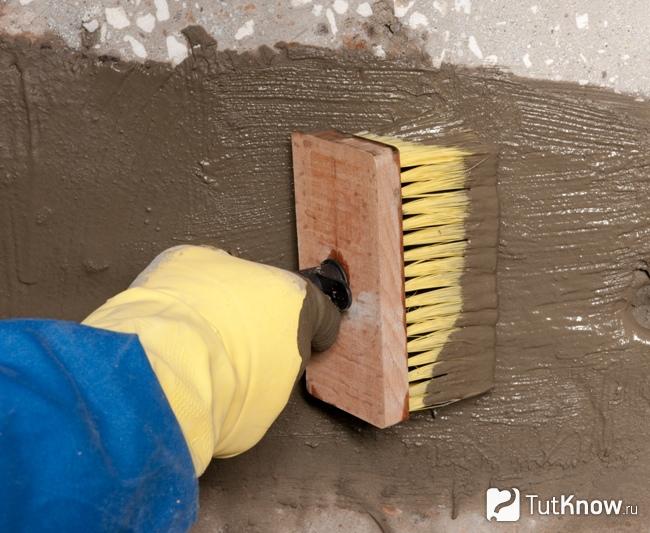
- The mixture is applied with a brush, roller or spatula, it depends on the consistency.
- After the surface has dried, it is subjected to final processing.
The use of mastic implies its application outside the building in order to protect it from water ingress. Before applying it, you must prepare the following tools: a brush or roller (depending on the consistency of the mastic), a spatula, a working bucket.
The algorithm for carrying out work with rubber mastic is as follows:
- The surface to be treated must be cleaned of old cement, dirt and debris.
- The surface is well moistened with water, this enables the material to better penetrate the concrete structure.
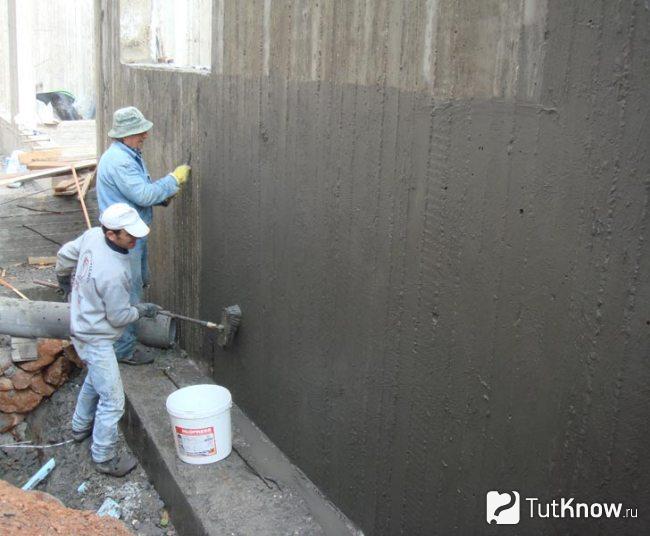
- The mastic is mixed and applied to the walls.
- When the surface is dry, you can plaster it.
Liquid rubber
To work with it, you will need the following tools: a roller or special installation... Materials used for applying liquid rubber: antiseptic primer, insulator, special fabric.
The technology boils down to the following works:
- Basement walls are cleaned of dust, dirt and existing fungi. If there are irregularities on the surface, they must be putty, as an excess amount of material will be used.
- A primer is applied to the basement wall, which performs an antiseptic function and promotes better bonding of the material and the base. It is thrown at all corners and crevices, then they are covered with a special cloth, this makes it possible to better seal the seams. After that, the entire wall is already primed, as a result, the seams and corners are primed twice. The solution dries out for 3-4 hours, it depends on the ambient temperature and the presence of ventilation in the basement.
- Liquid rubber applied to the walls using a roller or a special machine that evenly distributes the insulator over the wall surface.
- After curing, a film forms on the base that protects it from moisture. Now you can carry out finishing work.
To work with it, we need the following tools: a brush or roller, a working bucket, a spatula. Materials to be used: liquid glass, water, plaster.
The technology for using liquid glass inside the basement will be as follows:
- We clean the surfaces from dirt. Large irregularities can be removed with a chisel or chisel. After that, large debris and dust are swept from the base.
- Before using the insulator, first wash and then degrease the walls.
- We apply liquid glass first to all corners, crevices, then cover the entire area to be treated.
Installation of roll waterproofing
Tools that are required for laying such materials: brush, roller, working bucket, sharp scissors. Necessary materials: roll insulator, e.g. roofing material, primer, bitumen mastic.
The technology for using roll insulators is as follows:
- The walls are cleaned of everything superfluous: dirt, debris, concrete adhesion. It is advisable to wash the surface and let it dry thoroughly.
- Then the walls are covered with an even layer of soil mortar, which dries up within a few hours. It is leveled with a roller evenly over the entire area.
- When the surface dries, bituminous mastic is applied to it. During the drying process, it forms a stable, uniform coating.
- The final stage: the roofing material is cut into strips, laid on top of the mastic with an overlap of 15 cm. This is done to isolate all the joints of the wall.
Penetrating waterproofing application
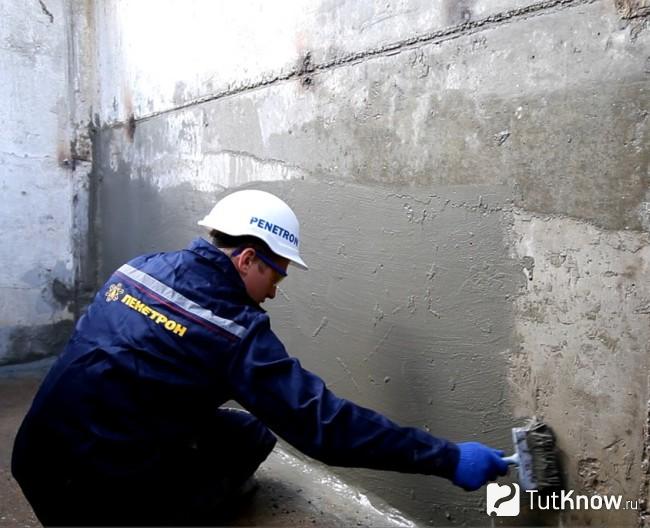
Tools used in the work: wide roller or brush, bucket, metal brush. Materials for work: Penetron dry insulating mixture, water.
The technology of application is reduced to the following algorithm of actions:
- The surface to be treated is prepared, cleaned with a metal brush.
- Then it is abundantly wetted with water, this is necessary so that the pores of the concrete open well, and the insulating mixture gets as deep as possible.
- Next, a solution is prepared: the dry insulating mixture is combined with water.
- First, all corners, joints are processed, then the rest of the surface is covered. The walls are treated with mortar several times. Moreover, at least 2 hours should pass between the application of the first and each subsequent layer.
- The treated surface must be watered with water for several days, this is done in order to uniformly harden the material.
Application of injection waterproofing
Tools used in the work: injection pump, packers, perforator. Materials for work: mixture for waterproofing.
The algorithm for performing injection isolation will be as follows:
- Holes are prepared using a hammer drill equipped with a heavy-duty drill. It is necessary to make a lot of holes - they are drilled at a distance of 1-2 cm from one another.
- A special device "Packer" is inserted into the hole, through which the prepared mixture is pumped under pressure using an injection pump.
- The insulating mixture should dry within 10-12 hours. It is desirable to be able to ventilate the room. After drying, the room can be used as usual.
It is not difficult to waterproof the basement from the inside if you stock up on the necessary tools, materials and carefully follow our instructions. Thanks to them, in a few days it will be possible to dry the room and protect its surfaces from the appearance of microorganisms.
Owners country houses try to use the area allocated for construction as efficiently as possible. This is due to the high cost of land in the suburban area, and the desire to reduce the cost of the project, since it is more profitable to build housing in several tiers than to scatter several one-story buildings, which have the same usable area in total. For this reason, in most cases, a basement is made, the outer walls of which are the deepened foundation of the house, made with a reinforced concrete monolith or blocks.
In order for the basement to end up with a full-fledged comfortable room with an acceptable microclimate, it should be protected from soil moisture, for which the foundation is waterproofed with our own hands. You can hire someone for these purposes, but if there is an opportunity to save a little at this stage of construction, why not. From the article, you will learn what is the essence of protecting the base of a house from moisture, and how to waterproof the foundation with high quality, inexpensively, and at the same time with your own hands. To consolidate the information received, you will be offered to watch a video on this topic.
Why waterproofing the base of the building is needed?
Why do you need to protect the foundation wall from moisture. Those who are building on wetlands will not understand the question. However, in many localities, underground waters are deep enough; moreover, atmospheric precipitation during the year cannot be called abundant. Is it worth it in this case to make the arrangement of water protection.
It's worth it, and here's why. First, no one can reliably predict how the bed of surface soil currents may change in the near future. There is no guarantee that in a year or two, water from below will not come up in an absolutely dry area. What awaits the owner of the building in this option? You need to forget about the basement, or do waterproofing with an already functioning building. And this is very time consuming and expensive, besides, we are not talking about doing it yourself.
Secondly, the climate is now very changeable. Where the rains poured twenty years ago, now you will not wait for them, and vice versa. It is not worth expecting that it will always be dry. So it is much more profitable and more convenient to protect underground walls during the construction phase, so that later not to return to this problem.
What does the complex of waterproofing works include?
High quality moisture protection underground structure involves a set of technological operations aimed at hydrising all surfaces in contact with the ground. Moreover, it is necessary to provide for water protection from water coming from below, as well as from atmospheric moisture. A full range of waterproofing measures consists of the following technological stages:
- horizontal moisture insulation;
- vertical protection against excess ground moisture;
- arrangement of the drainage system;
- installation of a high-quality blind area around the perimeter of the building.
The creation of a reliable horizontal hydro-barrier will protect the basement from water coming from below. Sometimes underground waters put significant pressure on the basement floor, therefore, the basement floor and the basement base must be carefully protected.
Vertical waterproofing is applied to the outer foundation surface and is designed primarily to be a barrier to excess ground moisture that accumulates due to precipitation. When groundwater rises above the base of the structure, a vertical hydro-barrier created using standard technology will be ineffective in this situation. Drainage is required for water drainage.
If construction is carried out in a region characterized by heavy rainfall, 50% of the success of vertical moisture protection depends on filling a reliable blind area, which would divert sedimentary water away from the outer foundation surface. So this stage of construction should be given due attention if there is a desire to keep the basement walls dry. Now we will consider the most common and effective technological methods that can be applied to carry out work on each of the listed waterproofing measures.
Horizontal protection against moisture
It is possible to create a horizontal waterproof cushion, which is the base of the basement floor, before pouring (assembly from blocks) of the foundation, or after. It is better to do this before, as there will be no need to waterproof the foot of the foundation wall. To work, you need the following.
Materials and tools
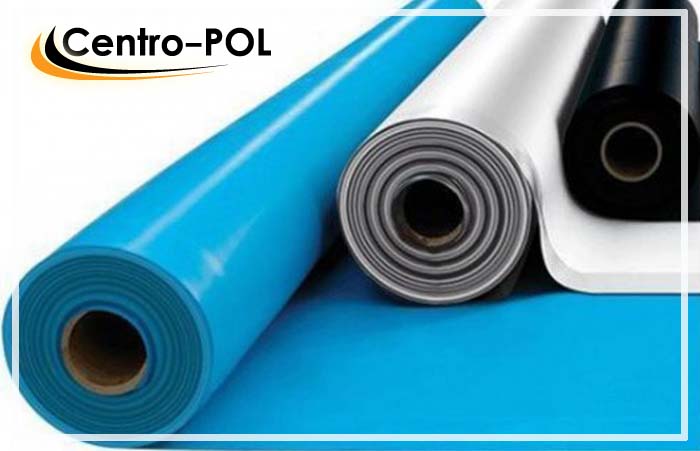
As a hydro-barrier here, you can use a thick continuous polyethylene film, or roll waterproofing material, hydroglass insol, for example. As an aid, bitumen or mastic based on it is applied. In addition, you will need:
- concrete, or ingredients for its preparation (fine gravel, sand, portland cement);
- coarse gravel;
- river sand or fine screening (for bedding);
- reinforcement (6-8 mm) or strong reinforcing mesh for the screed.
The tool should be prepared as follows:
- mechanical or manual ramming;
- concrete mixer;
- gas burner (if gidrostekloizol);
- welding machine or tying wire (if fittings).
Sequence of work
As a result of the work carried out, a horizontal reinforced slab base should be obtained, with an inner moisture-insulating layer protruding about half a meter beyond the outer perimeter of the foundation. That is, the installation of the base of the structure will take place on a ready-made slab base protected from water suitable from below.
- The bottom of the pit is leveled and compacted as much as possible;
- Backfilling is made, first with gravel (about 10 cm), then with sand (about 5 cm), after which a rough layer of concrete is poured (up to 10 cm). For greater reliability, you can reinforce the rough slab base;
Important! Before pouring concrete, it is imperative to saturate the backfill with plenty of water. If this is not done, the moisture from the cement mortar will quickly go down, which will cause the concrete's strength to become minimal. Moreover, it will be very problematic to level the solution that has lost moisture.

- After the first layer of concrete has set, it is possible to lay the film, if it is provided as a hydro-barrier. In the case when it is planned to apply bituminous mastic in order to glue the rolled material, it is necessary to wait for the concrete to dry;
- The polyethylene sheet is laid in one or two layers, after which the reinforcing frame is mounted and poured finishing screed for the entire area of \u200b\u200bthe slab base (preferably for lighthouses);
- Installation of roll waterproofing is done as follows: apply molten bitumen or mastic to the dried base. Application is done with a stiff brush. After the material has set, the hydroglass insulation is rolled out continuously (roofing material can be used). During installation, the material is heated with a gas torch or blowtorch and glued to the substrate. They are tightly overlapped, the joints are warmed up and immediately pressed down with a sliding motion. For this, a device in the form of a poker is used.
Important! Installation of a horizontal moisture-proof base can be done after the construction of the foundation structure. The simply described method makes the whole complex of work, which includes waterproofing the foundation with your own hands, less costly, both in terms of material costs and in terms of the laboriousness of the process.
Vertical moisture protection
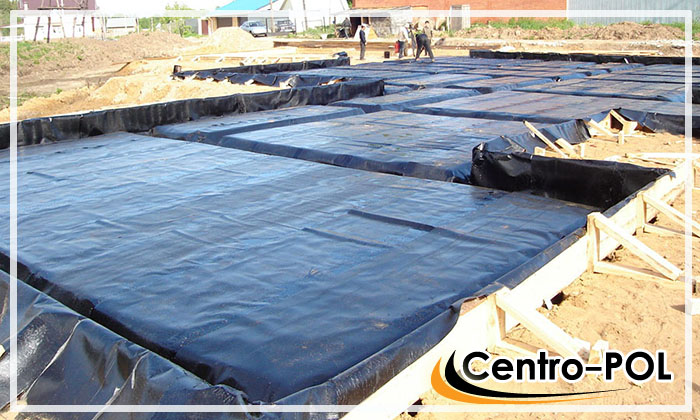
This type of work involves the application of a hydro-barrier layer on the outside of the foundation wall, which would protect the concrete structure from excess ground moisture. The simplest in terms of self-installation, while it is enough effective method, is the application of roll waterproofing materials... There are several other types of products used for similar purposes, but some of them are ineffective (hydrophobic plaster, for example), or very expensive and require knowledge of technology (how to apply), as well as special equipment for this.
In order to clearly understand the rules for waterproofing the foundation, it is recommended to watch the video below, where you can not only see how to apply a hydro-barrier layer, but also hear helpful advice and a description of the nuances of the work from an expert builder. Also in the video, the specialist explains the purpose of the drainage system. We will further figure out how to build a drainage system to drain groundwater on our own.
How to make a drainage system?
The installation of drainage communications is usually carried out by specialized teams, although, with the necessary information and a great desire, such work during the construction phase can be done independently. Of course, you will have to hire someone to build a drainage well, but laying the system itself is not so difficult.
Tools and materials
You will need a simple toolkit associated with conducting earthworks (shovels, crowbar, perhaps a puncher will come in handy somewhere). You can use the water level to determine the slope. The following materials will be needed:
- large crushed stone or gravel;
- special perforated drainage pipe;
- pipe fittings.
Work order
The underground drainage system is equipped after the creation of the slab base and the construction of the foundation wall. First you need to determine the natural slope and, at the lowest point, plan a place for installing a sewer well. After work, they are performed in the following sequence:
- Dig a trench about 25-30 cm along the perimeter of the foundation (with a bayonet). The width of the recess is arbitrary, within the range of 50-80 cm.
- The trench is covered with gravel to a level that is 10 cm below the slab base (or the base of the foundation, if the horizontal waterproofing was done after the foundation of the house).
- A drainage pipe is laid in the center of the trench along the gravel bed. It is necessary to ensure that the slope from the highest point to the drainage well is constantly maintained along its course.
- After laying the pipe, another layer of coarse gravel is poured, which will protect the drainage pipeline from the pressure of soil layers that will be filled up later.
Now, in the event of an approach of groundwater, they will be discharged into the constructed water intake, without reaching the level of the base of the base. From the drainage well, water can be pumped out at any time.
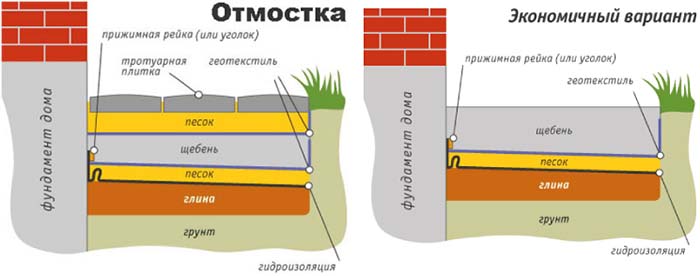
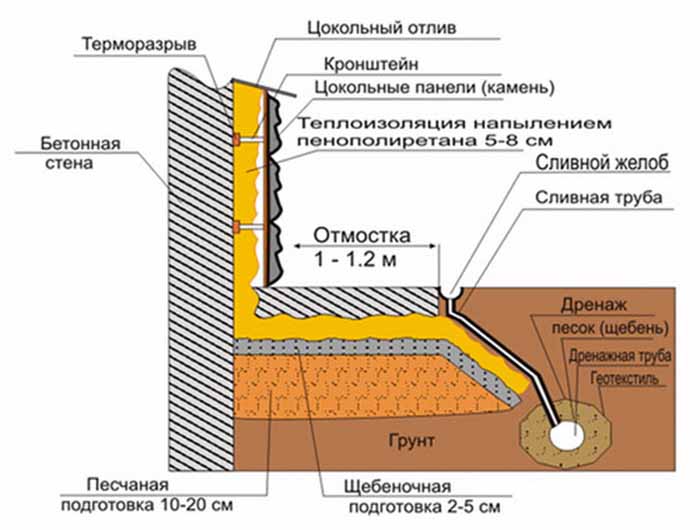
Upper waterproofing of the foundation (blind area)
The screed around the building protects the underlying foundation surface from excess moisture during heavy rains or when snow melts. An ideal option when a clay castle is created under the blind area to the depth of the base of the building. However, clay tends to condense for a very long time, which can take 2-3 years. Therefore, now few people want to equip a belt made of clay.
Important! Before pouring the blind area, you should make sure that the soil filled up around the base of the building is completely compacted. If this does not happen, the screed along the perimeter of the house will crack and eventually collapse completely.
How the blind area is made
To create a waterproof belt, you will need the same tools as for arranging the screed (a trowel, as a rule, a plaster float), as well as everything you need for earthwork. The materials you will need are:
- concrete;
- crushed stone;
- sand;
- reinforcement mesh;
- boards for the construction of formwork.
The order of work is as follows.
- A trench is formed around the perimeter of the structure up to 20 cm deep and up to 1 m wide. The soil is carefully compacted;
- The deepening is poured with gravel so that about 8 cm remains to the ground level. A leveling layer of sand is formed on top, slightly missing the upper edge of the trench;
- A vertical formwork is installed along the outer perimeter of the trench;
- Reinforcing elements are laid, the bedding is saturated with water;
- Between the basement of the building and the formwork, concrete is poured and leveled. In order for the surface to be even, after partial setting, it must be rubbed with a plaster float.
Important! When arranging the blind area, you need to control so that there is no bias towards the building. If after styling is planned paving slabs, you need to achieve a horizontal surface. If concrete surface, - the final version, it makes sense to make a bias from the house.
Obviously, there is no unequivocal comprehensive answer to the question of how to properly waterproof the foundation, since reliable waterproofing of the building base includes a whole range of measures, each of which plays its own role. It is possible to hope that the walls in the basement will always be dry, only if all the waterproofing works provided for by the technology are performed.


